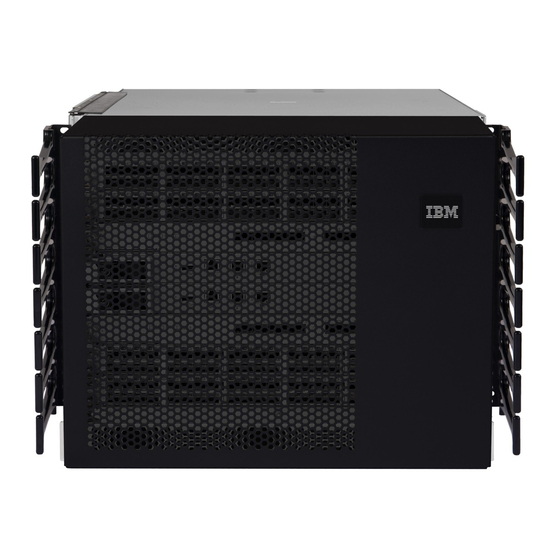
IBM System Storage SAN384B-2 Installation, Service And User Manual
Hide thumbs
Also See for System Storage SAN384B-2:
- Datasheet (12 pages) ,
- Installation, service and user manual (190 pages)
Table of Contents
Advertisement
Quick Links
IBM System Storage SAN384B-2
Installation, Service, and User Guide
Service information: 2499-416
Read Before Using
This product contains software that is licensed under written license agreements. Your use of such software is subject to
the license agreements under which they are provided.
GA32-0894-04
Advertisement
Table of Contents
Troubleshooting

Related Manuals for IBM System Storage SAN384B-2


Summary of Contents for IBM System Storage SAN384B-2
- Page 1 IBM System Storage SAN384B-2 Installation, Service, and User Guide Service information: 2499-416 Read Before Using This product contains software that is licensed under written license agreements. Your use of such software is subject to the license agreements under which they are provided.
- Page 3 IBM System Storage SAN384B-2 Installation, Service, and User Guide Service information: 2499-416 GA32-0894-04...
- Page 4 © Copyright IBM Corporation 2011, 2013. US Government Users Restricted Rights – Use, duplication or disclosure restricted by GSA ADP Schedule Contract...
-
Page 5: Fifth Edition
Read this first Summary of changes This is the fifth edition of the IBM System Storage SAN384B-2 Installation, Service, and User Guide. The content changes since the last edition of this publication are noted by a vertical line placed in the left margin beside each change. Minor edits are not identified by this mark. -
Page 6: Taiwan Contact Information
For redbooks associated with this product, enter search terms on the website: www.redbooks.ibm.com/. For support information for this and other IBM products, see the IBM Support Portal, www.ibm.com/supportportal. Search for the product Machine type or product name. -
Page 7: How To Send Your Comments
Your feedback is important in helping us provide the most accurate and high-quality information. If you have comments or suggestions for improving this document, send us your comments by email to starpubs@us.ibm.com . Be sure to include the information: v Exact publication title... - Page 8 SAN384B-2 Installation, Service, and User Guide...
-
Page 9: Table Of Contents
Managing cables. . 44 Brocade documents . . xxvii Planning for encryption (optional) . . 45 IBM and Brocade product matrix . . xxviii Configuring for encryption (optional). . 46 Accessibility features for SAN384B-2 . . xxviii Summary of procedure . - Page 10 Chapter 5. Removing and installing Removing and replacing a SAN384B-2 chassis . . 98 Time required . 99 components ... . 67 Items required . . 99 Removing and installing the chassis door . .
- Page 11 System blade and FRU weights . . 128 Appendix E. Port numbering ..151 Facility requirements . . 128 Environmental requirements . . 129 Notices ....155 Fibre Channel port specifications .
- Page 12 SAN384B-2 Installation, Service, and User Guide...
-
Page 13: Figures
. 153 Control processor blade (CP8) ports and LEDs 60 FS8-18 encryption blade . . 153 Core switch blade (CR16-4) . . 61 FX8-24 extension blade . . 153 Power supply . . 63 © Copyright IBM Corp. 2011, 2013... - Page 14 SAN384B-2 Installation, Service, and User Guide...
-
Page 15: Tables
Tables Brocade and IBM product and model Critical information checklist example number matrix . . xxviii Cable routing table for SAN384B-2 (64 ports Blades available for the SAN384B-2 . shown). . 110 Installation tasks, time, and items required General product specifications . - Page 16 SAN384B-2 Installation, Service, and User Guide...
-
Page 17: Safety Notices
Safety Notices publication that is shipped with this product. The notices and statements are used in IBM documents. They are listed below in order of increasing severity of potential hazards. Follow the links for more detailed descriptions and examples of the danger, caution, and attention notices in the sections that follow. - Page 18 DANGER Overloading a branch circuit is potentially a fire hazard and a shock hazard under certain conditions. To avoid these hazards, ensure that your system electrical requirements do not exceed branch circuit protection requirements. Refer to the information that is provided with your device or the power rating label for electrical specifications.
- Page 19 Electrical voltage and current from power, telephone, and communication cables are hazardous. To avoid a shock hazard: v Connect power to this unit only with the IBM provided power cord. Do not use the IBM provided power cord for any other product.
-
Page 20: Caution Notices
Delivery and subsequent transportation of the equipment The customer should prepare his environment to accept the new product based on the installation planning information provided, with assistance from an IBM Installation Planning Representative (IPR) or IBM authorized service provider. In... - Page 21 (C032) CAUTION: For CA residents only: IBM recommends installing this product in a room size of 62 cubic meters (2190 cubic feet) or larger at 0.4 ACH ventilation rate to reduce the concentrations of any chemicals emitted by the product.
-
Page 22: Safety Labels
Safety labels As an added precaution, safety labels are often installed directly on products or product components to warn of potential hazards. These can be either danger or caution notices, depending upon the level of the hazard. The actual product safety labels may differ from these sample safety labels: DANGER Hazardous voltage, current, or energy levels are present inside any component that has this label attached. -
Page 23: Attention Notices
Attention notices An attention notice indicates the possibility of damage to a program, device, or system, or to data. An exclamation point symbol may accompany an attention notice, but is not required. A sample attention notice follows: Attention: Do not bend a fibre cable to a radius less than 5 cm (2 in.); you can damage the cable. -
Page 24: Rack Safety
Rack safety Rack installation DANGER Observe the precautions when working on or around your IT rack system: v Heavy equipment—personal injury or equipment damage might result if mishandled. v Always lower the leveling pads on the rack cabinet. v Always install stabilizer brackets on the rack cabinet. v To avoid hazardous conditions due to uneven mechanical loading, always install the heaviest devices in the bottom of the rack cabinet. -
Page 25: Rack Relocation (19" Rack)
Rack relocation (19" rack) CAUTION: Removing components from the upper positions in the rack cabinet improves rack stability during relocation. Follow these general guidelines whenever you relocate a populated rack cabinet within a room or building: v Reduce the weight of the rack cabinet by removing equipment starting at the top of the rack cabinet. -
Page 26: Safety Inspections
Internal machine checks Perform the internal machine checks: 1. Check for any non-IBM changes that might have been made to the machine. If any are present, obtain the “Non-IBM Alteration Attachment Survey” form, number R009, from the IBM branch office. Complete the form and return it to the branch office. -
Page 27: Product Recycling And Disposal
Product recycling and disposal Refer to the IBM Systems Environmental Notices and User Guide (Z125-5823) shipped with the product for translated environmental statements and information regarding product recycling and disposal. This document may be provided either in printed version or on a CD-ROM. See “Removing the batteries” on page 111 for battery removal instructions, if needed to meet environmental regulations. - Page 28 xxvi SAN384B-2 Installation, Service, and User Guide...
-
Page 29: About This Document
The documents contain information related to this product. The documentation may be printed material, on the documentation CD that is shipped with the product, or available on the web through the IBM Support Portal or IBM Publications Center. v IBM System Storage SAN384B-2 Installation, Service, and User Guide, GA32-0894... -
Page 30: Ibm And Brocade Product Matrix
(FOS) publications, you will notice that the model numbers reflect the corresponding Brocade products. Table 1 provides a product matrix for you to use to correlate the Brocade products and models to the IBM product names and machine types and model numbers. Products withdrawn from marketing are not listed. - Page 31 An accessible HTML version of this document is also included on the documentation CD for this product. IBM and accessibility See the IBM Human Ability and Accessibility Center for more information about the commitment that IBM has to accessibility: www.ibm.com/able. xxix...
- Page 32 SAN384B-2 Installation, Service, and User Guide...
-
Page 33: Chapter 1. Introduction
Chapter 1. Introduction This chapter introduces the features and components of the IBM System Storage SAN384B-2 fabric backbone. Throughout this document, the product is referred to as the SAN384B-2, or more generically as system, device, or chassis, where appropriate. This chapter contains the information: v “Overview of the SAN384B-2”... -
Page 34: Hardware Components
v Redundant and hot-swappable control processor and core switch blades, power supplies, blower assemblies, and WWN cards that enable a high availability platform and enable nondisruptive software upgrades for mission-critical SAN applications. v Universal ports that self-configure as E_Ports, F_Ports, EX_Ports and M_Ports (mirror ports). -
Page 35: Port Side Of The San384B-2 (Sample Configuration)
– Blades use small form-factor pluggable (SFP+, and mSFP) optical transceivers. SFP+ and mSFP transceivers support speeds of 2, 4, 8, 10, or 16 Gbps. Note: The 8-Gbps SFP+s and mSFPs auto-negotiate at 2, 4, and 8 Gbps. The 16-Gbps SFP+s auto-negotiate at 4, 8, and 16 Gbps. The 10 Gbps speeds must be manually set and require special 10 Gbps SFP+ transceivers. -
Page 36: Port Side Of The San384B-2 With The Exhaust Kit
Figure 2 shows the SAN384B-2 with the port-side exhaust kit installed over the chassis exhaust vent (sample configuration). The exhaust is routed from the chassis exhaust vent through the port-side exhaust kit. The exhaust from the left side exits through the vent grill below the chassis. Figure 2. -
Page 37: San384B-2 Blades
Figure 3. Blower (non-port) side of the SAN384B-2 WWN bezel Blower assembly (2x) Power supply (2x) Label with serial number and WWN SAN384B-2 blades Table 2 summarizes the port, application, control processor, and core switch blades that are available for the SAN384B. Table 2. -
Page 38: Blades Available For The San384B-2
Table 2. Blades available for the SAN384B-2 (continued) Description Feature Code Name Function Core switch blade CR16-4 The CR16-4 blade contains the ASICs for switching between port blades. There can be up to 192 16-Gbps (256 8 Gbps) total ports for port blades. -
Page 39: High Availability
Table 2. Blades available for the SAN384B-2 (continued) Description Feature Code Name Function 48-port 8-Gbps port blade FC3649 FC8-48E A 48-port port blade supporting 2, 4, and 8 Gbps Fibre Channel port speeds. This port blade is compatible with the SAN384B-2 and SAN768B-2. -
Page 40: Reliability
FTP/SCP server, including software and firmware upgrades. v Nonvolatile random-access memory (NVRAM), containing the OEM serial number, IBM serial number, revision information, and part number information v Background health-check daemon v Memory scrubber, self test, and bus ping to determine if a bus is not functioning... -
Page 41: Software Features
CUP Activation (optional feature), providing in-band management of the supported SAN b-type switch and director products by system automation for z/OS from IBM System z10 EC, z10 BC, z9 EC, z9 BC, zSeries 990, 900, 890, and 880 servers. -
Page 42: Network Manageability
Installation of the optional Federal Information Processing Standards 140-2 (FIPS 140-2) security seals to the SAN384B-2 chassis, blades, and other components is available through Feature Code 7230. The IBM System Storage FIPS 140-2 Security Seal Application Procedures (GA32-2220-00) publication provides complete instructions for installing this feature on this and other models. -
Page 43: Chapter 2. Installing A San384B-2 In A Cabinet
Chapter 2. Installing a SAN384B-2 in a cabinet The SAN384B-2 is only available for installation in the IBM TotalStorage 2109 SAN Switch Cabinet C36. This product is to be installed and serviced only by qualified IBM service representatives. The SAN384B-2 can be ordered pre-installed in the cabinet, or it can be added to an existing C36 cabinet. -
Page 44: Ordering The Lift Tool
– WWN cards and WWN bezel – Power supplies – Blower assemblies – Cable management finger assemblies – Chassis door v Accessory kit containing: – Documentation CD (contains documents related to the product and Fabric – ESD grounding strap – USB device –... -
Page 45: Installation Guidelines
Attention: When you order the lift tool, you will receive an 18–inch load plate and a 24-inch load plate. Do not use the 18–inch load plate. You must use the 24–inch load plate when you install the SAN384B-2 to be able to safely install this product. -
Page 46: Installing A San384B-2 In A 2109 C36 Cabinet
4. Plan for managing the cables before you install the chassis. A fully populated SAN384B-2 will have a large number of cables that must be carefully routed to minimize problems with installation and replacement of components, and in order to maintain the minimum bend radius required for optical cables. Due to port density and the potentially large number of cables, if cables are not routed to the sides, then removal and replacement of blades and other components may be difficult to accomplish. -
Page 47: Installation Tasks, Time, And Items Required
FIPS seals on the chassis and port side exhaust kit prior to installing the chassis in a rack. These locations may be difficult to access once the chassis is installed. Refer to the IBM System Storage FIPS 140-2 Security Seal Application Procedures (GA32-2220-00) publication for complete instructions. -
Page 48: Unpacking And Assembling The Lift Tool
Table 3. Installation tasks, time, and items required (continued) Installation task Time estimate Items required Disassembling and packing 20 minutes No special tools required. the lift tool Unpacking and assembling the lift tool Assembling the lift tool before starting the installation will simplify the installation. The lift tool consists of several parts, including: v The fully assembled main vertical section of the lift tool with wheels, wheel lock, cables and winch attached... -
Page 49: Unpacking The San384B-2
extended. This middle section will need to be fully extended during the installation to safely span the gap between the lift tool and the cabinet mounting position. 11. Move the assembled lift tool and retention straps near the equipment to be installed. -
Page 50: Installing The Port-Side Exhaust Kit
4. Remove the port side exhaust kit, hardware accessory kit, chassis door, cable management finger assemblies, and foam from the top of the chassis. Remove the loose foam blocks from the corners of the chassis. Remove the anti-static plastic from the chassis. 5. -
Page 51: Cabinet
Exhaust kit parts list Table 4 lists items illustrated in Figure 6 on page 20. Table 4. Parts list for port-side exhaust kit for C36 cabinets Item Description Quantity Top rail Duct Shelf 10-32 x .5 in. (1.27 cm) Phillips screw (blue Loctite on threads) 10-32 x .63 in.(1.60 cm) Phillips screw with square... -
Page 52: Port-Side Exhaust Kit Assembly For 27 To 31 In
Port Side (Exhaust) 10-32 x .5" 10-32 x .63" 10-32 Clip Nut 10-32 Retainer Nut Alignment Washer 6-32 x .25" Figure 6. Port-side exhaust kit assembly for 27 to 31 in. (68.58 to 78.74 cm) cabinets SAN384B-2 Installation, Service, and User Guide... -
Page 53: Torque Requirements
Torque requirements Use the torque settings when tightening screws that secure the port-side exhaust kit and SAN384B-2 to the equipment cabinet. Table 5. Torque requirements for mounting screws Screw size Torque 6-32 x .25 in. (.635 cm) Phillips screw 8.75 in.-lbs (10 cm-kg) 10-32 x .63 in.(1.60 cm) Phillips screw 32 in.-lbs (36.86 cm-kg) Installing the exhaust kit hardware... -
Page 54: Clip And Retainer Nut Locations On Exhaust Side
clip nut attachment for round-hole rails Setup for Rails with Square Holes retainer nut (Item G) clip or retainer Rail nut locations for chassis rail clip or retainer nut locations for shelf Figure 7. Clip and retainer nut locations on exhaust side cabinet rails (example showing relative positions) 4. - Page 55 Port Side (Exhaust) 384b034 Figure 8. Shelf installed in cabinet Tighten the four 6-32 screws on the top of the shelf, which were loosened to adjust the shelf length. 5. Install the air-duct assembly (B in Figure 6 on page 20) by inserting it down into the side slot on left side of the shelf (see Figure 9).
-
Page 56: Installing The Top Rail Assembly To The Duct Assembly And Cabinet Rails
6-32 screws (I-3 in Figure 6 on page 20) and adjust the top-rail assembly to the required length. The length will be approximately the length of the adjustable shelf. b. Insert the top-rail assembly down into the air-duct assembly and then secure the top-rail assembly to the air-duct assembly with two 6-32 screws, one screw on each side of the air-duct assembly (I-1 and I-2 in Figure 6 on page 20). -
Page 57: Installing The San384B-2 Into The Cabinet
Installing the SAN384B-2 into the cabinet CAUTION: A fully populated SAN384B-2 weighs approximately 68 kg (150 lb) and requires a minimum of two people and a lift tool to install it. (C011) 55 kg ( 121.2 lbs) Now that the port-side exhaust kit is securely installed, the SAN384B-2 chassis can be safely installed into the C36 cabinet. -
Page 58: Load Plate Extended Inside The Cabinet To The Exhaust Kit Shelf
Note: If the chassis is not carefully centered over the middle section, the weight of the chassis may prevent the middle section from sliding. Adjust the alignment if needed. 8. Release the spring-loaded pin closest to the cabinet one more time, and slide the middle section to its full extension. - Page 59 Figure 13. Chassis half way into cabinet on load plate Note: For rails with round holes, use the clip nuts (F in Figure 6 on page 20) on the rails for securing the 10-32 screws. For rails with square holes, use the retainer nuts (G Figure 6 on page 20).
-
Page 60: Location Of Screws To Attach The Chassis To The Cabinet Rails
Install screws Install screws Figure 14. Location of screws to attach the chassis to the cabinet rails 14. Attach the two cable management finger assemblies to the cabinet vertical rails, using two screws each. The two assemblies are identical and can be installed on either side. -
Page 61: Port Numbering
Port numbering Table 6 provides a list of available port and application blades for the SAN384B-2. Table 6. Port and application blades available on the SAN384B-2 Blade label IBM blade name Feature code FC16-32 32 port 16Gbps Switch Blade 3632... -
Page 62: Port And Application Blades Available On The
The SAN384B-2 uses the port numbering for each of the blades that can be installed in the chassis. See illustrations of the different blades in Appendix E, “Port numbering,” on page 151. Refer to Implementing an IBM/Brocade SAN with 8 Gbps Directors and Switches, (an IBM Redbook), SG24-6116 for more details on port numbering and other technical information. -
Page 63: Chassis Slots
Unused slots must be filled with blade filler panels to maintain adequate cooling. See Appendix E, “Port numbering,” on page 151 for different SAN384B-2 port blades. Also refer to the IBM Redbook, Implementing an IBM/Brocade SAN with 8 Gbps Directors and Switches, SG24-6116, for more comprehensive information on port numbering and area port numbering, and other technical information. -
Page 64: Cable Design For The Msfp Patch Cables For The Fc8-64 High Density Port Blade
FC8-64 port blade. Narrower OM-3 LC cables are used to connect the FC8-64. These cables are offered by several major manufacturers. Contact your IBM representative for options regarding different cable and patch panel configurations to simplify cable management with higher density FC8-64 port blades. -
Page 65: Chapter 3. Starting And Configuring The San384B-2
1-Gbps switches using earlier Fabric OS versions. To access the appropriate matrix: v Go to the IBM SAN web page www.ibm.com/systems/storage/san v Select the IBM System Storage SAN768B-2 and SAN384B-2 product link v On the displayed product page, click the Interoperability Matrix link in the Learn more section. -
Page 66: Flow Of Configuration Tasks For The San384B-2
Configuration Tasks Connect Serial Cable between Switch and Host Log In to Serial Console Port Set IP Address Log off Serial Console Port and Disconnect Serial Cable Connect Ethernet Cable and Open Telnet Session Set Domain ID Set Date and Time Install SFPs and Attach Cables Manage Cables... -
Page 67: Providing Power To The San384B-2
6. Enable software licenses. See “Determining installed software licenses” on page 7. Configure the optional FS8-18 encryption blade. See “Configuring for encryption (optional)” on page 46. 8. Back up the configuration. See “Verifying correct operation and backing up the configuration” on page 47. Providing power to the SAN384B-2 DANGER An electrical outlet that is not correctly wired could place hazardous voltage... -
Page 68: Logging In To The Serial Console Port
4. Disable any serial communication programs running on the workstation (such as synchronization programs). 5. Open the terminal emulator application and configure as follows: v In a Windows environment: Table 7. Configuration parameters Parameter Value Bits per second 9600 Data bits Parity None Stop bits... -
Page 69: Logging Off The Serial Console Port And Disconnecting The Serial Cable
v 10.77.77.74 for CP1 (the CP blade in slot 5 at the time of configuration) Attention: Resetting an IP address while the SAN384B-2 has active IP traffic such as Fabric Manager, Fabric Watch, SNMP, or other applications can cause traffic to be interrupted or stopped. -
Page 70: Establishing An Ethernet Connection
purposes. If the serial port is no longer required, use the logout command to log out of the serial console, remove the serial cable, and replace the plug in the serial port. Establishing an Ethernet connection After using a serial connection to configure the IP addresses for the SAN384B-2, you can connect the active CP blade to the local area network (LAN). -
Page 71: Setting The Domain Id
3. Record the new name for reference. Setting the Domain ID Each switch in the fabric must have a unique Domain ID. The Domain ID can be set using the configure command or can be automatically set. The default Domain ID for the SAN384B-2 is "1". -
Page 72: Setting The Time Zone
Setting the time zone You must perform the procedure on all chassis for which the time zone must be set. However, you only need to set the time zone once on each switch, because the value is written to nonvolatile memory. Use one of the two procedures to set the time zone. -
Page 73: Verifying The Persistent Pid Feature
switch:admin> tsclockserver LOCL switch:admin> tsclockserver "132.163.135.131" switch:admin> tsclockserver 132.163.135.131 switch:admin> The example shows how to set up more than one NTP server using a DNS name: switch:admin> tsclockserver "10.32.170.1;10.32.170.2;ntp.localdomain.net" Updating Clock Server configuration...done. Updated with the NTP servers Changes to the clock server value on the principal or primary FCS switch are propagated to all switches in the fabric Verifying the persistent PID feature Before connecting the SAN384B-2 to the fabric, verify that the WWN Based... -
Page 74: Installing Transceivers And Attaching Cables
QSFPs. Attention: Use only transceivers that are supported for this product. Only transceivers purchased from IBM are supported. The use of transceivers that are not supported may cause data loss or cause the product to malfunction. For a listing of transceivers compatible with this product: v Go to the IBM Support Portal www.ibm.com/supportportal. - Page 75 Follow these steps to add the optical transceivers and cables to the Fibre Channel ports. 1. Ensure that both cable and transceiver are clean prior to installation. 2. Position one of the optical transceivers so that the key is oriented correctly to the port.
-
Page 76: Managing Cables
The minimum bend radius for a 50 micron cable is 5.1 cm (2 in.) under full tensile load and 3 cm (1.2 in.) with no tensile load. Note: Contact your IBM representative for options regarding different cable and patch panel configurations to simplify cable management with higher density FC8-64 port blades. -
Page 77: Planning For Encryption (Optional)
v If ISL Trunking is in use, group the cables by trunking group. The ports are color-coded to indicate which ports can be used in the same ISL Trunking group: eight ports marked with solid black ovals alternate with eight ports marked with oval outlines. -
Page 78: Configuring For Encryption (Optional)
There is no support of Cisco switches at this time by IBM. The section in the Fabric OS Encryption Administrator’s Guide Supporting Tivoli Key Lifecycle Manager (TKLM) Environments related to Cisco Fabric connectivity does not currently apply. v The use of Smart Cards provides additional encryption security management, and is highly recommended. -
Page 79: Avoid Double Encryption
v Establishing a trusted link (LKM Appliance) v Configuring the global parameters and policies of the encryption group v Generating and backing up the master key in RSA environments v Handling key-vault high-availability v Configuring cluster interconnect After completing the pre-initialization tasks, you may need to perform several tasks related to configuring the encryption group. -
Page 80: Fabric Os Firmware Updates
Select the SAN768B-2 and SAN384B-2 product link v On the displayed product page, click the Interoperability Matrix link in the Learn more section. Firmware release notes and download files are available through the IBM Support Portal. To view release notes and to download firmware: v Go to the IBM Support Portal www.ibm.com/supportportal. -
Page 81: Downloading And Installing Firmware
Click the Release Firmware link and follow the online prompts to navigate to the Brocade Downloads for IBM End Users page. v Follow the links and instructions on the Brocade pages. Note that associated FOS documentation can also be downloaded from this site. - Page 82 SAN384B-2 Installation, Service, and User Guide...
-
Page 83: Chapter 4. Monitoring System Components
Online FC F-Port 10:00:00:05:33:26:10:28 820b00 Online FC F-Port 10:00:00:05:33:26:10:73 1 12 820c00 Online FC F-Port 10:00:00:05:33:48:5e:d1 1 13 820d00 Online FC F-Port 10:00:00:05:33:26:10:29 1 14 820e00 Online FC F-Port 10:00:00:05:1e:f9:72:47 1 15 820f00 Online FC F-Port © Copyright IBM Corp. 2011, 2013... - Page 84 10:00:00:05:33:26:0e:8a 1 16 821000 Online FC F-Port 10:00:00:05:33:26:0e:8b 1 17 821100 Online FC F-Port 10:00:00:05:33:48:6b:eb 1 18 821200 Online FC F-Port 10:00:00:05:1e:f9:72:46 1 19 821300 Online FC F-Port 10:00:00:05:33:26:10:14 1 20 821400 Online FC F-Port 10:00:00:05:33:26:0e:64 1 21 821500 Online FC F-Port 10:00:00:05:33:26:10:72 1 22 821600...
- Page 85 Factory Part Num: 60-1002144-02 Factory Serial Num: BQB0345F00X Manufacture: Day: 19 Month: 11 Year: 2010 Update: Day: 29 Month: 3 Year: 2011 Time Alive: 32 days Time Awake: 0 days CP BLADE Slot: 4 Header Version: 2 Power Consume Factor: -40 Factory Part Num: 60-1000376-08 Factory Serial Num: AHJ0420F08K Manufacture: Day: 21 Month: 5 Year: 2010...
- Page 86 Time Alive: 32 days Time Awake: 0 days POWER SUPPLY Unit: 1 Header Version: 2 Power Consume Factor: 2000 Factory Part Num: 23-0000067-01 Factory Serial Num: AGC2M03FR4P Manufacture: Day: 7 Month: 6 Year: 2010 Update: Day: 29 Month: 3 Year: 2011 Time Alive: 229 days Time Awake: 0 days POWER SUPPLY Unit: 2...
-
Page 87: Port, Application, Or Encryption Blade Status
The sections provide information on how to determine the status of different chassis components by viewing the LEDs or by entering commands. v “Port, application, or encryption blade status” v “Control processor blade (CP8) status” on page 59 v “Core switch blade (CR16-4) status” on page 61 v “Power supply status”... - Page 88 Figure 20. FC16-48 port blade Status LED Fibre Channel port Power LED Port status LED Figure 21. FC8-32E port blade Status LED Fibre Channel port Power LED Port status LED Figure 22. FC8-48E port blade Status LED Fibre Channel port SAN384B-2 Installation, Service, and User Guide...
-
Page 89: Fc8-64 Port Blade
Power LED Port status LED Note: The FC8-64 port blade requires mSFPs (standard SFPs do not fit) as well as narrower OM-3 LC cables offered by several major manufacturers. Figure 23. FC8-64 port blade Status LED Fibre Channel port Power LED Port status LED Note: The FC8-64 port blade requires mSFPs (standard SFPs do not fit) as well as narrower OM-3 LC cables offered by several major manufacturers. -
Page 90: Port, Application, And Encryption Blade Led
Ensure blade is firmly seated and check the status with the slotShow command. If the LED remains amber, contact IBM. Slow-flashing amber (on 2 Blade is not seated correctly or Pull blade out and reseat it. If seconds, then off 2 seconds) is faulty. -
Page 91: Control Processor Blade (Cp8) Status
Table 8. Port, application, and encryption blade LED descriptions (continued) LED purpose Color Status Recommended Action FC port status No light (LED is off) Port has no incoming power, Verify that the power LED is or there is no light or signal on, check the transceiver and carrier detected. -
Page 92: Control Processor Blade (Cp8) Ports And Leds
If the LED remains amber, contact IBM. Slow-flashing amber CP blade is not Pull the blade out (on 2 seconds; then seated correctly or is and reseat it. If the off 2 seconds) faulty. -
Page 93: Core Switch Blade (Cr16-4) Status
Table 9. CP blade LED descriptions (continued) Recommended LED purpose Color Status Action Ethernet link status No light (LED is off) Either an Ethernet Ensure that the blade link is not detected, has power, the or it does not have Ethernet cable is incoming power. -
Page 94: Cr16-4 Blade Led Descriptions
If the LED remains amber, contact IBM. Slow-flashing amber CR16-4 blade is not Pull the blade out (on 2 seconds; then seated correctly or is and reset it. -
Page 95: Power Supply Status
The power supply status displays OK, Absent, or Faulty. If a power supply displays absent or faulty, contact IBM to order a replacement. Both "absent" or "faulty" could also be the result of the power supply being turned off or not being properly seated. -
Page 96: Blower Assembly Leds
If a blower assembly displays absent or faulty, contact IBM to order a replacement. Both "absent" or "faulty" could also be the result of the blower assembly not being properly seated. -
Page 97: Wwn Card Status
Table 12. Blower assembly LED descriptions (continued) Recommended LED purpose Color Status action Fault No Light (LED is off) Blower assembly is Ensure that the either healthy or blower assembly has does not have power. power. Steady amber Blower assembly has Replace the blower a failure (full or assembly. - Page 98 Table 13. Messages that may indicate WWN card failure (continued) Type of Message Sample error message WWN unit is being faulted. 0x24c (fabos): Switch: switchname, Critical EM-WWN_UNKNOWN, 1, Unknown WWN #2 is being faulted or <timestamp>, [EM-1003], 40, SLOT 7 | FFDC | CHASSIS, CRITICAL, SAN384B-2, WWN 2 has unknown hardware identifier: FRU faulted or <timestamp>, [EM-1034],...
-
Page 99: Chapter 5. Removing And Installing Components
1. Align the holes on the back of the door with the ball studs on the chassis 2. Push the door into place. It will snap onto the studs. See Figure 31 on page 68. © Copyright IBM Corp. 2011, 2013... -
Page 100: Removing And Installing Cable Management Finger Assemblies
384b015 Figure 31. Chassis door Removing and installing cable management finger assemblies The SAN384B-2 comes equipped with two vertical cable management finger assemblies. It can continue to operate during the replacement of the cable management assemblies. Due to the horizontal orientation of the blades, the cable management assemblies are attached to the uprights of the mounting rack. -
Page 101: Installing A Cable Management Finger Assembly
Figure 32. Cable management finger assemblies Installing a cable management finger assembly Complete the steps to install a cable management finger assembly. 1. Position the vertical cable management finger assembly along the upright rails of the rack, aligning the holes on the assembly with the holes in the SAN384B-2 chassis. -
Page 102: Removing And Installing Port, Application, And Encryption Blades
Removing and installing port, application, and encryption blades This section describes how to remove and install port, application, and encryption blades. Attention: A blade should be removed only when being replaced with another blade or a filler panel. Any slot that is not occupied by a blade should be occupied by a filler panel to ensure correct cooling of the chassis and protection from dust. -
Page 103: Port, Application, And Encryption Blade
5. Ensure that the part number on the unit being installed matches the replacement part number (unless you are performing an upgrade). The chassisShow command displays information about the blades, including part numbers, serial numbers, and additional status. 6. Ensure that traffic is not flowing through the blade (port status LED should be off) prior to disconnecting cables. -
Page 104: Installing A Blade
Installing a blade Complete the steps to install a port, application, or encryption blade. Attention: Follow ESD precautions (see “ESD precautions” on page xxi). 1. Orient the blade so that the ports are at the front of the chassis and the flat side of the blade is on the bottom. -
Page 105: Installing A Filler Panel
Figure 34. Filler panel removal and installation Installing a filler panel Attention: Do not leave a slot empty. This will adversely affect cooling of the chassis. Complete the steps to install a filler panel. 1. Orient the filler panel in front of the empty slot (see Figure 34). 2. -
Page 106: Time And Items Required
Attention: If the new CP blade does not have the same firmware as the active CP blade, the new blade must be upgraded to the same firmware version. You can determine the firmware version on the replacement blade and do a firmware upgrade if necessary after inserting the blade in the chassis, but you MUST disable high availability (HA) before inserting the new blade. -
Page 107: Recording Critical San384B-2 Information
Recording critical SAN384B-2 information Back up the SAN384B-2 configuration before you replace a CP blade. Refer to the Fabric OS Administrator’s Guide for backup information. 1. Connect to the chassis and log in as admin, using a serial console connection. 2. -
Page 108: Removing A Control Processor Blade (Cp8)
Removing a control processor blade (CP8) The SAN384B-2 continues to operate while a CP blade is being installed if the redundant CP blade is active and a failover does not occur. You can prevent failover by entering the haDisable command. Attention: Follow ESD precautions (see “ESD precautions”... -
Page 109: Installing A Control Processor Blade (Cp8)
Figure 35. Removing the control processor (CP8) blade Installing a control processor blade (CP8) Attention: Read all instructions for installing the CP blade before beginning the procedure. Use the same version of Fabric OS on both CP blades. Using different versions is not supported and may cause malfunctioning. -
Page 110: Verifying Operation Of The New Cp Blade
The FC8-32E and FC8-48E blades require FOS 7.0.1 or later. If the firmware on the replacement blade is earlier than 7.0.0, it must be brought up to the version (7.0.0 or later) on the active CP blade, which must be at least 7.0.0. IBM recommends upgrading to the latest version available. - Page 111 From the Release notes page, click the Release Firmware link and follow the online prompts to navigate to the Brocade Downloads for IBM End Users page. f. Follow the instructions on the Brocade pages. Enter all requested information (use default values).
-
Page 112: Downloading Firmware From A Usb Device
6. Log back in to the standby CP blade and run firmwareDownloadStatus on the standby CP blade to validate a successful commit. This may take up to 10 minutes. 7. If you are upgrading through several levels of the Fabric OS, repeat step 2 through step 7 as often as necessary based on the path outlined in the table above. -
Page 113: Completing The Cp8 Blade Replacement
Restarting system. The system is coming up, please wait... Fri Jun 18 14:53:13 2011: Doing firmwarecommit now. Please wait ... Fri Jun 18 14:55:27 2011: Firmware commit completes successfully. Validating the filesystem ... Fri Jun 18 22:36:05 2011: Doing firmwarecommit now. Please wait ... -
Page 114: Removing And Installing A Cr16-4 Core Switch Blade
4. Pack the faulty CP blade in the packaging provided with the new CP blade for return to IBM, local procedures. 5. Install the chassis door (See “Removing and installing the chassis door” on page 67.) -
Page 115: Removing A Cr16-4 Core Switch Blade
Removing a CR16-4 core switch blade The SAN384B-2 continues to operate while a core switch blade is being replaced. Attention: Follow ESD precautions (see “ESD precautions” on page xxi) whenever handling blades. Note: The CR16-4 blade is compatible only with the SAN384B-2. Complete the steps to remove a CR16-4 core switch blade. -
Page 116: Removing And Installing A Power Supply
67.) 9. Pack the faulty core switch blade in the packaging provided with the new core switch blade for return to IBM, local procedures. Removing and installing a power supply Use this procedure to remove and replace a power supply. The SAN384B-2 can continue operating during the replacement if the other power supply is operating. -
Page 117: Location Of The Two Power Supplies
Figure 37. Location of the two power supplies Power supply 1 (PS1) Power supply 2 (PS2) Complete the steps to remove a power supply. 1. Perform the appropriate action based on whether the SAN384B-2 is operating: v If the SAN384B-2 is not operating during the replacement procedure, go to step 2. -
Page 118: Installing A Power Supply
Figure 38. Removing and installing a power supply Installing a power supply Complete the steps to install a power supply. 1. Remove any filler panels that were temporarily installed. 2. Insert the power supply into the slot. Verify that the power supply is seated by gently pulling on the handle. -
Page 119: Removing A Blower Assembly
Removing a blower assembly Complete the steps to remove a blower assembly. 1. Before removing a blower assembly, verify that the other blower assembly is functioning correctly. The power LEDs should be steady green. 2. Use the screwdriver to loosen the captive screws at the left and right edges of the blower assembly. -
Page 120: Removing And Installing A Wwn Bezel And Wwn Card
Removing and installing a WWN bezel and WWN card Note: The World Wide Name (WWN) cards contain fully redundant circuits and normally do not require replacement. Two WWN cards are located beneath the WWN bezel. The LEDs on the WWN cards are not visible unless the bezel is removed. -
Page 121: Installing The Wwn Bezel And Wwn Card
4. Install the WWN bezel. Orient the bezel on the chassis (Figure 40). Insert and tighten the two screws. 5. Pack the faulty WWN card in the packaging provided with the new card for return to IBM, local procedures. Chapter 5. Removing and installing components... -
Page 122: Removing And Installing Transceivers
Removing and installing transceivers Attention: Use only transceivers that are supported for this product. Only transceivers purchased from IBM are supported. The use of transceivers that are not supported may cause data loss or cause the product to malfunction. For a listing of transceivers compatible with this product: v Go to the IBM Support Portal www.ibm.com/supportportal. -
Page 123: Optical Transceiver (Sfp+) Extraction Tool
Figure 41. Optical transceiver (SFP+) extraction tool The 16 Gbps SFP+ transceivers have an attached pull tab similar to the mSFPs and have no latching wire bail. To simplify insertion of the 16 Gbps SFP+ transceivers, it is recommended to connect the cables first, and then insert them as a unit into the port. -
Page 124: Removing And Installing An Msfp Optical Transceiver
Note: The mSFP transceivers are used only with the FC8-64 port blade. Narrower OM-3 LC cables are used to connect the FC8-64. These cables are offered by several major manufacturers. Contact your IBM representative for options regarding different cable and patch panel configurations to simplify cable management with higher density FC8-64 port blades. -
Page 125: Removing And Replacing Inter-Chassis Link (Qsfp) Cables
Attention: mSFP optical transceivers should not be inserted into ports intended for SFP+ transceivers. They will be faulted on power-up. To replace an mSFP transceiver, complete the steps. Due to high port and cable density, it is recommended that the optical cable be either removed from or inserted into the mSFP while the transceiver is out of the switch or blade. -
Page 126: Time And Items Required
QSFP is signal/no sync. installed; or ensure that the cable is properly connected. If the LED remains amber, contact IBM. Blinking amber Port is disabled or Check for console faulted, FC link messages or wait for activity, segmented,... -
Page 127: Removing An Inter-Chassis Link (Qsfp) Cable
Removing an inter-chassis link (QSFP) cable Complete the steps to remove a QSFP cable. 1. Remove the chassis door (“Removing and installing the chassis door” on page 67). 2. If you are replacing an ICL cable, note the cable routing, paying attention to which cable end plug into which socket. -
Page 128: Possible Icl Configurations
Possible ICL configurations Figure 47 illustrates one possible QSFP cable configuration between two SAN384B-2 or SAN768B-2 chassis. Each of two cores in one chassis should be interconnected with each of two cores in the second chassis. This provides for inter-chassis link (ICL) trunking between chassis, ensuring redundancy. Parallel connections between core blades are recommended. -
Page 129: Core/Edge Icl Topology For San384B-2 And San768B-2 Chassis
Figure 48. Core/edge ICL topology for SAN384B-2 and SAN768B-2 chassis SAN384B-2 and SAN768B-2 chassis can also be connected in a full mesh configuration as shown in Figure 49 on page 98. The SAN768B-2 chassis are shown in the figure, but either chassis can be connected. In this example, the three trunk groups are shown in different shades. -
Page 130: Removing And Replacing A San384B-2 Chassis
Trunked ICLs Trunked ICLs Trunked ICLs Figure 49. full mesh ICL topology for SAN384B-2 and SAN768B-2 chassis Removing and replacing a SAN384B-2 chassis This section describes how to remove and replace the SAN384B-2 chassis (with its backplane). The basic steps are: v “Verifying need for replacement”... -
Page 131: Time Required
“Verifying correct configuration of the fabric” on page 108 Note: The SAN384B-2 must be removed from the fabric and powered off to perform this procedure. Contact IBM Support if you have any questions about whether the chassis requires replacement. -
Page 132: Critical Information Checklist Example
Note: Run supportShow which includes all of the information in Table 16 and more. The customer should record the location of the .txt files, which are created by the customer and are not called out in the supportShow results. For detailed information about Fabric OS commands, refer to the Fabric OS Command Reference. - Page 133 3. Record the WWN value: Enter wwn; then, copy the command output into a file named “config-miscinfo.txt”. switch:admin> wwn 10:00:00:60:69:00:00:0a 4. Record the IP address information. Enter ipAddrShow -sw; then copy the command output into the “config-miscinfo.txt” file. switch:admin> ipaddrshow -sw SWITCH Ethernet IP Address: 10.32.50.12 Ethernet Subnetmask: 255.55.0.0...
-
Page 134: Disconnecting From The Network And Fabric
<output truncated> switch:admin> 6. Create a SAN “profile” by entering and recording the information provided by the commands: v nsShow v nsAllShow v switchShow -qsfp v fabricShow Copy the command output into a text file named “SANbefor.txt”. After the SAN384B-2 is restored to the fabric, this information can be used to verify that no unintentional changes have occurred to the fabric. -
Page 135: Removing Components From The Chassis
Shutting down the blade..Stopping blade 2 Shutting down the blade..Stopping blade 8 Shutting down the blade..Broadcast message from root (pts/1) Tue Jul 18 14:23:06 2008... The system is going down for system halt NOW !! 2. Power off the chassis by flipping all AC power switches to O. (The power supply status LED should turn off.) DANGER Multiple power cords. -
Page 136: Removing A San384B-2 From The Cabinet
Note: If the chassis being removed was factory installed, additional shipping braces were added for stability during shipment. These consist of L-brackets and flat mounting plates. The mounting plates are attached on either side at the blower end of the chassis. The L-brackets secure the mounting plates to the cabinet vertical rails. -
Page 137: Installing The Replacement Chassis
closest to the cabinet to allow the middle section to fully extend. Make sure the spring-loaded pin snaps back into place. The gap between the end of the load plate middle section and the port side exhaust kit shelf should be no more than 2.5 cm (1 in.). -
Page 138: Downloading The Configuration
4. Install the control processor blades (“Installing a control processor blade (CP8)” on page 77). 5. Install the core switch blades (“Installing a CR16-4 core switch blade” on page 83). 6. If ICL cables are not used, insert rubber plugs into the QSFP transceivers if installed in the core switch blades (CR16-4). -
Page 139: Verifying Correct Operation Of System
Verifying correct operation of system 1. Log in to the SAN384B-2 as admin: switch:admin> login login: admin password: xxxxxxxx switch:admin> 2. Enter the slotShow -m command and verify that all the installed cards are detected and that their status is operational (enabled). switch:admin>... -
Page 140: Reconnecting The System To The Network And Fabric
Ethernet Subnetmask: 255.55.0.0 HostName : cp0 Gateway Address: xxx.xxx.xxx.1 Ethernet IP Address: xxx.xxx.xxx.11 Ethernet Subnetmask: 255.55.0.0 HostName : cp1 Gateway Address: xxx.xxx.xxx.1 Backplane IP address of CP0 : 10.0.0.4 Backplane IP address of CP1 : 10.0.0.5 switch:admin>switch:admin> Reconnecting the system to the network and fabric See the cable routing and port connection information recorded previously in Table 17 on page 110 for the steps. - Page 141 If there are any mechanical problems, try reseating the associated component. v If the configuration information is not correct for the system, modify as required. v If other issues exist, contact IBM Support Chapter 5. Removing and installing components...
-
Page 142: Cable Routing Table Template
Cable routing table template Table 17 is a 64-port template for a cable-routing table. Expand or duplicate the table as needed, for the number of ports in the chassis. Table 17. Cable routing table for SAN384B-2 (64 ports shown) Slot/Port Cable labels Connected Slot/Port of... -
Page 143: Removing The Batteries
Table 17. Cable routing table for SAN384B-2 (64 ports shown) (continued) Slot/Port Cable labels Connected Slot/Port of Slot Port Switch end Device end device device Removing the batteries Local regulations may require removal of the battery before recycling or disposing of the product. -
Page 144: Battery Locations On The Cp8 Blade
Repair or disassemble Exchange only with the IBM-approved part. Recycle or discard the battery as instructed by local regulations. In the United States, IBM has a process for the collection of this battery. For information, call 1-800-426-4333. Have the IBM part number for the battery unit available when you call. -
Page 145: Encryption Blade Battery Location
Figure 51. Encryption blade battery location 8. Recycle the batteries as appropriate. Refer to the Environmental Notices and User Guide shipped with the product for more information on battery recycling and disposal. Chapter 5. Removing and installing components... - Page 146 SAN384B-2 Installation, Service, and User Guide...
-
Page 147: Chapter 6. Installing New Features
Disassembling any part of a port blade voids the part warranty and regulatory certifications. There are no user-serviceable parts inside the port blade. These instructions cover installing a new FC3632 or FC3648 in the SAN384B-2 chassis. Time required 20 minutes or less per port blade. © Copyright IBM Corp. 2011, 2013... -
Page 148: Items Required
Items required v ESD (electrostatic discharge) grounding strap v Workstation computer v Port blade v Phillips screwdriver v SFP+ transceivers (as needed) v Optical cables (as needed) Procedures Follow the links in the steps below to complete this installation: 1. Verify that the port blade is the correct part: 99Y0347 for the 32-port blade, and 99Y0350 for the 48-port blade. -
Page 149: Fc3633, Fc3649- Installing An Enhanced 8-Gb Port Blade (32 Or 48 Ports)
FC3633, FC3649- Installing an Enhanced 8-Gb port blade (32 or 48 ports) These features can be installed while the SAN384B-2 is operational. Note: A minimum level of FOS 7.0.1 is required for these blades. Attention: Follow these precautions for all procedures in this section to avoid damaging the port blades or chassis: v Wear a grounded ESD strap when handling a port blade (see “ESD precautions”... -
Page 150: Fc3864 - Installing An 8-Gb 64-Port Port Blade
Note: Firmware downloads require that Ethernet connections be made to both CP blades. Procedures for downloading and installing firmware are described in the Fabric OS Administrator's Guide. 4. Remove the filler panel or port blade. Refer to “Removing a port or application blade”... -
Page 151: Procedures
FC8-64 port blade. Narrower OM-3 LC cables are used to connect the FC8-64. These cables are offered by several major manufacturers. Contact your IBM representative for options regarding different cable and patch panel configurations to simplify cable management with higher density FC8-64 port blades. -
Page 152: Fc3890 - Installing An 8 Gbps Extension Blade (Fx8-24)
Attention: Do not route cables in front of the exhaust vent, which is located at the top on the port side of the chassis. 12. Verify the installation (see the appropriate section of Chapter 4, “Monitoring system components,” on page 51). For information about how to check the status of hardware components using the CLI, see the Fabric OS Administrator's Guide, which is located on the product documentation CD. -
Page 153: Fc3895 - Installing An Encryption Blade (Fs8-18)
Note: Firmware downloads require that Ethernet connections be made to both CP blades. Procedures for downloading and installing firmware are described in the Fabric OS Administrator's Guide. 4. Remove the filler panel or port blade. Refer to “Removing and installing port, application, and encryption blades”... -
Page 154: Items Required
Items required v ESD (electrostatic discharge) grounding strap v Workstation computer v Encryption blade v Phillips screwdriver v Transceivers (as needed) v Optical cables (as needed) Procedures Follow the links in the steps below to complete this installation. 1. Verify that the blade is the correct part. 2. -
Page 155: Avoid Double Encryption
Plan the installation of the chassis and other features accordingly. Refer to the separate publication, IBM System Storage FIPS 140-2 Security Seal Application Procedures (GA32-2220-00), for installation instructions of these seals for several different models. -
Page 156: Fc7872 - Installing A Qsfp And Enterprise Inter-Chassis License
8. Enable the inter-chassis links. See the iclCfg section in the Fabric OS Command Reference for CLI command options. 9. Verify the operation of the ICL (see Table 15 on page 94). FC7872 - Installing a QSFP and Enterprise inter-chassis license This feature can be used to connect up to nine 2499 fabric backbone chassis and can be installed while the SAN384B-2 is operational. -
Page 157: Appendix A. Product Specifications
Table 19 lists the system architecture for the SAN384B-2. Table 19. System architecture Fibre Channel Ports Up to 192 16 Gbps ports, universal (E_Port, F_Port, EX_Port, M_Port, D_Port). Control Processor Redundant (active/standby) control processor blades Scalability Full fabric architecture: 239 switches maximum © Copyright IBM Corp. 2011, 2013... - Page 158 Table 19. System architecture (continued) Performance 2.125 Gbps line speed, full duplex. 4.25 Gbps line speed, full duplex. 8.50 Gbps line speed, full duplex. 10.51875 Gbps line speed, full duplex. 16.0 Gbps line speed, full duplex. Autosensing of 2, 4, 8, and 16 Gbps port speeds depending on SFPs used.
-
Page 159: System Size And Weights
Table 19. System architecture (continued) Media types Attention: Use only transceivers that are supported for this product. Only transceivers purchased from IBM are supported. The use of transceivers that are not supported may cause data loss or cause the product to malfunction. -
Page 160: System Blade And Fru Weights
Table 20. System sizes and weights (continued) System specification Size and weight Empty chassis: 25.4 kg (56 lb.) v No blades v No CPs v No CRs v No power supplies v No fan assemblies v No cable management devices System blade and FRU weights Table 21 lists the weights of the compatible blades and other FRUs. -
Page 161: Environmental Requirements
CAUTION: For CA residents only: IBM recommends installing this product in a room size of 2190 cubic feet (62 cubic meters) or larger at 0.4 ACH ventilation rate to reduce the concentrations of any chemicals emitted by the product. -
Page 162: Power Specifications
The ports are universal and self-configuring, capable of becoming F_Ports (fabric ports), FL_Ports (fabric loop enabled), or E_Ports (expansion ports). The ports meet all required safety standards. Power specifications DANGER Multiple power cords. The product might be equipped with multiple power cords. To remove all hazardous voltages, disconnect all power cords. -
Page 163: Power Demands Per Component
Table 24. Power demands per component Number of Maximum blades Blade or fan power draw Type of Ports per permitted in Total ports units (Watts) blade blade chassis per chassis Control blade NA CR16-4 Core blade 8 64 Gbps 16 quad ports QSFP ports (64 ports) FC8-32E... -
Page 164: Data Transmission Ranges
Two power cords for connecting between the SAN384B-2 and the power distribution units on the 2109 C36 cabinet are shipped with the product. See the IBM TotalStorage SAN Cabinet 2109 Model C36 Installation and Service Guide for information on connecting the cabinet to the facility power source. If the stand-alone feature is ordered for the SAN384B-2, then you must also order the country-specific power cords. -
Page 165: Appendix B. Application And Encryption Blades
GbE port mode. If operating in 10GbE mode the other end of the circuit must also be an FX8-24 operating in either 10GbE mode or dual mode with the corresponding VE_ports in 10GbE mode. © Copyright IBM Corp. 2011, 2013... - Page 166 The FX8-24 blade is intended as a platform for FCIP and Fibre Channel Routing Services. Refer to the Fabric OS Administrator’s Guide for information on configuring these features. The FX8-24 blade provides the hardware features: v 12 autosensing FC ports with link speeds of 1, 2, 4 or 8 Gbps v Ten GbE ports supporting FCIP with fixed link speed at 1 Gbps v Two 10 GbE ports (licensable) supporting FCIP with fixed link speed at 10 Gbps The FX8-24 blade also provides the functionality features:...
-
Page 167: Appendix C. Diagnostics And Troubleshooting
SAN384B-2” on page 49 and then back on (“Providing power to the SAN384B-2” on page 35). If the problem is still unresolved after these steps, contact IBM support. The information required by technical support in order to provide assistance is listed under “Getting help”... -
Page 168: Interpreting Post And Boot Results
Fabric OS Administrator's Guide. v Verify that the switch prompt displays when POST completes. If it does not display, POST was not successfully completed. Contact IBM for support. v Review the system error log using the errShow or errDump commands. -
Page 169: Boot
4. Diagnostic tests are run on several functions, including circuitry, port functionality, ability to send and receive frames, all aspects of memory, parity, statistics counters, and serialization. Boot In addition to POST, boot includes the steps after POST is complete: 1. - Page 170 Table 27. Troubleshooting (continued) Several or all components One or both power cables may not Ensure that both power cables are connected to are not operating. be connected to a live source. live outlets. One or both AC power switches Ensure that both AC power switches are on (AC might be off.
- Page 171 Table 27. Troubleshooting (continued) None of the LEDs on an Component might not be seated Ensure that the SAN384B-2 has power and individual component are correctly. component is firmly seated. If problem continues, run the sensorShow command to determine component status. If component is a CP blade or port blade, enter the slotShow command to determine the status.
-
Page 172: Link Troubleshooting
Link troubleshooting IBM SAN b-type directors and switches use the latest high bandwidth Fibre Channel technology and auto-negotiate to 16 Gbps, 8 Gbps, 4 Gbps, or 2 Gbps based on the link data rate capability of the attached transceiver and the speed supported by the switches and directors. -
Page 173: Dust, Dirt, Or Other Contaminants
Once the original failing link (link 2) has been determined, the two connecting ports of that link need to be checked for the errors: v Encoder errors v Disparity errors v Invalid transmission words The port that displays any of the above errors is the cause of the link issue, which can be caused by dust or dirt in the connectors or fiber, an insufficient link loss budget, and/or incompatible SFPs. -
Page 174: Attenuation On Lwl Connections
LWL transceivers or use of 8 Gbps LWL transceivers that employ rate select. 2G LWL SFP maximum receive power The IBM SAN b-type 8 Gbps and 16 Gbps directors and switches use the latest high bandwidth Fibre Channel technology and auto-negotiate to 16 Gbps, 8 Gbps, 4 Gbps, or 2 Gbps based on the link data rate capability of the attached transceiver. -
Page 175: Maximum Receive Power Of 2 Gbps Lwl Sfps
attenuation. The common 2 Gbps SFP Rx maximum power levels are listed in Table 29 and can be used as a quick method to relieve concerns of over saturation. Table 29. Maximum receive power of 2 Gbps LWL SFPs Max Receive Power | | | Vendor Part number... - Page 176 SAN384B-2 Installation, Service, and User Guide...
-
Page 177: Appendix D. Tuning The System
<system name>, S<slot number>, C<chip index>: Internal monitoring has identified suspect hardware, blade may need to be reset or replaced: fault1:<fault1_cnt>, fault2:<fault2_cnt> th2:0x<threshold_used>. An example of finding a C2-1010 message using the errdump command on an IBM SAN768B-2 is shown below: errdump –a | grep C2-1010... - Page 178 1. If the Cx-5825 counters are not incrementing for any specific slot and blade port number then this indicates the Cx-1010 error message was logged for other types of errors for which tuning may not help. Contact IBM Support for further assistance.
-
Page 179: Before Tuning
To check whether a core blade is fully operational you can use the slotshow command and verify that the status of the core blade displays as “ENABLED”. An example of power cycling a core blade in slot 3 in an IBM SAN384B-2 is shown below. - Page 180 CORE BLADE INSERTED, NOT POWERED ON CP BLADE ENABLED CP BLADE ENABLED CORE BLADE ENABLED UNKNOWN VACANT SW BLADE ENABLED SAN384B-2:FID128:admin> slotpoweron -d626 3 Powering on slot 3 SAN384B-2:FID128:admin> slotshow Slot Blade Type Status ----------------------------------- AP BLADE ENABLED UNKNOWN VACANT CORE BLADE POWERING UP CP BLADE...
- Page 181 <slot #> slotpoweron <slot #> An example of power cycling a port blade in slot 8 in an IBM SAN384B-2 is shown below. SAN384B-2:FID128:admin> slotpoweroff 8 Slot 8 is being powered off SAN384B-2:FID128:admin> slotshow Slot Blade Type Status -----------------------------------...
- Page 182 SAN384B-2 Installation, Service, and User Guide...
-
Page 183: Appendix E. Port Numbering
Table 30. External port to slotShow port mapping for CR16-4 core blades External port slotShow port External port slotShow port number numbers number numbers 16-19 20-23 8-11 24-27 12-15 28-31 © Copyright IBM Corp. 2011, 2013... - Page 184 Figure 54. FC16-32 port blade Power LED FC ports 16-23 Status LED FC ports 0-7 FC ports 24-31 FC ports 8-15 Port and trunking group Figure 55. FC16-48 port blade Power LED FC ports 24-47 Status LED FC ports 0-23 Figure 56.
-
Page 185: Fc8-64 Port Blade
Figure 57. FC8-48E port blade Power LED FC ports 24-47 Status LED FC ports 0-23 Figure 58. FC8-64 port blade Status LED Port 61 LED Power LED Port 29 LED Port 63 FC ports 32-63 (right to left) Port 30 FC ports 0-31 (right to left) Figure 59. - Page 186 Status LED FC ports 0-5 (numbered right to left) Power LED FC ports 6-11 (numbered right to left) 1 GbE ports 0-3 (numbered right to left) 1 GbE ports 4-9 (numbered right to left) 10 GbE ports 0-1 (numbered right to left) SAN384B-2 Installation, Service, and User Guide...
-
Page 187: Notices
Consult your local IBM representative for information on the products and services currently available in your area. Any reference to an IBM product, program, or service is not intended to state or imply that only that IBM product, program, or service may be used. Any functionally equivalent product, program, or service that does not infringe on any IBM intellectual property right may be used instead. -
Page 188: Trademarks
International Business Machines Corporation in the United States, other countries, or both. A complete and current list of other IBM trademarks is available on the Web at www.ibm.com/legal/copytrade.shtml Adobe, the Adobe logo, PostScript, and the PostScript logo are either registered trademarks or trademarks of Adobe Systems Incorporated in the United States, and/or other countries. -
Page 189: Industry Canada Class A Emission Compliance Statement
Properly shielded and grounded cables and connectors must be used in order to meet FCC emission limits. IBM is not responsible for any radio or television interference caused by using other than recommended cables and connectors or by unauthorized changes or modifications to this equipment. Unauthorized changes or modifications could void the user's authority to operate the equipment. -
Page 190: People's Republic Of China Class A Electronic Emission Statement
Um dieses sicherzustellen, sind die Geräte wie in den Handbüchern beschrieben zu installieren und zu betreiben. Des Weiteren dürfen auch nur von der IBM empfohlene Kabel angeschlossen werden. IBM übernimmt keine Verantwortung für die Einhaltung der Schutzanforderungen, wenn das Produkt ohne Zustimmung der IBM verändert bzw. -
Page 191: Japan Voluntary Control Council For Interference (Vcci) Class A Statement
Japan Voluntary Control Council for Interference (VCCI) Class A Statement Translation: This is a Class A product based on the standard of the VCCI Council. If this equipment is used in a domestic environment, radio interference may occur, in which case, the user may be required to take corrective actions. Japan Electronics and Information Technology Industries Association (JEITA) Statement Japanese Electronics and Information Technology Industries Association (JEITA) -
Page 192: Taiwan Class A Electronic Emission Statement
Taiwan Class A Electronic Emission Statement SAN384B-2 Installation, Service, and User Guide... -
Page 193: Index
47 core switch blade installing 86, 87 configuring 46 components 61 LEDs 63 double 47, 123 CR16-4 5 removing 86, 87 planning 45 LEDs 62 status 63 pre-initialization tasks 46 status 61, 62 © Copyright IBM Corp. 2011, 2013... - Page 194 encryption (continued) FC3895 FS8-18 encryption blade (continued) redundancy 45 FS8-18 encryption blade 121 installing 121 encryption blade installing 121 LEDs 58 configuration 33 FC7230 status 58 description 133 FIPS seals 123 FX8-24 features 133 FC7871 FCIP extension blade 5 FS8-18 55 QSFP inter-chassis link (ICL) 123 FX8-24 blade 133 installing 70, 121...
- Page 195 95 installing 84, 86 environmental xv, xxv inter-chassis link (QSFP) cable LEDs 63 general 155 installing 93 removing 84 IBM 155 removing 93, 95 status 63 patents 155 internal machine checks xxiv product safety xv Interoperability Matrix 48 components 2...
- Page 196 removing (continued) SAN384B-2 (continued) system blade filler panel 72 weight 127 power off 49 blower assembly 86, 87 security 9 shutdown 49 cable management finger security features 9 tuning 145 assembly 68 security features table 9 system architecture 125 chassis door 67 serial connection 35 system component components 67, 103...
- Page 197 WWN bezel (continued) removing 88 WWN card failure 65 removing 88 Index...
- Page 198 SAN384B-2 Installation, Service, and User Guide...
- Page 200 Part Number: 98Y5378 Printed in USA GA32-0894-04...
Need help?
Do you have a question about the System Storage SAN384B-2 and is the answer not in the manual?
Questions and answers