Table of Contents
Advertisement
Quick Links
Download this manual
See also:
Maintenance Manual
Advertisement
Table of Contents

Related Manuals for Printronix P9212


Summary of Contents for Printronix P9212
- Page 1 Setup Guide P9212 Line Matrix Printer...
-
Page 3: Setup Guide
P9212 Line Matrix Printer Setup Guide P/N 134621–001, Rev C... - Page 4 Printronix, Inc. makes no representations or warranties of any kind regarding this material, including, but not limited to, implied warranties of merchantability and fitness for a particular purpose. Printronix, Inc. shall not...
-
Page 5: Table Of Contents
1–3 The P9212 Line Matrix Printer ........ - Page 6 Configuring the Printer Overview ........... . . 3–5 Operating States .
- Page 7 Unidirectional ..........3–37 Select SFCC .
- Page 8 Dataproducts Menu Options ........3–55 Data Bit 8 .
- Page 9 Printer Interfaces Overview ........... . . 4–2 Dataproducts Parallel Interface .
- Page 10 RibbonMinder Overview ........... . . 6–2 Running a Job .
-
Page 11: Introduction
1–3 The P9212 Line Matrix Printer ........ -
Page 12: About This Setup Guide
About This Setup Guide This Setup Guide is designed so you can quickly install and configure your P9212 printer. How to Locate Information • Use the Table of Contents at the front of this guide. • Use the Chapter Contents listed on the first page of each chapter. -
Page 13: Keys And Display Messages
The message “Save Config” appears on the display. Related Documents For more information about your printer, refer to the following documents: • P9212 Line Matrix Printer Operator’s Guide. Includes step-by-step instructions on daily printer operations. • Impact Printers Programmer’s Reference Manual. Describes printer codes and character sets for various printer emulation modes. -
Page 14: The P9212 Line Matrix Printer
The P9212 Line Matrix Printer The P9212 printer incorporates the latest refinements in line matrix printing technology, yet is very easy to use. The LCD and Light Emitting Diodes (LED) status indicators on the control panel communicate with you directly and clearly. -
Page 15: Standard Features
• Three printer emulations are selectable at the control panel and controlled by software: 1) Printronix P-Series emulation 2) Printronix P-Series XQ emulation 3) Serial Matrix printer emulation (similar to the IBM Graphic Printer, but with more features) • All emulation software, fonts, and character sets are permanently stored in printer Read–Only Memory (ROM). -
Page 16: Graphics And Vertical Formatting
1) EVFU: Printronix Electronic Vertical Format Unit 2) DAVFU: Dataproducts-compatible Direct Access Vertical Format Unit 3) NVFU: Printronix New direct access Vertical Format Unit 4) CVFU: Centronics-compatible direct access Vertical Format Unit 5) Vertical tabbing in Serial Matrix emulation mode... -
Page 17: Optional Features
Optional Features We offer a variety of options that enable you to fine-tune your printer to nearly any printing application: • Intelligent Graphics Processor (IGP–200 and IGP–210). The IGP processes and plots all graphics, freeing the host computer for other tasks. -
Page 18: Protocols And Emulations
When the printer executes the character and control codes of another printer protocol, we say that it emulates that printer. If the printer uses the P-Series protocol, for example, it is emulating a Printronix P-Series printer. As used in this manual, protocol and emulation mean the same thing. If the printer is using the Serial Matrix printer protocol, for example, we can also say it is in Serial Matrix emulation mode. -
Page 19: Setting Up The Printer
Setting Up the Printer Chapter Contents Before You Begin ..........2–2 Select a Site . -
Page 20: Before You Begin
Before You Begin Read this chapter carefully before installing and operating the printer. The printer is easy to install, but for your safety and to protect valuable equipment, perform all the procedures in this chapter in the order presented. Select a Site Select a printer site that meets the following requirements: •... - Page 21 • Is located within the maximum allowable distance to the host computer, as shown below: Maximum Distance to Type of Interface Host Computer Dataproducts-compatible 12 meters (40 feet) parallel interface Centronics-compatible 5 meters (15 feet) parallel interface RS-232 serial interface 15 meters (50 feet) Printer dimensions are shown in Figure 2–1 on page 2–4.
- Page 22 42” (106.7 cm) 58.75” (149.2 cm) 23” (58.4 cm) 26” (66 cm) 34” (86.4 cm) 24.38” (61.9 cm) Figure 2–1. Printer Dimensions 2–4 Setting Up the Printer...
-
Page 23: Remove The Shipping Restraints
Remove the Shipping Restraints WARNING To prevent possible injury, do not connect the AC power source before removing the shipping restraints. If the power source has already been connected, disconnect it before performing the shipping restraint removal procedures. WARNUNG Um mögliche Verletzungen zu vermeiden, darf die Netzverbindung erst nach dem Entfernen der Transportbefestigungen hergestellt werden. - Page 24 Remove the Tie Wraps and Outer Foam Pads 1. Raise the printer cover. 2. Cut and remove the tie wrap securing the paper fence. (See Figure 2–2.) 3. Cut and remove the tie wraps securing the outer foam pads. 4. Remove the outer foam pads. 5.
- Page 25 Outer Foam Pad Outer Foam Pad Paper Fence Tie Wrap Forms Thickness Lever Tie Wrap Protective Foam Figure 2–2. Removing the Tie Wraps and Outer Foam Pads Setting Up the Printer 2–7...
- Page 26 Remove the Platen Protective Foam 1. Open the tractor gates. Push the tractor locks down. Move the tractors outward as far as they will go. (See Figure 2–3.) 2. Rotate the forms thickness lever away from you as far as it will go; this is the fully open position.
- Page 27 Remove the Protective Film 4. Carefully peel the protective bubble wrap of the control panel. (See Figure 2–4.) Protective Bubble Wrap Figure 2–4. Removing the Protective Film Setting Up the Printer 2–9...
-
Page 28: Release The Paper Chains
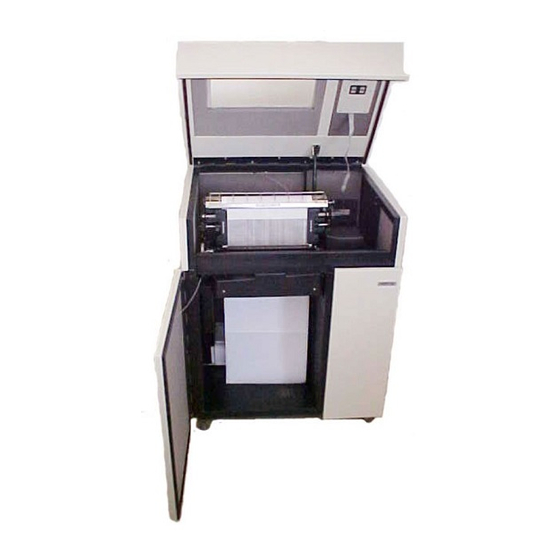
Release the Chains 1. Open the rear cabinet door. 2. Cut the tie wraps and release the chains from the bags at the rear of the printer frame. Remove the tie wraps and bags. (See Figure 2–5.) 3. Make sure each chain hangs freely, with no kinks or knots. Tie Wrap Tie Wrap Plastic Bag... - Page 29 4. Remove the bubble wrap from the paper stacker tent. 5. Unpack the ship kit. 6. Close the rear cabinet door. Paper Stacker Tent Figure 2–6. Paper Stacker Tent Setting Up the Printer 2–11...
-
Page 30: Connect The Interface Cable And Power Cord
Connect the Interface Cable and Power Cord 1. Verify that the voltage source at the printer site conforms to the requirements specified on page 2–2. 2. Make sure the printer power switch is set to O (off). 3. Connect the power cord to the printer’s AC power connector and to the AC line receptacle. -
Page 31: Load The Paper
Load the Paper This section explains how to load paper for the first time. 1. Open the printer top cover. 2. Raise the forms thickness lever as far as it will go. (See Figure 2–8.) 3. Swing open both tractor gates. 4. - Page 32 5. Open the front door of the cabinet. Align the paper supply with the label on the floor of the printer. If possible, use full-width (132-column) paper. 6. Feed the paper up through the paper slot inside the cabinet. Hold the paper to prevent it from slipping down through the paper slot.
- Page 33 7. Pull the paper above and behind the ribbon mask, which is a silver-colored metal strip. (See the ribbon path diagram on the shuttle cover.) Load the paper onto the left tractor and close the tractor gate. Paper Tractor Gate Ribbon Path Diagram Figure 2–10.
- Page 34 9. Align the paper according to the paper scale on the shuttle cover by turning the horizontal adjustment knob until the left tractor is aligned with the number “1” on the paper scale. (You can also use the paper scale to count columns.) Horizontal Adjustment Knob Figure 2–12.
- Page 35 10. Set the printer power switch to | (on). The printer warms up and tests itself. The message “Diagnostic Test In Progress” displays on the control panel. (If there is a fault, the status indicators will flash and a fault message will display.) After initialization, the printer displays “On-Line.”...
-
Page 36: Set The Top Of Form
Set the Top of Form 1. Make sure the forms thickness lever is raised as far as it will go. Forms Thickness Lever Figure 2–14. The Forms Thickness Lever 2. Align the paper perforation with the TOF indicator on the tractor door by rotating the vertical position knob up and down. - Page 37 3. Lower the forms thickness lever. Set it to match the paper thickness. If you are using single-part forms, set the forms thickness lever so that “A” is next to the indicator. (See Figure 2–16.) NOTE: Do not set the forms thickness lever too tightly; excessive friction can cause paper jams, smeared ink, or wavy print.
-
Page 38: Install The Ribbon
Install the Ribbon 1. Raise the forms thickness lever as far as it will go. Forms Thickness Lever Figure 2–17. The Forms Thickness Lever 2. If the alarm is enabled, press the CLEAR key on the control panel to silence the alarm. 3. - Page 39 4. Refer to Figure 2–18 and to the ribbon path diagram on the shuttle cover, and thread the ribbon as follows: Starting from the right ribbon spool, thread the ribbon around the right ribbon guide, under the right tractor gate, between the hammer bank cover and ribbon mask, and along the ribbon path to the left ribbon guide.
-
Page 40: Test The Printer
Test the Printer Step Press Result Notes The printer should be turned on and loaded with paper and ribbon. The top cover should be raised and the control panel display should read “Off-Line Ready.” Press: Press both keys at the same time. ENTER Switch Unlocking the ENTER key Not Locked... - Page 41 Step Press Result Notes To stop the Stops printing. ENTER Printer Test test, press: Shift Recycle Examine the print quality of the characters. They should be fully formed and of uniform density. If the test does not run or if text characters do not appear correctly formed, contact your service representative.
- Page 42 2–24 Setting Up the Printer...
-
Page 43: Configuring The Printer
Configuring the Printer Chapter Contents Overview ........... . . 3–5 Operating States . - Page 44 Buffer Size ..........3–34 Uppercase Select .
- Page 45 Slow Paper Slew ......... . . 3–49 Host Interface Menu Options .
- Page 46 Load Factory Parameters ........3–65 Save Parameters Menu Options .
-
Page 47: Overview
Overview IMPORTANT Configuration directly affects printer operation. Do not change the configuration of your printer until you are thoroughly familiar with the procedures in this chapter. In order to print data, the printer must respond correctly to signals and commands received from the host computer. Configuration is the process of matching the printer’s operating characteristics to those of the host computer. - Page 48 Off–Line Ready Ribbon Life Font Character Set Page 3–26 Page 3–29 Page 3–30 New Ribbon See page 3–29 for Select Set Set Job Rate font options. IBM PC Analyze Job Multinational Set Ribbon Size ECMA–94 Latin 1 When Worn Action DEC Multinat.
-
Page 49: Operating States
Operating States The printer has two operating states: on-line and off-line. When the printer is on-line, it is controlled by the host computer and prints data sent by the host computer. In the off-line state, communication with the host is interrupted so that you can load paper, change ribbons, or test and configure the printer. -
Page 50: Unlocking The Enter Key
Unlocking the ENTER Key To change a parameter, such as line spacing, you must unlock the ENTER key. With the printer off-line, raise the printer cover and press the Y and B keys at the same time. The following control panel message appears for about a second: ENTER Switch Not Locked... -
Page 51: Saving Parameters
Saving Parameters You can change a parameter, such as line spacing or form length, by pressing keys on the control panel or by sending control codes from the host data stream. Your programming reference manual provides information about control codes. Once you change a parameter, it is active as long as the printer is on. -
Page 52: Factory Default Configuration Values
Factory Default Configuration Values The printer is configured at the factory as shown in Table 3–1. All of the values are permanently stored in ROM and are easily reloaded. To load the factory default values, use the Load Parameters menu (page 3–19), or reset the printer (page 3–23) if the Factory Default is the designated power–up. - Page 53 Table 3–1. Factory Default Configuration Values (Continued) Configuration Factory Default Configuration Factory Default Parameter Value Parameter Value Application Compatibility Host Interface Centronics Control Code 06 8.0 LPI Fast Busy Enable Control Code 08 Double High Strobe Polarity Standard Overstrike Enable Latch Data On Leading Edge Compress Print...
-
Page 54: Printing The Current Configuration
Printing the Current Configuration Diagnostics Configuration Printout The configuration printout lists the configuration parameters currently stored and in use. The printout lists the main menus and submenu parameters in the same order as they occur when you use the control panel to configure the printer. - Page 55 Step Press Result Notes ENTER The configuration listing Configuration begins printing. Printing Wait until the Configuration printer stops Printout printing. CLEAR Off–Line Ready Prevents settings from ENTER Switch being changed. Locked Advances the paper. Carefully tear off the configuration printout. Advances the paper.
-
Page 56: Changing Configuration Values
Changing Configuration Values Application Paper Format Compatibility Line Spacing Form Length Set Auto Line Feed Set at 6 LPI Set at 8 LPI Set at 10.3 LPI A configuration consists of several parameters. The printer contains four predefined configurations (IGP, IBM 3287, IBM 5225, and the factory default), which cannot be altered. - Page 57 Step Press Result Notes Make a configuration printout. Refer to “Printing the Current Configuration” on page 3–12. You may skip this step. Determine which parameters you want to change, and what their new values should be. (In this example, we are changing the value of the Line Spacing parameter from “Set at 6 LPI” to “Set at 8 LPI”.) Press: ON LINE...
- Page 58 Step Press Result Notes Cycle through the values Line Spacing (6, 8, or 10.3 LPI). Set at X LPI * ENTER Selects the displayed value. Line Spacing Asterisk (*) appears, Set at 8 LPI * indicating this value is active. Continue this pattern to make other changes.
-
Page 59: Saving Your New Configuration
Saving Your New Configuration Save Parameters Save Parameters Values Saved X = Current Configuration Once you have changed all of the necessary parameters, it is recommended you save them as a configuration that can be stored and loaded later for future use. - Page 60 Step Press Result Notes Verify you have made all of the necessary changes to your current configuration. Return to the top of the menu. Ribbon Life X = the current Save Parameters UNTIL configuration. ENTER Displays for about one Save Parameters second.
-
Page 61: Loading Predefined Configurations
Loading Predefined Configurations Load Parameters Load Saved Parameters 1 Load IGP Load Factory Load IBM 3287 Load IBM 5225 Parameters Parameters Parameters Parameters Use this procedure to load the factory, IGP, IBM 3287, or IBM 5225 configurations. These configurations are stored on ROM and cannot be altered. - Page 62 Step Press Result Notes Press: The printer must be off-line ON LINE Off–Line Ready to load a configuration. Raise the printer cover. Unlocking the ENTER key ENTER Switch allows you to load a Not Locked configuration. Ribbon Life Load Parameters UNTIL First of series.
- Page 63 Step Press Result Notes Prevents settings from being ENTER Switch changed. Locked Close the printer cover. ON LINE Places the printer on-line, On–Line ready for normal operation. (Current Font) Configuring the Printer 3–21...
-
Page 64: Loading Customized Configurations
Loading Customized Configurations CONFIG Figure 3–3. The CONFIG Key A configuration contains a group of parameters that are set to particular values. You can customize up to four unique configurations to meet specific job requirements. Pressing the CONFIG key allows you to select and load one of the four customized configurations quickly. -
Page 65: Resetting The Printer To Default Or Saved Parameters
Resetting the Printer to Default or Saved Parameters Printer reset is also called initializing the printer. This procedure clears RAM and loads either the factory configuration parameters or a set of parameters you have saved previously. Factory parameters are permanently stored in ROM. However, if you have saved a set of configuration parameters, your most recently saved set loads when you reset the printer. -
Page 66: Configuration Menu Diagrams
Configuration Menu Diagrams The Configuration Menu diagrams on the following pages show the structure of the configuration menus and the parameters available in each menu. The diagrams list the menus and options in the order they appear on the control panel. - Page 67 Off–Line Ready Ribbon Life Font Character Set Page 3–26 Page 3–29 Page 3–30 New Ribbon See page 3–29 for Select Set Set Job Rate font options. IBM PC Analyze Job Multinational Set Ribbon Size ECMA–94 Latin 1 When Worn Action DEC Multinat.
-
Page 68: Ribbon Life Menu Options
Ribbon Life Menu Options RibbonMinder monitors ink consumption to ensure quality printing. Chapter 6 explains how to use this feature in more detail. Ribbon Life (From page 3–25) Analyze When Ribbon Job Rate Ribbon Size Worn Action Currently xxx Currently xxx Press ENTER to enter Press ENTER to reset... -
Page 69: New Ribbon
New Ribbon Whenever you install a new ribbon, you must reset the ribbon life to 100%. Set Job Rate The job rate describes the rate at which a particular print job wears out the ribbon. Values can range from 0 (no wear) to 1000 (the highest possible rate of ink usage). -
Page 70: Enable/Disable
Enable/Disable Turns RibbonMinder on or off. Even with RibbonMinder off, the printer continues to calculate ink consumption. It is possible to enable and disable RibbonMinder while still on the same ribbon and to retain to accurate ink consumption (ribbon life) percentages. Font Menu Options The printer is capable of printing the following fonts: •... - Page 71 Font (From page 3–25) DP AT 10 CPI DP AT 12 CPI DP AT 13 CPI DP AT 15 CPI DP AT 17 CPI DP AT 20 CPI NLQ AT 10 CPI NLQ AT 12 CPI NLQ AT 12.9 CPI NLQ AT 15 CPI NLQ AT 16.4 CPI HS AT 10 CPI...
-
Page 72: Character Set Menu Options
Character Set Menu Options Character (From page 3–25) Select IBM PC MULTINATIONAL ECMA–94 LATIN 1 MULTINAT. Select Select Subset Select Subset Select Select Subset Select Subset Language Primary Extended Extended Language Primary Select Select ASCII Select Language Select Language EBCDIC ASCII Language Language... - Page 73 Figure 3–7 shows the Character Set Menu. This menu defines which character code or symbol set the printer uses, including bar code character sets. There are four possible character sets from which to choose: IBM PC, Multinational, ECMA-94 Latin 1, and DEC Multinational. Each of these character sets has several additional choices for language.
-
Page 74: Application Compatibility Menu Options
Application Compatibility Menu Options The Application Compatibility parameters, shown in Figure 3–8, control the overall operation of the printer: • • Printer Protocol 80–9F Hex. • • Buffer Size Control Code 06 • • Uppercase Select Control Code 08 • •... - Page 75 Application Compatibility (From page 3–25) Printer Buffer Uppercase Printer Paper Power On Protocol Size Select Select Advance SW State Upper & Lower Disable Print + Pap Adv On–Line P–Series 2048 Characters Uppercase Only On=DC1/Off=DC3 Move Paper Only Off–Line Serial Matrix 512 Characters P–Series XQ 1024 Characters...
-
Page 76: Printer Protocol
IBM Graphics Printer emulation; uses ASCII Code ESC (1B hex) as a command delimiter. • P-Series XQ: Printronix P300 or P600 printer emulation; uses no command delimiters. Buffer Size The Buffer Size parameter allows you to select the number of characters that the printer internal input buffer can contain, including non-printable characters. -
Page 77: Uppercase Select
Uppercase Select The Uppercase Select parameter controls how the printer handles lowercase characters it receives from the host computer. • Upper & Lower: The printer prints lowercase characters received from the host computer as lowercase, and uppercase characters received from the computer as uppercase. •... -
Page 78: Paper Advance Sw (Switch)
Paper Advance SW (Switch) The Paper Advance SW parameter controls the action of the Form Feed (FF) key on the printer’s control panel when the printer is off-line. • Print + Pap Adv: If there is no data in the printer’s internal input buffer and you press the FF key, the paper immediately advances to top-of-form. -
Page 79: Alarm On Fault
Alarm On Fault The Alarm On Fault parameter determines whether or not the audible alarm sounds on a printer fault, such as an out-of-paper condition. If Alarm On Fault is enabled, the alarm sounds when a printer fault occurs. You can enable or disable this parameter. -
Page 80: Select Sfcc
Select SFCC The Select SFCC feature allows you to select which ASCII codes will function as the command delimiter (Special Function Control Character). • SOH (01 hex) • ETX (03 hex) • ESC (1B hex) • CIRCUMFLEX (5E hex) — also called caret or “hat” (^) •... -
Page 81: Control Code 08
Control Code 08 The Control Code 08 feature defines the function of ASCII code 08 hex (BS). You can select a Backspace function or a Double High (elongated) print function. NOTE: The Control Code 08 parameter is available only when the P-Series Printer Protocol has been selected. -
Page 82: Compress Print
Compress Print Compressed print characters are narrower than the normal character set. This is helpful for applications where you need to print the maximum amount of information on a page. The Compress Print parameter controls which host command sets compressed printing. •... -
Page 83: Font Select/Elongated
Font Select / Elongated The Font Select / Elongated parameter controls how the printer interprets the hex codes 08 and 0E. • Font Select = 0E and Elongated = 08: The printer interprets the code 0E hex in the data stream from the host computer as a Font Select command;... -
Page 84: Paper Format Menu Options
Paper Format Menu Options Paper Format (From page 3–25) Line Form Auto Define Define Spacing Length Set Line Feed CR Code LF Code In Inches In 6 LPI In 8 LPI Set at 6 LPI After Full Line CR = CR LF = CR + LF Lines Lines... -
Page 85: Line Spacing
Line Spacing The Line Spacing feature sets the number of lines to be printed per inch (lpi). At 6 lpi, for example, print lines are spaced 1/6-inch apart. • Set At 6 LPI • Set At 8 LPI • Set At 10.3 LPI Form Length Set The Form length feature sets the number of lines that can be printed on a page. -
Page 86: Auto Line Feed
Auto Line Feed The Auto Line Feed feature may be enabled to prevent data from being “lost” beyond the right margin. When the right margin is reached, a Line Feed code (0A hex) is inserted into the data stream, causing the remaining data to print on the next line. -
Page 87: Vfu (Vertical Format Unit) Select
VFU (Vertical Format Unit) Select The VFU Select feature controls how the printer handles vertical formatting. • EVFU: Enables the VFU and selects Printronix P-Series compatible Electronic Vertical Format Unit (EVFU). • DVFU: Enables the VFU and selects Dataproducts-compatible Direct Access Vertical Format Unit (DAVFU). -
Page 88: Vfu (Vertical Format Unit) Table
VFU (Vertical Format Unit) Table The VFU Table feature controls how the printer handles the VFU formatting information, which is stored in RAM. Either the VFU information can be cleared or it can be saved to NVRAM. • Clear: With “Clear” displayed, press ENTER to discard the loaded VFU data. -
Page 89: Paperout Adjust
Paperout Adjust The Paperout Adjust feature allows you to adjust the Paper Out distance from the perforation; that is, the last dot row on the page that will print when there is a Paper Out condition. CAUTION If the printer runs out of paper and this parameter is set incorrectly, the printer may print on the platen. -
Page 90: Slew Relative
PRÉCAUTIONS Lorsque la fonction PMD est désactivée, le déplacement du papier n’est plus contrôlé. L’imprimante ne signale plus les bourrages papier et continue l’impression, ce qui risque de l’endommager. Slew Relative The Slew Relative feature determines the number of lines slewed when an EVFU Slew Relative command is received. -
Page 91: Slow Paper Slew
Slow Paper Slew When enabled, the Slow Paper Slew option slows the rate at which paper advances into the stacking area of the printer. This option may be used if the paper slew speed is too fast to allow the paper to stack properly. •... -
Page 92: Host Interface Menu Options
Host Interface Menu Options Figure 3–10 shows the Host Interface Menu. From this menu, you can select one of three types of interface between the printer and your host computer: • Centronics: Selects a Centronics parallel interface. • Dataproducts: Selects a Dataproducts parallel interface. •... -
Page 93: Centronics Menu Options
Centronics Menu Options *Centronics (From page 3–50) Data Bit 8 PI Line Data Polarity Resp. Polarity Enable Disable Standard Standard Disable Enable Inverted Inverted Fast Busy Strobe Polarity Latch Data On Enable Standard Leading Edge Disable Inverted Trailing Edge To view options, press: DOWN "... -
Page 94: Data Bit 8
Data Bit 8 The Data Bit 8 parameter allows access to the extended ASCII character set. Normally, this parameter is enabled. When this parameter is disabled, the printer interprets bit 8 of each incoming data character as a zero, regardless of its actual setting. -
Page 95: Data Polarity
Data Polarity The Data Polarity parameter can be set to Standard or Inverted. It must be set to match the Data Polarity of your host computer. • Standard: The printer does not invert the data. • Inverted: The printer inverts the data it receives on the data lines from the host computer. -
Page 96: Strobe Polarity
Strobe Polarity The Data Strobe Polarity parameter can be set to Standard or Inverted. It must be set to match the Data Strobe Polarity of your host computer. When the host computer sends a data strobe signal to the printer, this enables the printer to read the data bus. -
Page 97: Dataproducts Menu Options
Dataproducts Menu Options Dataproducts (From page 3–50) Data Bit 8 PI Line Data Polarity Resp. Polarity Enable Enable Standard Standard Disable Disable Inverted Inverted Strobe Polarity Latch Data On Standard Leading Edge Inverted Trailing Edge To view options, press: DOWN "... -
Page 98: Pi (Paper Instruction) Line
Data Bit 8 The Data Bit 8 parameter allows access to the extended ASCII character set. Normally, this parameter is enabled. When this parameter is disabled, the printer interprets bit 8 of each incoming data character as a zero, regardless of its actual setting. -
Page 99: Strobe Polarity
Response Polarity The Response Polarity parameter can be set to Standard or Inverted. It must be set to match the Response Polarity of your host computer. • Standard: The printer does not invert the response signal. • Inverted: The printer inverts the response signal it sends to the host computer. -
Page 100: Data Protocol
Serial RS-232 Menu Options Serial RS–232 (From page 3–50) Data Protocol Data Rate Word Length Stop Bit Parity Bit 8 Function XON/XOFF 9600 BAUD 8 Bits None Font Select ACK/NAK 19200 BAUD 7 Bits PI Line ETX/ACK 150 BAUD Even Ignore DTR, RC, or RTS 300 BAUD... -
Page 101: Data Rate
Data Protocol The Data Protocol parameter selects one of several different serial interface protocols. These protocols provide for flow control and other host interface requirements. These are discussed on page 4–11 in Chapter 4, Printer Interfaces. • X-ON/X-OFF • ACK/NAK •... -
Page 102: Stop Bit
Stop Bit The Stop Bit parameter sets the number of stop bits in the serial data word. Either one or two stop bits can be selected. The setting must match the corresponding stop bit setting in the host computer. Parity The Parity parameter can be set for odd parity, even parity, or no parity. -
Page 103: Data Term Ready
Data Term Ready The Data Term Ready parameter selects how the printer controls the Data Terminal Ready (DTR) signal. DTR is a control signal from the printer to the host computer indicating whether or not the printer is ready to receive data. You should set this parameter according to the manner in which the host computer uses DTR. -
Page 104: Reverse Channel
Reverse Channel The Reverse Channel parameter selects how the printer controls the Reverse Channel (RC) signal. RC is a control signal from the printer to the host computer indicating whether or not the printer is ready to receive data. You should set this parameter according to the manner in which the host computer uses RC. -
Page 105: Load Parameters Menu Options
Load Parameters Menu Options You can load one of four sets of previously-saved parameters, one of three sets of permanently-stored factory-set parameters, or the permanently-stored factory-set default parameters, as needed, into the currently-selected configuration (1, 2, 3, or 4). (Also see “Loading Predefined Configurations” on page 3–19.) Load Parameters... -
Page 106: Load Saved Parameters (1, 2, 3, Or 4)
Load Saved Parameters (1, 2, 3, or 4) NOTE: Although you can use this menu to load customized configurations, it is recommended you use the CONFIG key. See page 3–22. Pressing ENTER when this message displays loads the first (or second, third, or fourth) set of parameters you saved previously. -
Page 107: Load Factory Parameters
Load Factory Parameters Pressing ENTER when this message is displayed loads the permanently-stored factory-set default parameters (also called the “factory default” parameters). After you press ENTER, the message, “Load Factory Completed” will be displayed for about one second. Then, the display returns to the “Load Factory Parameters”... -
Page 108: Save Parameters Menu Options
Save Parameters Menu Options You can save up to four configurations to meet different print job requirements. A configuration consists of several parameters. They will be saved into the currently loaded configuration (1, 2, 3, or 4). (Also see “Saving Your New Configuration” on page 3–17.) The parameters are stored in non-volatile memory (NVRAM), so they are not lost if you turn off the printer. -
Page 109: Diagnostics Menu Options
Diagnostics Menu Options Diagnostics (From page 3–25) Configuration Print Datastream Printer Test Printer Test Printout in Hex. Code 8 Inch Width Full Width Press ENTER Off–Line Hex Dump Press ENTER to start a test: Press ENTER to start a test: to print the On–Line Hex Dump Shift Recycle... - Page 110 The Diagnostics Menu allows you to do the following: • Print out a listing of the current printer configuration. • Print out the hexadecimal code values of characters received from the host computer. • Run various printer tests. • View certain printer statistics on the printer’s control panel message display.
-
Page 111: Printer Interfaces
Printer Interfaces Chapter Contents Overview ........... . . 4–2 Dataproducts Parallel Interface . -
Page 112: Overview
Overview The printer interface is the point where the data line from the host computer plugs into the printer. The interface processes all communications signals and data to and from the host computer. The printer interface consists of a printed circuit board assembly (PCBA) and a cable connector for the data line. -
Page 113: Dataproducts Parallel Interface
Dataproducts Parallel Interface The Dataproducts parallel interface allows the printer to operate with a 50-pin AMP Ampilite HDH-20 data cable connector. The length of the data cable from the host computer to the printer must not exceed 40 feet (12 meters). An adapter cable to accept the 50-pin Winchester MRAC50P connector is also available from your authorized service representative. -
Page 114: Dataproducts Parallel Interface Signals
Dataproducts Parallel Interface Signals Table 4–1 lists the Dataproducts interface connector pin assignments. Dataproducts-compatible interface signals between the computer and the printer are defined as follows: Data Lines 1 through 8 — Eight standard or inverted levels from the host that specify character data, plot data, or a control code. -
Page 115: Dataproducts Parallel Interface Configuration
Dataproducts Parallel Interface Configuration The printer is configured at the factory to match the interface specified by the customer. You can also configure the printer via its control panel. You can verify or change the following interface parameters as necessary to meet specific application requirements: •... -
Page 116: Centronics Parallel Interface
Centronics Parallel Interface The Centronics parallel interface enables the printer to operate with controllers designed for buffered Centronics printers. The length of the data cable from the host computer to the printer must not exceed 15 feet (5 meters). Table 4–2. Centronics Interface Connector Pin Assignments Input Signals Output Signals Miscellaneous... -
Page 117: Centronics Parallel Interface Signals
Centronics Parallel Interface Signals Table 4–2 lists the Centronics interface connector pin assignments. Centronics-compatible interface signals between the computer and the printer are defined as follows: Data Lines 1 through 8 — Eight standard or inverted levels from the host that specify a character or function code. -
Page 118: Centronics Parallel Interface Configuration
Centronics Parallel Interface Configuration The printer is configured at the factory to match the interface specified by the customer. You can also configure the printer via its control panel. You can verify or change the following interface parameters as necessary to meet specific application requirements: •... -
Page 119: Alternate Terminating Resistors
Alternate Terminating Resistors The factory equips the printer with 470 ohm pull-up and 1K ohm pull-down terminating resistors, located at coordinates 12C and 12D respectively on the Common Controller Board (CCB). These resistors are used for parallel interface configurations and are suitable for most applications. If the values of these terminating resistors are not compatible with the particular interface driver requirements of your host computer, other values of pull-up and pull-down resistors might be required... -
Page 120: Rs-232 Serial Interface
RS-232 Serial Interface The RS-232 Serial interface enables the printer to operate with bit serial devices compatible with an RS-232D controller. The interface circuit characteristics are compatible with the Electronic Industry Association Specification EIA-232-D. Input serial data transfer rates of 150, 300, 600, 1200, 2400, 4800, 9600, and 19200 baud are selectable at the control panel. -
Page 121: Rs-232 Serial Interface Protocols
Transmitted Data — Serial data stream from the printer for transmitting status and control information to the host. Subject to protocol selection. Request To Send (RTS) — Control signal from the printer. Subject to configuration. Clear To Send (CTS) — Status signal to the printer indicating the host is ready to receive data/status signals from the printer. -
Page 122: Rs-232 Serial Interface Error Handling
with an End of Text (ETX) signal. When the printer receives the ETX, it will acknowledge the ETX, thereby acknowledging it has received the entire block of data. DTR (Data Terminal Ready), RC (Reverse Channel), or RTS (Request to Send) — Control signals from the printer to the host computer. (Subject to configuration.) Configurations include: always true, always false, true if on-line and buffer not full, and true if off-line or buffer almost full. -
Page 123: Rs-232 Serial Interface Configuration
RS-232 Serial Interface Configuration The printer is configured at the factory to match the interface specified by the customer. You can also configure the printer via its control panel. You can verify or change the following interface parameters as necessary to meet specific application requirements: •... - Page 124 4–14 Printer Interfaces...
-
Page 125: Routine Service And Diagnostics
Routine Service and Diagnostics Chapter Contents Overview ........... . . 5–2 Cleaning Requirements . -
Page 126: Overview
Overview This chapter discusses general cleaning, running diagnostic tests, and understanding fault messages. The printer requires no routine maintenance beyond regular cleaning. Periodically remove excess paper chaff and dust from the ribbon and paper paths. If print quality or paper motion deteriorates seriously even after cleaning, contact your authorized field service representative for prompt attention. -
Page 127: Cleaning Outside The Cabinet
Cleaning Outside the Cabinet Clean the outside of the cabinet with a soft, lint–free cloth and mild detergent soap. (Dishwashing liquid works well.) Do not use abrasive powders or chemical solvents. Clean the windows with plain water or mild window cleaner. -
Page 128: Cleaning Inside The Cabinet
Cleaning Inside the Cabinet Over time, particles of paper and ink accumulate inside impact printers. This is normal. Paper dust and ink build–up must be removed periodically to avoid degraded print quality. Most paper dust accumulates around the ends of the platen and ribbon path. - Page 129 Using a soft–bristled brush and vacuum cleaner, brush and vacuum paper and dust particles from the paper path, ribbon guides, ribbon path, and base pan. CAUTION Vacuum carefully around the hammer bank and surrounding area to avoid damage. VORSICHT Um eine Beschädigung des Druckers zu vermeiden, beim Absaugen und Säubern im Bereich der Hammerbank äußerst vorsichtig vorgehen.
- Page 130 Ribbon Deck Forms Thickness Lever Ribbon Guide Ribbon Path Diagram Hub Latch Ribbon Hub Figure 5–2. Cleaning the Printer 5–6 Routine Service and Diagnostics...
-
Page 131: Diagnostic Tests
Diagnostic Tests With the exception of testing the interface between the printer and the host computer (and the associated data cable), you do not need to send data from the host computer to the printer to test printer operation. You can use the printer built-in diagnostic tests to check many of the functions of your printer, including print quality and overall operation. - Page 132 The following diagnostic tests are available: • Shift Recycle A “sliding” alphanumeric pattern used to identify missing or malformed characters, improper vertical alignment, or vertical compression. • All E’s A pattern of all uppercase letter E’s used to identify missing characters, misplaced dots, smeared characters, improper phasing, or light/dark character variations.
-
Page 133: Configuration Printout
• Paperout Adjust A pattern used to determine the number of dot rows from the completion of a paper out fault to the end of the paper. • Demo A text and graphics pattern that illustrates many of the printer’s features. This test can also be used to identify phasing problems within different character pitches and font styles. -
Page 134: Print Data Stream In Hex Code
Print Data Stream in Hex Code From the menu “Print Datastream in Hex. Code,” pressing the B key selects “Off-Line Hex Dump”. From this point, pressing the ON LINE key on the control panel toggles the display between “On-Line Hex Dump” and “Off-Line Hex Dump”. - Page 135 Shuttle Strokes The cumulative number of back-and-forth shuttle strokes that the printer has performed during normal printer operation. The range is 0 to 2,147,483,648 shuttle strokes. Print Lines The cumulative number of lines that the printer has printed. The range is 0 to 2,147,483,648 print lines. Print Pages The cumulative number of pages that the printer has printed.
-
Page 136: Running The Diagnostic Tests
Running the Diagnostic Tests Step Press Result Notes Press: The printer must be off-line to ON LINE Off–Line Ready select and run diagnostics. Raise the printer cover. Press both keys at the same ENTER Switch time. Unlocking allows you to Not Locked run diagnostics. - Page 137 Step Press Result Notes To start the ENTER The test starts. “Running Test Running Test test, press: (Name of test) (name)” appears. Or, for phase adjustment test, “Phase Adjustment (number)” appears. Phase Adjustment (Phasing Adj. Number) To stop the The test stops. ENTER Printer Test test, press:...
-
Page 138: Printing Hex Code
Printing Hex Code A hex code printout (or hex dump) translates all incoming data to hexadecimal equivalents. A hex dump lists each ASCII data character received from the host computer, together with its corresponding two-digit hexadecimal code. Hex dumps can be used to troubleshoot some types of printer data reception problems. - Page 139 Step Press Result Notes Press: The printer must be ON LINE Off–Line Ready off-line to place it in hex dump mode. Raise the printer cover. Press both keys at the same ENTER Switch time. Unlocking allows Not Locked you to place the printer in hex dump mode.
- Page 140 Step Press Result Notes To start the hex dump: Send the data from the host computer to the printer. The data will print in hex dump format. (Any data remaining in the printer’s internal input buffer will print before the hex code printout starts.) Figure 5–4 shows a few lines of a hex dump printout as a sample.
-
Page 141: Fault Messages
Fault Messages If a fault condition occurs in the printer, the status lamps on the control panel flash on and off, and the first line of the control panel message display indicates “Fault Condition.” The second line of the message display indicates the specific fault. - Page 142 Table 5–1. Fault Messages Fault Operator Explanation Solution Message Correctable? 48 Volt Failed * Internal power failure. Contact your authorized field service representative. Address Error * Failure in printer’s Contact your authorized field internal microprocessors service representative. or related IC chips. Bus Error * Failure in printer’s Contact your authorized field...
- Page 143 Table 5–1. Fault Messages (Continued) Fault Operator Explanation Solution Message Correctable? NOVRAM * Non-volatile memory Contact your authorized field fault. The NOVRAM service representative. NOTE: You battery is probably can still print, but you cannot save exhausted. configuration changes. Paper Jam No paper motion.
- Page 144 5–20 Routine Service and Diagnostics...
- Page 145 RibbonMindert Chapter Contents Overview ........... . . 6–2 Running a Job .
-
Page 146: Ribbonminder
Overview This chapter explains how RibbonMinder works and how to configure it to meet your specific print job requirements. RibbonMinder is a user–definable software feature that determines when a ribbon should be changed. It monitors ink consumption and alerts you when the print quality falls below a level that you designate. -
Page 147: Running A Job
Running a Job Once you have set up your parameters for RibbonMinder, it works without attention. Normally, you only need to select the RibbonMinder configuration menu to install a new ribbon, change job rates or ribbon size, or to disable/enable RibbonMinder. When you begin printing with RibbonMinder enabled, the message display shows a ribbon life value of 100%. -
Page 148: Configuring The Ribbonminder
Configuring the RibbonMinder The following procedures explain how to set each RibbonMinder parameter and either exit the configuration menu or continue to the next parameter. Parameters are presented in the order in which they are usually configured the first time. NOTE: When you make changes to RibbonMinder parameters, your changes are saved automatically in NVRAM (Non–Volatile Random Access Memory). - Page 149 Ribbon Life (From page 3–25) Analyze When Ribbon Job Rate Ribbon Size Worn Action Currently xxx Currently xxx Press ENTER to enter Press ENTER to reset To Stop Printer New Rate yyy New Size yyy the Analyze Job mode. ribbon life to 100%. Aud/Vis Alarm A new ribbon must Visual Alarm...
-
Page 150: Setting Up A New Ribbon
Setting Up a New Ribbon The New Ribbon parameter allows you to reset the ribbon life after replacing a worn ribbon. Also follow this procedure when first setting up RibbonMinder parameters. Note that it may be necessary to replace ribbons before the ink has been depleted. - Page 151 Step Press Result Notes Remove the old ribbon and install a new one (see the Operator’s Guide). If you try to print before changing the ribbon, the printer displays the fault message, “Fault Condition, Change Ribbon”. To set or change the ribbon size, go to page 6–8, step 4. Otherwise, continue with this procedure to exit.
-
Page 152: Setting Ribbon Size
Setting Ribbon Size Follow this procedure when first setting up RibbonMinder parameters or if you are changing the ribbon to a different length of ribbon. Changing the ribbon size always resets the new Ribbon Life value to 100%. Step Press Result Notes ON LINE... - Page 153 Step Press Result Notes ENTER Selects the displayed value. Currently xxx Change Ribbon To ensure that you selected the Currently xxx THEN proper ribbon size, verify that New Size xxx* the current ribbon size is now the same as the new ribbon size. Ribbon Life xxx% Set Ribbon Size...
-
Page 154: Enabling And Disabling Ribbonminder
Enabling and Disabling RibbonMinder The Enable/Disable parameter allows you to enable or disable RibbonMinder. You may want to disable RibbonMinder when it is not necessary to monitor print quality (for example, to print rough drafts). NOTE: While the RibbonMinder is disabled, the ribbon life value will not be displayed (whether on–line or off–line, or in any configuration menu). - Page 155 Step Press Result Notes Toggles between Enable and Ribbon Life xxx% Disable Action. Enable Action ENTER Enables (or disables) Ribbon Life xxx% RibbonMinder. Enable Action * Ribbon Life xxx% Enable/Disable To set “When Worn Action,” go to page 6–13, step 6. Otherwise, continue with this procedure to exit. CLEAR Off–Line xxx%...
-
Page 156: When Worn Action
When Worn Action This parameter allows you to choose what the printer will do when the ribbon life reaches 0%. The following options are available: • To Stop Printer (the default) causes the printer to stop printing at the next top of page when Ribbon Life reaches 0%. Pressing ON LINE allows the printer to print another page. - Page 157 Step Press Result Notes Ribbon Life xxx% UNTIL When Worn Action When Worn Action To Stop Printer * Press " or A to cycle through When Worn Action UNTIL Visual Alarm the options. ENTER When Worn Action Visual Alarm * Ribbon Life xxx% When Worn Action...
-
Page 158: Analyzing Jobs
Analyzing Jobs The Analyze Job parameter allows you to enter the job analysis mode to determine job rates for various print jobs. The job rate is the rate at which a particular print job or collection of jobs wears out the ribbon. To determine the rate for a new print job using analyze mode, you must install a new ribbon, analyze the job, and set the job rate. -
Page 159: Setting Analyze Job Mode
Setting Analyze Job Mode Step Press Result Notes ON LINE The printer must be off-line to Off–Line xxx% Ready change the configuration. Raise the printer cover. Press both keys at the same time. ENTER Switch Not Locked Unlocking permits configuration changes. - Page 160 Step Press Result Notes ON LINE Places the printer on-line. The On–Line 1000A (Current Font) printer must be on-line to analyze a job. The message display shows the analyze rate instead of the “Ribbon Life” percentage. Begin printing a job. The analyze job rate number begins at 1000 and decreases as the ribbon becomes worn.
-
Page 161: Analyzing Jobs Quickly
Analyzing Jobs Quickly To analyze a job without running the entire ribbon, follow these steps: 1. Generate a sample printout of the job. 2. Find the vertical dot column with the most printed dots. Count the number of dots printed in the dot column. 3. -
Page 162: Setting The Job Rate
Setting the Job Rate The Job Rate parameter describes the rate at which a particular print job wears out the ribbon. Values can range from 0 (no wear) to 1000 (the highest possible rate of ink usage). The job rate must be set in order for the RibbonMinder to work correctly. - Page 163 Step Press Result Notes Verify that the job rate has been recorded in “Analyze Job” mode. Refer to the previous section, “Analyzing Jobs.” ON LINE The printer must be off-line to Off–Line xxx% Ready change the configuration. Raise the printer cover. Press both keys at the same time.
- Page 164 Step Press Result Notes Press " or A to cycle through Currently xxx UNTIL New Rate (Desired value) the job rates until you reach the appropriate rate. If you have used the job analysis feature, refer to your log book of print jobs and their rates.
-
Page 165: Ribbonminder Host Data Stream Commands
RibbonMinder Host Data Stream Commands In addition to controlling the RibbonMinder feature from the printer’s control panel, you can also control RibbonMinder from the host computer by sending control code sequences to the printer. NOTE: The host commands “Set Job Rate,” “When Worn Action,” and “Enable/Disable”... -
Page 166: Enable/Disable
Enable/Disable ENABLE printer action Command: SFCC r E DISABLE printer action Command: SFCC r D RibbonMinder 6–22... -
Page 167: A Printer Specifications
Printer Specifications Contents Ribbon Specifications ......... . . A–2 Paper Specifications . -
Page 168: Ribbon Specifications
Ribbon Specifications NOTE: Use only the ribbons listed below. Each kit contains six ribbons. 60–yard Ribbon: Extended Life Text Ribbon Kit P/N 107675–001 Bar Code Ribbon Kit P/N 107675–005 100–yard Ribbon: Extended Life Text Ribbon Kit P/N 107675–007 Bar Code Ribbon Kit P/N 107675–008 Paper Specifications NOTE: The following are general paper specifications. -
Page 169: Printer Dimensions And Weight
Labels On Backing One-part continuous perforated fanfold back form. Labels must be placed at least 1/6 inch from the fanfold perforation. Backing adhesive must not be squeezed out during printing. Sheet Size 3- to 16-inches (7.62 to 40.64 cm) wide, including the two standard perforated tractor feed strips. -
Page 170: Environmental Characteristics
Environmental Characteristics Temperature ° ° ° ° Operating to 104 F (5 to 40 C) up to 5000 feet (1524 meters) ° ° ° ° to 90 F (5 to 32 C) up to 8000 feet (2438 meters) ° ° °... -
Page 171: Electrical Characteristics
Electrical Characteristics Input Power Voltage (RMS) 100 to 120 VAC or 200 to 240 VAC Phase Single Frequency 50 or 60 Hz Max RMS Current 6 A at 100 V; 3 A at 200 V Power Rating Standby 200 Watts Operating 900 Watts Data Input Rate (maximum) -
Page 172: Interfaces
Interfaces Type Resident parallel (two) and serial (one) Logic Levels TTL (parallel interfaces) RS-232 (serial interface) Data Format ASCII Compatibility Centronics Dataproducts EIA RS-232-D Buffer Size 512, 1024, or 2048 characters Printing Rates Printer throughput, in lines per minute (LPM), is a factor of the selected font. These rates assume that the printing mechanism is the limiting factor, not the data source. - Page 173 Table A–1. Nominal Print Rates PRINT PERFORMANCE APPLICATION CHARACTERS UPPERCASE UPPER DENSITY MATRIX PLOT MODE ONLY & LOWERCASE (DPI) INCH H X V NOTE NOTE 5 (9) X 5 + 1 HIGH SPEED A 4 (7) X 5 + 1 1200 1030 60 (120) X 48...
- Page 174 A–8 Printer Specifications...
- Page 175 A Quick Look at Line Matrix Printing Contents Character Formation ..........B–2 Printing Speed .
-
Page 176: Character Formation
Character Formation The P9212 is an impact printer: It creates characters by printing ink dots on paper. Dots overlap to produce a solid-appearing character of uniform density. The dots are made by an assembly of steel hammers mounted on a rapidly oscillating shuttle. - Page 177 Serial matrix printers use a moving printhead with pins to form single characters sequentially along the printed line. Unlike serial matrix printers, the P9212 is a line matrix printer. Line matrix printers divide every printable line into horizontal dot rows, then print a dot row of the entire line at every lateral sweep of the shuttle.
-
Page 178: Printing Speed
Printing Speed The speed of text printing is measured in lines per minute (lpm). This speed is dependent upon the number of dot rows required to produce a line of characters, regardless of the number of characters in the line. Because more dot rows are required to print lowercase characters with descenders, those character lines will print at a fractionally lower rate. - Page 179 ASCII Character Set BITS OCTAL equivalent DECIMAL equivalent HEX equivalent ASCII Character Name BITS COLUMN (XON) ” 0 0 1 0 0 0 1 1 (XOFF) 0 1 0 0 0 1 0 1 & 0 1 1 0 ’ 0 1 1 1 1 0 0 1 1 0 1 0...
- Page 180 ASCII Character Set C–2...
- Page 181 Predefined Configuration Values Overview The printer contains four predefined configurations. A configuration is a group of parameters that are set at particular values. The configurations include the following: the factory default, IGP, IBM 3287, and IBM 5225. All of these configurations are permanently stored in ROM;...
- Page 182 Table D–1. Factory Default Configuration Values Configuration Factory Default Configuration Factory Default Parameter Value Parameter Value Ribbon Life Application Compatibility (Continued) Job Rate Currently 150 Font Select / Font Select = 0E Elongated Elongated = 08 Ribbon Size Currently 60 View Lines When Worn Action...
- Page 183 Table D–1. Factory Default Configuration Values (Continued) Configuration Factory Default Configuration Factory Default Parameter Value Parameter Value Host Interface Host Interface Dataproducts Serial RS-232 Data Bit 8 Enable Data Protocol X-ON/X-OFF PI Line Enable Data Rate 9600 BAUD Data Polarity Standard Word Length 8 Bits...
- Page 184 Table D–2. IGP Configuration Values Configuration Factory Default Configuration Factory Default Parameter Value Parameter Value Ribbon Life Paper Format Job Rate Currently 150 Line Spacing Set at 6 LPI Ribbon Size Currently 60 Form Length Set At 11 Inches When Worn Action To Stop Printer Auto Line Feed Disable...
- Page 185 Table D–3. IBM 3287 and 5225 Configuration Values Configuration Factory Default Configuration Factory Default Parameter Value Parameter Value Ribbon Life Paper Format Job Rate Currently 150 Line Spacing Set at 6 LPI Ribbon Size Currently 60 Form Length Set At 11 Inches When Worn Action To Stop Printer Auto Line Feed...
- Page 186 Predefined Configuration Values D–6...
- Page 187 Glossary active column The horizontal location on the paper where the next character will print. active line The vertical location on the paper where the next character will print. active position The position on the paper where the next character will print. The intersection of the active column and the active line.
- Page 188 character cell The invisible rectangular space occupied by a character, including the white space around the character. The height of a cell is equal to the current line spacing, and the width is equal to the current character spacing. Used as a unit of spacing. character proportion The ratio of character height to character width.
- Page 189 compressed Refers to a typeface with a font width approximately 60% smaller than normal. Character height is not changed. configuration Refers to the operating properties that define how the printer responds to signals and commands received from the host computer at the printer interface. These properties are called configuration parameters and must be set to match the operating characteristics of the host computer system.
- Page 190 DIP switch A DIP equipped with switches. A typical DIP switch has from four to ten individual switches mounted in its package. The individual switches are typically toggle, rocker, or slide switches. disable To deactivate, make “false” (0), or set to OFF. Abbrev.
- Page 191 font The complete set of a given size of type, including characters, symbols, figures, punctuation marks, ligatures, signs, and accents. To fully describe a font, you must specify seven characteristics: 1) typeface (Courier, Helvetica, Swiss, etc.) 2) spacing (proportional or monospaced) 3) type size (12 point, 14 point, etc.) 4) scale factor (character height/width ratio) 5) type style (Roman or italic)
- Page 192 Abbrev. for high speed Abbrev. for Hertz. Cycles per second, a measure of frequency. Intelligent Graphics Processor. An interface that converts graphics commands received from the host computer to binary plot data that is usable by the printer. initialization A series of processes and self-tests to set power-up default conditions and parameters.
- Page 193 monospaced See font, monospaced. Abbrev. for near letter quality. NVRAM Abbrev. for nonvolatile random-access memory. A type of RAM in which stored data are not lost when the power is interrupted or turned off. A battery supplies power to NVRAM when the system does not.
- Page 194 pixel Derived from picture (PIX) ELement. The smallest displayable picture element on a video monitor or printable unit. In printing, a pixel is a dot. point A unit of length in printing and typography, used to specify type sizes, heights of font characters, etc. There are 72 points in a vertical inch;...
- Page 195 read To retrieve data from memory (RAM, NVRAM) or from mass storage (hard disk, floppy diskette, etc.). reset To turn off, deactivate, disable, or return to a previously determined state. resolution A measure expressing the number of component units in a given range used to create an image.
- Page 196 start bits In serial data transfer, a signal indicating the beginning of a character or data element. stop bits In serial data transfer, a signal indicating the end of a character or data element. string Two or more bytes of data or code treated as a unit. style, type See type style.
- Page 197 Index Numbers 0% Ribbon life, 6–12 Cable connections, 2–12 48 Volt Failed message, 5–18 Carriage return control code, 3–44 80–9F Hex parameter, 3–38 Case, upper/lower, 3–35 Centronics menu, 3–51 Centronics parallel interface, 4–6 configuration, 4–8 ACK/NAK serial protocol, 4–11 signals, 4–7 Acoustic noise levels, A–4 Chains, paper, 2–10 Address Error message, 5–18...
- Page 198 menu diagrams, 3–24 Dataproducts parallel interface, 4–3 power–up, 3–17 configuration, 4–5 predefined, D–1 signals, 4–4 printing current values, 3–12 DC1 and DC3 control codes, enabling, 3–35 printout, 5–9 Default configuration values, 3–10 RibbonMinder, 6–4 Define CR Code parameter, 3–44 RS-232 serial interface, 4–13 Define LF Code parameter, 3–44 saving, 3–17 Diagnostic tests, 5–7...
- Page 199 Environmental characteristics, A–4 Host data stream commands, RibbonMinder, 6–21 Error handling, RS-232 serial interface, 4–12 Host data, enabling/ignoring, 3–35 Error messages, 5–17 Humidity, A–4 ETX/ACK serial protocol, 4–12 EVFU slew relative feature, 3–48 IBM 3287 configuration, D–5 loading, 3–64 Factory configuration, 3–10, D–2 IBM 5225 configuration, D–5 loading, 3–65 loading, 3–64...
- Page 200 Interference, radio frequency, A–5 Maintenance, 5–2 Mech Driver Hot message, 5–18 Job rate Mech. Dr. Link message, 5–18 parameter, 3–27 Menu, configuration, 3–6, 3–24 setting (RibbonMinder), 6–18, 6–21 Centronics, 3–51 character sets, 3–30 Dataproducts, 3–55 diagnostics, 3–67, 5–7 Labels, specifications, A–3 fonts, 3–28 Language, changing message display, 3–41 host interface, 3–50...
- Page 201 Overstrike parameter, 3–39 Dataproducts Parallel Interface, 4–4 parameter, 3–52, 3–56 serial data bit 8, 3–60 Pitch, 3–28 P–Series protocol, 3–34 Platen Open message, 5–19 P–Series XQ protocol, 3–34 Platen, forcing open for thick forms, 3–48 Paper Plotting speed, B–4 loading, 2–13 PMD Fault parameter, 3–47 perforation, skipping over, 3–46 slewing, 3–41, 3–45, 3–48...
- Page 202 Rates, printing and plotting, B–4 When Worn Action, 6–12 When Worn Action command, 6–21 Related documents, 1–3 RS-232 serial interface, 4–10 Request to Send parameter, 3–61 configuration, 4–13 Resetting error handling, 4–12 printer, 3–23 protocols, 4–11 ribbon life, 3–27 signals, 4–10 Resistors, terminating, 4–9 RS–232 menu, 3–58 Response Polarity parameter...
- Page 203 Slew Relative parameter, 3–48 printing a hex dump, 5–14 question mark in text, 4–12 Slewing paper, 1–6, 3–36, 3–41, 3–45 controlling speed, 3–49 Specifications dimensions, A–3 U.S. ASCII character set, C–1 electrical, A–5 Unidirectional parameter, 3–37 environmental, A–4 Unlocking ENTER key, 3–8 interface, A–6 Unpacking a new printer, 2–5 labels, A–3...
- Page 204 Index–8...
- Page 206 RINTRONIX 17500 C ARTWRIGHT 19559 92713-9559 RVINE, 714/863-1900 HONE: 714/660-8682 RINTRONIX EDERLAND OX 163, IEUWEWEG 283 NL-6600 A IJCHEN ETHERLANDS (31) 8894-90111 HONE: (31) 246-419768 RINTRONIX 512 C 02-15 ANE, EDOK NDUSTRIAL STATE 1646 INGAPORE (65) 449-7555 HONE: (65) 449-7553 134621–001C...
Need help?
Do you have a question about the P9212 and is the answer not in the manual?
Questions and answers