Sign In
Upload
Manuals
Brands
Roland Manuals
Synthesizer
Fantom XR
Roland Fantom XR Manuals
Manuals and User Guides for Roland Fantom XR. We have
4
Roland Fantom XR manuals available for free PDF download: Owner's Manual, User Manual, Service Notes
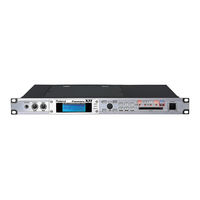
Roland Fantom XR Owner's Manual (284 pages)
128-Voice Synthesizer/Sampler Module
Brand:
Roland
| Category:
Synthesizer
| Size: 12.52 MB
Table of Contents
Listening to the Demo Songs
1
Important Safety Instructions
2
Table of Contents
6
Main Features
13
Panel Descriptions
14
Front Panel
14
Pc Card Slot
14
Rear Panel
15
Getting Ready
16
Connecting an Amp and Speaker System
16
Turning on the Power
17
Adjusting the Display Contrast (LCD Contrast)
18
Turning off the Power
19
Reset to Default Factory Settings (Factory Reset)
19
Quick Start
21
Listening to the Demo Songs
22
Playing Sounds
23
Playing Patches (Phrase Preview)
23
Playing a Patch on the Fantom-XR from an External MIDI Device (MIDI Keyboard)
23
Choosing a Patch
24
Basic Procedure for Choosing a Patch
24
Choosing a Group
24
Choosing a Patch by Category
25
Choosing a Rhythm Set
27
Basic Procedure for Choosing a Rhythm Set
27
Various Connection Examples
28
Connection Example 1: Using the Fantom-XR as a Sound Module for Live Performance
28
Connection Example 2: a Compact Production Setup
29
Connection Example 3: Music Production Using more than One Fantom-XR
30
Advanced Use
31
Overview of the Fantom-XR
32
Patch Mode and Performance Mode
32
How the Fantom-XR Is Organized
32
Classification of Fantom-XR Sound Types
32
About Simultaneous Polyphony
34
About Memory
34
Temporary Memory
35
Rewritable Memory
35
Non-Rewritable Memory
35
About the Onboard Effects
35
Effect Types
35
Temporary Area
35
System Memory
35
How Effects Units Work in Different Modes
36
About the Sampling Section
36
Where Samples Are Stored
37
Basic Operation of the Fantom-XR
37
Switching the Sound Generator Mode
37
Moving the Cursor
38
Modifying a Value
38
About the [SHIFT] Button
38
Assigning a Name
39
Playing in Patch Mode
40
About the Patch Play Screen
40
Auditioning Patches (Phrase Preview)
40
Selecting a Patch
40
Selecting Patches by Category
41
Selecting Patches from the List
42
Selecting Patches by Category
42
Selecting Patches/Rhythm Sets by Group
43
Selecting Favorite Patches
43
Selecting Patches by Keywords (Keyword Search)
44
Playing Percussion Instruments
45
Selecting a Rhythm Set
45
Creating a Patch
46
How to Make Patch Settings
46
Patch Edit Menu Screen Structure
46
How to Make Patch Settings
47
Selecting the Tone to Edit (Tone Select)
47
Selecting the Tones that will Sound (Tone Switch)
47
Cautions When Selecting a Waveform
48
Functions of Patch Parameters
49
Settings Common to the Entire Patch (GENERAL)
49
Patch Coarse Tune
49
Patch Fine Tune
49
Patch Level
49
Patch Pan
49
Velocity Sens Offset
50
Changing How a Tone Is Sounded (TMT)
51
Portamento Mode
51
Portamento Type
51
Portamento Start
51
Ring Modulator
53
Modifying Waveforms (WG)
54
Patch Wg
54
Random Pitch Depth
56
Tone Delay Time
56
P-Env Time Kf
57
Patch Pitch Env
57
P-Env T4 V-Sens
57
Modifying the Brightness of a Sound with a Filter (TVF/TVF Env)
58
Adjusting the Volume (TVA/TVA Env)
60
Tone Level
60
Pan Keyfollow
61
Output Settings
62
Patch Output
62
A-Env Time Kf
62
Patch out Assign
62
Tone out Assign
62
Modulating Sounds (Lfo1/2/Step LFO)
63
Patch Step Lfo
65
Controller-Related Settings (CTRL)
66
Matrix Control Settings (Matrix Ctrl1-4)
66
Control 1–4 Source
67
Initializing Patch Settings (Init)
69
Copying Patch (Tone) Settings (Copy)
69
Saving Patches You've Created (Write)
69
Creating a Rhythm Set
71
How to Make Rhythm Set Settings
71
Rhythm Edit Menu Screen Structure
71
Selecting the Wave/Key to Edit
72
Cautions When Selecting a Waveform
72
Functions of Rhythm Set Parameters
73
Making Settings Common to the Entire Rhythm Set (GENERAL)
73
Rhythm General
73
Rhythm Tone Name
73
Assign Type
73
Modifying Waveforms (WG)
74
Mute Group
74
Tone Receive Pan Mode
74
One Shot Mode
74
Tone Pitch Bend Range
74
Aft Time Ctrl Sens
74
Tone Receive Expression
74
Tone Receive Hold
74
Changing How a Rhythm Tone Is Sounded (WMT)
76
Wave Fine Tune
76
Wave Level
76
Modifying Pitch (PCH/PCH Env)
77
Tone Random Pitch Depth
77
Modifying the Brightness of a Sound with a Filter (TVF/TVF Env)
78
Rhythm Tvf
78
Cutoff V-Curve
79
Resonance V-Sens
79
Rhythm Tvf Env
79
Adjusting the Volume (TVA/TVA Env)
80
Alternate Pan Depth
80
Rhythm Tva
80
Rhythm Tva Env
80
A-Env T1 V-Sens
80
A-Env T4 V-Sens
80
Output Settings
81
Tone Reverb Send
81
Initializing Rhythm Set Settings (Init)
82
Copying Rhythm Tone Settings (Copy)
82
Saving Rhythm Sets You've Created (Write)
83
Playing in Performance Mode
84
About the Performance Play Screen
84
Selecting a Performance
84
Selecting Favorite Performances (Favorite Performance)
85
Selecting a Part
86
Selecting the Sound for a Part
86
About the Performance Mixer Screen
86
Editing the Part Settings
87
Performing with the Arpeggio/Rhythm Function
87
Viewing MIDI Messages for each Part (Part Information)
87
Creating a Performance
88
Viewing the Part Settings as a List (Performance Part View)
88
Adjusting the Parameters of each Part
88
Parameter List
88
Output Assign
89
Octave Shift
89
Fine Tune
89
Solo Switch
89
Mute Switch
89
Coarse Tune
89
Output Mfx Select
89
Cutoff Offset
90
Key Range Lower
91
Key Range Upper
91
Key Fade Upper
91
Scale Tune Settings
92
Part Pitch Bend Range
92
Part Velocity Sensitivity Offset
92
Parameter List
93
MIDI-Related Settings
93
Other Settings (General)
94
Parameter List
94
Rx Channel Pressure
94
Recommended Tempo
94
Changing the Settings of the Patch Assigned to a Part
95
Initializing Performance Settings (Init)
95
Saving a Performance You've Created (Write)
96
Playing Arpeggios
97
About Arpeggio
97
Turning Arpeggio on and off
97
Holding an Arpeggio
97
Arpeggio Settings
98
Selecting Styles for Arpeggio Performances (Arpeggio Style)
98
Determining the Tempo for Arpeggio Performances
98
Changing the Accent Strength (Accent Rate)
99
Hanging the Range of the Arpeggio (Octave Range)
99
Changing the Beat and Shuffle (Grid)
99
Applying Staccato and Tenuto (Duration)
99
Selecting Ascending/Descending Variations (Different Ways of Playing the Sounds) (Motif)
99
Adjusting the Velocity of the Arpeggio (Velocity)
100
Specifying the Channel that will Play Arpeggios in Performance Mode (Arpeggio Channel)
100
Creating Your Own Styles
100
Creating a New Arpeggio Style (Arpeggio Style Recording)
100
Editing an Arpeggio Style You Created (Arpeggio Style Edit)
102
Arpeggio Style
102
Saving the Styles You Have Created (Write)
103
Recording Arpeggios on Your External Sequencer
103
Using the Chord Memory Function (CHORD MEMORY)
104
About the Chord Memory Function
104
Performing with the Chord Memory Function
104
Turning Chord Memory Function on and off
104
Selecting Chord Forms
104
Sounding a Chord in the Order of Its Notes (Rolled Chord)
105
Creating Your Own Chord Forms
105
Saving the Chord Forms You Have Created (Write)
106
Recording Chords on Your External Sequencer
106
Playing Rhythms
107
About Rhythm Patterns
107
Using Rhythm Groups
107
Playing Rhythm
107
Turning Rhythm on and off
107
Select the Rhythm Group
108
Determining the Tempo for Rhythm Group
108
Creating Your Own Styles (Rhythm Group Edit)
109
Saving the Rhythm Group You Have Created (Write)
109
Rhythm Pattern Settings
110
Selecting Rhythm Patterns
110
Determining the Tempo for Rhythm Pattern (Tempo)
110
Changing the Accent Strength (Rhythm Accent)
110
Changing the Beat and Shuffle (Grid)
110
Applying Staccato and Tenuity (Duration)
111
Changing the Velocity of Rhythm Pattern (Velocity)
111
Specifying the Channel that will Play the Rhythm Pattern in Performance Mode (Rhy Ptn Channel)
111
Creating Your Own Styles (Rhythm Pattern Edit)
111
Creating a New Rhythm Pattern (Rhythm Pattern Step Recording)
111
Rhythm Pattern
112
Editing a Rhythm Pattern (Rhythm Pattern Edit)
113
Saving the Patterns You Have Created (Write)
114
Recording Rhythm Pattern Playback on Your External Sequencer
114
Sampling
115
Switching External Input On/Off
115
Making Input Source Settings (MIX IN)
115
Input Effect Settings (Input Effect)
116
Switching Input Effects On/Off
116
Editing the Input Effect Settings
116
Output Settings for the External Input (MIX in Output)
117
Sampling Procedure
117
Dividing a Sample During Sampling
119
Editing a Sample
120
Selecting a Sample (Sample List)
120
Selecting a Sample
120
Loading a Sample
120
Loading All Samples
121
Unloading a Sample
121
Deleting a Sample
121
Importing an Audio File
121
Displaying Sample Edit Screen
122
Magnifying/Shrinking the Waveform Display (Zoom In/Out)
122
Setting the Start/End Points of the Sample
122
Making Settings for Sample (Sample Parameters)
123
Creating a Patch from a Sample (Create Patch)
124
If You're Starting from Patch Mode
124
If You're Starting from Performance Mode
124
Creating a Rhythm Set from Samples (Create Rhythm Set)
125
If You're Starting from Patch Mode
125
If You're Starting from Performance Mode
125
Creating a Patch from Multiple Samples (Create Multisample)
126
Removing Unwanted Portions of a Sample (Truncate)
127
Boosting or Limiting the High-Frequency Range of the Sample (Emphasis)
128
Maximizing the Volume of a Sample (Normalize)
128
Amp
129
Stretching or Shrinking a Sample (Time Stretch)
129
Dividing a Sample into Notes (Chop)
130
Saving a Sample
131
Adding Effects
132
Turning Effects on and off
132
Applying Effects in Patch Mode
133
Signal Flow Diagram (Routing)
133
Effect Edit Menu Screen Structure
134
Making Effect Settings
134
Functions of Effect Parameters
134
Tone Output Level
134
Patch Output Assign
134
Mfx Output Level
135
Mfx Reverb Send Level
135
Chorus Type
136
Applying Effects in Performance Mode
139
Signal Flow Diagram (Routing)
139
Effect Edit Menu Screen Structure
140
Making Effect Settings
140
Functions of Effect Parameters
140
Part Output Level
140
Part Chorus Send Level
140
Part Reverb Send Level
140
Part Output Assign
140
Mfx Output Level
141
Part Output Mfx Select
141
Mfx Reverb Send Level
141
Control 1–4 Src
143
Specifying the Effect Source
145
Chorus Source
145
Reverb Source
145
Specifying the Multi-Effect Structure (MFX Structure)
146
Mastering Effects
146
Low/MID/High Attack
147
Low/MID/High Release
147
Low/MID/High Threshold
147
Low/MID/High Ratio
147
Low/MID/High Level
147
Connecting to Your Computer Via USB (USB Mode)
148
About USB Functions
148
Switching the Storage Mode and the MIDI Mode
148
Transferring Files to or from Your Computer (Storage Mode)
149
Connections
149
Specify the Connection-Destination Area
149
Cautions Regarding Folders and Files
150
Exiting Storage Mode
150
Canceling USB Communication
150
Examples of Using Storage Mode
150
Exchanging MIDI Messages with Your Computer (MIDI Mode)
151
File-Related Functions (File Utility)
153
Selecting a File
153
Copying a File (File Copy)
154
Moving a File (File Move)
154
Deleting a File (File Delete)
154
Initializing a Memory Card (Card Format)
154
Settings Common to All Modes (System Function)
155
How to Make System Function Settings
155
Saving the System Settings (Write)
155
Functions of System Parameters
156
System Startup
156
System MIDI
156
System Usb
157
System Sound
158
System Control
159
System Preview
160
System Scale Tune
160
System Sampling
161
System Memory Info
161
System Srx Info
161
System Version Info
161
Data Management Functions Reset to Default Factory Settings (Factory Reset)
162
Basic Procedure
162
Backing up User Data (User Backup)
162
Restoring User Data that You Backed up (User Restore)
162
Factory Reset
162
Using Fantom-X Editor
163
Installing Fantom-X Editor into Your Computer
163
Making Connections
163
Using Fantom-X Librarian
163
Fantom-X Editor System Requirements
164
System Requirements (Windows)
164
System Requirements (Mac OS)
164
Playing SMF Data (Song Play)
165
Installing the Wave Expansion Board
166
Cautions When Installing an Wave Expansion Board
166
How to Install a Wave Expansion Board
166
Checking the Installed Wave Expansion Boards
167
Installation de la Carte D'expansion Wave
168
Précautions À Prendre Lors de L'installation D'une Carte D'expansion Wave
168
Installation D'une Carte D'expansion Wave
168
Vérification des Cartes D'extension Audio Aprés Installation
169
Expanding the Memory
170
Precautions for Expanding Memory
170
How to Expand the Memory
170
Removing the Memory
171
Checking that Memory Is Installed Correctly
171
Ajouter de la Mémoire
172
Précautions À Prendre Lors de L'ajout de Mémoire
172
Installation du Module de Mémoire
172
Retrait du Module de Mémoire
173
Vérifier que la Mémoire Est Installée Correctement
173
Using a Memory Card
174
Before Using the Memory Card
174
Writing Data to the Card
174
Installing the PC Card Protector
174
Appendix
175
Troubleshooting
176
Issues Related to Sound
176
Issues Related to Effects
178
Issues Related to Saving Data
178
Parameter List
181
Patch Parameters
181
Rhythm Set Parameters
185
Performance Parameters
188
Sample Parameters
190
System Parameters
191
Effects List
193
Multi Stage Phaser
197
Step Ring Modulator
198
Band Step Flanger
203
Voice Pitch Shifter
210
Step Pitch Shifter
211
Sympathetic Resonance
214
Chorus Parameters
216
Reverb Parameters
217
Error Messages
218
Performance List
219
Patch List
220
Rhythm Set List
226
Rhythm Set List
227
Waveform List
235
Arpeggio Style List
239
Chord Form List
239
Rhythm Pattern List
240
Rhythm Group List
243
About MIDI
244
MIDI Implementation
245
Program Change
247
System Exclusive Message
248
System Exclusive Messages
251
Bank Select and Program Change Correspondence Chart
270
Rhythm Set
270
MIDI Implementation Chart
271
Pitch Bend
271
System Exclusive
271
Specifications
272
Maximum Polyphony
272
Index
274
Advertisement
Roland Fantom XR User Manual (60 pages)
Fantom Series Audio Track expansion
Brand:
Roland
| Category:
Electronic Keyboard
| Size: 1.52 MB
Table of Contents
Important Notes
4
Table of Contents
5
Check the Contents of the Package
8
Updating the Fantom-X
9
What Is the FANTOM-X Audio Track Expansion Kit
9
Items Required for Performing the Update
9
Cautions When Performing the Update (Important)
9
Update Procedure
10
Verifying the Update
11
Main Features
12
Using Audio Tracks
13
What Are Audio Tracks
13
To Access the Audio Track Edit Screen
14
To Access the Audio Track Mixer Screen
14
Items in the Audio Track Edit Screen
15
Editing Audio Tracks (Audio Track Edit Screen)
16
Moving a Sample Event (Move)
16
Selecting and Auditioning a Sample Event (Preview)
16
Using the Pads to Mute Audio Tracks (Mute/Solo)
16
Viewing a List of Markers (Marker List)
17
Opening the Loop/Locate Window (Loop/Locate)
17
Inserting a Sample Event at a Specified Location (Insert)
17
Deleting the Selected Sample Event from an Audio Track (Delete)
18
Copying a Sample Event (Copy)
18
Unloading a Sample (Unload Sample)
18
Combining the Contents of the Tracks into One Audio Track (Mixdown)
18
Erasing Audio Tracks (Clear)
19
Naming an Audio Track (Track Name)
20
Switching the Display Mode
20
Zooming in and Zooming out in the Display
20
Editing MIDI Tracks
20
Items in the Audio Track Mixer Screen
21
Controlling the Audio Tracks (Audio Track Mixer Screen)
22
Controlling the Audio Track Settings
22
Using the Knobs to Control the Mixer
23
Opening the Loop/Locate Window (Loop/Locate)
23
Using the Pads to Mute Audio Tracks (Mute)
23
Recording an Audio Track
24
Recording an Audio Track (SOLO/RE-SAMPLING)
24
Combining Multiple Audio Tracks into One Track (AUDIO MERGE)
25
Saving Your Audio Tracks
26
Using the Skip Back Sampling Function
27
What Is Skip Back Sampling
27
Using Skip Back Sampling
27
Editing the Data Created by Skip Back Sampling
28
Isolating the Desired Portion of the Sampled Data (Start Beat/End Beat)
28
Cancelling the Sample (Skip Back Cancel)
28
Assigning the Sampled Waveform to the Keyboard or a Pad (Assign to Keyboard/Pad)
28
Assigning the Sampled Waveform to an Audio Track (Assign to Audio Track)
29
Multisample Editing Functions
30
Creating a Multisample
30
Creating a Multisample in the Patch Edit Screen
31
Creating a Multisample in the Create Multisample Screen
31
Editing a Multisample
33
About the Multisample Edit Screen
33
Selecting the Notes to Edit
34
Changing the Multisample Assigned to a Tone (List)
34
Erasing the Data from the Selected Region of Notes (Erase)
34
Assigning a Sample to the Selected Region (Assign)
34
Copying a Sample from a Key to Another Key (Copy)
35
Opening the Tone Switch/Select Window (Tone Sw/Sel)
35
Moving the Split Point (Split Point)
35
Returning a Multisample to the Last-Written State (Reload)
36
Erasing All Notes (Erase All)
36
Replacing the Sample of the Current Zone (Sample Select)
36
Specify the Original Key (Org Key) of the Sample
37
Sorting Samples in the Order of Their Original Key (Sort)
37
Moving All Samples to Left or Right (Shift)
37
Moving the Data of the Current Zone to Left or Right (Move)
37
Saving a Multisample
38
Sample-Related Changes
39
Extended Patch Groups
39
Saving a Sample Auto Patch
39
Bank Select and Program Change Correspondence Chart
39
Newly Added Sample Parameters
40
Sample BPM Calculator (BPM Calc)
40
Selecting a Sample (Sample Number)
40
Changes in the Saved Sample Content (Save All Samples)
40
Changes in the Patch/Rhythm Edit Screen
41
Newly Added Patch Overview Screen
41
Changes Due to the Upgraded Editor Software
42
Newly Added PC Mode Screen
42
Cautions When Using S-700 Series Sounds with the Fantom-X
42
Before You Connect the Fantom-X to Your Computer
42
Importing Patches and Rhythm Sets
43
Fantom-X Editor System Requirements
45
System Requirements (Windows)
45
System Requirements (Mac OS)
45
About the Included USB MIDI Driver
45
Other Changes
46
Changes in the Patch Edit Screen
46
Changes in the Performance Mixer Screen
47
Changes in the Performance Layer Screen
47
Newly Added Layer List Window
47
Changes in the Key Range Window
48
Playing Different Sounds Across the Keyboard (Split)
48
Changes in the Song Edit Screen
48
Changes in the Song List Screen
49
Deleting a Song
49
Using the Pads for Realtime Erase
49
CC Filter Added to the Microscope
50
Improved Functionality for Step Recording
50
Changes in the Demo Song Loaded When You Start up the Fantom-X
50
Improved Functionality in Live Setting
51
Registering a Song File in a Live Setting
51
Recalling a Song File You Registered
52
Switching the Font
52
Removing the Text
52
Improvements in Arpeggio Functionality
52
Using the Pads to Switch Arpeggio Styles
52
Changing the Arpeggio Styles Assigned to the Pads
53
Improvements in Chord Memory Functionality
53
Using the Pads to Switch Chord Forms
53
Changing the Chord Forms Assigned to the Pads
54
Changes in the Librarian
54
New Shortcut from the Input Setting Screen to MFX Edit
55
New Parameters Available for the Assignable Switches
55
Newly Added DIMM Check Function
56
Index
57
Roland Fantom XR Service Notes (44 pages)
Brand:
Roland
| Category:
Synthesizer
| Size: 10.56 MB
Table of Contents
Table of Contents
1
Specifications
2
Location of Controls
4
Location of Controls Parts List
4
Exploded View 1
5
Exploded View 2
6
Exploded View Parts List
7
Wiring Diagram
8
Parts List
9
Checking the Version Number
17
Users Data Save and Load
17
Test Mode
18
Restoring the Factory Settings
21
System Software Update Procedure
21
Block Diagram
23
Circuit Board(Main 1)
24
Circuit Board(Main 2)
25
Circuit Diagram(Main 1)
26
Circuit Diagram(Main 2)
27
Circuit Diagram(Main 3)
28
Circuit Diagram(Main 4)
29
Circuit Diagram(Main 5)
30
Circuit Board(Jack Sheet 1)
31
Circuit Board(Jack Sheet 2)
32
Circuit Diagram(Jack1)
33
Circuit Diagram(Jack2)
34
Circuit Diagram(Phones,Encoder,Power Sw,Inlet)
35
Circuit Board(Panel Sheet)
36
Circuit Diagram(Panel,Sub)
38
Circuit Board(Exp-Base)
39
Circuit Diagram(Exp-Base)
41
Circuit Board(Pc Card)
42
Circuit Diagram(Pc Card)
43
Error Messages
44
Advertisement
Roland Fantom XR User Manual (26 pages)
Sample Tools Expansion
Brand:
Roland
| Category:
Synthesizer
| Size: 0.52 MB
Table of Contents
Important Notes
4
Table of Contents
5
Check the Contents of the Package
6
Updating the FANTOM-XR
7
What Is the FANTOM-XR Sample Tools Expansion Kit
7
Items Required for Performing the Update
7
Cautions When Performing the Update (Important)
7
Update Procedure
8
Verifying the Update
9
Main Features
10
Multisample Editing Functions
11
Creating a Multisample
11
Creating a Multisample in the Patch Edit Screen
12
Creating a Multisample in the Create Multisample Screen
12
Editing a Multisample
13
About the Multisample Edit Screen
13
Moving the Split Point
13
Selecting the Notes to Edit
13
Auditioning a Note (Preview)
13
Changing the Multisample Assigned to a Tone (Multisample List)
14
Assigning a Sample to the Selected Region (Assign)
14
Erasing the Data from the Selected Region of Notes (Erase)
14
Replacing the Sample of the Current Zone (Sample Select)
14
Specify the Original Key of the Sample (Original Key)
15
Sorting Samples in the Order of Their Original Key (Sort)
15
Returning a Multisample to the Last-Written State (Reload)
15
Erasing All Notes (Erase All)
16
Opening the Tone Select Window (Tone Select)
16
Saving a Multisample
17
Sample-Related Changes
18
Extended Patch Groups
18
Saving a Sample Auto Patch
18
Bank Select and Program Change Correspondence Chart
18
Newly Added Sample Parameters
19
Changes Due to the Upgraded Editor Software
20
Newly Added PC Mode Screen
20
Cautions When Using S-700 Series Sounds with the FANTOM-XR
20
Before You Connect the FANTOM-XR to Your Computer
20
Importing Patches and Rhythm Sets
21
Fantom-X Editor System Requirements
23
About the Included USB MIDI Driver
23
Other Changes
24
Changes in the Librarian
24
Newly Added DIMM Check Function
24
Saving Samples (Save All Samples)
24
Index
25
Advertisement
Related Products
Roland GAIA Fantom-G2008
Roland Fantom
Roland FANTOM Series
Roland FANTOM-6
Roland FANTOM-7
Roland FANTOM-8
Roland FANTOM 6
Roland FA 08
Roland Fa 06
Roland Fantom FA-76
Roland Categories
Musical Instrument
Synthesizer
Recording Equipment
Drums
Electronic Keyboard
More Roland Manuals
Login
Sign In
OR
Sign in with Facebook
Sign in with Google
Upload manual
Upload from disk
Upload from URL