Sign In
Upload
Manuals
Brands
Roland Manuals
Synthesizer
Fa 06
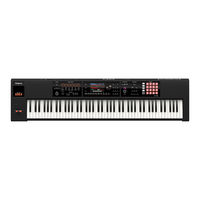
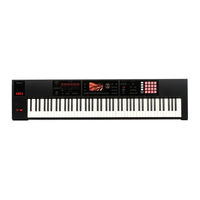
Roland Fa 06 Manuals
Manuals and User Guides for Roland Fa 06. We have
7
Roland Fa 06 manuals available for free PDF download: Owner's Manual, Reference Manual, Parameter Manual, Service Notes, Quick Start Manual, Application Manual
Roland Fa 06 Parameter Manual (120 pages)
Brand:
Roland
| Category:
Synthesizer
| Size: 18.22 MB
Table of Contents
Table of Contents
2
Studio Set
5
Studio Set Common
5
General Tab
5
Control Tab
5
Phase Lock Tab
5
Pedal Tab
6
S1/S2 Tab
6
Knob Tab
6
D-Beam Tab
7
Control Sw Tab
8
Part View
9
Level/Pan Tab
9
Keyboard Tab
9
Output/Efx Tab
10
EQ Tab
10
Pitch Tab
11
Scale Tune Tab
11
Vibrato Tab
12
Offset Tab
12
Mono/Poly/Legato Tab
13
Voice Reserve Tab
13
MIDI Rx Filter Tab
13
Effects Edit
14
Studio Set Effects
15
Chorus Tab
15
Reverb Tab
15
Comp+Eq Output Tab
16
Master Comp Tab
16
IFX Tab
16
Tone Effects (Mfx, Comp+Eq)
17
System Effects
18
Audio Input Tab
18
USB Audio Tab
18
Noise Suppressor Tab
18
MIC Reverb Tab
18
Master EQ Tab
19
TFX Tab
19
TFX Parameters
20
Filter+Drive
20
Isolator
20
Djfx Looper
20
Bpm Looper
20
Bit Crush
20
Wah
20
Reverb
20
Delay
20
Tape Echo
20
Pitch Shifter
21
Voice Trans
21
Flanger
21
Slicer+Flg
21
Phaser
21
Chorus
21
Tremolo/Pan
21
Overdrive
21
Distortion
21
Fuzz
21
Octave
22
Subsonic
22
Ring Mod
22
Chromatic Ps
22
Canceller
22
Vinyl Sim
22
Radio Tuning
22
Noise Gen
22
Comp
22
Equalizer
22
Supernatural Acoustic Tone (SN-A)
24
Tone Edit (Sn-A)
24
Common Tab
24
Inst Tab
25
Instrument List
25
Supernatural Inst Parameters
26
Performance Variation Sounds
29
MFX Tab
30
MFX Control Tab
30
Supernatural Synth Tone (SN-S)
31
Tone Edit (Sn-S)
31
Common Tab
31
OSC Tab
33
Pitch Tab
33
Filter Tab
34
Amp Tab
35
LFO Tab
35
Modulation LFO Tab
36
Aftertouch Tab
36
Misc Tab
36
MFX Tab
37
MFX Control Tab
37
Supernatural Drum Kit (SN-D)
38
Tone Edit (Sn-D)
38
Common Tab
38
DRUM Inst Tab
38
Comp Tab
39
EQ Tab
39
MFX Tab
39
MFX Control Tab
39
Supernatural Drum Inst List
40
PCM Synth Tone (PCMS)
42
Tone Edit (Pcms)
42
Common Tab
42
Wave Tab
45
PMT Tab
47
Pitch Tab
49
Pitch Env Tab
50
TVF Tab
51
TVF Env Tab
52
TVA Tab
53
TVA Env Tab
54
Output Tab
55
LFO1/LFO2 Tab
55
Step LFO Tab
57
How to Apply the LFO
57
Control Tab
58
Matrix Control 1-4 Tab
58
MFX Tab
60
MFX Control Tab
60
PCM Drum Kit (PCMD)
61
Tone Edit (Pcmd)
61
Common Tab
61
Wave Tab
62
WMT Tab
63
Pitch Tab
63
Pitch Env Tab
63
TVF Tab
64
TVF Env Tab
65
TVA Tab
65
TVA Env Tab
66
Output Tab
66
Comp Tab
66
EQ Tab
67
MFX Tab
67
MFX Control Tab
67
Chorus, Reverb
68
Chorus Parameters
68
Reverb Parameters
68
IFX Parameters
69
Equalizer
69
Spectrum
69
Isolator
69
Enhancer
69
Humanizer
69
Tremolo
69
Low Boost
70
Super Filter
71
Step Filter
71
Auto Wah
72
Speaker Simulator
72
Phaser
73
Step Phaser
73
Multi Stage Phaser
73
Infinite Phaser
73
Ring Modulator
74
Step Ring Modulator
74
Auto Pan
74
Step Pan
75
Slicer
75
Rotary
75
VK Rotary
76
Chorus
76
Flanger
76
Step Flanger
77
Hexa-Chorus
77
Tremolo Chorus
77
Space-D
77
3D Chorus
78
3D Flanger
78
3D Step Flanger
78
Band Chorus
79
Band Flanger
79
Band Step Flanger
79
Overdrive
80
Distortion
80
VS Overdrive
80
VS Distortion
80
Guitar Amp Simulator
80
Compressor
81
Limiter
81
Gate
81
Delay
81
Long Delay
82
Serial Delay
82
Modulation Delay
82
3Tap Pan Delay
83
Multi Tap Delay
83
Reverse Delay
84
Shuffle Delay
84
Delay
84
Time Ctrl Delay
85
Long Time Ctrl Delay
85
Tape Echo
85
Lofi Noise
86
Lofi Compress
86
Lofi Radio
86
Telephone
87
Phonograph
87
Pitch Shifter
87
2Voice Pitch Shifter
87
Step Pitch Shifter
88
Reverb
88
Gated Reverb
88
Overdrive G Chorus
89
Overdrive G Flanger
89
Overdrive G Delay
89
Distortion G Chorus
89
Distortion G Flanger
89
Distortion G Delay
90
Enhancer G Chorus
90
Enhancer G Flanger
90
Enhancer G Delay
90
Chorus G Delay
90
Flanger G Delay
91
Chorus G Flanger
91
Sympathetic Resonance
91
When Using 3D Effects
92
MFX Parameters
93
Equalizer
93
Spectrum
93
Low Boost
94
Step Filter
94
Enhancer
95
Auto Wah
95
Humanizer
95
Speaker Simulator
95
Phaser 1
96
Phaser 2
96
Phaser 3
96
Step Phaser
97
Multi Stage Phaser
97
Infinite Phaser
97
Ring Modulator
98
Tremolo
98
Auto Pan
98
Slicer
98
Rotary 1
99
Rotary 2
99
Rotary 3
100
Chorus
100
Flanger
101
Step Flanger
101
Hexa-Chorus
102
Tremolo Chorus
102
Space-D
102
Overdrive
102
Distortion
102
Guitar Amp Simulator
103
Compressor
103
Limiter
103
Gate
104
Delay
104
Modulation Delay
105
3Tap Pan Delay
105
Multi Tap Delay
106
Reverse Delay
106
Time Ctrl Delay
107
LOFI Compress
107
Bit Crusher
107
Pitch Shifter
107
2Voice Pitch Shifter
108
Overdrive G Chorus
108
Overdrive G Flanger
108
Overdrive G Delay
109
Distortion G Chorus
109
Distortion G Flanger
109
Distortion G Delay
109
OD/DS G Touchwah
109
OD/DS G Autowah
110
Guitarampsim G Chorus
110
Guitarampsim G Flanger
111
Guitarampsim G Phaser
111
Guitarampsim G Delay
112
EP Ampsim G Tremolo
113
EP Ampsim G Chorus
113
EP Ampsim G Flanger
113
EP Ampsim G Phaser
114
EP Ampsim G Delay
114
Enhancer G Chorus
115
Enhancer G Flanger
115
Enhancer G Delay
115
Chorus G Delay
115
Flanger G Delay
116
Chorus G Flanger
116
Vocoder
116
About the STEP RESET Function
117
Controlling a MFX Via MIDI (MFX CONTROL)
117
Advertisement
Roland Fa 06 Owner's Manual (122 pages)
Brand:
Roland
| Category:
Musical Instrument
| Size: 35.38 MB
Table of Contents
Performance Functions
1
Table of Contents
2
1 : Overview
5
Panel Descriptions
6
Top Panel
6
Rear Panel (Connecting Your Equipment)
8
Phones Jack
9
An Overview of the FA
10
Overall Structure
10
Synthesizer
10
Sequencer
10
Sampler
10
How the Sound Engine Is Structured
11
Tones
11
Studio Sets
12
About the Effects
13
About Memory
14
About the Sequencer
15
Songs
15
Tracks
15
About the Sampler
16
Getting Ready
17
Placing this Unit on a Stand
17
Turning the Power On/Off
19
Turning the Power on
19
Turning the Power off
19
Playing the Demo Songs
19
2 : Performing
21
Playing One Tone (Single Play)
22
Selecting a Tone
22
Selecting a Tone from a List
23
Playing Two Tones Together (Dual)
24
Changing the Tones
24
Playing Different Tones in the Right and Left Hands (Split)
25
Changing the Tones
25
Changing the Split Point
25
Playing Multiple Parts (Multi Part Play)
26
Viewing the Part Settings (PART VIEW Screen)
26
Selecting the Parts that Sound (Keyboard Switch)
27
Switching Studio Sets
27
Registering/Recalling Favorite Sounds (Favorites)
28
Registering a Sound as a Favorite
28
Recalling a Favorite
28
Registering/Recalling/Editing Favorites in the List
28
Changing the Keyboard Settings
29
Raising/Lowering the Key Range in Semitone Steps (Transpose)
29
Raising/Lowering the Key Range in Octaves (Octave Shift)
29
3 : Performance Functions
31
Playing Arpeggios
32
Using the Arpeggiator
32
Setting the Arpeggiator Tempo
32
Holding the Arpeggio (Hold)
32
Arpeggiator Settings
33
Importing a Computer SMF File into an Arpeggio Style
34
(Import SMF)
34
Creating an Arpeggio Style from a Song (Import Song)
34
Using Chord Memory
35
Performing with the Chord Memory Function
35
Chord Memory Settings
35
Performing with Rhythm Patterns
36
Selecting/Playing Rhythm Patterns
36
Changing the Tempo of the Rhythm Pattern
37
Saving a Rhythm Group
37
Importing SMF into a Rhythm Pattern
38
Creating a Rhythm Pattern from a Song
38
Modifying the Sound in Real Time
39
Using the SOUND MODIFY Knobs to Vary the Sound
39
Changing the Tonal Character of the Part (CUTOFF, RESONANCE)
39
Changing How the Volume will Vary of the Part
39
(Attack, Release)
39
Changing the Stereo Position of the Sound of the Part
39
(Pan)
39
Adjusting the Volume of the Part (LEVEL)
39
Adjusting the Level of the Low, MID, and High Frequencies (EQ)
39
Adjusting the Input Volume (INPUT LEVEL)
39
Applying Effects Conveniently (GLOBAL CONTROL)
40
Moving Your Hand to Vary the Pitch or Volume (D-BEAM Controller)
41
Changing the Pitch (Pitch Bend)
41
Applying Vibrato or Dynamics (Modulation)
41
Using an Assigned Function to Vary the Sound ([S1] [S2] Buttons)
41
Using a Pedal to Vary the Sound
42
Sustaining the Notes (Hold Pedal)
42
Adding Expression to Your Performance (Control Pedal)
42
Performing with a Microphone (Vocoder)
42
Using the Vocoder
42
Editing the Vocoder Settings
42
4 : Editing
43
Editing a Studio Set
44
Overall Settings for the Studio Set
44
Settings for each Part
44
Saving a Studio Set
45
Initializing a Studio Set (Studio Set Init)
45
Initializing a Part (Part Init)
45
Editing a Tone
46
Basic Procedure for Tone Edit
46
Supernatural Acoustic Tone (SN-A)
46
Supernatural Synth Tone (SN-S)
46
Supernatural Drum Kit (SN-D)
47
PCM Synth Tone (PCMS)
47
PCM Drum Kit (PCMD)
48
Saving a Tone/Drum Kit
48
Initializing a Tone (Tone Initialize)
48
Selecting the Partials that Sound (Partial Switch)
49
Selecting the Partials to Edit (Partial Select)
49
Initializing a Partial (Partial Initialize)
49
Copying a Partial (Partial Copy)
49
Editing a Pattern
50
Initializing a Pattern (Initialize)
50
Specifying the Time Signature and Length (Setup)
50
Specifying the Grid Scale (Scale)
50
Specifying the Note Type, Duration, and Loudness (Note Setup)
51
Entering Notes
51
Deleting Notes (Clear Step, Clear Note)
51
Saving the Pattern
51
Editing the Effects
52
Turning Effects On/Off
52
Editing the Effects of the Studio Set
53
Editing the Effects of the Tone
53
Editing the System Effects
54
5 : Sequencer (Creating Songs)
55
Playing Songs
56
Selecting and Playing Songs
56
Setting the Tempo of the Song
56
Looping the Song Playback
57
Recording the Song
58
Recording Workflow
58
Prepare for Recording
58
Realtime Recording
59
Selecting the Performance Data to Record (Recording Select)
60
Removing Unwanted Data During Recording
60
(Realtime Erase)
60
Auditioning Sounds or Phrases During Recording
60
(Rehearsal Function)
60
Step Recording
61
Canceling a Recording or Edit (Undo/Redo)
62
Editing the Song
63
Specifying the Sound Engine Played by each Track
63
Muting a Part's Performance (MUTE)
63
Sounding One Part by Itself (SOLO)
63
Edit Performance Data for Entire Tracks (Track Modify)
64
Basic Procedure for Track Modify
64
Correcting the Song's Timing (Quantize)
64
Erasing Unwanted Performance Data (Erase)
65
Deleting Unwanted Measures (Delete)
65
Copying Performance Data (Copy)
65
Inserting Blank Measures (Insert)
66
Transposing (Transpose)
66
Changing the Velocity (Change Velocity)
66
Changing the Duration of the Notes (Change Duration)
67
Moving Performance Data Forward or Backward
67
(Shift Clock)
67
Editing Individual Events of Performance Data (Microscope)
68
Selecting the Track to Edit / Viewing Specific Performance Data (View)
69
Inserting Performance Data (Create)
69
Erasing Performance Data (Erase)
69
Moving Performance Data (Move)
70
Copying/Pasting Performance Data (Copy/Paste)
70
Changing the Tempo During a Song
71
Changing the Time Signature During a Song
71
Adjusting the Pan and Volume Balance (Mixer)
72
Erasing the Song in the Temporary Area (Song Clear)
72
Assigning a Name to the Song (Song Name)
72
Specifying the Song's Time Signature (Time Signature)
73
Deleting a Song (Delete Song)
73
Saving/Exporting a Song
74
Save the Song
74
Exporting Tracks as Individual WAV Format Files (Multi-Track Export)
74
Exporting a Two-Channel MIX in WAV Format
75
Exporting the Song in SMF Format
75
Exporting Samples in WAV Format
76
Importing an SMF as a Song
76
6 : Sampler
77
Playing Samples
78
Selecting/Playing Samples
78
Switching Banks
78
Sampling
79
Sampling Procedure
79
Setting the Input Volume (Input Setting)
80
Moving/Copying a Sample (Clip Board)
80
Moving a Sample
80
Copying a Sample
80
Editing a Sample
81
Editing Procedure
81
Renaming the Sample (Rename)
81
Cutting Unwanted Regions from the Sample (Truncate)
81
Deleting a Sample (Delete)
81
Zooming the Sample Display (Zoom)
82
Auditioning the Edited Result (Preview)
82
Exporting the Sample in WAV Format (Export Sample)
82
Importing an Audio File (Sample Import)
82
Switching the Sample Information Display
82
(Change Information)
82
7 : Pads
83
Using the Pads
84
Specifying the Function of the Pads (PAD UTILITY)
84
Playing Samples (SAMPLE PAD)
84
Selecting Parts (PART SELECT)
84
Switching Part Mute (PART MUTE)
84
Switching the Soloed Part (PART SOLO)
84
Using the Pads as Numeric Keys (NUMERIC)
84
Selecting Partials and Turning Them On/Off
84
Partial Sw/Sel
84
Turning the Keyboard Switch On/Off (KBD SW)
85
8 : Daw
87
Connecting to a Computer Via USB
88
Installing the USB Driver
88
Making USB Driver Settings
88
Using the FA with DAW Software
89
Using the FA as a DAW Controller
89
Using the FA to Control DAW Software
89
Assigning Functions to Knobs and Buttons
90
Using the FA as a MIDI Keyboard
90
Playing the Fa's Sound Engine from DAW Software
91
Using the FA as an Audio Interface
91
Specifying the USB Audio Output
91
Saving the DAW CONTROL Settings
92
9 : Settings
93
Useful Functions
94
Basic Procedure for Utility Operations
94
Backing up User Data (Backup/Restore)
94
Backing up to an SD Card (Backup)
94
Returning Backup Data to the FA (Restore)
94
Importing a Studio Set or Tone (Import Studio Set/Tone)
95
Importing from Backup Data
95
Importing Tones Downloaded from the Axial Site
95
Restoring the Factory Settings (Factory Reset)
95
Initializing an SD Card (Format SD Card)
96
Backing-Up SD Card Data to a Computer
96
Transmitting the Temporary Area's Data to an External MIDI Device (Bulk Dump)
96
Settings for the Entire FA
97
Basic Procedure for System Settings
97
Saving the System Settings
97
System Parameter
97
About MIDI Connectors
102
Connection Examples
103
About the Wireless LAN Function
104
What Is Wireless LAN Function
104
Basic Connection Method (Connect by WPS)
104
Wireless LAN Function Settings
105
Status Indication (WIRELESS STATUS)
105
Connecting to a Wireless LAN Access Point that You Select (SELECT ACCESS POINT)
105
Other Settings (WIRELESS OPTIONS)
106
Checking the IP Address and MAC Address (WIRELESS INFORMATION)
106
Roland Fa 06 Reference Manual (122 pages)
Brand:
Roland
| Category:
Musical Instrument
| Size: 27.7 MB
Table of Contents
Table of Contents
2
01: Overview
5
Panel Descriptions
6
Top Panel
6
Rear Panel (Connecting Your Equipment)
8
An Overview of the FA
10
Overall Structure
10
Synthesizer
10
Sequencer
10
Sampler
10
How the Sound Engine Is Structured
11
Tones
11
Studio Sets
12
About the Effects
13
About Memory
14
About the Sequencer
15
Songs
15
Tracks
15
About the Sampler
16
Getting Ready
17
Placing this Unit on a Stand
17
Turning the Power On/Off
19
Turning the Power on
19
Turning the Power off
19
Playing the Demo Songs
19
02: Performing
21
Playing One Tone (Single Play)
22
Selecting a Tone
22
Selecting a Tone from a List
23
Playing Two Tones Together (Dual)
24
Changing the Tones
24
Playing Different Tones in the Right and Left Hands (Split)
25
Changing the Tones
25
Changing the Split Point
25
Playing Multiple Parts (Multi Part Play)
26
Viewing the Part Settings (PART VIEW Screen)
26
Selecting the Parts that Sound (Keyboard Switch)
27
Switching Studio Sets
27
Registering/Recalling Favorite Sounds (Favorites)
28
Registering a Sound as a Favorite
28
Recalling a Favorite
28
Registering/Recalling/Editing Favorites in the List
28
Changing the Keyboard Settings
29
Raising/Lowering the Key Range in Semitone Steps (Transpose)
29
Raising/Lowering the Key Range in Octaves (Octave Shift)
29
03: Performance Functions
31
Playing Arpeggios
32
Using the Arpeggiator
32
Setting the Arpeggiator Tempo
32
Holding the Arpeggio (Hold)
32
Arpeggiator Settings
33
Importing a Computer SMF File into an Arpeggio Style
34
(Import SMF)
34
Creating an Arpeggio Style from a Song (Import Song)
34
Using Chord Memory
35
Performing with the Chord Memory Function
35
Chord Memory Settings
35
Performing with Rhythm Patterns
36
Selecting/Playing Rhythm Patterns
36
Changing the Tempo of the Rhythm Pattern
37
Saving a Rhythm Group
37
Importing SMF into a Rhythm Pattern
38
Creating a Rhythm Pattern from a Song
38
Modifying the Sound in Real Time
39
Using the SOUND MODIFY Knobs to Vary the Sound
39
Changing the Tonal Character of the Part (CUTOFF, RESONANCE)
39
Changing How the Volume will Vary of the Part
39
(Attack, Release)
39
Changing the Stereo Position of the Sound of the Part
39
(Pan)
39
Adjusting the Volume of the Part (LEVEL)
39
Adjusting the Level of the Low, MID, and High Frequencies (EQ)
39
Adjusting the Input Volume (INPUT LEVEL)
39
Applying Effects Conveniently (GLOBAL CONTROL)
40
Moving Your Hand to Vary the Pitch or Volume (D-BEAM Controller)
41
Changing the Pitch (Pitch Bend)
41
Applying Vibrato or Dynamics (Modulation)
41
Using an Assigned Function to Vary the Sound ([S1] [S2] Buttons)
41
Using a Pedal to Vary the Sound
42
Sustaining the Notes (Hold Pedal)
42
Adding Expression to Your Performance (Control Pedal)
42
Performing with a Microphone (Vocoder)
42
Using the Vocoder
42
Editing the Vocoder Settings
42
04: Editing
43
Editing a Studio Set
44
Overall Settings for the Studio Set
44
Settings for each Part
44
Saving a Studio Set
45
Initializing a Studio Set (Studio Set Init)
45
Initializing a Part (Part Init)
45
Editing a Tone
46
Basic Procedure for Tone Edit
46
Supernatural Acoustic Tone (SN-A)
46
Supernatural Synth Tone (SN-S)
46
Supernatural Drum Kit (SN-D)
47
PCM Synth Tone (PCMS)
47
PCM Drum Kit (PCMD)
48
Saving a Tone/Drum Kit
48
Initializing a Tone (Tone Initialize)
48
Selecting the Partials that Sound (Partial Switch)
49
Selecting the Partials to Edit (Partial Select)
49
Initializing a Partial (Partial Initialize)
49
Copying a Partial (Partial Copy)
49
Editing a Pattern
50
Initializing a Pattern (Initialize)
50
Specifying the Time Signature and Length (Setup)
50
Specifying the Grid Scale (Scale)
50
Specifying the Note Type, Duration, and Loudness (Note Setup)
51
Entering Notes
51
Deleting Notes (Clear Step, Clear Note)
51
Saving the Pattern
51
Editing the Effects
52
Turning Effects On/Off
52
Editing the Effects of the Studio Set
53
Editing the Effects of the Tone
53
Editing the System Effects
54
05: Sequencer (Creating Songs)
55
Playing Songs
56
Selecting and Playing Songs
56
Setting the Tempo of the Song
56
Looping the Song Playback
57
Recording the Song
58
Recording Workflow
58
Prepare for Recording
58
Realtime Recording
59
Selecting the Performance Data to Record (Recording Select)
60
Removing Unwanted Data During Recording
60
(Realtime Erase)
60
Auditioning Sounds or Phrases During Recording
60
(Rehearsal Function)
60
Step Recording
61
Canceling a Recording or Edit (Undo/Redo)
62
Editing the Song
63
Specifying the Sound Engine Played by each Track
63
Muting a Part's Performance (MUTE)
63
Sounding One Part by Itself (SOLO)
63
Edit Performance Data for Entire Tracks (Track Modify)
64
Basic Procedure for Track Modify
64
Correcting the Song's Timing (Quantize)
64
Erasing Unwanted Performance Data (Erase)
65
Deleting Unwanted Measures (Delete)
65
Copying Performance Data (Copy)
65
Inserting Blank Measures (Insert)
66
Transposing (Transpose)
66
Changing the Velocity (Change Velocity)
66
Changing the Duration of the Notes (Change Duration)
67
Moving Performance Data Forward or Backward
67
(Shift Clock)
67
Editing Individual Events of Performance Data (Microscope)
68
Selecting the Track to Edit / Viewing Specific Performance Data (View)
69
Inserting Performance Data (Create)
69
Erasing Performance Data (Erase)
69
Moving Performance Data (Move)
70
Copying/Pasting Performance Data (Copy/Paste)
70
Changing the Tempo During a Song
71
Changing the Time Signature During a Song
71
Adjusting the Pan and Volume Balance (Mixer)
72
Erasing the Song in the Temporary Area (Song Clear)
72
Assigning a Name to the Song (Song Name)
72
Specifying the Song's Time Signature (Time Signature)
73
Deleting a Song (Delete Song)
73
Saving/Exporting a Song
74
Save the Song
74
Exporting Tracks as Individual WAV Format Files (Multi-Track Export)
74
Exporting a Two-Channel MIX in WAV Format
75
Exporting the Song in SMF Format
75
Exporting Samples in WAV Format
76
Importing an SMF as a Song
76
06: Sampler
77
Playing Samples
78
Selecting/Playing Samples
78
Switching Banks
78
Sampling
79
Sampling Procedure
79
Setting the Input Volume (Input Setting)
80
Moving/Copying a Sample (Clip Board)
80
Moving a Sample
80
Copying a Sample
80
Editing a Sample
81
Editing Procedure
81
Renaming the Sample (Rename)
81
Cutting Unwanted Regions from the Sample (Truncate)
81
Deleting a Sample (Delete)
81
Zooming the Sample Display (Zoom)
82
Auditioning the Edited Result (Preview)
82
Exporting the Sample in WAV Format (Export Sample)
82
Importing an Audio File (Sample Import)
82
Switching the Sample Information Display
82
(Change Information)
82
07: Pads
83
Using the Pads
84
Specifying the Function of the Pads (PAD UTILITY)
84
Playing Samples (SAMPLE PAD)
84
Selecting Parts (PART SELECT)
84
Switching Part Mute (PART MUTE)
84
Switching the Soloed Part (PART SOLO)
84
Using the Pads as Numeric Keys (NUMERIC)
84
Selecting Partials and Turning Them On/Off
84
Partial Sw/Sel
84
Turning the Keyboard Switch On/Off (KBD SW)
85
08: Daw
87
Connecting to a Computer Via USB
88
Installing the USB Driver
88
Making USB Driver Settings
88
Using the FA with DAW Software
89
Using the FA as a DAW Controller
89
Using the FA to Control DAW Software
89
Assigning Functions to Knobs and Buttons
90
Using the FA as a MIDI Keyboard
90
Playing the Fa's Sound Engine from DAW Software
91
Using the FA as an Audio Interface
91
Specifying the USB Audio Output
91
Saving the DAW CONTROL Settings
92
09: Settings
93
Useful Functions
94
Basic Procedure for Utility Operations
94
Backing up User Data (Backup/Restore)
94
Backing up to an SD Card (Backup)
94
Returning Backup Data to the FA (Restore)
94
Importing a Studio Set or Tone (Import Studio Set/Tone)
95
Importing from Backup Data
95
Importing Tones Downloaded from the Axial Site
95
Restoring the Factory Settings (Factory Reset)
95
Initializing an SD Card (Format SD Card)
96
Backing-Up SD Card Data to a Computer
96
Transmitting the Temporary Area's Data to an External MIDI Device (Bulk Dump)
96
Settings for the Entire FA
97
Basic Procedure for System Settings
97
Saving the System Settings
97
System Parameter
97
About the Wireless LAN Function
104
Advertisement
Roland Fa 06 Service Notes (67 pages)
Brand:
Roland
| Category:
Recording Equipment
| Size: 13.78 MB
Table of Contents
Table of Contents
1
Cautionary Notes
2
Specifications
2
Location of Controls (Front, Rear)
4
Exploded View
6
Plane View (1)
8
Plane View (2)
9
Plane View (3)
10
Disassembly Procedure
10
Keyboard Parts List (MSK-2)
11
Wiring Diagram
12
Block Diagram
14
Parts List
16
Verifying the Version Number
18
Data Backup and Restore Operations
18
Performing a Factory Reset
18
System Update Procedure
19
Test Mode
19
Circuit Board (Main Board)
27
Circuit Diagram (Main Board: 1/7)
28
Circuit Diagram (Main Board: 2/7)
30
Circuit Diagram (Main Board: 3/7)
32
Circuit Diagram (Main Board: 4/7)
34
Circuit Diagram (Main Board: 5/7)
36
Circuit Diagram (Main Board: 6/7)
38
Circuit Diagram (Main Board: 7/7)
40
Circuit Board (Jack, Panel-R, MIDI, LCD, 7-Seg Board)
42
Circuit Diagram (Jack Board: 1/3)
44
Circuit Diagram (Jack Board: 2/3)
46
Circuit Diagram (Jack Board: 3/3)
48
Circuit Diagram (Panel-R Board: 1/2)
50
Circuit Diagram (Panel-R Board: 2/2)
52
Circuit Diagram (MIDI Board: 1/2)
54
Circuit Diagram (MIDI Board: 2/2)
56
Circuit Diagram (LCD Board)
58
Circuit Diagram (7-Seg Board)
59
Circuit Board (Bender, Encoder, Panel-L, Panel-C Board)
60
Circuit Diagram (Bender Board)
61
Circuit Diagram (Encoder Board)
61
Circuit Diagram (Panel-L Board: 1/2)
62
Circuit Diagram (Panel-L Board: 2/2)
64
Circuit Diagram (Panel-C Board)
66
Roland Fa 06 Quick Start Manual (32 pages)
Brand:
Roland
| Category:
Synthesizer
| Size: 28.85 MB
Table of Contents
Declaration of Conformity
2
Table of Contents
3
Quick Start
3
Introduction (a Message from the Developers)
4
Main Features
5
Getting Ready
6
Panel Descriptions
6
Top Panel
6
Sd Card Slot
8
MIDI Connectors
8
Phones Jack
9
An Overview Of This Unit
10
Turning The Power On/Off
11
Playing The Demo Songs
11
Basic Operation
12
Synthesizer (Performing)
13
Selecting A Tone
13
Performance Settings
14
Using Performance Functions
15
Modifying The Sound In Real Time
16
Registering/Recalling Favorite Sounds (Favorites)
18
Synthesizer (Editing)
19
Editing A Studio Set
19
Editing A Tone
19
Editing the Part Settings
19
Editing The Effects
20
Saving A Studio Set, Tone, Or Song
20
Editing the Effect Parameters
20
Sampler (Recording)
21
Playing Samples
21
Switching Banks
21
Sampling
22
Sequencer (Creating Songs)
23
Selecting/Playing A Song
23
Recording A Performance (Realtime Recording)
24
Deleting a Song
25
DAW Control
26
Loading A MIDI Track Into A Daw Software
26
Using This Unit As A Daw Controller
27
Settings
28
Detailed Function Settings (Menu)
28
Backing Up User Data (Backup/Restore)
28
Restoring The Factory Settings (Factory Reset)
28
Using the Unit Safely
29
Important Notes
29
Main Specifications
30
Roland Fa 06 Quick Start Manual (28 pages)
Brand:
Roland
| Category:
Synthesizer
| Size: 18.84 MB
Table of Contents
Table of Contents
1
Introduction (a Message from the Developers)
2
Main Features
3
Getting Ready
4
Panel Descriptions
4
An Overview of this Unit
8
Turning the Power On/Off
9
Playing the Demo Songs
9
Basic Operation
10
Synthesizer (Performing)
11
Selecting a Tone
11
Performance Settings
12
Using Performance Functions
13
Modifying the Sound in Real Time
14
Registering/Recalling Favorite Sounds (Favorites)
16
Synthesizer (Editing)
17
Editing a Studio Set
17
Editing a Tone
17
Editing the Effects
18
Saving a Studio Set, Tone, or Song
18
Sampler (Recording)
19
Playing Samples
19
Sampling
20
Sequencer (Creating Songs)
21
Selecting/Playing a Song
21
Recording a Performance (Realtime Recording)
22
DAW Control
24
Loading a MIDI Track into a DAW Software
24
Using this Unit as a DAW Controller
25
Settings
26
Detailed Function Settings (Menu)
26
Backing up User Data (Backup/Restore)
26
Restoring the Factory Settings (Factory Reset)
26
Using the Unit Safely
27
Important Notes
27
Roland Fa 06 Application Manual (17 pages)
Track-making and DAW Workflow
Brand:
Roland
| Category:
Musical Instrument
| Size: 3.77 MB
Table of Contents
Introduction
2
Preparing to Create a Song
3
Selecting Multi-Part Mode
3
Clearing the Sequencer Song
3
Selecting a Studio Set
3
Selecting a Sequencer Track
4
Step-Recording the Bass
5
Selecting the Bass Part
5
Edit the Cutoff to Modify the Sound
5
Step-Recording Notes
6
Recording a Rhythm Pattern
7
Selecting a Rhythm Pattern and Drum Sound
7
Changing the Tempo
8
Chord Memory and Arpeggio Settings
9
Using Non-Stop Recording
10
Take Advantage of Input Quantization
10
Take Advantage of Rehearsal Mode
10
Using the Sampler and TFX
11
Playing the Sampler During the Song
11
Applying the TFX (Total Effect) to the Song
11
Mixing
12
Mixing in the Mixer Screen
12
Use the Compressor to Raise the Loudness
12
Distinguishing between Sounds that Do or Don’t Need Reverb
12
Export the Completed Tracks to a DAW
13
Saving the Song
13
Exporting Tracks to an SD Card
14
Using the FA to Control a DAW
15
Connecting the FA Via USB
15
Using the FA to Control a DAW Software
15
What Is the USB Driver?
15
Settings in LOGIC PRO
16
Settings in SONAR
16
Settings in CUBASE
16
Advertisement
Related Products
Roland GAIA Fantom-G2008
Roland Fantom XR
Roland Fantom
Roland FA 08
Roland Fantom FA-76
Roland FANTOM Series
Roland FANTOM-6
Roland FANTOM-7
Roland FANTOM-8
Roland FANTOM 6
Roland Categories
Musical Instrument
Synthesizer
Recording Equipment
Drums
Electronic Keyboard
More Roland Manuals
Login
Sign In
OR
Sign in with Facebook
Sign in with Google
Upload manual
Upload from disk
Upload from URL