Table of Contents
Advertisement
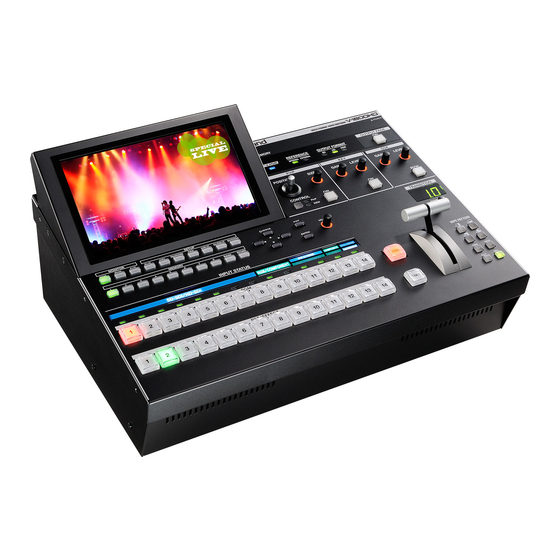
Owner's Manual
Before using this unit, carefully read the sections entitled: "IMPORTANT SAFETY INSTRUCTIONS" (p.2),
"USING THE UNIT SAFELY" (p. 4), and "IMPORTANT NOTES" (p. 6). These sections provide important
information concerning the proper operation of the unit. Additionally, in order to feel assured that
you have gained a good grasp of every feature provided by your new unit, owner's manual should
be read in its entirety. The manual should be saved and kept on hand as a convenient reference.
Copyright © 2010 ROLAND CORPORATION
All rights reserved. No part of this publication may be reproduced in any form without the written
permission of ROLAND CORPORATION.
Advertisement
Table of Contents

Related Manuals for Roland V-1600HD


Summary of Contents for Roland V-1600HD
- Page 1 The manual should be saved and kept on hand as a convenient reference. Copyright © 2010 ROLAND CORPORATION All rights reserved. No part of this publication may be reproduced in any form without the written...
-
Page 2: Important Safety Instructions
For the USA DECLARATION OF CONFORMITY Compliance Information Statement Model Name : V-1600HD Type of Equipment : Video Switcher Responsible Party : Roland Systems Group U.S. Address : 801 West Orchard Drive, Suite 3, Bellingham, WA 98225 Telephone : (360) 594-4282... -
Page 3: Check The Included Items
MMP (Moore Microprocessor Portfolio) refers to a patent portfolio concerned with microprocessor architecture, which was developed by Technology Properties Limited (TPL). Roland has licensed this technology from the TPL Group. -
Page 4: Using The Unit Safely
Refer all servicing to your retailer, pins); or liquids of any kind (water, soft drinks, etc.) to the nearest Roland Service Center, or an authorized Roland penetrate the unit. distributor, as listed on the “Information” sheet. - Page 5 Before using the unit in a foreign country, consult with your clean it by using a dry cloth to wipe all dust and other retailer, the nearest Roland Service Center, or an authorized accumulations away from its prongs. Also, disconnect the Roland distributor, as listed on the “Information”...
-
Page 6: Important Notes
Roland Corporation assumes nected from the source of power. If you need to turn off the power completely, no liability concerning such loss of data. -
Page 7: Table Of Contents
Contents Power Supply ....................9 About the Ground Terminal..........................9 About the Cord Hook ............................10 Turning the Power On and Off..............11 Turning the Power On............................11 Turning the Power Off............................11 Part Names and Functions ................12 Top Panel .................................12 Rear Panel ................................15 Connection Sections of the Rear Panel......................16 SD IN/OUT Section..............................16 RGB/COMPONENT IN/OUT Section ............... - Page 8 Outputting a Still Image................40 Switching the AUX Output Point ..............43 Changing the Output Source of the Second Connectors ......45 Menu Operations and Menu List ..............47 Menu Operations ..............................47 Menu List..................................48 Saving Settings to MEMORY Buttons............53 Saving the Current Settings ..........................53 Recalling Saved Settings ............................53 Saving Settings to a USB Memory Device..........
-
Page 9: Power Supply
(see figure) with an external ground. When the unit is grounded, a slight hum may occur, depending on the particulars of your installation. If you are unsure of the connection method, contact the nearest Roland Service Center, or an authorized Roland distributor, as listed on the “Information”... -
Page 10: About The Cord Hook
Power Supply About the Cord Hook Secure the power cord in place using the cord hook as shown below. This can help prevent power loss due to the plug being pulled out if the power cord is accidentally yanked. Connect the power cord to the AC IN connector. fig.connect-AC.eps Secure the power cord in place with the cord hook. -
Page 11: Turning The Power On And Off
* This unit is equipped with a protection circuit. A brief interval (a few seconds) after power up is required before the unit will operate normally. Connect the peripheral devices. Connect video cameras or other equipment. Make the connections while the power to all equipment, including the V-1600HD, is turned off. -
Page 12: Part Names And Functions
V-1600HD’s internal frame synchronizer. device. • EXTERNAL V-1600HD operates with an external clock as its source. You select * Only 24-bit bitmap (.bmp) files can be used as still images. this when connecting a device such as a signal generator and Maximum size is 1,920 x 1,200 pixels. - Page 13 5. OUTPUT FORMAT Indicators (p. 25) These indicate the output format of the V-1600HD. Use the menus to change the output format. Refer to “Menu Operations and Menu List” (p. 47). Also, for information on the output connectors for the various formats, refer to “Main Specifications” (p. 63).
- Page 14 Part Names and Functions 11. Compositing Section (p. 31, p. 34, p. 35) On the V-1600HD, you can carry out the following three types of compositing. • Picture-in-Picture (PinP) This displays an inset screen on a background. Use the dial and joystick on the top panel to adjust the size and location of the inset screen.
-
Page 15: Rear Panel
You connect an external source device for synchronization external MIDI device (a V-LINK-compatible device or the like) to the REFERENCE IN connector. When supplying a , or when using the V-1600HD to perform remote control of synchronizing signal to an external device via the V-1600HD, another device. -
Page 16: Connection Sections Of The Rear Panel
These output analog-component (Y/Pb/Pr) signals from the BNC connectors and RGB signals from the D-Sub 15-pin connector. Output from a desired point of the V-1600HD can be sent from the RGB/COMPONENT OUT connectors. You can use the menus to select the output point. Refer to “Menu Operations and Menu List” (p. 47). -
Page 17: Sdi In Section
1. DVI-D/HDMI OUT Connectors The final output of the V-1600HD (program output) is output from the PGM connector. Output from a desired point of the V- 1600HD (PGM, PVW or AUX) can be made from the [2] connector. You can use the menus to select the output point. Refer to “Menu Operations and Menu List”... -
Page 18: Connecting External Equipment
* To prevent malfunction or damage, always turn off the power on all devices before making any connections. About Signal Formats The signal formats listed below can be input to or output from the connectors of V-1600HD. 480/59.94i, 576/50i, 720/50p, 720/59.94p, 1080/50i, 1080/59.94i Component 480/59.94i, 576/50i, 480/59.94p, 576/50p, 720/59.94p, 720/50p, 1080/59.94i, 1080/50i,1080/59.94p,1080/50p... -
Page 19: Connecting Sd Analog Video Equipment (Composite)
Connecting External Equipment Connecting SD Analog Video Equipment (Composite) Connect DVD players, video decks, and other equipment providing composite output to the SD IN connector. SD input is assigned to channel 13. * When connecting an output device equipped with RCA pin type connector to the composite input connector, use a BNC adapter plug. fig.SD-connection.eps45 DVD Player When 4:3 signal is input while OUTPUT FORMAT is set to 16:9 aspect ratio, the output is letterboxed. -
Page 20: Connecting Hd Analog Video Equipment (Component)
Component input is assigned to channels 9 through 12. Component input and output on the V-1600HD is exclusively Y/Pb/Pr. Y/R-Y/B-Y cannot be input or output. For channels 9 and 10, you can make the connection directly via the three BNC connectors. Connection for channels 11 and 12 requires a BNC to D-Sub 15-pin conversion cable. -
Page 21: Connecting A Computer (Dvi-D)
Connect a computer providing DVI-D output to the DVI-D/HDMI IN connectors. * When you’re connecting a desktop computer, connect the display monitor to the THRU connector. Use cables with ferrite cores when you connect computers to the V-1600HD. fig.PC-connection-DVI.eps By default, input to RGB/COMPONENT IN is assigned to channels 11 and 12, and input for DVI-D/HDMI is not assigned. Use the menu operations described below to change the assignment. -
Page 22: Connecting Hdmi Equipment
By default, input to RGB/COMPONENT IN is assigned to channels 11 and 12, and input to DVI-D/HDMI is not assigned. Use the menu operations described in the previous section, “Connecting a Computer (DVI-D)” to change the assignments. * The V-1600HD does not support HDCP. Connecting Source Equipment for Synchronizing You can connect a source device for synchronizing. -
Page 23: Connecting Output Equipment
Connecting External Equipment Connecting Output Equipment Connecting a Projector or Other Display Equipment Connect projectors, plasma monitors, or various other display devices. Make the connection to an RGB/COMPONENT OUT or DVI- D/HDMI OUT connector to match the input connectors on the destination output devices. The DVI-D/HDMI OUT connectors are [1:PGM] and [2]. -
Page 24: Connecting A Source Monitor
RGB/COMPONENT IN, set the [TERMINATOR] switch for the respective thru-out connector to [OFF]. For termination at the V-1600HD without thru-out, set the switch to [ON]. When the switch is set to [ON], the indicator next to the switch lights up. -
Page 25: Selecting The Output Format
Selecting the Output Format Select the output format to match the source and output equipment connected to the V-1600HD. Making a selection makes one of the [OUTPUT FORMAT] indicators light up. fig.format-indicator.eps On the V-1600HD, you can select the following output formats. - Page 26 *2 Reduced blanking The V-1600HD cannot display still images at a reduced size. The format of still image should match the output format of the V-1600HD. If you switch output formats, output of the still image may not be displayed correctly.
-
Page 27: Selecting The Channel Displayed On The Monitor
A preview of the standby video is displayed. This lets you execute a transition after first checking the video currently on standby. • AUX This displays the video starting at various output points in the V-1600HD. For information on changing the output point, refer to “Switching the AUX Output Point” (p. 43). -
Page 28: Switching The Video In The Dsk Mode (Pgm/Pst)
In this mode, the V-1600HD extracts, composites, and outputs just the center portions of two video images. • Span Mode In this mode, the V-1600HD extracts just the center portion of the video, expands it, then splits it vertically and outputs left and right halves to two separate outputs. - Page 29 Use the [PST/EFFECT] buttons to choose the channel you want to display next. Pressing the button makes it light up green. * When the display mode for the monitor is set at [PVW], the video on the selected channel is displayed on the V-1600HD’s monitor.
-
Page 30: Switching The Picture Using The Video Fader
Switching the Video in the DSK Mode (PGM/PST) Switching the Picture Using the Video Fader Using the [TAKE] button makes the transitions occur linearly. To stop partway through and show a mix of two channels, perform the mix transition manually using the video fader. Move the video fader all the way. -
Page 31: Compositing The Pictures
* By default, the video input on channel 12 is assigned as the source for DSK. You can use the menu to select other channels as your DSK source. Refer to “Menu Operations and Menu List” (p. 47). Compositing Using Picture-in-Picture Two modes are available for Picture-in-Picture on the V-1600HD. The joystick and dial function differently depending on the mode. • Resize Mode (PinP) This allows adjustment of the inset screen itself. -
Page 32: Displaying A Reduced-Size View Of The Entire Inset Screen
While watching the preview on the unit’s monitor, go to the PinP section and use the [SIZE] dial and the [POSITION] joystick to adjust the size and position of inset screen. fig.adjust-size-position.eps Output the composited results. Press the [TAKE] button. The [ON] button lights up in red and the results of PinP compositing are output from the V-1600HD. -
Page 33: Zooming A Portion Of The Inset Screen
Compositing the Pictures Zooming a Portion of the Inset Screen You can display an enlarged view of a portion of the inset screen using the zoom feature. You can use this feature only when the [ON] button in the PinP section is illuminated. At the PinP section, press the [CONTROL] button to make the [VIEW] indicator light up. -
Page 34: Compositing Using Luminance Key/Chroma Key
Output the composited results. Press the [TAKE] button. The [ON] button lights up in red and the results of compositing are output from the V-1600HD. When Key is activated, MIX is automatically selected even if you have selected WIPE in the WIPE PATTERN section. -
Page 35: Compositing Using Dsk
Compositing the Pictures Compositing Using DSK By default, channel 12 is assigned as the source for the DSK. When performing DSK compositing with the default setting, input the source (e.g., logo, text etc) on channel 12. Also, by default, black is set as the key color. As shown below, a white text/logo on a black background produces a sharp, clean key. - Page 36 Compositing the Pictures Output the composited results. Press the DSK button. The logo or text input on the DSK channel is composited onto the background and output from the V- 1600HD. fig.DSK-button.eps Switch the background picture. Using DSK, you can transition to different background video source while your DSK material remains overlayed. At the PST/ EFFECT section, use the INPUT selectors and the [TAKE] button to change the background picture.
-
Page 37: Combining Key Compositing And Picture-In-Picture
Compositing the Pictures Combining Key Compositing and Picture-in-Picture On the V-1600HD, you can carry out key compositing, then also apply Picture-in-Picture. This allows you to display a reduced-size view of a logo or text and arrange it at the desired on-screen location. -
Page 38: Enlarging/Reducing The Picture
Enlarging/Reducing the Picture Using the joystick and dial in the PinP section, you can output an enlarged or reduced view of the picture. When using this feature, turn off Picture-in-Picture. Go to the PinP section and make sure the [ON] button is dark. Output the video. -
Page 39: Applying Fade To Final Output
Applying Fade to Final Output You can use the [OUTPUT FADE] button to apply a fade to the final output of the V-1600HD. Pressing the [OUTPUT FADE] button makes the button flash and starts a fade-out. When the fade-out has been completed, the button stops flashing and stays lit. -
Page 40: Outputting A Still Image
* The V-1600HD can load only still-image files that are 24-bit bitmap (.bmp) images up to 1,920 x 1,200 pixels in size. * The number of images that the V-1600HD can load ranges from one to four. The number varies according to the size of the bitmap images. - Page 41 * Changing the size may take a while. The V-1600HD cannot display still images at reduced size. The size of still image should match the output format of V-1600HD. Mismatched BMP file dimensions and output format may result in incorrect display of your still image.
- Page 42 • Connect the same USB memory device to the V-1600HD and start the V-1600HD. * If the still image file with exactly the same file name does not exist in the USB memory connected to V-1600HD, the file cannot be loaded with...
-
Page 43: Switching The Aux Output Point
DSK Mixer Output Fade The figure above depicts the state when the V-1600HD’s internal operation mode is set to the DSK mode. Internal signal flow differs when one of the alternative modes is enabled. Refer to “Multi-Screen Modes” (p. 57). - Page 44 Switching the AUX Output Point Display the OUTPUT menu. Go to the SETUP section and press the [OUTPUT] button to display the OUTPUT menu. fig.call-output-menu.eps Change the output point. Use [CURSOR] buttons to choose [AUX Source], then use the [VALUE] dial to change the setting. fig.AUX-change-menu.eps Exit the menu.
-
Page 45: Changing The Output Source Of The Second Connectors
Changing the Output Source of the Second Connectors On the V-1600HD, you can assign PGM, PVW or AUX output to the output connectors described below. You can assign the output sources independently to each respective output connector. • SDI OUT (2) •... - Page 46 Changing the Output Source of the Second Connectors Changing a Source This changes the output source assigned to a connector. Display the OUTPUT menu. Go to the SETUP section and press the [OUTPUT] button to display the OUTPUT menu. fig.call-output-menu.eps Select the connector.
-
Page 47: Menu Operations And Menu List
Menu Operations and Menu List Menu Operations The system settings menu for the V-1600HD is displayed on the monitor. Menu operations follow the flow described below. Display the desired menu. Press the button in the SETUP section to display the target menu. The pressed button lights up. -
Page 48: Menu List
Menu Operations and Menu List Menu List This menu is for the DSK mode. The menu differs partially when the unit has been switched to a Multi-Screen mode (p. 57). When movement from an upper level to a lower level is possible, [Enter] is displayed on the screen. Moving the cursor and pressing the [ENTER] button at this time changes the display to show the menu at the lower level. - Page 49 Menu Operations and Menu List TRANSITION Menu fig.transition-menu.eps Time This sets the length of the transition-effect time. Unit This selects the unit used for the time setting (seconds, seconds + frames or frames). Wipe Pattern This selects the WIPE PATTERN button. Wipe 1 - 4 This makes various settings for the wipe.
- Page 50 Menu Operations and Menu List OUTPUT Menu fig.output-menu.eps PGM Format This selects the format of final output. Format This selects the format of final output. DVI Connector Signal This selects the signal type of DVI-D/HDMI OUT jack. DVI-D/HDMI Color Space This selects the mode of the color space.
-
Page 51: System Menu
This selects the channel to assign to the connector and pin chosen using [Destination]. MIDI This makes settings for MIDI. * Paremeters for MIDI settings are described in the reference document for remote control. Download the document from the following Roland website. http://www.rolandsystemsgroup.net/ Remote This makes settings for remote control. - Page 52 Menu Operations and Menu List About Items to Save - [System] of [System Store Parameters] The following lists show which parameters are saved or not saved to MEMORY; saved items must be set to ON in the [System] of [System Store Parameters]. Save to MEMORY •...
-
Page 53: Saving Settings To Memory Buttons
Saving Settings to MEMORY Buttons You can save the current settings to a MEMORY button. The V-1600HD’s internal memory contains banks from 1 to 8, and up to 8 sets of settings can be saved in each bank, for a total of up to 64. -
Page 54: Saving Settings To A Usb Memory Device
Saving Settings to a USB Memory Device You can copy the values saved to the V-1600HD’s MEMORY buttons to a USB memory device. Connecting a USB Memory Device Connect the USB memory device to the USB MEMORY port on the side of the monitor. - Page 55 Press the [EXIT] button to exit the menu. At the [Parameter Storage] menu under [USB Memory], you can also carry out the operations described below. • [Load] This imports settings saved on the USB memory device into the V-1600HD. • [Save] This saves settings by overwriting.
-
Page 56: Returning To The Factory-Default State
Returning to the Factory-default State This returns various settings to their factory defaults. If video settings or parameter setting fail to resolve a problem, execute the factory reset to restore the mixer to its defaults. * Executing a factory reset causes all settings and saved values to be lost. Please be aware that all settings saved to MEMORY buttons are also lost. -
Page 57: Multi-Screen Modes
Multi-Screen Modes This chapter describes alternative modes of the V-1600HD. The V-1600HD’s operation mode is set to the DSK mode by default, and internal signal flow is as shown in the figure in “Switching the AUX Output Point” (p. 43). -
Page 58: Aux Mode
Multi-Screen Modes AUX Mode Using [Bus Structure] to select [AUX] switches the unit to the AUX mode. In this mode, the V-1600HD functions as an up or down converter, enabling simultaneous output of video having two different resolutions. * The operation methods when changing video in the AUX mode are the same as in the default mode. -
Page 59: Split Mode
Multi-Screen Modes Split Mode Using [Bus Structure] to select [Split] switches the unit to the split mode. This extracts, composites, and outputs just the vertical center portions of two video images. The video selected with PGM is output on the left side, and the video selected with PST/ EFFECT is output on the right side. -
Page 60: Span Mode
Multi-Screen Modes Span Mode Using [Bus Structure] to select [Span] switches the unit to the span mode. This mode extracts just the horizontal center portions of the video, then splits it in half outputting each half to each output. Source video at 16:9 is output as video at a wide 32:9 in the span mode. -
Page 61: Dual Mode
Multi-Screen Modes Dual Mode Using [Bus Structure] to select [Dual] switches the unit to the dual mode. In this mode, the different source images from two output connectors (1:PGM and 2) are output. The video selected with PGM is output from the [1:PGM] connector, and the video selected with PST/EFFECT is output from the [2] connector. -
Page 62: Appendices
• Never use any screws except the removed ones to block the screw holes. Using other screws may cause malfunction. • When reinstalling the rack mount angles, turn off the power to the V-1600HD and detach the power cord and all connection cables. Also, be... -
Page 63: Main Specifications
* In the interest of product improvement, the specifications and/or appearance of this unit are subject to change without prior notice. Name Plate A name plate bearing the power consumption, model name, and serial number of the V-1600HD is attached at the location shown below. -
Page 64: Troubleshooting
Has the mode setting for color space been made correctly? On the V-1600HD, you can make color-space settings for input channels 9 through 12 and for DVI-D output. When the color space of connected equipment is not clear, setting the value to [Auto] is recommended. -
Page 65: Index
Index AUX mode ..................58 PGM/PST ..................28 PinP ....................31 PinP Menu ..................48 projector ..................23 BANK ....................53 PST/EFFECT ..................29 Bus Structure ................. 57 rack ....................62 Chroma Key ..................34 rack-mount ..................62 component ..................20 recorder .................... - Page 66 For China...
- Page 67 For EU Countries This product is intended for use in the following Electromagnetic environments: E1: residential, E2: commercial and light industrial, E3: urban outdoors, E4: controlled EMC environment, ex. recording studio (broadcasting studio) which are specified in EN55103-1 and EN55103-2.