Table of Contents
Advertisement
Meridian 1
M1250/M2250 Attendant Consoles User Guide
Copyright Information
This Nortel documentation is protected by copyright. It may not be copied in any form or medium except pursuant to the
Nortel License to Copy Documentation ("License").
If a License has been purchased, it will be enclosed with this copy of Nortel documentation.
© 1998 Northern Telecom
All rights reserved
Information is subject to change without notice. Northern Telecom reserves the right to make changes in design or
components as progress in engineering and manufacturing may warrant.
This equipment has been tested and found to comply with the limits for a Class A digital device pursuant to Part 15 of the
FCC rules, and the radio interference regulations of Industry Canada.
These limits are designed to provide reasonable protection against harmful interference when the equipment is operated in a
commercial environment.
This equipment generates, uses and can radiate radio frequency energy, and if not installed and used in accordance with the
instruction manual, may cause harmful interference to radio communications.
Operation of this equipment in a residential area is likely to cause harmful interference in which case the user will be required
to correct the interference at their own expense.
SL-1 and Meridian 1 are trademarks of Northern Telecom.
i
Advertisement
Table of Contents

Related Manuals for Nortel Meridian M1250

Summary of Contents for Nortel Meridian M1250
-
Page 1: Copyright Information
M1250/M2250 Attendant Consoles User Guide Copyright Information This Nortel documentation is protected by copyright. It may not be copied in any form or medium except pursuant to the Nortel License to Copy Documentation ("License"). If a License has been purchased, it will be enclosed with this copy of Nortel documentation. -
Page 2: Table Of Contents
Your Meridian 1 attendant console 1 Dial pad 7 The Options menu (M2250) (4 line mode) 20 The Options menu (M1250) (4 line display) 25 Setting the buzz tone 27 The Options menu (M2250 only) (2 line display) 31 Using features 37... - Page 3 Contents Remote Call Forward 72 Call Forward/Hunt Override 75 Recovery on Misoperation of Attendant Console 76 Convenience features End-to-end signalling 77 Storing an Auto Dial number 78 Calling an Auto Dial number 80 Barge-in 81 Busy Verify 84 Attendant Monitor 86 Setting up Do-Not-Disturb 92 Canceling Do-Not-Disturb 94 Overriding Do-Not-Disturb 96...
- Page 4 Contents Automatic Wake-Up Programming a wake-up call 126 Canceling a wake-up call 128 Unanswered wake-up calls 129 Making a VIP wake-up call 130 Centralized Attendant Service (CAS) Answering a call to a remote console 131 Extending a call to an idle remote extension 132 Remote recall 133 Extending a call to a busy remote extension 134 Putting a call on silent hold 135...
- Page 5 Contents Message Center Taking a message 153 Delivering a message 155 Checking the status of a MSG WAITING signal 157 Supervisory features Supervisory mode 158 Monitoring other attendants 159 Calling an attendant 160 Transferring a call to an attendant 161 Supervisory assistance 162 Index...
- Page 6 Meri d i a n i s a trademark of Northern Tel e com Copyri g ht 1996 Northern Tel e com P0834426...
-
Page 7: Introduction
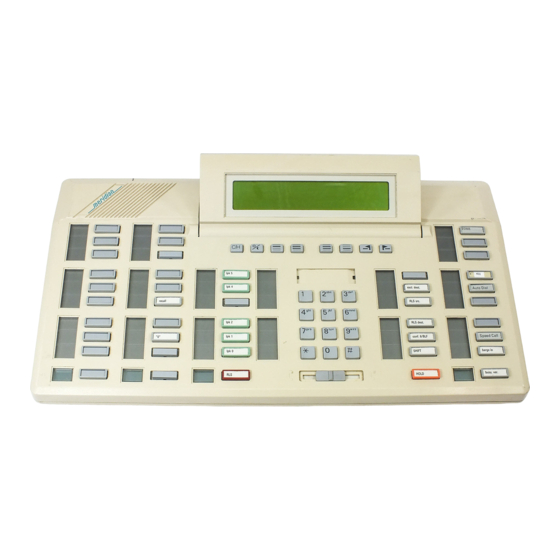
The M2250 attendant console reads “Meridian 1” on the first line of the display screen, along with the date and time. The M1250 attendant console has only the date and time on the first line of the display. The M1250 and M2250 consoles are virtually the same in operation. Differences between the two consoles are noted where applicable. - Page 8 When you dial a number, it shows up on the display screen. For some procedures, you will use the asterisk ( * ) or the octothorpe ( # ), which appears as an H on the M1250 attendant console. • • • • 2 • • • •...
- Page 9 When you dial a number, it shows up on the display. For some procedures, you will use the asterisk ( * ), which appears as a space, or the octothorpe (#), which appears as an H. When your telephone is idle… When your telephone is idle, the display looks something like this: 01-01-91 05:35:39PM (STATUS) The first line of the display shows the date and time.
- Page 10 Introduction When you have a call in progress… When you have a call in progress, the display looks something like this: The first line gives information about the source of the call. The source information may include the number of the extension that placed the call, and the name of the person who is calling, or the trunk line number for a call from outside the system.
- Page 11 Introduction Reading the display on 4 line display If the source information is too long to fit on Line 2, an arrow appears in either the upper right or upper left corner of the display. If the destination information is too long to fit on Line 3, an arrow appears in either the lower right or lower left corner of the display.
- Page 12 Introduction Alternating between the idle and active call display When you have no calls in progress, you can alternate between the idle display and the active call display by pressing the From the idle display, press the press the Note: You need to have the active call display showing when you want to: —...
-
Page 13: Dial Pad
Introduction The horizontal keystrip Directly below the display screen is a horizontal row of keys. They are: Centralized Attendant Service — If you are the attendant at a remote location, pressing this key automatically reroutes calls to a CAS attendant at the main location. - Page 14 The Trunk Group Busy keys enable you to deny users access to trunk groups from 0 to 9 (0 to 7 on the M1250) and have calls to those trunk groups sent to your console instead. The trunk group indicators show the status of each group of trunks: steadily lit —...
- Page 15 Introduction Vertical keystrip 2: Incoming Call Identification keys The next row contains ten Incoming Call IIndicator (ICI) keys and indicators. These identify the type of call coming to your console, such as internal, external, WATS, tie trunk, and so on. All incoming calls are automatically queued in the order of their arrival, and the appropriate ICI indicators go on.
- Page 16 Introduction The assignment and positioning of the ICI keys within the keystrip is flexible. Any of the following call types may be assigned to any of the ICI keys: Call Forward No Answer C. fwd. N.A. Call Forward Busy C. fwd. busy Foreign Exchange Interpositional Call inter pos.
- Page 17 The call is to a number for your organization as found in the public l. d. no. telephone directory. Up to four listed directory numbers can be assigned to your console. If you are answering calls for more than one organization, this key shows which organization is being called.
- Page 18 The call is on a Tie trunk. The call is on a Wide Area Telephone Service (WATS) trunk.
- Page 19 Introduction Vertical keystrip 3: loop pickup and release keys The third row from the left holds these keys with indicators: Loop Pickup Enables you to answer or place a call. There are six loop pickup keys, labeled lpk 0 through lpk 5. A source (S) and destination (D) indicator appears beside each lpk key.
- Page 20 Introduction Vertical keystrip 4: fixed feature keys This is what you will find in the second row of keys from the right: Exclude Source excl. src. Exclude Destination excl. dest. Release Source RLS src. Release Destination RLS dest. • • • • 14 • • • • Enables you to speak to the called party without the caller hearing.
- Page 21 Introduction Conference 6/BLF In normal mode, it enables you to establish a conference call of up to six conf. 6/BLF parties, including yourself. A maximum of two trunks can be in the conference at any one time. In shift mode, when the console is idle, this key allows you to input information from the dial pad to the Busy Lamp Field/Console Graphics Module.
- Page 22 Introduction Vertical keystrip 5: programmable feature keys The rightmost keystrip contains ten feature keys. These keys are programmed to suit the needs of your organization. Read the descriptions below for the keys you see on your console: Auto Dial auto D. Automatic Wake-Up A.
- Page 23 Introduction Calling Party Number Enables you to record the calling party number on an incoming collect call pty. no. call or to assign a special billing code to an incoming collect call. Call Park Enables you to place a call on hold without occupying a loop key on your call park console.
- Page 24 Introduction Do-Not-Disturb Individual dnd. ind. Malicious Call Trace call trace Message Cancellation msg. canc. Message Indication msg. indic. Meter meter Paging page Routing Control R. control • • • • 18 • • • • Enables you to place an individual extension or a predefined group of extensions in Do-Not-Disturb mode.
- Page 25 Introduction Speed Call Enables a previously stored phone number of up to 31 digits to be dialed by the system automatically, after you have keyed in the appropriate S. call one-, two-, or three-digit code. This key also enables selected attendants to assign codes to the stored phone numbers.
-
Page 26: The Options Menu (M2250) (4 Line Mode)
Introduction The Options menu (M2250) (4 line mode) The Options menu on the M2250 gives you the opportunity to set a number of display and console features to suit your preferences. It offers these choices: — set display-screen contrast — set buzz tone —... - Page 27 Introduction There are 16 levels of contrast between the characters you see on the screen and the background. Press 1 to increase the contrast. Press 2 to decrease the contrast. Press # to return to the Options menu. Setting the buzz tone If you press 2 on the Options menu, you see this screen: SETTING BUZZ TONE 1.
- Page 28 Introduction Press * again to see the third screen: SET LANGUAGE 1. POLSKI Move back and forth between these 3 screens using *, and select a language by pressing the corresponding number key on the dial pad. All display messages are then shown in the language of your choice.
- Page 29 Introduction Press 2 to set the date format. The date format screen looks like this: DISPLAY = DATE {DD-MMM-YY} # <exit> There are two formats for the date: day-month-year and month-day-year. Press * to change back and forth between the two formats. Press # to return to the previous screen. Press # to return to the Options menu.
- Page 30 Introduction Setting the key clicking If you press 5 on the Options menu, you see this screen: SET KEYCLICK 1. ON 4. PITCH – * <change> Press * to turn key clicking on and off. When key clicking is on, you hear a beep every time you press any key on the console.
-
Page 31: The Options Menu (M1250) (4 Line Display)
Press # to return to the Options menu. The Options menu (M1250) (4 line display) The Options menu on the M1250 gives you the opportunity to set a number of display and console features to suit your preferences. It offers these choices: —... - Page 32 Introduction Opening the Options menu To open the Options menu, press SHIFT and looks like this: OPTIONS MENU: 1. CONTRAST 4. SET TIME To set one of these options, you press on the dial pad the number listed beside the option. Notice the number 1 in the upper right corner of the screen.
-
Page 33: Setting The Buzz Tone
Introduction Closing the Options menu To close the Options menu, press # on either the first or second screen. The console remains in both Position Busy and shift mode. Press SHIFT to return to unshift mode, and press at your console again. Now let’s look at the screens you see when you select each of the options from the menu. - Page 34 Introduction Setting the language If you press 3 on the Options menu, you see this screen: SET LANGUAGE 1. ENGLISH 4. DEUTSCH The number in the upper right corner of the screen shows that this option takes up more than one screen. Press that number to see the second screen: SET LANGUAGE 1.
- Page 35 Introduction A short horizontal line, called the cursor, shows where your dial-pad entries will appear on the screen. First you enter hours (00-24) using the dial pad. The cursor automatically moves to the next spot. Here you enter minutes (00-59). When the cursor jumps to the last spot you enter seconds (00-59). Pressing the key moves the cursor to the start of the next input field.
- Page 36 Introduction Press 1 to set the time format. The time format screen looks like this: TIME DISPLAY * <change> There are two formats for the time: 12- and 24-hour format. Press * to change back and forth between the two formats. Press # to return to the previous screen. Press 2 to set the date format.
-
Page 37: The Options Menu (M2250 Only) (2 Line Display)
Introduction The Options menu (M2250 only) (2 line display) The Options menu when People’s Republic of China, Taiwan, or Korean languages are selected. When P.R.C. Taiwan, or Korean languages are selected, the Options menu will be shown in 2-line mode only. The options menu on the M2250 gives you the opportunity to set a number of display and console features to suit your preferences. - Page 38 Introduction Closing the Options menu To close the Options menu, press #. The console remains in the Position Busy mode. Choosing menu options To select one of the options listed on the display, use the dial pad to enter the number that corresponds to the option.
- Page 39 Introduction Press 1 to hear a continuous buzz while you set the pitch and volume. Then use 3 and 4 to raise and lower the buzz pitch. Use 5 and 6 to raise and lower the buzz volume. Once you‘ve adjusted the pitch and volume, press 2 to turn off the continuous buzz.
- Page 40 Introduction Level 2 1. Irish 2. Turkish 3. Katakana 4. P.R.C. 5. Taiwan 6. Korean Level 3 1. Polish 2. Czech/Slovak 3. Hungarian To select one of the languages listed on the menu, use the dial pad to enter the number that corresponds to the option.
- Page 41 Introduction Changing the System time Press CHANGE to update the system time: DISPLAY: TIME <#> EXIT { 12 HOUR } <*> CHANGE Enter the new time from your console key pad in hours and minutes (HH MM). Press Change again. Press # to return to the previous display. Note: This changes the time for the entire system, not just on the attendant console.
- Page 42 Introduction SET KEYCLICK (1–7) [SYMBOL] 7. CHANGE Press 7 to turn the key clicking on and off. A speaker symbol is displayed when key clicking is on. When key clicking is on, you hear a beep every time you press any key on the console. Press 1 to hear a continuous key click beep while you set the pitch and volume.
-
Page 43: Using Features
Press # to return to the previous display. Using features You can still use all the features described in the M1250 and M2250 Attendant Console User Guide. All of the features work exactly the same except the following: — Store an auto-dial number —... -
Page 44: Before You Start
Introduction Before you start Before you start there are a few terms and concepts you should be familiar with: Abbreviations — dest. short for “destination” — excl. short for “exclude” — ICI short for “incoming call indicator” — lpk short for “loop pickup key” —... - Page 45 Trunk group A trunk group is a group of telephone lines of a certain type (public, WATS, Tie, and so on). Networking Two types of networks are discussed in this document. ESN is Electronic Switched Network and ISDN is Integrated Services Digital Network.
- Page 46 Introduction Symbols The following symbols are used in this guide: • • • • 40 • • • • The musical note signifies that one of the responses of the console is audible (it may be ringing or busy signal at the called end, or the buzz tone heard through the console).
-
Page 47: Basic Call Processing
Basic call processing Answering a call Calls are queued in order of arrival. The call types are shown by the appropriate Incoming Call Indicators (ICIs). You receive a call. Press the lpk key beside the flashing S indicator. Note: To give priority to a certain type of call, answer by pressing the ICI key rather than the lpk key. You are connected to the call regardless of its place in the queue. -
Page 48: Extending A Call To An Idle Extension
Basic call processing Extending a call to an idle extension After you have answered a call, you can extend it to the extension the caller requests. • • • • 42 • • • • Dial the requested extension. To end your connection before the called party answers, press RLS immediately. -
Page 49: Extending A Call To A Busy Extension (With Camp-On)
Basic call processing Extending a call to a busy extension (with Camp-on) After you have answered a call, you can extend it to the extension the caller requests. Dial the requested extension. If you do not hear a busy signal and the caller wishes to wait, you can camp the call onto the busy extension by... -
Page 50: Extending A Call To A Busy Extension (With Hold)
Basic call processing Extending a call to a busy extension (with Hold) To extend a call to a busy extension which is not allowed camp-on, or which already has a call camped onto it, you can place the caller on hold. You must then reenter the call periodically to see if the extension is free. -
Page 51: Holding A Call On A Lpk Key
Basic call processing Holding a call on a lpk key In some cases you may receive a call from someone who wishes to be transferred to several different extensions in turn. You can hold the call on a lpk key so that the caller remains connected to your console when the called party hangs up. - Page 52 Basic call processing Note 1: Note 2: • • • • 46 • • • • When you only wish to put a call on hold, answer it, press HOLD, and then RLS If you wish to activate the Secrecy feature, which excludes the caller until connected to the called party, press excl.
-
Page 53: Parking A Call
Basic call processing Parking a call Call Park enables you to put a call on hold without occupying a lpk key on your console. You can, for example, hold a call on a Call Park extension while paging a called party. You wish to park a call, perhaps because the caller requests you to... -
Page 54: Timed Recall From An Unanswered Extended Call
Basic call processing Timed recall from an unanswered extended call If a called extension does not answer within a set time (usually 30 seconds), the call is automatically returned to your console. The recall incoming call indicator (ICI) goes on to signal this type of call. •... -
Page 55: Timed Recall From An Unanswered Parked Call
Basic call processing Timed recall from an unanswered parked call A parked call, if unanswered, is returned to you after a set time. You receive a timed recall from an unanswered parked call. Press the lpk key beside the flashing S and slowly flashing D indicators. -
Page 56: Recall From An Extension Using Link Or Att Recall
Basic call processing Recall from an extension using LINK or ATT RECALL An extension user, while talking to someone on the phone, may recall you by pressing ATT RECALL, or by pressing LINK once and dialing your number, depending on the type of extension. The recall ICI goes on. -
Page 57: Recall From An Extension Using Transfer
Basic call processing Recall from an extension using Transfer An extension user, while talking to someone on the phone, may recall you by pressing Transfer and dialing your number. The recall ICI goes on. You receive a recall. Press the lpk key beside the quickly flashing S indicator. -
Page 58: Recall From An Extension Using Conference
Basic call processing Recall from an extension using Conference An extension user, while talking to someone on the phone, may recall you by pressing Conference and dialing your number. The “0” ICI goes on. Note: This recall procedure describes a call that was not originally extended through your console (S indicator active, D indicator off). -
Page 59: Recall To Same Attendant
Basic call processing Recall to Same Attendant X11 release 20 introduces call Recall to Same Attendant. This feature functions the same way as normal call recall, with an enhancement. Previously, calls recalled to the first available attendant. With this feature enabled calls you extended can be queued to return to you only when you are idle. If you are busy, the calls remain in queue until you are available. -
Page 60: Calling An Extension
Basic call processing Calling an extension You can place a call to any extension within the system. • • • • 54 • • • • Press an idle lpk key. Dial the extension. Press RLS to end the call. The ... -
Page 61: Calling An Outside Number
Basic call processing Calling an outside number You can place a call to a number outside the system by dialing a trunk access code followed by the desired number. Press an idle lpk key. Dial the required trunk access code. Dial the outside number. -
Page 62: Trunk-To-Trunk Call
Basic call processing Trunk-to-trunk call A user, while outside the system, may call to request access to an outgoing trunk. Note: If neither of the trunks involved in the call has answer supervision, the call is automatically held on the lpk key. When both parties hang up, the S and D indicators remain on. Press the lpk key and then RLS src. -
Page 63: Through-Dialing
Basic call processing Through-dialing Extension or tie line users may request access to numbers or trunks which they are restricted from accessing themselves. Once you have accessed the trunk, the user is free to dial out. You can provide through-dialing to all but fully restricted extensions. You receive a call from a restricted extension or tie trunk. -
Page 64: Setting Up A Conference Call
Basic call processing Setting up a conference call You can set up a conference call for as many as six people, including yourself, at the request of either an extension user or an outside caller. A maximum of two trunks can be in the conference at one time. •... - Page 65 Basic call processing If you want to hold the conference at your console, press RLS. If you want to release the conference from your console, press RLS src., then RLS. Note: To reenter a conference that is being held at your console, press the lpk key beside the flashing lpk indicator.
-
Page 66: Calling Another Attendant
Basic call processing Calling another attendant With this feature, you can call another attendant in your multiple-console group. Note 1: Note 2: Note 3: • • • • 60 • • • • Press an idle lpk key. Dial the attendant access code. -
Page 67: Transferring A Call To Another Attendant
Basic call processing Transferring a call to another attendant With this feature, you can transfer a call to another attendant in your multiple-console group. The person to whom you are speaking wishes to speak to another attendant. Dial the attendant access code, then dial the appropriate attendant code. -
Page 68: Break-In (Post-Dial)
Basic call processing Break-in (post-dial) You can interrupt an existing connection in order to offer a call or relay an important message to one of the parties. • • • • 62 • • • • Someone calls you and requests that you relay a message or extend the call to someone already... - Page 69 Basic call processing You are in a three-way connection with the two parties in the established call. Relay the message, or announce the incoming call. Press excl. dest. to speak privately with the caller without ending the three-way connection. Press RLS to end the three-way connection and remain connected to the caller.
-
Page 70: Break-In (Pre-Dial)
Basic call processing Note 2: If the call is from an internal source, you cannot extend the call or camp on to the extension Note 3: Press RLS dest. and redial the extension to extend the call or camp on to the extension. Break-in (pre-dial) You can interrupt an existing connection in order to offer a call or relay an important message to one of the parties. - Page 71 Basic call processing Press BKI to interrupt the connection. You are in a three-way connection with the two parties in the established call. Relay the message, or announce the incoming call. Press excl. dest. to speak privately with the caller without ending the three-way connection.
-
Page 72: Break-In (Busy Verify)
Basic call processing Break-in (busy verify) You can check whether an extension is busy or idle before you attempt to break in. • • • • 66 • • • • Press RLS to end the three-way connection and remain connected to the caller. - Page 73 Basic call processing Dial the extension you wish to check. You are in a three-way connection with the parties in the established call. Press RLS to end your connection in the call. If the DN is idle, you hear ringing, the lpk indicator flashes slowly and the bki indicator goes off.
-
Page 74: Sending A Warning Tone To An Extension In Line Lockout
Basic call processing Sending a warning tone to an extension in line lockout When a handset is left off a telephone for an extended period of time, the telephone goes into a state called “line lockout.” . Note 1: Note 2: •... -
Page 75: Requeueing A Call To The Next Available Attendant
Basic call processing Requeueing a call to the next available attendant You can requeue an incoming call or recall to the next available attendant. You receive a call. Press If the system is in Night Service, press SHIFT, and then The ICI indicator goes on and the S indicator flashes. -
Page 76: Timed Reminder Recall
Basic call processing Timed Reminder Recall Timed Reminder Recall calls you after a period of time to remind you that a transferred call has not yet been answered. • • • • 70 • • • • You receive a call for transfer. -
Page 77: Centrex/Exchange Line Switchhook Flash
Basic call processing Centrex/Exchange Line Switchhook Flash Centrex Switchhook Flash (THF) allows you to signal the Central Office during an established call to request activation of a Centrex service such as call transfer or three-way calling. Press the Switchhook Flash key. Press the DN before the tone ends. -
Page 78: Remote Call Forward
Basic call processing Remote Call Forward • • • • 72 • • • • Press an idle loop key followed by the RFW key. Dial the DN of the set to be forwarded. RFW key is flashing. Loop key is steadily lit. If the password is required, the RFW key is winking, and the console... - Page 79 Basic call processing Dial the password required followed by #. The user can now enter a new CFW DN or press the RFW key to activate or deactivate the stored CFW DN. If a new CFW DN is entered, it must be preceeded by an RFW key press.
- Page 80 Basic call processing • • • • 74 • • • • When the RCFW operation is in this state, the user has three options: a. Press the release or release source key to complete RCFW operation. b. Press the RFW key to reverse the CFW status.
-
Page 81: Call Forward/Hunt Override
Camp-On, if Camp- On is applicable. In addition, Ring again can be placed against a telephone for which Call Forward/Hunt Override was used an a busy telephone was encountered. • • • • 75 • • • •... -
Page 82: Recovery On Misoperation Of Attendant Console
Basic call processing Recovery on Misoperation of Attendant Console The Recovery on Misoperation of Attendant Console feature provides a safeguard on the Meridian 1 to prevent calls from being inadvertently disconnected. The following lists the console functions in the event of accidental misoperation: Pressing the Release Key or Loop Key is ignored when: •... -
Page 83: Convenience Features
(Hold, Call Park, Charge Account, Release) will cancel end-to-end signalling. The EES indicator fast flashes. Line two (M1250) or line three (M2250) of the display shows each number you dial. You may... -
Page 84: Storing An Auto Dial Number
Convenience features Storing an Auto Dial number With Auto Dial, you can store a number (including access codes if necessary) against an Auto Dial key. You can also change a number already stored against an Auto Dial key using this procedure. •... - Page 85 Convenience features Note 1: You can store a number of 4, 8, 12, 16, 20, or 24 digits. If you try to store more than 24 digits, you hear a fast busy signal. Press auto D. to turn the auto D. indicator off. Begin again.
-
Page 86: Calling An Auto Dial Number
Convenience features Calling an Auto Dial number After you have stored a number against an Auto Dial key, you can dial it by pressing auto D. Note 1: Note 2: • • • • 80 • • • • Press an idle lpk key. Press the required auto D. -
Page 87: Barge-In
Convenience features Barge-in With Barge-in, you can verify that a trunk is in working order, or check the status—busy or idle— of a trunk. Press an idle lpk key. Press Barge-In. The lpk indicator goes on. The barge in indicator goes on. - Page 88 Convenience features Note: Barge-in cannot be used to verify the status of release link trunks (RLTs) used with Centralized Attendant Service (CAS). • • • • 82 • • • • Dial the required trunk access code and route member number, then press #.
- Page 89 Convenience features Attendant break-In Busy indication and Prevention If an attendant, during a break-in operation, dials a busy extenstion, the Attendalt Console display provides one of the following customedefined indications: — three dashes, appended to the end of a digit display, (if the busy staiton is involved in an external call), or —...
-
Page 90: Busy Verify
Convenience features Busy Verify With Busy Verify, you can verify that an extension is in working order, or check the status—busy or idle—of an extension. • • • • 84 • • • • Press an idle lpk key. Press busy ver. Dial the extension you wish to check. - Page 91 Convenience features To ring the extension, press Press RLS to end your connection in the call. If the called party answers, the S and busy ver. indicators go on steadily. The RLS indicator goes on; you are free to process calls. •...
-
Page 92: Attendant Monitor
Convenience features Attendant Monitor The Attendant Monitor feature provides modifications to the Busy Verify and Barge-In features. Monitoring a DN • • • • 86 • • • • Press an idle Loop key. Press the Busy Verify key. Press the Busy Verify key again to enable Attendant Monitor. - Page 93 Convenience features Attendant Monitor is blocked when the extension is in some transient state (e.g., Conference or Transfer) Attendant Monitor is blocked when the extension is idle, receiving busy tone, or receiving overflow tone. Attendant Monitor is blocked when the extension is involved with another attendant.
- Page 94 Convenience features • • • • 88 • • • • Press the Rls key to end Attendant Monitor. If the Attendant Monitor Customer Tone is allowed (TOA), a burst of tone is sent to the connected parties every 16 seconds. When the monitored DN disconnects from the call, Attendant Monitor is...
- Page 95 Convenience features Monitoring a Trunk Press an idle Loop key. Press the Barge-In key. Press the Barge-In key again to enable Attendant Monitor. Dial the trunk access code and route member number, then press "#". The Loop indicator is lit The Barge-In lamp is lit.
- Page 96 Convenience features Attendant Monitor is blocked when the trunk is not assigned. Attendant Monitor is blocked when the trunk is alreadly being monitored by another attendant. Attendant Monitor is active when the trunk is busy. The attendant is able to listen to all parties on the trunk.
- Page 97 Convenience features Press the Rls key to end Attendant Monitor. The Rls lamp is lit and the attendant is free to process calls. Deactivation occurs due to any one of the following: The RLS key on the Attendant Console is pressed.
-
Page 98: Setting Up Do-Not-Disturb
Convenience features Setting up Do-Not-Disturb An extension in Do-Not-Disturb (DND) mode is free to place calls but appears busy to all incoming calls. You can put one extension or a predefined group of extensions into Do-Not-Disturb mode. • • • • 92• • • • Press an idle lpk key. - Page 99 Convenience features Press dnd. ind. again. Press RLS to end the procedure. Note: If you have dnd. group keys, the procedure is simpler: at any point, press the dnd. group key for the group of extensions you wish to place in do-not-disturb mode. The dnd. group indicator flashes briefly, then goes on.
-
Page 100: Canceling Do-Not-Disturb
Convenience features Canceling Do-Not-Disturb You can cancel Do-Not-Disturb (DND) for a single extension or for a predefined group of extensions. • • • • 94 • • • • Press an idle lpk key. Press dnd. ind. You can now cancel individual or group DND. - Page 101 Convenience features Press dnd. ind. again. Press RLS to end the procedure. Note: If you have dnd. group keys, press the dnd. group key beside a dnd. group indicator which is on, to cancel DND for that group. The dnd. group indicator flashes briefly, then goes off. The dnd.
-
Page 102: Overriding Do-Not-Disturb
Convenience features Overriding Do-Not-Disturb A dnd. ind. indicator which is on tells you that you have dialed an extension in Do-Not-Disturb mode. You can temporarily override DND for that call using this procedure. Note: To override DND for an extension within a group that has been placed in Do-Not-Disturb, press an idle lpk key, press the appropriate dnd. -
Page 103: Testing Do-Not-Disturb
Convenience features Testing Do-Not-Disturb When the dnd. ind. indicator goes on steadily, Do-Not-Disturb is functioning properly. Use this procedure to determine whether DND is working properly for an extension or group of extensions. Press an idle lpk key. To test individual DND, dial the extension previously placed in DND mode. -
Page 104: Tracing A Malicious Call
Convenience features Tracing a malicious call Malicious Call Trace lets you trace nuisance calls being presented to your console. Note: A call trace report is printed on the maintenance terminal at your company. The report identifies the source or destination, or both. •... -
Page 105: Do Not Disturb
Convenience features Do Not Disturb Press an idle lpk key. To test individual DND, dial the extension previously placed in DND mode. To test group DND, dial one extension within a group previously placed in DND. Press RLS. The lpk indicator goes on. You hear a busy signal. -
Page 106: Night Service
Convenience features Night Service Night Service allows you to connect incoming trunks to selected Night Service extensions. You can assign any number of trunks to the same Night Service extension. • • • • 100 • • • • Press an idle lpk key. Press SHIFT. - Page 107 Convenience features To cancel an existing Night Service connection, dial *, then #. Repeat steps 1 through 4 for each trunk to be put into or taken out of Night Service. Press RLS to end the procedure. Trunk answer from any station (TAFAS) is now allowed.
-
Page 108: Turning Night Service On And Off
Convenience features Turning Night Service on and off To determine the Night Service setting: Night Service permits incoming calls that would normally be directed to the console to be routed to a preselected destination when the console is unattended. You can turn Night Service on or off for a single- or multiple-console system. -
Page 109: Enhanced Night Service
This feature modifies the existing Night Service operation by allowing Public Network (Central Office [CO], Direct Inward Dial [DID], Foreign Exchange [FEX], and Wide Area Telephone service [WAT]) trunks to be assigned to specific Directory Numbers (DN) during Night Service. - Page 110 Convenience features To select a new Night Service: Dial a one-digit (0-9) option number Press the RLS key. To activate Enhanced Night Service: Press the Night key, or the Position busy key (if you are the last active attendant). • • • • 104 • • • • The old Night Service Option number (X) is shifted and new Option...
-
Page 111: Turning Enhanced Night Service On And Off
Convenience features Turning Enhanced Night Service on and off Enhanced Night Service permits incoming calls that would normally be directed to the console to be routed to a preselected destination when the console is unattended. Your console may be equipped with either regular Night Service or enhanced Night Service, but not both. -
Page 112: Controlling Did Routes
Convenience features Controlling DID routes Direct inward dialing permits incoming calls from outside lines that would normally be directed to the console to be routed to a preselected destination. Incoming DID digit conversion translates the digits that are actually dialed into digits that correspond to internal extensions. You can direct calls coming in on DID trunks either to a set of extensions that are programmed as night destinations, or you can direct them to normal extensions. - Page 113 Note 3: If the DID route has been changed at a telephone (by the system administrator), you cannot change it at your console. All indicators go off.
-
Page 114: Paging
Convenience features Paging You can page someone over your organization’s paging equipment through your console if the two are connected. • • • • 108 • • • • Press an idle lpk key. Press page and hold it down while you make your announcement. -
Page 115: Radio Paging - Automatic Post-Selection
Convenience features Radio Paging - Automatic post-selection Lift the handset. Enter the DN of the party to be paged. Press the RPAG key (for RPA). Dialtone is heard. Set receives ringback or busy tone if DN is valid. Set receives CTVN treatment if DN is invalid. -
Page 116: Radio Paging - Manual Pre-Selection
Convenience features Radio Paging - Manual pre-selection • • • • 110 • • • • Lift the handset. Enter the RPAC (FFC) for initiating RPA. Enter the DN of party you wish to reach. Enter mode digit. Dialtone is heard. Set receives paging tone if FFC is valid. - Page 117 Convenience features Enter information to be sent. Enter # for end of information. Set receives ringback tone, call progress tones or silence (as configured) if paging was successful. Set receives busy tone if absence signal is received. • • • • 111 • • • •...
-
Page 118: Radio Paging - Manual Post-Selection
Convenience features Radio Paging - Manual post-selection • • • • 112 • • • • Lift the handset. Enter the DN of the party to be paged. Press the RPAG key (for RPA). Dialtone is heard. Set receives ringback or busy tone if DN is valid Set receives CTVN treatment if DN is invalid. -
Page 119: Radio Paging - Automatic Pre-Selection
Convenience features Radio Paging - Automatic pre-selection Lift handset. Enter the RPAC (FFC) for initiating RPA. Enter the DN of party to be paged. Set receives dialtone. Set receives paging tone if FFC is valid. Set receives CTVN treatment if FFC is invalid. Set receives congestion tone (as configured) if no trunk is available in a... -
Page 120: Position Busy
Convenience features Position Busy Position Busy allows you to make your console appear busy, thus preventing incoming calls from reaching you. Note 1: Note 2: • • • • 114 • • • • To activate Position Busy, press your console is idle (all lpk indicators off). -
Page 121: Speaking Privately (Splitting)
Convenience features Speaking privately (Splitting) Splitting allows you to talk to a called party without the caller hearing, or to talk to a caller without the called party hearing. A caller requests an extension. To exclude the caller from the connection, press excl. - Page 122 Convenience features Note 1: Note 2: • • • • 116 • • • • The Secrecy feature automatically prevents a voice connection between caller and called party while you are extending a call. Splitting allows you to talk selectively and privately to caller and called party while you are extending a call, or while you are actually connected to a call.
-
Page 123: Storing A Speed Call Number
Convenience features Storing a Speed Call number If your console is designated a Speed Call controller, you can store a number for Speed Call and use the Speed Call codes. Also use this number-storing procedure to change a number stored against a Speed Call code. - Page 124 Convenience features Note 1: Note 2: Note 3: Note 4: Note 5: Note 6: — SPRE code + 6 + authorization code — SPRE code + 6 + authorization code + # — SPRE code + 6 + authorization code + # + trunk access code + phone number Note 7: •...
-
Page 125: Calling A Speed Call Number
Convenience features Calling a Speed Call number If your console is designated a Speed Call user, you can place a call by dialing a one-, two-, or three-digit access code. Press an idle lpk key. Press S. call. [If you do not have this key, dial the SPRE code plus 73, the speed-call access code.]... -
Page 126: Storing A Stored Number Redial Number Ahead Of Time
Convenience features Storing a Stored Number Redial number ahead of time With Stored Number Redial (SNR), you can store one number of up to 31 digits for later use. Note 1: Note 2: Note 3: • • • • 120 • • • • Press snr. -
Page 127: Storing A Stored Number Redial Number During A Call
Convenience features Storing a Stored Number Redial number during a call You can use Stored Number Redial while trying to establish a call (when the other end is ringing or busy), or during an established call (when you are talking to someone at the other end). If on an established call, go directly to step 3. -
Page 128: Redialing A Stored Number
Convenience features Redialing a stored number Stored Number Redial can be used when you hear either dial tone or special dial tone. This means that SNR can be used during established calls to transfer or conference a call. • • • • 122 • • • • Press an idle lpk key. -
Page 129: Displaying And Changing The Night Service Option Number
Convenience features Displaying and changing the Night Service option number As part of enhanced Night Service, you can display and change the Night Service option number. The Night Service option number tells you which night number incoming calls will be directed to. To display the current Night Service option number, press an idle lpk... -
Page 130: Enhanced Secrecy
Convenience features Enhanced Secrecy The Enhanced Secrecy feature ensures that either the caller or the called party is always excluded from the call when you are talking to the other party. • • • • 124 • • • • Dial the requested extension. - Page 131 Convenience features Press HOLD, then RLS, to exclude yourself from the call, but keep it on hold at the console. You can reenter the call later. To reenter the call, press the lpk key beside the slowly flashing S indicator. Note 1: In step 1, press excl.
-
Page 132: Automatic Wake-Up
Automatic Wake-Up Programming a wake-up call With Auto Wake-up, you can instruct the system to provide automatic wake-up calls at requested times. If extension numbers are not the same as room numbers, you must translate the room numbers into the corresponding extension numbers. - Page 133 Automatic Wake-Up If the requested wake-up time is acceptable, press A. wake up again, then press RLS. If the initial request was not accepted, the next available time is displayed. Enter the new time, press A wake up, then press RLS. Note: If the requested wake-up time is not acceptable to the system, the display shows alternative wake-up times in this order: 5 minutes earlier than the requested time;...
-
Page 134: Canceling A Wake-Up Call
Automatic Wake-Up Canceling a wake-up call Use this procedure to cancel a wake-up call that has already been entered into system memory. • • • • 128 • • • • A hotel guest calls to The wake up indicator request that a wake-up goes on. -
Page 135: Unanswered Wake-Up Calls
Automatic Wake-Up Unanswered wake-up calls If a guest does not respond to the first wake-up call, the system makes up to two more attempts at 5-minute intervals. If the guest does not answer after the third call, the system, if set for this option, notifies you of an unanswered wake-up call. -
Page 136: Making A Vip Wake-Up Call
Automatic Wake-Up Making a VIP wake-up call At the requested time, you will provide a personal wake-up call to a guest with VIP status. Note: After a maximum of three attempts, if the guest still does not answer the VIP wake-up call, a message prints on the background terminal stating that the wake-up was tried, but unsuccessful. -
Page 137: Centralized Attendant Service (Cas)
Centralized Attendant Service (CAS) Answering a call to a remote console With Centralized Attendant Service (CAS), attendant services for multiple locations can be provided from a single location. As a CAS attendant, you can handle calls that would normally be handled by the attendants at a remote location. -
Page 138: Extending A Call To An Idle Remote Extension
Centralized Attendant Service (CAS) Extending a call to an idle remote extension After answering a call to a remote console, you can extend it to the desired extension at the remote location. • • • • 132 • • • • The caller requests an extension at the remote location. -
Page 139: Remote Recall
Centralized Attendant Service (CAS) Remote recall When you extend a call to an idle extension at a remote location and the called party does not answer within a set time, you are automatically recalled by the caller. You receive a recall from a remote location. -
Page 140: Extending A Call To A Busy Remote Extension
Centralized Attendant Service (CAS) Extending a call to a busy remote extension You can route one call to a busy extension at a remote location if camp-on is allowed at the busy end. If the called extension does not become idle within a set time, you are automatically recalled by the camped caller. -
Page 141: Putting A Call On Silent Hold
Centralized Attendant Service (CAS) Putting a call on silent hold When one call is already camped onto a busy extension and a third caller wishes to wait for a connection, you can put the third caller on silent hold until camp-on becomes possible. You are automatically recalled by the caller after a set time. -
Page 142: Transferring A Recall To Another Remote Extension
Centralized Attendant Service (CAS) Transferring a recall to another remote extension A called party at a remote location can transfer a call back to you, which you can then extend to another extension. • • • • 136 • • • • You receive a recall from a remote location. -
Page 143: Charge
Charge Entering an account number after dialing a call Use this procedure to assign a charge account number to an outgoing call after you have dialed the call. You have dialed an outgoing call for an extension at your location. Press chg. [If you do not have this key, press conf. -
Page 144: Calling Party Number
Charge Calling Party Number You can assign a billing code to an incoming collect call or record the caller’s number. Charges are then applied against the caller’s number or the billing code. Calling Party Number records are useful for confirming the phone company’s billing of collect calls. •... -
Page 145: Metering Calls
Charge Metering calls Calling Party Numbers may consist of up to 23 digits (including * and # if needed). When an extension or tie line user makes an outgoing call you can flag it as a metered call. Once the call has ended, you receive a recall providing charge information for the call. -
Page 146: Answering Meter Recalls
Charge Answering meter recalls When a metered call ends or is modified (for example, transferred), you receive a recall providing charge information on the metered call. The recall is presented on the meter recall ICI key. Note 1: Note 2: •... -
Page 147: Network Attendant Service (Nas)
Network Attendant Service (NAS) Network Attendant Services (NAS) allows attendant console positions to be dispersed in multiple locations within the network. NAS provides attendant console functions throughout the network just as if the attendant was local. Feature operation across the network is the same as for local calls. These features are supported on NAS calls, so refer to the operations described in this guide. -
Page 148: Answering A Call From A Remote Console
Network Attendant Service (NAS) Answering a call from a remote console With Network Attendant Service (NAS), attendant services for multiple locations can be provided from a single location. As a NAS attendant, you can handle calls that would normally be handled by the attendants at a remote location. -
Page 149: Extending A Call To An Idle Remote Extension
Network Attendant Service (NAS) Extending a call to an idle remote extension After answering a call to a remote console, you can extend it to the desired extension at the remote location. You receive a call intended for a remote console. -
Page 150: Remote Recall
Network Attendant Service (NAS) Remote recall When you extend a call to an idle extension at a remote location and the called party does not answer within a set time, you are automatically recalled by the caller. Note: Calling Line ID supplies the information regarding the source of the recall. •... -
Page 151: Extending A Call To A Busy Remote Extension
Network Attendant Service (NAS) Extending a call to a busy remote extension You can route a call to a busy extension at a remote location if camp-on is allowed at the busy end. If the called extension does not become idle within a set time, you are automatically recalled by the camped caller. -
Page 152: Transferring A Call To Another Remote Extension
Network Attendant Service (NAS) Transferring a call to another remote extension A called party at a remote location can transfer a call back to you, which you can then extend to another extension. • • • • 146 • • • • You receive a call from a remote location. -
Page 153: Networking (Esn, Isdn) Features
Networking (ESN, ISDN) features Extending a call—Off-Hook Queuing When an extension user requests an ESN location for which a trunk is not immediately available, you can wait, off-hook, until a trunk becomes available or release the connection and allow the caller to wait for the trunk. -
Page 154: Expensive Route Warning Tone
Networking (ESN, ISDN) features Expensive Route Warning Tone When an extension user requests an ESN location, you may be signaled that only an expensive route is available. The caller can accept the expensive route (direct distance dialing) or try again later. •... -
Page 155: Charge Account
Networking (ESN, ISDN) features Charge Account If your console has a charge key, you can assign a charge account number to a call about to be extended to an ESN location. A caller requests an extension at a distant ESN location and wishes to charge the call to an account number. -
Page 156: Authorization Code
Networking (ESN, ISDN) features Authorization code When an extension user requests an ESN location, you may have to enter an authorization code to override the access restrictions assigned to the user’s extension. Authorization codes are issued to extension users with special calling needs. •... -
Page 157: Network Speed Call
Networking (ESN, ISDN) features Network Speed Call With Network Speed Call, you can extend calls to a selected number at an ESN location by dialing a one-, two-, or three-digit code. Press a lpk key. Dial the network access code, the Network Speed Call list access number, and the one- to three-digit code for the... -
Page 158: Routing Control
Networking (ESN, ISDN) features Routing control You can use ESN routing control to modify extension users’ network access. When routing control is on, each extension usually has more restrictions. Turning routing control off restores the Network Class of Service (NCOS) assigned to each ESN user. •... -
Page 159: Message Center
Message Center Taking a message A call is forwarded to you when the original destination is busy or does not answer. You can leave a signal at the called extension, either during the call or when there is no call in progress, to indicate that a message is waiting. - Page 160 Whenever you need to leave a MSG WAITING signal (when no call is in progress), press msg. indic., dial the extension number, and press msg. indic. again. The MSG WAITING signal may be, for example, a flashing MSG WAITING indicator or a stutter dial tone; it depends on the type of telephone.
-
Page 161: Delivering A Message
Message Center Delivering a message When someone calls to retrieve their messages, you can cancel the MSG WAITING signal at their extension. You can also turn a MSG WAITING signal off when there is no call in progress. You receive a call from someone wishing to retrieve a message. - Page 162 Message Center Note: A person calls you to retrieve messages by pressing MSG WAITING or by dialing a message-center access code. When the retrieval call first appears on your console, the msg. canc. indicator: — goes on when there is no MSG WAITING signal at the called extension —...
-
Page 163: Checking The Status Of A Msg Waiting Signal
Message Center Checking the status of a MSG WAITING signal When you have no active calls on your lpk keys, and your msg. indic. and msg. canc. indicators are both off, you can check the status of an extension’s MSG WAITING signal. Press msg. -
Page 164: Supervisory Features
Supervisory features Supervisory mode With supervisory console, pressing your console in position-busy mode, preventing calls from ringing at your console. • • • • 158 • • • • enables you to perform supervisory functions. It also puts To use supervisory No further calls will ring at your console. -
Page 165: Monitoring Other Attendants
Supervisory features Monitoring other attendants As supervisor, you can monitor selected attendant calls without being detected by either the attendant or the caller. Once in position-busy mode, press an idle lpk key. Press obs/B. ver. Dial the access code, then the attendant number. -
Page 166: Calling An Attendant
Supervisory features Calling an attendant As supervisor, you can call an attendant in your group, unless their console is in position-busy mode. Note 1: If you dial an incorrect attendant code, you hear a fast busy signal and the S indicator remains off. -
Page 167: Transferring A Call To An Attendant
Supervisory features Transferring a call to an attendant As supervisor, you can transfer a call to an attendant in your group, even if their console is in position-busy mode.• The person to whom you are speaking wishes to speak to another attendant. -
Page 168: Supervisory Assistance
Supervisory features Supervisory assistance Despite the fact that your console may be in supervisory mode, another attendant can call you for assistance or transfer a call to you. Note: If an attendant tries to transfer a call to you while your console is in supervisory mode, the call waiting indicator goes on.