Fiat Bravo Service Manual
Hide thumbs
Also See for Bravo:
- Service manual (869 pages) ,
- Owner's handbook manual (299 pages) ,
- Owner's manual (246 pages)

Related Manuals for Fiat Bravo


Summary of Contents for Fiat Bravo
- Page 1 Fiat Bravo/a Service Manual Volume 1 C l i c k h e r e to c h o o s e c h a p t e r Gearbox Jk Oiff ^ Broking System 1 •y Braking System 2...
-
Page 2: Table Of Contents
Bravo-Brava I n t r o d u c t i o n a n d t e c h n i c a l d a t a Index 0 0 . page INTRODUCTION - Car exterior -Identification-data - Weights - Performance-Fuel consumption - Dimensions . -
Page 3: Car Exterior
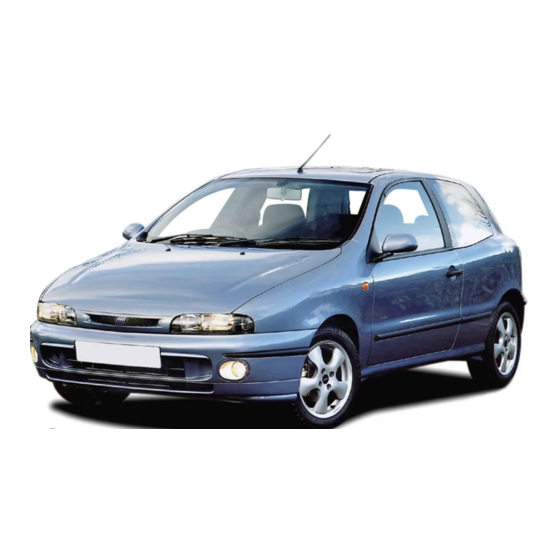
Bravo-Btava I n t r o d u c t i o n Car exterior O O . o P4A001A01 3/4 front view - Bravo P4A001A02 3/4 front view - Brava Copyright by Fiat Auto... -
Page 4: Identification-Data
Bravo-Brava I n t r o d u c t i o n Identification data O O . o G E A R B O X ENGINE C H A S S I S V E R S I O N... -
Page 5: Weights
Bravo-Brava I n t r o d u c t i o n Identification data O O . o S20V I 0 t mi6v ! B | Vehicle type identification code Name of manufacturer and chassis manufacture number Homologation number Engine type and number. - Page 6 Bravo-Brava I n t r o d u c t i o n Weights O O . o E N G I N E T Y P E W E I G H T S (in kg) 3 door 1010...
- Page 7 (*) See specifications on previous page ( • ) Versions for specific markets (Germany) ( A ) Versions with C513 gearbox NOTE The figures with the shaded background refer to the Fiat Brava VII-97 - Cancels and replaces Copyright by Fiat Auto...
-
Page 8: Dimensions
Bravo-Brava I n t r o d u c t i o n Dimensions O O . o 3 DOOR V E R S I O N S D I M E N S I O N S (mm) Engine... - Page 9 Bravo-Brava I n t r o d u c t i o n Dimensions D I M E N S I O N S (mm) Engine Wheel type J x 1 4 " - 3 2 1 4 6 1...
-
Page 10: Capacities
Bravo-Brava T e c h n i c a l d a t a Capacities O O . o Quantity Capacities Unit (kg) 1370-1581 Petrol Ss O.R. 9 5 Unleaded 1747-1998 . 1 • • • • I, 1910 TD-1929 D... - Page 11 Cancels and replaces the subject in question published in Service News 4/97 through the variation of the figures for the Fiat Bravo TD, Fiat Brava TD and Fiat Marea TD T Y P E OF P R O B L E M The oil capacity figures in the "Owner's Handbook"...
- Page 12 Model/version Engine sump. Engine sump Engine sump filter and pipes and oil filter (1st filling) Fiat Bravo TD 75 and TD 100 5 4,35 3,75 Fiat Brava TD 75 and TD 100 5 4,35 3,75 Fiat Marea TD 75 3,75...
- Page 13 Tecnologie Assistenziati V a r i o u s m o d e l s models: Fiat Bravo-Rat Brava - Fiat Marea • Fiat barchetta • Coupe Fiat 15.97 0010 T 120 AA CHANGING E N G I N E OIL service literature update with new oil figures.
- Page 14 Engine sump Engine sump and pipes (1st oil filter filling) Fiat Bravo TD 75 and TD 100 4,7 3,75 Fiat Brava TD 75 and TD 100 4,7 3,75 Fiat Marea TD 75 and TD 100 4,7 3,75 Fiat Marea TD 125...
-
Page 15: Characteristics
Bravo-Brava I n t r o d u c t i o n Characteristics of Fiat Lubricant products O O . o Name of Description Application product International designation Temperature Semi-synthetic multigrade engine oil. Exceeds specifications SELENIA SAE 15 W/40 - 2 5 °... - Page 16 Bravo-Brava T e c h n i c a l d a t a Engine O O . i o C H A R A C T E R I S T I C S OTTO 4 stroke Cycle single overhead...
- Page 17 Bravo-Brava T e c h n i c a l d a t a Engine: typical curves O O . i o C V kW 1000 2000 3000 4000 5000 6000 7000 Engine power curves obtained by E E C method The power curves illustrated can be obtained with the engine overhauled and run in, without a fan and with a silencer and air filter fitted at sea level.
- Page 18 Bravo-Brava T e c h n i c a l d a t a Engine: cylinder block/crankcase, crankshaft and associated components O O . i o D E S C R I P T I O N Values in mm...
- Page 19 N e w s 1 / 9 6 F i a t s.p.A Copyright by Fiat Auto D.M.C. - M.P.S. - Servizi Post Vendita Assistenza Tecnica F i a t B r a v o - F i a t B r a v a i s s i i e 05.96...
- Page 21 Bravo-Brava T e c h n i c a l d a t a Engine: cylinder block/crankcase. crankshaft and associated components O O . i o D E S C R I P T I O N Values in mm...
- Page 22 Bravo-Brava T e c h n i c a l d a t a Engine: cylinder block/crankcase, crankshaft and associated components O O . i o DESCRIPTION Values in mm " ^ 1 1 , 4 7 0 * 1 , 4 9 0 1 , 4 7 5 * 1 , 4 9 0 .
- Page 23 Bravo-Brava T e c h n i c a l d a t a Engine: cylinder block/crankcase, crankshaft and associated components O O . i o !&I5| 112V DESCRIPTION Values in mm 2 3 , 0 0 7 * 2 3 , 0 2 7...
- Page 24 Bravo-Brava T e c h n i c a l d a t a Engine: cylinder block/crankcase, crankshaft and associated components O O . i o llg5t 16V D E S C R I P T I O N D E S C R I P T I O N...
- Page 25 Bravo-Brava T e c h n i c a l d a t a Engine: auxiliary shaft O O . i o Values in mm DESCRIPTION 35,664 - 35,684 32,000 - 32,020 Bushes for auxiliary shaft in housing 35,593 - 35,618...
-
Page 26: Cylinder Head Assembly And Valve Gear
Bravo-Brava T e c h n i c a l d a t a Engine: cylinder head assembly and valve gear components O O . i o • j^9|l6V \12V Values in mm DESCRIPTION Camshaft supports in cylinder head lESL i2v... -
Page 27: Cylinder Head Assembly And Valve Gear
Bravo-Brava T e c h n i c a l d a t a Engine: cylinder head assembly and valve gear components O O . i o l^p)l6V 1 8 9 DESCRIPTION Values in mm n —^.nj—in_. —i_r~<-i—I_T^-T—i^-^ Tap. housing in «... -
Page 28: Cylinder Head Assembly And Valve Gear
Bravo-Brava T e c h n i c a l d a t a Engine: cylinder head assembly and valve gear components O O . i o Values in mm DESCRIPTION Camshaft bearings 2 9 , 9 4 4 * 2 9 , 9 6 0... -
Page 29: Cylinder Head Assembly And Valve Gear
Bravo-Brava T e c h n i c a l d a t a Engine: cylinder head assembly and valve gear components O O - i o fmfHiev 120V Values in mm D E S C R I P T I O N... -
Page 30: Cylinder Head Assembly And Valve Gear
Bravo-Brava T e c h n i c a l d a t a Engine: cylinder head assembly and valve gear components O O . i o T I M I N G D I A G R A M S... - Page 31 Bravo-Brava T e c h n i c a l d a t a Engine: counter-balance shaft O O . i o • 120V 1 9 9 8 D E S C R I P T I O N Values in mm...
-
Page 32: Lubrication
Bravo-Brava T e c h n i c a l d a t a Engine: lubrication O O . i o I^9|i6v Values in mm LUBRICATION - Description LUBRICATION - Description forced feed via lobe gear pump Engine lubrication system... - Page 33 Bravo-Brava T e c h n i c a l d a t a Engine: lubrication O O . i o 1 6 V L U B R I C A T I O N - Description Values in mm...
- Page 34 Bravo-Brava T e c h n i c a l d a t a Engine: lubrication O O . i o L U B R I C A T I O N Values in mm forced feed, via lobe geared pump with cartridge...
- Page 35 Bravo-Brava T e c h n i c a l d a t a Engine: cooling system - fuel system O O . i o I ^ P l i e v i f i h i s v COOLING S Y S T E M...
-
Page 36: Fuel System
Bravo-Brava T e c h n i c a l d a t a Engine: fuel system O O . i o I N T E G R A T E D E L E C T R O N I C I N J E C T I O N / I G N I T I O N... - Page 37 Bravo-Brava T e c h n i c a l d a t a Engine: fuel system O O . i o COMPONENTS OF I N T E G R A T E D E L E C T R O N I C I N J E C - TION-IGNITION S Y S T E M I.A.W.- IAF.13...
- Page 38 Bravo-Brava T e c h n i c a l d a t a Engine: fuel system O O . i o | ^ ^ ( l COMPONENTS OF I N T E G R A T E D E L E C T R O N I C...
- Page 39 Bravo-Brava T e c h n i c a l d a t a Engine: fuel system O O . i o ! 0 p 3 | 20V I N T E G R A T E D E L E C T R O N I C I N J E C T I O N / I G N I T I O N...
-
Page 40: Characteristics
Bravo-Brava T e c h n i c a l d a t a Engine O O . i o C H A R A C T E R I S T I C S DIESEL 4 stroke Cycle Timing... -
Page 41: Typical Curves
Bravo-Brava T e c h n i c a l d a t a Engine: typical curves O O . i o N m kgm C E E D I N 120-1 110¬ 11¬ 100- 3000 4000 5000 Test bench cycles of overhauled engines... -
Page 42: Cylinder Block/Crankcase, Crankshaft And As Sociated Components
Bravo-Brava T e c h n i c a l d a t a Engine: cylinder block/crankcase, crankshaft and associated components O O . i o D E S C R I P T I O N Values in mm... - Page 43 Bravo-Brava T e c h n i c a l d a t a Engine: cylinder block/crankcase, crankshaft and associated components O O . i o DESCRIPTION Values in mm Gudgeon pin 24,994 - 24,999 25,991 + 25,996 housing •H*...
- Page 44 Bravo-Brava T e c h n i c a l d a t a Engine: cylinder block/crankcase, crankshaft and associated components O O . i o D E S C R I P T I O N Values in mm...
- Page 45 Bravo-Brava T e c h n i c a l d a t a Engine: cylinder block/crankcase, crankshaft and associated components O O . i o D E S C R I P T I O N Values in mm...
-
Page 46: Cylinder Head Assembly And Valve Gear Components
Bravo-Brava T e c h n i c a l d a t a Engine: cylinder head assembly and valve gear components O O . i o D E S C R I P T I O N Values in mm... - Page 47 Bravo-Brava T e c h n i c a l d a t a Engine: cylinder head assembly and valve gear components O O . i o D E S C R I P T I O N Values in mm...
- Page 48 Bravo-Brava T e c h n i c a l d a t a E n g i n e : c y l i n d e r h e a d a s s e m b l y a n d v a l v e g e a r c o m p o n e n t s O O .
- Page 49 Bravo-Brava T e c h n i c a l d a t a Engine: cylinder head assembly and valve gear components O O . i o DESCRIPTION DESCRIPTION Values in mm 2 1 a - 2 1 b Camshaft supports...
-
Page 50: Lubrication
Bravo-Brava T e c h n i c a l d a t a Engine: lubrication - cooling system O O . i o LUBRICATION Values in mm forced circulation via lobe gear pump Engine lubrication system with cartridge filter in series... - Page 51 Bravo-Brava T e c h n i c a l d a t a Engine: cooling system O O . i o j^^J COOLING SYSTEM coolant circulation via centrifugal pump, radiator and two speed electrical fan operated by two speed...
-
Page 52: Fuel System
Bravo-Brava T e c h n i c a l d a t a Engine: fuel system O O . i o £ - c.t; Q. < © o § C M " > >. o •= o a. a >... - Page 53 Technical data Bravo-Brava Engine: fuel system OO.10 C T 3 L O - •I- •I- •I- C M C M C M C N C M C N C M C M C M C M C M C M C M C M C M C M r-»...
-
Page 54: Supercharging
Technical data Bravo-Brava Engine: supercharging OO.io S U P E R C H A R G I N G Turbocharger operated by exhaust gases with waste gate valve and air/air heat ex- changer (intercooler) Turbocharger type Garrett Maximum supercharging pressure N.D. -
Page 55: Clutch
Technical data Bravo-Brava Clutch 00.18 Values in mm Type dry, single plate with bearing diaphragm spring Operating mechanism Spring loading Lining Distance between 1 7 0 ± 1 0 1 5 5 ± 1 0 pedal in end of travel... -
Page 56: Gearbox And Differential
Technical data Bravo-Brava Gearbox and differential 00-21-27 Print no. 506.670/70... - Page 57 Technical data Bravo-Brava Gearbox and differential 00.21-27 DIFFERENTIAL 3 , 3 5 3 ( 3 , 0 5 3 » ) ^ J ^ l Ratio crown 3,886 3,353 3,562 ( 1 7 / 5 7 ) fed* wheel & pinion...
- Page 58 Technical data Bravo-Brava Gearbox and differential 00.21-27 Print no. 506.670...
- Page 59 Technical data Bravo-Brava Gearbox and differential 00.2127 DIFFERENTIAL Ratio 16/57 crown wheel & (3,562) pinion reduction 13,923 7,972 5,143 3,665 Ratio at the wheels 2,906 13,923 conical roller bearings Differential internal casing bearing by shims Adjustment of bearing pre-loading 1,70-2,60...
- Page 60 Technical data Bravo-Brava Braking system 00.33 W> 4- (•) |&( 12V iSBl 16V 1^1 16V TD 75 f i E H | D FRONT BRAKES FRONT BRAKES Values in mm 11,80 - 12,10 19,80 - 20,10 L/lbCOl 11,10 18,55 • 1 v - <...
- Page 61 Technical data Bravo-Brava Braking system 00.33 FRONT BRAKES Values in mm 283,800±284,200 21,900-22,100 Disc 20,55 20,20 allowed Brake allowed pads (LF# Caliper Master cylinder 23,81 (15/16") (pump) ISO-VAC 8"+7" pneumatic vacuum servo Servo brake acting on all four wheels Distance of hydraulic...
- Page 62 Technical data Bravo-Brava Steering 00.41 n|S| |E21| 1 6 V 161/ E N G I N E T Y P E E N G I N E T Y P E Type rack and pinion rack and pinion power assisted ©...
- Page 63 Bravo-Brava Technical data Wheels 00.44 Tyre inflation pressure > ENGINE TYPE ENGINE TYPE ENGINE TYPE Radial, t u b e l e s s Radial, t u b e l e s s W h e e l r i m t y p e...
- Page 64 ( • ) Angular values which cannot be adjusted, used for the correct alignment of the vehicle ( • ) Versions with power assisted steering and for Bravo 1998 ( • • ) For versions with 1910 TD 75 engine X-96 - Cancels and replaces Print no.
- Page 65 Bravo-Brava Technical data Front suspension 00.44 Front suspension independent, Mac Pherson type with steel track control arms anchored to an auxil- iary cross member. Offset coil springs and double acting telescopic shock abosrbers. Anti-roll torsion bar. 4Aim /m±\ i j p l i e v...
- Page 66 Technical data Bravo-Brava Front suspension 00.44 Coil springs Diameter of wire 1 2 , 5 ± 0 , 0 5 ( 1 2 , 7 ± 0 , 0 5 ) * 1 2 , 7 ± 0 , 0 5 ( 1 2 , 9 ± 0 , 0 5 ) *...
- Page 67 Bravo-Brava Technical data Rear suspension 00.44 Rear suspension independent with cast iron track control arms. Coil springs and shock absorbers with vulcanized bushes. Anti-roll torsion bar. Rigid H shaped auxiliary frame made up of a transverse tubular element and two pressed side members connected to it.
-
Page 68: Electrical Equipment
Bravo-Brava Technical data Electrical equipment 00.55 l^3)l6V M . Marelli M. Marelli M. Marelli E80E-12V-0,9KW M 7 0 R - 1 2 V - 1 , 4 k W STARTER M70R-12V-1,4kW ( w i t h reduction gear) MOTOR (with reduction (M. - Page 69 Bravo-Brava Technical data Electrical equipment 00.55 M. Marelli M. Marelli E 95RL - 12V - 2,2 kW (with reduction gear) E 95RL - 12V - 2,2 kW STARTER MOTOR (with reduction gear) Bosch 078,5-2,00/12 ( • • ) M. Marelli M.
-
Page 70: Starting
Bravo-Brava Technical data Electrical equipment: starting 00.55 STARTER MOTOR M . Marelli M . Marelli M . Marelli Type M 7 0 R - 1 2 V - 1 , 4 k W E 8 0 - 1 2 V - 0 , 9 k W... -
Page 71: Recharging
Bravo-Brava Technical data Electrical equipment: recharging 00.55 iSfc 16V @ t 16V (•) ifpi DC) ljP»16V(») j^Pl (•) ALTERNATOR M.Marelli M.Marelli M. Marelli M.Marelli Type A 1 1 5 I - 1 4 V - 3 8 / 6 5 A... -
Page 72: Electronic Injection/Ignition
Bravo-Brava Technical data Electrical equipment: electronic injection/ignition 00.55 INTEGRATED ELECTRONIC INJECTION/IGNITION CONTROL MODULE Make Bosch 0.261.203.868 Firing order 1 - 3 - 4 - 2 IGNITION COIL WITH 4 HIGH TENSION SOCKETS Make Bosch Type 0.221.503.407 Ohmic resistance of primary winding at 20°C 0,45 - 0,55 Ohmic resistance of secondary winding at 20°C... - Page 73 Bravo-Brava Technical data Electrical equipment: injection - electronic ignition 00.55 INTEGRATED ELECTRONIC INJECTION-IGNITION SYSTEM Type I.A.W. M.P.I WEBER - MARELLI Firing order 1-3-4-2 INJECTION-IGNITION CONTROL UNIT Make and type I.A.W. - 1AF.13 COIL WITH 4 HIGH TENSION OUTLETS M. Marelli...
- Page 74 Bravo-Brava Technical data Electrical equipment; electronic injection-ignition 00.55 INTEGRATED ELECTRONIC INJECTION-IGNITION SYSTEM Type HITACHI M F I - 0 Firing order 1 - 3 - 4 - 2 IGNITION COIL (1 FOR SPARK PLUG) Type HITACHI Code G E 212331 Ohmic resistance of primary winding at 20°C...
- Page 75 Bravo-Brava Technical data Electrical equipment: electronic injection/ignition 00.55 INTEGRATED ELECTRONIC INJECTION/IG- NITION SYSTEM Bosch 0.261.203.994 Make Firing order 1 - 2 - 4 - 5 - 3 IGNITION COIL (1 PER SPARK PLUG) Bosch Make Type 0.221.504.006 Ohmic resistance of primary winding at 20°C Ohmic resistance of secondary winding at 20°C...
- Page 76 Bravo-Brava Technical data Special tools 00.A E N G I N E T Y P E T o o l T o o l D E S C R I P T I O N O F T O O L...
- Page 77 Bravo-Brava Technical data Special tools 00.A ENGINE T Y P E Tool DESCRIPTION OF TOOL number t i n • 1860443000 Tool for tensioning t i m i n g belt • • Drift fitting seal valve g u i d e 1860454000 •...
- Page 78 Bravo-Brava Technical data Special tools 00.A ENGINE TYPE Tool DESCRIPTION OF TOOL number • Support for cylinder head w h i l s t removing and refitting valves 1860749000 • Tool for r e m o v i n g cartridge oil filter 1860757000 •...
- Page 79 Bravo-Brava Technical data Special tools 00.A ENGINE T Y P E Tool DESCRIPTION OF T O O L number l^^l l^9t • • Tool for introducing camshaft gasket 1860824000 • • 1860831000 Spanner for rotating t i m i n g pullies •...
- Page 80 Technical data Bravo-Brava Special tools 00.A ENGINE TYPE Tool Tool DESCRIPTION OF TOOL DESCRIPTION OF TOOL n u m b e r n u m b e r lfEX3| • 1860875000 Tools for camshaft t i m i n g •...
- Page 81 Bravo-Brava Technical data Special tools 00.A ENGINE T Y P E Tool DESCRIPTION OF TOOL number lujjjljl| • T o o l for t i m i n g camshaft 1860899000 • 1860901000 T o o l for p o s i t i o n i n g T.D.C.
- Page 82 Bravo-Brava Technical data Special tools 00.A ENGINE T Y P E Tool DESCRIPTION OF T O O L number 1 0 1 tea) • Graduated disc for angular t i g h t e n i n g of cylinder head f i x i n g...
- Page 83 Bravo-Brava Technical data Special tools 00.A ENGINE TYPE Tool DESCRIPTION OF TOOL number 1855035000 Spanner ( 1 9 m m ) for removing and refitting gearbox Drift for r e m o v i n g and refitting gear hardening ball plug •...
- Page 84 Bravo-Brava Technical data Special tools 00.A ENGINE TYPE Tool DESCRIPTION OF T O O L number | E E S | • Drift for fitting c l u t c h release shaft bush 1870633000 • S u p p o r t for gearbox-differential unit w h i l s t overhauling (to...
- Page 85 Bravo-Brava Technical data Special tools 00.A ENGINE TYPE Tool Tool DESCRIPTION OF T O O L DESCRIPTION OF T O O L n u m b e r n u m b e r STEERING Puller for steering rod ball pins 1847035000 •...
- Page 86 Bravo-Brava Technical data Special tools 00.A ENGINE TYPE Tool Tool DESCRIPTION O F TOOL DESCRIPTION O F TOOL number number lga> Iffli | Q I S | ORDINARY TOOLS Universal extractor 1840005000 Percussion extractor ( t o be used w i t h specific t o o l s )
- Page 87 Bravo-Brava Technical data Tightening torques ENGINE T Y P E Tightening Tightening torques torques DESCRIPTION DESCRIPTION Thread size Thread size daNm daNm ENGINE • M 1 0 • • • • • M 1 2 2 + 1 0 0 °...
- Page 88 Bravo-Brava Technical data Tightening torques ENGINE TYPE Tightening torques DESCRIPTION Thread size I c S i I0i daNm ! TD • • • • • Engine flywheel f i x i n g , bolt Engine flywheel f i x i n g , bolt Engine flywheel f i x i n g , bolt •...
- Page 89 Bravo-Brava Technical data Tightening torques ENGINE Tightening Tightening torques torques DESCRIPTION DESCRIPTION Thread size Thread size daNm daNm Cover a n d bracket t o w a t e r p u m p casing f i x i n g , bolt •...
- Page 90 Bravo-Brava Technical data Tightening torques ENGINE Tightening Tightening torques torques DESCRIPTION Thread size daNm • M 1 2 X 1 , 5 U n i o n o n injection p u m p • M 2 0 X 1 , 5 Oil filter m o u n t i n g u n i o n •...
- Page 91 Bravo-Brava Technical data Tightening torques ENGINE Tightening Tightening torques torques DESCRIPTION Thread size daNm • • • • Reaction bracket t o air conditioner f i x i n g , bolt w i t h f l a n g e •...
- Page 92 Bravo-Brava Technical data Tightening torques Tightening torquesio DESCRIPTION Thread size daNm ENGINE EXHAUST Front section of exhaust pipe with differential side bracket fixing, bolt POWER UNIT MOUNTING Bracket, differential side, to gearbox fixing, bolt (1370) M12x1,25 Bracket, differential side and engine side, to gearbox, fixing M10><1,25...
- Page 93 Bravo-Brava Technical data Tightening torques Tightening torque Thread size DESCRIPTION daNm PEDALS Brake pedal and clutch pedal to pedals fixing, self-locking nut with polyammide ring for hinging bolt Complete support for brake pedal and clutch pedal to body- work fixing, nut with border...
- Page 94 Bravo-Brava Technical data Tightening torques Tightening torques DESCRIPTION Thread size daNm Reverse shaft fixing, bolt Ring nut for main and lay shaft fixing 5th speed gear 11,8 M20*1,5 Gear selector forks fixing, bolt Lever to gear selector and engagement control shaft fixing,...
- Page 95 Bravo-Brava Technical data Tightening torques Tightening torque Thread size DESCRIPTION daNm Power steering bracket fixing, bolt Power steering bracket fixing, bolt Power steering bracket fixing, nut M12x1,5 Filler for return union from power steering to reservoir Filler for oil supply union from pump to power steering, on...
- Page 96 Bravo-Brava Technical data Tightening torques Tightening torques DESCRIPTION Thread size daNm Ends of anti-roll bar to connecting rod fixing, nut M10x1,25 Connecting rod to front suspension arm fixing, nut M10x1,25 M22xl,5 Front wheel hub to joint fixing, nut Front wheel hub to joint fixing, nut...
- Page 97 Bravo-Brava Technical data Tightening torques Tightening torques Thread size DESCRIPTION daNm BODYWORK Luggage compartment retaining hook fixing, bolt Side door lock fixing, bolt with tapered washer 0,75 Rear door fixed hinge fixing, bolt M10x1,25 Front bumper fixing, bolt with flange...
-
Page 98: Planned Maintenance
Technical data Bravo-Brava Planned maintenance Lubrication service The engine oil should be changed, on petrol engines, every 20,000 km or, irrespective of the mileage, every 12 months and for diesel engines every 10,000 km. The oil filter should be replaced at the same time as the oil is changed. - Page 99 Bravo-Brava Technical data Tightening torques I N T E R V A L S T H O U S A N D S O F 20 40 80 100 PLANNED MAINTENANCE OPERATIONS Replace spark plugs, check high tension leads •sir Replace brake fluid •sir...
- Page 101 Untitled Document Removing-Refitting file:///D|/Volume%201/engine.htm08/07/2006 16:06:14...
- Page 102 Bravo-Brava i g | 12v Engine Contents page page - Injector BOSCH MONOMOTRONIC S.P.I. INTEGRATED INJECTION-IGNITION - Fuel pressure regulator S Y S T E M - Intake air temperature sensor - Coolant temperature sensor - Introduction - Electric fuel pump...
-
Page 103: Bosch Monomotronic Spi Integrated Injection-Ignition System
System management strategies are essentially as follows: 1. injection management; 2. ignition management; 3. engine idle control; 4. fuel vapour recirculation management; 5. controlling knock; 6. heating/ventilation system management; 7. system self-adaption; 8. Fiat CODE lock management; 9. test management. Copyright Fiat Auto... -
Page 104: Injection Management
Bravo-Brava Engine Fuel system INJECTION MANAGEMENT The E C U receives information on rpm (n) and throttle valve opening (alpha) and is then able to identify base pulse constant (ti) within a specific map. Under various different engine service conditions, injector opening times are optimised by correcting times (in accordance with changing conditions) of: coolant temperature (1), air temperature (2) and signal received from lambda probe (3). - Page 105 Bravo-Brava igSi^ Engine Fuel system Controlling supply to fuel pump Control of fuel pump (A) is through the E C U which is responsible for turning on pump, by means of re- lay (B), during start-up and normal engine operation.
- Page 106 Bravo-Brava Engine iSt^v Fuel system Starting With the ignition key in MAR position, the E C U activates the electric pump for a few moments and ob- tains data from the various sensors. According to information from coolant temperature sensor, the E C U commands throttle valve opening via direct current motor.The control unit recognises the start-up phase when the rpm value reading...
- Page 107 Bravo-Brava ^ i Engine Fuel system Acceleration and full power During acceleration, the electronic control unit brings about enrichment of the mixture concentration (graph A) as a function of signals from the coolant temperature sensor (1), rpm sensor (2) and throttle valve angular position sensor (3).
- Page 108 Bravo-Brava Engine iffyix, Fuel system Over-run and cut-off During over-run, the mixture must be made more lean to reduce fuel consumption and polluting emis- sion levels (HC + C O ) . To achieve this aim, the control unit contains a function known as fuel C U T - O F F that is dependent upon the closure of contact (1) in the idle control motor at a given coolant temperature and rpm.
- Page 109 Bravo-Brava i © t ^ Engine Fuel system Lambda adjustment The LAMBDA probe controls mixture concentration by measuring the residual oxygen content of ex- haust emissions. Because the ceramic is not active below 300° C, the LAMBDA probe is heated electrically by a resistance (inside the probe) that is continually supplied by a locked positive and protected by a 10 A fuse.
-
Page 110: Ignition Management
Bravo-Brava Engine Fuel system IGNITION M A N A G E M E N T The ignition system is solid-state distribution type. In other words, moving parts are eliminated by doing away with a high tension distributor (case-brush-cap). Coil (B) is fitted with four high tension outlets connected directly to the spark plugs. Their operation is managed entirely by control unit (A). -
Page 111: Engine Idle Control
Bravo-Brava @ t Engine Fuel system The ignition coil consists of two primary windings connected to control unit (A) via terminals 34 and 35 supplied by battery voltage, and two high tension secondary windings whose outputs are connected di- rectly to the spark plugs of cylinders 1 -4 and 3-2. -
Page 112: System Self-Adaption
When the key is turned to MAR, the following operations take place in sequence: 1. the engine control unit (whose memory contains a secret code) sends the FIAT C O D E a request de- manding that a secret code be sent to de-activate the function lock: 2. - Page 113 DIAGRAM SHOWING INPUT/OUTPUT BETWEEN ECU AND SENSORS/ACTUATORS OF THE BOSCH MONOMOTRONIC SPI INJECTION-IGNITION SYSTEM Key to components 11. Injector 1. Electronic control unit 12. FIAT C O D E control unit 2. Coil 13. Engine idle speed actuator 3. Air temperature sensor 14. Rev counter 4.
-
Page 114: Air Intake Circuit Diagram
Bravo-Brava ! 0 i Engine Fuel system AIR INTAKE CIRCUIT DIAGRAM 5. Thermostatic valve 1. Warm air intake on exhaust manifold 2. Actuator for warm/cold air deflector 6. Vacuum ducts 7. Vacuum socket 3. Cold air intake fitting 4. Air cleaner 8. - Page 115 Bravo-Brava (§1^ Engine Fuel system FUEL SUPPLY CIRCUIT DIAGRAM 1. Delivery line from tank to filter N O T E Due to the specific shape of the tank, when fuel is added, an air lock may 2. Fuel filter build up at the bottom which could 3.
-
Page 116: Fuel Evaporation Control Circuit Diagram
Bravo-Brava i f p Engine Fuel system FUEL EVAPORATION CONTROL CIRCUIT DIAGRAM The fuel evaporation system prevents fuel vapour, mainly comprising lighter hydrocarbon fractions for- med in the tank, to escape into the atmosphere. 1. Pipe carrying fuel vapour to butterfly val- 5. - Page 117 Bravo-Brava Engine i j p t i 2 v Fuel system BLOW-BY GAS RECIRCULATION DIAGRAM P4A15AJ01 The system controls emission, from the engine block, of vent gases made up of air-fuel mixtures, burnt gases which leak through piston rings and lubricant oil vapours by recirculating them to the intake.
-
Page 118: Injection-Ignitiea System Wiring Diagram
Bravo-Brava 1^1 Engine Fuel system INJECTION-IGNITION SYSTEM WIRING DIAGRAM 8 C H W L H C p-cH v o i l - — - t S 3 — | — | ® [ 3 - co [ 3 - Publication... - Page 119 A. I.e. electronic control unit. 1. Earth 2. Diagnostic socket 3. Air conditioning system connection 4. System warning light 5. Rev counter 6. FIAT CODE control unit 7. Speedometer signal 8. Ignition coil 9. Knock sensor 10. I.e. system supply relay. 11. Ignition switch 12.
-
Page 120: Engine Exhaust Assembly Diagram
Bravo-Brava Engine Fuel system ENGINE EXHAUST ASSEMBLY DIAGRAM P4A18AJ01 1. Exhaust manifold 2. Lambda probe 3. Catalytic converter 4. Silencers Publication 506.670... -
Page 121: Location Of Injection-Ignition System Components In Engine Bay
Bravo-Brava Engine i f p i u v Fuel system LOCATION OF INJECTION-IGNITION SYSTEM COMPONENTS IN ENGINE BAY P4A19AJ01 Key to components 10. Diagnostic socket 1. Fuel vapour cut-off solenoid 2. Carbon filter 11. Lambda probe 3. 10A fuse for pump and injection-ignition 12. -
Page 122: Injection System Fuses Andr E L A Y S
Bravo-Brava igai Engine Fuel system INJECTION SYSTEM FUSES AND R E - LAYS General system protection fuse The general fuse (EFI-30A) protecting the injection-ignition system (1) is housed inside a container; to gain access to the fuse, undo side clips and lift lid. - Page 123 It is also equipped with a full S E L F - D I A G N O S T I C strategy for both input and output sensors. It also contains a special memory able to record any faults received during testing. When a Fiat/Lancia TESTER is connected to the system it is therefore possible to test or display any er- rors stored in the memory.
- Page 124 20. Engine earth 4. Not connected 21. Injector 5. Not connected 22. Not connected 6. FIAT C O D E control unit 23. Air conditioning system connection 7. Intake air temperature sensor 24. Throttle position sensor 8. Coolant temperature sensor 25.
- Page 125 Engine Bravo-Brava Fuel system R P M T D C S E N S O R (0.281.002.102) The sensor responsible for measuring rpm and T D C is inductive, in other words it works by means of changes in a magnetic field gen-...
- Page 126 Engine Bravo-Brava © Fuel system Checking gap Because the rpm and T D C sensor is secured directly to the engine block, gap and angular position do not require adjustment. If a fault is suspected, the gap can be checked as fol- lows: - remove the rpm and T D C sensor;...
-
Page 127: Throttle Case
Engine Bravo-Brava \^± Fuel system THROTTLE CASE (0.438.201.523) All the components of the aluminium butterfly valve case or injector turret are highly miniaturised and the unit is extremely compact. Most system sensors and actuators are fitted to this unit: 1. Fuel intake fitting 2. -
Page 128: Throttle Angtflar Opening Sensor
Engine Bravo-Brava Fuel system Throttle angular opening sensor The angular position signal (a) from throttle (1) plays a fundemental role in determining base pulse constant. This signal is recorded by a dual-race potentiometer (2) fitted to butterfly valve case by means of a brush with two double rows (4) integral with the throttle valve spindle (5). - Page 129 Engine Bravo-Brava Fuel system a (°) 18° 24° M A X The signal therefore assumes a value close to 0 Volt when the throttle is completely closed, and a value close to 5 Volt for an opening of 24° in relation to rest position.
-
Page 130: Direct Current Motor For Idle Speed Control
Engine igSt^v Bravo-Brava Fuel system Recovery The potentiometer emergency/safety function is activated when faults prevent the ECU from measuring the actual throttle openng angle (a). - when race 1 of the potentiometer is faulty, predefined safety injection times and ignition advances are set. - Page 131 Engine Bravo-Brava Fuel system When motor (D) is activated, the reduction unit is set in rotation. This consists of a worm screw (E) and helical gear (F). The helical gear contains a worm screw which microswitch case (G) moves along in both directions so that the case can move in and out according to wheel rotation direction.
-
Page 132: Injector
Engine Bravo-Brava iffii*, Fuel system Injector The injector performs the function of nebulizing the fuel necessary for forming the fuel mixture. It is made out of stainless steel for more effective resistance to any impurities present in the fuel. It is con- nected in a central position on the injector turret above the butterfly valve. -
Page 133: Fuel Pressure Regulator
Engine Bravo-Brava Fuel system A positive injector supply current is supplied through the fuel pump relay; the circuit is earthed in the control unit via terminal 21. P4A31AJ01 Fuel pressure regulator The mechanical diaphragm regulator (1) is fitted in the injector turret (2). -
Page 134: Intake Air Temperature Sensor
Engine Bravo-Brava Fuel system Intake air temperature sensor Intake air temperature is measured by temperature sensor (B) located on the butterfly valve case. This sensor consists of a plastic case on which is located the reactive element (1), which consists of a resistance (N.T.C.) that varies in inverse proportion to temperature. - Page 135 Engine Bravo-Brava Fuel system COOLANT TEMPERATURE SENSOR (0.280.130.026) The coolant termperature sensor (B) consists of a variable N.T.C. resistance. It is fitted on the thermostat case and works in a similar way to the intake air temperature sensor. Terminal 8 of ECU (A) supplies sensor (B). The circuit is earthed through the sensor terminal to terminal 11 of the E C U .
- Page 136 Engine Bravo-Brava Fuel system Recovery - with coolant temperature sensor disconnected, short circuited (d.c.) or with circuit open ( a . c ) , im- plausible signals reach the ECU, i.e.: - d . c : coolant temperature > 96.5 °C - a .
- Page 137 Engine Bravo-Brava Fuel system F U E L F I L T E R (A.450.024.262) The fuel filter is fitted under the floor pan, along the fuel delivery line. Refer to fuel system section in 1581 16V manual for location and removal-refitting procedure.
- Page 138 Engine Bravo-Brava Fuel system LAMBDA PROBE (0.258.003.466) The vehicle is fitted with a four channel hot lambda probe which measures exhaust gas oxygen content. Refer to Fuel System section in the 1581 16V manual for a full description of the lambda probe...
- Page 139 Engine i ^ i * Bravo-Brava Fuel system CARBON FILTER AND FUEL VAPOUR CU- T-OFF SOLENOID The carbon filter and solenoid are located in the right hand wheel arch compartment. For a description of the carbon filter refer to Fuel System section of the 1581 16V manual.
- Page 140 Engine Bravo-Brava Fuel system I N E R T I A S W I T C H The vehicle is equipped with an inertia switch located inside the passenger compart- ment beneath the driver's seat. This sensor reduces the possibility of fire (caused by fuel emerging from the injection system) by de-activating the fuel feed pump.
- Page 141 - Activate fuel pump with engine off. P4A39AJ01 The last operation is carried out by selecting "fuel pump" test on a Fiat/Lancia tester. Under these conditions, the pressure gauge reading should stabilise at 1.1 ± 0.1 bars. If pressure is insufficient, carry out the test 2.
- Page 142 Engine Bravo-Brava @ i Fuel system Test 2 Testing maximum fuel feed pressure (or pump efficiency) Same connections as previous test. - Close fuel cock lever (A); - operate the pump with the engine off, described previously: pressure should not exceed 5 bar (pump pres- sure relief valve setting).
- Page 143 Engine Bravo-Brava ! g | i 2 v Fuel system A D J U S T I N G B U T T E R F L Y V A L V E OPENING C O N T R O L...
- Page 144 Engine Bravo-Brava Fuel system REMOVING-REFITTING BUTTERFLY VALVE CASE 1. Disconnect the air shroud and blow-by gas recirculation lines by unfastening at the points indicated. 2. Disconnect fuel lines, evaporation con- trol line and vacuum duct 3. Disconnect electrical connections 4-5 Release accelerator link by unscrewing the screws indicated and remove the butterfly valve case.
- Page 145 It is therefore necessary to check that the accelerator linkage is properly adjust- ed and then search for the fault through full diagnosis using a Fiat/Lancia Tester. C H E C K I N G L E V E L S O F P O L L U T I N G E M I S S I O N S The Monomotronic system is self-adaptive and thus constantly monitors idle speed and C O levels.
- Page 146 The ECU is able to manage the following parameters in the case of failure: idle adjustment actuator, coolant temperature sensor, butterfly valve position sensor, air temperature sensor and knock sensor. If required by an operator, anomalies may be read off the E C U using a Fiat/Lancia Tester. Recording faults This is carried out while running the basic function used to manage the sensor/actuator.
- Page 147 Diagnosis using Fiat/Lancia tester Connect the Fiat/Lancia Tester ( F . L T . ) to a socket beside the E C U . Information is exchanged between ECU and Tester via a two-way serial line (line K) using standard Bosch communication Protocol.
- Page 148 The value is also relayed to the Fiat/Lancia tester, and therefore it should be noted, when diagnosing, that in the event of a malfunction, the Fiat/Lancia tester indicates an error in the affected sensor and dis- plays the recovery value.
-
Page 149: Components Of Injection-Ignition System
- Fuel pressure regulator - Signal management - Carbon filter and fuel vapour - Injection management cut-off valve - Fiat C O D E anti-theft function manage- - Multifunction valve ment - Vehicle speed sensor - Ignition management - Safety and ventilation valve... - Page 150 Engine Bravo-Brava M^ie, Fuel system M.MARELLI-WEBER I.A.W.-1 AF.13 INTEGRATED INJECTION-IGNITION SYSTEM Introduction The I.A.W.-1 AF.13 system (I.A.W.-1 AF.23 for versions with automatic transmission) The Hitachi sys- tem fitted to the 1581 i.e. 16v engine belongs to the category of digital electronic ignition systems with static advance and timing, integrated with a phased, multipoint, intermittent electronic fuel injection system.
- Page 151 (air/fuel) at all times. System management strategies are essentially as follows: -signal management; -injection management; -Fiat C O D E ignition lock function management); -ignition management; -engine idle control; -fuel vapour recirculation management; -test management...
- Page 152 Engine Bravo-Brava &| Fuel system INJECTION MANAGEMENT The ignition management strategies are designed to provide the engine with the correct amount of fuel at the right time in accordance with engine service conditions. The Marelli I.A.W.-IAF.13 injection-ignition system uses an indirect measurement system known as «SPEED DENSITY - LAMBDA», i.e.
- Page 153 Engine @ti 6 v Bravo-Brava Fuel system Stoichiometric ratio is defined and indicated by the symboloc st as follows theoretical quantity of air required to burn all the fuel injected a s t quantity of fuel injected Mixture concentration is defined and indicated by the Greek letterX as the ratio::...
- Page 154 Engine Bravo-Brava Fuel system Starting and post-starting During start-up, engine phase cannot be identified and phased injection cannot therefore be imple- mented. An initial simultaneous injection is carried out during the first few engine revolutions (full group) be- cause the considerable fluctuations in rotation speed do not permit injection time to be calculated cor- rectly.
- Page 155 Engine l^Pi** Bravo-Brava Fuel system As a result: - At very low temperatures the injector stays open longer Tj) graph (b) for a low air fuel ratio (rich mix- tures); - As engine temperature increases, injector opening time becomes shorter (tj) graph (a) and the air/fuel ratio becomes correspondingly higher (lean mixture).
- Page 156 Engine Bravo-Brava Fuel system Cut-off The fuel cut-off strategy is activated when the E C U recognises that the throttle is in closed position (throttle potentiometer signal) and engine speed exceeds 2000 rpm. The E C U activates cut-off only when engine temperature exceeds 0°...
- Page 157 When the key is turned to MAR, the following operations take place in sequence: 1 - the engine control unit (whose memory contains a secret code) sends the FIAT C O D E a request de- manding that a secret code be sent to de-activate the function lock: 2 - the FIAT CODE control unit responds by sending the secret code only after receiving a recognition code sent by the ignition key;...
- Page 158 Engine Bravo-Brava Fuel system IGNITION MANAGEMENT The ignition circuit is static inductive discharge type, i.e. a high tension distributor with power modules located inside the injection-ignition control unit. The system comprises two high tension twin outlet coils combined in a single container and connected directly to the spark plugs.
- Page 159 Engine Bravo-Brava Fuel system The rising side of signal (graph B in figure on previous page) therefore represents a moment within which alternative primary winding conduction could take place. This point can be established only by the control unit power module. The conduction time the H.T. coil needs in order to store sufficient ener- gy is also defined by DWELL management strategies.
- Page 160 Engine i g l ^ Bravo-Brava Fuel system When the voltage required for triggering an arc between the spark plug electrodes is examined, w e note that voltage is high in the cylinder undergoing compression (about 10kV) while it is reduced (about 5kV) in the cylinder undergoing exhaust.
- Page 161 Engine Bravo-Brava @ | i Fuel system ENGINE IDLE CONTROL The main aim of this strategy is to maintain engine speed at around the mapped setting (warm engine: 850 rpm): the position assumed by the actuator is dependent on engine conditions/rpm and vehicle speed.
- Page 162 Engine Bravo-Brava Fuel system HEATING/VENTILATION SYSTEM MANAGEMENT Rpm decreases when the air conditioner is turned on because the system compressor takes up power. This involves a drop in rpm, which is particularly evident during idling. To overcome this drawback, when the E C U is informed of air conditioner activation (pin 10) ahead of compressor activation (pin 26), it increases the speed by adjusting the air flow by means of the step mo- tor.
- Page 163 7. Ignition switch 21. Lambda probe 8. Dual relay 22. Coolant temperature sensor 9. Electric fuel pump 23. FIAT C O D E control unit 10. Throttle position sensor 24. Automatic transmission 11. Air temperature sensor 12. Engine idle speed actuator 13.
- Page 164 Engine Bravo-Brava (j f c Fuel system AIR INTAKE CIRCUIT MANAGEMENT 1. Inlet manifold 7. Throttle case 8. Upper resonator 2. Evaporation control system socket 3. Socket for absolute pressure sensor 9. Gas uptake from crankcase 10. Air cleaner 4. Socket for servo brake 11.
- Page 165 Engine l&t Bravo-Brava Fuel system FUEL SUPPLY CIRCUIT DIAGRAM 1. Fuel supply manifold NOTE Due to the specific shape of the tank, when fuel is added, an air lock may 2. Delivery line from tank to filter build up at the bottom which could 3.
- Page 166 Engine £p Bravo-Brava Fuel system FUEL EVAPORATION CONTROL CIRCUIT DIAGRAM The fuel evaporation system prevents fuel vapour, mainly comprising lighter hydrocarbon fractions formed in the tank, to escape into the atmosphere. 1. Fuel vapour cut-off valve 5. Reservoir 2. Active carbon trap filter 6.
- Page 167 Engine l ( p M < * Bravo-Brava Fuel system BLOW-BY GAS RECIRCULATION DIAGRAM P4A18CJ01 The system controls emission, from the engine block, of vent gases made up of air-fuel mixtures, burnt gases which leak through piston rings and lubricant oil vapours by recirculating them to the intake.
- Page 168 15. Earth on engine 16. Injectors 17. System warning light 18. Automatic transmission E C U 19. FIAT C O D E control unit 20. Speedometer signal 21. Air conditioner compressor 22. Three stage pressure switch 23. Engine idle speed actuator 24.
- Page 169 Engine Bravo-Brava tyi* Fuel system LOCATION OF INJECTION-IGNITION SYSTEM COMPONENTS IN ENGINE BAY P4A22CJ01 Key to components 11. Injection-ignition ECU 1. Fuel vapour cut-off solenoid 12. Injector lead coupling 2. Carbon filter 13. Rpm and T D C sensor 3. Absolute pressure sensor 14.
- Page 170 Copyright Fiat Auto...
- Page 171 Engine Tipo @ i ^ Fuel system COMPONENTS OF INJECTION-IGNITION SYSTEM The injection-ignition system consists mainly of wiring, an electronic control unit ( E C U ) and the fol- lowing sensors and actuators: Sensors Actuators -Rpm and T D C sensor -Engine idle speed actuator -Timing sensor -Electric fuel pump...
- Page 172 One of its functions is to receive from the RAM S T A N D - B Y recordings of anomalies that have arisen during engine operation and send these through the diagnostic socket to a Fiat-Lancia Tester. A Fi- at-Lancia Tester must be used in active diagnosis in order to delete the anomalies.
- Page 173 Before replacing an ECU as a result of testing, ensure it is really faulty because when a new ECU is activated, the secret Fiat CODE system code is memorised and this makes the unit completely unusable on other vehicles.
- Page 174 Electronic earth 46. N. C. N. C. 47. Coolant temperature sensor signal N. C. 48. FIAT C O D E control unit 49. Rpm and T D C sensor signal Engine idle speed actuator (stage 2) 50. Automatic transmission ECU (neutral/¬...
- Page 175 Engine Bravo-Brava Fuel system RPM AND TDC SENSOR (Jeager CVM01) RPM and crankshaft angular position refer- ence (TDC indicator) sensor (1) is secured to the engine block facing phonic wheel (7) lo- cated on the crankshaft pulley. Principle of operation...
- Page 176 Engine Bravo-Brava Fuel system Wiring connector The sensor is connected to the E C U (pin 30 and 49) by means of twisted wires covered by a shielded, interference-proof sheath c o n - nected to earth. NOTE The numbers in boxes indicate corresponding control unit pins.
- Page 177 Engine 1 0 16v Bravo-Brava Fuel system TIMING SENSOR (SFA 200) The I.A.W.-1 AF.13 system adopts a phased, sequential injection system. In other words, fuel is injected into each cylinder in sequence during the intake phase. To achieve this, the E C U uses a timing signal together with the rpm and T D C signal to de- termine the point of injection.
- Page 178 Engine Bravo-Brava Fuel system BUTTERFLY VALVE CASE (54 CFA 26) The butterfly valve case is responsible for metering the quantity of air supplied to the engine (and thus controlling engine power output) according to accelerator position determined by the driver.
- Page 179 Engine Bravo-Brava l § | Fuel system THROTTLE VALVE POSITION SENSOR (WEBER PF-1C) This takes the form of a potentiometer whose mobile part is controlled by the butterfly valve spindle. The potentiometer is fitted inside a plastic container equipped with two tabs containing two UNSLOTTED holes.
- Page 180 Engine Bravo-Brava Fuel system Wiring connector The numbers in squares indicate the corre- sponding control unit pins. 53 16 23 Checking resistance P 4 A 3 3 C J 0 4 The sensor's resistance can be measured by connecting an ohmmeter between pins A and C of the sensor.
- Page 181 Engine Bravo-Brava 1 0 Fuel system INTAKE AIR TEMPERATURE SEN- SOR (Jaeger ATS-04) The sensor is installed on the inlet port. It consists of a brass body, from which a plastic cage emerges. This protects the actual resistive ele- ment, which is an NTC ("Negative Temperature C o - efficient") thermistor;...
- Page 182 Engine Bravo-Brava Fuel system ENGINE IDLE SPEED ACTUATOR (step motor) (WEBER B02) 1. Bearing 5. Screw 6. Anti-rotation 2. Lead screw grooves 3. Coils 7. Plunger 4. Magnets The actuator is fitted to the butterfly valve case and consists - An electric step motor with two windings in the stator and a rotor that contains a certain number of permanent magnet pairs.
- Page 183 - refit the actuator, checking that the plunger fits easily without forcing. To do this, fit the actuator and replace screws but do not tighten. Operate the step motor using a Fiat-Lancia/Tester until it has moved through its entire travel. Tighten screws only after checking plunger is correctly aligned in its seat and electrical connector is positioned correctly.
- Page 184 Engine Bravo-Brava Fuel system ABSOLUTE PRESSURE SENSOR WEBER PRT 03 The sensitive element is enclosed within a plastic container (1) and consists of a Wheat- stone sridge screen printed to a very fine cir- cular ceramic plate (diaphragm) fitted to the underside of a ring mount.
-
Page 185: Coolant Temperature Sensor
Engine Bravo-Brava Fuel system COOLANT TEMPERATURE SENSOR (Jeager 401930.01) The sensor is fitted to the thermostat case. It consists of a brass case, which protects the actual resistance element: an NIC thermistor (standing for Negative Temperature Coeffi- cient because sensor electrical resistance de- creases in inverse proportion to temperature). - Page 186 Engine 1 0 * * Bravo-Brava Fuel system ELECTRIC FUEL PUMP (Walbro-Marwal MSS071) The pump is housed inside the fuel tank in a holder, together with the fuel level indicator. It is fitted with a mesh filter on the pump intake.
-
Page 187: Electric Fuel Pump
Engine Bravo-Brava Fuel system Removing-refitting electric fuel pump The pump is located in the tank: proceed as follows to remove: Undo retaining buttons indicated using tool 1878077000. Lift load compartment mat. Remove dust cover. Disconnect electrical connections from pump and from fuel level sending unit. -
Page 188: Fuel Filter
Engine Bravo-Brava iBt Fuel system FUEL FILTER < i > (Bosch A 450.024.262) The filter is inserted in the fuel delivery pipe; it consists of a steel plate casing and an internal polyurethane mounting on which an element with high-filtration capacity is wound. - Page 189 Engine Bravo-Brava Fuel system FUEL MANIFOLD (CB 104) The fuel manifold is secured to the inside of the inlet manifold, and its function is to send fuel to the fuel injectors. The fuel manifold consists of an aluminium casting and it incorporates the seats for the fu- el injectors and pressure regulator.
-
Page 190: Carbon Filter And Fuel Vapour Cut-Off
10** Engine Bravo-Brava Fuel system FUEL PRESSURE REGULATOR (RPM 40) This differential diaphragm device is set to a pressure of 3.00 ± 0.05 bar in the factory. Pressurised fuel from the pump exercises thrust on reflux valve (7) countered by calibrated spring (8). - Page 191 Engine I0i6v Bravo-Brava Fuel system Fuel vapour cut-off solenoid (Siemens EC1) The function of this valve is to control the quantity of fuel taken up by the active carbon filter and direct- ed to the intake manifold (via the injection-ignition control unit).
- Page 192 Engine Bravo-Brava Fuel system MULTIFUNCTION VALVE (SIRIO 0175.00) This valve performs the following functions: - prevents fuel flowing out when tank is over-filled or in case the vehicle overturns in an accident; - vents fuel vapours from tank to the active carbon trap filter;...
- Page 193 Engine Bravo-Brava Fuel system VEHICLE SPEED SENSOR SWF B451 BORLETTI TGK SO.GE.MI. The sensor is located on the differential out- put, near the left half-axle joint. It sends in- formation on vehicle speed to the control unit: the signal is also used to operate the speedometer.
- Page 194 Engine Bravo-Brava Fuel system I N J E C T O R S ( W E B E R IWP 001) The twin jet injectors are used specifically on engines with four valves per cylinder because they allow the jets to be directed against the two intake valves.
- Page 195 Engine Bravo-Brava Fuel system I N E R T I A S A F E T Y S W I T C H The vehicle is equipped with an inertia switch located inside the passenger compart- ment beneath the driver's seat.
- Page 196 Engine Bravo-Brava Fuel system IGNITION COILS (Marelli Bae 920A) The coils are fastened by means of a bracket to the camshaft covers and are closed mag- netic loop type. They are formed from a lay- ered pack, whose central core (broken by a narrow gap) carries both windings.
- Page 197 Engine Bravo-Brava Fuel system Checking winding resistance Primary circuit (A cylinders 2-3, B cylinders 1-4) Bring the probes of an ohmmeter into contact with the postive strip (central pin) and the negative strip (pin 1 for circuit A and pin 2 for circuit B).
- Page 198 Engine Bravo-Brava Fuel system DUAL RELAY (NDRS 240103) 13 8 5 4 101111 1 2 131114 1 5 " D2> 4 1 | 5 ©u D 2 i _ r - £ 4 - 1 1 1 0 2 3 9 1...
- Page 199 Fiat C O D E system. When the ignition key is returned to S T O P position, the electronic control unit maintains section A of the dual relay excited for about 90 seconds before cutting off its power supply (time taken to transfer data from RAM S T A N D - B Y memory to the E E P R O M .
- Page 200 Engine Bravo-Brava Fuel system LAMBDA PROBE (NTK 0ZA112-A1) This sensor measures exhaust gas oxygen content. The sensor output signal is sent to the electronic control unit to adjust the air-fuel mixture in order to maintain the ratio as close as possible to stoichiometric levels.
- Page 201 Engine Bravo-Brava Fuel system a. Electrode (+) in con- tact with outside air b. Electrode (-) in con- tact with exhaust gas Ceramic case Protective pipe Metal case Electrical resistant When the probe supplies a low voltage level (less than 200 mV) the E C U recognises that the mixture is lean (lambda »...
- Page 202 Engine Bravo-Brava Fuel system REMOVING REFITTING LAMBDA PROBE - Position vehicle on lift " @ - Disconnect battery negative lead - Disconnect electrical connection located against the rear wall of the engine bay and protected by a cover. Remove the lambda probe from its seat on the exhaust pipe.
-
Page 203: S Y S T E M
Engine 10** Bravo-Brava Fuel system CHECKS, ADJUSTMENTS AND REPAIRS TO I.A.W. INJECTION-IGNITION SYSTEM. OBSERVE THE FOLLOWING PRECAUTIONS WHEN WORKING ON VEHICLES WITH I AW INJECTION-IGNITION SYSTEMS: - never start the engine when the electrical terminals are poorly connected or loose on the battery poles;... - Page 204 Engine Bravo-Brava Fuel system 1. Unscrew the bolts fastening the fuel sup- ply manifold. 2. Unscrew the bolts fastening both sections of the intake manifold together. 3. Unscrew screws fastening the second sec- tion of the intake manifold to the engine block and remove.
-
Page 205: Checking Fuel Supply Circuit
- Activate fuel pump with engine off. P4A58CJ01 The last operation is carried out by selecting "fuel pump" test on a Fiat/Lancia tester. Under these conditions, the pressure gauge reading should stabilise at 3.0 bar. If pressure is insufficient, carry out the test 2. - Page 206 Engine Bravo-Brava Fuel system If pressure measured in test 1 (see pre- vious page) exceeds 3 bars proceed as follows: - disconnect fuel return pipe (at point (1) for connection to rigid fuel return line to pump) and place in a container suitable for collecting the fuel.
-
Page 207: Checking Engine Idle Speed
It is therefore necessary to check that the accelerator linkage is properly adjust- ed and then search for the fault through full diagnosis using a Fiat/Lancia Tester. C H E C K I N G L E V E L S O F P O L L U T I N G E M I S S I O N S The IAW -1 AF.13 system is self-adaptive and thus constantly monitors idle speed and CO levels. - Page 208 Fiat/Lancia Tester. Diagnosis using Fiat/Lancia tester Connect the Fiat/Lancia Tester (F.L.T.) to a socket beside the E C U . Information is exchanged between E C U and Tester via two test lines (K e L); the communication proto- col follows ISO 8 standards.
-
Page 209: List Of Errors
Engine idle speed actuator Self-adaptability Vehicle speed Mixture level Petrol vapour solenoid Fiat C O D E List of errors RPM sensor A . C - D . C . A . C - D . C . Throttle potentiometer Absolute pressure sensor A . - Page 210 - Electric fuel pump - Signal management - Fuel filter - Injection management - Inertia safety switch - FIAT C O D E anti-theft system manage- - Anti-flow single-acting valve ment - Fuel manifold - Ignition management - Fuel pressure regulator...
- Page 211 HITACHI INTEGRATED INJECTION/IGNITION SYSTEM Introduction The H itach i system fitted on the Bravo-Brava with the 1747 i.e. 16v eng i ne belongs to the category of static advance digital electronic ignition systems integrated with multiple phased type intermittent electronic fuel injection systems.
- Page 212 27. Coolant temperature sensor 28. Charcoal filter solenoid valve 10. Inertia switch 11. Vehicle speed sensor 29. Charcoal filter 30. Fiat C O D E control unit 12. F/L Tester connector (diagnostic socket) 13. Rev counter 31. Lambda sensor 32. Catalytic silencer 14.
- Page 213 8. Coolant temperature sensor 22. Spark plugs 9. Butterfly position sensor 23. Ignition coils 10. Lambda sensor 24. Ignition power module 11. Ignition switch 25. Fiat C O D E control unit 12. Detonation sensor 13. Engine timing sensor Copyright by Fiat Auto...
- Page 214 Engine Bravo-Brava Fuel system LOCATION OF HITACHI INJECTION/IGNITION SYSTEM COMPONENTS IN ENGINE COMPART- MENT 1. Ignition coils 10. Engine rpm sensor 2. Injectors 11. Detonation sensor 3. Engine timing sensor 12. Fuel manifold 4. Coolant temperature sensor 13. Ignition power module 5.
- Page 215 Engine Bravo-Brava ifih Fuel system SYSTEM MANAGEMENT STRATEGIES SIGNAL MANAGEMENT During starting, the control unit recognizes the injection and ignition timing which are fundamental for the subsequent operation of all strategies. This recognition is implemented on the basis of the interpretation of the succession of signals coming from the flywheel sensor on the crankshaft and from the engine timing sensor on the camshaft.
- Page 216 Engine Bravo-Brava Fuel system INJECTION MANAGEMENT The injection management strategies have the aim of supplying the engine with the correct quantity of fuel at the desired moment according to the engine operating conditions. NOTE The presence of the air flow meter makes it possible to directly measure the mass of intake air, making the presence of the intake air temperature sensor superfluous.
- Page 217 Engine Bravo-Brava Fuel system Checking mixture strength NOTE The following ratio is defined as the mixture ratio and is denoted by the Greek lettercx (a/fa): quantity of air drawn in by the engine quantity of fuel injected The following ratio is defined as the stoichiometric mixture and is denoted by cxst :...
- Page 218 Engine 10** Bravo-Brava Fuel system Starting and post-starting During starting it is not possible to recognize the engine timing and consequently it is not possible to implement the timed injection. During the first revolutions of the engine an initial simultaneous injection is carried out (also because the considerable fluctuations in the rotation speed do not allow the correct calculation of the injection timing) and subsenquently the injection is the timed type.
- Page 219 Engine Bravo-Brava Fuel system Operation during acceleration During this stage the control unit increases the quantity of fuel supplied. The "basic" injection time is multiplied by a coefficient depending on the temperature of the engine and the speed of the opening of the accelerator butterfly (avearge value 1.2).
- Page 220 The system is equipped with an anti-theft function. This function is achieved thanks to the presence of a special control unit (FIAT C O D E ) , capable of dialogue with the engine control unit and an electronic key, equipped with a special transmitter for sending a recognition code.
- Page 221 10** Engine Bravo-Btava Fuel system IGNITION MANAGEMENT The ignition management strategies have the objective of striking the spark with the desired advance ac- cording to the engine operating conditions. The management of the ignition basically consists of determining the ignition advance and its imple- mentation by controlling the power module, connected externally to the control unit.
- Page 222 Engine Bravo-Brava Fuel system Starting During starting it is not possible to carry out the normal management of the advance be- cause the considerable fluctuations in the ro- tation speed do not allow the correct calcula- tion of the dwell and the advance.
- Page 223 Engine Bravo-Brava Fuel system 1 0 7 Checking detonation The strategy has the task of detecting the presence of the phenomenon of detonation, by processing the signal coming from the appropriate sensor. The strategy constantly compares the signal coming from the sensor with a level which, in turn, is constantly updated to take into account the background noise and the ageing of the engine.
- Page 224 Engine )0i6v Bravo-Brava Fuel system RADIATOR FAN MANAGEMENT The control unit directly controls the operation of the radiator fan depending on the coolant temperature and whether or not there is a climate control system. NOTE Since the temperature of the engine is measured by the appropriate sensor there is no longer a thermal contact on the radiator.
- Page 225 10** Engine Bravo-Brava Fuel system Diagram showing operation of electric fan for version with air conditioning Low speed: it switches on when the temperature of the coolant reaches 95°C. High speed: it switches on when the temperature of the coolant reaches 100°C.
- Page 226 Engine Bravo-Brava Fuel system CLIMATE CONTROL SYSTEM MANAGEMENT The Hitachi engine control unit is operationally connectedto the climate control system and: 1. receives the request to switch on the compressor from the climate control system control unit via pin 28 and operate the relevant functions (additional air);...
- Page 227 Working with the Fiat Lancia Tester it is pos- sible to carry out a complete fault diagnosis of the system which consists of three stages: 1.
- Page 228 Engine 0)** Bravo-Brava Fuel system 2. Detecting and cancelling faults Detecting faults This is carried out during the basic functions through which the sensor/actuator is managed. Memorizing the error and the structure of the errors memory The errors are memorized in the control unit in the order in which they occur.
- Page 229 Bravo-Brava Engine Fuel system RECOVERY STRATEGIES if a problem is detected with the sensors/ actuators the control unit, where possible, replaces the miss- ing data, reconstructing it using software (recovery) to alicw the operation of the engine. For the sensors/actuators not mentioned in the list below, there is not type of recovery.
- Page 230 (if fitted), detonation sensor; Fiat C O D E control unit. Layout of system earth points In order to increase the electro-magnetic compatibility and the operational reliability special care has been taken over the layout of the earth points, as shown in the diagram below: 1.
- Page 231 1 9 . N.C. 3 1 . Earth for detonation sensor 2 0 . Connection w i t h FIAT CODE 2 1 . Positive for d e t o n a t i o n sensor 32. N e g a t i v e for c o o l a n t temperature a n d butterfly position 2 2 .
- Page 232 § < < . E £ »...
- Page 233 31. A W signal from ignition key ( + 50) out climate control) 32. Supply from battery (+30) 17. Connection with Fiat CODE control unit 33. Supply from ignition key (+15) 18. Operation of electric fan low speed relay 34. Pump fuse (30 A) 35.
- Page 234 Engine Bravo-Brava © Fuel system ENGINE RPM SENSOR The sensor is fixed to the cylinder block- /crankcase: the flywheel is fixed with a crankshaft crank. Operating principle The sensor is made up of a tubular casing (1) which houses a permanent magnet (3) and an electrical winding (2).
- Page 235 Engine Bravo-Brava Fuel system ENGINE TIMING SENSOR The engine timing signal, together with the engine rpm and T D C signal, allows the con- trol unit to recognize the succession of cylin- ders to implement the injection timing. This signal is generated by a Hall effect sen- sor, fitted by the exhaust camshaft drive pul- ley.
- Page 236 Engine Bravo-Brava Fuel system AIR FLOW METER The air flow meter is the hot wire type where the flow rate is measured at source. The upper part has a duct parallel to the main flow inside of which there is the heated wire.
- Page 237 Engine Bravo-Brava I 0 i Fuel system LAMBDA SENSOR The Lambda sensor measures the oxygen content in the exhaust gases: it is fitted on the exhaust pipe upstream of the catalytic s i - lencer. The sensor output signal is sent to the control unit to correct (feed-back) the mixture stren- gth.
- Page 238 Engine Bravo-Brava Fuel system BUTTERFLY POSITION SENSOR It is made up of a single track potentiometer where the moving part is rotated by the ac- celerator butterfly shaft. Wiring connector COOLANT TEMPERATURE SENSOR The sensor is fitted on the thermostat.
- Page 239 Engine Bravo-Brava Fuel system VEHICLE SPEED SENSOR The sensor is positioned on the differential outlet, by the left drive shaft coupling and transmits the information relating to the vehi- cle speed to the control unit: the signal is also used for the operation of the speedometer.
- Page 240 Engine Bravo-Brava Fuel system IGNITION SYSTEM The ignition circuit is the static advance inductive discharge type. The power module is outside of the control unit, whilst the high tension is supplied by four ignition coils fitted directly on the spark plugs (top-plug type coils).
- Page 241 Engine Bravo-Brava Fuel system IGNITION POWER MODULE The power module, located on the side of the inlet manifold, is basically an electronic switch which, by means of the impulses coming from the control unit, controls the current in the ignition coil primary winding.
- Page 242 Engine Bravo-Brava 10M* Fuel system DIAGRAM SHOWING INTAKE CIRCUIT P4A32BJ01 1. Air filter 2. Air flow meter 3. Inlet 4. Butterfly casing 5. Engine idle adjustment solenoid valve 6. Inlet manifold 7. Exhaust manifold Print no. 506.670...
- Page 243 ® M < * Engine Bravo-Brava Fuel system INTAKE CIRCUIT The intake circuit is made up of the following components: - air filter with relevant sleeves; - acoustic resonator fitted in parallel to the inlet sleeve; - inlet manifold, on which the fuel manifold is fitted;...
- Page 244 Engine Bravo-Brava Fuel system ADJUSTMENT ENGINE IDLE SPEED SOLENOID VALVE The solenoid valve, fitted on the butterfly casing, intercepts the flow of air which, com- ing from the air upstream of the butterfly, re- turns it downstream: it has the task of ensur-...
- Page 245 Engine Bravo-Brava Fuel system DIAGRAM SHOWING FUEL SUPPLY CIRCUIT 1. Fuel tank 5. Fuel supply 2. Anti-flow valve 6. Fuel return 3. Electric fuel pump 7. Fuel manifold 4. Fuel filter FUEL SUPPLY CIRCUIT The fuel supply circuit is made up of the following components: - fuel tank;...
- Page 246 Engine ft** Bravo-Brava Fuel system ELECTRIC FUEL PUMP The pump is housed inside the fuel tank on a special tray which also supports the fuel level gauge and is fitted with a gauze filter at the pump inlet. The pump is the volumetric type (G-Rotor) and is designed to run on unleaded fuel.
- Page 247 Engine Bravo-Brava Fuel system INERTIA SAFETY SWITCH The inertia switch has the task of interrupting the electrical supply for the electric fuel pump if the vehicle undergoes violent deceleration (impact) to prevent fuel from escaping and creating a fire hazard if the fuel manifold or N C X the supply pipe are damaged.
- Page 248 Engine ft** Bravo-Brava Fuel system FUEL MANIFOLD The fuel manifold, which has the function of distributing the fuel to the injectors, is made from die-cast aluminium and incorporates the housings for the injectors and for the pressure regulator. The fuel inlet is achieved with a sealed fixing bolt.
- Page 249 Bravo-Btava E n g i n e l e v Fuel system INJECTORS The injectors have the task of supplying the quantity of fuel required for the operation of the engine: the fuel is injected into the inlet manifold, immediately upstream of the inlet valve.
- Page 250 Engine Bravo-Brava ft** Fuel system EMISSION CONTROL DEVICES The devices used have two objectives: - to keep down the pollutant substances present in the exhaust, via the catalytic silencer; - to eliminate the dispersion towards the outside of the unburnt hydrocarbons, via the (fuel) anti-evap- oration system and the (lubrication) oil vapour recirculation system.
- Page 251 E n g i n e Bravo-Brava Fuel system Exhaust system with catalytic converter 3. Catalytic silencer 2. Lambda sensor 1. CO socket FUEL ANTI-EVAPORATION SYSTEM Location of anti-evaporation system components 6. Charcoal filter 1. Fuel tank 7. Charcoal filter solenoid valve 2.
- Page 252 Engine Bravo-Brava ft*» Fuel system Operating principle The anti-evaporation system has the aim of preventing the fuel vapours, made up of the lightest parts of the hydrocarbons which basically form in the tank, from being discharged into the atmosphere. The system operates, above all at high outside temperatures when the temperature of the fuel increses and consequently the tendency towards evaporation increases: in this situation there is an increase in the pressure inside the tank.
- Page 253 Bravo-Brava E n g i n e Fuel system Float valve The float valve has the task of allowing the flow of vapours towards the separator, without, however, al- lowing the escape of liquid fuel. The valve contains a float, one end of which closes the valve outlet port in the following conditions: - strong side acceleration (vehicle taking a bend) or longitudinal acceleration (vehicle braking) with the relevant movement of the mass of fuel as a result of the inertia force;...
- Page 254 Engine Bravo-Brava Fuel system Safety and ventilation valve This valve is located in the fuel filler cap and carries out the following functions: - discharging the excess pressure outwards which forms inside the tank (safety func- tion); the pressure acts on the plate (2)
- Page 255 E n g i n e Bravo-Brava Fuel system PROCEDURE FOR DISMANTLING THE RAPID ATTACHMENT PIPE FOR THE AN- TI-EVAPORATION SYSTEM FROM THE INLET MANIFOLD The pipe for the anti-evaporation system (1) is held in place on the inlet manifold cartridge (2) by the small clamp (3).
- Page 256 Engine Bravo-Brava Fuel system Replacing clamp A kit is available for replacing the clamp which comprises an 0-ring (5) and a clamp (3). After having removed the pipe for the anti-e- vaporation system, insert your fingers be- tween the clamp (3) and the cartridge casing...
- Page 257 Bravo-Brava ft*» E n g i n e Fuel system S Y S T E M FOR R E C I R C U L A T I N G G A S E S COMING F R O M T H E C R A N K C A S E ( B L O W - B Y )
- Page 258 E n g i n e Bravo-Brava Fuel system TIGHTENING TORQUES The main tightening torques for the HITACHI injection/ignition system components are given below (values in Nm). butterfly casing 6,3 ± 0,4 ignition power module 2,5 ± 0,5 PCV valve (on butterfly casing) 18,0 ±...
- Page 259 Bravo-Brava ft** E n g i n e Fuel system CHECKS, ADJUSTMENTS AND REPAIR OPERATIONS ON HITACHI MPI SYSTEM When working on a vehicle equipped with a Hitachi MPI system, the following precautions should be observed: - do not start up the engine with the electrical connection terminals not properly connected or slack at the battery poles;...
- Page 260 E n g i n e Bravo-Brava Fuel system Removing-refitting electric fuel pump Proceed with the removal of the pump as fol- lows: - working from the luggage compartment, remove the cover to gain access to the pump housing cover;...
- Page 261 Bravo-Brava E n g i n e mi6v Fuel system With the drip tray removed, proceed as follows: 1. disconnect the pump supply con- nector from the drip tray; 2. lift up the pump and extract it by bending it sideways, as shown in the diagram.
- Page 262 Engine Bravo-Brava Fuel system FUEL CIRCUIT PRESSURE CHECKS Checking fuel regulation pressure Disconnect the pipe coming from the filter (shown by the arrow) from the injector fuel manifold. Place pressure gauge 1895890000 and two taps (1) and (2) between the end of the disconnected pipe and the fuel manifold, as illustrated in the diagram.
- Page 263 Bravo-Brava ft** E n g i n e Fuel system If the pressure value in the previous test was higher than 3.0 bar it is necessary to: - disconnect the fuel return pipe from the pressure regulator and replace it, temporarily, with a pipe which, inserted on the filler, allows the return of fuel to the tank.
- Page 264 Engine Bravo-Brava Fuel system INTAKE CIRCUIT Removing-refitting engine idle adjustment solenoid valve and butterfly position sen- - Undo the fixing bolts (arrow) to remove the engine idle adjustment solenoid valve (1); - undo the fixing bolts (arrow) to remove the butterfly position sensor (2).
- Page 265 Bravo-Brava E n g i n e Fuel system Removing-refitting butterfly casing Proceed as described for the removal of the air flow meter, removing the meter complete with the two sleeves. Then, proceed as follows: - disconnect the electrical connectors from...
- Page 266 E n g i n e Bravo-Brava Fuel system ELECTRICAL CIRCUIT Removing-refitting engine timing sensor This operation involves removing the timing belt and the camshaft toothed pulley, exhaust side. Having carried out these operations, it is nec- essary to: - disconnect the electrical connector;...
- Page 267 Bravo-Brava ft*» E n g i n e Fuel system Removing-refitting: 1. Lambda sensor 2. Detonation sensor 3. Vehicle speed sensor P4AS5BJ01 P4A55BJ02 P4ASSBJ03 P4A55BJ04 1. Disconnect the electrical connector, then undo the Lambda sensor and remove it from its housing.
- Page 268 E n g i n e Bravo-Brava ft** Fuel system Removing-refitting ignition coils Proceed with the removal of the ignition coils by carrying out the following operations: - disconnect the electrical connector; - undo the two fixing bolts and remove the coil, extracting it from the housing.
- Page 269 Bravo-Brava ft** E n g i n e Fuel system Removing-refitting engine control unit The control unit is located under the glove compartment. Proceed with removing the control unit by carrying out the following operations: - remove the glove compartment;...
- Page 270 Bravo-Brava ty™* E n g i n e Fuel system P4A58BJ01 Table summarizing pollutant emission tolerance values HC (p.p.m.) CO(%) CO-2 ( % ) Upstream of the catalyzer < > 12 Downstream of the catalyzer < 0,35 < 90 > 13...
- Page 271 - Clutch pedal position adjustment - Removi ng - refitting cable clutch con- trol cable - Removing - refitting hydraulically op- erated clutch components - Clutch pump - Operating cylinder - Bleeding IX-95 - Cancels and replaces Copyright by Fiat Auto...
-
Page 272: Composition And Operation
C l u t c h Bravo-Brava Composition and operation IF52G5 CLUTCH WITH MECHANICAL RELEASE MECHANISM (1370 -1581 -1747 -1929 D engines) The clutch is the dry, single plate type, with the thrust bearing always in contact with the pressure plate spring. -
Page 273: Clutch With Hydraulic Release Mechanisnrf
C l u t c h Bravo Composition and operation IF53G5 1 8 . CLUTCH WITH HYDRAULIC RELEASE MECHANISM (1998 20v) Composition In order to improve quietness levels and performance, a hydraulic device has been fitted on the 1998 20v version. This device is made up of a reservoir, common to the braking system (1), a pump (2) fixed to the pedals assembly and an operating cylinder (3) fixed to the bell housing. -
Page 274: Removing-Refitting
C l u t c h Bravo-Brava Clutch operation 1 8 . THRUST BEARING 1. The thrust bearing should not show signs of sticking or noise during rotation or else it must be replaced. FORK CONTROL SHAFT Removing - refitting 2. -
Page 275: Thrust Bearing Sleeve
C l u t c h Bravo-Brava Clutch operation 1 8 . THRUST BEARING SLEEVE (only for 1581 - 1747 - 1998 - 1929 D versions) N O T E The 1370 M.P.I, version is not fitted with a thrust bearing sleeve. -
Page 276: Clutch Pedal Position Adjustment
C l u t c h Bravo-Brava Clutch operation 1 8 . C L U T C H P E D A L POSITION A D J U S T - MENT (for vehicles with mechanical release mechanism) 1. Measure the clutch pedal travel: 1. -
Page 277: Removing - Refitting Hydraulically Op- Erated Clutch Components
C l u t c h Bravo-Brava Clutch operation 1 8 . Version w i t h o u t air c o n d i t i o n i n g Release the clutch cable from the anchor-... - Page 278 C l u t c h Bravo Clutch operation 1 8 . P4A008C05 1.2. Disconnect the pipe connecting the air filter to the butterfly casing acting as il- lustrated in the diagram also removing the resonator. 3. Remove the relay box cover.
- Page 279 C l u t c h Bravo Clutch operation 1 8 . 1. Release the pipe connecting the operating cylinder to the retaining bands. 2. Disconnect the pipe for the hydraulic sys- tem from the clutch pump. Before disconnecting the pipe it is ne- cessary to drain the hydraulic system.
-
Page 280: Operating Cylinder
Bravo C l u t c h Clutch operation 1 8 . OPERATING CYLINDER (1998 20v) 1. Disconnect the flexible pipe from the op- erating cylinder. 2. Undo the nuts shown and remove the clutch operating cylinder. 3. View of clutch operating cylinder assem- bly. - Page 282 Gearbox and differential Bravo-Brava Contents 2 1 - 2 7 . page page R E M O V I N G - R E F I T T I N G R E M O V I N G - R E F I T T I N G DRIVE SHAFTS DRIVE SHAFTS - REM.
-
Page 283: Removing - Refitting
Bravo-Brava Gearbox and differential Removing - refitting 2 1 - 2 7 . REMOVING - REFITTING Removing Place the car on ramps, remove the front wheels, then proceed as described below: 1. Disconnect the battery's negative termi- nal, lift the protective cover from the posi- tive terminal and disconnect the latter;... - Page 284 I mm i2v Gearbox and differential Bravo-Brava Removing - refitting 2 1 - 2 7 . 1. Disconnect the gear selector rod (1), dis- connect the reversing lights switch (2), inhibition cable (3), earth cable (4) and clutch cable (5).
- Page 285 Gearbox and differential Bravo-Brava Removing - refitting 2 1 - 2 7 . Using tool 1878077000, remove the but- ton securing the dust guard to the body shell, then undo the bolts and release the guard from its seating. Repeat the proce- dure on the dust guard on the other side.
- Page 286 Gearbox and differential Bravo-Brava I Removing - refitting 2 1 - 2 7 . 1. Disconnect the drive shaft, gearbox side, from the differential, levering on the en- gagement point, and move it away from the working area. 2. Disconnect the Lambda probe wiring connector.
- Page 287 Bravo-Brava Gearbox and differential Removing - refitting 2 1 - 2 7 . 1. Undo the bottom bolt securing the starter motor. 2. Disconnect the starter motor cables and disconnect the starter motor. 3. Remove the flywheel cover by undoing the bolts illustrated.
- Page 288 Gearbox and differential Bravo-Brava Removing - refitting 2 1 - 2 7 . 1. Remove the plastic cover from the anti- pollen filter by undoing the screws illus- trated. 2. Undo the top bolts securing the gearbox to the engine.
- Page 289 Bravo-Brava Gearbox and differential \12v Removing - refitting 2 1 - 2 7 . 1. Raise the car and disconnect the central power unit mounting from the bodywork and the gearbox. 2.3 Install the tool illustrated to support the gearbox during the removal operation.
- Page 290 Gearbox and differential Bravo-Brava Removing - refitting 2 1 - 2 7 . <•> Manoeuvre the jack as appropriate to re- lease the gearbox from the centring studs, then remove the gearbox from the engine compartment by slowly lowering the hy- draulic jack.
- Page 291 Bravo-Brava I Gearbox and differential Drive shafts 2 1 - 2 7 , REMOVING - REFITTING Place the car on ramps, disconnect the bat- tery's negative terminal, remove the front wheels and then proceed as follows: 1. Using a hammer and chisel, relieve the staking on the hub nut.
-
Page 292: Dismantling
Gearbox and differential Bravo-Brava 112v Drive shafts 2 1 - 2 7 . 1. Disconnect the drive shaft from the differ- ential levering on the engagement point, then withdraw it from the car. NOTE To refit, re verse the pro cedure for re -... - Page 293 Bravo-Brava Gearbox and differential Drive shafts 2 1 - 2 7 . 1. If interventions on the right drive shaft in- volve dismantling the damping weight, during reassembly refit the weight at the distance specified in the figure. 2. Undo the clips securing the protective...
-
Page 294: Refitting
Gearbox a n d differential Bravo-Brava ft** Drive shafts 2 1 - 2 7 . REFITTING 1. Refit the protective gaiter on the wheel side and fit the constant velocity joint, ap- plying appropriate pressure. It is advisable to replace the protective... -
Page 295: Drive Transmission Components
Gearbox and differential Bravo-Brava Drive shafts 2 1 - 2 7 . DRIVE TRANSMISSION COMPONENTS 5. Protective gaiter 1. Constant velocity joint wheel side 6. Tripod joint 2. Circlip securing constant velocity joint 7. Circlip securing tripod joint 3. Protective gaiter 8. -
Page 296: Remote Control Assembly
2 1 - 2 7 . DIAGRAM OF REMOTE CONTROL ASSEMBLY The Bravo-Brava with 137012venginehasaremotecontrolassemblysystemconsistingofarigidrod(3)and a flexible cable (4). The rigid rod (3) controls gear selection by means of a relay link (5); the flexible cable (4) instead con- trols gear engagement. -
Page 297: Removing-Refitting " 1
Bravo-Brava to 12v Gearbox and differential Remote control assembly 2 1 - 2 7 . P4A015B02 REMOVING - REFITTING Disconnect the battery's negative terminal, and remove the remote control assembly as described below: 1. From inside the car, remove the gearlever trim. - Page 298 !gn 12v Gearbox and differential Bravo-Brava Remote control assembly 2 1 - 2 7 . 1. Raise the car, then disconnect the hand- brake cables from the mounting and re- lease them from the bracket. 2. After disconnecting the Lambda probe...
- Page 299 Gearbox and differential Bravo-Brava Remote control assembly 2 1 - 2 7 . 1. Undo the bolt securing the exhaust pipe rear bracket, then withdraw it from the car. 2. Remove the heat shield by undoing the bolts indicated. 3. Undo the front and rear bolts of the hand-...
-
Page 300: Dismantling At The Bench
Gearbox and differential Bravo-Brava Remote control assembly 2 1 - 2 7 . DISMANTLING AT THE BENCH Dismantling - refitting reverse gear en- gagement inhibitor - Remove the circlip, withdraw the cable from the plastic mounting, then withdraw it from the assembly. - Page 301 Bravo-Brava Gearbox and differential Remote control assembly 2 1 - 2 7 . Dismantling - refitting reaction link - Remove the reverse gear inhibitor cable, the gear engagement flexible transmission cable and gearlever, then withdraw the re- action link. REMOVING REFITTING GEARLEVER ON - Remove the gearlever trim;...
-
Page 302: Removing - Refitting
Gearbox and differential Bravo-Brava Removing - refitting 2 1 - 2 7 . P4A01CX01 P4A01CX03 REMOVING-REFITTING Removing Place the car on ramps, disconnect the bat- tery's negative terminal and remove the front wheels, then proceed as described below: 1. Remove the air intake duct by undoing the bolts shown in the figure, securing it to the front crossframe. - Page 303 Bravo-Brava l&t Gearbox and differential Removing - refitting 2 1 - 2 7 . Remove the nuts securing the fuse and re- lay box to the battery cage, then move the box over to one side. 2. Disconnect the i.e. control unit supply connector.
- Page 304 Gearbox and differential Bravo-Brava Removing - refitting 2 1 - 2 7 . 1. Disconnect the reaction link shown in the detail and the gear selector and engage- ment rods from the gearbox; also discon- nect the speedometer sensor wiring con- nector.
- Page 305 Bravo-Brava Gearbox and differential Icpi Removing - refitting 2 1 - 2 7 . 1. Remove the gearbox top bolts. 2. Fit an appropriate support eyelet at the point shown in the figure, to hook the power unit onto during removal of the gearbox.
- Page 306 Gearbox and differential Bravo-Brava Removing - refitting 2 1 - 2 7 . Fit the engine support stand 1860851000 and the adaptor 1860851001 in the appropriate mountings. Front mounting: insert the tool in the seat of the bonnet catch so that it rests on the front crossframe.
- Page 307 Gearbox and differential Bravo-Brava Removing - refitting 2 1 - 2 7 . 1. Remove the plastic wheelarch protection on the gearbox by undoing the bolts and retaining button shown in the figure. To withdraw the protection, it is also neces-...
- Page 308 Gearbox and differential Bravo-Brava Removing - refitting 2 1 - 2 7 . 1. Undo the bolt (arrowed) on the bellhous- ing so that the gearbox support tool can be installed. 2-3. Place gearbox support tool 1860873000 on a hydraulic jack, then secure it to the gearbox at the points in- dicated in the figure.
- Page 309 Bravo-Brava Gearbox and differential Removing - refitting 2 1 - 2 7 . 1. Remove the engine mounting, gearbox side. 2. Remove the bottom bolts securing the bellhousing to the engine block. 3. Remove the nuts securing the first section of...
-
Page 310: Drive Shafts
«p Gearbox and differential Bravo-Brava Drive shafts 2 1 - 2 7 . Refitting When refitting the engine mounting on the gearbox side, to avoid creating stresses on the gearbox sealing surfaces resulting in de- formation and oil leaks, strictly observe the... -
Page 311: Refitting
Bravo-Brava Gearbox and differential l e v Drive shafts 2 1 - 2 7 . REFITTING Reverse the procedure described for removal. To refit the differential cas- ing oil seal bearing, refer to the in- structions below. 1. Refitting differential casing oil seal bearing. -
Page 312: Remote Control Assembly
Bravo-Brava ft lev Gearbox and differential Remote control assembly 2 1 - 2 7 DIAGRAM OF REMOTE CONTROL ASSEMBLY P4A03OBO1 Gear engagement and selector linkage 1. Gear selector rod mounting 2. Control rod 3. Relay mounting supporting gear engagement and selector linkage 4. -
Page 313: Removing-Refitting
Bravo-Brava Gearbox and differential i 6 v Remote control assembly 2 1 - 2 7 . REMOVING - REFITTING Disconnect the battery's negative terminal, and dismantle the remote control assembly as described below: 1. Remove the gearlever trim from inside the car. - Page 314 Gearbox and differential Bravo-Brava Remote control assembly 2 1 - 2 7 . 1. Disconnect the Lambda probe electrical connection and disconnect the first sec- tion of the exhaust pipe from the front mountings. 2. Release the exhaust pipe from the rubber mount indicated.
- Page 315 Gearbox and differential Bravo-Brava Remote control assembly 2 1 - 2 7 . 1. Disconnect the gear engagement and se- lector rods and the reaction link, then un- do the nut and disconnect the relay as- sembly from the control rod.
-
Page 316: Dismantling At The Bench
Gearbox and differential Bravo-Brava Remote control assembly 2 1 - 2 7 . DISMANTLING AT THE BENCH Dismantling - refitting gearlever - Undo the bolts securing the gearlever to the mounting and the bolt securing the control rod to the gearlever, then discon- nect it from the assembly. -
Page 317: Removing - Refitting
Bravo-Brava Gearbox and differential Removing - refitting 2 1 - 2 7 . REMOVING - REFITTING Removing Place the car on ramps, disconnect the bat- tery's negative terminal and remove the front wheels. 1. Remove the air inlet duct by undoing the bolts illustrated. - Page 318 Gearbox and differential Bravo-Brava miev Removing - refitting 2 1 - 2 7 . 1. Undo the bolts securing the relay box to the battery cage, then move it over to one side. 2. Disconnect the cables indicated from the wiring on the battery's positive terminal.
- Page 319 Bravo-Brava Gearbox and differential • J i t 16 v Removing - refitting 2 1 - 2 7 . 1. Disconnect the fan's supply c o n n e c - tions. Undo the bolts securing it to the ra- diator, then remove it from the car.
- Page 320 Gearbox and differential Bravo-Brava Removing - refitting Disconnect the electrical connector of the odometer signal and the Lambda probe connector. Using two ordinary bolts, install a suitable supporting eyelet for hooking the power unit support stand. Fit the engine support stand 1860851000 and adaptor 1860851001 in the appropri- ate mountings.
- Page 321 Gearbox and differential Bravo-Brava Removing - refitting 2 1 - 2 7 . Using tool 1878077000, remove the but- ton securing the dust guard to the body- work, then undo the bolts and release the dust guard from its seating.
- Page 322 Gearbox and differential Bravo-Brava Removing - refitting 2 1 - 2 7 . Disconnect the drive shaft by undoing the bolts securing the constant velocity joint to the gearbox flange. Operations to be repeated on the other side 2. Disconnect the gear engagement and sec- tor rods from the gearbox.
- Page 323 Bravo-Brava Gearbox and differential Removing - refitting 2 1 - 2 7 . 1. Drain the gearbox oil, undoing the bolt in- dicated. 2. Undo the bolts securing the intermediate shaft to the engine, release it from the gearbox and move it away from the work- ing area, securing it in an appropriate manner.
- Page 324 Gearbox and differential Bravo-Brava I l 6 v Removing - refitting 2 1 - 2 7 . 1. Raise the ramps and remove the starter motor complete with wiring. 2. Undo the bolt illustrated securing the gearbox to the power unit, and unscrew...
-
Page 325: Drive Shafts
Bravo-Brava Gearbox and differential 3 l i 6 v Drive shafts 2 1 - 2 7 . 1. Manoeuvre the hydraulic jack as appropri- <i> ate to withdraw the gearbox from the cen- tring studs, then withdraw the gearbox from the engine compartment, slowly lowering the jack. -
Page 326: Dismantling
Gearbox and differential Bravo-Brava ft 16v Drive shafts 2 1 - 2 7 . DISMANTLING 1. Remove the clip and the protective gaiter on the constant velocity joint, wheel side. During assembly, it is advisable to re- place the protective gaiter. -
Page 327: Refitting
Gearbox and differential Bravo-Brava Ml6v Drive shafts 2 1 - 2 7 . Withdraw the joint from the drive shaft and then withdraw the protective gaiter. It is advisable to renew the protective gaiter whenever it is removed. 2. Undo the two screws, one of which is not... - Page 328 Gearbox and differential Bravo-Brava Drive shafts 2 1 - 2 7 . Wash the constant velocity joints thor- oughly with naphtha or petrol, and visual- ly check that the balls and their seatings mirror each other perfectly and have no signs of seizure or scoring.
- Page 329 Gearbox and differential Bravo-Brava Drive shafts 2 1 - 2 7 . Drive transmission components 6. Protective gaiter 1. Constant velocity joint, wheel side 7. Flange for constant velocity joint, gearbox side 2. Retaining clips 8. Constant velocity joint, gearbox side 3.
-
Page 330: Intermediate Shaft - Remote Control Assembly
Gearbox and differential Bravo-Brava Intermediate shaft - Remote control assembly 2 1 - 2 7 . REMOVING - REFITTING Place the car on ramps, remove the front right wheel, drain the gearbox oil and carry out the operations listed below, which have already... - Page 331 Gearbox and differential Bravo-Brava Removing-refitting 2 1 - 2 7 . REMOVING-REFITTING Removing Place the car on ramps, disconnect the bat- tery's negative terminal and the front wheels, then proceed as described below: 1. Remove the air intake duct by undoing the bolts shown in the figure.
- Page 332 Gearbox and differential Bravo-Brava Removing-refitting 2 1 - 2 7 . Remove the nuts securing the relay box to the battery cage, then move it over to one side. Remove the battery cage by undoing the bolts shown in the figure; also disconnect the electrical wiring clips indicated.
- Page 333 Bravo-Brava Gearbox and differential l » 2 0 v Removing-refitting 2 1 - 2 7 . P4A05DX04 1. Disconnect the Lamba probe connection. 2. Lift the protective cover, then remove the windscreen wiper arm by undoing its at- tachment nut.
- Page 334 Gearbox and differential Bravo-Brava Removing-refitting 2 1 - 2 7 . 1. Position engine support stand 1860851000 and adaptor 1860851001 in the mounting points. Front mounting: insert the tool in the seat of the safety catch so that it rests on the front crossframe.
- Page 335 Bravo-Brava iggi Gearbox and differential Removing-refitting 2 1 - 2 7 . P4A04DX03 1. Remove the engine bay bottom guard. 2. Disconnect the first section of the exhaust pipe by undoing the attachments shown in the figure. 3. Remove the wheelarch trim on the gear- box side and timing gear side.
- Page 336 Gearbox and differential Bravo-Brava Removing-refitting 2 1 - 2 7 . 1. Undo the bolts securing the right drive shaft flange. 2. Disconnect the gear selector and engage- ment rods accessible from the wheelarch on the gearbox side. 3. Remove the power unit central mounting.
- Page 337 Bravo-Brava Gearbox and differential S20v Removing-refitting 2 1 - 2 7 . 1. Undo the bolts securing the wishbone (right and left sides) to the front cross- frame; rotate the wishbone as appropriate to release it from the crossframe. 2. Remove the nuts shown in the figure on the heat shield to permit the subsequent withdrawal of the front crossframe.
- Page 338 Gearbox and differential Bravo-Brava Removing-refitting 2 1 - 2 7 . 1. Undo the bolts securing the intermediate shaft to the engine, release it from the gearbox and move it away from the work- ing area, securing it in an appropriate manner.
- Page 339 Bravo Gearbox and differential Removing-refitting 2 1 - 2 7 . 1. Rear attachment of gearbox support tool 1860873000. 2. Remove the engine mounting, gearbox side. 3. Manoeuvre the hydraulic jack as appropri- ate in order to disengage the gearbox from the attachment studs and surrounding parts.
-
Page 340: Removing-Refitting Remote Control Assembly
Gearbox and differential Bravo-Brava Drive shafts - Remote control assembly 2 1 - 2 7 . REMOVING-REFITTING DISMAN- TLING DRIVE SHAFTS To remove/refit and dismantle the drive shafts, refer to the procedure described for the 1747 16V engine, with the difference that drive shafts on the 1998 20V engine do not have the damping weight. -
Page 341: Removing-Refitting
Bravo-Brava Gearbox and differential Removing-refitting 2 1 - 2 7 . REMOVING-REFITTING Place the car on ramps, disconnect the bat- tery's negative terminal, remove the front wheels and then proceed as described below: 1. Disconnect air inlet duct by undoing the bolts shown in the figure, securing it to the front crossframe. - Page 342 Gearbox and differential Bravo-Brava Removing-refitting 2 1 - 2 7 . 1. Remove the nuts securing the fuse and re- lay box to the battery cage, then move the box over to one side. 2. Remove the battery cage by undoing the bolts shown in the figure;...
- Page 343 Gearbox and differential Bravo-Brava SP o Removing-refitting 2 1 - 2 7 . 1. Disconnect the reversing lights switch connector from the gearbox. 2. Disconnect the fan supply connections, then remove the fan by undoing its attach- ment bolts. 3. Disconnect the starter motor supply c a - bles.
- Page 344 | p ° Gearbox and differential Bravo-Brava Removing-refitting 2 1 - 2 7 . Remove one exhaust manifold nut and fit a suitable hook for supporting the power unit during removal of the gearbox. Remove the nut securing the right wind- screen wiper arm after removing its pro- tective cover.
- Page 345 Bravo-Brava Gearbox and differential Removing-refitting 2 1 - 2 7 . Position the power unit support stand 1860851000 and the special adaptor 1860851001 in the appropriate mounting points. a. Front mounting: insert the tool in the seating of the bonnet catch, so that it rests on the front crossframe.
- Page 346 Gearbox and differential Bravo-Brava @ i o Removing-refitting 2 1 - 2 7 . Remove the plastic protection from the wheelarch on the gearbox side by undo- ing the bolts and the button shown in the figure. To withdraw the protection, also...
- Page 347 Bravo-Brava ° Gearbox and differential Removing-refitting 2 1 - 2 7 . 1. Remove the bottom flywheel guard from the bellhousing. 2. Undo the bolt shown in the figure on the bellhousing, to enable the gearbox sup- port tool to be installed.
- Page 348 Gearbox and differential Bravo-Brava Removing-refitting 2 1 - 2 7 . 1. Remove the engine mounting, gearbox side. 2. Remove the bottom bolts securing the bellhousing to the engine block. 3. Manoeuvre the hydraulic jack to disen- gage the gearbox from the attachment...
-
Page 349: Removing-Refitting Drive Shafts
Bravo-Brava Gearbox and differential Drive shafts - Remote control assembly 2 1 - 2 7 . Refitting When refitting the engine mounting on the gearbox side, to avoid creating stresses on the gearbox sealing surfaces resulting in de- formation and oil leaks, strictly observe the... - Page 351 APART FROM FAULT DIAGNOSIS WITH - Connection wim engine starting immo- T H E F I A T / L A N C I A T E S T E R bilizing device (Fiat C O D E ) - Autodiagnosis - Adjustment...
- Page 352 E n g i n e Bravo Fuel system BOSCH M O T R O N I C M 2.10.4 M.P.I. I N T E G R A T E D I N J E C T I O N / I G N I T I O N S Y S T E M...
- Page 353 - fuel cut off during deceleration (Cut-off); - connection with the engine starting immo- - checking and managing engine idle speed; bilizing device (Fiat C O D E ) ; - limiting the maximum number of revs; - autodiagnosis. - checking combustion via the Lambda sen- sor;...
- Page 354 Bravo E n g i n e Fuel system S Y S T E M M A N A G E M E N T S T R A T E G I E S Adjustment of the injection times...
- Page 355 Engine Bravo igp 2 Fuel system Before the idle speed is reached the dynamics of the engine speed decrease are checked. If they exceed a certain value, the fuel supply is partly reactivated on the basis of a logic which involves the "soft accompaniment"...
- Page 356 Bravo $ 2 * E n g i n e Fuel system Fuel vapour recovery The (pollutant in terms of the regulations) fuel vapours are sent to an active charcoal filter and from there towards the engine where they are burnt; this takes places by means of a solenoid valve which is operated by the control unit only when the engine is in a load condition which allows the correct com- bustion without the operation of the engine being "disturbed": in effect, the control unit compensates...
- Page 357 A special two directional serial line allows the exchange of information between the injection/ignition control unit and the Fiat C O D E control unit. If there is a failure in the Fiat C O D E system it is, however, still possible to start the engine via an emer- gency procedure.
- Page 358 15. Electric fuel pump and Lambda sensor 1. Electronic control unit 2. Coils and spark plugs relay 3. Fiat CODE control unit 16. Electric fuel pump 17. Petrol vapour inlet solenoid valve 4. Three stage pressure switch 18. Intake air temperature sensor 5.
- Page 359 Bravo E n g i n e Fuel system DIAGRAM SHOWING FUEL SUPPLY CIRCUIT 1. Fuel supply manifold NOTE Given the special shape of the tank, when fuel is being introduced an air 2. Supply pipe from the tank to the filter pocket tends to form in the lower 3.
- Page 360 E n g i n e Bravo Fuel system DIAGRAM SHOWING AIR INTAKE CIRCUIT 1. Inlet manifold 6. Flow meter 2. Engine idle speed actuator 7. Air filter 3. Butterfly casing 8. Lower resonator 4. Butterfly valve position sensor 9. Upper resonator 5.
- Page 361 E n g i n e Bravo ft 2 0 v Fuel system DIAGRAM SHOWING FUEL ANTI-EVAPORATION CIRCUIT P4A10FJ01 The anti-evaporation system has the task of preventing the fuel vapours, made up of the lightest sections of hydrocarbons which form in the tank, from being discharged into the atmosphere.
- Page 362 Bravo E n g i n e Fuel system S Y S T E M FOR R E C I R C U L A T I N G G A S E S C O M I N G F R O M T H E ENGINE C R A N K C A S E...
- Page 363 E n g i n e Bravo i g i u o v Fuel system DIAGRAM SHOWING ENGINE EXHAUST ASSEMBLY P4A12FJ01 1. Exhaust manifold 2. Lambda sensor 3. Catalytic silencer 4. Silencers Print no. 506.670...
- Page 364 Bravo E n g i n e Fuel system LOCATION OF INJECTION/IGNITION SYSTEM COMPONENTS P4A13FJ01 12. Air temperature sensor 1. Charcoal filter 13. Vehicle speed sensor 2. Fuel vapour solenoid valve connection 3. Injection/ignition control unit 14. Lambda sensor 4. Fuses and relays 15.
- Page 365 E n g i n e Bravo Fuel system WIRING DIAGRAM SHOWING INJECTION/IGNITION SYSTEM P4A14FJ01 Print no. 506.670...
- Page 366 1. Rev counter signal 2. Climate control relay 3. Climate control on button 4. Fiat/Lancia Tester diagnostic sock- 5. Fiat C O D E control unit 6. Speedometer signal 7. Rpm and T D C sensor 8. Detonation sensor 1 9.
- Page 367 E n g i n e Bravo Fuel system 1 0 . FUSES, RELAYS AND EARTH POINTS 1. General protective fuse The genera! protective fuse (EFI-30A) for the injection/ignition system (1) is housed inside a container; to gain access to it, remove the cover releasing the side clips.
- Page 368 ( R E C O V E R Y ) . 5. Supplying the Fiat/Lancia Tester, if connected, via the serial line (diagnostic socket) with the data relating to the operating defects detected and memorized.
- Page 369 45. Coolant temperature sensor 16. Injector for cylinder N°2 46. Not connected 17. Injector for cylinder N°1 47. Fiat C O D E control unit 18. Supply (+30) 48. Rpm and T D C sensor 19. Engine earth 49. Rpm and T D C sensor 20.
- Page 370 Bravo E n g i n e Fuel system E L E C T R O N - R E M O V I N G - R E F I T T I I M G I C C O N T R O L U N I T The electronic control unit is located under the glove compartment (right hand side).
- Page 371 E n g i n e Bravo Fuel system 1 0 . Electrical features Primary winding inductance 3 mH Primary winding resistance 0,4 O Interference resistance 1 KQ Diagram showing electrical connections A. Operating signal X. Primary winding Y. Secondary winding 1.
- Page 372 E n g i n e Bravo Fuel system 1 0 . T I M I N G S E N S O R (0.232.101.036) The Bosch Motronic M 2.10.4 system uses a sequential timed system, i.e. the injection of the fuel takes place in sequence for each cylinder during the inlet stroke.
- Page 373 E n g i n e Bravo Fuel system 1 0 . T D C S E N S O R (0.281.002.102) The sensor designed to detect the rpm and T D C is the inductive type, i.e. it operates by...
- Page 374 E n g i n e Bravo Fuel system Checking the gap The rpm and T D C sensor is fixed directly to the engine crankcase and therefore no ad- justments of the gap or the angular position are required. If a problem is suspected it is...
- Page 375 Engine Bravo ft Fuel system 1 0 . E L E C T R I C F U E L PUMP (0.580.453.408) The submerged electric fuel pump is located inside the tank, housed in a mounting also containing the fuel gauge.
- Page 376 Bravo E n g i ne Fuel system F U E L F I L T E R (A.450.024.262) The fuel filter is fitted under the floor panel, on the fuel supply pipe. For the removing-refitting proce- dure, refer to the fuel system section for the 1581 16v engine.
- Page 377 E n g i n e Bravo Fuel system 1 0 . I N J E C T O R S (0.280.150.443) The double jet type injectors are fitted on the inlet manifolds, immediately before the inlet valve. These injectors are specifically for engines with 4 valves per cylinder, making it possible to direct the jets towards the two inlet valves.
- Page 378 Bravo E n g i n e Fuel system B U T T E R F L Y C A S I N G The quantity of air drawn in is determined by the opening of the butterfly located at the start of the inlet manifold.
- Page 379 E n g i n e Bravo Fuel system 1 0 . B U T T E R F L Y V A L V E POSITION S E N - SOR (0.280.122.001) The sensor is made up of a potentiometer in-...
- Page 380 Bravo E n g i n e Fuel system E N G I N E I D L E S P E E D A C T U A T O R (0.280.140.553) It is composed of an electric motor which, by...
- Page 381 E n g i n e Bravo Fuel system 1 0 . A I R T E M P E R A T U R E S E N S O R (0.280.130.073) The intake air temperature sensor is, in this...
- Page 382 E n g i n e Bravo Fuel system 1. Connector 2. Measuring duct 3. Hot film sensor A = Air intake I M O T E This flow meter directly measures the mass of air (and not the volume as on previous...
- Page 383 Bravo E n g i n e Fuel system 1 0 . COOLANT TEMPERATURE SENSOR (0.280.130.026) The sensor is fitted near the thermostat cas- ing with the sensitive part in contact with the coolant. It is made up of a brass casing...
- Page 384 Fiat I Lancia Tester. PHASE T R A N S F O R M E R In order to achieve a good compromise between the high performance in terms of power at high speeds and good torque at low speeds, a phase transformer (electronically and hydraulically operated) is fitted for the inlet camshaft.
- Page 385 E n g i n e Bravo Fuel system 1 0 . An additional duct ensures the lubrication of the bearing on the camshaft even when the device is not activated. The oil which reaches the chamber (H) for the electro-magnet is discharged through the drainaqe duct (E).
- Page 386 Bravo 0 * * E n g i n e Fuel system LAMBDA SENSOR (0.258.003.466) To meet the strict legislation governing the emission of harmful residues from internal combustion engines which require increas- ingly more precise metering of the air/fuel...
- Page 387 E n g i n e Bravo Fuel system 1 0 . Checking the resistance The resistance of the sensor heater can be measured by disconnecting the connector and connecting an ohmmeter as shown in the diagram. Resistance: 4.5 ± 0.5 ohm at 20 °C...
- Page 388 Bravo E n g i n e $20v Fuel system Removing-refitting The procedure is valid for both the charcoal filter and the vapour cut out solenoid valve. . - Raise the vehicle; - remove the right front wheel; - remove the rear liner for the right front wheel arch;...
- Page 389 E n g i n e Bravo Fuel system MULTI-PURPOSE VALVE AND SAFETY AND VENTILATION VALVE These valves belong to the fuel vapour anti-evaporation and recirculation system. For their description refer to the Fuel System section for the 1581 16V engine.
- Page 390 Bravo E n g i n e Fuel system R E M O V I N G - R E F I T T I N G F U E L M A N I F O L D C O M P L E T E WITH I N J E C T O R S AND P R E S - S U R E R E G U L A T O R 1.
- Page 391 E n g i n e Bravo Fuel system 1 0 . C H E C K S ON F U E L S U P P L Y C I R C U I T 1st T e s t...
- Page 392 E n g i n e Bravo S i Fuel system 1 0 . If in the 1 st test (see previous page) the pres- sure value was more than three bar it is nec- essary to: - disconnect the fuel return pipe (at the con-...
- Page 393 2. If the CO value is not within the recommended figures, it is necessary to check: - the correct operation of the Lambda sensor, using the Fiat/Lancia Tester; - the presence of air penetration in the area surrounding the Lambda sensor housing;...
- Page 394 If there are problems with the control unit, the timing sensor or the injectors, the system does not detect the problem and the vehicle breaks down. The problems can be read by an operator on the control unit using the Fiat/Lancia Tester. Detecting problems This is carried out during the basic function which manages the sensor/actuator.
- Page 395 On the right hand side of the engine compartment (near the engine oil dip stick) is the diagnostic socket to which the Fiat/Lancia Tester is connected. The exchange of data between the control unit and the Tester takes place via a two direction serial line (line K) using the standard Bosch communication protocol.
- Page 396 This value is also transmitted to the Fiat/Lancia Tester, therefore, during the fault diagnosis it is worth bearing in mind that in the case of problems the Fiat/Lancia Tester will signal the error for the sensor concerned and the Recovery value will be displayed.
- Page 398 - • Adjusting engine top speed Bleeding pump hydraulic circuit Bleeding air from diesel fuel Replacing cartridge fuel filter Fault diagnosis Introduction Test tables Checking exhaust smoke using opaci meter Fuel system diagram " Air intake circuit diagram Copyright Fiat Auto...
-
Page 399: Fuel System Page
E n g i n e Bravo-Brava ° Fuel system REMOVING-REFITTING INJECTION PUMP ON VEHICLE Removing injection pump 1. Unscrew the bolts indicated and remove intake assembly with connection sleeve to air cleaner container. 2. Remove the following parts from the pump: 1. - Page 400 Bravo-Brava SP> Engine Fuel system 1 0 . P4A02DJ03 P4A02DJ02 1. Remove timing belt by unscrewing the nuts indicated and the two retaining bolts and nuts located on the rear end. 2. Loosen the screw retaining the mobile belt tensioner.
- Page 401 E n g i n e Bravo-Brava ° Fuel system 1. Unscrew the bolts indicated and discon- nect the injection pump retaining bracket from the support beam fastened to the en- gine block 2. Use tool 1850167000 to unscrew the nuts shown.
-
Page 402: Refitting Injection Pump
Engine Bravo-Brava fti ° Fuel system 1 0 . Refitting injection pump To refit the injection pump, reverse the order of removal operations and carry out the following checks: 1. Position the injection pump drive pulley so that the reference mark on the gear is aligned with the reference mark on the rear timing belt cover. -
Page 403: Lucas Ft05 Injection Pump
14. Fitting for diesel delivery line from filter. 15. Enrichment flow cut-out or supplement valve. 16. Automatic advance device. 17. Fiat C O D E system interface E C U . (*) This valve performs the following func- tions: a. Creates transfer pressure generated by vane pump. -
Page 404: Fitting Pump And Checking Advance On Engine
Engine Bravo-Brava Fuel system 1 0 . INJECTION PUMP OPERATION ON ENGINE Fitting pump and checking advance on engine Tools required: n° 1865091000 comprising probe sty- lus (C), mount (B) and centesimal dial gauge (A) no. 1895885000. Pump must also bear label (E) glued to the top. Above this is the installation gap in mm. -
Page 405: Final Check
Bravo-Brava E n g i n e Fuel system - Secure dial gauge (A) on plunger ( C ) . Ensure that gauge is fitted with a preload of 10 - 1 5 mm, then zero. - Turn pump in its slots to move top of pump away from the cylinder assembly (maximum delay posi- tion). -
Page 406: Checking Antistall Screw Setting
Engine Bravo-Brava fti * Fuel system 4. Adjust idle speed to 7 8 0 ± 5 0 / m i n by means of idle adjustment screw (4) (see figure on page 7) after loosening locknut. After adjustment, tighten idle adjustment screw locknut. -
Page 407: Bleeding Pump Hydraulic Circuit
Bravo-Brava E n g i n e Fuel system BLEEDING PUMP HYDRAULIC CIRCUIT If engine stalls due to lack of fuel or if fuel low pressure lines have been disconnected or fuel filter has been changed, proceed as follows to facilitate pump self-priming: - unscrew fittings fastening delivery lines to injectors (A);... -
Page 408: Replacing Cartridge Fuel Filter
Engine Bravo-Brava Fuel system Bleeding air f r o m diesel (See illustration on previous page) Each time the oil is changed, bleed off the water from the fuel filter as follows: - unscrew water bleed screw (B) under filter, - unscrew air bleed screw (C) above the filter. -
Page 409: Fault Diagnosis
Bravo-Brava $ ° E n g i n e Fuel system FAULT DIAGNOSIS Introduction The main differences experienced when working on a Diesel engine, compared to a petrol engine, are as follows: 1) The diesel fuel system is driven by an injection pump and also comprises: - a tank and two fuel feed and return lines;... -
Page 410: Test Tables ]2
E n g i n e Bravo-Brava Fuel system Test tables This fault diagnosis table is applicable only if the engine is efficient and the electrical equipment has been properly checked. ANOMALY CAUSE REMEDY Tank empty, ventilate blocked tank Water in fuel... - Page 411 Bravo-Brava SPi° E n g i n e Fuel system ANOMALY CAUSE REMEDY Fit fittings correctly Fuel outlet and inlet fittings on in- jection pump exchanged Engine misses when idling Check injection pump setting at Incorrect injection pump setting test bench...
- Page 412 E n g i n e Bravo-Brava Fuel system ANOMALY CAUSE REMEDY Tank ventilation defective Check tank ventilation Injection order does not corre- Fit pipes from pump to injectors in spond to combustion order correct order Fuel delivery and return lines on in-...
- Page 413 Bravo-Brava $<> E n g i n e Fuel system REMEDY ANOMALY CAUSE Fit pipes from pump to injectors in Injection order does not corre- correct order spond to combustion order Replace filter element Air cleaner blocked Check and/or replace injectors...
-
Page 414: Checking Exhaust Smoke Using Opacimeter
E n g i n e Bravo-Brava fti» Checks and adjustments 1 0 . CHECKING EXHAUST SMOKE USING OPACIMETER Start up vehicle engine and allow to warm up to service temperature (radiator cooling fan comes on twice). Position opacimeter measurement unit firm-... - Page 415 Bravo-Brava E n g i n e Checks and adjustments 1 0 . P 4 A 1 7 D J 0 2 P4A17DJ01 Check injection pump timing and/or output Check air cleaner condition P 4 A 1 7 D J 0 4...
- Page 416 E n g i n e Bravo-Brava Fuel system 1 0 . FUEL CIRCUIT DIAGRAM 1. Injection pump. 2. Fuel delivery line from filter to pump. 3. Excess fuel return line from pump to tank. 4. Air breather line. NOTE Due to the specific shape of the tank, 5.
-
Page 417: Fuel System Diagram
E n g i n e Bravo-Brava Fuel system 1 0 . AIR INTAKE CIRCUIT DIAGRAM 1. Inlet manifold. 2. Upper resonator. 3. Air cleaner. 4. Lower resonator. 5. Inlet fitting. Copyright Fiat Auto... - Page 419 - Disc brakes - Brake caliper - Automatic adjuster assembly for recov- ering clearance between rear brake pads and discs and handbrake slack - Brake discs - Brake pads - Bleeding - Brake pressure proportioning valve - Handbrake Copyright Fiat Auto...
- Page 420 Braking s y s t e m Bravo-Brava 2 < c e < L U C C < > _> > £ ' c o v» o .t; C C U J > c to D £? £ •— co o 2 C O >- ©...
-
Page 421: System
B r a k i n g s y s t e m Bravo-Brava Hydraulic system BRAKE PEDAL Removing - ref itti ng To remove the brake pedal, proceed as fol- lows: - remove the split pin and withdraw the ser- vo unit pushrod from the pin on the brake pedal;... -
Page 422: Brake Fluid Reservoir
B r a k i n g s y s t e m Bravo-Brava Hydraulic system BRAKE FLUID RESERVOIR <I> Checking low brake fluid level indicator NOTE Periodically check the operation of the indicator by pressing on the top of the reservoir cover (as shown by the arrows);... -
Page 423: Brake Pump
Braking s y s t e m Bravo-Brava Hydraulic system BRAKE PUMP Removing-refitting To remove the brake pump, proceed as fol- lows: - undo the brake pipe connectors using tool 1856132000, so as not to damage them; P4A004D01 When overhauling the brake pump, replace the sealing rings;... -
Page 424: Servo Unit
B r a k i n g s y s t e m Bravo-Brava Hydraulic operation P4A005D01 Longitudinal section of brake pump SERVO UNIT Servo unit mounted on the car Checking hydraulic pushrod recess using a depth gauge NOTE The servo unit is adjusted using the adjustment screw located on the end of the rod. - Page 425 B r a k i n g s y s t e m Bravo-Brava Hydraulic operation Removing-refitting To remove the servo unit, proceed as follows: NOTE The arrows shows the sound-proof- ing panel. To facilitate dismantling, remove the accelerator pedal, whose attachment plate rests on the sound- -proofing panel.
- Page 426 B r a k i n g s y s t e m Bravo-Brava Hydraulic system remove the attachment buttons (1) and (2) on the sound-proofing panel; NOTE The button (1) cannot be reused, so during assembly, after fitting the plate (3), a new button should be fitted.
- Page 427 Braking s y s t e m Bravo-Brava Hydraulic system - undo the nuts securing the brake pump to the servo unit; P4AOO8D01 - withdraw the brake pump complete w i t h reservoir from the servo unit and rest it in the engine compartment to facilitate the re- moval-refitting of the servo unit;...
- Page 428 B r a k i n g s y s t e m Bravo-Brava Hydraulic system <t> View of servo unit from attachment side to pedal assembly mounting P4A009D01 22.45 - 22.65 mm P4A009D02 Longitudinal section of Iso-Vac 8" servo unit 22.45 - 22.65 mm =...
-
Page 429: Vacuum Unit
B r a k i n g s y s t e m Bravo-Brava ftoftiTD Hydraulic system VACUUM UNIT Vacuum gauge with connections for check- ing operation of vane-type vacuum unit P4A010D01 Checking operating faults If the braking system is faulty, before replac-... -
Page 430: Front Brakes
B r a k i n g s y s t e m Bravo-Brava Front brakes REMOVING-REFITTING Dismantle the components of the brak- ing system as described below: 1. disconnect the brake hose using tool 1856132000 on the connectors; dis- connect the brake pad wear sensor wiring connector;... -
Page 431: Brake Caliper
B r a k i n g s y s t e m Bravo-Brava Front brakes BRAKE CALIPER Dismantling-reassembly Place the caliper in a vice, fitting the protec- tions, then proceed as described below: direct a jet of compressed air into the brake fluid inlet hold in order to dismantle the piston from the caliper case;... -
Page 432: Brake Discs
Braking s y s t e m Bravo-Brava Front brakes BRAKE DISCS Dismantling-reassembly Undo the brake disc attachment bolts and re- move the disc. When refitting, eliminate any traces of rust to ensure that the disc is per- fectly perpendicular to the hub. -
Page 433: Brake Pads - Bleeding
B r a k i n g s y s t e m Bravo-Brava Front brakes <•> BRAKE PADS Check 1. The brake pads must be renewed if the thickness of the friction material is less than 1.5 mm. Check that brake pads of the same type are fitted to each pair of wheels. -
Page 434: Rear Brakes
Bravo-Brava B r a k i n g s y s t e m ft^vft l e v f t Rear brakes DRUM BRAKES Removing - refitti ng To dismantle the rear drum brakes, proceed as follows: - undo the two bolts and remove the brake drum;... - Page 435 B r a k i n g s y s t e m Bravo-Brava ftiavft^ft^ Rear brakes sheath from the brake backplate; Publication 506.670...
- Page 436 Braking s y s t e m Bravo - Brava !{pi i f t izvVBk ^ Rear brakes remove the lower shoe return spring; remove the left self-adjuster spring; - withdraw the shoe h o l d - d o w n pins;...
- Page 437 Bravo-Brava Ip^Jcpi Braking system v f t 16v Rear brakes - remove the shoes; dismantle the self-adjuster from the right shoe. P 4 A 0 1 8 D 0 2 After refitting, adjust the handbrake < s > l A by following the procedure described on page 32.
-
Page 438: Automatic Adjuster Assembly For Recovering Shoe-Drum Clearance
Bravo-Brava Braking s y s t e m ftizvfti i e v f t i e Rear brakes AUTOMATIC ADJUSTER ASSEMBLY FOR RECOVERING SHOE-DRUM CLEARANCE sembly each time the brakes are operatee. P4A019DQ1 should any adjustment be necessary at that mo- ment. -
Page 439: Brake Drums - Shoes
B r a k i n g s y s t e m Bravo- Brava S i izvi&i ^ ftiie Rear brakes BRAKE DRUMS Checking and measuring brake drums If the brake drums are deeply scored or are unevenly worn, they must be skimmed. - Page 440 Bravo-Brava B r a k i n g s y s t e m l A t ^ i f i M ^ f t i Rear brakes WHEEL CYLINDER Removing-refitting To remove the wheel cylinder, proceed as f o l -...
- Page 441 Braking s y s t e m Bravo i g j j u o v...
-
Page 442: Disc Brakes
B r a k i n g s y s t e m Bravo-Brava Rear brakes DISC BRAKES Removing-refitting To dismantle the rear disc brakes, proceed as follows: - withdraw the retaining clip (1); - undo the hose connector using tool 1856132000;... - Page 443 B r a k i n g s y s t e m Bravo-Brava \20v Rear brakes undo the attachment bolts and remove the brake caliper; The caliper case attachment bolts are self-locking and should be renewed whenever they are slackened or un- screwed.
-
Page 444: Brake Caliper
B r a k i n g s y s t e m Bravo-Brava Rear brakes BRAKE CALIPER Dismantling Place the caliper in a vice, fit- ting the protections, then proceed as described below: - undo the connector and re- move the brake hose;... - Page 445 The dust excluder and seal should always be replaced; also make sure that the bleed screw is not blocked. Use a solution of FIAT LDC detergent with hot water to wash the metal parts. 1. Caliper mounting bracket 2. Bleed screw 3.
-
Page 446: Automatic Adjuster Assembly For Recovering Clearance Between Rear Brake Pads And Discs And Handbrake Slack
Bravo-Brava ft a* B r a k i n g s y s t e m Rear brakes AUTOMATIC ADJUSTER ASSEMBLY FOR RECOVERING CLEARANCE BETWEEN REAR BRAKE PADS AND DISCS AND HANDBRAKE SLACK The rear brake caliper piston contains a device for automatically adjusting the distance between the disc and friction pads. -
Page 447: Brake Discs
B r a k i n g s y s t e m Bravo-Brava Rear brakes BRAKE DISCS Dismantling-reassem- Undo the the bolts se- curing the brake disc and remove it; when re- fitting, eliminate any tra- ces of rust to ensure that the disc is perfectly per- pendicular to the hub. -
Page 448: Brake Pads - Bleeding
B r a k i n g s y s t e m Bravo-Brava Rear brakes BRAKE PADS <i> Dismantling-reassembly To replace the brake pads, proceed as f o l - lows: 1. undo the bolts securing the brake caliper to the mounting bracket and secure the brake caliper in an appropriate manner;... -
Page 449: Brake Pressure Proportioning Valve
B r a k i n g s y s t e m Bravo-Brava Rear brakes BRAKE PRESSURE PROPORTIONING VALVE Removing-refitting To remove the brake pressure proportioning valve, proceed as follows: 1. disconnect the exhaust pipe end section mounting; 2. disconnect the exhaust pipe intermediate section mounting;... -
Page 450: Handbrake
Braking s y s t e m Bravo-Brava Rear brakes P 4 A 0 3 2 D 0 4 P 4 A 0 3 2 D 0 3 Handbrake lever Removing - refitting 1. Working as illustrated o n the preceding... - Page 451 Braking s y s t e m Bravo-Brava Rear brakes 1.2. Detach the cables from the handbrake control by undoing the points illustrated. Remove the protective cover illustrated and release the handbrake cable from the anchor on the lever, then w i t h d r a w the sheath with the handbrake cable and remove it.
- Page 452 Braking s y s t e m Bravo-Brava Rear brakes P4A032D03 Handbrake lever Removing - refitting 1. Working as illustrated on the preceding page, remove the lever cover and undo the adjustment nut underneath, then discon- nect the wiring connector for the hand- brake warning light switch.
- Page 453 Braking s y s t e m Bravo-Brava Rear brakes P4A033D09 Detach the cables from the handbrake control by undoing the points illustrated. Remove the protective cover illustrated and release the handbrake cable from the anchor on the lever, then w i t h d r a w the sheath with the handbrake cable and remove it.
- Page 454 B r a k i n g s y s t e m Bravo-Brava Rear brakes Operation The handbrake operates by means of a cable on the rear brakes. At the bottom, this cable is attached to the bracket (1), the top of which is hinged onto...
- Page 456 B r a k i n g s y s t e m Bravo-Brava Contents page ANTI-LOCK BRAKING SYSTEM - Introduction - Method of operation of the T E V E S MK20 anti-lock braking system (A.B.S.) - Components of the...
-
Page 457: Anti-Lock Braking System
Bravo-Brava B r a k i n g s y s t e m Anti-lock braking system INTRODUCTION The braking system must be rated to take account of the weight of the vehicle when fully laden and the maximum tyre/ground grip coefficient that may be achieved, in order to bring about efficient slowing down or stopping in the shortest possible distance and under any driving condition. - Page 458 Braking s y s t e m Bravo-Brava Anti-lock braking system 1. Actual vehicle speed 2. Vehicle reference speed 3. Peripheral wheel speed 4. Wheel acceleration/deceler- ation 5. Braking system pressure 6. Permissible acceleration band 7. Permissible deceleration band P4A02AD01 The signals (alternating or analogue) sent by the rpm sensors to the electronic control unit are converted by the input amplifier into square-wave (or digital) signals.
- Page 459 B r a k i n g s y s t e m Bravo-Brava Anti-lock braking system If the wheel does not regain its speed within a pre-determined time (t), a new pressure reduction phase is started. The wheel normally regains speed until it exceeds the reference speed; at this point a new braking cycle (point D) commences, characterized by the three regulation phases for reducing, maintaining or re-esta- blishing on the brake calipers the pressure generated by the driver on the brake pedal.
- Page 460 F/L Tester (or Computerized Diagnostic Station). The presence of a fault causes the A.B.S. to be deactivated immediately. The fault information present can be read by connecting the Fiat/Lancia Tester or Computerized Diag- nostic Station to the diagnostic socket. DIAGRAM OF BRAKING SYSTEM WITH ANTI-LOCK BRAKING SYSTEM...
- Page 461 Braking s y s t e m Bravo-Brava Anti-lock braking system P4A05AD02 Copyright Fiat Auto...
- Page 462 B r a k e s Bravo-Brava Wheel anti-lock system TEVES MK20 A.B.S. SYSTEM ELECTRICAL DIAGRAM 18*¬ 3*" 1 1 *• 4»" 1 *- 17*- 1 8 3 2*¬ 2-^31 10*" 11 4 24*¬ 1 1 7 2 1 0...
- Page 463 Bravo-Brava Braking s y s t e m Anti-lock braking system CONTROL UNIT The electronic control unit (E.C.U.) consists of: - input circuits for filtering, conditioning and digitizing the signals received from the system via wiring; - integrated logic circuits for processing signals and managing program memories;...
-
Page 464: Fault Diagnosis
Bravo-Brava B r a k i n g s y s t e m Anti-lock braking system The control unit (1) is supplied: - directly from the battery (+VB) on pins 9 and 25, through a 60A fuse (2); - under ignition key (+15) on pin 23, through a 10A fuse (3). - Page 465 Braking s y s t e m Bravo-Brava Anti-lock braking system NOTE The fault warning light is connected so that it is on if the connector is not connected to the control unit or if the wire (1) is shorting to earth.
-
Page 466: Wheelrpm Sensor
Bravo-Brava B r a k i n g s y s t e m Anti-lock braking system WHEELRPM SENSOR The vehicle speed measurement system consists of a wheel or toothed crownwheel (phonic wheel) fitted on the hub or wheel axle, and a variable re- luctance sensosr. -
Page 467: Stop Lights Switch
Bravo-Brava B r a k i n g s y s t e m Anti-lock braking system If one or more phonic wheels break or become deformed, causing a difference in speed of 25% in rela- tion to the reference speed, the electronic control unit switches off the device and switches on the fault warning light. -
Page 468: Fault Warning Light
B r a k i n g s y s t e m Bravo-Brava Anti-lock braking system A.B.S. FAULT WARNING LIGHT Under normal operating condi- tions, the red warning light (ar- rowed) is off. During starting, when the ignition is switched on, the control unit carries out a static self-last lasting about 2 seconds, during w h i c h time the warning light stays on. -
Page 469: Hydraulic Diagram Of T E V E Smk20
Bravo-Brava Braking s y s t e m Anti-lock braking system HYDRAULIC DIAGRAM OF TEVES MK20 A.B.S. P 4 A 1 3 A D 0 1 17. Rear left inlet solenoid 1. Brake pump 18. Rear left outlet solenoid 2. Servo unit 19. -
Page 470: Description Of Hydraulic Operation Of Teves Mk20 A.b.s
Bravo-Brava B r a k i n g s y s t e m Anti-lock braking system DESCRIPTION OF HYDRAULIC OPERATION OF TEVES MK20 A.B.S. Rest position P4A14A001 1. Electronic control unit 8. Rapid pressure reducing valve 2. Low-pressure accumulator (reservoir) 9. - Page 471 Bravo-Brava B r a k i n g s y s t e m Anti-lock braking system Presssure increase phase P4A15AD01 1. Electronic control unit 8. Rapid pressure reducing valve 2. Low-pressure accumulator (reservoir) 9. Inlet solenoid (A) open (B) closed 3.
- Page 472 Braking s y s t e m Bravo-Brava Anti-lock braking system Pressure maintenance phase P4A16A001 1. Electronic control unit 8. Rapid pressure reducing valve 2. Low-pressure accumulator (reservoir) 9. Inlet solenoid (A) open (B) closed 3. Recycling pump motor 10. Outlet solenoid (A) closed (B) open 4.
- Page 473 B r a k i n g s y s t e m Bravo-Brava Anti-lock braking system Pressure reduction phase P4A17AO01 1. Electronic control unit 8. Rapid pressure reducing valve 9. Inlet solenoid (A) open (B) closed 2. Low-pressure accumulator (reservoir) 10.
- Page 474 Braking s y s t e m Bravo-Brava Anti-lock braking system The braking is therefore intermittent or in steps, and follows a succession of phases dictated by the rol- ling conditions of the braked wheel in accordance w i t h a repetitive cycle in the form of jerks. This is not...
-
Page 475: Requirements To Be Observed On Cars Fitted With Anti-Lock Braking System
Before dismantling the electrohydraulic control unit, disconnect the battery's negative lead. The entire A.B.S. system must be checked with the Fiat/Lancia Tester whenever the electrohydraulic unit, an rpm sensor, the electronic control unit or wiring is replaced. - Page 476 B r a k i n g s y s t e m Bravo-Brava Anti-lock braking system REMOVING-REFITTING COMPONENTS OF THE ANTI-LOCK BRAKING SYSTEM Electrohydraulic control unit To remove the electrohydraulic unit, proceed as follows: 1. undo the clips securing the inlet pipe;...
- Page 477 B r a k i n g s y s t e m Bravo-Brava Anti-lock braking system disconnect the sensor connector on the brake fluid reservoir cap and unscrew the cap; remove the brake fluid from the reservoir using the special syringe;...
- Page 478 Braking s y s t e m Bravo-Brava Anti-lock braking system use a screwdriver to release the two fuses and move them aside; undo the bolt securing the connector block bracket and move aside the connec- tor block with the fuses;...
- Page 479 B r a k i n g s y s t e m Bravo-Brava Anti-lock braking system 1. undo the front bolt (1) and remove the side bolt (2); 2. disconnect the connector, pulling hooking device (3) upwards and remove the electrohydraulic unit;...
- Page 480 B r a k i n g s y s t e m Bravo-Brava Anti-lock braking system Front wheel speed sensor To remove the front wheel speed sensor, pro- ceed as follows: - disconnect the electrical connector; undo the bolt and remove the sensor.
- Page 481 B r a k i n g s y s t e m Bravo-Brava Anti-lock braking system Rear wheel speed sensor To remove the rear wheel speed sensor, pro- ceed as follows: 1. remove the rear seat and lift the sound¬...
- Page 482 B r a k i n g s y s t e m Bravo-Brava Anti-lock braking system undo the bolt and remove the sensor. P4A26AD01 ipp i6v mm D mBjt TD Checking gap between wheel speed sensor phonic wheel on res»*...
- Page 483 Bravo-Brava S t e e r i n g Contents 4 1 . page UPPER STEERING SYSTEM - Steering wheel - Stalk unit base - Steering column - Ignition switch block STEERING GEAR - Variable ratio rack-and-pinion steering ' gear...
-
Page 484: Upper Steering System
Bravo-Brava S t e e r i n g Upper steering system 4 1 . STEERING WHEEL Removing-refitting To remove the steering wheel, proceed as fol- lows: 1. use a screwdriver to remove the horn cov- 2. disconnect the horn wiring connectors;... -
Page 485: Stalk Unit Base
S t e e r i n g Bravo-Brava Upper steering system 4 1 . STALK UNIT BASE Removing-refitting To remove the stalk unit base, proceed as fol- lows: 1. undo the bolts arrowed and remove the steering column bottom shroud;... -
Page 486: Steering Column
Bravo-Brava S t e e r i n g Upper steering system 4 1 . STEERING COLUMN Removing-refitting To remove the steering column, proceed as follows: 1. remove the bolt securing the lower steer- ing column to the steering pinion;... -
Page 487: Ignition Switch Block
S t e e r i n g Bravo-Brava Upper steering system 4 1 . IGNITION SWITCH BLOCK Dismantling-refitting To remove the ignition switch block, proceed as follows: 1. use a punch to undo the shear bolts lock- ing the ignition switch block mounting;... -
Page 488: Steering Gear
Bravo-Brava S t e e r i n g Steering gear 4 1 . VARIABLE RATIO RACK-AND-PIIMIOIM STEERING GEAR Removing-refitting To remove the steering gear, proceed as fol- lows: 1. remove the bolt securing the lower col- umn to the steering gear pinion;... - Page 489 S t e e r i n g Bravo-Brava Steering gear 4 1 . - prise off the gearchange control lever from the head on the steering gear; P4A006F01 - undo the bolts securing the steering gear to the steering subframe;...
-
Page 490: Variable Ratio Rack-And-Pinion Steering Gear
Bravo-Brava S t e e r i n g Steering gear 4 1 . Variable ratio rack-and-pinion steering gear Dismantling-refitting 1. undo the nuts shown and remove the steering damper; 3. undo the clamps on the dust gaiter and lu- 2. -
Page 491: Operation
S t e e r i n g Bravo-Brava Steering gear 4 1 . OPERATION Its innovative characteristic is that it can re- duce the difference between the maximum force applied to the steering wheel when the car is on a bend or carrying out manoeuvres... -
Page 492: Power-Assisted Steering
Bravo-Brava S t e e r i n g Power-assisted steering 4 1 . DESCRIPTION AND OPERATION The power-assisted steering system comprises: - a feed reservoir located in the engine compartment; - a vane pump driven by the engine, with flow regulating and pressure relief valve;... - Page 493 S t e e r i n g Bravo-Brava Power-assisted steering 4 1 . Power steering distributor valve The power steering pump is driven by the engine by a belt, and can supply a feed pressure varying from 3.5 bar in the "neutral"...
-
Page 494: Front Wheel Toe-In
Bravo-Brava S t e e r i n g Power-assisted steering 4 1 . The power-assisted steering system is self-bleeding; it is bled by turning the steering wheel full lock to the right and left with the engine running and the car stopped. - Page 495 S t e e r i n g Bravo-Brava Power steering gear 4 1 . RACK-AND-PIIMION POWER STEERING GEAR Removing - refitting Before removing the power steering gear, drain the fluid from the reservoir. NOTE The old fluid should not be reused.
- Page 496 Lambda probe w i r i n g c o n - nector; also undo the t w o nuts on the clamp securing the front exhaust pipe; 3. undo the nuts securing the front exhaust pipe t o the catalytic converter and remove the pipe; Copyright Fiat Auto...
- Page 497 S t e e r i n g Bravo-Brava Power-assisted steering gear 4 1 . P4A015F01 P4AO15F02 1. undo the bolts securing the power unit mounting, differential side, to the body shell; 2. undo the bolts securing the power unit mounting bracket to the gearbox;...
- Page 498 S t e e r i n g Bravo-Brava Power-assisted steering 4 1 . 1. prise off head securing the gearchange lever (4) to the relay mount- ing and move to the left the gearchange lever with the gear selector lever rod (3);...
- Page 499 Btavo-Brava S t e e r i n g Power-assisted steering gear 4 1 . - withdraw the power steering gear from underneath the vehicle. NOTE To refit the power steering gear, reverse the procedure for removal. Check the front wheel toe-in whenever the steering gear is removed-refitted.
-
Page 500: Power Steering Pump
Top up the level with fresh fluid. 2. undo the clamps and remove the air intake pipe; 3. undo the bolts indicated and remove the belt guard; 4. disconnect the fluid inlet and outlet pipes from the power steering pump. Copyright Fiat Auto... - Page 501 S t e e r i n g Bravo-Brava Power steering pump 4 1 . Place the vehicle on ramps, remove the front wheel, then: - undo the bolts, release the button and re- move the right wheelarch cover; P4A019F01 - slacken the pump pulley bolts;...
- Page 502 S t e e r i n g Bravo-Brava Power steering pump 4 1 . undo the bolts and remove the pulley; undo the bolts securing the pump to the bracket and remove the pump. NOTE To refit the power steering pump, re- verse the procedure for removal.
- Page 503 S t e e r i n g Bravo-Brava Power steering pump 4 1 . Removing-refitting Before removing the power steering pump, drain the fluid from the reservoir. NOTE The old fluid should not be reused. Top up the level with fresh fluid.
- Page 504 Bravo-Brava S t e e r i n g fti* Power steering pump 4 1 . 1. undo the bolts and remove the pulley and belt; P4A022F01 verse the procedure removal. Copyright Fiat Auto...
- Page 505 S t e e r i n g Bravo-Brava Power steering pump 4 1 . Removing-refitting Before removing the power steering pump, drain the fluid from the reservoir. NOTE The old fluid should not be reused. Top up the level with fresh fluid.
- Page 506 Bravo-Brava ft 16v S t e e r i n g Power steering pump 4 1 . Working from the engine compartment, carry out the following operations: 1. undo the two bolts securing the link to the engine and the bracket, and remove the link;...
- Page 507 S t e e r i n g Bravo-Brava ft 16v Power steering pump 4 1 . Raise the vehicle, then: - from the rear, undo the bolts securing the inlet manifold reaction bracket and remove the bracket; - undo the bolts securing the alternator mounting bracket and remove the bracket;...
- Page 508 - unscrew the delivery pipe connector (ar- rowed), then withdraw the pump w i t h the hose. NOTE To refit the power steering pump, verse procedure removal, then refit and tension the belts described in Sec. 10. Copyright Fiat Auto...
- Page 509 S t e e r i n g Bravo-Brava igp 20v Power steering pump 4 1 . P4A027F02 Dismantling-reassembly power steering pump bearing 1. Remove circlip tool 1860888000 as shown in the figure, then tighten the nut until the bearing is fully withdrawn;...
- Page 510 Bravo-Brava S t e e r i n g fti< Power steering pump 4 1 . Removing-refitting To remove the power steering pump, proceed as follows: 1. drain the fluid reservoir using a syringe; NOTE The old fluid should not be reused.
- Page 511 Bravo-Brava ® i o S t e e r i n g Power steering pump 4 1 . 1. remove the bolts (1) and (2), then remove the pump body complete with pulley and mounting brackets; 2. undo the nut and remove the pulley;...
- Page 512 The documentation relating to this engine was not yet available at the time of going t o print. The procedure for removing and refitting the power steering pump will be published in a subsequent u p - date. Copyright Fiat Auto...
-
Page 513: 1910 Td Engine
S t e e r i n g Bravo-Brava Power steering pump 4 1 . 1910 TD ENGINE The documentation relating to this engine was not yet available at the time of going to print. The procedure for removing and refitting the power steering pump will be published in a subsequent up- date. - Page 514 Bravo-Brava S u s p e n s i o n and w h e e l s Contents 4 4 . page FRONT SUSPENSION - Diagram of front suspension assembly - Wishbone and steering subframe - Spring-damper assembly - Vertical linLand wheel hub...
-
Page 515: Front Suspension
S u s p e n s i o n and w h e e l s Bravo-Brava Front suspension DIAGRAM OF FRONT SUSPENSION ASSEMBLY Copyright Fiat Auto... -
Page 516: Wishbone And Steering Subframe
S u s p e n s i o n and w h e e l s Bravo-Brava Front suspension 4 4 . P4A002G02 WISHBONE AND STEERING SUBFRAME Removal To remove the wishbone and the steering subframe, place the car on... - Page 517 Bravo-Brava S u s p e n s i o n and w h e e l s Front suspension P4A003G02 Copyright Fiat Auto...
- Page 518 Sospensioni e ruote Bravo-Brava Sospensione anteriore 4 4 . 1 . rimuovere il riparo anticalore; 2. svitare le viti di fissaggio della scatola ser- vosterzo alia traversa anteriore; 3. posizionare un sollevatore idraulico a co- lonna sotto la traversa, quindi svitare le viti di fissaggio della traversa alia scocca (frecce);...
- Page 519 Bravo-Brava S u s p e n s i o n and w h e e l s Front suspension 4 4 . Dismantling-refitting anti- roll bar on steering subf rame Checking anti-roll bar Neither the rubber buffers nor the bar should show signs of damage, otherwise the buffers and the bar must be replaced.
-
Page 520: Spring-Damper Assembly
Bravo-Brava S u s p e n s i o n and w h e e l s Front suspension 4 4 . SPRING-DAMPER ASSEMBLY Removing - ref itti ng To remove the spring-damper assembly, pro- ceed as follows: 1. undo the bolts securing the damper top plate to the bodywork;... - Page 521 Springs of the same category must be fitted. Refit the components in reverse order, tighten the damper stem nut to the correct torque then refit the dust excluder. Copyright Fiat Auto...
- Page 522 S u s p e n s i o n and w h e e l s Bravo-Brava Front suspension 4 4 . VERTICAL LINK AND WHEEL HUB Removal To remove the front vertical link and wheel hub, proceed as follows: - undo the nut securing the front wheel hub to the stub axle;...
- Page 523 Bravo-Brava S u s p e n s i o n and w h e e l s Front suspension P4A009G05 Copyright Fiat Auto...
- Page 524 S u s p e n s i o n and w h e e l s Bravo-Brava Front s u s p e n s i o n - undo the bolts securing the spring-damper assembly to the vertical link;...
- Page 525 Bravo-Brava S u s p e n s i o n and w h e e l s Front suspension 4 4 . Dismantling To dismantle the vertical link and wheel hub, proceed as follows: - dismantle the hub from the vertical link us- ing a press;...
- Page 526 Bravo-Brava S u s p e n s i o n and w h e e l s Front suspension 4 4 . dismantle the circlip securing the bearing outer race; dismantle the bearing outer race from the vertical link using a press.
- Page 527 1870007000. Then fit the bearing circlip. Fit the hub in the bearing on the vertical link using a press, supporting the bearing inner race w i t h a cylinder (1) of suitable diameter. Copyright Fiat Auto...
-
Page 528: Components Of The Front Suspension Supplied As Spare Parts
S u s p e n s i o n and w h e e l s Bravo-Brava Front suspension 4 4 . COMPONENTS OF THE FRONT SUSPEN- <i> SION SUPPLIED AS SPARE PARTS anPa Components of the damper top mounting Check that the components have no faults that might impair their efficiency. - Page 529 USAG 362 or similar). The collar should be cut on the notch of the hub on the side opposite that of tightening the nut, so that the safety lug opposes accidental uncrewing (see figure 2 ) . Copyright Fiat Auto...
-
Page 530: Rear Suspension
Bravo-Brava S u s p e n s i o n and w h e e l s Rear suspension 4 4 . DIAGRAM OF REAR SUSPENSION ASSEMBLY 1. Anti-roll bar 4. Torsion bar 2. Trailing arm 5. Damper 3. Spring Publication 506.670... -
Page 531: Removing-Refitting
2. disconnect the t w o wiring connectors; 3. undo the nut and disconnect the vent pipe (1), then release the retaining lugs and disconnect the fuel delivery and return pipes (2); Copyright Fiat Auto... - Page 532 S u s p e n s i o n and w h e e l s Bravo-Brava Rear suspension Publication no. 506.670...
- Page 533 S u s p e n s i o n and w h e e l s Bravo-Brava Rear suspension 4 4 . P4A019G04 1. place a column jack under the tank, undo the bolts and remove the attachment but- tons shown, then gently lower the fuel tank;...
- Page 534 S u s p e n s i o n and w h e e l s Bravo-Brava Rear suspension 4 4 . P4A020G05 P4A020G04 Publication 506.670...
- Page 535 3. unscrew and move aside the A.B.S. sensor; 4. place a hydraulic jack under the suspen- sion crossframe and undo the bolts secur- ing the suspension to the body; lower the hydraulic jack and remove the rear sus- pension assembly. P4AO21G04 Copyright Fiat Auto...
-
Page 536: Dismantling-Refitting
S u s p e n s i o n and w h e e l s Bravo-Brava Rear suspension 4 4 . DISMANTLING-REFITTING Rear suspension on overhaul stand Dismantling anti-roll bar from attachments on trailing arm Anti-roll bar Check that the anti-roll bar is not damaged or deformed, otherwise it will have to be re- placed. - Page 537 S u s p e n s i o n and w h e e l s Bravo-Brava Rear suspension 4 4 . Dismantling damper from anchorage on trailing arm To remove the damper, compress the rear suspension with hydraulic jack.
-
Page 538: Stub Axle-Rear Wheel Hub
S u s p e n s i o n and w h e e l s Bravo-Brava Rear suspension 4 4 . Dismantling dust cap from wheel hub Refitting dust cap on wheel hub NOTE Before assembly, smear TUTELA MR3 grease around the edge of the cap. - Page 539 S u s p e n s i o n and w h e e l s Bravo-Brava Rear suspension 4 4 . Dismantling trailing arm from rear torsion beam <i> Checking trailing arm Check that the trailing arm is not cracked, de- formed or worn (on the surface on the wheel side), otherwise it will have to be replaced.
- Page 540 Bravo-Brava S u s p e n s i o n and w h e e l s Rear suspension 4 4 . 15 d a N m Fitting trailing arm to rear torsion beam and tightening nut to correct torque 6 d a N m 8.8 d a N m...
- Page 541 1 0 . 8 d a N m Refitting rear suspension Tightening bodywork attachment bolts to correct torque 28 d a N m Tightening nut securing stub axle and wheel hub to correct torque P4A027G02 Also: Bleed the brakes Check the rear wheel geometry Copyright Fiat Auto...
-
Page 542: Components Of The Rear Suspension Supplied As Spare Parts
S u s p e n s i o n and w h e e l s Bravo-Brava Rear suspension 4 4 . COMPONENTS OF THE REAR SUSPENSION SUPPLIED AS SPARE PARTS 1. Rear torsion beam - 2. Rubber buffers - 3. Damper top mounting bolt - 4. Coil spring - 5. Damper - 6. -
Page 543: Wheel Geometry
Bravo-Brava S u s p e n s i o n a n d w h e e l s Wheel geometry 4 4 . FRONT WHEEL GEOMETRY The wheel geometry must be checked after the components that affect it have been subjected to the fol- lowing checks: - tyre pressures;... -
Page 544: Rear Wheel Geometry
Bravo-Brava S u s p e n s i o n a n d w h e e l s Wheel geometry 4 4 . REAR WHEEL GEOMETRY The wheel geometry must be checked after the following checks have been carried out: - tyre pressures;...