Table of Contents
Advertisement
Quick Links
Advertisement
Table of Contents

Related Manuals for Dürkopp Adler 1767


Summary of Contents for Dürkopp Adler 1767
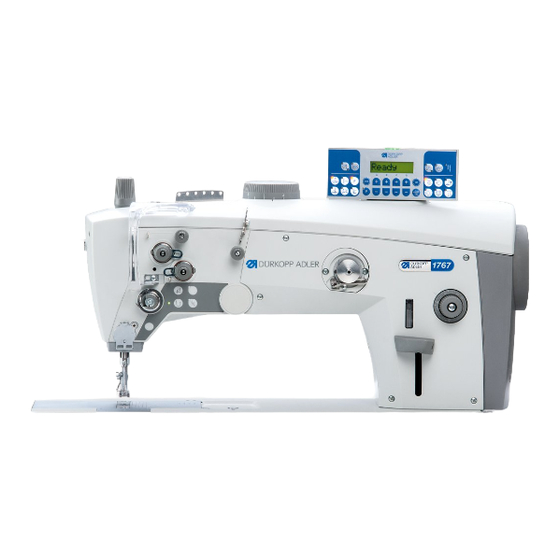
- Page 1 1767 Service Instructions...
- Page 2 IMPORTANT READ CAREFULLY BEFORE USE KEEP FOR FUTURE REFERENCE All rights reserved. Property of Dürkopp Adler AG and protected by copyright. Any reuse of these contents, including extracts, is prohibited without the prior written approval of Dürkopp Adler AG. Copyright © Dürkopp Adler AG 2016...
-
Page 3: Table Of Contents
Setting the feed dog movement..........44 9.2.1 Setting the feed eccentric ............44 9.2.2 Setting the compensating weight..........45 9.2.3 Setting the feed stroke eccentric ..........46 Setting the feed dog height at top dead center......47 Service Instructions 1767 - 00.0 - 12/2016... - Page 4 19.2.3 Using the multiple start bartack as the darning program .... 97 19.2.4 Setting the end bartack............... 98 19.2.5 Setting the multiple end bartack ..........99 19.2.6 Activating the thread cutter ............99 Service Instructions 1767 - 00.0 - 12/2016...
- Page 5 20.3.3 Cleaning the filter element ............115 20.4 Parts list ..................116 Decommissioning..............117 Disposal................... 119 Troubleshooting ..............121 23.1 Customer Service ..............121 23.2 Errors in sewing process ............121 Technical data................. 123 Service Instructions 1767 - 00.0 - 12/2016...
- Page 6 Table of Contents Service Instructions 1767 - 00.0 - 12/2016...
-
Page 7: About These Instructions
Proper setting Specifies proper setting. Disturbances Specifies the disturbances that can occur from an incorrect setting. Cover Specifies which covers must be disassembled in order to access the components to be set. Service Instructions 1767 - 00.0 - 12/2016... - Page 8 Safety ( p. 9). If no other clear location information is used in a figure, indications of right Location information or left are always from the user's point of view. Service Instructions 1767 - 00.0 - 12/2016...
-
Page 9: Other Documents
Leave machines, equipment and packaging material in the condition in which they were found when the damage was discovered. This will ensure any claims against the transport company. Report all other complaints to Dürkopp Adler immediately after receiving the product. Service Instructions 1767 - 00.0 - 12/2016... - Page 10 About these instructions Service Instructions 1767 - 00.0 - 12/2016...
-
Page 11: Safety
• set up the machine • perform maintenance work and repairs • perform work on electrical equipment Only authorized persons may work on the machine and must first have understood these instructions. Service Instructions 1767 - 00.0 - 12/2016... -
Page 12: Signal Words And Symbols Used In Warnings
If ignored, environmental damage can result NOTICE (without hazard symbol) If ignored, property damage can result The following symbols indicate the type of danger to personnel: Symbols Symbol Type of danger General Electric shock Service Instructions 1767 - 00.0 - 12/2016... - Page 13 Type and source of danger! Consequences of non-compliance. Measures for avoiding the danger. This is what a warning looks like for a hazard that could result in moderate or minor injury if the warning is ignored. Service Instructions 1767 - 00.0 - 12/2016...
- Page 14 NOTICE Type and source of danger! Consequences of non-compliance. Measures for avoiding the danger. This is what a warning looks like for a hazard that could result in property damage if ignored. Service Instructions 1767 - 00.0 - 12/2016...
-
Page 15: Working Basis
1. Lay any excess cabling neatly in proper cable snakes. 2. Bind together the cable loops with cable ties. Important Tie loops wherever possible to fixed parts. The cables must be secured firmly. 3. Cut off any overlapping cable ties. Service Instructions 1767 - 00.0 - 12/2016... -
Page 16: Removing The Covers
3.3.1 Access to the underside of the machine In order to access the components at the machine bottom section, you must first tilt the machine head. Fig. 1: Access to the underside of the machine Service Instructions 1767 - 00.0 - 12/2016... -
Page 17: Removing And Placing The Arm Cover
3. Remove the arm cover (2). The arm cover and control panel holder are removed jointly. Placing the arm cover To place the arm cover: 4. Place arm cover (2) and control panel holder. Service Instructions 1767 - 00.0 - 12/2016... -
Page 18: Removing And Placing The Head Cover
To remove the head cover: 1. Loosen the screws (1). 2. Remove the head cover (2). Placing the head cover To place the head cover: 1. Place the head cover (2). 2. Tighten the screws (1). Service Instructions 1767 - 00.0 - 12/2016... -
Page 19: Removing And Placing The Rear Cover
2. Remove the rear cover (2). Placing the rear cover To place the rear cover: 1. Place the rear cover (2). 2. Tighten the screws (1). Important When placing the cover, make sure not to pinch any cables. Service Instructions 1767 - 00.0 - 12/2016... -
Page 20: Removing And Placing The
To place the front cover: 1. Switch on the winder (1). 2. Place the front cover (4). 3. Tighten the screws (5). 4. Fit the stitch adjustment lever handle (2). 5. Tighten the screw (3). Service Instructions 1767 - 00.0 - 12/2016... -
Page 21: Disassembling And Assembling The Tensioning Plate
To assemble the tensioning plate: 1. Place the tensioning plate (7). 2. Tighten the screws (1). 3. Connect the compressed air line (6). 4. Insert plug (4) and (5). 5. Assemble the equipotential bonding (3). Service Instructions 1767 - 00.0 - 12/2016... -
Page 22: Removing And Placing The Belt Cover
2. Loosen screws (2) and (3). 3. Remove the belt cover (4). Placing the the belt cover To place the belt cover: 1. Place the belt cover (4). 2. Tighten screws (2) and (3). Service Instructions 1767 - 00.0 - 12/2016... -
Page 23: Opening And Closing The Throat Plate Slide
1. Press the clamping spring (3) downwards. 2. Push the throat plate slide (1) apart. Closing the throat plate slide To close the throat plate slide: 1. Slide the throat plate slide (1) up to the throat plate (2). Service Instructions 1767 - 00.0 - 12/2016... -
Page 24: Disassembling And Assembling The Throat Plate
1. Insert the throat plate (2). Ensure that the nose (3) of the bobbin case (4) is in the cutout of the throat plate. 2. Tighten both screws (1). 3. Close the throat plate slide ( p. 21). Service Instructions 1767 - 00.0 - 12/2016... -
Page 25: Disassembling And Assembling The Feed Dog
Check the feed dog position in its movement at maximum stitch length (depending on the equipment: 6, 9 or 12) by turning the handwheel. The feed dog must not hit against the throat plate. Service Instructions 1767 - 00.0 - 12/2016... -
Page 26: Flats On Shafts
Fig. 12: Locking the machine in place (1) ④ ③ ② ① (1) - Locking peg (3) - Small arresting groove (2) - Large arresting groove (4) - Arm shaft crank Service Instructions 1767 - 00.0 - 12/2016... - Page 27 3. Insert the locking peg (7) with the appropriate end into the slot (5). Removing the lock To remove the lock: 1. Pull the locking peg (7) out of the slot (5). 2. Insert the plug into the locking opening (6). Service Instructions 1767 - 00.0 - 12/2016...
-
Page 28: Setting The Handwheel Into Position
② (1) - Marking (2) - Graduated scale To set the handwheel into position: 1. Turn the handwheel until the required number on the graduated scale (2) is next to the marking (1). Service Instructions 1767 - 00.0 - 12/2016... -
Page 29: Positioning The Arm Shaft
Fig. 15: Positioning the arm shaft crank ① ② ③ ④ ⑤ (1) - Ball bearing (4) - Flat of crank (2) - Locking ring (5) - Flat of arm shaft (3) - Threaded pins Service Instructions 1767 - 00.0 - 12/2016... - Page 30 2. Turn the arm shaft so that the threaded pins (3) are seated flush on the flat. 3. Position the arm shaft so that the face of the arm shaft (5) is flush with the face of the crank (4). 4. Tighten the threaded pins (3). Service Instructions 1767 - 00.0 - 12/2016...
-
Page 31: Positioning The Toothed Belt Wheels
1. Fit the adjusting spring (3) into the slot (2) of the toothed belt wheel (4). 2. Push the toothed belt wheel (4) with the adjusting spring (3) up against the motor shaft. 3. Tighten the threaded pins (1). Service Instructions 1767 - 00.0 - 12/2016... -
Page 32: Positioning The Upper Toothed Belt Wheel
1. Loosen the threaded pins (4). 2. Turn the toothed belt wheel (3) such that the threaded pins (4) are seated flush on the flat of the arm shaft. 3. Tighten the threaded pins (4). Service Instructions 1767 - 00.0 - 12/2016... -
Page 33: Positioning The Lower Toothed Belt Wheel
3. Turn the toothed belt wheel (1) such that the threaded pins (2) are seated on the flat of the arm shaft. 4. Tighten the threaded pins (2) such that the first screw in the direction of rotation is seated on the flat. Service Instructions 1767 - 00.0 - 12/2016... -
Page 34: Setting The Toothed Belt Tension
The toothed belt tension is set to the optimum value when the belt oscillates at 75 Hz. Check the oscillation, for instance, using a device made by Contitech. 4. Tighten the screw (2). Service Instructions 1767 - 00.0 - 12/2016... -
Page 35: Setting The Handwheel Scale
(4) - Screws To set the handwheel scale: 1. Place the handwheel flange (1) on the shaft. The handwheel flange (1) abuts on the toothed belt wheel (2). 2. Loosen the screws (3). Service Instructions 1767 - 00.0 - 12/2016... - Page 36 3. Lock the machine in place at position 2. Fig. 21: Setting the handwheel scale (2) ⑤ (5) - Handwheel in the 0° position 4. Turn the handwheel to the 0° position (5). 5. Tighten the screws (3). Service Instructions 1767 - 00.0 - 12/2016...
-
Page 37: Latching The Safety Snap-On Coupling
After the coupling has disengaged, they are no longer parallel. Cover • Tilt the machine head ( p. 14) Fig. 22: Latching the safety snap-on coupling (1) ② ① (1) - Threaded pins (2) - Safety snap-on coupling Service Instructions 1767 - 00.0 - 12/2016... - Page 38 1. Press and hold the button (3) on the upper side of the throat plate. The pin (4) must be seated in the hole (5). 2. Turn the handwheel until the threaded pins (1) are in parallel position. The safety snap-on coupling latches into place. Service Instructions 1767 - 00.0 - 12/2016...
-
Page 39: Setting The Stitch Length Adjusting Wheel
• Remove the front cover ( p. 18) Fig. 24: Setting the stitch length adjusting wheel ① ② ③ ④ (1) - Stitch length adjusting wheel (3) - Frame of the stitch regulator gear (2) - Screw (4) - Spindle Service Instructions 1767 - 00.0 - 12/2016... -
Page 40: Setting The Stitch Length Limit
Not all stitch lengths may be available depending on the sewing equipment used. Proper setting 1. Turn the stitch length counterclockwise as far as it will go. The stitch length adjusting wheel can only be turned up to the set maximum stitch length. Service Instructions 1767 - 00.0 - 12/2016... - Page 41 7. Turn the scale so that the 0 is exactly next to the adjusting mark. 8. Assemble the stitch length adjusting wheel (1) and hold it in place. 9. Tighten the screw (2). Service Instructions 1767 - 00.0 - 12/2016...
-
Page 42: Setting The Basic Eccentric Setting For Forward Stitch And Backward Stitch
⑤ ⑥ (5) - Screw (6) - Clips 5. Tilt the machine ( p. 14). 6. Loosen the screw (5). 7. Set the clips (6) to parallel position. 8. Tighten the screw (5). Service Instructions 1767 - 00.0 - 12/2016... -
Page 43: Feed Dog
• For minimal deviations, it suffices to move the feed dog on the carrier ( p. 42) • If this is not sufficient, move the entire feed dog carrier on the sliding shaft ( p. 43) Service Instructions 1767 - 00.0 - 12/2016... -
Page 44: Moving The Feed Dog
2. Move the feed dog (1) on the feed dog carrier (2). Place the removed throat plate next to it as an aid for orientation so that the feed dog can be screwed on straight. 3. Tighten the screws (3). Service Instructions 1767 - 00.0 - 12/2016... -
Page 45: Moving The Feed Dog Carrier
9. Tighten the screw (2). 10. Tighten the screws (1). Important Make sure that the feed dog height has the proper setting ( p. 46). Service Instructions 1767 - 00.0 - 12/2016... -
Page 46: Setting The Feed Dog Movement
9.2.1 Setting the feed eccentric Cover • Remove the front cover ( p. 18) Fig. 30: Setting the feed eccentric ② ③ ④ ① (1) - Locking pin (3) - Eccentric (2) - Markings (4) - Screws Service Instructions 1767 - 00.0 - 12/2016... -
Page 47: Setting The Compensating Weight
1. Loosen the screw (1). 2. Turn the compensating weight (2) until the screw of the compensating weight (1) is parallel to the 1st screw in the rotational direction (5) of the eccentric (4). Service Instructions 1767 - 00.0 - 12/2016... -
Page 48: Setting The Feed Stroke Eccentric
The needle is in the loop stroke position. 2. Loosen the screws (4) on the eccentric (3). 3. Turn the eccentric (3) until the markings (2) line up. 4. Tighten the screws (4). Service Instructions 1767 - 00.0 - 12/2016... -
Page 49: Setting The Feed Dog Height At Top Dead Center
2. Loosen the threaded pins (2) for the lever (1). 3. Turn the lever (1) such that the upper edge of the feed dog protrudes 0.5 mm (KFA = 0.8 mm) above the throat plate. 4. Tighten the threaded pins (2). Service Instructions 1767 - 00.0 - 12/2016... -
Page 50: Aligning The Needle Bar Linkage
• Disassemble the tensioning plate ( p. 19) • Remove the front cover ( p. 18) Fig. 34: Aligning the needle bar linkage sideways (1) ① ② ③ (1) - Threaded pins (3) - Screw (2) - Adjusting rings Service Instructions 1767 - 00.0 - 12/2016... - Page 51 6. Push the two adjusting rings (2) inwards as far as they will go and tighten them. 7. Tighten the threaded pins (1) on the two adjusting rings (2). Service Instructions 1767 - 00.0 - 12/2016...
- Page 52 9. Tighten both threaded pins (8) on the arm shaft crank (9). Order Then check the following settings: • Distance between hook and needle ( p. 52) Service Instructions 1767 - 00.0 - 12/2016...
-
Page 53: Aligning The Needle Bar Linkage In The Sewing Direction
2. Move the needle bar linkage (2) such that the needle pierces in the center of the needle hole. 3. Tighten the screw (1). Order Then check the following setting: • Loop stroke position ( p. 54) Service Instructions 1767 - 00.0 - 12/2016... -
Page 54: Position Of The Hook And Needle
The distance between the hook tip and the groove of the needle is 0.1 mm. Cover • Tilt the machine head ( p. 14) • Open the throat plate slide ( p. 21) Service Instructions 1767 - 00.0 - 12/2016... - Page 55 5. Tighten the screws (3). Important 6. Check the loop stroke position ( p. 54). 7. Tighten the threaded pins (2) for the clamping ring (1). 8. Remove the lock ( p. 24). Service Instructions 1767 - 00.0 - 12/2016...
-
Page 56: Setting The Loop Stroke Position
1. Lock the machine in place at position 1 ( p. 24). The hook tip (2) points exactly to the vertical center line (1) of the needle. The loop stroke is precisely 2 mm. Disturbance • Missing stitches Service Instructions 1767 - 00.0 - 12/2016... - Page 57 • Disassemble the feed dog ( p. 23) Fig. 41: Setting the loop stroke position ④ ① ② ③ (1) - Clamping ring (3) - Vertical center line of the needle (2) - Threaded pins (4) - Hook tip Service Instructions 1767 - 00.0 - 12/2016...
-
Page 58: Setting The Needle Bar Height
The hook tip is level with the lower third of the groove on the needle. Disturbance • Damage to the hook tip • Jamming of the needle thread • Missing stitches • Thread breaking • Needle breakage Cover • Remove the head cover ( p. 16) Service Instructions 1767 - 00.0 - 12/2016... - Page 59 The groove (3) must face toward the hook. 5. Tighten the screw (2) for the needle bar (1). 6. Remove the lock ( p. 24). Order Then check the following setting: • Position of the needle guard ( p. 58) Service Instructions 1767 - 00.0 - 12/2016...
-
Page 60: Setting The Needle Guard
Cover • Disassemble the feed dog ( p. 23) Fig. 43: Setting the needle guard ① ② ③ (1) - Screw (3) - Needle (2) - Needle guard Service Instructions 1767 - 00.0 - 12/2016... - Page 61 2. Turn the screw (1) such that the needle guard (2) just pushes the needle (3) far away enough so that it cannot be touched by the hook tip: • For pushing away more: Turn counterclockwise • For pushing away less: Turn clockwise Service Instructions 1767 - 00.0 - 12/2016...
-
Page 62: Setting The Bobbin Case Lifter
So that the thread can slip through without a problem, the width of the lifting gap and the timing of opening have to be set. Disturbance • Thread breaking • Formation of loops on the bottom side of the seam • Loud machine noise Service Instructions 1767 - 00.0 - 12/2016... -
Page 63: Setting The Lifting Gap
Ensure that the gap is not too big. The middle part of the hook must not swing back and forth, hitting the slot in the throat plate. 5. Tighten the threaded pin (1). 6. Push the cover (2) upwards. 7. Tighten the screw (3). Service Instructions 1767 - 00.0 - 12/2016... -
Page 64: Setting The Timing For Opening
4. Use the hex key to turn the control cam (3) such that the bobbin case lifter opens at the correct point in time. 5. Tighten the threaded pin (4). 6. Insert the plug (1) into the slot. Service Instructions 1767 - 00.0 - 12/2016... -
Page 65: Sewing Feet
In order to ensure a correct feed, the stroke movement for the feeding foot must be aligned to the stroke movement for the feed dog. Order First, check the following settings: • Feed dog movement ( p. 44) • Even sewing foot stroke ( p. 65) Service Instructions 1767 - 00.0 - 12/2016... - Page 66 • Remove the front cover ( p. 18) Fig. 49: Setting the stroke movement for the feeding foot ④ ① ② ③ (1) - Screw (3) - Marking (2) - Eccentric (4) - Marking Service Instructions 1767 - 00.0 - 12/2016...
-
Page 67: Setting An Even Sewing Foot Stroke
(1) - Presser foot (3) - Screw (2) - Feeding foot (4) - Sewing foot lever To set an even sewing foot stroke: 1. Check the sewing foot stroke. 2. Loosen the screw (3). Service Instructions 1767 - 00.0 - 12/2016... -
Page 68: Setting The Adjusting Frame
5. Manually lower the feeding foot down onto the hex key. 6. Center the stroke lever (4) in the slot (2). 7. Tighten the screws (3). Important 8. Ensure that the stroke lever (4) does not shift. Service Instructions 1767 - 00.0 - 12/2016... -
Page 69: Setting The Sewing Foot Lifting Height
Fig. 52: Setting the sewing foot lifting height ① ② (1) - Adjusting screw (2) - Counternut To set the lifting height of the sewing foot: 1. Loosen the counternut (2) for the adjusting screw (1). Service Instructions 1767 - 00.0 - 12/2016... - Page 70 • To raise the sewing feet to a lesser height: Turn clockwise • To raise the sewing feet higher: Turn counterclockwise 3. Tighten the counternut (2) for the adjusting screw (1). Service Instructions 1767 - 00.0 - 12/2016...
-
Page 71: Setting The Thread Tensioning Spring
3. To set the spring tension: Turn the tension disk (3): • Greater spring tension: Turn counterclockwise • Less spring tension: Turn clockwise Important Do not twist the stop collar (1) when doing so. 4. Tighten the screw (4). Service Instructions 1767 - 00.0 - 12/2016... -
Page 72: Winder
Fig. 54: Disassembling the winder and setting the winder filling quantity (1) - Screws (3) - Winder lever (2) - Screw (4) - Arm To disassemble the winder and set the winder filling quantity: 1. Loosen the screws (1). 2. Remove the winder. Service Instructions 1767 - 00.0 - 12/2016... - Page 73 9. Set the block (5) such that it is resting against the locking disk (14). 10. Set the block (5) such that its distance to the winder wheel (6) is 0.5 mm. 11. Tighten the threaded pin in the block (5). Service Instructions 1767 - 00.0 - 12/2016...
- Page 74 Assembling the winder Fig. 57: Assembling the winder (1) - Screws (2) - Marking for XXL hook To assemble the winder: 16. Place the winder on the machine arm. 17. Tighten the screws (1). Service Instructions 1767 - 00.0 - 12/2016...
-
Page 75: Setting The Winder Wheel
(2) - Distance To set the winder wheel: 1. Loosen the screws (3). 2. Switch off the winder (1). 3. Set the distance (2) between the wheels to 0.8 mm. 4. Tighten the screws (3). Service Instructions 1767 - 00.0 - 12/2016... -
Page 76: Setting The Hook Thread Guide
2. Turn the hook thread guide (2): • To the front: The thread will be wound on further to the front • To the rear: The thread will be wound on further to the rear Service Instructions 1767 - 00.0 - 12/2016... -
Page 77: Thread Cutter
Fig. 60: Setting the height of the thread-pulling knife (1) - Counter blade (4) - Knife carrier (2) - Thread-pulling knife (5) - Distance (3) - Hook bearing screw-on surface (6) - Screw Service Instructions 1767 - 00.0 - 12/2016... -
Page 78: Setting The Cutoff Curve
1. Loosen all 4 threaded pins (2) on the clamping ring (1). 2. Slide the clamping ring (1) to the left as far as it will go. 3. Tighten all 4 threaded pins (2) on the clamping ring (1). Service Instructions 1767 - 00.0 - 12/2016... - Page 79 13. Push the clamping ring (1) to the right up against the control cam (4). Important Check the loop stroke position ( p. 54). 14. Tighten all 4 threaded pins (2) on the clamping ring (1). Service Instructions 1767 - 00.0 - 12/2016...
-
Page 80: Setting The Cutting Pressure
4. Turn the hook thread clamp (5) such that it rests against the thread- pulling knife (3). 5. Turn the counter blade (2) such that it rests against the thread-pulling knife (3). 6. Tighten the screw (1). Service Instructions 1767 - 00.0 - 12/2016... -
Page 81: Setting Point In Time For Cutting
(6) - Thread-pulling knife To set the point in time for cutting: 1. Loosen the threaded pins (4). 2. Turn the handwheel until the thread-pulling knife (6) can be swung out by hand. Service Instructions 1767 - 00.0 - 12/2016... - Page 82 • Insert the thread into the thread-pulling knife (6) and slowly turn the handwheel. • Check the handwheel position at which the thread is cut. • If necessary, repeat setting steps 1 – 7 until the cut takes place at 60°. Service Instructions 1767 - 00.0 - 12/2016...
-
Page 83: Short Thread Cutter
Requirements • The needle bar must be at the top dead center when the handwheel position is 0° ( p. 33) • The hook bearing must be set correctly ( p. 52). Service Instructions 1767 - 00.0 - 12/2016... - Page 84 When changing the knives make sure that you do not lose the adjusting washers. Important The height of the thread-pulling knife is determined by the height of the counter blade. The upper edges of the two knives must be on the same level. Service Instructions 1767 - 00.0 - 12/2016...
- Page 85 (label is upside down) of the clamping ring (4). Proper setting The control cam (5) makes contact with the clamping ring (4). The label of the control cam (5) is correct in accordance with the installa- tion situation. Service Instructions 1767 - 00.0 - 12/2016...
-
Page 86: Setting The Locking Latch
(5) - Screw (3) - Control cam (6) - Locking pin To set the locking latch: 1. Loosen the nut (4). 2. Turn the screw (5) and set the distance. 3. Tighten the nut (4). Service Instructions 1767 - 00.0 - 12/2016... -
Page 87: Setting The Thread-Pulling Knife
8. Turn the thread-pulling knife (1) until the marking (3) on the cutting edge of the counter blade (2) is adjacent to it. 9. Tighten the clamping screw (9). Take care to ensure that there is no axial play. Service Instructions 1767 - 00.0 - 12/2016... -
Page 88: Setting The Counter Blade
5. Check whether the sewing threads have been cleanly cut and pressure is built up starting at the marking (2). Disturbance • Increased knife wear when the pressure is too great • Problems in cutting the thread Service Instructions 1767 - 00.0 - 12/2016... - Page 89 1. Swing out the thread-pulling knife (1) until the marking (2) is next to the cutting edge of the counter blade (5). 2. Loosen the screw (6). 3. Place the counter blade (5) in position against the thread-pulling knife (1). 4. Tighten the screw (6). Service Instructions 1767 - 00.0 - 12/2016...
-
Page 90: Setting The Cutoff Position
(5). 3. Tighten the threaded pins (6) on the control cam (5) again. 4. Check the position as described above under Proper setting and correct the position again if necessary. Service Instructions 1767 - 00.0 - 12/2016... -
Page 91: Setting The Potentiometer
The display starts. 3. Release the P button (2) and the Reset button (4). The display indicates the current level. Service Instructions 1767 - 00.0 - 12/2016... - Page 92 Ensure that the potentiometer (8) is guided on the pin (9). 10. Press the ESC button 2 times. Important 11. Switch off the machine 12. Switch on the machine. Switching off and on will save the setting. Service Instructions 1767 - 00.0 - 12/2016...
-
Page 93: Programming
• User levels • Categories • Parameters ( Parameter list) Fig. 75: Display (A) - User level (D) - Parameter (B) - Category The user level (A) includes • 0 (user) • t (technician) Service Instructions 1767 - 00.0 - 12/2016... -
Page 94: Buttons
Needle position after • Sets the needle position sewing stop after sewing stop p. 100 Sewing foot lift after • Activates or deactivates thread cutter the sewing foot lift after thread cutter Service Instructions 1767 - 00.0 - 12/2016... - Page 95 • Increases parameter • Selects subprogram • Increases parameter • Selects subprogram • Calls parameter or saves it • Starts or ends the parameter mode • Decreases parameter • Changes user level • Selects subprogram Service Instructions 1767 - 00.0 - 12/2016...
- Page 96 DAC basic/ classic Instructions Seam program II • Activates seam program II for use DAC basic/ classic Instructions Seam program III • Sets seam program III for use DAC basic/ classic Service Instructions 1767 - 00.0 - 12/2016...
-
Page 97: Using Button Groups
1. Press the corresponding button on the control panel. You will recognize which machine function has been activated by the LED in the respective button. When the LED illuminates you can sew. Changes are only possible outside of a seam. Service Instructions 1767 - 00.0 - 12/2016... -
Page 98: Thread Button Group Functions
3. Press the B+ button repeatedly until the required number of backward stitches is reached. You can begin sewing; press the pedal forward to pedal position +1. To deactivate the start bartack press Service Instructions 1767 - 00.0 - 12/2016... -
Page 99: Setting The Multiple Start Bartack
4. Press the B+ button repeatedly until the required number of backward stitches is reached. 5. Press the C+ button to set the start of path 1. 6. Press the D+ button repeatedly until the required number of repetitions is reached. Service Instructions 1767 - 00.0 - 12/2016... -
Page 100: Setting The End Bartack
You can begin sewing; press the pedal forward to pedal position +1. At the end of the seam, press the pedal back to pedal position -2. To deactivate the end bartack press Service Instructions 1767 - 00.0 - 12/2016... -
Page 101: Setting The Multiple End Bartack
19.2.7 Activating the thread clamp The thread clamp holds the thread firmly to pull it down and loop it while sewing on. To activate the thread clamp: 1. Press The LED illuminates. Service Instructions 1767 - 00.0 - 12/2016... -
Page 102: Setting The Needle Position After Sewing Stop
19.2.10Activating sewing foot lift after sewing stop The sewing foot lift after sewing stop lifts the sewing foot after a sewing stop. To activate the sewing foot lift: 1. Press The LED illuminates. Service Instructions 1767 - 00.0 - 12/2016... -
Page 103: Activating The Soft Start
The reduced speed increases by one-hundredth. 3. Press the D+ button. The reduced speed increased by one-tenth. You can also reduce the speed: 1. Press the C- button for one-hundredth and D- for one-tenth increments. Service Instructions 1767 - 00.0 - 12/2016... -
Page 104: Programming Button Group Functions
The bobbin stitch counter must be set for every thread type. The value to be set (i.e. 8000) is the product of the default value (reset value) and the number of stitches (factor): 400 20 8000 × Service Instructions 1767 - 00.0 - 12/2016... - Page 105 8. Use the D- or D+ button to set the factor to 20. 9. Confirm your selection with 10. Exit parameter mode with The bobbin stitch counter is at 8000. Service Instructions 1767 - 00.0 - 12/2016...
- Page 106 1 appears on the display. 5. Confirm your selection with The bobbin stitch counter is activated. 6. Exit parameter mode with To deactivate the bobbin stitch counter again, in category 06 change parameter 00 to 0. Service Instructions 1767 - 00.0 - 12/2016...
-
Page 107: Maintenance
Check the oil level Lubricating the gear Pneumatic system Check the water level in the pressure controller Check the filter element in the maintenance unit Check the tightness of the system Service Instructions 1767 - 00.0 - 12/2016... -
Page 108: Cleaning
Lint and thread remnants can impair the operation of the machine. Clean the machine as described. NOTICE Property damage from solvent-based cleaners! Solvent-based cleaners will damage paintwork. Use only solvent-free substances for cleaning. Service Instructions 1767 - 00.0 - 12/2016... -
Page 109: Areas Requiring Special Cleaning
• Area around the needle (1) To clean areas that are susceptible to soiling: 1. Switch off the machine 2. Remove any lint and thread remnants using a compressed air gun or a brush. Service Instructions 1767 - 00.0 - 12/2016... -
Page 110: Cleaning The Motor Fan Mesh
(1) - Areas requiring cleaning (2) - Motor To clean the motor fan mesh: 1. Switch off the machine 2. Remove the arm cover. 3. Remove any lint and thread remnants using a brush. Service Instructions 1767 - 00.0 - 12/2016... -
Page 111: Lubricating
• Flash point: 150 °C You can order the lubricating oil from our sales offices using the following part numbers: Container Part no. 250 ml 9047 000011 9047 000012 9047 000013 9047 000014 Service Instructions 1767 - 00.0 - 12/2016... -
Page 112: Checking The Oil Level
(2). Topping off the oil To top off the oil: 1. Pour in oil through the refill opening (1). Add oil up to but not past the maximum level marking. Service Instructions 1767 - 00.0 - 12/2016... -
Page 113: Lubricating The Gear
② ③ (1) - Screws (3) - Gear (2) - Plate To lubricate the upper gear: 1. Loosen the screws (1). 2. Remove the plate (2). 3. Spread grease across the gear (3). Service Instructions 1767 - 00.0 - 12/2016... - Page 114 Lubricating the lower gear Cover • Remove the front cover ( p. 18) Fig. 80: Lubricating the lower gear ① (1) - Gear To lubricate the lower gear: 1. Spread grease across the gear (1). Service Instructions 1767 - 00.0 - 12/2016...
-
Page 115: Servicing The Pneumatic System
2. Turn the pressure controller until the pressure gage (2) indicates the proper setting: • Increase pressure = turn clockwise • Reduce pressure = turn counterclockwise 3. Push the pressure controller (1) down. Service Instructions 1767 - 00.0 - 12/2016... -
Page 116: Draining The Water Condensation
2. Place the collection tray under the drain screw (3). 3. Loosen the drain screw (3) completely. 4. Allow water to drain into the collection tray. 5. Tighten the drain screw (3). 6. Connect the machine to the compressed air supply. Service Instructions 1767 - 00.0 - 12/2016... -
Page 117: Cleaning The Filter Element
6. Wash out the filter tray using benzine. 7. Tighten the filter element (1). 8. Tighten the water separator (2). 9. Tighten the drain screw (3). 10. Connect the machine to the compressed air supply. Service Instructions 1767 - 00.0 - 12/2016... -
Page 118: Parts List
Maintenance 20.4 Parts list A parts list can be ordered from Dürkopp Adler. Or visit our website for further information at: www.duerkopp-adler.com Service Instructions 1767 - 00.0 - 12/2016... -
Page 119: Decommissioning
5. Cover the control panel to protect it from soiling. 6. Cover the control to protect it from soiling. 7. Cover the entire machine if possible to protect it from contamination and damage. Service Instructions 1767 - 00.0 - 12/2016... - Page 120 Decommissioning Service Instructions 1767 - 00.0 - 12/2016...
-
Page 121: Disposal
When disposing of the machine, be aware that it consists of a range of different materials (steel, plastic, electronic components, etc.). Follow the national regulations when disposing these materials. Service Instructions 1767 - 00.0 - 12/2016... - Page 122 Disposal Service Instructions 1767 - 00.0 - 12/2016...
-
Page 123: Troubleshooting
Thread-guiding parts, such Check threading path as thread tube, thread guide or thread take-up disk, are sharp-edged Throat plate, hook or Have parts reworked by qualified spread have been specialists damaged by the needle Service Instructions 1767 - 00.0 - 12/2016... - Page 124 Needle thread and hook Check threading path thread have not been threaded correctly Needle breakage Needle thickness is Use recommended needle unsuitable for the sewing thickness material or the thread Service Instructions 1767 - 00.0 - 12/2016...
-
Page 125: Technical Data
All subclasses are equipped with a bar holding 6 push buttons. An additional button panel has been placed within easy reach of the sewer and allows the sewer to assign the same 6 functions of the buttons housed in the button bar. Service Instructions 1767 - 00.0 - 12/2016... - Page 126 Technical data Service Instructions 1767 - 00.0 - 12/2016...
- Page 128 DÜRKOPP ADLER AG Potsdamer Straße 190 33719 Bielefeld GERMANY Phone +49 (0) 521 / 925-00 E-mail service@duerkopp-adler.com www.duerkopp-adler.com...