Sign In
Upload
Manuals
Brands
Roland Manuals
Musical Instrument
VS-2400CD
Roland VS-2400CD Manuals
Manuals and User Guides for Roland VS-2400CD. We have
5
Roland VS-2400CD manuals available for free PDF download: Owner's Manual, Appendices, Service Notes, Mixer Block Diagram, Supplementary Manual
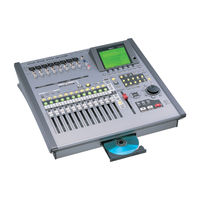
Roland VS-2400CD Owner's Manual (508 pages)
24TR/96kHz/24-bit Digital Studio Workstation
Brand:
Roland
| Category:
Musical Instrument
| Size: 18.52 MB
Table of Contents
Important Safety Instructions
2
Important Notes
5
Memory Backup
5
Power Supply
5
Table of Contents
9
Step-By-Step Instruction Finder
21
1 Welcome
29
About this Manual
29
How the VS-2400CD Owner's Manual Is Organized
29
Names
30
Note, Tip, Glossary and Warning Icons
30
Other Documents in the VS-2400CD Box
31
Getting more Help
31
The Roland US Web Site
31
The Roland US Faxback System
31
Roland US Product Support
31
2 Getting Around
33
The Top Panel of the VS-2400CD
33
Analog Input Jacks
33
Monitor/Display Controls
34
Channel Strips Area
35
Display Area
39
Keypad Area
41
Basic Controls and Navigation Tools
45
The Rear Panel of the VS-2400CD
48
3 Introduction to the VS-2400CD
51
What's Inside the VS-2400CD
51
Input Jacks and Connectors
51
The Mixing Console
52
The Internal Effects
54
The Hard Disk Recorder
55
Output Jacks and Connectors
55
Signal Flow
56
Projects
56
Busses in the VS-2400CD
57
What's a Bus
57
About Direct Paths
58
Achieving Perfect Levels
58
What's "Clipping
58
How Do I Get Good Levels
58
The Importance of Backing up
59
4 Setting up and Basic Operations
61
Things You'll Need
61
Power
61
A Way to Listen to the VS-2400CD
61
Getting Ready
61
Powering up
63
What Happens During the VS-2400Cd's Power-Up
63
Configuring the VS-2400CD
64
Setting up the VGA Monitor, Mouse and Keyboard
64
Setting the VS-2400Cd's Clock
65
A few Fundamental Concepts
65
Selection
65
Switches
66
Parameters and Values
66
Tools You'll Use All the Time
66
The Cursor/Zoom Buttons
66
The F Buttons
66
The Time/Value Dial
67
The ENTER/YES and EXIT/NO Buttons
68
The SHIFT Button
68
Using a Mouse
68
Using an ASCII Keyboard
70
UNDO and REDO
70
Naming
71
Undoing a Track Recording or Editing Operation
71
Entering Numbers with the Numeric Keypad
72
Entering a New Name Using the VS-2400CD Controls
72
Entering a New Name from a Keyboard
72
If You're Using DS-Series Monitors
73
Setting up for Roland's DS-Series Digital Monitors
73
Adjusting Your Listening Level
74
Playing the Factory Demos
74
Chemistry
74
Other Demo
77
Turning off the VS-2400CD
78
5 Understanding Effects
79
Harnessing the VS-2400Cd's Effects
79
Dry and Wet
79
Effect Routings
79
Insert Effects
80
Loop Effects
80
Master Effects
81
External Effects
81
Getting the most from Your Effect Processors
82
6 Understanding the Hard Disk Recorder
83
VS-2400CD Hard Disk Drives
83
What's a Hard Drive
83
How a VS-2400CD Hard Drive Organizes Data
83
Preparing a Hard Drive for Use
84
How Audio Is Recorded on a VS-2400CD Hard Drive
84
How Recordings Are Played Back
84
Random Access
84
What's Pointer-Based Playback
84
Non-Destructive, Pointer-Based Editing
85
Pointer-Based Editing
85
What Is a VS-2400CD Track
87
The Power of V-Tracks
87
Track Editing Basics
88
About Editing Phrases
88
About Editing Regions
88
7 Project and Drive Operations
89
Navigating the PROJECT Menu Screens
89
Working with the PROJECT LIST
89
About "Store Current?" Messages
90
Selecting an Item in the Project List
90
To Display the Projects on a Drive
90
Project Operations
91
About F6 (MARK)
91
Select
91
Loading a Project
91
Marking a Project
91
New
92
Sample Rate
92
Recording Mode
93
Creating a New Project
94
Name
95
Protect
95
Entering a Project Comment
95
Re-Naming a Project
95
Optimize
96
Locking and Un-Locking a Project on Your Hard Drive
96
Optimizing a Project
96
Destination Drive Selection
97
Copy
97
Selecting a New Destination Drive
97
Copying a Project
97
Erase
98
Erasing a Project
98
Split
99
Splitting a Project
99
Combine
100
Backup
101
Combining Two Projects
101
Recover
103
Import
104
Importing a Song from an Earlier V-Studio
104
Export
105
Exporting a VS-2400CD Project
106
Drive Operations
107
Disk Maintenance
107
Fragmentation
107
Format Drive
108
Roland VS-2400CD Owner's Manual Www.rolandus.com
109
Formatting a Hard Drive
109
Clear Partition
110
Clearing a Drive/Partition
110
Drive Check
111
Running Drive Check
112
8 The Home Screen
115
Elements of the Home Screen
115
Display Pop-Up Menu Button
115
Current Channel Display
116
PAN Knobs
116
Meters Display
116
Position Bar
118
The Playlist
118
Zooming in and out on the Playlist
119
Meter Switches
120
Aux Busses
121
Input Peak Indicators
122
Current Time Location Display
122
Clock, Calendar
123
Using the Fader/Pan Display
123
The F/P Switches
123
Changing Your Current Location in a Project
123
About the ID Buttons
124
9 Working with Input Signals
125
Analog Input Signals
125
Making Analog Connections
125
Phantom Power
126
Setting Analog Input Levels
126
To Set an Analog Input Level
126
Digital Input Signals
127
Digital Connections
127
Turning on the Coaxial or Optical Digital Inputs
127
Digital Considerations
127
Activating the Coaxial or Optical Digital Inputs
127
The Master Clock
128
Designating the Master Clock for Digital Audio Input
129
Recording Digital Input Signals
130
Routing Input Signals to Input Channels
130
Choosing an Input Patching Screen
131
How Input Connections Work
131
Patching Input Connections
132
Input Signals to Input Channels
132
10 Using the Digital Mixer
133
Changing Channels
133
Channels
133
Switching between Input, Track, Aux and FX Channels
134
Channel Selection
134
Selecting a Channel for Editing
134
About the Channel Faders
134
Controlling Fader Group Levels with the Channel Strips
135
Setting a Fader to Unity Gain and Centering Its Panning
135
Adjusting Stereo Positioning Using Faders
135
To Reset a Channel's Fader and Pan
135
Activating Knob Control of Channel Panning
135
The FADER ASSIGN Button
136
To Turn the FADER ASSIGN Feature on and off
136
Activating Fader Control of Aux Send Levels
136
Controlling a Parameter of Your Choice
136
Controlling a Parameter of Your Choice Using a Fader
136
Turning FADER ASSIGN on and off
136
The MASTER Fader
137
Activating Fader Control of any Channel Parameter
137
Setting the USER Parameter
137
Muting and Soloing Channel Signals
138
Mute Mode
138
Solo Mode
138
Muting Channels in Mute Mode
138
Scenes
139
Soloing Channels in solo Mode
139
Basic Scene Operations
140
Clearing a Scene
140
Recalling a Scene
140
Storing a Scene
140
Editing Scenes
141
Leaving Scene Mode
141
Scenes in Safe Mode
142
Protecting a Channel's Settings When a Scene Is Recalled
142
Recalling a Scene in Safe Mode
142
Turning on Scene Safe Mode
142
Resetting Mixer Parameters
143
Clearing a Scene in Safe Mode
143
Storing a Scene in Safe Mode
143
11 Input and Track Channel Tools
145
Viewing a CH EDIT Screen
145
Introduction to the CH EDIT Screens
145
How the CH EDIT Screens Are Organized
145
The CH EDIT Screens
146
The CH EDIT VIEW Screen
146
Aux Send Controls
148
Roland VS-2400CD Owner's Manual Www.rolandus.com
149
The DYN Screen
152
The EQ Screen
157
The FX ins Screen
160
The Surrnd Screen
160
The CH EDIT P.BAY Screen
160
The CH EDIT ASSIGN Screen
161
Parameter View
161
Assorted CH EDIT Tools
163
The CH EDIT VIEW Cpyprm Button
163
The DYN and EQ Screen RESET Buttons
163
12 Working with Input Channels
165
Introduction to Input Channel Routing
165
Routing Linked Stereo Input Channels
165
Routing an Input Channel Signal to a Track
166
Quick-Routing Input Channels to Tracks
166
Input Signal Routing on the EZ ROUTING VIEW Screen
168
Input Channel Signals and the Main MIX
169
Removing Input Channel Signals from the Main MIX
169
Adding an Input Channel's Signal to the Main MIX
169
Routing an Input Channel Signal to a Direct Path
169
Sending an Input Channel's Signal into the Main MIX
169
13 Operating the Hard Disk Recorder
171
The Transport Buttons
171
The Main Transport Buttons
171
Special Transport Buttons
171
The TRACK STATUS Buttons
172
How the TRACK STATUS Buttons Work
172
Recording
172
Before Recording a Track
172
Recording a New Track
173
Playback
173
Basic Playback Procedure
173
Moving through a Project
173
Playing Back Recorded Tracks
173
Using Jump
174
Looped Playback
174
Clearing Loop Points
174
Setting Loop Points When a Project Isn't Playing
174
Setting Loop Points While a Project Is Playing
174
Activating Looped Playback
175
Editing Loop from and to Points Manually
175
Setting Loop Points Using Locators
175
Setting Loop Points Using Markers
175
Vari Pitch Playback
176
Activating Vari Pitch
176
Preview
177
Pinpointing an Event with the PREVIEW Buttons
177
Scrub
178
Locators
179
Basic Locator Operations
179
Other Locator Operations
180
Clearing a Locator
180
Editing Locators
180
Recalling a Locator
180
Storing a Locator
180
Switching Automatically to Locator Mode
181
Locators in Safe Mode
181
Recalling a Locator in Safe Mode
181
Turning on Locator Safe Mode
181
Markers
182
Placing a Marker
182
Clearing a Locator in Safe Mode
182
Storing a Locator in Safe Mode
182
Moving the Now Line to a Marker
183
Clearing Markers
184
Editing Markers
184
Punching
185
Monitoring During Punching
185
Before You Punch
185
Punching in and out Manually
186
Auto-Punching
186
Setting Auto Punch Points When a Project Isn't Playing
186
Clearing Auto Punch Points
187
Editing Auto Punch in and out Points Manually
187
Setting Auto Punch Points Using Locators
187
Setting Auto Punch Points Using Markers
187
Setting Auto Punch Points While a Project Is Playing
187
Performing an Auto Punch
188
14 Working with Track Channels
189
Bouncing
189
The Mechanics of Bouncing
190
Mono and Stereo Bouncing
190
First Things First
190
Link the Destination Tracks for a Stereo Bounce
191
Routing Tracks for a Bounce
191
Listening as You Bounce
194
Mixing the Bounce
194
Performing the Bounce
195
Sending a Track Channel's Signal to a Direct Path
196
Routing a Track to a Direct Path
196
Mixing
196
The Mechanics of Mixing
196
15 Aux Busses and Direct Paths
199
Aux Busses
199
Aux Bus Overview
199
When Would You Use an Aux Bus
199
Sending a Signal to an Aux Bus
200
Stereo Aux Busses
200
Aux Bus Levels
200
Metering Aux Bus and Direct Path Levels
200
Configuring an Aux Bus
201
Adjusting an Aux Bus's Master Level
201
Configuring an Aux Bus from a CH EDIT VIEW Screen
201
Configuring an Aux Bus from a MASTER EDIT Screen
201
Direct Paths
202
When Would You Use a Direct Path
202
External Insert-Like Effects
202
Sending a Signal to a Direct Path
203
Direct Path Levels
203
Configuring a Direct Path
203
Aux Bus/Direct Path Strategy
204
Sending Signals to Internal Effects
204
Sending Signals to External Devices
204
Sending Signals to Tracks
204
Routing Aux and Direct Paths to Internal Effects
204
Creating a Headphone MIX Using an Aux Bus
205
Setting up a Headphone MIX
205
16 Using Effects
207
Using Loop Effects
207
Setting up an Internal Loop Effect
207
Setting up an External Loop Effect
209
Inserting an Effect
210
About Insert Effects
210
Input and Track Channel Insert Effects
210
Inserting Effects on an Input or Track Channel
211
MASTER Bus Insert Effects
213
Inserting Effects on the MASTER Bus
213
Selecting, Editing and Saving Effect Patches
214
The EFFECT VIEW Screen
214
The Algorithm View Screen
215
Selecting Effect Patches
215
Editing Effect Patches
217
Selecting an Effect Patch
217
Saving Effect Patches
218
Editing an Effect Patch
218
Speaker Modeling
219
Using Speaker Modeling
219
Saving an Effect Patch
219
Microphone Modeling
220
Rss Pan
220
Using Microphone Modeling
220
17 Working with FX Return Channels
223
The FX Return Channel Fader
223
FX Return CH EDIT Tools
223
The Main FX Return CH EDIT Screen
224
Roland VS-2400CD Owner's Manual Www.rolandus.com
225
The FX Return Parameter View Screen
227
Routing Effects to Tracks
227
Quick Routing an FX Return Channel
228
FX Return Routing on the EZ Routing VIEW Screen
229
Adding Effects to a Headphone MIX
230
18 Editing Tracks
231
Editing Concepts and Overview
231
Phrases and Regions
231
Edit Points
232
Using the IN, OUT, from and to Buttons
233
Placing Edit Points Using the IN, OUT, from and to Buttons
233
Performing Edits
234
The Appearance of Selected Tracks, Phrases and Regions
234
Configuring the Behavior of the IN, OUT, from and to Buttons
234
Where Editing Takes Place
235
Selecting Phrase or Region Editing
236
Editing Methods
237
Edit Messages
237
Editing with a Mouse
238
Placing Edit Points with Your Mouse
239
Selecting a Track with Your Mouse
239
Selecting Destination V-Tracks with Your Mouse
240
Selecting Phrases by Clicking or Dragging Your Mouse
240
Selecting Phrases from the SELECT PHRASE Pop-Up Menu
240
Selecting Regions from the SELECT TRACK Pop-Up Menu
241
Selecting Regions by Dragging Your Mouse
241
Copying Data by Dragging with Your Mouse
242
Moving Data by Dragging with Your Mouse
242
Trimming Phrases by Dragging Your Mouse
242
Snapping to Grid
243
Performing an Edit Operation from the Edit Pop-Up Menu
244
Editing from the TRACK Menu
245
Performing an Edit Operation from the TRACK Menu
246
Placing Edit Points on a TRACK Menu Operation Screen
246
Quick-Selecting from the TRACK Menu
247
Selection Using the TRACK Menu's Onscreen Selection Tools
248
19 Phrase Editing Operations
251
Copy
251
Move
253
Trim in
253
Trim out
254
Delete
254
Split
254
New
255
Normalize
256
Divide
256
Name
257
Parameter
258
Take Mngr
259
20 Region Editing Operations
261
Copy
261
Move
263
Insert
263
Cut
264
Erase
265
Comp/Exp
265
Import
267
Exchange
268
Arrange
268
Creating a New Playlist
269
Name
270
21 Working with the VS-2400CD Outputs
271
The VS-2400CD Outputs
271
Output Pairs
271
Analog Output Jacks
271
Digital Output Connectors
271
Output Signal Routing
272
Bus Routing
272
Routing a Pair of Busses to a Pair of Outputs
272
Monitoring the Recording Busses Directly
273
Routing a Pair of Busses to the Stereo MONITOR Bus
273
Track Direct Outs
274
Routing a Pair of Tracks to a Pair of Outputs
274
Setting up Pre or Post Track Direct Outputs
275
22 EZ Routing
277
The EZ ROUTING Screens
277
Navigating the EZ ROUTING Screens
277
EZ ROUTING VIEW Screen
278
The EZ ROUTING PATCH BAY Screen
278
Making Connections on the EZ ROUTING VIEW Screen
278
The EZ ROUTING OUTPUT ASSIGN Screen
279
Making Connections on the EZ ROUTING PATCH BAY Screen
279
The EZ ROUTING LOOP EFFECT ASSIGN Screen
280
Making Connections on the EZ ROUTING OUTPUT ASSIGN Screen
280
Making Connections on the LOOP EFFECT ASSIGN Screen
280
EZ Routing Tools
281
Initializing and Clearing Routings
281
Saving and Loading EZ Routing Templates
282
Saving an EZ Routing Template
282
Loading an EZ Routing Template
283
23 MIDI and Synchronization
285
MIDI Operations
285
VS-2400CD MIDI Basics
285
V.fader-The VS-2400CD MIDI Control Surface
286
Turning Fader Control on or off
286
Remote MIDI Control of the VS-2400CD
287
Using the VS-2400CD as a MIDI Control Surface
287
Changing Scenes Via MIDI
288
Remote Control of the VS-2400CD with Sysex Messages
288
Changing Effect Patches Via MIDI
289
Remote Control of the VS-2400CD with Control Change Messages
289
Remote MIDI Storage of VS-2400CD Settings
290
Sending Sysex Bulk Dump Data
290
MIDI Metronome
291
Receiving Sysex Bulk Dump Data
291
Setting up a MIDI Metronome
292
Synchronization
293
Why Sync the VS-2400CD
293
Basic Synchronization Concepts
293
Roland VS-2400CD Owner's Manual Www.rolandus.com
295
Working with a Sync Track
297
Creating a Sync Track Automatically
297
Generating a Sync Track from Markers
297
Recording a Sync Track from an External Device
297
Working with a Tempo Map
298
Shaping a Tempo Map by Hand
299
Syncing an External Device to the VS-2400CD
300
Creating a Tempo Map from Markers
300
Syncing the VS-2400CD to an External Device
301
Setting up the VS-2400CD as a Sync Slave
301
Setting up the VS-2400CD as the Sync Master
301
Starting Synchronized Playback with the VS-2400CD as Master
301
Shifting the Project Start Time
303
Starting Synchronized Playback with the VS-2400CD as Slave
303
Synchronizing the VS-2400CD and Video Equipment
304
Exchanging Digital Audio Data During Synchronization
308
24 Surround
309
What Is Surround
309
Surround Formats
309
How the VS-2400CD Delivers Surround
310
Turning on Surround Mode
311
Positioning a Signal in the Surround Field
312
Adjusting Master Surround Bus Levels
313
25 Automix
315
The Benefits of Automix
315
How Automix Works
315
The AUTOMIX Screen
316
Navigating to the Automix Screen
316
Activating Automix Mode
318
The AUTOMIX STATUS Buttons
318
Using the AUTOMIX STATUS Buttons
318
Recording Automix Data
319
Realtime Automix Recording
319
Recording a Realtime Automix
319
Realtime Punching of Automix Data
320
AUTOMIX Button Punching
321
AUTOMIX STATUS BUTTON Punching
321
Snapshot Recording of Parameter Values
322
Playing Back Automix Data
322
Editing Automix Data
322
Automix Editing Concepts
322
Taking a Snapshot
322
The AUTOMIX EDIT Screen
322
Targeting Automix Data
323
Automix Editing Methods
324
Automix Editing Operations
325
Micro-Editing Automix Data
328
Automix and V-Link
329
Creating a New Automix Event
329
Deleting an Automix Event
329
Micro-Editing Automix Data
329
Undoing a Micro-Edit
329
26 Mastering and CD-R/RW Operations
331
Mastering
331
Mixing for Mastering
331
Important Mastering Concepts
331
Working in the VS-2400CD Mastering Room
335
Navigating to the Mastering Room
335
Selecting the Mastering Room Operating Mode
335
Selecting the Mastering Tracks' Recording Mode
335
Turning on the Mastering Room
335
Building Mastering Tracks Selection-By-Selection
336
Selecting the Mastering V-Tracks
336
Recording Mastering Tracks
337
Using the Mastering Tool Kit
337
Editing Mastering Tracks
338
Stretching Effects
338
Placing CD Track Markers
339
Placing CD Track Markers
340
CD-R/RW Operations
341
Creating an Audio CD
341
CD-R/RW Operations Burning an Audio CD
342
Making Sure You Have Enough Space
342
Erasing a CD-RW Disk
344
If You Encounter Error Messages During CD Burning
345
The CD Player Feature
345
Playing an Audio CD
345
WAV File Importing
346
Importing a .WAV File
347
Exporting Tracks and Phrases as .WAV Files
348
Exporting Tracks as .WAV Files
348
Exporting Phrases as .WAV Files
349
CD Capture
350
27 Utility Menu Parameters
353
The Main UTILITY Menu Screen
353
System
354
Phantom Sw
354
Ext Level Meter (Mb-24)
354
Vga
355
Ps/2 Mouse
356
Ps/2 Keyboard
356
Global
356
Shift Lock
357
Numerics Type
358
Operation Display
359
Project
359
Digital I/O
359
Display
360
Playrec
360
Vari Pitch
361
Solo/Mute
361
Preview
361
MIDI
362
Sync
362
Tempo
362
Metronome
363
Programming the Metronome's Beat Box
364
Sending the Metronome to Outputs
364
Auto Punch/Loop
365
Marker
365
Locate
365
V.fdr
365
Scene
365
Automix
365
Surround
366
Oscillator/Analyzer
366
Generator
366
Analyzer
368
Powering the Spectrum Analysis Display
368
Setting up the Spectrum Analysis Display
368
Date/Time
370
Parameter Initialization
370
Resetting Mixer and UTILITY Parameters
370
R-Bus
371
Rss Pan Setup
371
28 Expanding the VS-2400CD
373
Installing a VS8F-2 Effect Expansion Board
373
Installation Procedure
374
Installation de la Carte D'extension D'effets (French Language for Canadian Safety Standard)
375
Connecting an MB-24 Level Meter
377
Replacing the VS-2400Cd's Battery
377
Remplacement de la Pile du VS-2400Cd.fs (French Language for Canadian Safety Standard)
379
29 Using a VGA Monitor: Overview
381
About Chapters 29-35
381
The Main Display and the Info Display
381
Setting the Operation Target
381
Moving the Mouse to a Different Display
381
About the Main Display
382
The LCD as Main Display
382
The VGA as Main Display
382
About the Info Display
384
When the VGA Is Designated as the Info Display
384
When the LCD Is Designated as the Info Display
386
30 VGA Main Display Universal Elements
387
VGA Menus
387
The PROJECT Menu
387
The TRACK Menu
388
The EFFECT Menu
388
The UTILITY Menu
389
MIXER Menu
390
EZROUTING Menu
390
CD-RW MASTERING Menu
390
VGA Control Bar
392
Automix Controls
393
Ext Sync
393
Transport Buttons
394
Abs/Rel Indicator
394
Preview Buttons
394
PAN Knob Strip
395
Locator (Loc)
395
Scene (Scn)
395
Scene Name/Number
395
Project Information
395
The VGA Input Clipping Indicators
396
VGA F Buttons
396
Status Strip
396
VGA Remaining Space Status Strip
396
31 VGA Main Display Home Screen
397
The Meters Strip
397
Working with the Meters Strip
398
The Playlist Area
400
Operating the VGA Playlist
400
VGA Playlist Track Controls
402
Track Name
403
Pan Slider
404
Att Slider
404
The Playlist's Measure Bar
406
Status Toggles
406
Editing VGA Playlist Track Audio
407
The VGA Playlist Control Panel
409
The VGA Wave Display
410
32 VGA Main Display CH VIEW Screens
411
Displaying CH EDIT Parameters on the VGA
411
Universal CH VIEW Elements
411
Input/Output Control Strip
412
Solo Button
412
Mute Button
412
AUX Send Controls
413
DIR (DIRECT) 1-8 Selector
414
Channel-Specific Parameter Strips
414
Input Channel Parameter Strip
414
Track Channel Parameter Strip
415
FX Return Channel Parameter Strip
416
Input and Track Channel CH VIEW Elements
416
Track/V-Track Info
416
Dynamics and EQ Controls
417
EFFECT INSERT Controls
419
FX Return Channel CH VIEW Elements
420
Loop Fx Assign
420
Effect Algorithm Display
420
33 VGA Main Display Mixer Views
421
Shared Elements
421
Shared MASTER Fader Strip
421
FADER Select Indicator
422
Aux Send Sliders
422
Input Mixer/Master Block View
423
Input Channel Strips
423
Master Block Strips
424
Track Mixer/Fx Return Mixer View
425
Track Channel Strips
426
FX Return Channel Strips
427
Multi-Channel Strip Views
428
The Multi-Channel View MASTER Strip
428
Multi-Channel View Input Channels
429
Multi-Channel View Aux and Direct Path Channels
431
Multi-Channel View Track Channels
432
Multi-Channel View FX Return Channels
434
Multi-Channel View V.FADER Channels
435
Multi-Channel View Fader Group Channels
435
Channel Fader
436
34 VGA Main Display EZ ROUTING Screen
437
Making Connections
437
Routing on the VGA Using a Mouse
437
Other Onscreen EZ ROUTING Tools
440
Phantom Power Switches
440
Activating Digital Inputs
440
Recording Bus Attenuation
440
35 VGA Main Display Automix Editing
441
Editing Automix Data on the VGA
441
Targeting Automix Tracks and Data for Editing
442
Roland VS-2400CD Owner's Manual Www.rolandus.com
441
Supplemental Information
443
R-BUS Remote Control
443
DIF-AT Settings
443
Using a Roland DIF-AT
444
With a TASCAM da Series Device
444
With an ADAT
444
ADA-7000 Settings
445
AE-7000 Settings
446
Clock Source
447
VSR-880 Settings
448
Using the VS-2400CD with a VM-7000 Mixing System
449
Using a Roland VE-7000
450
Connecting the VE-7000
450
Using the VE-7000
450
Roland MB-24 Notes
452
Factory EZ Routing Templates
453
Recording Template
453
Bouncing Template
454
Mixdown Template
455
Mastering Template
456
Surround 2+2 Template
457
Surround 3+1 Template
458
Surround 3+2+1 Template
460
VS-2400CD Tick Resolution Table
461
MIDI Channels and Control Change Maps
462
V-Fader Control Messages
465
Automix Parameter List
466
V-Studio Song/Vs-2400CD Project Compatibility
468
Recording Mode Tables
468
Parameter Translations
468
Glossary
471
Roland VS-2400CD Owner's Manual Www.rolandus.com
471
MIDI Control Change Messages
475
Index
479
Routing to Tracks
487
Memo
505
Advertisement
Roland VS-2400CD Appendices (156 pages)
24TR / 24-bit / 96kHz Digital Studio Workstation
Brand:
Roland
| Category:
Musical Instrument
| Size: 3.87 MB
Table of Contents
Table of Contents
3
About MIDI
4
Troubleshooting
5
Internal Effects
6
Other Problems
7
Q&A
8
Basic Functions
8
Effects
9
CD-R/Rw Drive
10
Digital I/O
11
Data Compatibility with Other Vs Models
12
MIDI Devices
12
Others
13
How to Record with External Effects Devices Connected
14
Arbitration Failed
16
Blank Disc
16
Can't Communicate
16
Check Condition
16
Digital in Unlock Change to Internal Clock
16
Drive Busy
16
Drive Status Error
16
Illegal Request
16
Aborted Command
16
Error Messages
16
Disk Memory Full
17
Drive Unformatted
17
Event Memory Full
17
Fx Board for Rss Pan Is Not Installed
17
Hardware Error
17
Illegal Track
17
Lack of Event
17
Lack of Ide Memory
17
Not 44.1Khz Project
17
Operation Failed
17
Current Project
18
Guitar (Hi-Z)
19
Ntsc Format
19
Phantom Power
19
Pink Noise
19
Sine Wave
20
Track Minutes
20
Glossary
18
Ch Edit/Select/Automix Status Buttons
21
Locator/Scene Buttons
22
Shortcut Key Operations
21
Parameter List
25
Preset Patch List
39
Algorithm List
45
Stereo Pitch Shifter Delay
54
Delay Rss
56
Tape Echo
57
Chorus Rss
62
Space Chorus
63
Stereo Phaser
64
Analog Phaser
66
Stereo Flanger
67
Analog Flanger
68
Ch Rss
70
Speaker Simulator
77
Vocal Multi
78
Voice Transformer
80
Vocal Canceler
81
Lo-Fi Processor
86
Band Isolator
87
Dual Compressor/Limiter
88
Stereo Multi
93
Speaker Modeling
95
MIDI Implementation
100
Control Change
101
Song Position Pointer
116
MIDI Time Code
117
Project Parameter
121
MIDI Machine Control
139
Bulk Dump
141
System Exclusive Message
116
Timing Clock
116
System Real Time Message
116
Program Change
116
Channel Mode Messages
142
System Exclusive Messages
142
MIDI Implementation Chart
144
Track Sheet
145
About the Demo Performances
148
Specifications
149
Power Supply
150
Dynamics Processor
150
Index
151
Roland VS-2400CD Service Notes (49 pages)
Digital Studio Workstation
Brand:
Roland
| Category:
Musical Instrument
| Size: 12.95 MB
Table of Contents
Table of Contents
1
Specifications
2
Location of Controls Parts List
4
Location of Controls
5
Exploded View Parts List
6
Exploded View
7
Wiring Diagram
8
Parts List
9
Checking the Version Number
17
Saving User Data & Reloading Saved Data
17
Test Mode
19
System Software Update Procedure
22
Formatting the Hard Disk
22
Block Diagram 1
25
Block Diagram 2
26
Circuit Board (Main)
27
Circuit Diagram (Main 1/8)
29
Circuit Diagram (Main 2/8)
30
Circuit Diagram (Main 3/8)
31
Circuit Diagram (Main 4/8)
32
Circuit Diagram (Main 5/8)
33
Circuit Diagram (Main 6/8)
34
Circuit Diagram (Main 7/8)
35
Circuit Diagram (Main 8/8)
36
Circuit Board (Analog)
37
Circuit Diagram (Analog 1/4)
39
Circuit Diagram (Analog 2/4)
40
Circuit Diagram (Analog 3/4)
41
Circuit Diagram (Analog 4/4)
42
Circuit Board (Panel/Fader)
43
Circuit Diagram (Panel)
44
Circuit Diagram (Fader)
45
Circuit Board (Contrast/Cdrw)
46
Circuit Diagram (Contrast)
48
Circuit Diagram (Cdrw)
49
Advertisement
Roland VS-2400CD Mixer Block Diagram (1 page)
Digital Studio Workstation
Brand:
Roland
| Category:
Musical Instrument
| Size: 0.87 MB
Roland VS-2400CD Supplementary Manual (1 page)
Roland VS-2400CD Digital Studio Workstation: Supplementary Guide
Brand:
Roland
| Category:
Musical Instrument
| Size: 0.05 MB
Advertisement
Related Products
Roland VS-2480CD
Roland VS-1680 V-XPANDED
Roland VS-880EX
Roland VS-890
Roland V-Studio VS-840EX
Roland VXpanded VS-880
Roland V-Accordion FR-3xb
Roland V-Accordion FR-7xb
Roland V-Accordion FR-18d
Roland VK-77
Roland Categories
Musical Instrument
Synthesizer
Recording Equipment
Drums
Electronic Keyboard
More Roland Manuals
Login
Sign In
OR
Sign in with Facebook
Sign in with Google
Upload manual
Upload from disk
Upload from URL