Sign In
Upload
Manuals
Brands
Psion Teklogix Manuals
Handhelds
7530
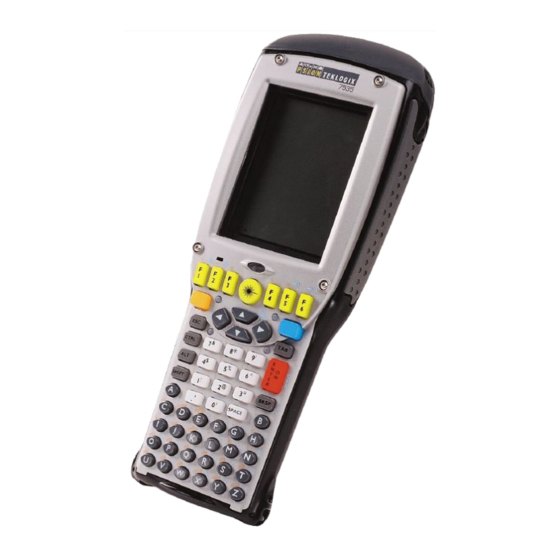
Psion Teklogix 7530 Manuals
Manuals and User Guides for Psion Teklogix 7530. We have
2
Psion Teklogix 7530 manuals available for free PDF download: User Manual
Psion Teklogix 7530 User Manual (440 pages)
Hand Held Micro-computer with Portable Docking Module
Brand:
Psion Teklogix
| Category:
Handhelds
| Size: 7 MB
Table of Contents
Support Services
4
Table of Contents
5
Program License Agreements
15
License Agreement
16
Approvals and Safety Summary
22
Important Note
24
Chapter 1: Introduction
29
About this Manual
29
Text Conventions
30
7535/7530 Features
30
About the 7535 Hand-Held Computer
33
The 7535 Hand-Held Computer
34
Regulatory Labels
36
About the 7530 Hand-Held Computer
38
The 7530 Hand-Held Computer
38
Regulatory Labels
39
Chapter 2: Basic Checkout
43
Preparing the 7535/7530 for Operation
43
Equipment You Need to Get Started
43
Charging the Battery
43
Attaching Carrying Accessories
44
Attaching the Hand Strap
44
Attaching the Pistol Grip
45
Powering up the 7535/7530
46
Installing the Battery and Switching the Hand-Held on
47
Configuring an IEEE 802.11 Radio in the Unit
48
Assigning an IP Address
54
Name Servers Tab
55
Advanced Features
56
Rearranging Preferred Networks
56
Deleting a Preferred Network
56
Checking the Scanner
57
Using Microsoft® Activesync
57
Changing Network Properties
57
Calibrating the Touchscreen
58
Resetting the Hand-Held
58
Chapter 3: Getting to Know Your 7535/7530
60
Features of the 7535
61
Features of the 7530
62
The Battery
63
Battery Safety
63
Removing and Installing the Battery Pack
63
Battery Chargers
64
Switching the Hand-Held on and off
65
The Keyboard
66
Modifier Keys
66
The Keys
67
Activating Modifier Keys
67
Locking Modifier Keys
67
Alphanumeric Keyboards - 58-Key and 63-Key
68
Numeric Keyboards - 36-Key and 37-Key
69
The Keypad Backlight
71
The Display
71
Adjusting the Display Backlight
71
Adjusting the Contrast
71
Calibrating the Touchscreen
72
7535/7530 Indicators
73
Leds
73
Charge LED
74
Radio Traffic LED
75
Scan LED
75
User Application LED
75
Onscreen Indicators
76
Audio Indicators
79
Internal Scanners
79
Adjusting the Beeper Volume
79
Scan LED Indicators
81
Scanning Techniques
81
Operating One Dimensional (1D) Internal Laser Scanners
82
Troubleshooting
82
Operating Internal PDF Laser Scanners
83
Operating Internal Two Dimensional (2D) Imager Scanners
83
Operating Rfid/Scanner Modules
84
Connecting & Disconnecting Tethered Peripherals
85
Monitoring the Battery and Maximizing Run Time
86
Storing Batteries
88
Monitoring the Network Connection
88
Uploading Data in a Docking Station
89
General Maintenance
89
Caring for the Touchscreen
89
Cleaning the 7535/7530
90
Chapter 4: Working with Windows CE
93
Navigating in Windows CE .NET and Applications
93
Navigating Using a Touchscreen and Stylus
93
Navigating Using the Keyboard
93
Working with Files, Folders and Programs
94
The Startup Desktop
95
The Desktop Icons
96
The Taskbar
96
Using the Taskbar
97
Customizing the Taskbar
97
The Start Menu
98
The Desktop
99
Security Settings
100
Programs
103
Shortcuts
104
Settings
106
Run
107
Shutdown
107
Using a Dialog Box
108
Chapter 5: Configuration
112
Remote Desktop Connection
115
Pocket PC Compatibility
115
The Control Panel
115
Control Panel Icons
116
Basic Setup
120
Display Properties
120
Display Contrast
121
Display Backlight
121
Display Appearance
123
Keyboard Properties
124
Key Repeat
124
Keyboard Backlight
125
Keyboard One Shot Modes
126
Keyboard Macro Keys
127
Unicode Mapping
129
Scancode Remapping
131
Volume and Sound Properties
134
Volume Adjustments
134
Power Management Properties
135
Sound
135
Battery Capacity
136
Power Saving Schemes
136
Suspend Threshold
137
Charger
138
Card Slots
138
Stylus Properties
139
Setting Double-Tap Sensitivity
139
Touchscreen Calibration
140
Touchscreen Options
140
Certificate Assignment
141
Bluetooth Setup
142
The Devices Tab
143
The Servers Tab
146
Outgoing Tab
147
Active Conn. Tab
148
The Properties Tab
149
The Bluetooth GPRS Phone
150
Total Recall
156
Creating a Backup Profile
156
Restoring a Profile
161
Ipv6 Support
162
Narrow Band Radio Setup - 7530 Only
163
Info Tab
163
Channel Tab
166
Protocol Tab
170
Power Tab
172
Radio Tab
173
Scanner Properties Setup
176
Bar Codes
176
Non-Decoded Scanners
178
Non-Decoded Options
179
Code 39
179
Code 128
181
Ean 13
182
Ean 8
184
Upc a
184
Upc E
185
Codabar
185
Code 93
185
Code 11
186
Interleaved 2 of 5
186
MSI Plessey
187
Discrete 2 of 5
187
Decoded (Internal) Scanners
188
IATA 2 of 5
188
Options - Decoded (Internal) Scanner
189
Data Options - Decoded (Internal) Scanner
191
Code 39
192
Code 128
194
Ean 13
195
Ean 8
195
Upc a
195
Upc E
196
UPC/EAN Shared Settings
197
Codabar
198
Code 93
199
Interleaved 2 of 5
199
MSI Plessey
200
Discrete 2 of 5
201
Pdf-417
202
Micro PDF-417
202
RSS Code (Reduced Space Symbology)
203
Composite
203
Decoded (Intermec ISCP)
204
Code 39
204
Code 128
204
Upc a
205
Upc E
205
Ean 8
205
Ean 13
205
UPC/EAN Shared Settings
205
Interleaved 2 of 5
206
Discrete 2 of 5
206
Code 11
206
Codabar
206
Imager
207
Code 93
207
MSI Plessey
207
Options - Imager
208
Code 39
209
Code 128
209
Upc/Ean
209
Code 93
209
Codabar
210
Interleaved 2 of 5
210
Postal: Australian
210
Postal: Japanese
211
Postal: Korean
211
Postal: Planet
211
Postal: Postnet
211
Postal: Royal
211
Datamatrix
212
Maxicode
212
Pdf-417
212
Micro PDF-417
212
QR Code
212
RSS Code
213
Aztec
213
Composite
213
Decoded (External)
214
Tether Port
214
Console Port
216
Options Tab
217
Translations
219
SNMP (Simple Network Management Protocol) Setup
220
Contact Tab
221
Communities Tab
222
Adding a Community
223
Modifying a Community Setting
224
Removing an Existing Community
224
Trap Destination Tab
225
Enabling Authentication TRAPS
225
Adding a Destination
225
Changing a Destination
226
Removing a Trap Destination
226
Permitted Hosts Tab
227
Adding a Host
227
Wireless WAN
228
Taskbar Icons
228
Changing a Host
228
Establishing a Connection
229
Disconnecting from a Network
231
Shutting down the Wireless WAN User Interface
231
Advanced Information
232
Entering a PIN Number
232
Error States
233
Tools Menu
234
Data Connection Configuration
234
Security Configuration
238
Network Configuration
239
Driver Mode Configuration
240
Modem Information
241
Chapter 6: Tekterm Application
247
The Tekterm Application
247
Additional Keyboard Functions
247
Function Keys and Softkeys
247
7535 Function Keys
247
7530 Function Keys
248
Softkey Function Keys
249
Macro Keys
250
Changing the Screen Font Size
251
Panning the Screen Contents
251
Using the Task Manager to Switch between Applications
252
The Tekterm Status Area
253
TESS Emulation
253
Configuration
254
Working with Multiple Sessions
254
The Field Types
254
IBM 5250 Emulation Keys
255
Data Entry
255
TESS Edit Modes and Cursor Movement
256
DEL> Key Behaviour in TESS
257
BKSP> Key Behaviour in TESS
258
TESS Status Message
259
Lock Messages
260
Control Commands
260
Resetting a TESS Session
260
The Local Menu
261
Selecting Another Host Computer
261
Queuing Mode
262
ANSI Emulation
262
Configuration
262
Sending Data to the Host
263
Psion Teklogix Keyboard and VT220 Equivalent Keys
263
Block Mode (Local Editing)
264
Working with Sessions
265
Establishing a New Session
265
Listing Sessions and Moving to Other Sessions
265
Closing a Session
265
The Radio Statistics Screen
266
Printing a Screen
266
Smart Echo - Disabling
266
The Tekterm Startup Display Menu
269
Working with Menus
270
Using the Keyboard to Navigate through Menus
270
Sub-Menus
270
Numeric Parameters
271
Y/N Parameters
271
Alpha Parameters
271
String Entry Parameters
271
Using the Touchscreen to Navigate through Menus
273
Sub-Menus
273
Numeric Parameters
274
Y/N Parameters
274
Alpha Parameters
274
Saving Changes to Parameters
275
Retrieving Default Parameter Values
275
Resetting the 7535/7530 Hand-Held Computer
275
String Entry Parameters
275
The Parameters Menu
276
Security Settings
276
Display Options
277
More Parameters
277
Radio Parameters
278
System Parameters
280
Keyboard
281
Macro Control Panel
281
Indicators
281
Softkeys
282
Ctrl Panel
282
Audio
283
Power Mgmt Ctrl Panel
284
User Permissions
284
Windows Properties
285
Auto Start
285
Scanner Control Panel
286
View Manager
286
Split Screen
287
Splitting and Displaying Screens
288
Moving between Split Screens
289
Toggling between Full & Split Screens
289
Using the Asterisk as a Wild Card
289
Custom Characters (Unicode™)
290
Creating a Unicode™ Character
290
Displaying the Unicode™ Pop-Up Window
291
Applications
293
ANSI Settings
294
Host Conn
295
Screen
299
Xmit Modes
302
Kbd Modes
306
Edit Modes
309
Serial
310
Host Char Set
310
TESS Settings
311
Anchor View
311
Host Conn
312
Screen
313
Characters
315
Tests
317
Features
318
Scanner
322
Fields
323
Anchor View
326
Emulation
326
Ports - Tether and Console
334
Peripheral Port Options
334
Port Parameter Settings
335
Port Scan-See Parameters
338
Scan-See Sub-Menu - Mapping the Viewport
338
Scan-See Keyboard Mapping
342
Network
343
Network Ctrl Panel Settings
343
IQ V2
344
Chapter 7 : Peripheral Devices & Accessories
349
External Bar Code Readers
349
Powerscan™ Standard, LR and XLR Bar Code Scanners
349
Entering Data with the Bar Code Reader
349
Batteries
349
Lithium-Ion Battery Safety Precautions
349
Important Charger Safety Instructions
351
Chargers
352
Gang Charger
352
Installation
353
Operator Controls
353
Charge Indicators
353
Charging Batteries
354
Troubleshooting
354
Excessive Charge Duration
354
Combo Charger
355
Indicator Does Not Light When Battery Installed
355
Indicator Flashing Red
355
Power LED Does Not Light up
355
Charging the Spare Battery
356
Installation
356
Operator Controls
356
Using the Combo Charger with the 7535/7530
356
Charge Indicators
357
Troubleshooting
357
Combo Dock
358
Installation
358
Using the Combo Dock
358
Network Access
358
Troubleshooting
359
Quad Dock
359
Installation
359
Indicators and Controls
360
Using the Quad Dock
360
Network Access
360
Battery Charging
360
Network Addressing
360
Troubleshooting
361
Portable Docking Module (PDM)
361
Network Link Unsuccessful
361
7535/7530 LED Does Not Light When Docked
361
Bluetooth Peripherals
364
The 7535/7530 Picker Cradle
364
Picker Cradle Mounting Recommendations
365
Wiring Guidelines
365
Mounting Template
365
Using the Picker Cradle
366
Maintaining the Picker Cradle
366
Powered Cradle Installation in High Voltage Vehicles
366
Powered Cradle Installation
367
Wiring Vehicle Power to the Cradle
368
The Port Replicator
369
Chapter 8: Specifications
373
7535 Hand-Held Computer Specifications
373
7530 Hand-Held Computer Specifications
375
Radio Specifications
377
Internal Scanner Port
378
Bar Code Applications
378
RFID Applications
378
Internal Scanners
379
External Scanners
379
Internal Scanner Specifications
379
SE 1200 High Performance & Long Range Specs
380
SE 1200 Advanced Long Range & SE 2223PDF Specs
381
Decode Zones
382
Se 1224Hp, Se 1200Wa & Se 923Hs
383
Decode Zones
384
SE 1524ER - Extended Range Scanner
386
Decode Zones
387
Intermec E1022 Linear 1D Imager Scanner
389
Symagery SX5303 Imager
390
Depth of Field - E1022
390
Depth of Field - SX5303
391
External Scanner Specifications
392
Powerscan™ LR and XLR Industrial Scanner Specs
392
Powerscan™ Standard Range Scanner Specs
394
RD7950 Integrated UHF RFID Reader (7535 Only)
395
7535 1900 Mah Lithium-Ion Battery Pack
397
7530 1900 Mah Lithium-Ion Battery Pack
397
7530 2400 Mah Lithium-Ion Battery Pack
398
Appendix A: Support Services and Worldwide Offices
399
Technical Support
399
Product Repairs
399
Worldwide Offices
400
Appendix B: RD7950 Integrated UHF RFID Reader (7535 Only)
401
Installation
401
Enabling the RD7950
405
Appendix C: Port Pinouts
407
Tether Port Pinout
407
Docking Station Connector
407
Battery Contacts
408
7535 USB Cable - PN 1010099
408
7535 USB Cable - PN 1010057
409
Appendix D: USB Setup Application
411
USB Setup
411
Launching the Application
411
Pre-Installation: Updating Usbstor.inf and Wceusbsh.inf
412
Installation: Installing the 7535/7530 as a Device on the PC
414
Post Installation
415
Advertisement
Psion Teklogix 7530 User Manual (341 pages)
Hand-Held Computer
Brand:
Psion Teklogix
| Category:
Handhelds
| Size: 3 MB
Table of Contents
Program License Agreements
5
Table of Contents
13
Declaration of Conformity
25
Approvals and Safety Summary
26
Chapter 1: Introduction
33
About this Manual
33
Text Conventions
34
About the 7530 Hand-Held Computer
35
Features
35
The 7530 Hand-Held Computer
37
Regulatory Labels
39
Chapter 2: Basic Checkout
43
Preparing the 7530 for Operation
43
Equipment You Need to Get Started
43
Charging the Battery
43
Attaching Carrying Accessories
43
Attaching the Hand Strap
44
Attaching the Pistol Grip
45
Powering up the 7530 and Configuring the Radio
46
Installing the Battery and Switching the 7530 on
47
Configuring an IEEE 802.11 Radio Installed in the 7530
48
Configuring an IEEE 802.11 Radio Installed in the 7530
48
Assigning an IP Address
54
Name Servers Tab
55
Advanced Features
56
Rearranging Preferred Networks
56
Changing Network Properties
57
Deleting a Preferred Network
57
Checking the Scanner
57
Using Microsoft® Activesync® to Work with Files
57
Calibrating the Touchscreen
58
Resetting the 7530 Hand-Held
58
Chapter 3: Getting to Know Your 7530
60
Features of the 7530
61
The Battery
62
Battery Safety
62
Removing and Installing the Battery Pack
62
Charging the Battery
63
Switching the 7530 Hand-Held on and off
64
The Keyboard
65
Modifier Keys
65
Modifier Keys
65
Activating Modifier Keys
66
Locking Modifier Keys
66
The Keys
66
The 58-Key Keyboard
67
The 36-Key Keyboard
68
The Keypad Backlight
70
The Display
70
Adjusting the Display Backlight
70
Adjusting the Contrast
71
Calibrating the Touchscreen
71
7535 Indicators
72
Leds
72
Charge LED
73
Radio TraffiC LED
74
Scan LED
74
User Application LED
74
Onscreen Indicators
75
Audio Indicators
77
Adjusting the Beeper Volume
78
Internal Scanners
78
Scanning Techniques
79
Scan LED Indicators
79
Troubleshooting
80
Operating One Dimensional (1D) Internal Laser Scanners
80
Operating Internal PDF Laser Scanners
81
Operating Internal Two Dimensional (2D) Imager Scanners
81
Connecting & Disconnecting Tethered Peripherals
82
Monitoring the Battery and Maximizing Run Time
83
Storing Batteries
85
Monitoring the Network Connection
85
Uploading Data in a Docking Station
86
General Maintenance
86
Caring for the Touchscreen
86
Cleaning the 7535
87
Cleaning the 7530
87
Chapter 4: Working with Windows CE
91
Navigating in Windows CE and Applications
91
Navigating Using a Touchscreen and Stylus
91
Navigating Using the Keyboard
92
Working with Files, Folders and Programs
93
The Startup Desktop
94
The Desktop Icons
95
The Taskbar
96
Using the Taskbar
96
Customizing the Taskbar
97
The Start Menu
98
The Desktop
98
Security Settings
99
The System Tray
100
The Task Manager
101
Cycle Tasks
101
Power Info
101
Programs
102
Settings
103
Run
104
Shutdown
105
Using a Dialogue Box
106
Chapter 5: Configuration
110
Remote Desktop Connection
113
Pocket PC Compatibility
113
The Control Panel
113
Control Panel Icons
114
Basic Setup
118
Display Properties
118
Display Contrast
118
Display Backlight
119
Display Appearance
121
Keyboard Properties
122
Key Repeat
122
Keyboard Backlight
123
Keyboard One Shot Modes
124
Keyboard Macro Keys
125
Unicode Mapping
127
Volume and Sound Properties
129
Volume Adjustments
129
Power Management Properties
130
Battery Capacity
130
Power Saving Schemes
131
Suspend Threshold
132
Charger Details
133
Stylus Properties
133
Setting Double-Tap Sensitivity
134
Touchscreen Calibration
134
Certificate Assignment
135
Certificate Assignment
135
Scanner Properties Setup
136
Scanner Options
136
Bar Codes
139
Code 39 Settings
140
Code 128 Settings
142
EAN 13 Settings
143
Ean 8
144
UPC a Settings
145
UPC and EAN Settings
145
UPC E Settings
145
Codabar
146
Code 11
146
Code 93
146
Discrete 2 of 5
147
Interleaved 2 of 5
147
MSI Plessey
147
IATA 2 of 5
148
Postal: Australian
148
Postal: Japanese
148
Postal: Korean
148
Datamatrix
149
Maxicode
149
Pdf-417
149
Postal: Planet
149
Postal: Postnet
149
Postal: Royal Mail
149
Aztec
150
Micro PDF-417
150
QR Code
150
RSS Code
150
Translations
150
SNMP (Simple Network Management Protocol) Setup
152
Contact Tab
153
Communities Tab
154
Adding a Community
155
Modifying a Community Setting
156
Removing an Existing Community
156
Adding a Destination
157
Enabling Authentication TRAPS
157
Trap Destination Tab
157
Changing a Destination
158
Removing a Trap Destination
158
Adding a Host
159
Permitted Hosts Tab
159
Changing a Host
160
Chapter 6: Tekterm Application
163
The Tekterm Application
165
Additional Keyboard Functions
165
Function Keys and Softkeys
165
Function Keys
165
Softkey Function Keys
166
Macro Keys
167
Keyboard Modes
168
View Mode
168
Changing Font Sizes
168
Macro Keys
168
Panning the Screen Contents
168
Exiting View Mode
169
Using the Task Manager to Switch between Applications
170
The Tekterm Status Area
172
TESS Emulation
173
Configuration
173
Working with Multiple Sessions
173
The Field Types
173
Configuration
173
IBM 5250 Emulation Keys
174
Data Entry
174
TESS Edit Modes and Cursor Movement
175
DEL> Key Behaviour in TESS
176
BKSP> Key Behaviour in TESS
177
TESS Status Message
178
Lock Messages
179
Control Commands
179
Resetting a TESS Session
179
The Local Menu
180
Selecting Another Host Computer
180
Queuing Mode
181
ANSI Emulation
181
Configuration
181
Configuration
181
Sending Data to the Host
182
Psion Teklogix Keyboard and VT220 Equivalent Keys
182
Block Mode (Local Editing)
183
Working with Sessions
184
Closing a Session
184
Establishing a New Session
184
Listing Sessions and Moving to Other Sessions
184
Printing a Screen
185
Smart Echo - Disabling
185
The Radio Statistics Screen
185
The Tekterm Startup Display Menu
187
Working with Menus
188
Using the Keyboard to Navigate through Menus
189
Numeric Parameters
189
Sub-Menus
189
Alpha Parameters
190
String Entry Parameters
190
Y/N Parameters
190
Sub-Menus
192
Using the Touchscreen to Navigate through Menus
192
Alpha Parameters
193
Numeric Parameters
193
String Entry Parameters
193
Y/N Parameters
193
Resetting the 7530 Hand-Held Computer
194
Retrieving Default Parameter Values
194
Saving Changes to Parameters
194
The Parameters Menu
195
Security Settings
195
Display Options
196
More Parameters
196
Radio Parameters
198
System Parameters
199
Keyboard
200
Macro Control Panel
200
Ctrl Panel
201
Indicators
201
Softkeys
201
Audio
202
Power Mgmt Ctrl Panel
203
Default Mode
204
Security
204
User Level Options
204
Allow Teklogix
205
Sup. Password
205
Scanner Control Panel
206
View Manager
206
Split Screen
207
Splitting and Displaying Screens
208
Moving between Split Screens
209
Toggling between Full & Split Screens
209
Using the Asterisk as a Wild Card
209
Creating a Unicode™ Character
210
Custom Characters (Unicode™)
210
Displaying the Unicode™ Pop-Up Window
211
Applications
213
ANSI Settings
214
Host Conn
215
Screen
218
Xmit Modes
221
Kbd Modes
225
Edit Modes
228
Host Char Set
229
Serial
229
Anchor View
230
TESS Settings
231
Host Conn
232
Screen
233
Characters
235
Tests
237
Features
238
Scanner
242
Fields
243
Anchor View
246
Emulation
246
Ports- Tether and Console
254
Tether and Console Port Peripheral Options
254
Tether and Console Port Parameter Settings
255
Tether and Console Port Scan-See Parameters
258
Scan-See Sub-Menu - Mapping the Viewport
259
Scan-See Sub-Menu - Mapping the Viewport
260
Scan-See Keyboard Mapping
263
Network
263
IQ V2
264
Network Ctrl Panel Settings
264
IQ V2
266
Chapter 7: Peripheral Devices & Accessories
270
External Bar Code Readers
270
Powerscan™ Standard, LR and XLR Bar Code Scanners
270
Entering Data with the Bar Code Reader
270
The 7530 Battery
270
Lithium-Ion Battery Safety Precautions
271
Important Charger Safety Instructions
272
Chargers
273
Gang Charger
273
Installation
274
Operator Controls
274
Charge Indicators
275
Charging Batteries
275
Troubleshooting
276
Excessive Charge Duration
276
Indicator Flashing Red
276
Power LED Does Not Light up
276
Indicator Does Not Light When Battery Installed
277
Combo Charger
277
Installation
277
Operator Controls
278
Using the Combo Charger with the 7530
278
Charging the Spare Battery
278
Charge Indicators
279
Troubleshooting
279
Combo Dock
280
Installation
280
Using the Combo Dock
280
Network Access
280
Troubleshooting
281
Quad Dock
281
Installation
281
Indicators and Controls
282
Using the Quad Dock
282
Network Access
282
Network Addressing
282
Battery Charging
282
Troubleshooting
283
Network Link Unsuccessful
283
Portable Docking Module (PDM)
283
Bluetooth Peripherals
287
The 7530 Picker Cradle
287
Picker Cradle Mounting Recommendations
288
Mounting Template
288
Wiring Guidelines
289
Using the Picker Cradle
289
Maintaining the Picker Cradle
289
Powered Cradle Installation in High Voltage Vehicles
290
Extreme Wet Environments
290
Powered Cradle Installation
291
Wiring Vehicle Power to the Cradle
292
The Port Replicator
293
Chapter 8: Specifications
296
7530 Hand-Held Computer Specifications
296
Radio Specifications
298
Bar Code Scanning
298
Internal Scanners
298
Internal Scanner Port
299
External Scanners
299
Internal Scanner Specifications
300
SE1200 High Performance & Long Range Specs
300
SE1200 Advanced Long Range & SE2223 PDF Specs
301
Decode Zones
303
External Scanner Specifications
303
Powerscan™ LR and XLR Industrial Scanner Specs
303
Powerscan™ Standard Range Scanner Specs
306
Lithium-Ion Battery Pack
307
Appendix A: Support Services and Worldwide Offices
310
Support Services
310
Canada and USA: Technical Support and Repair Services
310
International Support
310
Appendix B: Port Pinouts
314
7530 Tether Port Pinout
314
Docking Station Connector
314
Battery Contacts
315
Appendix C: USB Setup Application
316
USB Setup
316
Launching the Application
316
Pre-Installation: Updating Usbstor.inf and Wceusbsh.inf
317
Installation: Installing the 7530 as a Device on Your PC
319
Post Installation
320
Advertisement
Related Products
Psion Teklogix 7535
Psion Teklogix 7545
Psion Teklogix Hand-Held Computer 7530 G2
Psion Teklogix 7535 G2
Psion Teklogix Schnellstart- Anleitung 7525
Psion Teklogix IKON RUGGED PDA 7505-BTHC25
Psion Teklogix 7525M
Psion Teklogix 7527 C
Psion Teklogix 7527S
Psion Teklogix 7527S-G2
Psion Teklogix Categories
Handhelds
Desktop
PDA
Docking Station
Laptop
More Psion Teklogix Manuals
Login
Sign In
OR
Sign in with Facebook
Sign in with Google
Upload manual
Upload from disk
Upload from URL