Sign In
Upload
Manuals
Brands
Overland Storage Manuals
Storage
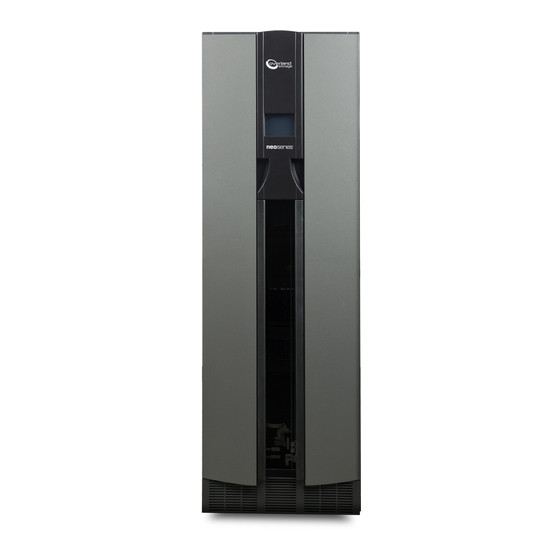
NEO 8000
Overland Storage NEO 8000 Manuals
Manuals and User Guides for Overland Storage NEO 8000. We have
16
Overland Storage NEO 8000 manuals available for free PDF download: User Manual, Installation Manual, Remove & Replace Instructions, Replacement Instruction, Quick Start Manual, Remove & Replace / Add-On Instructions, Replacing A Shuttle Assembly, Unpacking Instructions, Assembly Instructions, Instructions, Add-On Instruction
Overland Storage NEO 8000 User Manual (162 pages)
Brand:
Overland Storage
| Category:
Storage
| Size: 3 MB
Table of Contents
Preface
3
Conventions Used
3
Obtaining Documentation
3
About this Guide
3
Overland Technical Support
4
Electrostatic Discharge Information
4
Table of Contents
5
Chapter 1 - NEO 8000 Library Overview
9
Benefits and Features
9
Accessories Included
9
Library Design and Layout
9
Front Components
10
Rear Components
12
Capacity Configurations
21
Chapter 2 - Unpacking and Setting up
23
Tools Needed
23
Removing the Outer Carton
23
Detaching the Pallet
25
Attaching the Front Doors
27
Leveling the Library
28
Remove the Drawer Shipping Brackets
29
Chapter 3 - Installation and Initialization
31
Installation Considerations
31
Input Supply
31
Grounding
31
Power-Up and Cabling Pre-Check
31
Powering up the Library
32
Power-On Self Test
32
Powering down the Library
33
Standard Method
33
Alternate Method
34
Chapter 4 - Daily Operation
35
Common Configuration Modifications
35
Setting a SCSI ID
35
Configuring a Fibre Channel Drive
36
Creating Reserved Slots
38
Media Handling
40
Bar Code Labels
40
Using Mail Slot Magazine for Small Quantity Exchanges
41
Using Media Drawers for Bulk Exchanges
44
Moving Media Inside the Library
44
Tape Drive Cleaning
46
Automatically Running a Cleaning Cartridge
46
Manually Running a Cleaning Cartridge
46
Replacing a Cleaning Cartridge in a Reserved Slot
48
Chapter 5 - Graphical User Interface Usage
49
Overview
49
Default Screen
50
Password Protection
50
Host Lock out
51
Default Screen Options
51
GUI Software Map
51
Menu Button
53
Online / Offline Button
54
Status Button
54
Power Button
55
Mail Slot Access Button
56
Drawer Access Button
56
Move Media Button
57
Technical Support Button
58
LCD Contrast Controls
58
Menu Screen Options
58
Library Options Button (View System Data)
59
SCSI/FC Options Button (View System Data)
60
Network Options Button (View System Data)
61
Library Info Button (View System Data)
61
Cartridge Map Button (View System Data)
62
Maintenance Button (Utilities)
62
Diagnostics Button (Utilities)
65
Factory Button (Utilities)
66
Security Level Button (Utilities)
66
Library Button (Edit Options)
66
SCSI/FC Button (Edit Options)
69
Network Button (Edit Options)
74
Passwords Button (Edit Options)
76
Additional Menu Items for Partitions
76
Chapter 6 - Webtlc Usage
77
Setting up Webtlc
77
Accessing Webtlc
78
Status Button
80
Move Media Button
83
Setup Button
84
Functions Button
91
History Button
94
Logout Button
94
Chapter 7 - Neo8000Center Usage
95
Installing Neo8000Center on a Host
95
Neo8000Center Menu Options
95
Configuring the Library Using Neo8000Center
96
Establishing Host/Library Communications
96
Launching the Configuration Dialog Box
98
Exiting the Configuration Screen
108
Uploading Data Files
108
Downloading Data Files
110
Viewing Library Information
111
Generating a Post-Process Report
111
Rebooting the Library with Neo8000Center
113
Chapter 8 - Cabling Options and Examples
115
SCSI Interface Connectors
115
Interface Cable Specifications
115
SCSI Drive Cabling Examples
116
Single Host SCSI Network with Two SCSI Drives
116
Fibre Channel Network with Two SCSI Drives
117
Four SCSI Drives on a Two Host SCSI Network
118
Fibre Channel Cabling Examples
119
Multi-FCO Card System Configuration
119
Chapter 9 - Component and Capacity Additions
121
Upper Power Supplies (Drives 7-12)
121
Additional Drive Assemblies
122
Optional Interface Cards
122
Adding Capacity
123
Scalability Option - Horizontal Robotics Assembly
124
Appendix A - NEO 8000 Specifications
125
FCC Notice
131
Japanese Voluntary Control Council for Interference (VCCI
131
Taiwan BSMI Class a Warning
131
Declaration of Conformity
132
Appendix B - Repacking for Shipment to a New Location
133
Tools Needed
133
Prepare the Library for Transport
133
Removing the Front Doors
134
Attaching the Drawer Shipping Brackets
135
Attaching the Pallet
136
Attaching the Outer Carton
138
Appendix C - Library Partitioning
141
Introduction
141
Installing a Router Card
142
Installing a Partition Controller Card
143
Additional Menu Items for Partitions
144
Cabling Configuration Examples
145
Partitions 4 Drives 2 Hosts
145
Advertisement
Overland Storage NEO 8000 Installation Manual (50 pages)
Brand:
Overland Storage
| Category:
Storage
| Size: 1 MB
Table of Contents
Preface
3
Manual Organization
3
Conventions
4
Overland Storage Technical Support
4
Table of Contents
5
Chapter 1: Introduction
9
Installation Process Overview
9
Required Tools
10
Suggested Items
10
HRA Parts Locations
10
Figure 1-1: HRA Major Components
10
Electrostatic Discharge Information
11
Chapter 2: Pre-Installation Processes
13
Conduct the Site Survey
13
Verify Minimum Firmware Level
13
Figure 2-1: Clearance Needed for HRA Installation
13
Figure 2-2: Power Strip Circuit Breakers
14
Figure 2-3: Power Supply Power ON/OFF Switch on Position
14
Figure 2-4: NEO 8000 Front Panel
14
Obtaining the Current Firmware File
15
Removing Components for Access
15
Figure 2-5: Verify Minimum Firmware Level
15
Power down the Libraries
16
Remove Media Drawers
16
Remove Side Panels
16
Figure 2-6: Library Panel Cover Removal Example
17
Figure 2-7: Example Removing Door Hinge Pin
17
Remove Library Doors
17
Figure 2-8: Access Plates and Drives that Need to be Removed
18
Remove Components for Rear Access
18
Chapter 3: Prepare the Libraries
19
Verify Cable Channel Status
19
Install the HRA Mounting Brackets
19
Figure 3-1: Cable Channel after Modification
19
Figure 3-2: Mounting Bracket Assembly for HRA (D-Clamps Attached)
20
Figure 3-3: Positioning the Mounting Bracket Assembly
20
Verify the Mail Slot PWA
21
Figure 3-4: Location of Mounting Bracket Screw Holes
21
Figure 3-5: Magazine Latch Assembly Location
22
Figure 3-6: Old and New Mail Slot PWA
23
Figure 3-7: Mail Slot PWA Replacement
23
Install the Master Signal Cable
24
Figure 3-8: Location of Fan/Card Cage Assembly
24
Install the Master Power Wiring Harness
25
Figure 3-9: Master Signal Cable Connection
25
Figure 3-10: Location of Robotics Power Supply Bay Power Cords
26
Figure 3-11: Robotics Power Supply Bay Screws
26
Install the Slave Signal Cable
27
Figure 3-12: Power Supply Bay Assembly Connectors
27
Figure 3-13: Slave Signal Cable Connection
28
Install the Slave Power Wiring Harness
29
Figure 3-14: Rear of Slave Unit Showing Wiring Exiting Access
29
Chapter 4: Connect the Libraries
31
Install the Connector Bolts
31
Figure 4-1: M8X100Mm Bolt Locations on Master Unit Braces
31
Position and Level the Master Unit
32
Figure 4-2: Bolt Pushed Back through Brace
32
Figure 4-3: Marking Reference Points for a Front Leveler
32
Position and Level the Slave Unit
33
Figure 4-4: Placement of Small Level on Slide Housing
33
Confirm Mounting Bracket Assembly Alignment
34
Tighten Connecting Hardware
34
Figure 4-5: Hex Bolt and Nuts after Tightening
34
Complete the Slave Wiring Routing
35
Chapter 5: Install the HRA
37
Attach the HRA
37
Figure 5-1: HRA Positioned above the Mounting Bracket Assemblies
37
Figure 5-2: Mounting Bracket Alignment Pins
37
Figure 5-3: Screw Locations to Attach the HRA to the Brackets
38
Install the VIA Router Card
39
Figure 5-4: HRA PWA Connectors
39
Figure 5-5: Inserting the VIA Router Card into the Master Library
40
Figure 5-6: VIA 8-Port Router Card
40
Prepare the Library System for Use
41
Chapter 6: Configure the System
43
Power up the Library System
43
Configure the Library System
43
Figure 6-1: Configure Slave Unit
43
Figure 6-2: Configure Master Unit
44
Reinstall Library Components
45
Appendix A: Troubleshooting
47
Robotics Hangs
47
Lost Contact with Slave Unit
47
Library Unit Fails to Get Cartridge from HRA
47
Slave Unit Not Recognized
48
Index
49
Overland Storage NEO 8000 Replacement Instruction (28 pages)
Z-Axis Robotics Retrofit
Brand:
Overland Storage
| Category:
Storage
| Size: 0 MB
Table of Contents
Preface
3
Conventions
3
Overland Storage Technical Support
4
Table of Contents
5
Chapter 1 - Introduction
7
Replacement Process Overview
7
Required Tools
8
Electrostatic Discharge Information
8
Unpacking the Retrofit Kit
8
Chapter 1: Introduction
8
Chapter 2 - Prepare the Library for Internal Access
9
Removal of Media Drawers
9
Figure 2-1: Access Plates and Components that Need to be Removed
9
Power down the Library
10
Remove Panels for Access
10
Front Panel Assembly
10
Figure 2-2: Left Bottom Rack Cover Trim Piece
10
Figure 2-3: Front Panel Assembly Screw Locations
11
Figure 2-4: Location of the J3 GUI PWA Connector
11
Rear Access Panels
12
Chapter 3 - Replace the Front BDA
13
Remove the Front BDA
13
Figure 3-1: Locations of the J2 and J4 Drive PWA Connectors
13
Move the Drive Motor
14
Chapter 3: Replace the Front BDA
14
Figure 3-2: Location of the 1/8" Hex Shoulder Screw
14
Figure 3-3: Location of the Helical Coupling Front Cap Screw
14
Figure 3-4: Location of the Three Drive Motor Pan Head Screws
15
Reinstall the Front BDA
15
Chapter 4 - Replace the Rear BDA
17
Remove the Rear BDA
17
Figure 4-1: Base of Rear BDA and Connected Components
17
Move the Drive Motor
18
Chapter 4: Replace the Rear BDA
18
Figure 4-2: Location of the Rotary SPI PWA Connectors
18
Figure 4-3: Location of the Helical Coupling Front Cap Screw
19
Figure 4-4: Location of the Three Drive Motor Pan Head Screws
19
Reinstall the Rear BDA
20
Chapter 5 - Verify the Robotics Level and Height
21
Verify the Monorail Is Level
21
Figure 5-1: Removing Shims from the BDA
21
Chapter 5: Verify the Robotics Level and Height
22
Figure 5-2: Taking a Measurement with the Calipers
22
Figure 5-3: Picker Height Tool in Position
23
Verify the Picker Height
23
Figure 5-4: Position the Picker against the Picker Height Tool
24
Chapter 6 - Verify the Library Operation
25
Reattach the Library Panels and Components
25
Rear Access Panels
25
Front Panel Assembly
25
Media Drawers
25
Power on the Library System
26
Test the Library
26
Chapter 6: Verify the Library Operation
26
Figure 6-1: Starting the Cartridge Cycle Test
26
Appendix A - Moving the Library
27
Move the Library out for Access
27
Figure A-1: Leveler Reference Marks on Floor
27
Move the Library Back in Place
28
Appendix A: Moving the Library
28
Figure A-2: Positioning the Level
28
Advertisement
Overland Storage NEO 8000 Remove & Replace Instructions (18 pages)
Horizontal Robotics Assembly
Brand:
Overland Storage
| Category:
Storage
| Size: 0 MB
Table of Contents
Preface
3
Manual Organization
3
About this Guide
3
Conventions
4
Overland Storage Technical Support
4
Table of Contents
5
Chapter 1: Introduction
7
Replacement Process Overview
7
Required Tools
7
HRA Parts Locations
8
Electrostatic Discharge Information
8
Figure 1-1: HRA Major Components
8
Chapter 2: Prepare the Libraries
9
Move the Library System
9
Power down the Libraries
9
Remove the Side Panels
9
Figure 2-1: Clearance Needed for HRA Removal
9
Remove Components for Rear Access
10
Figure 2-2: Library Panel Cover Removal Example
10
Figure 2-3: Back Access Plates and Drives that Need to be Removed
10
Chapter 3: Replace the HRA
11
Remove the Old HRA
11
Figure 3-1: HRA PCB Connections
11
Attach the New HRA
12
Figure 3-2: Screws Holding the HRA to the Mounting Brackets
12
Figure 3-3: HRA Positioned above the Mounting Bracket Assemblies
12
Check the Position of the Libraries
13
Figure 3-4: Screw Locations to Attach the HRA to the Brackets
13
Figure 3-5: Placement of Small Level on Slide Housing
13
Appendix A - Moving the Libraries
13
Reattach Side Panels and Access Plates
14
Figure 3-6: Reattaching the Side Panels
14
Chapter 4: Verify the HRA Operation
15
Power on the Library System
15
Test the Libraries
15
Figure 4-1: Starting the Cartridge Cycle Test
16
Appendix A: Moving the Libraries
17
Move the Library System out for Access
17
Figure A-1: Leveler Reference Marks on Floor
17
Move the Library System Back in Place
18
Figure A-2: Placement of Small Level on Slide Housing
18
Overland Storage NEO 8000 Remove & Replace Instructions (44 pages)
Spare Z-Axis Housing Assemblies
Brand:
Overland Storage
| Category:
Storage
| Size: 1 MB
Table of Contents
Typographical Conventions
4
Electrostatic Discharge Information
4
Required Tools
6
Front Panel Assembly Removal
10
Front Panel Assembly
38
Media Drawers
39
Calibration Test
41
Overland Storage NEO 8000 Remove & Replace / Add-On Instructions (4 pages)
Libraries, LTO Drive Assembly
Brand:
Overland Storage
| Category:
DC Drives
| Size: 0 MB
Table of Contents
Unpacking the Drive
1
Removing a Drive Cover Plate
1
Removing an Existing Drive
2
Installing the Drive Assembly
2
Cabling Examples for a Newly Added Drive
2
Fibre Channel Cabling
2
SCSI Cabling
3
Activating the Drive
3
Firmware Configuration Requirements
3
Configuring Fibre Channel Drives
4
Configuring SCSI Drives
4
Overland Storage NEO 8000 Assembly Instructions (3 pages)
Tape Library, Spare Touchscreen
Brand:
Overland Storage
| Category:
Touchscreen
| Size: 0 MB
Table of Contents
Prepare the Unit
1
Power off and Disconnect
1
Front Panel Assembly Removal
1
Replace the Assembly
2
Remove Old Controller Card
2
Remove Old LCD Assembly
2
Prepare New Assembly
2
Install New Assembly
2
Reassemble the Library
3
Reattach the FPA
3
Power on the Library
3
Return Old Parts to Overland
3
Overland Storage NEO 8000 Remove & Replace Instructions (4 pages)
HRA Signal Cable Spare
Brand:
Overland Storage
| Category:
Storage
| Size: 0 MB
Table of Contents
Overview & Notes
1
Electrostatic Discharge Information
1
Unpacking the Spare
1
Preparing a Library for Installation
1
HRA Cable Change-Out
2
Signal Cable Connections
2
Master Card Cage Cable Change-Out
3
Slave Card Cage Cable Change-Out
3
Reactivating the Library
4
Overland Storage NEO 8000 Unpacking Instructions (4 pages)
Library
Brand:
Overland Storage
| Category:
Storage
| Size: 0 MB
Table of Contents
Overview & Notes
1
Tools Needed
1
Removing the Outer Carton
1
Detaching the Pallet
2
Attaching the Doors
3
Leveling the Library
4
What’s Next?
4
Additional Help
4
Overland Storage NEO 8000 Quick Start Manual (2 pages)
Brand:
Overland Storage
| Category:
Storage
| Size: 0 MB
Table of Contents
Overview & Notes
1
Electrostatic Discharge Information
1
Unpacking the Spare
1
Prepare the Library
1
Replacing the Hot Swap Assembly
1
Remove Old Assembly
2
Install New Assembly
2
Restart the Library
2
Additional Help
2
Overland Storage NEO 8000 Add-On Instruction (2 pages)
Drive Shoe Assembly
Brand:
Overland Storage
| Category:
Network Storage Server
| Size: 0 MB
Table of Contents
Overview
1
Inspect Shipping Container
1
Safety Notes
1
Electrostatic Discharge Information
1
Adding a Drive
1
Setting a SCSI ID for Native SCSI Drives
2
Setting a SCSI ID
2
Native Fibre Channel Drive Configuration Set Values
2
Overland Storage NEO 8000 Remove & Replace Instructions (2 pages)
Brand:
Overland Storage
| Category:
Storage
| Size: 0 MB
Table of Contents
Electrostatic Discharge Information
1
Unpacking the Spare
1
Preparing the Library for Replacement
1
Replacing the Card Cage
2
Reactivating the Library
2
Getting Help
2
Overland Storage NEO 8000 Quick Start Manual (7 pages)
Brand:
Overland Storage
| Category:
Cables and connectors
| Size: 1 MB
Overland Storage NEO 8000 Instructions (2 pages)
Power Supply Module Spare
Brand:
Overland Storage
| Category:
Storage
| Size: 0 MB
Table of Contents
Unpacking the Spare
1
Electrostatic Discharge Information
1
Adding or Replacing a Power Supply
1
Additional Help
2
Overland Storage NEO 8000 Replacing A Shuttle Assembly (4 pages)
Brand:
Overland Storage
| Category:
Storage
| Size: 1 MB
Overland Storage NEO 8000 Remove & Replace / Add-On Instructions (2 pages)
Fibre Channel LTO-3 Drive Assembly
Brand:
Overland Storage
| Category:
DC Drives
| Size: 0 MB
Advertisement
Related Products
Overland Storage Neo Series Library
Overland Storage NEO S-Series
Overland Storage NEO 8000E
Overland Storage Neo Series 2000
Overland Storage Neo Series 4000
Overland Storage NEO 200S
Overland Storage NEO 400S
Overland Storage NEO 2000e
Overland Storage NEO 4000e
Overland Storage Neo 8135
Overland Storage Categories
Storage
Server
Chassis
Network Storage Server
DC Drives
More Overland Storage Manuals
Login
Sign In
OR
Sign in with Facebook
Sign in with Google
Upload manual
Upload from disk
Upload from URL