Sign In
Upload
Manuals
Brands
Lexmark Manuals
All in One Printer
X792dtpe
Lexmark X792dtpe Manuals
Manuals and User Guides for Lexmark X792dtpe. We have
8
Lexmark X792dtpe manuals available for free PDF download: User Manual, Compatibility Manual, Manual, Brochure & Specs, Datasheet, Product Specification
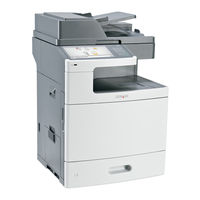
Lexmark X792dtpe User Manual (347 pages)
X790 Series
Brand:
Lexmark
| Category:
All in One Printer
| Size: 9.12 MB
Table of Contents
Table of Contents
2
Safety Information
16
Learning about the Printer
18
Thank You for Choosing this Printer
18
Finding Information about the Printer
18
Selecting a Location for the Printer
19
Printer Configurations
20
Basic Functions of the Scanner
21
Understanding the ADF and Scanner Glass
22
Understanding the Printer Control Panel
23
Understanding the Home Screen
24
Using the Touch-Screen Buttons
25
Sample Touch Screen
26
Other Touch-Screen Buttons
27
Setting up and Using the Home Screen Applications
29
Accessing the Embedded Web Server
29
Activating the Home Screen Applications
29
Scan to Network
30
Exporting and Importing a Configuration Using the Embedded Web Server
32
Additional Printer Setup
33
Installing Internal Options
33
Available Internal Options
33
Using the Security Lock Feature
34
Accessing the System Board
35
Installing a Memory Card
38
Installing a Flash Memory or Firmware Card
40
Installing an Internal Solutions Port
42
Installing a Printer Hard Disk
46
Removing a Printer Hard Disk
51
Order of Installation
52
Installing Optional Trays
53
Attaching Cables
54
Verifying Printer Setup
55
Printing a Menu Settings Page
55
Printing a Network Setup Page
56
Setting up the Printer Software
56
Installing the Printer Software
56
Updating Available Options in the Printer Driver
57
Setting up Wireless Printing
57
Information You will Need to Set up the Printer on a Wireless Network
57
Installing the Printer on a Wireless Network (Windows)
58
Installing the Printer on a Wireless Network (Macintosh)
60
Installing the Printer on a Wired Network
62
For Windows Users
63
Changing Port Settings after Installing a New Network Internal Solutions Port
65
Setting up Serial Printing
66
Minimizing Your Printer's Environmental Impact
68
Saving Paper and Toner
68
Using Recycled Paper
68
Conserving Supplies
68
Saving Energy
69
Using Eco-Mode
69
Reducing Printer Noise
69
Adjusting Sleep Mode
70
Using Hibernate Mode
71
Adjusting the Brightness of the Display
71
Setting the Standard Exit bin Light
72
Recycling
72
Recycling Lexmark Products
72
Recycling Lexmark Packaging
73
Returning Lexmark Cartridges for Reuse or Recycling
73
Loading Paper and Specialty Media
74
Setting the Paper Size and Type
74
Configuring Universal Paper Settings
74
Loading the Standard or Optional 550-Sheet Tray
75
Loading the 2000-Sheet High-Capacity Feeder
78
Loading the Multipurpose Feeder
80
Linking and Unlinking Trays
82
Linking Trays
82
Unlinking Trays
83
Linking Exit Bins
83
Creating a Custom Name for a Paper Type
83
Assigning a Custom Paper Type Name
84
Configuring a Custom Name
84
Paper and Specialty Media Guidelines
85
Paper Guidelines
85
Paper Characteristics
85
Selecting Paper
86
Selecting Preprinted Forms and Letterhead
86
Using Recycled Paper and Other Office Papers
86
Storing Paper
88
Supported Paper Sizes, Types, and Weights
88
Supported Paper Sizes
88
Supported Paper Types and Weights
90
Supported Finishing Features
90
Printing
93
Printing a Document
93
Printing in Black and White
93
Adjusting Toner Darkness
93
Printing from a Flash Drive
94
Supported Flash Drives and File Types
96
Printing on Specialty Media
96
Tips on Using Letterhead
96
Tips on Using Transparencies
97
Tips on Using Envelopes
97
Tips on Using Labels
97
Tips on Using Card Stock
98
Printing Confidential and Other Held Jobs
98
Storing Print Jobs in the Printer
98
Printing Confidential and Other Held Jobs
99
Printing Information Pages
100
Printing a Font Sample List
100
Printing a Directory List
100
Canceling a Print Job
100
Canceling a Print Job from the Printer Control Panel
100
Canceling a Print Job from the Computer
100
For Macintosh Users
101
Copying
102
Making Copies
102
Making a Quick Copy
102
Copying Using the ADF
102
Copying Using the Scanner Glass
103
Copying Film Photos
103
Copying on Specialty Media
103
Copying on Transparencies
103
Copying on Letterhead
103
Customizing Copy Settings
104
Copying in Black and White
104
Copying to a Different Size
104
Making Copies Using Paper from a Selected Tray
104
Copying Different Paper Sizes
105
Copying on both Sides of the Paper (Duplexing)
105
Reducing or Enlarging Copies
106
Adjusting Copy Quality
106
Collating Copies
107
Placing Separator Sheets between Copies
107
Copying Multiple Pages Onto a Single Sheet
108
Creating a Custom Copy Job (Job Build)
108
Placing Information on Copies
109
Placing the Date and Time at the Top of each Page
109
Placing an Overlay Message on each Page
109
Canceling a Copy Job
109
Canceling a Copy Job While the Document Is in the ADF
109
Canceling a Copy Job While Copying Pages Using the Scanner Glass
110
Canceling a Copy Job While Pages Are Being Printed
110
Understanding the Copy Screens and Options
110
Copy from
110
Copy to
110
Copies
110
Scale
111
Darkness
111
Sides (Duplex)
111
Collate
111
Content
111
Color
112
Advanced Options
112
Save as Shortcut
113
E-Mailing
114
Getting Ready to E-Mail
114
Setting up the E-Mail Function
114
Configuring E-Mail Settings
114
Creating an E-Mail Shortcut
115
Creating an E-Mail Shortcut Using the Embedded Web Server
115
Creating an E-Mail Shortcut Using the Touch Screen
115
E-Mailing a Document
116
Sending an E-Mail Using the Touch Screen
116
Sending an E-Mail Using a Shortcut Number
116
Sending an E-Mail Using the Address Book
116
Customizing E-Mail Settings
117
Adding E-Mail Subject and Message Information
117
Changing the Output File Type
117
Canceling an E-Mail
118
Understanding E-Mail Options
118
Recipients
118
Subject
118
Message
118
File Name
118
Original Size
118
Resolution
119
Color
119
Content
119
Darkness
119
Send as
119
Page Setup
120
Scan Preview
120
Advanced Options
120
Faxing
121
Getting the Printer Ready to Fax
121
Initial Fax Setup
122
Choosing a Fax Connection
123
Connecting to an Analog Telephone Line
123
Connecting to a DSL Service
124
Connecting to a PBX or ISDN System
124
Connecting to a Distinctive Ring Service
125
Connecting to an Adapter for Your Country or Region
125
Setting the Outgoing Fax or Station Name and Number
126
Setting the Date and Time
126
Configuring the Printer to Observe Daylight Saving Time
127
Creating Shortcuts
127
Creating a Fax Destination Shortcut Using the Embedded Web Server
127
Creating a Fax Destination Shortcut Using the Touch Screen
128
Sending a Fax
128
Sending a Fax Using the Touch Screen
128
Sending a Fax Using the Computer
128
Sending a Fax Using Shortcuts
129
Sending a Fax Using the Address Book
129
Customizing Fax Settings
130
Changing the Fax Resolution
130
Making a Fax Lighter or Darker
130
Sending a Fax at a Scheduled Time
130
Viewing a Fax Log
131
Blocking Junk Faxes
131
Canceling an Outgoing Fax
131
Canceling a Fax While the Original Documents Are Still Scanning
131
Canceling a Fax after the Original Documents Have Been Scanned to Memory
132
Understanding Fax Options
132
Content
132
Resolution
132
Darkness
133
Color
133
Page Setup
133
Scan Preview
133
Delayed Send
133
Advanced Options
133
Holding and Forwarding Faxes
134
Holding Faxes
134
Forwarding a Fax
134
Scanning to an FTP Address
136
Scanning to an FTP Address Using the Touch Screen
136
Scanning to an FTP Address Using a Shortcut Number
136
Scanning to an FTP Address Using the Address Book
137
Creating Shortcuts
137
Creating an FTP Shortcut Using the Embedded Web Server
137
Creating an FTP Shortcut Using the Touch Screen
138
Understanding FTP Options
138
Ftp
138
File Name
138
Original Size
138
Send as
138
Color
139
Resolution
139
Darkness
139
Page Setup
139
Content
139
Scan Preview
140
Advanced Options
140
Scanning to a Computer or Flash Drive
141
Scanning to a Computer
141
Scanning to a Flash Drive
142
Understanding the Scan Center Features
142
Using the Scanback Utility
142
Understanding Scan Profile Options
143
Original Size
143
Resolution
143
Color
143
Content
143
Darkness
144
Page Setup
144
Scan Preview
144
Advanced Options
144
Understanding Printer Menus
145
Menus List
145
Supplies Menu
146
Paper Menu
148
Default Source Menu
148
Paper Size/Type Menu
148
Configure MP Menu
151
Substitute Size Menu
152
Paper Texture Menu
152
Paper Weight Menu
154
Paper Loading Menu
155
Custom Types Menu
157
Custom Names Menu
157
Custom bin Names Menu
158
Custom Scan Sizes Menu
158
Universal Setup Menu
158
Bin Setup Menu
159
Reports Menu
160
Network/Ports Menu
161
Active NIC Menu
161
Standard Network or Network [X] Menus
161
Network Reports Menu
163
Network Card Menu
163
TCP/IP Menu
164
Ipv6 Menu
165
Wireless Menu
166
Appletalk Menu
166
Standard USB Menu
167
Parallel [X] Menu
169
Serial [X] Menu
171
SMTP Setup Menu
173
Security Menu
174
Editing Security Setups Menu
174
Miscellaneous Security Settings Menu
175
Confidential Print Menu
176
Disk Wiping Menu
176
Security Audit Log Menu
177
Set Date and Time Menu
178
Settings Menu
179
General Settings Menu
179
Copy Settings Menu
188
Fax Settings Menu
194
E-Mail Settings Menu
205
FTP Settings Menu
211
Flash Drive Menu
215
Print Settings
219
Print Settings
221
Finishing Menu
224
Quality Menu
226
Utilities Menu
229
Xps Menu
230
Postscript Menu
231
Html Menu
234
Help Menu
235
Advertisement
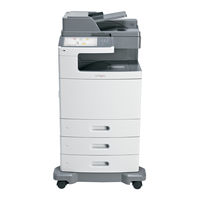
Lexmark X792dtpe User Manual (335 pages)
X790 Series
Brand:
Lexmark
| Category:
Printer
| Size: 16.32 MB
Table of Contents
Table of Contents
2
Safety Information
7
Learning about the Printer
9
Thank You for Choosing this Printer
9
Finding Information about the Printer
9
Printer Configurations
10
Basic Functions of the Scanner
11
Understanding the ADF and Scanner Glass
12
Using the Adf
12
Using the Security Lock Feature
13
Understanding the Printer Control Panel
14
Understanding the Home Screen
15
Using the Touch-Screen Buttons
16
Additional Printer Setup
19
Installing Internal Options
19
Accessing the System Board
20
Installing a Memory Card
23
Installing a Flash Memory or Firmware Card
25
Installing an Internal Solutions Port
27
Installing a Printer Hard Disk
31
Removing a Printer Hard Disk
36
Order of Installation
37
Installing Optional Trays
37
Attaching Cables
38
Verifying Printer Setup
39
Printing a Menu Settings Page
40
Printing a Network Setup Page
40
Updating Available Options in the Printer Driver
41
Setting up Wireless Printing
41
Installing the Printer on a Wireless Network (Windows)
42
Installing the Printer on a Wireless Network (Macintosh)
44
Configure the Printer for Wireless Access
45
Configure Your Computer to Use the Printer Wirelessly
46
Installing the Printer on a Wired Network
47
Changing Port Settings after Installing a New Network Internal Solutions Port
49
For Windows Users
49
For Macintosh Users
49
Setting up Serial Printing
50
Setting up and Using the Home Screen Applications
52
Making the Home Screen Applications Work for You
52
Configuring Forms and Favorites
52
Adding Bookmarks Using the Printer Control Panel
53
Adding Bookmarks Using the Embedded Web Server
53
Printing Forms
53
Configuring Scan to Network
54
Exporting and Importing a Configuration Using the Embedded Web Server
55
Minimizing Your Printer's Environmental Impact
56
Saving Paper and Toner
56
Using Recycled Paper
56
Conserving Supplies
56
Avoid Paper Jams
57
Saving Energy
57
Reducing Printer Noise
57
Adjusting Sleep Mode
58
Using Hibernate Mode
59
Adjusting the Brightness of the Display
59
Recycling
60
Setting the Standard Exit bin Light
60
Recycling Lexmark Products
60
Recycling Lexmark Packaging
61
Returning Lexmark Cartridges for Reuse or Recycling
61
Loading Paper and Specialty Media
62
Setting the Paper Size and Type
62
Configuring Universal Paper Settings
62
Loading the Standard or Optional 550-Sheet Tray
63
Loading the 2000-Sheet High-Capacity Feeder
66
Loading the Multipurpose Feeder
68
Linking and Unlinking Trays
71
Linking Exit Bins
72
Assigning a Custom Paper Type Name
72
Creating a Custom Name for a Paper Type
72
Configuring a Custom Name
72
Paper and Specialty Media Guidelines
73
Paper Guidelines
73
Fiber Content
74
Selecting Paper
74
Selecting Preprinted Forms and Letterhead
74
Using Recycled Paper and Other Office Papers
74
Storing Paper
76
Supported Paper Sizes, Types, and Weights
76
Supported Paper Types and Weights
78
Printing
79
Printing a Document
79
Printing on Specialty Media
79
Tips on Using Letterhead
79
Tips on Using Transparencies
80
Tips on Using Envelopes
80
Tips on Using Labels
81
Tips on Using Card Stock
81
Printing Confidential and Other Held Jobs
82
Storing Print Jobs in the Printer
82
Supported Flash Drives and File Types
83
Printing from a Flash Drive
84
Printing Information Pages
85
Printing a Font Sample List
85
Printing a Directory List
85
Printing in Black and White
86
Adjusting Toner Darkness
86
Supported Finishing Features
86
Standard bin
87
Canceling a Print Job
88
Copying
90
Making Copies
90
Making a Quick Copy
90
Copying Using the Adf
90
Copying Using the Scanner Glass
91
Copying Film Photos
91
Copying on Specialty Media
91
Copying on Transparencies
91
Copying on Letterhead
91
Customizing Copy Settings
92
Copying to a Different Size
92
Making Copies Using Paper from a Selected Tray
92
Copying Different Paper Sizes
93
Reducing or Enlarging Copies
94
Adjusting Copy Quality
94
Collating Copies
95
Placing Separator Sheets between Copies
95
Copying Multiple Pages Onto a Single Sheet
96
Placing Information on Copies
97
Canceling a Copy Job
97
Canceling a Copy Job While Pages Are Being Printed
98
Understanding the Copy Screens and Options
98
Copy from
98
Advanced Options
100
Save as Shortcut
100
E-Mailing
101
Getting Ready to E-Mail
101
Creating an E-Mail Shortcut
102
E-Mailing a Document
103
Changing the Output File Type
104
Customizing E-Mail Settings
104
Canceling an E-Mail
105
Understanding E-Mail Options
105
Page Setup
106
Scan Preview
107
Faxing
108
Getting the Printer Ready to Fax
108
Initial Fax Setup
109
Using the Embedded Web Server for Fax Setup
109
Choosing a Fax Connection
109
Connecting to an Analog Telephone Line
110
Connecting to a Dsl Service
110
Connecting to a Pbx or Isdn System
111
Connecting to a Distinctive Ring Service
112
Connecting to an Adapter for Your Country or Region
112
Setting the Outgoing Fax or Station Name and Number
113
Setting the Date and Time
113
Configuring the Printer to Observe Daylight Saving Time
114
Sending a Fax
114
Creating Shortcuts
115
Creating a Fax Destination Shortcut Using the Touch Screen
115
Using Shortcuts and the Address Book
116
Using Fax Shortcuts
116
Customizing Fax Settings
116
Changing the Fax Resolution
116
Making a Fax Lighter or Darker
117
Sending a Fax at a Scheduled Time
117
Viewing a Fax Log
117
Blocking Junk Faxes
118
Canceling an Outgoing Fax
118
Canceling a Fax While the Original Documents Are Still Scanning
118
Understanding Fax Options
118
Holding and Forwarding Faxes
120
Forwarding a Fax
121
Scanning to an FTP Address
122
Creating Shortcuts
123
Scanning to an Ftp Address Using the Address Book
123
Creating an Ftp Shortcut Using the Embedded Web Server
123
Creating an Ftp Shortcut Using the Touch Screen
124
Understanding FTP Options
124
Scanning to a Computer or Flash Drive
127
Scanning to a Computer
127
Scanning to a Flash Drive
128
Understanding the Scan Center Features
128
Using the Scanback Utility
128
Understanding Scan Profile Options
129
Understanding Printer Menus
131
Menus List
131
Supplies Menu
132
Paper Menu
134
Default Source Menu
134
Configure Mp Menu
137
Substitute Size Menu
138
Paper Texture Menu
138
Paper Weight Menu
140
Paper Loading Menu
141
Custom Types Menu
143
Custom Names Menu
143
Custom bin Names Menu
144
Custom Scan Sizes Menu
144
Universal Setup Menu
144
Bin Setup Menu
145
Reports Menu
146
Print Fonts
147
Print Directory
147
Active Nic Menu
147
Network/Ports Menu
147
Network Reports Menu
149
Network Card Menu
149
Tcp/Ip Menu
150
Ipv6 Menu
151
Auto Configuration
151
Wireless Menu
152
Network Mode
152
Appletalk Menu
152
Standard Usb Menu
153
Job Buffering
154
Advanced Status
156
Honor Init
156
Smtp Setup Menu
159
Security Menu
160
Editing Security Setups Menu
160
Miscellaneous Security Settings Menu
161
Confidential Print Menu
162
Disk Wiping Menu
162
Security Audit Log Menu
163
Set Date and Time Menu
164
Settings Menu
165
Quiet Mode
166
Factory Defaults
172
Copy Settings Menu
172
Print Page Borders
174
Transparency Separators
174
Separator Sheets
175
Output bin
175
Background Removal
177
Color Dropout
178
Mirror Image
178
Negative Image
178
Fax Settings Menu
179
Fax Send Settings
180
Dial Prefix
182
Automatic Redial
182
Fax Receive Settings
184
Auto Reduction
184
Fax Forwarding
185
Fax Resolution
188
E-Mail Settings Menu
189
Ftp Settings Menu
194
Flash Drive Menu
199
Scan Settings
199
Print Settings
202
Setup Menu
204
Print Area
205
Finishing Menu
206
Separator Sheets
206
Separator Source
206
Quality Menu
208
Utilities Menu
211
Pdf Menu
211
Postscript Menu
212
Image Smoothing
212
Pcl Emul Menu
212
Font Name
213
Html Menu
215
Image Menu
216
Auto Fit
216
Xps Menu
216
Help Menu
217
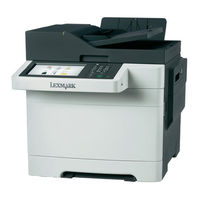
Lexmark X792dtpe User Manual (338 pages)
X790 Series
Brand:
Lexmark
| Category:
Printer
| Size: 8.78 MB
Table of Contents
Table of Contents
2
Safety Information
7
Learning about the Printer
9
Finding Information about the Printer
9
Selecting a Location for the Printer
10
Printer Configurations
11
Basic Functions of the Scanner
12
Understanding the ADF and Scanner Glass
13
Understanding the Printer Control Panel
14
Understanding the Home Screen
15
Using the Touch-Screen Buttons
16
Setting up and Using the Home Screen Applications
20
Finding the IP Address of the Printer
20
Accessing the Embedded Web Server
20
Exporting and Importing a Configuration Using the Embedded Web Server
21
Activating the Home Screen Applications
22
Setting up Forms and Favorites
22
Setting up Scan to Network
22
Setting up My MFP
23
Understanding WS-Scan
23
Setting up Remote Operator Panel
23
Additional Printer Setup
25
Installing Internal Options
25
Using the Security Lock Feature
26
Accessing the System Board
27
Installing a Memory Card
30
Installing a Flash Memory or Firmware Card
32
Installing an Internal Solutions Port
34
Installing a Printer Hard Disk
38
Removing a Printer Hard Disk
43
Order of Installation
44
Installing Optional Trays
45
Attaching Cables
46
Verifying Printer Setup
47
Setting up the Printer Software
48
Updating Available Options in the Printer Driver
49
Setting up Wireless Printing
50
Installing the Printer on a Wireless Network (Windows)
51
Installing the Printer on a Wireless Network (Macintosh)
52
Installing the Printer on an Ethernet Network
55
For Macintosh Users
56
Changing Port Settings after Installing a New Network Internal Solutions Port
58
Setting up Serial Printing
59
In Windows
60
Minimizing Your Printer's Environmental Impact
62
Saving Paper and Toner
62
Saving Energy
63
Using Eco‑Mode
63
Adjusting Sleep Mode
64
Using Hibernate Mode
65
Adjusting the Brightness of the Display
65
Recycling
66
Recycling Lexmark Packaging
67
Returning Lexmark Cartridges for Reuse or Recycling
67
Loading Paper and Specialty Media
68
Setting the Paper Size and Type
68
Configuring Universal Paper Settings
68
Loading the Standard or Optional 550-Sheet Tray
69
Loading the 2000-Sheet High-Capacity Feeder
72
Loading the Multipurpose Feeder
74
Linking and Unlinking Trays
76
Unlinking Trays
77
Linking Exit Bins
77
Creating a Custom Name for a Paper Type
77
Assigning a Custom Paper Type Name
78
Configuring a Custom Name
78
Paper and Specialty Media Guidelines
79
Paper Guidelines
79
Fiber Content
80
Selecting Paper
80
Selecting Preprinted Forms and Letterhead
80
Using Recycled Paper and Other Office Papers
80
Supported Paper Sizes, Types, and Weights
82
Supported Paper Types and Weights
84
Supported Finishing Features
84
Standard bin
85
Printing
87
Printing a Document
87
Printing from a Flash Drive
88
Printing on Specialty Media
90
Tips on Using Transparencies
91
Tips on Using Envelopes
91
Tips on Using Labels
91
Printing Confidential and Other Held Jobs
92
Printing Information Pages
94
Canceling a Print Job
94
Copying
96
Making Copies
96
Copying Film Photos
97
Copying on Specialty Media
97
Customizing Copy Settings
98
Copying Different Paper Sizes
99
Reducing or Enlarging Copies
100
Adjusting Copy Quality
100
Collating Copies
101
Placing Separator Sheets between Copies
101
Copying Multiple Pages Onto a Single Sheet
102
Placing Information on Copies
103
Canceling a Copy Job
103
Understanding the Copy Screens and Options
104
Advanced Options
106
Save as Shortcut
107
E-Mailing
108
Getting Ready to E-Mail
108
Creating an E-Mail Shortcut
109
E-Mailing a Document
110
Customizing E-Mail Settings
111
Canceling an E-Mail
112
Understanding E-Mail Options
112
Page Setup
114
Scan Preview
114
Faxing
115
Getting the Printer Ready to Fax
115
Choosing a Fax Connection
116
Connecting to an Analog Telephone Line
116
Connecting to a Dsl Service
117
Connecting to a Pbx or Isdn System
117
Connecting to a Distinctive Ring Service
118
Connecting to an Adapter for Your Country or Region
118
Setting the Outgoing Fax or Station Name and Number
119
Setting the Date and Time
119
Creating Shortcuts
120
Sending a Fax
121
Sending a Fax Using Shortcuts
122
Sending a Fax Using the Address Book
122
Customizing Fax Settings
123
Canceling an Outgoing Fax
124
Viewing a Fax Log
124
Understanding Fax Options
125
Delayed Send
126
Holding and Forwarding Faxes
127
Scanning to an FTP Address
129
Creating Shortcuts
130
Understanding FTP Options
131
Scanning to a Computer or Flash Drive
134
Scanning to a Computer
134
Scanning to a Flash Drive
135
Using the Scanback Utility
135
Understanding Scan Profile Options
136
Understanding Printer Menus
138
Menus List
138
Supplies Menu
139
Paper Menu
141
Configure Mp Menu
144
Substitute Size Menu
145
Paper Texture Menu
145
Paper Weight Menu
147
Paper Loading Menu
148
Custom Types Menu
150
Custom Names Menu
150
Custom bin Names Menu
151
Custom Scan Sizes Menu
151
Universal Setup Menu
151
Bin Setup Menu
152
Reports Menu
153
Network/Ports Menu
154
Network Reports Menu
156
Network Card Menu
156
Tcp/Ip Menu
157
Ipv6 Menu
158
Wireless Menu
159
Appletalk Menu
159
Standard Usb Menu
160
Smtp Setup Menu
166
Security Menu
167
Miscellaneous Security Settings Menu
168
Confidential Print Menu
169
Disk Wiping Menu
169
Security Audit Log Menu
170
Set Date and Time Menu
171
Settings Menu
172
Copy Settings Menu
181
Fax Settings Menu
187
E‑Mail Settings Menu
198
Ftp Settings Menu
204
Flash Drive Menu
208
Print Settings
212
Setup Menu
214
Job Accounting Menu
216
Finishing Menu
217
Quality Menu
219
Utilities Menu
222
Postscript Menu
224
Html Menu
227
Image Menu
228
Help Menu
229
Securing the Memory before Moving the Printer
230
Statement of Volatility
230
Erasing Volatile Memory
230
Erasing Non-Volatile Memory
231
Erasing Printer Hard Disk Memory
231
Configuring Printer Hard Disk Encryption
232
Advertisement
Lexmark X792dtpe Compatibility Manual (179 pages)
Card Stock & Label Guide
Brand:
Lexmark
| Category:
Printer
| Size: 3.23 MB
Table of Contents
Edition Notice
2
Table of Contents
3
Overview
7
Introduction
7
General Information
8
Paper and Label Industry
8
Printing Volumes
8
Testing Print Material
8
Design Factors
9
Pick Roller Technology
11
Maintenance Procedures
14
Troubleshooting
14
Card Stock
16
Weight
16
Grain Orientation
17
Coatings
18
Offset Powders
19
Labels
20
Label Characteristics
20
Printing on Labels
20
Duplexing Paper Labels
20
Primary Rib Pattern Design Guidelines for Reference Edge Alignment
22
Label Components
23
Label Design Guidelines
25
Printer Specifications
32
Lexmark C500N
32
Lexmark C510
33
Lexmark C520, C522, and C524
34
Lexmark C530, C532, and C534
36
Lexmark C540, C543, C544, and C546Dtn
38
Lexmark C720
40
Lexmark C734 and C736
42
Lexmark C746 and C748
44
Lexmark C750
46
Lexmark C752
48
Lexmark C760 and C762
51
Lexmark C770, C772, C780, and C782
53
Lexmark C792E, C792De, C792Dte, and C792Dhe
54
Lexmark C910
56
Lexmark C912
58
Lexmark C920
59
Lexmark C925
61
Lexmark C935
62
Lexmark C950
64
Lexmark Cs310N, Cs310Dn, Cs410N, Cs410Dn, and Cs510De
65
Lexmark Cx310N, Cx310Dn, Cx410E, Cx410De, Cx410Dte, Cx510De, Cx510Dhe, and Cx510Dthe
67
Lexmark E120
69
Lexmark E220
70
Lexmark E230, E232, E234(N), E330, and E332N
71
Lexmark E238, E240, E240N, E340, and E342N
72
Lexmark E250, E350, and E450N
73
Lexmark E260, E260D, E260Dn, E360D, E360Dn, E460Dn, E460Dw, and E462Dtn
74
Lexmark E320, E322
75
Lexmark E321, E323
76
Lexmark Ms310D, Ms310Dn, Ms410D, Ms410Dn, Ms510Dn, Ms610Dn, and Ms610De
77
Lexmark MS710 and MS711
79
Lexmark MS810, MS811, and MS812
82
Lexmark Mx310Dn, Mx410De, Mx510De, Mx511De, Mx511Dhe, Mx610De, Mx611De, and Mx611Dhe
84
Lexmark MX710, MX711, MX810, MX811, and MX812
86
Lexmark T420
89
Lexmark T430
91
Lexmark T520, T522
93
Lexmark T620, T622
96
Lexmark T630, T632, T634
99
Lexmark T640, T642, T644
102
Lexmark T650, T652, T654, and T656Dne
104
Lexmark W812
107
Lexmark W820
108
Lexmark W840
109
Lexmark W850
111
Lexmark X203N and X204N
113
Lexmark X215
114
Lexmark X264Dn, X363Dn, X364Dn, and X364Dw
116
Lexmark X422
118
Lexmark X463De, X464De, X466Dte, and X466Dtwe
119
Lexmark X500 and X502N
121
Lexmark X543, X544, and X546Dtn
122
Lexmark X548
124
Lexmark X560
125
Lexmark X642E
127
Lexmark X644E, X646E
129
Lexmark X651De, X652De, X654De, X656De, and X658De
132
Lexmark X734, X736, and X738
135
Lexmark X746 and X748
137
Lexmark X782
139
Lexmark X792De, X792Dte, X792Dtfe, X792Dtpe, X792Dtme, and X792Dtse
141
Lexmark X850, X852E, and X854E
143
Lexmark X860E, X862E, and X864E
145
Lexmark X925
147
Lexmark X940 and X945
149
Lexmark X950
150
Optra Plus, 4039, 4029, 4019, Winwriter 600 Printers
151
Optra C
155
Optra C710
155
Optra Color 1200
157
Optra E, Ep
158
Optra E310, E312
159
Optra es Special Media Printer
160
Optra K 1220
161
Optra M410, M412
162
Optra N
164
Optra S
165
Optra SC 1275
168
Optra T
169
Lexmark X792dtpe Manual (170 pages)
Card Stock & Label Guide
Brand:
Lexmark
| Category:
Printer
| Size: 3.21 MB
Table of Contents
Edition Notice
2
Table of Contents
3
Overview
7
Introduction
7
General Information
8
Paper and Label Industry
8
Printing Volumes
8
Testing Print Material
8
Design Factors
9
Pick Roller Technology
11
Maintenance Procedures
14
Troubleshooting
14
Card Stock
16
Weight
16
Grain Orientation
17
Coatings
18
Offset Powders
19
Labels
20
Label Characteristics
20
Printing on Labels
20
Duplexing Paper Labels
20
Primary Rib Pattern Design Guidelines for Reference Edge Alignment
22
Label Components
23
Label Design Guidelines
25
Printer Specifications
32
Lexmark C500N
32
Lexmark C510
33
Lexmark C520, C522, and C524
34
Unacceptable Labels
35
Lexmark C530, C532, and C534
36
Lexmark C540, C543, C544, and C546Dtn
38
Lexmark C720
39
Lexmark C734 and C736
41
Lexmark C746 and C748
43
Lexmark C750
45
Lexmark C752
47
Lexmark C760 and C762
49
Lexmark C770, C772, C780, and C782
51
Lexmark C792E, C792De, C792Dte, and C792Dhe
53
Lexmark C910
54
Lexmark C912
56
Lexmark C920
57
Lexmark C925
59
Lexmark C935
60
Lexmark C950
62
Lexmark Cs310N, Cs310Dn, Cs410N, Cs410Dn, and Cs510De
63
Lexmark Cx310N, Cx310Dn, Cx410E, Cx410De, Cx410Dte, Cx510De, Cx510Dhe, and Cx510Dthe
65
Lexmark E120
66
Lexmark E220
67
Lexmark E230, E232, E234(N), E330, and E332N
68
Lexmark E238, E240, E240N, E340, and E342N
69
Lexmark E250, E350, and E450N
70
Lexmark E260, E260D, E260Dn, E360D, E360Dn, E460Dn, E460Dw, and E462Dtn
71
Lexmark E320, E322
72
Lexmark E321, E323
73
Lexmark Ms310D, Ms310Dn, Ms410D, Ms410Dn, Ms510Dn, Ms610Dn, and Ms610De
74
Lexmark MS710 and MS711
76
Lexmark MS810, MS811, and MS812
78
Lexmark Mx310Dn, Mx410De, Mx510De, Mx511De, Mx511Dhe, Mx610De, Mx611De, and Mx611Dhe
80
Lexmark MX710, MX711, MX810, MX811, and MX812
82
Lexmark T420
85
Lexmark T430
87
Lexmark T520, T522
89
Lexmark T620, T622
91
Lexmark T630, T632, T634
94
Lexmark T640, T642, T644
97
Lexmark T650, T652, T654, and T656Dne
99
Lexmark W812
102
Lexmark W820
103
Lexmark W840
104
Lexmark W850
106
Lexmark X203N and X204N
107
Lexmark X215
109
Lexmark X264Dn, X363Dn, X364Dn, and X364Dw
111
Lexmark X422
112
Lexmark X463De, X464De, X466Dte, and X466Dtwe
114
Lexmark X500 and X502N
115
Lexmark X543, X544, and X546Dtn
116
Lexmark X548
118
Lexmark X560
119
Lexmark X642E
120
Lexmark X644E, X646E
123
Lexmark X651De, X652De, X654De, X656De, and X658De
125
Lexmark X734, X736, and X738
128
Lexmark X746 and X748
130
Lexmark X782
132
Lexmark X792De, X792Dte, X792Dtfe, X792Dtpe, X792Dtme, and X792Dtse
134
Lexmark X850, X852E, and X854E
136
Lexmark X860E, X862E, and X864E
138
Lexmark X925
140
Lexmark X940 and X945
142
Lexmark X950
143
Optra Plus, 4039, 4029, 4019, Winwriter 600 Printers
144
General Maintenance
146
Optra C
147
Optra C710
148
Optra Color 1200
149
Optra E, Ep
150
Optra E310, E312
151
Optra es Special Media Printer
152
Optra K 1220
153
Optra M410, M412
154
Optra N
156
Optra S
157
Optra SC 1275
159
Optra T
160
Optra W810
163
Lexmark X792dtpe Brochure & Specs (8 pages)
color laser MFPs
Brand:
Lexmark
| Category:
All in One Printer
| Size: 1.3 MB
Lexmark X792dtpe Datasheet (8 pages)
Color laser MPFs
Brand:
Lexmark
| Category:
All in One Printer
| Size: 1.79 MB
Lexmark X792dtpe Product Specification (8 pages)
X792 Series colour laser MFPs
Brand:
Lexmark
| Category:
All in One Printer
| Size: 4.98 MB
Advertisement
Related Products
Lexmark X792dtfe
Lexmark X792de
Lexmark X792dte
Lexmark X792dtme
Lexmark X792
Lexmark X74
Lexmark X782E
Lexmark X746X
Lexmark X772
Lexmark X738de MFP
Lexmark Categories
Printer
All in One Printer
Printer Accessories
Software
Print Server
More Lexmark Manuals
Login
Sign In
OR
Sign in with Facebook
Sign in with Google
Upload manual
Upload from disk
Upload from URL