Sign In
Upload
Manuals
Brands
Lexmark Manuals
Server
X466dtwe
Lexmark X466dtwe Manuals
Manuals and User Guides for Lexmark X466dtwe. We have
13
Lexmark X466dtwe manuals available for free PDF download: User Manual, Manual, Setup Manual, Administrator's Manual, Install Manual, Quick Reference, Fax Manual
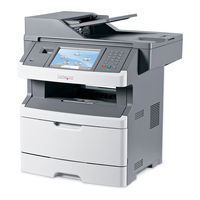
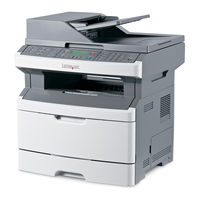
Lexmark X466dtwe User Manual (319 pages)
X46 Series
Brand:
Lexmark
| Category:
All in One Printer
| Size: 6.35 MB
Table of Contents
Table of Contents
2
Safety Information
15
Learning about the Printer
17
Thank You for Choosing this Printer
17
Finding Information about the Printer
17
Printer Configurations
18
Basic Model
19
Selecting a Location for the Printer
20
Basic Functions of the Scanner
21
Understanding the ADF and Scanner Glass
22
Understanding the Printer Control Panel
23
Understanding the Home Screen
24
Using the Touch-Screen Buttons
25
Sample Touch Screen
26
Other Touch-Screen Buttons
27
Additional Printer Setup
29
Installing Internal Options
29
Available Internal Options
29
Accessing the System Board to Install Internal Options
30
Installing a Memory Card
32
Installing a Flash Memory or Firmware Card
34
Installing an Internal Solutions Port
36
Installing a Printer Hard Disk
43
Installing a Fax Card
47
Installing Hardware Options
50
Installing a 250- or 550-Sheet Drawer
50
Attaching Cables
51
Verifying Printer Setup
52
Printing a Menu Settings Page
52
Printing a Network Setup Page
53
Setting up the Printer Software
53
Installing Printer Software
53
Updating Available Options in the Printer Driver
54
Setting up Wireless Printing
55
Follow These Steps to Set up Your Printer
55
Information You will Need to Set up the Printer on a Wireless Network
55
Installing the Printer on a Wireless Network (Windows)
56
Installing the Printer on a Wireless Network (Macintosh)
59
Configure the Printer for Wireless Access
61
Configure Your Computer to Use the Printer Wirelessly
61
Installing the Printer on a Wired Network
63
Changing Port Settings after Installing a New Network Internal Solutions Port
65
For Macintosh Users
66
Setting up Serial Printing
67
Minimizing Your Printer's Environmental Impact
69
Saving Paper and Toner
69
Using Recycled Paper
69
Conserving Supplies
69
Saving Energy
70
Using Eco-Mode
70
Adjusting Power Saver
71
Adjusting the Brightness of the Display
72
Setting the Standard Exit bin Light
72
Recycling
73
Recycling Lexmark Products
73
Recycling Lexmark Packaging
73
Returning Lexmark Cartridges for Reuse or Recycling
74
Reducing Printer Noise
74
Loading Paper and Specialty Media
76
Setting the Paper Size and Paper Type
76
Configuring Universal Paper Settings
76
Avoiding Jams
77
Loading Trays
77
Using the Multipurpose Feeder
81
Loading the Multipurpose Feeder
83
Linking and Unlinking Trays
86
Linking Trays
86
Unlinking Trays
86
Assigning a Custom Paper Type Name
87
Changing a Custom Type <X> Name
87
Paper and Specialty Media Guidelines
89
Paper Guidelines
89
Paper Characteristics
89
Unacceptable Paper
90
Selecting Paper
90
Using Recycled Paper and Other Office Papers
90
Selecting Preprinted Forms and Letterhead
91
Storing Paper
91
Supported Paper Sizes, Types, and Weights
92
Paper Sizes Supported by the Printer
92
Paper Types and Weights Supported by the Printer
93
Paper Capacities
94
Printing
95
Printing a Document
95
Printing on both Sides of the Paper (Duplexing)
95
Printing on Specialty Media
96
Tips on Using Letterhead
96
Tips on Using Transparencies
96
Tips on Using Envelopes
96
Tips on Using Labels
97
Tips on Using Card Stock
97
Printing Confidential and Other Held Jobs
98
Holding Jobs in the Printer
98
Printing Confidential and Other Held Jobs from Windows
99
Printing Confidential and Other Held Jobs from a Macintosh Computer
99
Printing from a Flash Drive
100
Printing Information Pages
101
Printing a Font Sample List
101
Printing a Directory List
101
Printing the Print Quality Test Pages
102
Canceling a Print Job
102
Canceling a Print Job from the Printer Control Panel
102
Canceling a Print Job from the Computer
102
Copying
104
Making Copies
104
Making a Quick Copy
104
Copying Using the ADF
104
Copying Using the Scanner Glass
105
Copying Photos
105
Copying on Specialty Media
105
Making Transparencies
105
Copying to Letterhead
106
Customizing Copy Settings
106
Copying from One Size to Another
106
Making Copies Using Paper from a Selected Tray
106
Copying on both Sides of the Paper (Duplexing)
107
Reducing or Enlarging Copies
107
Adjusting Copy Quality
107
Collating Copies
108
Placing Separator Sheets between Copies
108
Copying Multiple Pages Onto a Single Sheet
109
Creating a Custom Job (Job Build)
109
Pausing the Current Print Job to Make Copies
110
Placing Information on Copies
110
Placing the Date and Time at the Top of each Page
110
Placing an Overlay Message on each Page
111
Canceling a Copy Job
111
Canceling a Copy Job While the Document Is in the ADF
111
Canceling a Copy Job While Copying Pages Using the Scanner Glass
111
Canceling a Copy Job While the Pages Are Being Printed
111
Understanding the Copy Screens and Options
112
Copy from
112
Copy to
112
Scale
112
Darkness
112
Content
112
Sides (Duplex)
113
Collate
113
Options
113
Improving Copy Quality
114
E-Mailing
115
Getting Ready to E-Mail
115
Enabling the E-Mail Function
115
Setting up the E-Mail Function
116
Configuring the E-Mail Settings
116
Creating an E-Mail Shortcut
116
Creating an E-Mail Shortcut Using the Embedded Web Server
116
Creating an E-Mail Shortcut Using the Touch Screen
117
E-Mailing a Document
117
Sending an E-Mail Using the Touch Screen
117
Sending an E-Mail Using a Shortcut Number
117
Sending an E-Mail Using the Address Book
118
Customizing E-Mail Settings
118
Adding E-Mail Subject and Message Information
118
Changing the Output File Type
119
Canceling an E-Mail
119
Understanding E-Mail Options
119
Original Size
119
Sides (Duplex)
119
Orientation
120
Binding
120
E-Mail Subject
120
E-Mail File Name
120
E-Mail Message
120
Resolution
120
Send as
120
Content
120
Advanced Options
121
Faxing
122
Getting the Printer Ready to Fax
122
Setting up the Printer to Fax
122
Choosing a Fax Connection
122
Connecting to an Analog Telephone Line
123
Connecting to a DSL Service
124
Connecting to a PBX or ISDN System
124
Connecting to a Distinctive Ring Service
125
Connecting the Printer and a Telephone or Answering Machine to the same Telephone Line
125
Connecting to an Adapter for Your Country or Region
127
Connecting to a Computer with a Modem
132
Enabling the Fax Function
133
Using the Embedded Web Server for Fax Setup
134
Setting the Date and Time
134
Turning Daylight Saving Time on or off
135
Sending a Fax
135
Sending a Fax Using the Printer Control Panel
135
Getting Ready to Send a Fax Using the Computer
135
Installing a Postscript Driver
136
Sending a Fax Using the Computer
137
Creating Shortcuts
138
Creating a Fax Destination Shortcut Using the Embedded Web Server
138
Creating a Fax Destination Shortcut Using the Touch Screen
138
Using Shortcuts and the Address Book
139
Using Fax Shortcuts
139
Using the Address Book
139
Customizing Fax Settings
140
Changing the Fax Resolution
140
Making a Fax Lighter or Darker
140
Sending a Fax at a Scheduled Time
140
Printing an Incoming Fax on both Sides of the Paper (Duplexing)
141
Viewing a Fax Log
141
Blocking Junk Faxes
141
Canceling an Outgoing Fax
142
Canceling a Fax While the Original Documents Are Still Scanning
142
Canceling a Fax after the Original Documents Have Been Scanned to Memory
142
Understanding Fax Options
142
Original Size
142
Content
142
Sides (Duplex)
143
Resolution
143
Darkness
143
Advanced Options
143
Improving Fax Quality
144
Holding and Forwarding Faxes
144
Holding Faxes
144
Forwarding a Fax
145
Scanning to an FTP Address
146
Scanning to an FTP Address Using the Keypad
146
Scanning to an FTP Address Using a Shortcut Number
146
Scanning to an FTP Address Using the Address Book
147
Creating Shortcuts
147
Creating an FTP Shortcut Using the Embedded Web Server
147
Creating an FTP Shortcut Using the Touch Screen
147
Understanding FTP Options
148
Original Size
148
Sides (Duplex)
148
Orientation
148
Binding
148
Resolution
148
Send as
148
Content
149
Advanced Options
149
Improving FTP Quality
150
Scanning to a Computer or Flash Drive
151
Scanning to a Computer
151
Understanding Scan Profile Options
152
Quick Setup
152
Format Type
152
Compression
152
Default Content
152
Color
153
Original Size
153
Orientation
153
Duplex
153
JPEG Quality
153
Darkness
153
Resolution
153
Advanced Imaging
153
Scanning to a Flash Drive
154
Improving Scan Quality
154
Understanding Printer Menus
155
Menus List
155
Paper Menu
156
Default Source Menu
156
Paper Size/Type Menu
156
Configure MP Menu
159
Substitute Size Menu
159
Paper Texture Menu
160
Paper Weight Menu
161
Paper Loading Menu
161
Custom Types Menu
163
Custom Names Menu
163
Custom Scan Sizes Menu
163
Universal Setup Menu
164
Reports Menu
165
Network/Ports Menu
166
Active NIC Menu
166
Standard Network or Network <X> Menus
166
SMTP Setup Menu
168
Network Reports Menu
169
Network Card Menu
169
TCP/IP Menu
170
Ipv6 Menu
171
Wireless Menu
171
Appletalk Menu
172
Netware Menu
172
Lexlink Menu
173
Standard USB Menu
174
Parallel <X> Menu
175
Serial <X> Menu
177
Security Menu
180
Miscellaneous Menu
180
Confidential Print Menu
180
Disk Wiping Menu
181
Security Audit Log Menu
182
Set Date/Time Menu
183
Settings Menu
184
General Settings Menu
184
Displayed Information
186
Copy Settings Menu
190
Print Page Borders
191
Background Removal
195
Auto Center
195
Color Dropout
195
Mirror Image
195
Negative Image
195
Fax Settings Menu
196
Fax Send Settings
198
Dial Prefix
198
Automatic Redial
199
Fax Receive Settings
201
Auto Reduction
201
Fax Forwarding
201
E-Mail Settings Menu
205
Scan Preview
208
FTP Settings Menu
210
Flash Drive Menu
213
Print Settings
216
Paper Source
217
Print Settings
218
Print Area
219
Job Accounting
219
Finishing Menu
220
Quality Menu
222
Print Resolution
222
Utilities Menu
223
Pdf Menu
224
Postscript Menu
224
Pcl Emul Menu
225
Html Menu
227
Image Menu
228
Auto Fit
228
Help Menu
229
Xps Menu
229
Maintaining the Printer
230
Cleaning the Exterior of the Printer
230
Cleaning the Scanner Glass
230
Cleaning the ADF Separator Rollers
231
Adjusting Scanner Registration
232
Storing Supplies
233
Checking the Status of Supplies
234
Checking the Status of Supplies from the Printer Control Panel
234
Checking the Status of Supplies from a Network Computer
234
Ordering Supplies
235
Ordering Toner Cartridges
235
Ordering a Photoconductor Kit
235
Ordering ADF Replacement Parts
236
Moving the Printer to Another Location
236
Shipping the Printer
237
Administrative Support
238
Finding Advanced Networking and Administrator Information
238
Using the Embedded Web Server
238
Checking the Device Status
238
Setting up E-Mail Alerts
238
Viewing Reports
239
Restoring the Factory Default Settings
239
Advertisement
Lexmark X466dtwe User Manual (313 pages)
Card for IPDS and SCS/TNe -SCS/TNe Emulation
Brand:
Lexmark
| Category:
Printer Accessories
| Size: 1.06 MB
Table of Contents
Card for IPDS and Scs/Tne - Scs/Tne Emulation User's Guide Getting Started
1
Scs/Tne in a LAN Environment
1
Documentation Overview
1
Equipment Requirements and Specifications
2
Support
4
Customer Support
4
Important Configuration Basics
5
Introduction
5
What Are "IDB Options", "IDB Events Etc
6
Setup Options Vs. Printer Setup Options
6
What Are “IDB Options”, “IDB Events Etc.?
6
Understanding the Control Panel
8
Introduction
8
Printer Operator Panel
9
Selecting a New Value as a Setting
10
MFP Touch Screen
17
Remote Configuration Using a Browser
22
Introduction
22
How Remote Configuration Works
22
How to Use the Browser Interface
23
Installation Setup for Mainframe Users
26
Introduction
26
Task 1A - Configuring the Host
28
Task 1B - Configuring the Host for Printing Via a SNA Server
32
Task 2A - Configuring a Host for Tn3270E Printing
34
Task 2B - Configuring an SNA Server for Tn3270E Printing
37
Task 3 -Configuring a Print Server
39
Task 4 - Configuring the SCS Settings
43
Task 5 - Configuring the Scs/Tne Emulation
45
Task 6A - Verifying the Mainframe Connection
49
Task 6B - Verifying the Mainframe/Sna Server Connection
51
Installation Setup for AS/400 and Iseries Users
53
Introduction
53
Task 1 - Configuring the Host
54
Task 2 - Configuring a Print Server
56
Task 3 - Configuring the SCS Settings
60
Task 4 - Configuring the Scs/Tne Emulation
64
Task 5 - Verifying the Host Connection
69
Scs/Tne Cancel
71
About Cancel Job
71
Important
71
Printer Cancel Job
72
MFP Cancel Job
74
Operations Reference - Common Setup
75
Introduction
75
Menu Options Overview
77
Disconnect Ses
78
Reset TN Session
79
SCS Debug Trace
80
Reset ALL Def
82
Operations Reference - TN3270E SETUP
83
Introduction
83
NETWORK SETUP Menu: Options Overview
87
Print Active
88
TN3270 Defaults
89
Connect Status
90
NETWORK SETUP> SERVER INFO Menu: Options Overview
93
Name / IP Address
94
IP Address
95
Hostname
96
TN Server Port
97
LU Name
98
Device Type
99
Keep Alive Type
100
Keep Alive Time
101
SCS OPTIONS Menu: Options Overview
102
COR/APO Sett (IDB Option 122)
103
SCS Options > MISC SETTINGS Menu: Options Overview
104
FF Support (IDB Option 5)
106
Non-Print Char (IDB Option 3)
107
CSC Characters (IDB Options 8 & 9)
108
IDB Delimiter (IDB Option 7)
109
Use IR (IDB Option 21)
110
Format Ctrl Sup (IDB Option 177)
111
Country Code (IDB Option 2)
114
Skip Blank Page (IDB Option 32)
116
CPI (IDB Option 100)
117
Max Prt Pos (IDB Option 102)
118
LPI (IDB Option 105)
119
Line Spacing (IDB Option 106)
120
LPP (IDB Option 107)
121
Transparency (IDB Option 167)
122
Form Strings (IDB Option 168)
123
IBM Trn Code (IDB Option 169 Bit 1)
124
Leadin Sequence (IDB Option 169 Bit2)
125
Euro Support (IDB Event 191)
126
SCS Options> MISC SETTINGS > BOLD PRINT Menu - Options Overview
127
Bold on CR (IDB Option 22 Bit 1)
128
Bold on BS (IDB Option 22 Bit 2)
129
Bold on Multi BS (IDB Opt. 22 Bit 3)
130
SCS Options > PAPER SETTINGS Menu: Options Overview
131
Left Margin (IDB Option 103)
133
Right Margin (IDB Option 104)
134
Top Margin (IDB Option 108)
135
Bottom Margin (IDB Option 109)
136
Source Input (IDB Option 113)
137
Tray 1 Orient (IDB Option 123)
138
Tray 2 Orient (IDB Option 124)
139
Tray 3 Orient (IDB Option 125)
140
Tray 4 Orient (IDB Option 126)
141
Tray 5 Orient (IDB Option 127)
142
Tray1 Paper Size (IDB Option 90)
143
Tray2 Paper Size (IDB Option 91)
144
Tray3 Paper Size (IDB Option 92)
145
Tray4 Paper Size (IDB Option 93)
146
Tray5 Paper Size (IDB Option 94)
147
TEST OPTIONS Menu: Options Overview
148
SCS3270 Hex Dump
149
Print 3270 IDB
150
SCS3270 Defaults
151
Operations Reference - TN5250E SETUP
153
Introduction
153
CONNECTION # Menu: Options Overview
157
Print # Active
158
TN5250## Default
159
Connect # Status
160
CONNECTION # > SERVER # INFO Menu: Options Overview
163
Name / Ipaddress
164
IP # Address
165
Hostname
166
Server # TN Port
167
Device # Name
168
Keep Alive Type
169
Keep Alive Time
170
MSGQ # Name
171
MSGQ # Lib
172
IR # Reply
173
Auto Sense # END
174
SCS OPTIONS Menu: Options Overview
175
Overlay Call (IDB Option 28)
177
Prop Font Move (IDB Option 118)
179
Compress CPI (IDB Option 128)
181
Move Hor/Ver (IDB Option 158)
183
Format Ctrl Sup (IDB Option 177)
185
Download Font (IDB Option 244)
186
Euro Support (IDB Option 139)
188
SCS OPTIONS > CSC CHARACTERS Menu: Options Overview
190
IDB First Char (IDB Option 8)
191
IDB Second Char (IDB Option 9)
193
IDB Delimiter (IDB Option 7)
195
SCS OPTIONS > COR/APO SETTINGS Menu: Options Overview
196
Def Page Ori 1 (IDB Option 121)
197
Def Page Ori 2 (IDB Option 122)
198
COR Action 1 (IDB Option 123)
199
COR Action 2 (IDB Option 124)
201
PPM Quality Dis (IDB Opt.126)
203
COR LSI Reduc (IDB Option 127)
205
SCS OPTIONS > MISC SETTINGS Menu: Options Overview
206
Country Code (IDB Option 2)
208
Codepage (IDB Options 240 and 241)
210
Font (IDB Options 242 and 243)
213
CPI (IDB Option 100)
216
Max Print Pos (IDB Option 102)
217
Left Margin (IDB Option 103)
218
Right Margin (IDB Option 104)
219
LPI (IDB Option 105)
220
Lines Per Page (IDB Option 107)
221
Top Margin (IDB Option 108)
222
Source Input (IDB Option 113)
223
Forms Media (IDB Option 114)
224
Output bin (IDB Option 115)
225
Simplex/Duplex (IDB Option 116)
226
Non-Print Char (IDB Option 3)
228
SCS OPTIONS > PAPER SETTINGS Menu: Options Overview
229
Left Margin COR (IDB Opt. 78 & 79)
230
Top Margin COR (IDB Opt. 80 & 81)
232
Left Margin Lan (IDB Opt. 86 & 87)
234
Top Margin Lan (IDB Opt. 88 & 89)
236
Page Length (IDB Opt. 82 & 83)
238
Page Width (IDB Opt.84 & 85)
240
TEST OPTIONS Menu: Options Overview
242
SCS5250 Hex Dump
243
Print 5250 IDB
244
SCS5250 Defaults
245
Lexmark X466dtwe User Manual (119 pages)
Card for IPDS and SCS/TNe IPDS Emulation
Brand:
Lexmark
| Category:
Printer Accessories
| Size: 0.7 MB
Table of Contents
Ipds Emulation
1
Notice
2
Trademarks and Credits
2
Table of Contents
3
1 Introduction
7
About this Guide
7
Equipment Requirements and Specifications for IPDS Emulation Printing
7
Customer Support
8
Conventions Used in the Manual
9
2 Using the Operator Panel or Touch Screen for IPDS MENU Setup
10
IPDS MENU Setup Options Vs. Printer Setup Options
10
Changing IPDS Settings Using the Operator Panel
11
Accessing the IPDS MENU
11
Example: Selecting a New Value as a Setting
11
Example: Changing a Numerical Setting
13
Saved Option Changes Become Active on New Session
14
Printing the Menu Settings Page (Printers)
14
Changing IPDS Settings Using the MFP Touch Screen
15
Accessing the IPDS MENU
15
Example: Selecting a New Value as a Setting
15
Example: Changing a Numerical Setting
16
Saved Option Changes Become Active on New Session
17
Printing the Menu Settings Page (Mfps)
17
3 Setup Operations Reference
18
IPDS MENU - Map of All Options
18
IPDS MENU - Default Values Overview
19
Emulation
19
Paper Handling
19
MAP Input Trays
19
Map Output Bins
20
Margins
20
Resource Capture
20
EMULATION - Options Descriptions
21
IPDS Emulation
21
Host Resolution
21
Color Processing
22
Toner Saver
22
Bar Code
22
Bar Code Symbol
22
Bar Code Size
23
Default Codepage
23
Codepage Version
24
Default Fgid
24
Default CPI
24
Printable Area
24
Exception Control
25
Font Control
26
Font Style
26
IPDS Print Res
26
Intervention Required
27
IPDS Timeout
27
Fax Interrupt
28
Print Resource List
29
Trace Functions
29
IPDS Version
29
PAPER HANDLING Menu - Option Descriptions
30
Offset Stacking
30
Universal Size
30
Other Env Size
32
MAP INPUT TRAYS Menu Options
34
MAP OUTPUT BINS Menu Options
37
Descriptions of Output bin Values
37
Descriptions of IPDS bin Selection Numbers
38
Default bin Mapping
38
MARGINS Menu Options
39
All Input Trays
41
Tray 1 Adjust
41
Tray 2 Adjust
41
Tray 3 Adjust
42
Tray 4 Adjust
42
Tray 5 Adjust
43
Mp Feeder Adjust
43
Env Feeder Adj
43
Manual Paper Adj
44
Manual Env Adj
44
RESOURCE CAPTURE Menu Options
45
Storage Media
45
Resources Captured
46
Remove Resources
46
4 Duplex Printing Using Preprinted Media
47
5 Finishing Support
48
Offset Stacking
50
AS/400 and Iseries Offset Stacking
50
Mainframe Offset Stacking
51
Stapling
52
AS/400 and Iseries Stapling
52
Lexmark T650, T652, T654 and X658De MFP Optional Finisher
53
Lexmark W850, X860De, X862De and X864De Optional Standard Finisher
54
Corner Staple
54
Dual Staple (IPDS Edge Stitch with 2 Staples)
55
Lexmark X860De, X862De and X864De Mfps Optional Advanced Finisher Functions
56
Center Fold (IPDS Center Fold-In)
56
Saddle Staple (IPDS Saddle Stitch-In)
56
Mainframe Stapling
58
Lexmark T650, T652, T654, T656Dne and X658De Optional Finisher
58
Lexmark W850, X860De, X862De and X864De Optional Standard Finisher
59
Lexmark X860De, X862De and X864De Mfps Optional Advanced Finisher Functions
60
Hole Punching
61
Hole Punching from an Input Source
61
Hole Punching to an Output bin
62
6 IPDS Job Cancel
63
Canceling IPDS Jobs
63
How to Cancel a Job Using the Printer Operator Panel
63
How to Cancel a Job Using the MFP Touch Screen
64
7 Working with Captured Resources
65
Capture Resource and Remove Resources
65
Preparing Fonts for Capture
65
Capturing Fonts from an AS/400 or Iseries
66
Enabling Font Capture on the Printer
66
Program Requirements
66
Making Bitmap LF1 and Outline LF3 Font Fonts Eligible for Capture on an Iseries Host
66
Making Truetype Fonts Eligible for Capture on an Iseries Host
66
Capturing Fonts from a Mainframe Host
67
Enabling Font Capture on the Printer
67
Mainframe Program Requirements
67
Making Bitmap LF1 and Outline LF3 Font Fonts Eligible for Capture on a Mainframe
67
Making Truetype Fonts Eligible for Capture on Mainframe
70
Preparing Data Objects (Non-Font Resources) for Capture
70
Capturing Data Objects from an IBM Host
70
Enabling Data Object Capture on the Printer
70
Making Data Objects Eligible for Capture on the Host
70
Advertisement
Lexmark X466dtwe Manual (170 pages)
Card Stock & Label Guide
Brand:
Lexmark
| Category:
Printer
| Size: 3.21 MB
Table of Contents
Edition Notice
2
Table of Contents
3
Overview
7
Introduction
7
General Information
8
Paper and Label Industry
8
Printing Volumes
8
Testing Print Material
8
Design Factors
9
Pick Roller Technology
11
Maintenance Procedures
14
Troubleshooting
14
Card Stock
16
Weight
16
Grain Orientation
17
Coatings
18
Offset Powders
19
Labels
20
Label Characteristics
20
Printing on Labels
20
Duplexing Paper Labels
20
Primary Rib Pattern Design Guidelines for Reference Edge Alignment
22
Label Components
23
Label Design Guidelines
25
Printer Specifications
32
Lexmark C500N
32
Lexmark C510
33
Lexmark C520, C522, and C524
34
Unacceptable Labels
35
Lexmark C530, C532, and C534
36
Lexmark C540, C543, C544, and C546Dtn
38
Lexmark C720
39
Lexmark C734 and C736
41
Lexmark C746 and C748
43
Lexmark C750
45
Lexmark C752
47
Lexmark C760 and C762
49
Lexmark C770, C772, C780, and C782
51
Lexmark C792E, C792De, C792Dte, and C792Dhe
53
Lexmark C910
54
Lexmark C912
56
Lexmark C920
57
Lexmark C925
59
Lexmark C935
60
Lexmark C950
62
Lexmark Cs310N, Cs310Dn, Cs410N, Cs410Dn, and Cs510De
63
Lexmark Cx310N, Cx310Dn, Cx410E, Cx410De, Cx410Dte, Cx510De, Cx510Dhe, and Cx510Dthe
65
Lexmark E120
66
Lexmark E220
67
Lexmark E230, E232, E234(N), E330, and E332N
68
Lexmark E238, E240, E240N, E340, and E342N
69
Lexmark E250, E350, and E450N
70
Lexmark E260, E260D, E260Dn, E360D, E360Dn, E460Dn, E460Dw, and E462Dtn
71
Lexmark E320, E322
72
Lexmark E321, E323
73
Lexmark Ms310D, Ms310Dn, Ms410D, Ms410Dn, Ms510Dn, Ms610Dn, and Ms610De
74
Lexmark MS710 and MS711
76
Lexmark MS810, MS811, and MS812
78
Lexmark Mx310Dn, Mx410De, Mx510De, Mx511De, Mx511Dhe, Mx610De, Mx611De, and Mx611Dhe
80
Lexmark MX710, MX711, MX810, MX811, and MX812
82
Lexmark T420
85
Lexmark T430
87
Lexmark T520, T522
89
Lexmark T620, T622
91
Lexmark T630, T632, T634
94
Lexmark T640, T642, T644
97
Lexmark T650, T652, T654, and T656Dne
99
Lexmark W812
102
Lexmark W820
103
Lexmark W840
104
Lexmark W850
106
Lexmark X203N and X204N
107
Lexmark X215
109
Lexmark X264Dn, X363Dn, X364Dn, and X364Dw
111
Lexmark X422
112
Lexmark X463De, X464De, X466Dte, and X466Dtwe
114
Lexmark X500 and X502N
115
Lexmark X543, X544, and X546Dtn
116
Lexmark X548
118
Lexmark X560
119
Lexmark X642E
120
Lexmark X644E, X646E
123
Lexmark X651De, X652De, X654De, X656De, and X658De
125
Lexmark X734, X736, and X738
128
Lexmark X746 and X748
130
Lexmark X782
132
Lexmark X792De, X792Dte, X792Dtfe, X792Dtpe, X792Dtme, and X792Dtse
134
Lexmark X850, X852E, and X854E
136
Lexmark X860E, X862E, and X864E
138
Lexmark X925
140
Lexmark X940 and X945
142
Lexmark X950
143
Optra Plus, 4039, 4029, 4019, Winwriter 600 Printers
144
General Maintenance
146
Optra C
147
Optra C710
148
Optra Color 1200
149
Optra E, Ep
150
Optra E310, E312
151
Optra es Special Media Printer
152
Optra K 1220
153
Optra M410, M412
154
Optra N
156
Optra S
157
Optra SC 1275
159
Optra T
160
Optra W810
163
Lexmark X466dtwe Manual (154 pages)
Card Stock & Label Guide
Brand:
Lexmark
| Category:
Printer
| Size: 2.47 MB
Table of Contents
Edition Notice
2
Table of Contents
3
Overview
7
Introduction
7
General Information
8
Paper and Label Industry
8
Print Volumes
8
Print Material Testing
8
Design Factors
9
Pick Roller Technology
11
Maintenance Procedures
13
Troubleshooting
13
Card Stock
15
Weight
15
Grain Orientation
16
Coatings
17
Offset Powders
18
Labels
19
Label Characteristics
19
Printing on Labels
19
Duplexing Paper Labels
19
Label Components
21
Label Design Guidelines
23
Printer Specifications
30
Lexmark C500N
30
Lexmark C510
31
Lexmark C520, C522, and C524
32
Unacceptable Labels
32
Media Specifications
33
Lexmark C530, C532, and C534
34
Lexmark C540, C543, C544, and C546Dtn
36
Lexmark C720
38
Lexmark C734 and C736
40
Lexmark C750
42
Lexmark C752
44
Lexmark C760 and C762
46
Lexmark C770, C772, C780, and C782
49
Lexmark C790
50
Lexmark C910
52
Lexmark C912
53
Lexmark C920
55
Lexmark C925
56
Lexmark C935
58
Lexmark E120
59
Lexmark E220
61
Lexmark E230, E232, E234(N), E330, and E332N
62
Lexmark E238, E240, E240N, E340, and E342N
63
Lexmark E250, E350, and E450N
64
Lexmark E260, E260D, E260Dn, E360D, E360Dn, E460Dn, E460Dw, and E462Dtn
65
Lexmark E320, E322
66
Lexmark E321, E323
67
Lexmark T420
68
Lexmark T430
70
Lexmark T520, T522
72
Lexmark T620, T622
74
Lexmark T630, T632, T634
77
Lexmark T640, T642, T644
81
Lexmark T650, T652, T654, and T656Dne
83
Lexmark W812
86
Lexmark W820
87
Lexmark W840
88
Lexmark W850
90
Lexmark X203N and X204N
92
Lexmark X215
93
Lexmark X264Dn, X363Dn, X364Dn, and X364Dw
95
Lexmark X422
97
Lexmark X463De, X464De, X466Dte, and X466Dtwe
98
Lexmark X500 and X502N
100
Lexmark X543, X544, and X546Dtn
101
Lexmark X560
103
Lexmark X642E
104
Lexmark X644E, X646E
107
Lexmark X651De, X652De, X654De, X656De, and X658De
109
Lexmark X734, X736, and X738
113
Lexmark X782
115
Lexmark X790
117
Lexmark X850, X852E, and X854E
119
Lexmark X860E, X862E, and X864E
121
Lexmark X925
124
Lexmark X940 and X945
126
Optra Plus, 4039, 4029, 4019, Winwriter 600 Printers
127
General Maintenance
129
Optra C
130
Optra C710
131
Optra Color 1200
133
Optra E, Ep
134
Optra E310, E312
135
Optra es Special Media Printer
136
Optra K 1220
137
Optra M410, M412
138
Label Guidelines
138
Optra N
140
Optra S
141
Optra SC 1275
144
Optra T
145
Optra W810
148
Lexmark X466dtwe Manual (146 pages)
Card Stock & Label Guide
Brand:
Lexmark
| Category:
Printer
| Size: 2.28 MB
Table of Contents
Edition Notice
2
Table of Contents
3
Overview
7
Introduction
7
General Information
8
Paper and Label Industry
8
Print Volumes
8
Print Material Testing
8
Design Factors
9
Pick Roller Technology
11
Maintenance Procedures
13
Troubleshooting
13
Card Stock
15
Weight
15
Grain Orientation
16
Coatings
17
Offset Powders
18
Labels
19
Label Characteristics
19
Printing on Labels
19
Duplexing Paper Labels
19
Label Components
21
Label Design Guidelines
23
Printer Specifications
30
Lexmark C500N
30
Lexmark C510
31
Lexmark C520, C522, C524
32
Media Specifications
33
Lexmark C530, C532, and C534
34
Lexmark C540, C543, C544, and C546Dtn
36
Lexmark C720
38
Lexmark C734, C736
40
Lexmark C750
42
Lexmark C752
44
Lexmark C760, C762
47
Lexmark C770, C772, C780, and C782
49
Lexmark C910
51
Lexmark C912
53
Lexmark C920
54
Lexmark C935
56
Lexmark E120
57
Lexmark E220
58
Lexmark E230, E232, E234(N), E330, and E332N
59
Lexmark E238, E240, E240N, E340, E342N
60
Lexmark E250, E350, E450N
61
Lexmark E260, E260D, E260Dn, E360D, E360Dn, E460Dn, E460Dw, and E462Dtn
62
Lexmark E320, E322
63
Lexmark E321, E323
64
Lexmark T420
66
Lexmark T430
68
Lexmark T520, T522
70
Lexmark T620, T622
72
Lexmark T630, T632, T634
76
Lexmark T640, T642, T644
79
Lexmark T650, T652, T654, and T656Dne
81
Lexmark W812
84
Lexmark W820
85
Lexmark W840
86
Lexmark W850
88
Lexmark X203N and X204N
90
Lexmark X215
91
Lexmark X264Dn, X363Dn, X364Dn, and X364Dw
94
Lexmark X422
95
Lexmark X463De, X464De, X466Dte, and X466Dtwe
97
Lexmark X500 and X502N
99
Lexmark X543, X544, and X546Dtn
100
Lexmark X560
102
Lexmark X642E
103
Lexmark X644E, X646E
106
Lexmark X651De, X652De, X654De, X656De, and X658De
108
Lexmark X734, X736, and X738
112
Lexmark X850, X852E, and X854E
114
Lexmark X860E, X862E, and X864E
116
Lexmark X940, X945
118
Optra Plus, 4039, 4029, 4019, Winwriter 600 Printers
119
Optra C
123
Optra C710
123
Optra Color 1200
125
Optra E, Ep
126
Optra E310, E312
127
Optra es Special Media Printer
128
Optra K 1220
129
Optra M410, M412
130
Tray Specifications
131
Optra N
132
Optra S
133
Optra SC 1275
136
Optra T
137
Optra W810
140
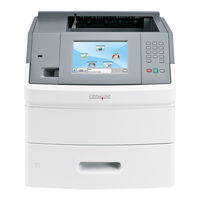
Lexmark X466dtwe Administrator's Manual (40 pages)
Embedded Web Server Administrator's Guide
Brand:
Lexmark
| Category:
Server
| Size: 0.37 MB
Table of Contents
Embedded Web Server
1
Table of Contents
3
Using Security Features in the Embedded Web Server
5
Understanding the Basics
5
Authentication and Authorization
5
Groups
6
Access Controls
6
Security Templates
6
Configuring Building Blocks
7
Creating a Password
7
Creating a PIN
7
Setting up Internal Accounts
8
Using LDAP
9
Using LDAP+GSSAPI
11
Configuring Kerberos 5 for Use with LDAP+GSSAPI
13
Using NTLM Authentication
14
Securing Access
15
Setting a Backup Password
15
Setting Login Restrictions
16
Using a Password or PIN to Control Function Access
16
Using a Security Template to Control Function Access
16
Scenarios
18
Scenario: Printer in a Public Place
18
Scenario: Standalone or Small Office
18
Scenario: Network Running Active Directory
19
Managing Certificates and Other Settings
21
Managing Certificates
21
Setting Certificate Defaults
22
Configuring Confidential Printing
22
Enabling and Disabling USB Devices
23
Disk Wiping
23
Encrypting the Hard Disk
24
Configuring Security Audit Log Settings
25
Configuring 802.1X Authentication
26
Setting up SNMP
27
Enabling the Security Reset Jumper
28
Appendix
29
Notices
32
Gnu Lesser General Public License
35
Glossary of Security Terms
39
Index
40
Lexmark X466dtwe Setup Manual (52 pages)
Lexmark All in One Printer Setup Guide
Brand:
Lexmark
| Category:
All in One Printer
| Size: 8.56 MB
Lexmark X466dtwe Setup Manual (41 pages)
Card for IPDS and SCS/TNe IPDS Printer and Host Setup Guide
Brand:
Lexmark
| Category:
Printer Accessories
| Size: 0.28 MB
Table of Contents
Notices
2
Table of Contents
3
Equipment Requirements and Specifications
4
Customer Support
5
AS/400 and Iseries LAN Printing Using the Printer Standard Network Port or Marknet Internal Print Server
6
PSF/MVS LAN Printing Using the Standard Network Port or Internal Print Server
14
PSF/2 LAN Printing Using an Internal LAN Print Server
22
PSF/AIX LAN Printing Using an Internal LAN Print Server
29
Printer and Host Timeout Values
34
Printer Messages and Problems
36
Lexmark X466dtwe Setup Manual (38 pages)
Card for IPDS and Card for IPDS and SCS/TNe IPDS Printer and Host Setup Guide
Brand:
Lexmark
| Category:
Printer
| Size: 0.64 MB
Table of Contents
Notices
2
Table of Contents
3
Equipment Requirements and Specifications
4
Customer Support
6
Iseries and AS/400 LAN Printing Using the Printer Standard Network Port or Marknet Internal Print Server
7
PSF/MVS LAN Printing Using the Standard Network Port or Internal Print Server
15
PSF/2 LAN Printing Using an Internal LAN Print Server
23
Printer and Host Timeout Values
30
Printer Messages and Problems
32
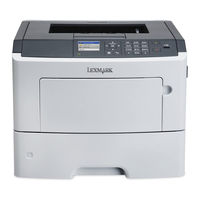
Lexmark X466dtwe Install Manual (27 pages)
Lexmark X466DTE: Install Guide
Brand:
Lexmark
| Category:
All in One Printer
| Size: 0.53 MB
Table of Contents
Edition Notice
2
Table of Contents
3
Preparing to Connect Wirelessly
5
Follow These Steps to Set up Your Printer
5
Information You will Need to Set up the Printer on a Wireless Network
5
Adding the Printer to a Network that Uses MAC Address Filtering
6
Connecting to a Wireless Network Using Windows
7
Installing the Printer on a Wireless Network (Windows)
7
Connecting to a Wireless Network Using Windows
8
Connecting to a Wireless Network Using Macintosh
10
Installing the Printer on a Wireless Network (Macintosh)
10
Configure the Printer for Wireless Access
12
Configure Your Computer to Use the Printer Wirelessly
12
Troubleshooting Wireless Setup
14
Cannot Print over Wireless Network
15
For Windows Users
15
Cannot Print and There Is a Firewall on the Computer
22
Networking Glossary
25
Index
27
Lexmark X466dtwe Quick Reference (4 pages)
Lexmark X463DE: Quick Start
Brand:
Lexmark
| Category:
All in One Printer
| Size: 0.1 MB
Table of Contents
Copying Using the Scanner Glass
1
Canceling a Copy Job While Copying Pages Using the Scanner Glass
1
Quick Reference
1
Canceling a Copy Job While the Pages Are Being Printed
1
Making Copies
1
Making a Quick Copy
1
Job Interrupt
1
Copying Using the Adf
1
Canceling a Copy Job
1
Touch Screen
2
Sending a Fax Using the Computer
2
For Windows Users
2
Control Panel
2
Creating Shortcuts
3
Creating a Fax Destination Shortcut Using the Embedded Web Server
3
Address Book
3
Scanning to an Ftp Address
3
Creating a Fax Destination Shortcut Using the Touch Screen
3
Scanning to a Computer
4
Lexmark X466dtwe Fax Manual (4 pages)
Sending a fax using the computer
Brand:
Lexmark
| Category:
Printer
| Size: 0.07 MB
Advertisement
Related Products
Lexmark X738DE
Lexmark X738DTE
Lexmark X642E - X642E
Lexmark 13C1104 - X 466dwe B/W Laser
Lexmark X466de
Lexmark X466DTE
Lexmark X466DWE
Lexmark X466
Lexmark X464de
Lexmark X464
Lexmark Categories
Printer
All in One Printer
Printer Accessories
Software
Print Server
More Lexmark Manuals
Login
Sign In
OR
Sign in with Facebook
Sign in with Google
Upload manual
Upload from disk
Upload from URL