Sign In
Upload
Manuals
Brands
Avery Dennison Manuals
Printer
SNAP 700
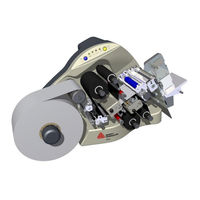
Avery Dennison SNAP 700 Manuals
Manuals and User Guides for Avery Dennison SNAP 700. We have
5
Avery Dennison SNAP 700 manuals available for free PDF download: Operator's And Service Manual, User Manual, Reference Manual
Avery Dennison SNAP 700 Operator's And Service Manual (176 pages)
Brand:
Avery Dennison
| Category:
Printer
| Size: 13 MB
Table of Contents
Table of Contents
4
1 Introduction
9
2 Safety Instructions
11
3 Installation
13
Preparing for the Installation
13
AC Power Line
13
Location Considerations
13
PC Requirements
14
User Safety
15
Receiving
15
Unpacking
16
Removing the Printer from the Carton
16
Inspection / Inventory Checklist
17
Downloading Support Documentation
18
Disassembly and Disposal
18
Printer Description
19
Component Descriptions
19
Printer Configurations
20
Printer Setup
21
Attaching the Stacker
21
Attaching the Unwind Assembly
22
Checking the Main Fuse Configuration
22
Installing the Power Cord
23
Communications Cable Installation
24
Serial Cable
24
USB Cable
24
Networking Setup
25
BIOS Settings
25
Connecting the Networking Cable
25
Setting the Printer IP Address
26
Pcmate Platinum Software Installation
27
Printing a Test Label
27
Loading Supplies
27
Turning the Printer on
27
Selecting the Test Format
28
Printing the Test Labels
28
4 Operation
29
Loading Supplies
29
Installing Ink to the Top Ink Supply Station
29
Installing Ink to the Bottom Ink Supply Station
32
Loading the Stock
32
Butt Splice
34
Threading Diagrams
35
Sending a Print Job to the Printer
36
Printing Labels
36
The Control Panel
36
Printing
37
Handling the Leader
37
Feeding the Stock
37
Errors
38
End of Day
38
Clearing Print Jobs
38
Using Pre-Printed Stock
39
Selecting the Sensor
39
Aligning the Stock to the Sensor
39
Aligning the Sensor to the Stock
40
Option Menu System
40
Running Test Patterns
41
Setting / Adjusting Voice Button Volume
43
5 Making Adjustments
45
Print Head Adjustments
45
Adjusting Print Head Pressure
45
Adjusting Density (Darkness)
46
Adjusting the Stacker
46
Stacker Position
46
Toggle Switch
46
Stacker Angle
47
Platform
47
Static Brush
48
Virtual Control Panel
49
Introduction
49
Changing Printer Settings in Pcmate
50
Print/Cut Adjust Tab
51
Selecting the Printer Language
52
Setting the Date and Time
52
Enabling or Disabling the Cutter
53
Selecting the Print Speed
53
Selecting the Flagging Mode
53
Selecting the Sense Mark Type
54
Setting the Default Transfer
54
Viewing the Life Counts
55
Firmware
55
Print Quality
56
Other Information on VCP
56
Web Server
57
Viewing and Changing the Printer Settings
57
Converting the DHCP Address to a Static Address
58
Resetting the Printer to DHCP Mode
59
Troubleshooting the Network Connection
59
6 Maintenance
60
Print Head Cleaning and Handling
60
Handling Techniques
60
Cleaning Procedures
61
Print Head Replacement
62
Lubrication
65
Rotary Knife Assembly
65
Removing and Replacing the Knife Assembly
66
Adjust the Knife Home Position
69
Rubber Roller Replacement
69
7 Service Adjustments
70
Stock (Web) Guide Position
70
Stock (Web) Guide Width Adjustments
70
Stock Feed
70
Knife Shear Adjustment
71
8 Upgrading the Printer Firmware
73
Introduction
73
Selecting the UPG File
73
Getting the UPG File
73
Getting UPG File Using D2Comm
73
Getting UPG File Without Using D2Comm
74
Performing the Upgrade
74
Unzipping the File
74
Upgrading through Pcmate
75
Upgrading through USB Flash Drive
78
Upgrading through the Webserver
79
9 Electrical Troubleshooting
82
Power up / Sign on / Communications
82
Stock / Ink Advance
85
Print
86
Cut / Stack
88
Printer Errors
89
10 Mechanical Troubleshooting
95
Stock
95
Ink
96
Print
96
Knife
96
Stacker
97
11 Appendices
98
Fuse Configuration
98
Ink and Stock Transfer Types
99
Printer Specifications
101
Factory / Field Installation of Top Sensor Assemblies
103
Installation Procedure
103
Programming the Contrast Sensors
107
Programming the Contrast Sensor
108
Programming the Color Contrast Sensor
109
Factory / Field Installation of High Speed Verifier Assembly
111
Installation Procedure - Mechanical
111
Installation Procedure - Electrical
113
Installation - Rear Cover
114
Warranty Policy
115
Service
116
Option Menu System Flowchart
117
12 Electrical Drawings
118
Electrical System Schematic
119
Harness Connections
120
13 Mechanical Assembly Drawings
121
Unwind Assembly
122
Unwind Assembly RFID 3" / 4
124
Unwind Motor Assembly
126
Decurler Assembly
128
Web Guide Assembly
130
Sensor Tray Assembly
132
Sensor Tray RFID Assembly
134
Top Print Head Assembly
136
Bottom Print Head Assembly
138
Print Head Assembly
140
Platen Roller Assembly
142
Ink Arbor Assembly
144
Ink Unwind / Rewind Motor(S) Assembly
146
Drive Assembly
148
Knife Assembly
150
Knife Assembly Parts List
151
Nip Roller Assembly
152
Knife / Drive Motors Assembly
154
Knife Drive Motor Assembly RFID
156
RFID Reader Assembly
158
Covers Assembly
160
Cooling Fans Assembly
162
Stacker Assembly (Sheet 1 of 2)
164
Stacker Assembly (Sheet 2 of 2)
166
14 Addendum I - Handling Procedures
169
15 Addendum II - Short Feed
171
Short Feed O-Ring Replacement
171
Short Feed Assembly
172
Short Feed Assembly Part List
173
16 Revision Record
175
Advertisement
Avery Dennison SNAP 700 User Manual (154 pages)
Brand:
Avery Dennison
| Category:
Label Maker
| Size: 5 MB
Table of Contents
Table of Contents
3
Introduction
9
Installation
10
Preparing for the Installation
10
AC Power Line
10
Location Considerations
10
PC Requirements
11
User Safety
12
Receiving
12
Unpacking
13
Removing the Printer from the Carton
13
Inspection / Inventory Checklist
14
Printer Description
15
Setting up the Printer
17
Attaching the Stacker
17
Checking the Main Fuse Configuration
18
Installing the Power Cord
19
Installing the PC Interface Cable
19
Installing Pcmate Platinum Software
20
Printing a Test Label
20
Loading Supplies
20
Turning the Printer on
20
Selecting the Test Format
20
Printing the Test Labels
21
Operation
22
Loading Supplies
22
Installing Ink to the Top Ink Supply Station
22
Installing Ink to the Bottom Ink Supply Station
26
Loading the Stock
26
Butt Splice
28
Sending a Print Job to the Printer
28
Printing Labels
29
The Control Panel
29
Printing
30
Handling the Leader
30
Errors
30
End of Day
31
Clearing Print Jobs
31
Using Pre-Printed Stock
31
Selecting the Sensor
33
Aligning the Stock to the Sensor
33
Aligning the Sensor to the Stock
33
Feeding the Stock
34
Option Menu System
34
Running Test Patterns
35
Setting / Adjusting Voice Button Volume
37
Making Adjustments
39
Print Head Adjustments
39
Adjusting Print Head Pressure
39
Adjusting Density (Darkness)
40
Adjusting the Stacker
40
Stacker Position
41
Toggle Switch
41
Stacker Angle
41
Platform
42
Print and Cut Adjustments
43
Cut Adjust
43
Print Adjust
43
Printer Features
44
Selecting the Printer Language
44
Setting the Date and Time
44
Enabling or Disabling the Cutter
44
Selecting the Print Speed
45
Selecting the Flagging Mode
45
Selecting the Sense Mark Type
45
Setting the Default Transfer Type
46
Viewing the Life Counts
46
Maintenance
47
Print Head Cleaning and Handling
47
Handling Techniques
47
Cleaning Procedures
48
Print Head Replacement
49
Lubrication
52
Rotary Knife Assembly
52
Removing and Replacing the Knife Assembly
53
Adjust the Knife Home Position
56
Rubber Roller Replacement
56
Service Adjustments
57
Stock (Web) Guide Position
57
Stock (Web) Guide Width Adjustments
57
Stock Feed
57
Knife Shear Adjustment
57
Remote Control / Display Module
60
Virtual Control Panel
61
Viewing and Changing Printer Settings
62
Upgrading the Printer Software
63
Introduction
63
What Is Needed
63
Getting the UPG File
63
Using Avery Dennison Online to Get the UPG File
63
Ordering the UPG File on CD
63
Getting Ready to Upgrade the Printer
63
Performing the Upgrade
64
Electrical Troubleshooting
67
Power up / Sign on / Communications
67
Stock / Ink Advance
69
Print
70
Cut / Stack
72
Printer Errors
73
Mechanical Troubleshooting
79
Stock
79
Ink
80
Print
80
Knife
80
Appendices
83
Fuse Configuration
83
Ink and Stock Transfer Types
84
Printer Specifications
86
Installation Procedure
88
Programming the Contrast Sensors
92
Programming the Contrast Sensor
93
Programming the Color Contrast Sensor
94
Instructions for Factory / Field Installation of High Speed Verifier Assembly 620008F (Factory) and 620008 (Field)
96
Installation Procedure - Mechanical
96
Installation Procedure - Electrical
98
Installation - Rear Cover
99
Warranty Policy
100
Service
101
Option Menu System Flowchart
102
Electrical Drawings
103
Electrical System Schematic
104
Harness Connections
105
Mechanical Assembly Drawings
107
Unwind Assembly
108
Unwind Parts List
109
Unwind Assembly RFID 3" / 4
110
Unwind Parts List RFID 3" / 4
111
Decurler Assembly
112
Decurler Parts List
113
Web Guide Assembly
114
Web Guide Parts List
115
Sensor Tray Assembly
116
Sensor Tray Parts List
117
Sensor Tray Assembly RFID
118
Sensor Tray RFID Parts List
119
Top Print Head Assembly
120
Top Print Head Parts List
121
Bottom Print Head Assembly
122
Bottom Print Head Parts List
123
Print Head Assembly
124
Print Head Parts List
125
Platen Roller Assembly
126
Platen Roller Parts List
127
Ink Arbor Assembly
128
Ink Arbor Parts List
129
Drive Assembly
130
Drive Parts List
131
Knife Assembly
132
Knife Parts List
133
Nip Roller Assembly
134
Nip Roller Parts List
135
Knife / Drive Motors Assembly
136
Knife / Drive Motors Parts List
137
Knife / Drive Motors Assembly RFID
138
Knife / Drive Motors RFID Parts List
139
Upright Frame Assembly
140
Upright Frame Parts List
141
Covers Assembly
142
Covers Parts List
143
Stacker Assembly (Sheet 1 of 2)
144
Stacker Assembly (Sheet 2 of 2)
145
Stacker Parts List
146
Addendum - Printing and Supplies Handling Procedure
147
Addendum II - Short Feed
149
Short Feed O-Ring Replacement
149
Short Feed Assembly Parts List
151
Short Feed Part List
152
Revision Record
154
Avery Dennison SNAP 700 Operator's And Service Manual (153 pages)
Brand:
Avery Dennison
| Category:
Printer
| Size: 4 MB
Table of Contents
Table of Contents
3
Introduction
9
Installation
10
Preparing for the Installation
10
AC Power Line
10
Location Considerations
10
PC Requirements
11
User Safety
12
Receiving
12
Unpacking
13
Removing the Printer from the Carton
13
Inspection / Inventory Checklist
14
Downloading Support Documentation
14
Printer Description
15
Printer Configurations
16
Setting up the Printer
17
Attaching the Stacker
17
Checking the Main Fuse Configuration
18
Installing the Power Cord
19
Installing the PC Interface Cable
19
Installing Pcmate Platinum Software
20
Attaching the Unwind Assembly
20
Printing a Test Label
21
Loading Supplies
21
Turning the Printer on
21
Selecting the Test Format
21
Printing the Test Labels
22
Operation
23
Loading Supplies
23
Installing Ink to the Top Ink Supply Station
23
Installing Ink to the Bottom Ink Supply Station
26
Loading the Stock
26
Butt Splice
28
Threading Diagrams
29
Sending a Print Job to the Printer
30
Printing Labels
30
The Control Panel
30
Printing
31
Handling the Leader
31
Feeding the Stock
31
Errors
32
End of Day
32
Clearing Print Jobs
32
Using Pre-Printed Stock
33
Selecting the Sensor
34
Aligning the Stock to the Sensor
34
Aligning the Sensor to the Stock
34
Option Menu System
35
Running Test Patterns
36
Setting / Adjusting Voice Button Volume
38
Making Adjustments
40
Print Head Adjustments
40
Adjusting Print Head Pressure
40
Adjusting Density (Darkness)
41
Adjusting the Stacker
41
Stacker Position
42
Toggle Switch
42
Stacker Angle
42
Platform
43
Virtual Control Panel
44
Introduction
44
Changing Printer Settings in Pcmate (Printer Settings)
45
Print/Cut Adjust (VCP Print/Cut Adjust Tab)
45
Selecting the Printer Language (VCP Options Tab)
46
Setting the Date and Time (VCP Options Tab)
47
Enabling or Disabling the Cutter (VCP Options Tab)
47
Selecting the Print Speed (VCP Options Tab)
47
Selecting the Flagging Mode (VCP Options Tab)
48
Selecting the Sense Mark Type (VCP Options Tab)
48
Setting the Default Transfer Type (VCP Options Tab)
48
Viewing the Life Counts (VCP Versions/History Tab)
49
Firmware Version (VCP Versions/History Tab)
49
Print Quality (VCP Arbor Tension Adjust Tab)
50
Other Information on VCP
50
Web Server
51
Setting the Printer IP Address
51
Obtaining a DHCP Address
51
Determining the DHCP Address
52
Converting the DHCP Address to a Static Address
53
Resetting the Printer to DHCP Mode
54
Viewing and Changing the Printer Settings
55
Troubleshooting the Network Connection
56
Maintenance
57
Print Head Cleaning and Handling
57
Handling Techniques
57
Cleaning Procedures
58
Print Head Replacement
59
Lubrication
62
Rotary Knife Assembly
62
Removing and Replacing the Knife Assembly
63
Adjust the Knife Home Position
66
Rubber Roller Replacement
66
Service Adjustments
67
Stock (Web) Guide Position
67
Stock (Web) Guide Width Adjustments
67
Stock Feed
67
Knife Shear Adjustment
67
Upgrading the Printer Firmware
69
Introduction
69
Selecting the UPG File
69
Getting the UPG File
70
Getting UPG File Using D2Comm
70
Getting UPG File Without Using D2Comm
70
Performing the Upgrade
71
Unzipping the File
71
Upgrading through Pcmate
72
Upgrading through USB Flash Drive
75
Upgrading through the Webserver
75
Electrical Troubleshooting
79
Power up / Sign on / Communications
79
Stock / Ink Advance
81
Print
82
Cut / Stack
84
Printer Errors
85
Mechanical Troubleshooting
91
Stock
91
Ink
92
Print
92
Knife
92
Appendices
93
Fuse Configuration
93
Ink and Stock Transfer Types
94
Printer Specifications
96
Installation Procedure
98
Programming the Contrast Sensors
102
Programming the Contrast Sensor
103
Programming the Color Contrast Sensor
104
Instructions for Factory / Field Installation of High Speed Verifier Assembly 620008F (Factory) and 620008 (Field)
106
Installation Procedure - Mechanical
106
Installation Procedure - Electrical
108
Installation - Rear Cover
109
Warranty Policy
110
Service
111
Option Menu System Flowchart
112
Electrical Drawings
113
Electrical System Schematic
114
Harness Connections
115
Mechanical Assembly Drawings
117
Unwind Assembly - Single Shaft Design (Old)
118
Unwind Assembly - Two Shaft Design (New)
119
Unwind Assembly RFID 3" / 4" - Single Shaft Design (Old)
120
Unwind Assembly RFID 3" / 4" - Two Shaft Design (New)
121
Unwind Motor Assembly
122
Decurler Assembly
123
Web Guide Assembly
124
Sensor Tray Assembly
125
Sensor Tray Assembly RFID
126
Top Print Head Assembly
127
Bottom Print Head Assembly
128
Print Head Assembly
129
Platen Roller Assembly
130
Ink Arbor Assembly
131
Ink Unwind / Rewind Motor(S) Assembly
132
Drive Assembly
133
Knife Assembly
134
Nip Roller Assembly
136
Knife / Drive Motors Assembly
137
Knife / Drive Motors Assembly RFID
138
RFID Reader Assembly
139
Covers Assembly
140
Cooling Fans Assembly
141
Stacker Assembly (Sheet 1 of 2)
142
Stacker Assembly (Sheet 2 of 2)
143
Stacker Parts List
144
Addendum I - Printing and Supplies Handling Procedure
145
Advertisement
Avery Dennison SNAP 700 User Manual (155 pages)
Manual Edition 4.2
Brand:
Avery Dennison
| Category:
Printer
| Size: 5 MB
Table of Contents
Table of Contents
3
Introduction
9
Installation
10
Preparing for the Installation
10
AC Power Line
10
Location Considerations
10
PC Requirements
11
Receiving
12
User Safety
12
Unpacking
13
Removing the Printer from the Carton
13
Inspection / Inventory Checklist
14
Lift Locations
14
Printer Description
15
Setting up the Printer
17
Attaching the Stacker
17
Rotary Knife and Stacker
17
Checking the Main Fuse Configuration
18
Right Side of Printer - Rear View
18
Installing the Power Cord
19
Installing the PC Interface Cable
19
Rear View of the Printer
19
Printing a Test Label
20
Installing Pcmate Platinum Software
20
Loading Supplies
20
Turning the Printer on
20
Printing the Test Labels
21
Operation
22
Installing Ink to the Top Ink Supply Station
22
Threading Diagram
25
Installing Ink to the Bottom Ink Supply Station
26
Loading the Stock
26
Stock Supply through Print Stations
27
Sending a Print Job to the Printer
28
Butt Splice
28
Printing Labels
29
The Control Panel
29
Errors
30
Handling the Leader
30
End of Day
31
Clearing Print Jobs
31
Using Pre-Printed Stock
31
Selecting the Sensor
33
Aligning the Stock to the Sensor
33
Aligning the Sensor to the Stock
33
Option Menu System
34
Feeding the Stock
34
Running Test Patterns
35
Setting / Adjusting Voice Button Volume
37
Making Adjustments
39
Print Head Adjustments
39
Adjusting Print Head Pressure
39
Adjusting the Stacker
40
Adjusting Density
40
Stacker Position
41
Toggle Switch
41
Stacker Angle
41
Platform
42
Print and Cut Adjustments
43
Printer Features
44
Selecting the Printer Language
44
Setting the Date and Time
44
Enabling or Disabling the Cutter
44
Selecting the Print Speed
45
Selecting the Flagging Mode
45
Selecting the Sense Mark Type
45
Setting the Default Transfer Type
46
Viewing the Life Counts
46
Maintenance
47
Print Head Cleaning and Handling
47
Handling Techniques
47
Static Discharge
47
Cleaning Procedures
48
Print Head Replacement
49
Lubrication
52
Rotary Knife Assembly
52
Removing and Replacing the Knife Assembly
53
Adjust the Knife Home Position
56
Rubber Roller Replacement
56
Service Adjustments
57
Stock Guide Position
57
Stock Guide Width Adjustments
57
Stock Feed
57
Remote Control / Display Module
60
Virtual Control Panel
61
Viewing and Changing Printer Settings
62
Upgrading the Printer Software
63
Getting the UPG File
63
Getting Ready to Upgrade the Printer
63
Performing the Upgrade
64
Electrical Troubleshooting
67
Power up / Sign on / Communications
67
Stock / Ink Advance
69
Cut / Stack
72
Printer Errors
73
Mechanical Troubleshooting
79
Fuse Configuration
83
Ink and Stock Transfer Types
84
Printer Specifications
86
Instructions for Factory / Field Installation of Top Sensor Assemblies
88
Programming the Contrast Sensors
92
Programming the Color the Contrast Sensor
94
Installation Procedure - Electrical
98
Installation - Rear Cover
99
Option Menu System Flowchart
102
Electrical System Schematic
104
Harness Connections
105
Mechanical Assembly Drawings
107
Unwind Assembly
108
Unwind Parts List
109
Unwind Assembly RFID 3/4
110
Decurler Assembly
112
Web Guide Assembly
114
Sensor Tray Assembly
116
Sensor Tray Assembly RFID
118
Top Print Head Assembly
120
Top Print Head Parts List
121
Bottom Print Head Assembly
122
Print Head Assembly
124
Print Head Parts List
125
Platen Roller Assembly
126
Platen Roller Parts List
127
Ink Arbor Assembly
128
Ink Arbor Parts List
129
Drive Assembly
130
Drive Parts List
131
Knife Assembly
132
Knife Parts List
133
Nip Roller Assembly
134
Nip Roller Parts List
135
Knife / Drive Motor Assembly
136
Knife / Drive Motors Assembly RFID
138
Upright Frame Assembly
140
Upright Frame Parts List
141
Covers Assembly
142
Coves Parts List
143
Stacker Assembly
144
Stacker Parts List
146
Printing and Supplies Handling Procedure
147
Supplies
148
Short Feed
149
Short Feed O-Ring Replacement
149
Short Feed Assembly
151
Short Feed Parts List
152
Avery Dennison SNAP 700 Reference Manual (22 pages)
Thermal Transfer Printer Machine Guide
Brand:
Avery Dennison
| Category:
Printer
| Size: 0 MB
Table of Contents
Table of Contents
1
Reference Guide
1
Feature Summary
2
Detailed Printer Feature Review - Printer
3
Printer Item # Decision Matrix
5
Connectivity
6
Sensors
7
Remote Panel
8
Verifier
9
Stand-Alone Equipment - Unwind
10
Stand-Alone Equipment - Sonic Knife
11
Other Printer Options
12
Other Equipment
13
Documentation
14
Replacement Items
15
Check out
16
Special Configurations
17
Appendix A - On-Line Configuration and Quoting
18
On-Line Configuration
18
Rfq - Request for Quote
19
Appendix B - Selecting the Printing System
20
Appendix C - Printer Specifications
22
Advertisement
Related Products
Avery Dennison SNAP 500
Avery Dennison SNAP 600
Avery Dennison SNAP 700 RFID
Avery Dennison Monarch SIERRA SPORT4 9493
Avery Dennison Monarch Sierra Sport2
Avery Dennison Monarch 9433 Sierra Sport3
Avery Dennison Monarch Sierra Sport 2
Avery Dennison Monarch Sierra Sport2 9460 SNP
Avery Dennison ST9500
Avery Dennison S 95
Avery Dennison Categories
Printer
Label Maker
Printer Accessories
Barcode Reader
Battery Charger
More Avery Dennison Manuals
Login
Sign In
OR
Sign in with Facebook
Sign in with Google
Upload manual
Upload from disk
Upload from URL