Grundig DIGTA 420 User Manual
Digital portable dictation machine
Hide thumbs
Also See for DIGTA 420:
- Quick reference manual (24 pages) ,
- Quick reference manual (16 pages)
Table of Contents
Advertisement
Quick Links
Download this manual
See also:
Quick Reference Manual
Advertisement
Table of Contents

Related Manuals for Grundig DIGTA 420


Summary of Contents for Grundig DIGTA 420
- Page 1 DIGTA 420 ENGLISH www.grundig-gbs.com...
-
Page 2: Inserting An Index
CONTENTS ________________________________________ 5 Notes 20 PIN / PUK 5 Safety 20 Entering the four digits PIN 5 Environmental note 21 Entering the eight digits PUK 6 Scope of delivery 21 Saving dictations on remova- 6 Accessories ble memory cards 22 Recording 7 User controls 22 Saving dictations, selecting a 8 Rear view... -
Page 3: Table Of Contents
82 Foot control device is connected to a PC 82 Charging unit, power supply* 49 Data list 83 Communication with the PC 52 Group 83 The Grundig Business 53 Typist Systems PC software 54 Dictation type 83 System requirements 55 Priority 84 Connecting and separating the 56 No./Reference... - Page 4 CONTENTS ________________________________________ 98 Configuring the Digta Scan barcode reader 100 Setting the Digta Scan bar- code reader 101 Restoring the default settings 102 RFID reader Digta RFID 414 102 Using RFID codes 102 Connecting and removing the RFID reader 103 Turning the RFID Reader on and off 104 Scanning a RFID code for a new dictation...
-
Page 5: Notes
NOTES _____________________________________________ Your DigtaSonic 420 is a digital portable dictation machine. It can be used as a single workstation dictation system together with the included software. It may also be integrated into a net- work solution (local network with several authors and typists). The dictating machine offers functions such as inserting or deleting passages that allow you to easily edit your dictations. -
Page 6: Scope Of Delivery
Please make sure to choose only genuine accessories from Grundig Business Systems. Product liability and warranty service are provided only in this case. The use of non-Grundig Business Systems accessories or those which are not recom- mended and approved by Grundig Business Systems auto- matically void any warranty claims towards Grundig Business Systems. -
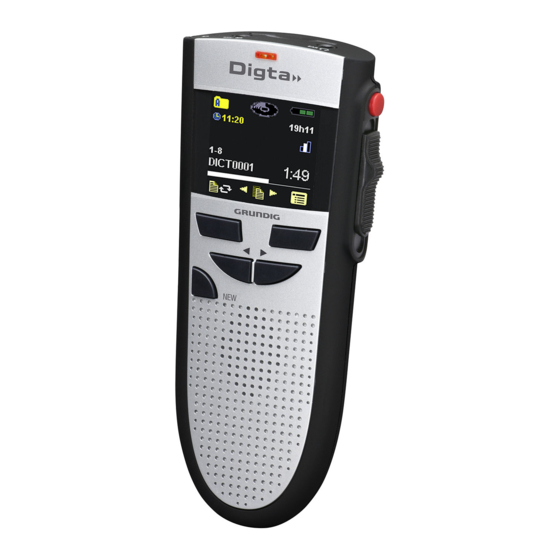
Page 7: User Controls
USER CONTROLS _______________________________ Earphone socket Socket for external microphone (output voltage max. 90 mV) Microphone LED indicator Record: illuminated red Record pause: blinking red Recording button Insert: illuminated orange Display Insert pause: jittering orange PC transfer: jittering red Slide switch for Charging of rechargeable batte- fast forward, ries: blinking green... -
Page 8: Rear View
REAR vIEw _______________________________________ Card slot for MMC-/SD cards Slide switch for fast forward, stop, start Battery com- (record, play-back) partment and rewind On/Off switch Keylock... -
Page 9: Display
To switch between Mode and Easy MODE, keep on pressing the „NEW“ button after having switched on the DIGTA 420 until the initial display appears on the dis- play (hour glass and progress bar). For further information concerning the e Mode, please see the Quick Reference Guide. -
Page 10: Preparation
PREPARATION ___________________________________ Battery operation The dictation machine can be used for approximately 9 hours when the alkaline manganese batteries are fully charged. • Open the battery compartment. • Insert batteries (Micro type / AAA, 2 x 1,5 V). Make cer- tain the polarity is correct. -
Page 11: Direct Charging Of The Rechar
PREPARATION ___________________________________ Note: The dictation machine’s operating system is “shut down” (similar to a PC) when it is turned off. There must still be suf- ficient power available for this purpose. If, after the dictation machine has automatically turned off, you turn it back on again without having plugged it into a power supply* (e.g. - Page 12 PREPARATION ___________________________________ Charging the battery – using the Digta Station 446* Line Out Mic In COM 1 • Connect your USB plug from the power supply* cable to the »DC IN 5V« jack of the Digta Station*. • Plug the power supply* plug to the wall outlet. –...
- Page 13 PREPARATION ___________________________________ Notes on rechargeable battery 466 New rechargeable batteries do not reach full capacity until they have been recharged several times. For this reason the operating time for new rechargeable batteries in some rare cases is less than 3 hours. When the rechargeable battery* is fully charged, you can use the dictation machine up to 7 hours (DSS Standard Play).
-
Page 14: Mains Operation
PREPARATION ___________________________________ Mains operation via USB You can connect your dictation machine to your PC via a USB cable (included in delivery). • Switch on your PC. • Switch on your dictation machine and connect it to the PC via the USB cable. A display for rechargeable bat- tery* operation appears on the upper right edge, or the symbol »... -
Page 15: Inserting And Removing Repla
Inserting and removing replaceable memory cards You can use memory cards (not included in delivery) instead of the internal memory. Use Digta Cards supplied as accessories by Grundig Business Systems. • Push the memory card into the slot with the side with the diagonal corner facing the direction shown on the back of the device. - Page 16 PREPARATION ___________________________________ New memory cards must be formatted before any wri- ting can be done. It is essential that the notes in the chapter “THE MENU – Formatting” be observed. Formatting replaceable memory cards Memory cards – including those which have been prefor- matted –...
-
Page 17: Switching On The
SwITCHING ON THE MACHINE _______________ Switching on and off Initial switching on • Move the On/Off switch down to »ON«. • Select a language with the navigation buttons »◄►« and confirm with the right selection button » «., for example, »English«. •... -
Page 18: Subsequent Switching On
SwITCHING ON THE MACHINE _______________ Subsequent switching on • Move the On/Off switch downward to "On". • If an authors list appears please select your name and confirm with the right selection button » «. Switching off • Move the On/Off switch upward to »OFF/HOLD«. Key lock The keylock prevents you from accidentally turning off the machine while you are recording or playing back a... - Page 19 Digta 420 till the initial display view appears on the display (hour glass and progress bar). A detailed description how to operate with the DIGTA 420 in the e is available in the attached Quick Reference...
-
Page 20: Entering The Four Digits Pin
PC software in the menu item „configuration/extended...“ or contact our service hotline on: www.grundig-gbs.com Support / Contact Info Default settings are 0000. You may change your PIN via the menu functions described in the chapter „THE MENU –... -
Page 21: Entering The Eight Digits Puk
PIN / PUK _________________________________________ Entering the eight digits PUK If the wrong PIN was entered several time the dictation machine will be locked. You then will have to enter the eight digits PUK (Personal Unblocking Key) • You may confirm your entry via the navigation buttons move slide... -
Page 22: Recording
RECORDING ______________________________________ Saving dictations, selecting a folder Dictations are stored on the internal memory of the dictati- on machine if no external, replaceable memory card (Digta Card) is in use. If a memory card is inserted, all dictations are recorded on this card. -
Page 23: New Dictation
RECORDING ______________________________________ Dictation • Speak in a direction just over the dictation machine. The figure illustrates the optimum position. The high precision microphone also allows you to record conver- sations from greater distances. New dictation STOP • Move the slide switch to » «. -
Page 24: Recording Pause
RECORDING ______________________________________ Recording pause STOP • Move the slide switch to » «. – The recording indicator blinks, the Disc symbol » « stops spinning in the display and the Pause symbol » « appears again. End recording • Press the red recording button » DICT«. - Page 25 RECORDING ______________________________________ • Press the red recording button » DICT«, the red recording indicator starts blinking, the white Disc symbol » « and the Pause symbol » « appear in the display. ► • Move the slide switch to » START«...
-
Page 26: Inserting A Part Of A Dictation
RECORDING ______________________________________ Inserting a part of a dictation During play-back you may insert a new recording at your current dictation position. Pay attention to the remaining free memory space. In e the free memory space is displayed firstly after the capacity falls below a value of 60 minutes. -
Page 27: The Info Function And The
RECORDING ______________________________________ The info function and the index function As an integral part of a dictation, in M you can record information (» « = Info) for your typist and mark them, or set index marks (» «= Index) for specific parts of the dictation. Info »... - Page 28 RECORDING ______________________________________ • Move the slide switch to » STOP « once you have finished inserting the text. • To stop, press the red recording button » DICT« or the left selection button » «. Inserting an index In the M , a new index can be inserted at the acti- ve dictation position during recording.
-
Page 29: Dictating Using The Foot Control
RECORDING ______________________________________ Dictating using the foot control • Connect the foot control to the » « socket of the Digta Station*. • Connect the power supply* to the »DC IN 5V« socket or via USB cable to the »PC/USB« socket of a PC to supply the Digta Station* and the foot control with elec- tric power. -
Page 30: Select Dictation And Listen To It
PLAy-BACK _______________________________________ Select dictation and listen to it • Move the slide switch to » STOP «. • Select the folder in which your dictation is located (see „Saving dictations, selecting a folder“). • Select the desired dictation with the navigation buttons ◄►... -
Page 31: Setting The Volume
PLAy-BACK _______________________________________ Setting the volume • During play-back, press the left navigation button to lower the volume or the right button to increase the volume. – The loudspeaker symbol in the display » « turns into the symbol for adjusting the volume » «. -
Page 32: Fast Forward And Rewind
PLAy-BACK _______________________________________ Fast forward and rewind ►► ◄◄ • Move the slide switch to » FFWD« or » REW«. – The status bar in the display quickly moves forward or backward. Note: Go to the »FFWD / Rewind« menu item to switch the speed to very slow, slow or fast. -
Page 33: Inserting An Index
PLAy-BACK _______________________________________ - The next highest info number appears in the display, » «, for example. STOP • Move the slide switch to » « at the end of your recording. • To stop, press the red recording button » DICT«... -
Page 34: Search For Info Or Index
PLAy-BACK _______________________________________ - The next highest info number shortly appears in the display, for e.g. » «. STOP • Move the slide switch to » «. • To stop, press the red recording button » DICT« or the left selection button » «... -
Page 35: Transcription With Foot Control
PLAy-BACK _______________________________________ Transcription with foot control • Connect the foot control* to the » « socket on the Digta Station*. • To connect the Digta Station* and the foot control to a power supply*, connect the mains adapter to the »DC IN 5V«... - Page 36 PLAy-BACK _______________________________________ Note: In menu setting »Foot control play-back«, it is not possi- ble to edit an existing dictation or create a new dictation. On pressing the New or Record buttons, the “Play-back only” message appears. You can delete dictation as long as it has not been locked.
-
Page 37: Modify Menu
MODIFy MENU __________________________________ Editing an existing dictation In the modify menu, several functions are provided to work on a stored dictation. The modify menu ist available only in the • Move the slide switch to » STOP «. • Select the desired dictation with the navigation buttons ◄►... -
Page 38: Display Or Modify Data Set In
MODIFy MENU __________________________________ Display or modify data set in the dictation. In the modify menu, additional data e.g. patient- or client data can be assigned to each individual dictation by means of the data set-function. The data can be assigned to the respective dictation by means of a scanner when patient-numbers or folder numbers are administered through barcodes in order to avoid mismatches. - Page 39 MODIFy MENU __________________________________ » « – Allocation or indication of a data set of the cor- responding barcode or RFID. The functions are only available in combination with DIGTA Scan 404* or DIGTA RFID 414*. • Hold the scanner near a barcode or RFID-tag and press the right selection button »...
-
Page 40: Setting A Priority To A Dictation
MODIFy MENU __________________________________ Setting a priority to a dictation Notes: In the DSS standard, the priority levels ranging from 1 (high priority) to 16 (no priority) are selectable. The dictation machine can allocate for each assigned author an individu- al maximum of author priority to a dictation. The presetted priority for the author Dict is 15. -
Page 41: Postpone A Dictation
MODIFy MENU __________________________________ Postpone a dictation You can prevent the automatic PC transfer of a dictation (via DSS mover) with the postponed function in the Modify menu item. Postpone uncompleted dictations before transferring com- pleted dictations to the transcription office by connecting the dictation machine via USB. -
Page 42: Dictation Lock
With such a lock the whole Grundig Business Systems PC dictation system only allows to modify or delete a dictation, if this attribute is deactivated on the PC or in the dictation machine. -
Page 43: Deleting A Dictation
DELETING A DICTATION _______________________ Deleting an entire dictation Herein is the cancelling in the M described. Please read the contents item “Deleating of a dictation” provided in the Quick Reference Guide when you prefer to operate in the • Move the slide switch to » STOP «. -
Page 44: Deleting The Contents Of A Folder
DELETING A DICTATON ________________________ Deleting the contents of a folder In the M you not only can delete individual dic- tations but also the contents of a selected folder or the contents of all folders. • Move the slide switch to » STOP «. -
Page 45: Deleting A Part Of The Dictation
DELETING A DICTATON ________________________ Deleting a part of a dictation • Move the slide switch to » STOP « in the M • Select the folder in which your dictation is located (see “Saving a dictation, selecting a folder”). • Select the desired dictation using the navigation but- ◄►... -
Page 46: The Menu
THE MENU ________________________________________ Functions in the menu at a glance • Press the right selection button » « in the M ◄► With the navigation buttons » « you may select the following functions and confirm them with » « –... - Page 47 THE MENU ________________________________________ – Voice activation (if enabled the dictation will be automatically suspended if it is interrupted). USB connection or only if manually selected. – Preselect time when the energy saving, non-ope- rative state shall be activated automatically. The Digta will completely switch off 30 minutes later.
-
Page 48: Functions Available If The Device Is Connected To A Pc
USB audio and USB HID: Activate the dictation machine as PC micro- phone (without recording), when connected to a PC, for example for direct dictation to the Grundig Business Systems PC software or to a voice recognition system. – USB powered The PC doesn’t recognize the device;... -
Page 49: Data List
THE MENU ________________________________________ Data list This function enables you to record dictations related to an ID (e.g. patient- or client number, also scanned barcode or RFID recognition) with text information. This information is created on your PC in the CSV format (comma separated values), e.g. - Page 50 THE MENU ________________________________________ - »[No found]« is displayed in case that the scanned barcode or RFID-tag is not allocated to a dictation. • Confirm with the right selection button » «, in order to view additional data of the data set. - Firstly the ID can be viewed by means of the left navigation button and the individual data by means of the right navigation button.
- Page 51 THE MENU ________________________________________ Deletion of the data list: Note: This function enables the deletion of the entire data list. The data list functions are unavailable afterwards until a new data list has been read in. • Select with the navigation buttons »◄►« the menu item „data list“...
-
Page 52: Group
THE MENU ________________________________________ Group The »Group« function is used to assign your dictation to a specific group or department. • Go to Workflow lists » « and confirm with the right selection button » «. • Select the »Group « menu item and confirm with the »... -
Page 53: Typist
THE MENU ________________________________________ Typist The »Typist« function is used to select the transcriber who will receive your dictation. • Go to Workflow lists » « and confirm with the right selection button » «. « menu item and confirm with the •... -
Page 54: Dictation Type
THE MENU ________________________________________ Dictation type The »Dictation type« function is used to select the template to be used for the dictation: for eg. fax, letter, or report. • Go to Workflow lists » « and confirm with the right selection button » «. -
Page 55: Priority
THE MENU ________________________________________ Priority With the function »Priority« you can determine if the new dictation shall have priority because it urgently needs to be typed before the other dictations. The dictation is marked with »PR« and is displayed above the time data. Notes: In the DSS standard, the priority levels ranging from 1 (high priority) to 16 (no priority) are selectable. -
Page 56: No./Reference
THE MENU ________________________________________ No./Reference The function »No./Reference« enables to input up to 16 characters for this dictation – for example: folder num- ber or patient number. • Go in the menu item workflow lists » « and confirm it with the right selection button » «. - Page 57 THE MENU ________________________________________ • Repeat the entry for additional characters and, at the end, confirm them with the » « button. • Confirm the entry with the » « button or delete the entry with the » « button. Notes: Numerics and special characters are available in the second subdirectory of the reference set.
-
Page 58: Microphone Sensitivity
THE MENU ________________________________________ Microphone sensitivity You can select one of three levels of noise sensitivity for your microphone. • Go to the menu item » « and confirm with » «. • Set the sensitivity of your microphone using the naviga- ◄►... -
Page 59: Voice Activation
THE MENU ________________________________________ voice activation If the function “Voice Activation” is active, the recording will be interrupted if there is a pause in speaking in a quiet environment. If the dictation machine does not turn off, select a lower microphone sensitivity, for example for nor- mal dictation or persons who speak loudly. -
Page 60: Automatic Power Off
THE MENU ________________________________________ Automatic power off With the „Sleep mode“ » « function you determine whe- ther the device turns to a power-saving "sleep mode" after some minutes or has to be switched off manually. The device will be immediately switched on again as soon as any key is pressed. -
Page 61: Audio Signals
THE MENU ________________________________________ Audio signals The »Audible signals« function » « enables you to turn the acknowledgement and signal tones on and off. • Select the menu item » « and confirm with the right selection button » «. ◄► •... -
Page 62: Dimmed
THE MENU ________________________________________ Dimmed This function serves for setting the time period of the dis- play illumination brightness. The illumination is dimmed after a few seconds to save battery. • Go in the menu item „Dimmed“ » « and confirm it with the button»... -
Page 63: Usb Connection Automatic / Manual
THE MENU ________________________________________ USB connection automatic / manual You can choose whether the dictation machine automati- cally switches to USB parallel operation when connected to a PC‘s USB connection or whether you want to activate this function manually. • Select the menu item » « and confirm with the right selection button »... -
Page 64: Speaker
THE MENU ________________________________________ Speaker You may switch off the loudspeaker of your dictation machine with this function if you want to listen to your dic- tations via headphones connected to the Digta Station*. • Select the menu item » « and confirm with the right selection button »... -
Page 65: Fast Forward / Rewind
SETTINGS IN THE MENU ______________________ Fast forward / rewind This function allows you to set the speed for fast forward and rewind. You can select very slow, slow and fast. • Go to menu item »FFWD/Rewind « and confirm with »... -
Page 66: Foot Control
THE MENU ________________________________________ Foot control The »Foot control« function allows you to select whether the foot control* is used for transcription mode or hands-free dictation. • Select the menu item » « and confirm with the right selection button » «. -
Page 67: Foot Control Assignment During Play-Back
THE MENU ________________________________________ Foot control assignment during play-back The pedals on the foot control* are designed for tran- scription operation. Left pedal – Rewind; Middle pedal – Fast forward; Right pedal – Start/stop play-back. accessory... -
Page 68: Automatic Backspace
SETTINGS IN THE MENU ______________________ Automatic backspace Here you can set the length of automatic backspace to between 0 and 10 seconds. Every time play-back begins, the current position is rewound by the specified time, and play-back begins from there. Note: The »Auto Backspace»... -
Page 69: Setting An Index During Play-Back
THE MENU ________________________________________ Setting an index during play-back You may choose whether the right selection button change the speed or sets an index during play-back. • Select the menu item » « "Index While Play" and con- firm with the right selection button » «. -
Page 70: Dictation Position Number
THE MENU ________________________________________ Dictation position number The dictation position number indicates where in the cur- rent folder the selected dictation is located. You are addi- tionally shown the total number of dictations in the folder. This function allows you to switch off the position indicator to improve overview on the display during recording or playback. -
Page 71: Time Indicator
THE MENU ________________________________________ Time indicator This function allows you to switch off the time indicator to improve overview on the display during recording or playback. To activate/deactivate the indicator, proceed as follows: • Select the menu item » « and confirm with the right selection button »... -
Page 72: Date Format
THE MENU ________________________________________ Date format This function serves for setting a date format. • Go in the menu item “date format“ » « and confirm it with the button » «. • Select by means of the navigation button »◄►« bet- ween the following formats: –... -
Page 73: Display Id
THE MENU ________________________________________ Display ID With this function you can set the ID display format. • Go to the menu item “Display ID” » « and confirm it with » «. • Select by means of the navigation button »◄►« bet- ween the 2 display possibilities: –... -
Page 74: Version
– The serial number of your dictation machine and the version number of the firmware (software) appear in the display. Note: For information on new software versions call the »Configuration => Update Server« function in the PC software or visit us on our Website: www.grundig-gbs.com. -
Page 75: Dss Pro
THE MENU ________________________________________ DSS Pro This function makes for the quality and storage capacity of your dictations. DSSPro allows to set the quality and encryption of dictations separately. Quality Play (QP): 10 minutes recording require 2 MB, especially suitable for voice recognition. File ending ».DS2«. -
Page 76: Time, Date
THE MENU ________________________________________ Time, date The time and date a dictation is recorded are indicated for each dictation (PC display only). • Go to the menu command » « and confirm with » «. • You can now enter or change the year, month, day, hours and minutes successively using the navigation buttons »▼▲«. -
Page 77: Dictation Counter
THE MENU ________________________________________ Dictation counter Using the »Dictation counter« function, you can reset the dictation counter. The dictation counter is able to count till 9999. You should not reset the counter too often to avoid conflicts with dictations having the same name and being stored on the PC. -
Page 78: Modifying The Pin
THE MENU ________________________________________ Modifying the PIN The personal identification number (PIN) protects the dictation machine against unauthorized use. The factory settings are 0000. Do only enter a sequence of digits known to yourself. You have to enter the PIN each time you switch on the dictation machine as well as each time you reactivate it from the "Sleep mode". -
Page 79: Formatting
THE MENU ________________________________________ Formatting With the »Formatting« function you reformat the internal memory of your dictation machine or a replaceable, exter- nal memory card. Note: If a list of several authors is installed this function is only available if there are no dictations in the memory. This ensures that dictations from another user are not acciden- tally deleted. -
Page 80: Default Settings
THE MENU ________________________________________ Default settings Using the »Factory setting« function, you restore the fac- tory settings of the machine. Note: If a list of several authors is installed this function is only available if there are no dictations in the memory. This ensures that dictations from another user are not acciden- tally deleted. -
Page 81: Language
THE MENU ________________________________________ Dictation counter – 1; PIN – retained, not reset to 0000; DSS/DSS Pro – DSS Language – Englisch All dictations will be deleted; Preallocation for the dictati- on accompanying note will be reset to »No entry«. The author's name will be set to »DICT«. -
Page 82: Operation With Digta Station
You can exchange data via the USB interface (green indi- cator at the Digta Station*) of the PC. Additionally you may use a USB audio / HID function to dictate into the Grundig Business Systems PC software or in voice recognition systems. Foot control It's possible to plug in a foot control for hands-free dicta- tions. -
Page 83: Communication With The Pc
COMMUNICATION wITH THE PC _____________ The Grundig Business Systems PC software The Grundig Business Systems PC software allows you to transfer your dictations to your PC. You immediately have an overview of all your work and can also listen to the dictations on your notebook. -
Page 84: Connecting And Separating The Dictation Machine And The Pc
Disconnect the USB interface via the task bar, as otherwi- se the transfer may not be complete. Note: The Grundig Business Systems PC software can only be connected to one dictation machine at a time. If you connect a second dictation machine to the USB interface, the PC will not detect it, i.e. -
Page 85: Pc Microphone Operation, Usb Audio, Usb Hid
You can set the microphone sensitivity via » « (see chapter „The menu / Microphone sensitivity“). • Select a sound program on your PC now, e.g. a Grundig Business Systems dictation software, a voice recogniti- on system or the Windows audiorecorder. •... -
Page 86: Configuration Of The Dictation Accompanying Note
COMMUNICATION wITH THE PC _____________ With the supplied software "AdapterServer" shortcuts and PC functions may be allocated to the user controls of the dictation machine for PC microphone operation. Install the Adapter server and find out more about the configuration options in its help function or its PDF instruction manual. -
Page 87: Carrying Out A Firmware Update
• You will find the »gh0420.hex« file on the »www.grundig-gbs.com« website under Service/Download/Firmware/Digta420/ZIP, as well as in the »Firmware\Digta0420« folder on the provided CD. Copy this file to the »System« folder in the dictation machine drive (removable disk). - Page 88 FIRMwARE-UPDATE ____________________________ • Disconnect the USB plug from the dictation machine. • Confirm »LOAD UPDATE« with the » « button. Do not interrupt the loading process for any reason. This could make the dictation machine inoperative. • Then format the memory in the dictation machine (see „The menu / Formatting").
-
Page 89: Digta Scan 404 Barcode Reader
DIGTA SCAN 404 BARCODE READER _____ Using barcodes You can scan a barcode for each new dictation. The detected codes are stored in the header of a DSS file in the “Topic” field, and thus displayed in the note which accom- panies the dictation. -
Page 90: Plugging In
DIGTA SCAN 404 BARCODE READER _____ Plugging in Both mechanically and electrically, the Digta Scan connec- tion is designed in the same way as a memory card. Note: Only plug in or unplug the Digta Scan when the port- able dictation machine is switched off. •... -
Page 91: Unplugging
DIGTA SCAN 404 BARCODE READER _____ Unplugging • Remove the locking screw (if present). • Press the latch on the back of the Digta Scan. The Digta Scan is unlocked and you can now pull it out of the memory card slot. See the illustration on previous page. -
Page 92: Switching The Digta Scan On And Off
DIGTA SCAN 404 BARCODE READER _____ Switching the Digta Scan on and off • The Digta Scan must be inserted and latched into the portable dictation machine. Only when the Digta Scan is plugged in are the associ- ated menu items available on the dictation machine. •... -
Page 93: Scanning A Barcode For A New Dictation
DIGTA SCAN 404 BARCODE READER _____ Scanning a barcode for a new dictation The Digta Scan must be connected to the portable dicta- tion machine, enabled and configured for the barcodes you are using. • Switch on the dictation machine. •... -
Page 94: Displaying A Barcode For A Dictation
DIGTA SCAN 404 BARCODE READER _____ Note: If the machine cannot read a code, it emits a double signal and displays the message »Scan fails Repeat ?«. Confirm the error message and repeat the scan proce- dure with » « or cancel it and continue dictating with- out barcodes by pressing »... -
Page 95: Scanning A Barcode For An Existing Dictation
DIGTA SCAN 404 BARCODE READER _____ Scanning a barcode for an existing dictation • Switch on the dictation machine. • Push the slide switch to » STOP «. • Use the navigation buttons »◄►« to select the dicta- tion for which the barcode is to be scanned. •... -
Page 96: Searching For A Dictation Belonging To Barcode
DIGTA SCAN 404 BARCODE READER _____ Searching for a dictation belonging to barcode • Switch on the dictation machine. • Push the slide switch to » STOP «. • Press the »» « button. • Use the navigation buttons »◄►« to select » «... -
Page 97: Deleting A Barcode From A Dic
DIGTA SCAN 404 BARCODE READER _____ Deleting a barcode from a dictation • Push the slide switch to » STOP «. • Use the Unavigation buttons »◄►« to select the dicta- tion whose barcode is to be deleted. • Press the » «... -
Page 98: Configuring The Digta Scan Barcode Reader
If the table is not supplied with your Digta Scan or you need codes it does not contain, please visit our Internet download centre: http://www.grundig-gbs.com Our Internet site also lists our Customer Service address and hotline number. - Page 99 DIGTA SCAN 404 BARCODE READER _____ Preparing settings You can change the symbology settings (see also “Default symbologies”) as follows: • Print out the required programming codes from the programming code table. – There are usually two programming codes displayed for the usable barcode symbologies;...
-
Page 100: Setting The Digta Scan Barcode Reader
DIGTA SCAN 404 BARCODE READER _____ Setting the Digta Scan barcode reader • The Digta Scan must be inserted and latched into the portable dictation machine (see also “Plugging in, Unplugging”). – Only when the Digta Scan is plugged in are the asso ciated menu items available on the dictation machine. -
Page 101: Restoring The Default Settings
DIGTA SCAN 404 BARCODE READER _____ Restoring the default settings You can restore the Digta Scan’s default settings. If you do so, all barcode symbologies are disabled except for EAN-13. • The Digta Scan must be inserted and latched into the portable dictation machine (see also “Plugging in, Unplugging”). -
Page 102: Rfid Reader Digta Rfid
RFID READER DIGTA RFID 414 _____________ Using RFID codes RFID codes are located on RFID labels (TAG). You can scan a RFID code for each new dictation. The detected codes are stored in the header of a DSS file in the “Subject” field, and thus displayed in the note that accompanies the dictation. -
Page 103: Turning The Rfid Reader On And Off
RFID READER DIGTA RFID 414 _____________ Turning the RFID Reader on and off • The RFID Reader must be plugged into the portable dicta tion machine and locked. Only if the RFID Reader is plugged in will you be able to select the associated menu items available on the dictation machine. -
Page 104: Scanning A Rfid Code For A New Dictation
RFID READER DIGTA RFID 414 _____________ Scanning a RFID code for a new dictation The RFID Reader is connected to the portable dictation machine and activated. • Switch on the dictation machine. • Push the slide switch to » STOP «. -
Page 105: Additional Functions
RFID READER DIGTA RFID 414 _____________ Notes: A maximum of 32 digits (two lines) of the scanned RFID code can be displayed. RFID code that you have scanned and included in dictations with » « are stored in the “Topic” field in the new dictation’s accompanying note. -
Page 106: Messages, Error Numbers
MESSAGES, ERROR NUMBERS _____________ 1537 »Dictation cannot be created« – Error in the file system of the internal memory or the external memory card. Remedy: Format the internal memory or memory card. 1538 »Dictation cannot be created« – Error in the file system of the internal memory or the external memory card. - Page 107 MESSAGES, ERROR NUMBERS _____________ delete these files. Transfer the files to a computer and then perform the deletion or formatting function. 1611 »PLAY-BACK ONLY« – The dictation machine is set to play-back with foot control and is in the Digta Station. Dictations are protected from being edited.
- Page 108 MESSAGES, ERROR NUMBERS _____________ 8321 »BATTERY LOW« – Battery voltage too low for updating the firmware. Remedy: Recharge the batteries or operate the dictation machine powered from the USB port on your PC. 8322 »BATTERY LOW« – Battery voltage too low for formatting.
- Page 109 MESSAGES, ERROR NUMBERS _____________ 9751 »NO MEMORY« – Recording has not started because of a full memory. Remedy: Delete some dictations. Delete other files (for eg. .doc, .ppt) if existing. 9753 »FIRMWARE INCORRECT« – The gh0420.hex firmware file contains false data (e.g. firmware of another device).
- Page 110 17674 »CARD NOT SUPPORTED« – If you use MultiMediaCards/SecureDigital Cards (MMC/SD) with insufficient writing speed, »Card not sup- ported« appears in the display. Remedy: Use a Digta Card by Grundig Business Systems. 17936 »UPDATE FILE ERROR« – Error of the firmware update.
- Page 111 17991 »MEDIA NOT SUPPORTED« – The MMC/SD mem- ory card is not supported, e.g. a card with more than 2 GB. Remedy: Use a Digta Card by Grundig Business Systems. 17992 »MEDIA DAMAGED« – The internal memory or external memory card is faulty.
- Page 112 You can help the customer service solve your problem much more quickly if you report the steps taken to produce the error and the error number displayed. Hotline, E-Mail: www.grundig-gbs.com under Support/Contact info BDA 05: ab V3.11 B367 02/2011...
Need help?
Do you have a question about the DIGTA 420 and is the answer not in the manual?
Questions and answers