Oce TDS400 User Manual
Ibm multifunctional digital system user manual
Hide thumbs
Also See for Oce TDS400:
- Quick reference manual (95 pages) ,
- User manual (210 pages) ,
- Quick reference manual (101 pages)
Table of Contents
Advertisement
Advertisement
Table of Contents

Related Manuals for Oce Oce TDS400


Summary of Contents for Oce Oce TDS400
- Page 1 Océ TDS400 User Manual...
- Page 2 Océ-Technologies B.V. This manual contains a functional and task-oriented description of the Océ TDS400 multifunctional digital system release 1.4 Trademarks Products in this manual are referred to by their trade names. In most, if not all cases, these designations are claimed as trademarks or registered trademarks of their respective companies.
-
Page 3: Table Of Contents
Table of Contents Chapter 1 Introduction About this manual 10 The Océ TDS400 12 The Océ TDS400 concept and components 13 The Océ TDS400printer 13 The Océ TDS400scanner 13 The Océ Power Logic® controller 14 Océ TDS400 options 15 Océ TDS400 users 18 User interaction 19 The data flow to the Océ... - Page 4 Configuration 38 Select a language 38 Network settings 38 Paper series 41 Clear set memory 41 Diagnostic mode 41 Status messages 42 Error messages 44 Menu structure of the printer 46 Chapter 3 Using the Océ TDS400 to Copy Scanner operator panel 48 The keys 49 The display 50 Menu level indicator 51...
- Page 5 Settings to scan 77 Destinaspbtion 78 Checkprint 78 Resolution 78 File format 80 Optimisation 81 Menu structure Océ TDS400 Scanner 82 Océ Scan Manager 83 Tree view 84 Table view 84 Actions from the Océ Scan Manager 86 Destinations 86 Scanned files 90 Manage the temporary store 92 How to retrieve scanned files 93...
- Page 6 Chapter 8 Océ Power Logic®: Remote Logic Introduction 130 Installation procedure for MS Windows® systems 131 Installation procedure for Unix systems 133 IBM AIX 134 HP-UX 134 Linux 134 Installation procedure for Other systems 135 Use Océ Remote Logic® 136...
- Page 7 Chapter 10 Printer Supplies and Maintenance Media 152 The paper rolls 152 Reload paper 153 How to program media settings 157 How to refill toner 159 Clean the glass platen and the reference roller of the scanner 162 Maintenance of the reinforcement unit 164 Insert a new tape roll 164 Empty he waste box 171 Clean the reinforcement knives 172...
- Page 8 Appendix A Summary and Tables The Océ TDS400 206 Printer operator panel 207 Scanner operator panel 208 Product specifications Océ TDS400 209 List of available material types and sizes 214 Material types 214 Automatic format selection 216 Reinforcement strips 216 Summary of standard zoom formats 218 Appendix B Safety information...
-
Page 9: Introduction
Chapter 1 Introduction This chapter contains a general introduction to theOcé TDS400. This chapter describes the main features, options and software applications provided with the system. Océ TDS400 User Manual... -
Page 10: About This Manual
About this manual This manual contains the following chapters: Chapter 1: Introduction system, a general description of the main features, delivery options and software applications provided with the system. Chapter 2: Using the Océ TDS400 to print how to use the printer. Chapter 3: Using the Océ... - Page 11 Describes the problems that can occur Chapter 11: How to solve problems when you use the Océ TDS400. Describes the folder delivered as an optional with the Chapter 12: The folder Océ TDS400. Contains the product specifications for the Appendix A: Summary and tables Océ...
-
Page 12: The Océ Tds400
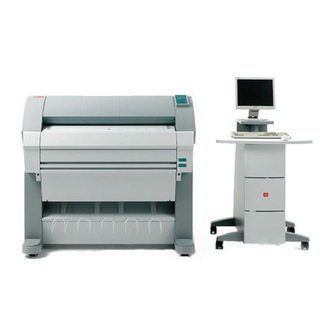
The Océ TDS400 The Océ TDS400 is a wide format, black and white, multifunctional system. The Océ TDS400 offers a broad range of print, copy, and scan-to-file functionality. The system includes a printer (1 or 2 rolls) a controller and an optional scanner. -
Page 13: The Océ Tds400 Concept And Components
The Océ TDS400 concept and components The Océ TDS400printer The Océ TDS400 printer is available with an automatic 1- or 2-roll unit and manual feed.Use manual feed when you want to print a job on a media type or size that is not available on one of the paper rolls. The manual feed is a special slot just above the paper drawers on the Note: printer. -
Page 14: The Océ Power Logic® Controller
Green key principle The Océ TDS400 is easy to use. Press the green key on the scanner operator panel to start the basic copy jobs. If you have difficult copy jobs, you change the default copy settings with the help of the other settings on the scanner operator panel. -
Page 15: Océ Tds400 Options
Refer to ‘Océ Power Logic®: System Control Panel’ on page 115, for complete information about the Océ System Control Panel. Océ Queue Manager graphical design of the print queue. You can manage jobs in the print queue, history queue, or inbox queue. Refer to ‘Océ... - Page 16 Output Delivery Tray [2] Output Delivery Tray and Integrated Receiving Tray Graphical User Interface screen, a mouse, a keyboard and software. You use the screen, mouse and keyboard to interact with the graphical user interface of the controller. With the GUI you can perform Key Operator and System Administrator tasks in a graphical way.
- Page 17 Océ Repro Desk is a print management solution for the Océ Repro Desk reprographer and their clients. See also ‘Print with Océ Repro Desk’ on page 37. An optional feature that enables you to track how many jobs Account logging you make for a customer.
-
Page 18: Océ Tds400 Users
Océ TDS400 users The Océ TDS400 has the following user types: System administrator makes the configuration for Océ TDS400. The system administrator defines the printer-language settings, pen settings and Automatic Language Sensing (ALS) settings. The system administrator can help the users who need to install the printer drivers on their workstations. -
Page 19: User Interaction
User interaction You can operate the Océ TDS400 from different locations: local and remote: Operator panels The Océ TDS400 has two operator panels to make the settings for the print jobs and the copy jobs. See ‘Printer operator panel’ on page 24 and ‘Scanner operator panel’... -
Page 20: The Data Flow To The Océ Tds400
The data flow to the Océ TDS400 Connect the Océ TDS400 to a host environment, which can be a stand alone Workstation or a Workstation connected to a network. It accepts different standard format vector and raster data files from the host environment and converts these into high quality prints (see figure 3). - Page 21 To compose such a header, you can: Compose the header within your application. Please refer to the Océ Job Ticket (OJT) manual. Use an Windows® and/or AutoCAD® HDI driver to generate both a printable file (e.g. HP-RTL, HP-GL/2) and the appropriate header with RCF-commands.
- Page 22 Océ TDS400 User Manual...
-
Page 23: Using The Océ Tds400 To Print
Chapter 2 Using the Océ TDS400 to Print This chapter explains how to print with the Océ TDS400. Océ TDS400 User Manual... -
Page 24: Printer Operator Panel
Printer operator panel The operator panel on the right hand side is easy to use (see Figure 4). The panel has keys and a display. Browse keys On-line [4] Printer operator panel Océ TDS400 User Manual Alphanumeric display previous next/select on-line stop Previous... -
Page 25: Display
Display The display shows the feedback about print job status and error messages see page 42and page 44 in normal mode. In off-line mode it shows the ‘off-line’ menu (see Figure on page 46). Menu level indicator The menu level indicator indicates the current position in the menu. Press the Previous key to scroll through the menu. -
Page 26: Keys
Keys With the keys on the operator panel you can make the settings for the Océ TDS400 Printer. The following keys are available Available keys Key types On-line key Next/select key Previous key Browse keys Stop key Océ TDS400 User Manual Function Press the On-line key to put the printer on-line or off-line. -
Page 27: How To Turn On And Turn Off The Océ Tds400 Printer
How to turn on and turn off the Océ TDS400 printer To turn on the system: turn on the printer. turn on the scanner (see page 53). turn on the controller(see page 28). When you turn on the system, it is ready for operation. In this state, the machine is in the stand-by mode. -
Page 28: Cancel A Print
Turn off the printer Set the ON/OFF switch at the rear of the printer to position ‘0’ (see Figure 4). If you switch off the printer during a print job, it is possible that Attention: you lose information or that a paper jam occurs. Turn on the controller Press the key on the front of the controller. -
Page 29: Menu Structure
Menu structure On the Océ TDS400 printer operator panel, you can do a number of actions. These actions include: Media settings (material and size). Print info (configuration report, menu card and demo print). Configuration (connectivity issues). System (clear set memory and diagnostic mode). Media type and size on the printer One of the features of the Océ... - Page 30 Set the media width settings Press the On-line key to put the printer off-line. Select the ‘Media settings’ item with the Press Next/select to enter the ‘Media settings’ menu. Select ‘Roll 1’or Press Next/select to enter the ‘Roll’ or ‘Manual feed’ menu. Select the ‘Width’...
-
Page 31: Manual Feed
Manual feed There are two possibilities to select manual feed: via remote control commands added to the print file (by means of Plot Director or drivers). choose ‘manual feed’ on the scanner operator panel. [7] Manual feed If you want to use manual feed, you must: program the media settings (material and feed time out) on the printer send the file feed the sheet of material... -
Page 32: Cut Media
Cut media If the material does not have a straight leading strip, you can cut the material at right angles from the roll. Cut the material from roll 1 or roll 2 Open the drawer. Feed the paper manually until it is 5 cm above the top drawer. Press the On-line key to put the printer off-line. -
Page 33: Print Info
Print info You have the possibility to print: the configuration report the menu card a demo plot Print the configuration report The configuration report shows the configuration and the settings of the system. How to print the configuration report Press the On-line key to put the printer off-line. Select the ‘Print info Press Next/select to enter the ‘Print info’... -
Page 34: Print The Demo Print
Print the demo print After the installation of the Océ TDS400, you can print the demo print, to check the printer and the controller. Make a demo print Press the On-line key to put the printer off-line. Select the ‘Print info Press Next/select to enter the ‘Print info’... -
Page 35: Print With Océ Print Exec® Workgroup
Print with Océ Print Exec® Workgroup Introduction Océ Print Exec which allows you to send print jobs to the Océ TDS400 through your web browser. Enable Océ Print Exec Settings Editor. Océ Print Exec Select and collect the files to print (documents and drawings), in a print job. Configure the print job. -
Page 36: Connect To Océ Print Exec® Workgroup
Connect to Océ Print Exec® Workgroup Requirements for the browser software and network. ® Microsoft Netscape Navigator TCP/IP network which connects the printer and the end user workstation. How to connect to Océ Print Exec ® Workgroup Enable Océ Print Exec Enter the following link URL in you browser: http://printer name. -
Page 37: Print With Océ Repro Desk
Print with Océ Repro Desk Introduction Océ Repro Desk is the preferred print management solution for reprographers. Océ Repro Desk consists of the following two parts. Océ Repro Desk Remote software which facilitates the electronic submission of drawing files and print request from the clients to their reprographers. -
Page 38: Configuration
Configuration Select a language On the operator panel of the Océ TDS400 Printer you can indicate which language you use to display the printer information, like status and error messages. Select a language Press the On-line key to put the printer off-line. Select the ‘Configuration’... - Page 39 Enter the System menu Press arrow left ( Press the Stop key. Press arrow right ( Press the Stop key. Press arrow left ( You can now enter the System menu. Set use DHCP server Press the On-line key to put the printer off-line. Select the ‘System’...
- Page 40 Set the Subnetmask Press the On-line key to put the printer off-line. Select the ‘System’ item with the Press Next/select to enter the ‘System’ menu. Enter password. Select ‘Network sett.’ with the Press Next/select to enter the ‘Network sett.’ menu. Select ‘adapter 1’...
-
Page 41: Paper Series
Paper series You must enter the paper series that you use in the printer. Choose between: DIN CARTO Only 8.5 inch Mix 8.5/9 inch To set a paper series Press the On-line key to put the printer off-line. Select the ‘Configuration’ item with the Press Next/select to enter the ‘Configuration’... -
Page 42: Status Messages
Status messages Status Messages Status messages Explanation Off-line Reset printer Connecting... Printer asleep Please wait Printer ready Preparing job Printing Load roll 1 Paper Load roll 2 Paper Manual feed Paper Open left cover Refill toner Press <on-line> Conditioning Printer ready Roll 1 empty Printer ready Roll 2 empty... - Page 43 Status Messages (continued) Status messages Explanation Sensor not free The paper of one of the rolls is transferred after the marker (see Remove paper ‘Feed the material’ on page 155) when power is applied to the Press <on-line> printer. Take the paper back. Press <on-line>...
-
Page 44: Error Messages
Error messages Error messages Error messages Copy too late Remove paper Press <on-line> Speed failure Remove paper Press <on-line> Knife 1 error Remove paper Press <on-line> Knife 2 error Remove paper Press <on-line> Roll retract err Press <on-line> Roll init error Open roll unit Press <on-line>... - Page 45 Error messages (continued) Error messages Explanation Error 1st fold A paper jam occurred in the first fold section of the folder. Clear the paper jam. Press <on-line> Error in folder A tape jam occurred in the reinforcement unit or a paper jam oc- curred in the folder.
-
Page 46: Menu Structure Of The Printer
Menu structure of the printer When you browse through the tree, the left items are displayed on top. The upper items are displayed first. Media settings Print info Folding Configuration System Installation Océ TDS400 User Manual A0 (841x1189mm) A1 (594x841mm) A2 (420x594mm) A3 (297x420mm) B1+ (700x1000mm) -
Page 47: Using The Océ Tds400 To Copy
Chapter 3 Using the Océ TDS400 to Copy This chapter contains a description how to copy with the Océ TDS400. Océ TDS400 User Manual... -
Page 48: Scanner Operator Panel
Scanner operator panel Define the settings with the scanner operator panel. The display gives you the feedback and the available menu options. Media key Exposure Zoom key Start key - key [8] Scanner operator panel Océ TDS400 User Manual Input key Output Extra key file... -
Page 49: The Keys
The keys The Input key The Output key The Extra key return to the normal mode. Set the properties for the original, the scanned files and for the scanner in the Extra mode. The Browse keys (left shown in the display. Browse the preset zoom values. The Browse keys (up structure as the display shows. -
Page 50: The Display
The display The display shows the feedback about the scan job status (see table below) in normal mode. In off-line mode it shows the off-line menu (see page 71) and (see page 82)) Status messages Status Messages Scanner ready = add = close Connecting... -
Page 51: Menu Level Indicator
Menu level indicator The menu level indicator indicates the current position in the menu. Press the Previous key to scroll through the menu. sheet input [9] Menu level indicator on the scanner operator panel Using the Océ TDS400 to Copy file copy output... -
Page 52: Copy Jobs
Copy jobs Your printer system has a 1 roll or 2 roll unit. Use the Media key, on the scanner operator panel, to select a roll, or to select the manual feed on the printer. You must set the media type on the printer. Note: You can make 1:1 copies and you can decrease or increase your original from 25% to 400%. -
Page 53: Turn On And Turn Off The Océ Tds400 Scanner
You can also do a number of special copy jobs. These special copy jobs include: Copy non standard size originals Define the copy size Define image quality: Optimisation for line/text/photo or blueprint mode Background compensation for line/text/photo or blueprint mode Edit function: mirror Turn on and turn off the Océ... -
Page 54: Start The Copy Process
The system is ready to use. You can turn ON and OFF the scanner Note: separate from the printer and without any particular order. Turn off the scanner Set the on/off switch at the rear of the scanner, to position ‘0’ (see Figure 10). Start the copy process If you press the Start key, and you do not change any settings, the settings of the previous copy job are used or the default settings of the machine are used:... -
Page 55: Number Of Copies
[11] Insert the original The original will be transported about 1 centimetre to a defined position. Specify the number of copies with the ‘+’ or ‘-’ keys. Press the ‘media’ key to select a roll or to select ‘manual feed’. Press the ‘input’... -
Page 56: Select The Use Of Roll 1 Or Roll 2 Or Manual Feed
Select the number of copies Enter the number of copies (1 up to 99) with the ‘+’ or ‘-’ key on the scanner operator panel. The display shows the number of copies. Select the use of roll 1 or roll 2 or manual feed You can select between two rolls or manual feed with the ‘media’... -
Page 57: Select The Input Mode
Select the input mode You can use the ‘Input’ setting to indicate how a job is sorted: the ‘sheet’ option prepares each sheet as a separate job (see Figure 12). Select ‘set’ to keep the copies together and to prevent the interruption with a print job. -
Page 58: Specify The Zoom Factor
Specify the zoom factor With the Océ TDS400 you can reduce or enlarge your original from 25% to 400%. Press the ‘zoom’ key to enter the zoom mode. You can select the zoom factor by means of the ‘browse’ keys when the indication flashes. Choose between the fixed step zoom mode by means of the right and left browse keys. - Page 59 When you copy very light or dark originals, or originals with unequal background density, the result can not meet your requirements (e.g. too much background). Default the automatic background compensation is active and the exposure level is 0. The automatic background compensation will provide a good quality copy from a large variety of originals.
-
Page 60: Deliver Originals After Scanning
Improve the copy quality according to the type of image Press the Extra key. Select ‘Original type’ with the Press the Select ‘Lines/text’, ‘Blueprint’ or ‘Photo’ with the Press the Select the needed original type. Press the confirm key. Deliver originals after scanning You can choose for delivery of the original at the front (rewind) or the rear side of the scanner. -
Page 61: Define Settings For The Next Original
To enable automatic feed Press the Extra key. Select ‘Scanner’ with the Press the Select ‘Autofeed orig.’ with the Press the Select ‘on’ or ‘off’ with the Press the ‘confirm’ key. Define settings for the next original For each original you need to copy you can specify new settings. Define settings for the next copy job Select all the needed settings for the next original. - Page 62 [13] Manual feed Enter the number of copies. Select the copy size. Feed the original. Press the Start key Take your sheet of copy material to the side of the printer that contains the cassette tray (see Figure 13). Align the copy material with your hands to the format indication and the label on the manual feed table.
- Page 63 Set the time-out for manual feed Default is 60 seconds. Press ‘on-line’ on the printer operator panel, to enter the main menu. Select the ‘media settings’ item with the Press ‘next/select’ to enter the ‘media settings’ menu. Select ‘manual feed’ with the Press ‘next/select’...
-
Page 64: Stop A Copy Job
Stop a copy job Press the ‘cancel’ key to interrupt the original transport. Stop a job Press the ‘cancel’ key. The original transport is stopped. The message ‘Remove original’, ‘Press cancel’ appears on the scanner display. Open the scanner cover and remove the original. Close the cover. -
Page 65: Adjust The Leading Or The Trailing Strip
Select standard cut Press the Extra key. Select ‘Paper copy’ with the Press key, to enter the ‘Paper copy’ menu. Select ‘cut length’ with the Press key, to enter the ‘cut length’ menu. Select a standard paper format with the Press the ‘confirm’... - Page 66 Leading and trailing strip and trailing strip to eliminate or add a filing strip. Leading and trailing strips can be extended up to 400 mm or shortened up to 400 mm (see Figure 14). [14] Example of adjusting the leading and trailing strip of an original Océ...
-
Page 67: Mirror-Image Copies
Mirror-image copies You can make a mirror-image copy of an original, as shown in the next figure: [15] Example of a mirror-image copy To make a mirror-image copy Press the Extra key. Select ‘Paper copy’ with the Press the Select ‘Mirror’ with the Press the Select ‘on’... -
Page 68: Stamping
Stamping Stamping is an Océ TDS400 option which allows you to print a predefined text on all your copies. Enable stamping with a password in the Océ Setting Editor. The key operator can predefine a maximum of 10 stamps in the Océ Settings Editor (see chapter 5, ‘Océ... - Page 69 Select ‘Colour’ with the Press the key to enter the ‘Colour’ menu. Select a color with the Press the Confirm key. How to change the stamp size Press the Extra key. Select ‘Paper copy’ with the Press the key to enter the ‘Paper copy’ menu. Select ‘Stamp’...
- Page 70 Select ‘Paper copy’ with the Press the Select ‘Stamp’ with the Press the Select ‘Position’ with the Press the Select the position with the Press the Confirm key. Océ TDS400 User Manual key. key to enter the ‘Paper copy’ menu. key.
-
Page 71: Menu Structure Of The Scanner
Menu structure of the scanner Original Paper copy Scanner Using the Océ TDS400 to Copy Lines/text Original type Blueprint Photo Background comp. Synchrone cut Standard cut A0 (841x1189mm) A1 (594x841mm) A2 (420x594mm) A3 (297x420mm) E (34x44”) D (22x34”) C (17x22”) Cut length B (11x17”) E+ (36x48”) - Page 72 Océ TDS400 User Manual...
-
Page 73: Using The Océ Tds400 To Scan-To-File
Chapter 4 Using the Océ TDS400 to Scan-to-file This chapter describes the scan-to-file function of the Océ TDS400. This chapter contains a description of the interface of the Océ TDS400 scanner, and of the Océ Scan Manager and Océ View Station LT applications on the local controller Océ... -
Page 74: Introduction
Introduction ‘Océ Scan Logic®’ is an option which enables you to scan a document and send it to a specific directory on the network. It makes full use of Océ Image Logic®, a quality enhancement technology. Enable Océ Scan Logic® through a password in the Océ... -
Page 75: Make A Scan
Make a scan To scan an original to file is an easy operation. If the settings (see ‘Settings to scan’ on page 77) are correct, you must press the Start key operator panel. How to make a scan Place your original face-down, right aligned along the original guide. Select the appropriate original type. - Page 76 [16] Océ View Station Océ TDS400 User Manual...
-
Page 77: Settings To Scan
Settings to scan Press the Extra key on the scanner operator panel to access the settings to make a scan. The following options are available in the ‘File’ menu: You can store your scan either in the temporary storage on the Destination controller or you can store it on a network destination. -
Page 78: Destinaspbtion
Destinaspbtion You can store your scan either in the temporary store on the controller or on a network destination. You can define up to six destinations in the Océ Scan Manager application. On the scanner operator panel you can choose one of these destinations. - Page 79 Select the resolution Press the Output key to select ‘file’. Press the Extra key. Select ‘File resolution’ with he Press the key, to enter the ‘File resolution’ menu. Select the needed resolution with the Press the Confirm key. Using the Océ TDS400 to Scan-to-file key.
-
Page 80: File Format
File format To define the internal order of the scanned files, select between TIFF (Tagged Image File Format), CALS-I (Continuous Acquisition and Life Cycle support), or PDF (Portable Document Format). Within the ‘Tiff format’ option, you can define 9 different Tiff subformats. The ‘Organization’... -
Page 81: Optimisation
Optimisation You can turn File size optimization’ or ‘off’. If you select ‘on’ the file size is smaller, the scan quality will be less. Select optimise size Press the Output key to select ‘file’. Press the Extra key. Select ‘Optimise size’ with he Press the Select ‘on’... -
Page 82: Menu Structure Océ Tds400 Scanner
Menu structure Océ TDS400 Scanner Original File Scanner Océ TDS400 User Manual Standard size Scan size Custom width Custom size Lines/text Original type Blue print Photo Background comp. Destination 1 Destination 2 Destination 3 Destination Destination 4 Destination 5 Destination 6 Check print 200 dpi File resolution... -
Page 83: Océ Scan Manager
Océ Scan Manager The Océ Scan Manager is an application available local on the controller. With the Océ Scan Manager you can configure the destinations for Océ Scan Logic®. To increase your productivity you can define automatic file naming. This way you can do batch scans without operating the controller. During scanning, Océ... -
Page 84: Table View
Tree view The tree view displays: the system name the collapsible destination tree the collapsible temporary store tree. If you scan to a particular destination, that destination is displayed bold and the corresponding icon changes. The destination you scanned last to, is displayed bold. - Page 85 Update the table view From the ‘View’ menu select ‘Refresh’ or click the ‘Refresh’ button on the toolbar (see Figure 18). If the opened destination is also the one which is currently scanned to, then the view is automatically updated. [18] ‘Refresh’...
-
Page 86: Actions From The Océ Scan Manager
Actions from the Océ Scan Manager The Océ Scan Manager enables you to make settings for scan-to-file. You can edit and view the destination properties. You can also view the properties of scanned files. Destinations A destination is a location where you scan your file to. You can create, delete and lock destinations. - Page 87 [20] ‘Destination properties’ window Enter a logical name for the destination in the ‘Name’ text box. This logical name also appears on the scanner panel S. Select the ‘On the controller’ type from the ‘Type’ drop-down list box. Enter a path of the target folder in the ‘Path’ text box. You can also click the ‘Browse’...
- Page 88 Set the required file naming properties Click OK Océ Scan Manager connects to the new SMB destination. Océ Scan Manager then shows the contents of the new SMB destination. Create a web destination with FTP Create a home directory and a subdirectory on a workstation. For example c:Ftp/Scan Enable FTP on the workstation On the Océ...
- Page 89 This option is only available if you are logged on as a Key operator (see Note: chapter 9, ‘Océ Account Center’ on page 145). Unlock a destination Select a destination. From the ‘File’ menu select ‘Properties’. Uncheck the ‘Locked’ check box. Click ‘OK’...
-
Page 90: Scanned Files
Set or Change destination properties Select a destination. From the ‘File’ menu select ‘Properties’ or click the ‘Properties’ button on the toolbar (see Figure 22). [22] ‘Properties’ button on the toolbar The ‘Destination properties’ screen appears as in figure 20 on page 87. Change the destination properties as described in ‘Create a local destination’... - Page 91 Delete a scanned file Select a file in the right pane. From the ‘File’ menu select ‘Delete’ or click the ‘Delete’ button on the toolbar (see Figure 25). [25] ‘Delete’ button on the toolbar. The selected file will be deleted. This option is only available if you are logged on as a Key operator Note: or as a Repro operator.
-
Page 92: Manage The Temporary Store
Automatically view a file after scanning You can choose to view a file automatically after scanning: From the ‘System’ menu select ‘Auto view’. When you scan, Océ View Station LT starts automatically and show the scanned file. Manage the temporary store When you normally scan the originals to a file, many files are created in the temporary store. -
Page 93: How To Retrieve Scanned Files
How to retrieve scanned files When you scan your files will be stored in the destination you set. This can be on the local controller or on a remote system. You can retrieve your files from the local host via File Transfer Protocol (FTP) (see Figure 28). Also if during scanning to a remote destination, something goes wrong, you can retrieve your files from the local host. - Page 94 As there is no registered user, you can press Enter to initiate the Note: connection. Set the transmission mode to binary by entering ‘binary’. Go to the ‘tempstore’ directory using the following command: ‘cd tempstore\’. Go to the ‘scan’ directory if you want to retrieve a file from a destination on the local host, go to the ‘unsent’...
-
Page 95: Océ View Station Lt
Océ View Station LT With Océ View Station LT you can view your scanned files. This can be automatically (see ‘Automatically view a file after scanning’ on page 92) after scanning or via Scan Manager (see ‘Print a scanned file’ on page 90). Océ... -
Page 96: Menu Options
Menu options File menu Command Close Properties [30] View menu Command Magnify Reduce Refresh Invert Mirror Rotate 90 CCW Rotates the image 90 degrees counter-clockwise. Rotate 90 CW Rotate 180 Sample Negate Scale to gray Monochrome [31] Preference menu Command View ribbon Status bar [32]... -
Page 97: Function Buttons
Preference menu (continued) Command Reference Detail Measurement [32] Help menu Command About [33] You can retrieve help about Océ View Station LT via the Océ Scan Note: Manager. Function buttons Below the menu’s there are function buttons in a ribbon. This ribbon can be turned on and off (see ‘View ribbon’... -
Page 98: View Error
Reference. This small floating window displays the entire current page in miniature for reference. Displays or removes the Detail window. View error When the memory is almost full it can occur that the viewer does not show the scanned file. Instead it shows a red border with a red cross (see Figure 35). [35] Error view in Océ... -
Page 99: Océ Power Logic®: The Settings Editor
Chapter 5 Océ Power Logic®: The Settings Editor This chapter gives information about the Océ Settings Editor. For details about specific settings, refer to the Help on the Océ Settings Editor. Océ TDS400 User Manual... -
Page 100: Introduction
Introduction Use the Océ Settings Editor to set the default settings of the Océ TDS400 according to your companies requirements. 2 types of users can determine settings in the Océ Settings Editor, Key Operators and System Administrators. You can log on as either Key Operator or System Administrator. Key Operators and System Administrators have different rights to determine settings. -
Page 101: How To Start Up And Shut Down The Controller
How to start up and shut down the controller Take the following actions to start up the controller: Start up the Océ controller Turn on the controller and the screen. After the initial system test of the controller the applications, Océ Queue Manager, Océ... -
Page 102: Océ Settings Editor
Océ Settings Editor The Océ Settings Editor is one of the controller applications for the Océ TDS400. The Océ Settings Editor allows users and operators to view settings of the system. If authorised, the settings of the system can be modified on the Océ... -
Page 103: General Structure
[36] Océ Settings Editor General structure The Océ Settings Editor is structured as follows: Menu bar Top toolbar Left toolbar Settings area Status bar Océ Power Logic®: The Settings Editor... -
Page 104: Menu Bar
Menu bar The menu bar of the Océ Settings Editor contains the following menus: If you select the ‘File’ menu you can log on as a particular type of user, File log off from the previously selected user mode, open an existing setting file, save the current settings to a file, connect to a different controller (only for remote users) or exit the Océ... - Page 105 These settings can only be saved in Key Operator or System Note: Administrator mode. When you click on the ‘Apply’ button, the changes you have made Apply become effective. Initially, this button is disabled. It is enabled after the first setting is changed and disabled again after the apply action is performed or after an undo action.
-
Page 106: Left Toolbar
Open a saved file Open the ‘File’ menu and select ‘Open’, or press the ‘Open’ button on the toolbar. A dialog box is displayed from where you can choose the correct file. Click the ‘Apply’ button. The loaded settings are transferred to the system. This is only possible if the user is logged on as a Key Operator or System Note: Administrator. - Page 107 The settings for system components that are not available are not displayed. So, if you do not have a folder, no folder settings are available. This means that different configurations result in different tree structures. When a tree item has been changed, this item will be marked with a Note: bullet.
-
Page 108: Status Bar
Status bar The Océ Settings Editor has a status bar displaying the following information (left to right): System status (icon for connected or disconnected) The following icons are used: The Océ Settings Editor is connected to a system. The Océ Settings Editor is not connected to a system. System name (‘localhost’... -
Page 109: How To Perform Actions From The Océ Settings Editor
Start Océ Settings Editor on a remote workstation You must first install Océ Remote Logic® as described (see Note: ‘Installation procedure for MS Windows® systems’ on page 131). Select 'Océ Remote Logic®' via the 'Start' menu. Select the 'Launcher' application. Select Océ... - Page 110 When an Apply is performed, first the contents of the current settings is copied to the backup file. There are two versions of this file, one for KO settings and one for SA settings. These files are always stored on the system. Load a settings file Open the ‘File’...
-
Page 111: Key Operator Settings
Key Operator settings The Key Operator is responsible for correct default settings of the system. These settings include the default settings, and groups of default printer settings for the print and the copy jobs that again occur. The Key Operator can define all timer settings, like the panel time out and the sleep mode time out. -
Page 112: System Administrator Settings
System Administrator settings The Océ TDS400 System Administrator is responsible for: Dithering matrix and Poker settings Printer language controller settings Pen settings Automatic Language Selection (ALS) settings Controller identification settings Set memory reservation settings Connectivity settings. Poker stands for Portable Kernel. Poker performs automatic Note: interpretation of the host language in which the data from the scanner or in the job ticket is encoded. - Page 113 In order to perform special System Administrator functions, you must log on to the Océ Settings Editor as a System Administrator (see ‘User modes’ on page 137). When you are finished, make certain you log off from the System Note: Administrator mode of the Océ...
- Page 114 Océ TDS400 User Manual...
-
Page 115: Océ Power Logic®: System Control Panel
Chapter 6 Océ Power Logic®: System Control Panel This chapter describes how to view the status of the Océ TDS400. Océ TDS400 User Manual... -
Page 116: Introduction
Introduction The Océ System Control Panel (SCP) application provides you with status information about the system. This includes: Status of the printer Overview of the loaded media types and sizes Status of the scanner Status of the controller Memory usage. If you do not have a scanner, the scanner status is not available. - Page 117 Scanner: to hide or to show the status of the scanner. Controller: to hide or to show the status of the controller. Memory: to hide or to show the amount of set memory that is used. If operator invention is required for a device, the respective key flashes. Note: The Printer status window messages displayed on the printer control panel also appear in the printer status...
-
Page 118: Icons
[42] Océ System Control Panel window You can hide the media by de-selecting it in the View menu option. Note: Icons The Océ TDS400 System Control Panel uses a number of icons to display information about the media available on the printer. The following icons are used: The material is available and the roll is ready for printing. -
Page 119: User Operations
User operations The Océ System Control Panel allows you to perform the following operations: Make a demo print Print your system configuration Clear the system Shut down the system Make a demo print Select the Demo print option in the System menu. A demo print is made on the printer. - Page 120 Océ TDS400 User Manual...
-
Page 121: Océ Power Logic®: Queue Manager
Chapter 7 Océ Power Logic®: Queue Manager This chapter describes how to view and manage jobs in the Océ TDS400 print queue, inbox queue, and history queue. It shows how to cancel the active print and how to delete the prints, how to hold the print jobs in the queue, how to restart the jobs, and how to move jobs to top. -
Page 122: Introduction
Introduction The Océ Queue Manager application provides you with a graphical representation of the print queue. It allows you to view the print queue and the status of the print jobs as well as to manage the jobs in the queue. With the Océ Queue Manager you can: Abort the job currently being printed Delete job(s) in the queue... - Page 123 The toolbar for the Océ Queue Manager contains the following The tool bar icons: hold, resume, move to top, delete and print job(s). The active print job window. printed on the Océ TDS400. The print queue window. waiting to be printed. The jobs are displayed in the order in which they are expected to be printed.
-
Page 124: Modes
You can resize the columns in the main queue window by dragging the table header separators. It is also possible to change the order of the columns by dragging a specific column to a new position. You can sort the inbox and history. You can not sort the printer queue. Note: menu bar tool bar... - Page 125 the Abort, Delete, Resume and Hold buttons. The service operator mode is meant for Océ technicians. In the Océ Queue Manager and the Océ System Control Panel, the repro Note: operator, the key operator and the system administrator have the same user rights.
-
Page 126: Icons
Icons The Océ TDS400 Queue Manager uses a number of icons to display information about a job in the queue. The following icons are used: [44] Receiving/received the job [45] Processing / processed the job [46] Printing the job [47] Delivering the job [48] The delivered job [49] The deleted job [50] A job that requires manual feed... -
Page 127: Managing Print Jobs
Managing print jobs View the print queue The Océ Queue Manager displays all jobs sent to the print queue in a list sorted according to the order in which they will be printed. This ordering can be changed by: deleting jobs putting jobs on hold restarting jobs currently on hold moving jobs to top... - Page 128 A job that is put on hold will retain its position in the print queue. Note: Once it reaches the top of the queue, the job that is put on hold will stay there until it is restarted or deleted. While a job is on hold, other jobs will be printed, even when they were behind the job on hold in the queue.
-
Page 129: Océ Power Logic®: Remote Logic
Chapter 8 Océ Power Logic®: Remote Logic This chapter describes how to install and use Océ Remote Logic ® Océ TDS400 User Manual... -
Page 130: Introduction
Introduction Océ Remote Logic® enables you to: View system status (Océ System Control Panel). Manage print jobs (Océ Queue Manager). Change settings (Océ Settings Editor). For more information see ‘Use Océ Remote Logic®’ on page 136 Océ TDS400 User Manual... -
Page 131: Installation Procedure For Ms Windows® Systems
Installation procedure for MS Windows® systems Before you install Océ Remote Logic minimum system requirements for the remote system. The system must be a ® Pentium 233 with 32 Mb RAM running Windows ® 3) Windows more possible systems. Océ Remote Logic Editor) are on the Océ... - Page 132 Indicate the required language and click ‘OK’. Follow the instructions on screen to complete the installation of ‘Océ Remote Logic’. When the installation is complete, you can start the applications by selecting them from the specified folder in the ‘Start’ menu. To work with the applications you first have to connect to an available Océ...
-
Page 133: Installation Procedure For Unix Systems
Java™ Virtual Machine (VM). It is also assumed that Océ Remote Logic® is installed by an experienced user. UNIX versions and the required JRE UNIX version IBM AIX IBM AIX IBM AIX IBM AIX SUN Solaris... -
Page 134: Ibm Aix
For HP-UX 10.20 and 11.00 the runtime engine can be downloaded from: http://www.unix.hp.com/java The preferred version of the Java™ runtime environment for HP-UX 10.20 and HP-UX 11.00 is version C.01.18.xx. Linux IBM has a runtime engine available for Linux which can be downloaded from: http://www.ibm.com/java Océ TDS400 User Manual... -
Page 135: Installation Procedure For Other Systems
Installation procedure for Other systems In general, Océ Remote Logic Steps to install Océ Remote Logic Install Java™ Virtual machine (preferred 1.1.8 (or higher)). Extract ‘RemoteLogic_vX.tar’ or ‘RemoteLogic_vX.zip’, from the Océ Remote logic® CD-ROM. Set the environment variable RL_VM_HOME to point to the Java™ VM installation directory. -
Page 136: Use Océ Remote Logic
Use Océ Remote Logic Océ Remote Logic® enables you to: View the system status (Océ System Control Panel). Manage print jobs (Océ Queue Manager). Change settings (Océ Settings Editor). Océ Remote Logic® has five different user modes. These user modes are meant to limit access to the special functions to authorised users only. -
Page 137: User Modes
User modes The following user modes are available: Anonymous user mode Repro operator mode Key operator mode System administrator mode Service operator mode The anonymous user mode only offers monitoring capabilities. You are not allowed to change anything. The repro operator, the key operator and the system administrator modes allow you to perform a number of user actions. -
Page 138: Log On
Log on The access to the key operator, repro operator, system administrator and service operator modes is password protected to allow only authorised personnel to use particular functions. The default password for the System Administrator is: SysAdm. The default password for the Key Operator is: KeyOp. The default password for the Repro Operator is: ReproOp. -
Page 139: To Change The Password
To change the password You can change your password on a standard base. You can change the password for each user mode (except anonymous user mode, for which no password is required and service operator) by taking the following steps: Change the password From the ‘File’... -
Page 140: Language
Language From the ‘View’ menu, select ‘Language’, to select one of the supported languages. The check mark in front of the language indicates that this is the active Note: display language. Set the languages From the ‘View’ menu, select ‘Language’. You have to change the display language setting in the Settings Editor, to change the languages in the scanner and printer operator panels, and in the local applications. - Page 141 Specifies the second language in combination with the country2=country parameter ‘language2=language You must always use a matching combination of ‘lang’ and ‘country’ Note: (see table on page 141). Language Language Language parameters Danish Czech Spanish Finnish Hungarian Italian US English UK English Dutch German...
- Page 142 The easiest way to do this is by creating a short-cut of an application and then add the command line properties. Below is an example of how to start the Example command line parameter Océ Remote Logic® applications with the configuration file ‘Myconfig.cfg’, connected to the ‘My9600’...
-
Page 143: How To Use The Remote System
How to use the remote system Start up the Océ Remote Logic® applications (Océ Settings editor, Océ Queue manager, Océ System control panel), on a remote client after you installed the software (see ‘Installation procedure for MS Windows® systems’ on page 131). - Page 144 Océ TDS400 User Manual...
-
Page 145: Océ Account Center
Chapter 9 Océ Account Center This chapter describes what Account logging is and how to use it. Océ TDS400 User Manual... -
Page 146: Introduction
Introduction Océ Account Center is an application to manage the account information of the print, copy and scan-to-file jobs. Océ Account Center consists of the following two applications: Océ Account Logic. Océ Account Logic requests the operator and the user to enter account information. -
Page 147: Océ Account Logic
Océ Account Logic Introduction to Océ Account Logic Use Océ Account Logic to link account information to your job. The account information requirements are defined and managed by the system administrator. Use Océ Account Logic for the following. Enter the account information for the print jobs Manage print jobs that do not have valid account information Enter account information for the copy and scan-to-file jobs Lock and unlock the scanner... - Page 148 System setting KO - System - Job man- agement - Print jobs KO - System - Job man- agement - Rights for print- KO - Scanner - Settings - Timers - Panel timeout Please consult the Océ Account Center user manual and the on-line help Note: in the application for detailed information.
-
Page 149: Océ Account Console
Océ Account Console Introduction to Océ Account Console Océ Account Console is installed on a PC that functions as a server. Access to Océ Account Console is password protected and limited to the administrator. Use Océ Account Console for the following. Manage, preview, and publish the account information dialog for Océ... - Page 150 Océ TDS400 User Manual...
-
Page 151: Printer Supplies And Maintenance
Chapter 10 Printer Supplies and Maintenance This chapter describes how to: Load media Refill toner and replace the waste toner bag Clean the glass platen and the reference roller of the scanner Clean the reinforcement unit Océ TDS400 User Manual... -
Page 152: Media
Media The Océ TDS400 is available with a roll unit for one or two rolls. Each of the rolls on the Océ TDS400 can be loaded with print material of a different size or type. The size and type of the available media are indicated on the operator panel. -
Page 153: Reload Paper
Reload paper How to load roll 1 Open the drawer completely (see Figure 57). [57] Open the drawer Remove the roll holder from the drawer (see Figure 58). [58] Removing the roll holder from the drawer Remove the empty core from the roll holder while pressing the knob (see Figure 59). - Page 154 [59] Press the knob Align the roll with the appropriate lines on the roll holder while pressing the knob. This line has to be completely visible. Place the roll holder with the material in the drawer (see Figure 60). [60] Reposition the roll Feed the material between the input guide plates against the rollers.
- Page 155 [61] Feed the material If you have inserted a roll with another material or with a different width, you have to program the correct width and material type (refer to ‘Media type and size on the printer’ on page 29). If you want to cut the paper to get a straight leading strip refer to ‘Cut media’...
- Page 156 [63] Remove the roll holder from the lower paper drawer Remove the empty core from the roll holder while pressing the knob (see Figure 59 on page 154). Slide the roll holder in the roll of print material while pressing the knob (see Figure 59 on page 154).
-
Page 157: How To Program Media Settings
[65] Feed the material If you want to cut the paper to get a straight leading strip refer to ‘Cut media’ on page 32. Otherwise continue with the next step. Close the lower paper compartment. Press the On-line key. How to program media settings If you insert a new roll with another material or with a different width, set the new roll specifications. -
Page 158: Material Properties
The width of the material Note: The default is 36 inch Note: The material translucent. Set the material type according to the following table: Material properties Material Plain paper Plain paper Biotop paper Green label Recyonomic Transparent paper Transparent paper Transparent paper Translucent Vellum... -
Page 159: How To Refill Toner
How to refill toner If the ‘Refill toner’ message appears on the printer panel, you must refill toner immediately. Use only B5 toner. Attention: Refill toner Turn off the printer. Unscrew the knurled nut at the left hand side of the printer and open the left cover (see Figure 67). - Page 160 [68] Screw in the bottle Move the toner bottle to a vertical position (see Figure 69). [69] Add toner Tap the toner out of the bottle. When the toner bottle is empty return the bottle to the original position. Unscrew the toner bottle anti clockwise. Replace the waste toner bag Pull the waste toner bag from the holder and place the cap provided on the bag (see Figure 70).
- Page 161 [70] Replace the waste toner bag Slide a new waste toner bag over the holder. Close the cover and tighten the knurled nut. Press the On-line key to resume printing. Replace the toner waste bag, every time you refill the toner. Note: Printer Supplies and Maintenance...
-
Page 162: Clean The Glass Platen And The Reference Roller Of The Scanner
Clean the glass platen and the reference roller of the scanner If the glass platen of the scanner is dirty or static, it should be cleaned to ensure top quality copies are produced. At the same time you can clean the white reference roller. - Page 163 [72] Glass platen and reference roller Lower the top cover. Lock the cover by pushing the front side of the cover down and pushing it back to the rear until you hear a click. Make sure that the cover is closed correctly, to ensure proper original Note: transport.
-
Page 164: Maintenance Of The Reinforcement Unit
Maintenance of the reinforcement unit This section covers maintenance activities for the optional reinforcement unit of the folder, such as: Insert a new tape roll Empty the waste box Clean the reinforcement knives To avoid damage to the reinforcement unit, only use the original Attention: reinforcement strips from Océ. - Page 165 [74] Opening the guide plates Remove the trailing strip of the old tape (see Figure 75). [75] Removing the trailing strip of the old tape Open the front side plate of the roll holder by unscrewing the green knurled nut and remove the old kernel.
- Page 166 [76] Placing the new roll Detach the end of the roll and lead the tape over the large guide roller (see Figure 77). [77] Guiding the tape around the guide roller Lead the tape between the upper and lower knife and over the pin roller (see Figure 78).
- Page 167 [78] Leading the tape between upper and lower knife Make certain that at least 200 mm (2 strip lengths) of tape protrude from the knife section (see Figure 79). [79] Protruding tape The holes in the tape must be aligned with the hole pattern on the sticker you can find on the frame plate of the reinforcement unit (see Figure 80).
- Page 168 [80] Adjusting the holes on the tape Close the guide plates of the pin roller (see Figure 81). [81] Closing the guide plates How to prepare the tape roll for operation Peel the protection sheet off the tape (see Figure 82). Océ...
- Page 169 [82] Peeling off the protection sheet Lead the protection sheet back between the upper and lower knife. [83] Leading the protection sheet between upper and lower knife Lift the guide and lead the protection sheet between the protection sheet rollers, pulling the protection sheet tight (see Figure 84). Printer Supplies and Maintenance...
- Page 170 [84] Leading the protection sheet between the rollers Insert the leading strip of the tape into the closed section of the slide (see Figure 85). [85] Inserting the tape into the closed section of the slide Hold the upper guide plate down and cut the tape at the knife section by quickly pulling the strip up so that the tape is cut by the upper knife (see Figure 86).
-
Page 171: Empty He Waste Box
[86] Cutting the tape at the knife section Close the side door of the reinforcement unit. Empty he waste box If a reinforcement unit is installed, the protective sheet from the reinforcement tape is stored in a waste box. For each roll of tape the box should be emptied twice. -
Page 172: Clean The Reinforcement Knives
Close the waste box by first pushing it forwards and next pushing it to the right hand side. [88] Closing the waste box Clean the reinforcement knives Because the knives of the reinforcement unit get sticky from the glue on the reinforcement tape, they have to be cleaned regularly. - Page 173 [89] Cleaning the upper and lower knife Oil the felt using Fixing Unit Cleaning Oil (silicon oil). [90] Oiling the felt Close the side door of the reinforcement unit. The knives are automatically placed back in their home positions., depending on whether or not a job was interrupted to clean the knives.
- Page 174 Océ TDS400 User Manual...
-
Page 175: Troubleshooting
Chapter 11 Troubleshooting This chapter describes the problems that can occur with the Océ TDS400. Océ TDS400 User Manual... -
Page 176: Introduction
Introduction This chapter describes problems that can occur with the Océ TDS400 and how to correct the problems. The following problems can occur on the Océ TDS400: Original jams in the scanner (see page 177). Paper jams in the printer (see page 179). Paper jams in the folder (see page 182) Problems with the reinforcement unit (see page 189) Stickers on parts of the system indicate which green handles, green knobs,... -
Page 177: Original Jams In Scanner
Original jams in scanner If an original jams, you can stop the original with the orange Cancel key. How to remove a jammed original Unlock the top cover by pushing the front side of the cover down and to pull it towards you. - Page 178 Remove the original. Lower the top cover. Lock the cover by pushing the front side of the cover down and to push it back to the rear until you hear a click. Make sure that the cover is closed correctly, to make sure correct Note: original move.
-
Page 179: Paper Jams In The Printer
Paper jams in the printer Paper jam in the material feed section If a jam occurs a message appears on the operator panel. If a paper jam occurs, check if: The roll is loaded correct and the media is fed as indicated. The correct media is used (see ‘List of available material types and sizes’... -
Page 180: Paper Jam In The Fuser Section
Paper jam in the fuser section Open the fuser only to remove the paper after a media jam. Caution: Because of hot surfaces the operator always has to be cautious and wear heat-protective gloves, when he removes material in the fuser section. How to clear a jam in the fuser section Turn off the printer. - Page 181 If the printer is used, the fuser can be hot. Caution: [96] Open the fuser section Remove the jammed material. Be careful! The toner is not fused. Attention: Lift the green handle and close the fuser unit. Close the left cover and tighten the screw. Turn on the printer.
-
Page 182: Paper Jams In The Folder
Paper jams in the folder Any jams in the folder can occur in either the first fold section, the folder transport section, the second fold section or the belt unit (see page 196). Paper jam in the first fold section How to clear a jam in the first fold section Open the top cover of the folder (see Figure 97). -
Page 183: Paper Jam In The Folder Transport Section
[98] Opening first fold section Open the guide plate (see Figure 99). [99] Opening guide plate Remove any jammed printing material. Close the guide plate. Close the cover of the first fold section. Close the top cover of the folder. Paper jam in the folder transport section How to clear a jam in the folder transport section Open the cover of the transport to the first fold delivery (see Figure 100). -
Page 184: Paper Jam In The Second Fold Section
[100] Opening the cover of the folder transport section Remove any jammed printing material. Close the cover of the folder transport section from the left side by lifting it up and pushing the hinge away from you. Paper jam in the second fold section How to clear a jam in the second fold section Open the front door of the second fold section (see Figure 101). - Page 185 [102] Putting the belt in an upright position Open the delivery unit (see Figure 103). [103] Opening the delivery unit Open the guide plate with the green lever (see Figure 104). [104] Opening the guide plate with the green lever Troubleshooting...
- Page 186 Remove any jammed printing material. Open the vertical transport with the green lever (see Figure 105). [105] Opening the vertical transport Remove any jammed printing material. Close the vertical transport (see Figure 106). [106] Closing the vertical transport Close the guide plate. Close the delivery unit (see Figure 107).
-
Page 187: Paper Jam In The Belt Unit
[107] Closing the delivery unit Paper jam in the belt unit How to clear a jam in the belt unit Open the door of the belt unit (see Figure 108). [108] Opening the belt unit door Squeeze the two green knobs in the upper section of the belt unit and open the plate (see Figure 109). - Page 188 [109] Opening the plate Remove any jammed printing material. Squeeze the two knobs again and put the plate in its original position. Release the green lever in the lower section of the belt unit (by slightly lifting it and pulling it forward) to open the lower plate (see Figure 110). [110] Opening the lower plate Remove any jammed printing material.
-
Page 189: Problems With The Reinforcement Unit
Problems with the reinforcement unit If a reinforcement unit is installed, the following errors can occur: Paper jams Tape jams No reinforcement strips on the output This section explains how these errors can be solved. Paper jam in the reinforcement unit How to clear a paper jam Open the cover of the transport to the First Fold delivery and remove all paper inside (see Figure 111). -
Page 190: Tape Jam In The Reinforcement Unit
[112] Opening the front door of the reinforcement unit Open the top cover of the reinforcement unit and remove all paper inside (see Figure 113). [113] Opening the top cover of the reinforcement unit Close top cover and side door of the reinforcement unit. Tape jam in the reinforcement unit When a tape jam occurs in the reinforcement unit (see Figure 114) the following message appears on the display: ‘Error in folder’. - Page 191 [114] Tape jam in reinforcement unit How to clear a tape jam Open the front door of the reinforcement unit (see Figure 115). [115] Opening the front door of the reinforcement unit Turn the two guide plates away from the pin roller and lock them into their open position (see Figure 116).
-
Page 192: No Reinforcement Strips On The Output Without An Error Message
[116] Opening the guide plates Remove all tape between the rollers and knives (see Figure 117). [117] Removing the tape Lead a new trailing strip of tape between the rollers and knives. No reinforcement strips on the output without an error message Solve this error Put the printer off-line by pressing the On-line key on the operator panel. - Page 193 [118] Situation A: No mechanical errorSituation B: Mechanical error If there are, remove the tape strips in the reinforcement unit. If the protection sheet is not on the reinforcement strip (see situation Note: A in figure 118), there is no mechanical error and you should insert a new tape roll as described in ‘How to insert a new tape roll’...
- Page 194 Océ TDS400 User Manual...
-
Page 195: The Folder
Chapter 12 The folder This chapter describes the: Folder Reinforcement unit Belt unit Océ TDS400 User Manual... -
Page 196: Introduction
Introduction If you have a folder installed on your Océ TDS400 system, the following two other optional features are available: Reinforcement unit(see page 202) Belt unit(see page 203) Océ TDS400 folder The Océ TDS400 can have a folder to fold your output. The output is folded according to the selected folding width and length with a drawing method. -
Page 197: The Océ Tds400 Folder Settings
The Océ TDS400 folder settings Before you use the folder, switch the lever downward (see Figure 121). Note: When you want to use the integrated receiving tray, switch the lever upward. [121] To fold, switch the lever downward Set the folded output delivery Press the On-line key on the printer operator panel. - Page 198 Press the Select ‘Trailing’ or ‘Leading’. Set the drawing method Press the On-line key on the printer operator panel. Select ‘Folding’ with the Press the Select ‘Input’ with the Press the Select ‘Method’ with the Press the Select ‘Standard’, ‘Afnor’ or ‘Ericsson’. Set the binding method Press the On-line key on the printer operator panel.
- Page 199 Set the folded package width Press the On-line key on the printer operator panel. Select ‘Folding’ with the Press the key to enter the ‘Folding’ menu. Select ‘Package’ with the Press the key to enter the ‘Package’ menu. Select ‘Width’ with the Press the key to enter the ‘Width’...
- Page 200 Maximum folding settings for long prints Paper densi- ty [g/m Folding settings 75 grams Output selection ‘Stacker’ or ‘Belt’ ‘Stacker’ or ‘Belt’ ‘Stacker’ or ‘Belt’ ‘Stacker’ or ‘Belt’ ‘Stacker’ or ‘Belt’ ‘First fold only’ selected < 6 m ‘First fold only’ ‘First fold only’...
-
Page 201: Off-Line Folding
Off-line folding An important productivity feature provided by the Océ TDS400 folder is the possibility to make off-line folds. For off-line folding the same settings can be made as for normal folding. By default, the predefined settings in the Océ Settings Editor for off-line folding are used. -
Page 202: Reinforcement Unit
Reinforcement unit f you install a reinforcement unit, output can be delivered with a pre-punched, self-adhesive strip (see Figure 122). [122] Example a of reinforcement strip With this strip the copy can be stored in a binder, without running the risk that the punching holes tear out. -
Page 203: Belt Unit
Belt unit A belt unit offers a large capacity and more flexibility. On the belt unit up to 75 A0 prints can be delivered offset stacked. You can adjust the side guides of the belt, depending on the width of the folded package. Set the belt as folded output delivery Press the On-line key on the printer operator panel. - Page 204 Océ TDS400 User Manual...
-
Page 205: Appendix A Summary And Tables
Appendix A Summary and Tables Océ TDS400 User Manual... -
Page 206: The Océ Tds400
The Océ TDS400 [125] The Océ TDS400 system Scanner Scanner feed table Output delivery tray you can replace the output delivery tray by an optional folder (see Note: Figure 120 on page 196). Scanner operating panel Printer Manual feed Printer operating panel Monitor Cabinet Océ... -
Page 207: Printer Operator Panel
Printer operator panel on-line previous next/select stop The graphics display The Previous key The Next/select key The Stop key The Browse keys (left , right ) The On-line key... -
Page 208: Scanner Operator Panel
Scanner operator panel Input key input Media key media Exposure key Zoom key zoom Start key - key start Océ TDS400 User Manual Output key file sheet copy output extra manual roll 2 roll 1 trailing leading exposure strip Extra key Alphanumeric display Browse keys... -
Page 209: Product Specifications Océ Tds400
Product specifications Océ TDS400 The Océ TDS400 is a wide format low to medium volume print and copy system. Printer Technology Resolution Speed Media sources Output sizes Media types Output reception Warm up time Dimensions Weight [126] Electrophotography (LED) with organic photoconductor (OPC) drum and closed toner system 600 dpi 3 linear meters p/min. - Page 210 Océ Power Logic® Controller Platform Memory Disk space File formats Interfaces Network protocols Cabinet User Interface Adobe® Postscript® 3™ / PDF Print Exec® WorkgroupOptional software which allows you to create and send a Account logging Functionality [127] Océ TDS400 User Manual Océ...
- Page 211 Océ Remote Logic® software Software Application Functionality Océ Queue Manager view status for each job and cancel, hold and restart the en- tire job Océ System Control view status and settings of system components Panel application Océ Settings Editor change system settings [128] Scanner Model...
-
Page 212: Océ Scan Logic
Océ Scan Logic® Application Scan destinations Resolution Data formats Scan modes File naming Check print Viewing Océ Image Logic® Ease of use Requirements Options Drivers and application software Océ ADI driver Océ HDI driver Océ Windows driver Adobe® PostScript® Level 3™ drivers Océ... - Page 213 Types of media Plain paper, transparent paper, film, vellum, polyester and translucent Dimensions 1170 mm (W) x 1090 mm (H) x 1440 mm (D) with tray ful- ly extended Weight 35.5 kg [130] Finishing: folder Folding modes On-line fanfold and crossfold, off-line folding Folding method Standard (=DIN-like), Ericsson, Afnor-like;...
-
Page 214: List Of Available Material Types And Sizes
List of available material types and sizes Océ machines and materials are matched for optimal quality and performance. It is therefore recommended to use only approved Océ materials in the Océ TDS400. A full list of Océ materials suited for use in the Océ TDS400, including plain paper, transparent paper, colored papers and various polyester films is available from your Océ... - Page 215 The following material sizes are available for the Océ TDS400: DIN range Material 8,5 inch range Material 11 inch / B 17 inch / C 22 inch / D 34 inch / E 22.86 cm range Material 12 inch / B+ 18 inch / C+ 24 inch / D+ 36 inch / E+...
-
Page 216: Automatic Format Selection
Automatic format selection The Océ TDS400 controller switches to the next larger format. For example you set the 8,5 inch range on the printer. The job you print is an A1 format. The printer will automatically select the 30 inch format. The next table shows which format the Océ... - Page 217 Only use the original reinforcement strips from Océ, to avoid Attention: damage to the reinforcement unit.
-
Page 218: Summary Of Standard Zoom Formats
Summary of standard zoom formats Standard zoom fixed steps for the DIN paper series [%] Original 91.44 cm [134] Standard zoom fixed steps for the DIN carto paper series [%] Original 91.44 cm [135] Standard zoom fixed steps for the 8,5 inch paper series Original 11 / B 17 / C 22 / D [inch]... - Page 219 Standard zoom fixed steps for the 8,5 & 9 inch mixed paper series [%] Original 11 / B 12 / [inch] 11 / B 12 / B+ 17 / C 18 / C+ 22 / D 24 / D+ 34 / E 36 / E+ [137] 17 / C18 /...
- Page 220 Océ TDS400 User Manual...
-
Page 221: Appendix B Safety Information
Appendix B Safety information Océ TDS400 User Manual... -
Page 222: Instructions For Safe Use
Instructions for safe use Océ designed products have been tested in accordance with the strictest international safety standards. To help assure safety while working with these products it is important that you observe the following safety rules: Maintenance Do not remove any screws from fixed panels. Do not carry-out maintenance activities except for the parts and maintenance materials mentioned in this manual. - Page 223 Surroundings Do not block the ventilation openings of the machine. Ensure that the machine is placed on a level, horizontal surface of sufficient strength. See the Océ TDS400 safety data sheet in this appendix for information about the weight of the equipment. Ensure there is sufficient space around the machine.
-
Page 224: Safety Data Sheets
Safety data sheets The disclaimer below is valid for all safety data sheets in this manual. For questions about Océ products regarding health, safety and environment, please contact your Océ organization; you can find the address in the last appendix of this manual. The safety data sheets in this manual have been compiled to the Disclaimer best of our knowledge as a compact guide for safe handling of this product. -
Page 225: Safety Data Sheet Océ Tds400 Printer
Safety data sheet Océ TDS400 printer PRODUCT SAFETY DATA SHEET Océ-USA, Inc. Model Description Max. process speed Dimensions Weight Voltage Frequency Current-rated Current-max Power consumption, stand by Power consumption, operation ® NERGY * Power consumption Mains connection Safety class Protection class Sound pressure level (at bystander position) Sound power level... -
Page 226: Safety Data Sheet Océ Tds400 Printer And Scanner
Safety data sheet Océ TDS400 printer and scanner PRODUCT SAFETY DATA SHEET Océ-USA, Inc. Model Description Max. process speed Dimensions Weight Voltage Frequency Current-rated Current-max Power consumption, stand by Power consumption, operation ® NERGY * Power consumption Mains connection Safety class Protection class Sound pressure level (at bystander position) -
Page 227: Epa Energy Star
EPA E NERGY Océ-Technologies B.V. has joined the E States Environmental Protection Agency (EPA). The purpose of the E TAR ® Program is to promote the manufacturing and marketing of energy-efficient equipment, thereby potentially reducing combustion-related pollution. Using the energy management features outlined below prevents unnecessary power consumption, which helps to prevent air pollution from electricity generating plants and saves you money on your utility bills. - Page 228 Océ TDS400 User Manual...
-
Page 229: Appendix C Miscellaneous
Appendix C Miscellaneous Océ TDS400 User Manual... -
Page 230: How To Read This Manual
How to read this manual The consistent style that is used in this manual enables you to quickly become familiar with the use of this manual and ultimately the Océ TDS400. Each section or subsection contains a description of the feature or Description operation identified in the title. -
Page 231: User Survey
User survey Did you find this manual to be accurate? Were you able to operate the product after reading this manual? Does this manual provide adequate background information? Is the format of this manual convenient in size, easy to read and layed out well? Did you find the information you were looking for? Always Most of the times... - Page 232 Comments: -------------------------------------------------------------------------------------------- -------------------------------------------------------------------------------------------- -------------------------------------------------------------------------------------------- -------------------------------------------------------------------------------------------- -------------------------------------------------------------------------------------------- --------------------------------------------------------------------------------------------- Date: This reader’s comment sheet is completed by: Name (optional) Occupation: Company: Phone: Address: City: Country: Please return this sheet to: Océ-Technologies B.V. Attn: ITC-User Documentation P.O. Box 101 5900 MA Venlo The Netherlands Send you comments by E-mail to : itc-userdoc@oce.nl For the addresses of local Océ...
-
Page 233: Addresses Of Local Océ Organizations
Addresses of local Océ organizations Océ-Australia Ltd. P.O.Box 363 Ferntree Gully MDC VIC 3165 Australia Océ-Österreich GmbH Postfach 95 1233 Vienna Austria Océ-Belgium N.V./S.A. Avenue J.Bordetlaan 32 1140 Brussels Belgium Océ-Brasil Comércio e Industria Ltda. Caixa Postal 3187 01060-970 Sao Paulo, SP Brazil Océ-Canada Inc. - Page 234 Océ-Nederland B.V. P.O.Box 800 5201 AV ‘s-Hertogenbosch The Netherlands Océ Norge A/S Postboks 53, Grefsen 0409 Oslo 4 Norway Océ-Poland Ltd. ul. Łopuszańska 53 02-232 Warszawa Poland Océ-Lima Mayer S.A. Av. José Gomes Ferreira, 11 Ed. Atlas II Miraflores 1495 Algés Portugal Océ...
-
Page 235: Index
Index access 108 account center 145 account console 149 Account logic 147 add a controller 143 add toner 159 replace waste toner bag 159 Advanced printing 35 alphanumeric display 25 applications 130 apply 105 auto-feed 75 Automatic format selection 216 Automatic logon 139 automatically view a scanned file 92 available material types and sizes 11, 214... - Page 236 general control buttons 108 get files 93 help 140 How to use the remote system 143 input key 49 install remote logic 131 IP address. 38 Japan support 16 destination names 88 key operator settings 102 keys 26 selection keys 26 stop 26 language 140 load media 152...
- Page 237 output key 49 paper jam belt unit 187 folder 182 folder transport section 183 reinformcement unit 189 second fold section 184 paper series 41 21.59 cm 41 DIN 41 DIN CARTO 41 mix 8.5/9 inch 41 password 139 Power Logic Controller 14 pre-cut copy material 61 print configuration report 33...
- Page 238 Scan Manager destination lock 88 local destination 86 network destination 87 web destination 88 scanner 13 scanner display 50 scanner feed table 54 scanner operating panel keys 49 Scan-to-file destination ftp 88 local 86 smb 87 scan-to-file file name 89 password 74 settings 77 select language 38...
- Page 239 view printer status 115 view station 95 view station LT 74 see a scanned file 75 waste box 171 waste toner bag 159, 160 width of the material 157 work on a remote system 143 Index...
Need help?
Do you have a question about the Oce TDS400 and is the answer not in the manual?
Questions and answers