Table of Contents
Advertisement
Quick Links
Advertisement
Table of Contents

Related Manuals for AEG Electrolux KB9820E


Summary of Contents for AEG Electrolux KB9820E
- Page 1 KB9820E User manual Built-in fan / steam oven...
-
Page 2: Table Of Contents
Contents Thank you for choosing one of our high-quality products. To ensure optimal and regular performance of your appliance please read this instruction manual carefully. It will enable you to navigate all processes perfectly and most efficiently. To refer to this manual any time you need to, we recommend you to keep it in a safe place. -
Page 3: Electrical Safety
Safety information Electrical safety • This appliance must only be connected by a qualified installation engineer . • In the event of a fault or damage to the appliance: Take the fuses out or switch off. • Repairs to the appliance must only be carried out by qualified service engineers . Considerable danger may result from improper repairs. -
Page 4: Description Of Product
Description of product Information on the oven enamel Changes to the colour of the oven's enamel surface as a result of use do not affect the appliance's suitability for normal and correct use. They therefore do not constitute a defect in terms of warranty law. -
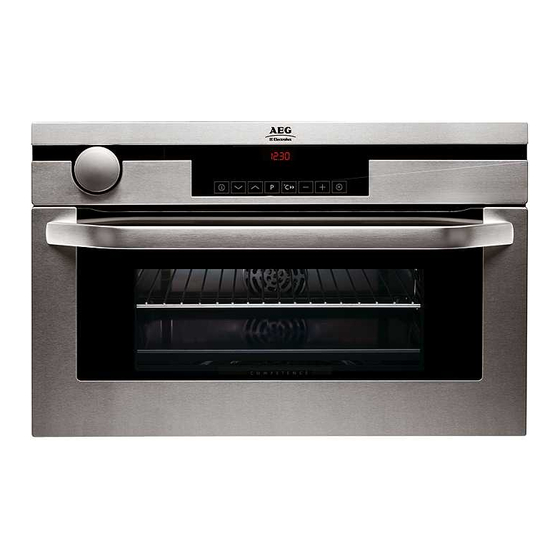
Page 5: Control Panel
Description of product Control panel Oven displays Oven functions buttons Water drawer Oven layout Grill element Light in the oven Grease filter Rear wall heating element fan... -
Page 6: Accessories Oven
Before using for the first time Steam generator/Steam rosette Side rails, removable Oven shelf levels Accessories Oven Shelf For cookware, cake tins, roasts and grilling food. Baking tray For cakes and biscuits. Patisserie tray For rolls, brezels and small pastries. Can be use for steam function. -
Page 7: Cleaning For The First Time
Before using for the first time When the appliance has been connected to the electrical supply or when there has been a power cut, the symbol for the time automatically flashes. 1. To change a time that has already been set, press the clock functions button repeatedly until the symbol for the time... -
Page 8: Getting To Know The Appliance
Operating the oven Getting to know the appliance The appliance can be operated in test mode to test or demonstrate all operating steps. The oven does not heat up. Test mode Switching on mode 1. Switch the appliance off using the On/Off button . - Page 9 Operating the oven The control panel On/Off Baking/Roasting Programmes button +/- Clock functions Fast Warm Up Oven function selection General instructions • Always switch appliance on first by pressing the On/Off button • When the selected function is lit, the oven begins to heat up or the time set begins to count down.
- Page 10 Operating the oven 2. Press the button repeatedly until the desired oven function appears. • A suggested temperature appears in the temperature display. • If the suggested temperature is not changed within approx 5 seconds, the oven begins to heat up. Changing the oven temperature Press the button to raise or lower the...
-
Page 11: Oven Functions
Operating the oven Switching the oven off Switch the appliance off using the On/Off but- ton. Cooling fan The fan switches on automatically to keep the ap- pliance surfaces cool. When the oven is switched off, the fan continues to run to cool the appliance down and then switches itself off. -
Page 12: Inserting The Oven Shelf And Baking Tray
Operating the oven Inserting the oven shelf and baking tray Shelf runner safety and anti-tip device To increase shelf runner safety, all insertable components have a small curved indentation at the bottom on the right and left-hand edge. Always insert insertable components so that this indentation is at the back of the oven interior. -
Page 13: Grease Filter
Operating the oven Grease filter Only use the grease filter when roasting to protect the rear heating elements from fat splashes. Inserting the grease filter Hold the grease filter by the tab and insert the two mounts downwards into the opening on the rear wall of the oven (fan opening) Removing the grease filter Hold the grease filter by the tab, unhook it and... -
Page 14: Additional Functions
Operating the oven 3. Using the button, select the Steam Cooking function and using button, set the desired tem- perature (between 50°C - 96°C). 4. Select the function Cook Time End Time with the clock functions but- and set the requested cooking time or switch-off time with the button or. - Page 15 Operating the oven 1. Switch the oven on using the On/Off but- . Press the Baking/Roasting Pro- grammes button then press the button repeatedly, until the desired programme appears in the display (P1 to P12) – The symbol for the corresponding oven function appears in the function dis- play.
-
Page 16: Clock Functions
Operating the oven Starting the Memory function 1. Switch the oven on using the On/Off button 2. Use the Baking/Roasting Programmes button to call up the saved setting. Clock functions Clock functions Clock displays Time Cook Time/End Time/Operating Time Clock functions Selector buttons Countdown To set a countdown. - Page 17 Operating the oven Time To set, change or find out the time (see section Before using for the first time). General instructions • After a clock function has been selected, the corresponding symbol flashes for about. 5 seconds. During this period, the desired times can be set or modified using the button.
- Page 18 Operating the oven When the time has elapsed, a signal sounds for 2 minutes. "0.00" lights up and the symbol for Countdown flashes. To turn off the signal: Press any button. Cook Time 1. Select oven function and using the button select the temperature.
- Page 19 Operating the oven When the time has elapsed, a signal sounds for 2 minutes. The oven switches itself off. "0.00" is displayed and the symbol for Cook Time flashes. To turn off the signal: Press any button. End Time 1. Select oven function and using the button select the temperature.
- Page 20 Operating the oven When the time has elapsed, a signal sounds for 2 minutes. The oven switches itself off. "0.00" is displayed and the symbols for End Time and Cook Time flash To turn off the signal: Press any button. Cook Time and End Time combined...
-
Page 21: Other Functions
Operating the oven Other functions Switching off the display You can save energy by switching off the display. Switching off the display 1. If necessary, switch off the appliance using the On/Off button . Residual heat must not be displayed. 2. -
Page 22: Use, Tables And Tips
Use, Tables and Tips 1. If necessary, switch off the appliance us- ing the On/Off button 2. Press and hold the buttons at the same time, until a signal sounds (ap- prox. 2 seconds). The button beep is now switched off. Switching on button beep Press and hold the buttons at the... - Page 23 Use, Tables and Tips • With the Steam Cooking oven function remove the grease filter ; otherwise, cooking time is longer. • If the appliance is not used for prolonged periods, thoroughly rinse out the water drawer, connecting hoses and steam generator (see section Cleaning and Care.) Note on the tables for Steam Cooking and Interval Steam Cooking The tables below give the required temperature settings, cooking times and oven levels for a selection of typical dishes.
- Page 24 Use, Tables and Tips Type of food to be cooked Water to add via Tempera- Oven level Time water drawer ml ture °C min. Cauliflower, whole 40-45 Cauliflower in florets 30-35 Sauerkraut 50-60 Tomatoes, whole 15-20 Beetroot, whole 60-70 Kohlrabi/celery /fennel 35-40 Courgettes, sliced 20-25...
- Page 25 Use, Tables and Tips Ventitherm ® Fan Operated Cooking and steam cooking in succession Ventitherm ® Fan Operated Cooking and steam cooking can be combined, using one after the other, then using them together to cook meat, vegetables and side- dishes in the oven, so that they will be ready to serve at the same time.
-
Page 26: Baking
Use, Tables and Tips Cooking on more than one oven level. Type of food to be cooked Interval steam cooking (max. 250 ml water to be added) Temperature in Time in min. Oven levels °C Meat loaf, raw 500 g 30-40 Frankfurters / veal sausages 15-20... - Page 27 Use, Tables and Tips 1 baking tray: e. g. oven level 2 1 baking tin: e. g. oven level 1 2 baking trays: e. g. oven levels 2 and 4 General instructions With Ventitherm ® Fan Operated Cooking you can also bake with two cake tins next to each other on the oven shelf at the same time.
- Page 28 Use, Tables and Tips • Your new oven may bake or roast differently to your previous appliance. If this is the case, adjust your normal settings (temperature, cooking times) and oven levels to the recommendations in the following tables. With longer baking times, you can switch the oven off about 10 minutes before the end of baking time to make use of the residual heat.
- Page 29 Use, Tables and Tips Baking on one oven level Type of baking Oven function Oven Tempera- Time in level ture °C hours: min. Butter cake/sugar cakes Moist Fan Cooking 0:15-0:30 180-200 Fruit flan (made with yeast Ventitherm ® Fan Op- 160-180 0:25-0:50 dough/sponge mixture)
- Page 30 Use, Tables and Tips Baking on more than one oven level Type of baking Ventitherm ® Fan Operated Cook- Temperature Time in hours: in °C min. Oven level from the bottom 2 levels Small cake Short pastry biscuits 2 / 4 160-180 0:15-0:35 Viennese whirls...
-
Page 31: Roasting
Use, Tables and Tips Bakes and Gratins Table Dish Oven functions Oven Tempera- Time in level ture °C hours: min. Pasta bake Moist Fan Cooking 180-200 0:30-0:50 Lasagne Ventitherm ® Fan Op- 180-200 0:25-0:40 erated Cooking Ventitherm ® Fan Op- 160-170 0:15-0:30 Gratinated vegetables... - Page 32 Use, Tables and Tips • All types of meat that should be browned or have crackling, can be roasted in a roasting tin or dish without a lid . Tips on using the Roasting Table The information given in the following table is for guidance only. •...
-
Page 33: Low Temperature Cooking
Use, Tables and Tips Food to be roasted Ventitherm ® Fan Operated Cooking Oven level Temperature °C Time in hours: min. Rissoles 0:15-0:20 210-220 Fish (steamed) Whole fish (1,000-1,500g) 210-220 0:45-1:15 Poultry Chicken, poulard (1-1.5 kg) 190-210 0:45-1:15 Half chicken (per 400-500 g) 200-220 0:35-0:50 Poultry pieces (per 200-250 g) -
Page 34: Single Economy Grill
Use, Tables and Tips Weight g Temperature set- Oven level Total time Food to be cooked ting (mins.) Fillet of beef 1000-1500 90-110 Roast veal 1000-1500 100-120 Steaks 200 - 300 20-30 1) Brown in a frying pan before cooking Single economy grill Oven functions: Single economy grill with maximum temperature setting... -
Page 35: Defrosting
Use, Tables and Tips • Pre-heat oven for 3 minutes when convection grilling flat pieces of meat or fish. Then insert food to be grilled according to the table. Place a baking tray filled with 1-1.5 cm water on level 1. CAUTION! Steam will also escape when the door is opened Dish... -
Page 36: Making Preserves
Use, Tables and Tips • You will get a better result, if you switch the oven off halfway through the drying time, open the door and leave it to cool down, preferably overnight. Then finish drying the food to be dried. Food to be dried Temperature in °C Oven level... -
Page 37: Programmed Functions And Recipes
Use, Tables and Tips Temperature in Cooking time until Continue to cook at Preserve °C simmering in minutes. 100 °C in minutes. Vegetables 160-170 50-60 5-10 Carrots Cucumbers 160-170 50-60 Mixed pickles 160-170 50-60 Kohlrabi, peas, asparagus 160-170 50-60 15-20 1) The times and temperatures for making preserves are for guidance only. - Page 38 Use, Tables and Tips 5. Remove any residual water from the steam generator. – Put moist Quick Sponge into cooled down steam generator. – Soak up well with sponge. – Remove sponge and squeeze out water. Leave the door open for approx. 1 hour to let the oven dry completely.
- Page 39 Use, Tables and Tips Setting Oven level Cook Time Water to add via water drawer P 3 POTATO GRATIN 50 min. 200 ml WHITE BREAD 500-700 G Ingredients: • 1000 g flour, type 405 • 1 cube of fresh yeast or 2 packets of dried yeast •...
- Page 40 Use, Tables and Tips • 200 ml cream • 50 g breadcrumbs • Salt, pepper, lemon juice • Parsley, chopped • 40 g butter to grease the dish Preparation: Sprinkle the fish fillet with lemon juice and leave it to marinate for a while. Then dab off surplus juice using kitchen paper.
- Page 41 Use, Tables and Tips • 100 g onions, finely chopped • 2 cloves of garlic, finely chopped • Salt, pepper, oregano or pizza herbs Method for the tomato sauce: Mix onions, garlic, seasoning and herbs into the tomatoes and reduce the liquid, until a thick sauce is produced Leave to cool.
- Page 42 Use, Tables and Tips P 9 QUICHE LORRAINE 3 35Min. CHICKEN 1200 G Ingredients: • 1 chicken (1,000 - 1,200 g) • 2 tbsp peanut oil • Salt, pepper, paprika and curry powder Preparation: Wash the chicken and dry it with kitchen paper. Mix the spices with the oil and use the mixture to coat the chicken evenly inside and out.
-
Page 43: Cleaning And Care
Cleaning and care Setting Oven level Cook Time Water to add via water drawer P 12 WARMING UP 1 and 4 20 min. 200 ml Cleaning and care WARNING! For cleaning, the appliance must be switched off and cooled down. WARNING! For safety reasons, do not clean the appliance with steam jet or high-pressure cleaning equipment! -
Page 44: Accessories
Cleaning and care Accessories Wash up all insertable parts (oven shelf, baking tray, side rails, etc.) after each use and dry well. For easier cleaning, leave to soak for a while. Grease filter 1. Clean the grease filter in a solution of hot water and washing-up liquid or in the dishwasher. - Page 45 Cleaning and care 3. Pull the rail out of the rear catch. Inserting the side rail 1. Insert the rail at an angle from above and along the side wall into the rear catch. 2. Swing the rail on the front catch above the bolts towards the wall.
-
Page 46: Steam Generation System
Cleaning and care 3. Insert the rail into the front catch. Steam generation system CAUTION! Wipe the steam generator dry after each use . Soak up water with a sponge. Remove any lime residue with water and vinegar. CAUTION! Chemical de-scaling agents can damage the oven's surface enamel. Please follow the man- ufacturer's instructions exactly! Water Drawer and Steam Generator 1. -
Page 47: Oven Door
Cleaning and care 1. Take out the side rails on the left. 2. Unscrew the metal frame using a cross- tip screwdriver. 3. Take off the metal frame and seal and clean. 4. If necessary: Replace bulb with a 25 Watt, 230 V, 300°C heat-resistant oven light bulb. -
Page 48: If Something Is Wrong
If something is wrong… Removing the oven door from its hinges 1. Open the oven door as far as it will go. 2. Fold back the clamping levers on both door hinges completely . 3. Take hold of the oven door on the sides with both hands and close it about 3/4 of the way going through the point of resistance... -
Page 49: Installation Instructions
Problem Possible cause Remedy The clock has not been set Set the current time on the clock The required settings have not Check the settings been made The oven's automatic switch-off See Automatic switch-off has been triggered The child safety device is activated. Switching off the child safety de- vice The house wiring fuse (in the fuse Check fuse. -
Page 50: Safety Instructions For The Installer
Safety instructions for the installer • The set-up of the electrical installation is arranged so that the appliance can be isolated from the mains with a minimum 3mm all-pole contact separation. Suitable separation devices include e. g. cut-outs, fuses (screw fuses are to be taken out of the holder), RCD's and contactors. - Page 51 380-383 min. min.
- Page 52 380-383 min. 560 min.
- Page 53 2x3,5x25...
-
Page 54: Disposal
Disposal Disposal The symbol on the product or on its packaging indicates that this product may not be treated as household waste. Instead it should be taken to the appropriate collection point for the recycling of electrical and electronic equipment. By ensuring this product is disposed of correctly, you will help prevent potential negative consequences for the environment and human health, which could otherwise be caused by inappropriate waste handling of this product. - Page 56 To buy accessories, consumables and spare parts at our online shop please visit: www.aeg-electrolux.co.uk...
Need help?
Do you have a question about the KB9820E and is the answer not in the manual?
Questions and answers