Table of Contents
Advertisement
Advertisement
Table of Contents

Related Manuals for AEG Electrolux COMPETENCE B5741-4


Summary of Contents for AEG Electrolux COMPETENCE B5741-4
- Page 1 COMPETENCE B5741-4 Built-In Electric Oven User information...
-
Page 2: Dear Customer
Dear Customer, Please read this user information carefully and keep it to refer to later. Please pass the user information on to any future owner of the appli- ance. The following symbols are used in the text: Safety instructions Warning! Information that affects your personal safety. Important! Information that prevents damage to the appliance. -
Page 3: Table Of Contents
Contents Operating Instructions ........Safety instructions. - Page 4 Cleaning and care ..........41 Outside of the appliance.
-
Page 5: Operating Instructions
Operating Instructions 1 Safety instructions This appliance conforms with the following EU Directives: – 73/23/EEC dated 19.02.1973 Low Voltage Directive – 89/336/EEC dated 03.05.1989 EMC Directive inclusive of Amending Directive 92/31/EEC – 93/68/EEC dated 22.07.1993 CE Marking Directive Electrical safety •... -
Page 6: Disposal
How to avoid damage to the appliance • Do not line the oven with aluminium foil and do not place baking trays, pots, etc. on the oven floor, as the heat that builds up will dam- age the oven enamel. •... -
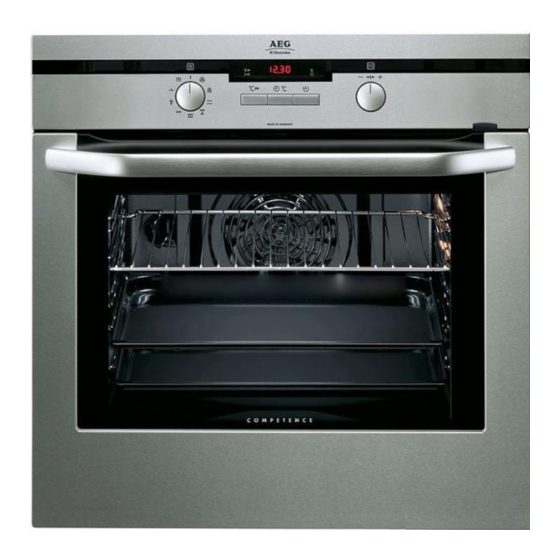
Page 7: Description Of The Appliance
Description of the Appliance General Overview Control panel Door handle Full glass door... -
Page 8: Control Panel
Control Panel Oven power indicator Oven power indicator Temperature / Time Display Oven Functions Temperature/Time selection Function buttons Oven Features Top heat and heating elements Oven lighting Shelf positions Fan heating element Bottom heat Oven shelf runners, removable... -
Page 9: Oven Accessories
Oven Accessories Shelf For dishes, cake tins, items for roasting and grilling. Roasting Pan For baking and roasting or as a pan for collecting fat. Grill pan with handle Support for the grill tray as a col- lecting vessel for fat. Grill tray Insert for the grill pan for grilling smaller amounts of food. -
Page 10: Before Using For The First Time
Before using for the first time Setting and changing the current time The oven only operates when the time has been set. When the appliance has been con- nected to the electrical supply or when there has been a power cut, the function indicator Time flashes automatically. -
Page 11: Initial Cleaning
Initial cleaning Clean the oven before using it for the first time. Important: Do not use caustic or abrasive cleaning agents! These can damage the oven surfaces. For the metal surfaces, use commercially available cleaning agents. 1. Open the oven door. The oven light is lit. -
Page 12: Operating The Oven
Operating the Oven The oven is equipped with retractable buttons for “Oven functions” and “Temperature selection”. To use, press the relevant button. The button then pops out. Switching the Oven On and Off Oven power indicator Temperature / Time Oven power indicator Display Heat indicator Speedcook... -
Page 13: Switching The Oven Off
Changing the oven temperature Use the control knob to raise or lower the temperature. The setting changes in steps of 5 °C. Switching the oven off To turn the oven off, turn the oven functions dial to the OFF position. Cooling fan The fan switches on automatically in order to keep the appliance’s sur- faces cool. -
Page 14: Speedcook
Fast heat indicator When the fast heat function has been switched on the bars that flash one after the other indi- cate that fast heat is operating. In addition the bars next to the symbol light up. Residual heat indicator When the oven has been switched off, the bars that are still lit indicate the remaining residual heat in the... -
Page 15: Oven Functions
Oven Functions The oven has the following functions: Heating element/ Oven function Full Width Dual For grilling flat food items in Grill, top heat Grill large quantities and for toasting. Single Economy For grilling flat food items ar- Grill Grill ranged in the middle of the grill and for toasting. -
Page 16: Inserting The Oven Shelf And The Roasting Pan
Inserting the Oven Shelf and the Roasting Pan Shelf runner safety and anti-tip device As a shelf runner safety device all insertable components have a small curved indentation at the bottom on the right and left-hand edge. Always insert insertable components so that this indentation is at the back of the oven interior. -
Page 17: Attaching/Removing The Grill Pan Handle
Attaching/Removing the Grill Pan Handle The handle is particularly useful for removing the grill pan and tray more easily from the hot oven. Attaching the handle Insert the handle at an angle from above into the recess in the side of the grill pan (1) press and hold the release button, lift the handle gen- tly and then lower it (2) let go of... -
Page 18: Clock Functions
Clock Functions Temperature / Time Display Clock function lights Selector Button Change display Cook time To set how long the oven is to be in use. End time To set when the oven is to switch off again. Countdown To set a countdown. A signal sounds after the time has elapsed. This function does not affect the operation of the oven. - Page 19 How to use the clock functions • After a clock function has been selected, the corresponding function indicator flashes for about 5 seconds. During this period, the desired times can be set or modified using the dial. • When the desired time has been set, the function indicator continues to flash for approx.
- Page 20 Countdown 1. Press the Select button repeated- ly until the function indicator Countdown flashes. 2. Using the control knob set the desired countdown (max. 99.00minutes). The function Countdown indicator lights up. When 90% of the time set has elapsed, an audible signal sounds. When the time has elapsed, “00.00”...
- Page 21 Cook time 1. Select the oven function and tem- perature. 2. Press the Select button repeated- ly until the function indicator Cook time flashes. 3. Using the control knob set the desired cooking time (max. 09.59hours). The Cook time function indicator lights up and the oven comes on immediately.
- Page 22 End time 1. Select the oven function and temperature. 2. Press the Select button repeated- ly until the End time function indi- cator flashes. 3. Using the control knob set the desired switch-off time. The End time function indicator lights up and the oven comes on immediately.
- Page 23 Cook time and End time combined Cook time and End time can be used simultaneously, if the oven is to be switched on and off automatically at a later time. 1. Select the oven function and temperature. 2. Using the Cook time function, set the time that the dish needs to cook.
-
Page 24: Other Functions
Other Functions Switching off the display You can save energy by switching off the clock display. Switching off the clock display 1. Turn the control knob to the right and hold it. 2. In addition press the Select but- ton until the display goes out. As soon as the appliance is switched on again, the display comes on au- tomatically. -
Page 25: Oven Safety Cut-Out
Deactivating the child safety device 1. Turn the dial to the left and hold it. 2. In addition press and hold the Select button, until “SAFE” disappears from the display. The child safety device is now deactivated and the oven is again ready for use. -
Page 26: Usage, Tables And Tips
Usage, Tables and Tips Baking Oven function: Ventitherm ® Precision Fan Cooking or Conven- tional Cooking Baking tins • For Conventional Cooking dark metal and non-stick tins are suita- ble. • For Ventitherm ® Precision Fan Cooking bright metal tins are also suitable. - Page 27 General Instructions • Insert the tray with the bevel at the front. • With Conventional Cooking or Ventitherm ® Precision Fan Cooking you can also bake with two tins next to one another on the oven shelf at the same time. This does not significantly in- crease baking time.
-
Page 28: Baking Tables
Baking Tables Time Tempera- Cakes, Shelf- Oven functions ture Biscuits, Bread, Pies position Hr. : Min. ºC Using cake tins Cakes in Pound Cake tins Pizza Setting 150-160 1:00-1:10 Sandcakes/ Pizza Setting 150-160 1:15-1:30 Cakes in loaf tins Madeira cake Pizza Setting 150-160 1:00-1:10... - Page 29 Time Tempera- Cakes, Shelf- Oven functions ture Biscuits, Bread, Pies position Hr. : Min. ºC Apple strudel Pizza Setting 170-180 0:30-0:50 Conventional Choux pastry buns 200-210 0:20-0:35 Cooking Buns / cup cakes Pizza Setting 150-160 0:25-0:35 Conventional 190-210 Cooking Scones Pizza Setting 0:10-0:15 Conventional...
- Page 30 Baking on more than one oven level Ventitherm Pizza ® Precision Setting Fan Cooking Time Type of baking Hours: Mins. Shelf positions from Tempe- bottom rature in °C 2 levels 3 levels Cakes/pastries/biscuits on baking trays Cream puffs/Eclairs 1 / 4 160-180 0:35-0:60 Dry streusel cake...
-
Page 31: Tips On Baking
Tips on Baking Baking results Possible cause Remedy The cake is not Wrong shelf level Place cake on a lower shelf browned enough at the bottom The cake sinks (be- Oven temperature too high Use a slightly lower tempera- comes soggy, lumpy, ture setting streaky) Baking time too short... -
Page 32: Table: Desserts
Table: Desserts Ventitherm ® Precision Time Fan Cooking Desserts Shelf Tempera- Hr. : Min. position ture °C Apple pie 180-190 0:45-050 Rice pudding 130-140 2:00-2:30 Fruit crumble 0:50-1:10 Pineapple upside down cake 0:35-0:45 Pavlova 1:00-1:10 Baked custard 150-160 0:45-1:00 Baked apples 160-170 0:40-1:00 Bread and butter pudding... -
Page 33: Frozen Ready Meals Table
Frozen Ready Meals Table Food to be Shelf Temperature Oven function Time cooked position °C as per manu- as per manu- Conventional Frozen pizza facturer’s in- facturer’s in- Cooking structions structions as per manu- Chips Rotitherm 200-220 facturer’s in- (300-600 g) Roasting structions as per manu-... -
Page 34: Roasting
Roasting Oven function: Ventitherm ® Precision Fan Cooking , Conven- tional Cooking or Rotitherm Roasting Roasting dishes • Any heat-resistant ovenware is suitable for roasting. (Please read the manufacturer's instructions.) • Large roasting joints can be cooked directly in the tray or on the shelf with the tray placed below •... -
Page 35: Table: Meat, Roasting, Casseroles
Table: Meat, roasting, casseroles Tempera- Time Shelf Meat Oven functions ture position °C Hr. : Min. Pork Shoulder; leg; rolled; Rotitherm 170-180 0:30-0:35 boned spare rib; Roasting per 450 g/1 lb loin of pork plus 30-35 mins Beef Inexpensive cuts Rotitherm 160-170 0:35-0:40... -
Page 36: Table: Roasting, Casseroles, Au Gratin
Table: Roasting, casseroles, au gratin Tempera- Time Poultry, Game, Quantity Oven function Shelf ture Fish, Vegetables approx. position °C Hr. : Min. Casseroles, miscellaneous Casseroles 1 kg/2 lbs Ventitherm 2:30-3:00 ® Precision Fan Cookin 1 kg/2 lbs Conven- 160-170 tional Cooking Lancashire 1 kg/2 lbs... - Page 37 Tempera- Time Poultry, Game, Quantity Oven function Shelf ture Fish, Vegetables approx. position °C Hr. : Min. Fisch (baked, steamed) Whole fish 1-1.5 kg/ Conven- 210-220 0:45-1:15 2-3 lbs tional Cooking Fish pies, bakes 750 g-1 kg/ Rotitherm 180-200 0:30-1:00 1.5-2 lbs Roasting Vegetables...
-
Page 38: Grill Sizes
Grill sizes Oven function: Single Economy Grill or Full Width Dual Grill with maximum temperature setting Important: Always grill with the oven door closed. The empty oven should always be pre-heated with the grill functions for 5 minutes. • For grilling, place the shelf in the recommended shelf position. •... -
Page 39: Defrosting
Defrosting Oven function: Fan Controlled Defrosting (no temperature set- ting) • Unpack the food and place it on a plate on the oven shelf. • Do not cover with a plate or bowl, as these can substantially lengthen the defrosting time. •... -
Page 40: Making Preserves
Making preserves Oven function: Pizza Setting • For preserving, use only commercially available preserve jars of the same size. • Jars with twist-off or bayonet type lids and metal tins are not suitable. • When making preserves, use the first shelf position from the bot- tom. -
Page 41: Cleaning And Care
Cleaning and care Warning: For cleaning, the appliance must be switched off and cooled down. Warning: For safety reasons, do not clean the appliance with steam jet or high-pressure cleaning equipment. Important: Do not use any abrasive cleaners, sharp scrapers or abrasive items. -
Page 42: Pyrolytic Cleaning
Pyrolytic cleaning Warning: The oven gets very hot during this process. Keep small chil- dren away. Important! All removable parts including the side rails must be re- moved from the oven before using the pyroluxe function. If you use the oven shelf runners that are available as special accesso- ries, these must be removed before pyrolytic cleaning. -
Page 43: Shelf Support Rails
Shelf Support Rails The shelf support rails on the left and right hand sides of the oven can be removed for cleaning the side walls. Removing the shelf support rails First pull the front of the rail away from the oven wall (1) and then un- hook at the back (2). -
Page 44: Oven Lighting
Oven Lighting Warning: There is a danger of electric shock! Prior to changing the oven light bulb: – Switch off the oven! – Disconnect from the electricity supply. Place a cloth on the oven floor to protect the oven light and glass cov- Replacing the oven light bulb/ cleaning the glass cover 1. -
Page 45: Oven Door
Oven door For easier cleaning of the oven interior the oven door of your appliance can be taken off its hinges. Removing the oven door from its hinges 1. Open the oven door as far as it will 2. Undo the clamping levers (A) on both door hinges fully. - Page 46 Hanging the oven door back on its hinges 1. From the handle side take hold of the oven door with a hand on each side and hold at an angle of approx. 45°. Position the recesses on the bottom of the oven door on the hinges on the oven.
-
Page 47: Oven Door Glass
Oven door glass The oven door is fitted with four panels of glass mounted one behind the other. The inner panels can be removed for cleaning. Important Rough handling, especially around the edges of the front panel, can cause the glass to break. Removing door glass panels 1. - Page 48 5. Take hold of the door glass panels on their upper edge one after the other and take them out of the guide by pulling them upwards. Cleaning the door glass panels Clean the door glass panels thoroughly with a solution of water and washing up liquid.
- Page 49 On the open side of the door trim (B) there is a guide bar (C). This must be pushed between the outer door panel and the guide corner (D). The clip seal (E) must be snapped in. 3. Open the oven door as far as it will 4.
-
Page 50: What To Do If
What to do if … Problem Possible cause Remedy The oven does not heat up The oven is not switched Switch the oven on The clock has not been set Set the current time on the clock The required settings have Check the settings not been set The oven’s safety cut-out... - Page 51 If the appliance has been operated incorrectly, the visit from the service technician or dealer may not take place free of charge, even during the warranty period. Advice on cookers with metal fronts: Because of the cooler surface at the front of the cooker, opening the oven door during (or just after) baking or roasting may cause the glass to steam up.
-
Page 52: Electrical Connection
Electrical Connection The oven is designed to be connected to 230-240V~(50Hz) electricity supply. The oven has an easily accessible terminal block which is marked as follows: Letter L Live terminal Letter N Neutral terminal Earth terminal This oven must be earthed! The cable used to connect the oven to the electrical supply must comply to the specifications given below. -
Page 53: Installation Instructions
Installation Instructions Attention: The new appliance may only be installed and connected by a registered expert. Please comply with this. If you do not, any damage resulting is not cov- ered by the warranty. Safety information for the installer • The electrical installation is to be set up so that the appliance can be isolated from the mains with a minimum 3mm all-pole contact sepa- ration. -
Page 56: Guarantee/Customer Service
Guarantee/Customer Service Great Britain Standard guarantee conditions We, AEG, undertake that if within 12 months of the date of the purchase this AEG appliance or any part thereof is proved to be defective by reason only of faulty workmanship or materials, we will, at our discretion repair or replace the same FREE OF CHARGE for labour, materials or carriage on condition that: •... -
Page 57: European Guarantee
European Guarantee This appliance is guaranteed by Electrolux in each of the countries listed at the back of this user manual, for the period specified in the appliance guarantee or otherwise by law. If you move from one of these countries to another of the countries listed below the appliance guarantee will move with you subject to the following qualifications:- •... - Page 58 H-1142 Budapest XIV, Magyarország +36 1 252 1773 Erzsébet királyné útja 87 Vennootsweg 1, 2404 CG - Nederland +31 17 24 68 300 Alphen aan den Rijn Norge +47 81 5 30 222 Risløkkvn. 2 , 0508 Oslo Österreich +43 18 66 400 Herziggasse 9, 1230 Wien Polska +48 22 43 47 300...
-
Page 59: Service And Spare Parts
Service and Spare Parts If the event of your appliance requiring service, or if you wish to pur- chase spare parts, please contact Service Force by telephoning: 0870 5 929 929 Your telephone call will be automatically routed to the Service Force Centre covering your post code area. - Page 60 www.electrolux.com www.aeg-electrolux.co.uk 822 926 921-B-140706-02 Subject to change without notice...
Need help?
Do you have a question about the COMPETENCE B5741-4 and is the answer not in the manual?
Questions and answers