Table of Contents
Advertisement
Quick Links
Advertisement
Table of Contents

Subscribe to Our Youtube Channel
Related Manuals for AEG Electrolux KB9810E


Summary of Contents for AEG Electrolux KB9810E
- Page 1 KB9810E User manual Electric built-in oven...
-
Page 2: Table Of Contents
Contents Thank you for choosing one of our high-quality products. To ensure optimal and regular performance of your appliance please read this instruction manual carefully. It will enable you to navigate all processes perfectly and most efficiently. To refer to this manual any time you need to, we recommend you to keep it in a safe place. -
Page 3: Electrical Safety
Safety information Read carefully and keep for future use! Electrical safety • This appliance must only be connected by a qualified installation engineer . • In the event of a fault or damage to the appliance: Take the fuses out or switch off. •... -
Page 4: How To Avoid Damage To The Appliance
Safety information • Do not leave the appliance unattended, if food is being heated or cooked in disposable containers made of plastic, paper or other flammable materials. • If smoke appears, keep the appliance closed. Switch off the appliance and disconnect from the power supply. -
Page 5: Do Not Use The Appliance
Safety information • Do not put any strain on the oven door when open. • Never pour water directly into the oven when it is hot. This could cause damage to and discoloration of the enamel. • Rough handling, especially around the edges of the front panel, can cause the glass to break. -
Page 6: Description Of Product
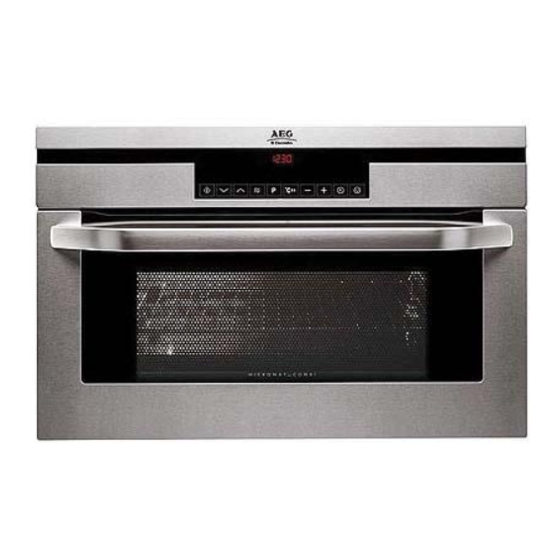
Description of product Description of product General view Control Panel Door handle Full glass door Control panel Oven displays... -
Page 7: Oven Layout
Description of product Oven functions buttons Oven layout Grill element Microwave generator Light in the oven Rear heating panel Oven lighting Glass base, removable Side rails, removable Oven shelf levels Accessories Oven Oven shelf For cookware, cake tins, roasts and grilling food. -
Page 8: Before Using For The First Time
Before using for the first time Baking tray For cakes and biscuits. (not suitable for microwave mode) Before using for the first time Setting and changing the time The oven only operates when the time has been set. When the appliance has been connected to the electrical supply or when there has been a power cut, the symbol for the time automatically... -
Page 9: Cleaning For The First Time
Before using for the first time Cleaning for the first time Before you use the oven for the first time, you should clean it thoroughly. Do not use any sharp or abrasive cleaning tools or materials! These could damage the surface. -
Page 10: Operating The Oven
Operating the oven Operating the oven The electronic oven controls The display field Memory: P / Test: d Microwave function Temperature/Time/Microwave Power Weight display Time functions Length of operation Thermometer symbol Baking/Roasting Programmes Oven functions The control panel Start button... - Page 11 Operating the oven Microwave button Fast Warm Up Stop button / Restore settings Clock functions Selector buttons Baking/Roasting Programmes Oven functions General instructions • Always confirm the selected function with the Start button . If the selected function is not started within 30 seconds, the appliance switches itself off. •...
-
Page 12: Oven Functions
Operating the oven Thermometer symbol • The slowly rising thermometer symbol indicates how far the oven has heated up. • The three segments of the thermometer symbol flashing one after the other show that Fast Warm Up is on. Switching the oven off To switch the oven off, press the Stop button repeatedly until only the time and any residual... - Page 13 Operating the oven For the style of heating for the oven function(s), the Microwave function can be switched on The dishes are cooked in the shortest time and browned at the same time. Microwave Quick Start Quick Start of the maximum microwave power when the appliance is switched off using the Start button Operating time from 30 seconds to 7 minutes.
- Page 14 Operating the oven – While the time counts down, using the clock functions buttons the cooking time can be increased reduced. When the time has elapsed, a signal sounds for 2 minutes. The microwave switches it- self off. The symbol for Cook Time flashes and the time display appears.
- Page 15 Operating the oven 6. When the Start button is pressed, the time set begins to count down. Oven and microwave are on. The symbol for Cook Time lights up. – While the time counts down, the power can be changed using the Microwave button.
-
Page 16: Inserting The Oven Shelf And Baking Tray
Operating the oven When the time has elapsed, a signal sounds for 2 minutes. The appliance switches itself off. The symbol for Cook Time flashes and the time dis- play appears. To turn off the signal: Press any button. Information on power settings The overview indicates at which power setting certain processes can be performed. -
Page 17: Additional Functions
Operating the oven Baking tray : Push the baking tray between the guide bars of the selected oven level. Oven shelf : Insert the oven shelf so that the feet point down- wards. Push the oven shelf between the guide bars of the selected oven level. - Page 18 Operating the oven 3. By pressing the button , the weight display can be adapted to the weight of the food, minimum 100 g, max- imum 1,500 g (P 5 to P12 maximum 1,000 – Inputting the weight automatically controls the length of time the micro- wave operates.
-
Page 19: Clock Functions
Operating the oven 2. Press and hold the Baking/Roasting Pro- grammes button for approx 2 seconds until a signal sounds. The setting is saved. 3. Continue by pressing the Start button or switch the appliance off using the Stop button To save another setting, press the Baking/ Roasting Programmes button for approx. - Page 20 Operating the oven Time Cook Time/End Time/Operating Time Clock functions Selector buttons Countdown To set a countdown. When it has counted down, a signal sounds. This function has no effect on the operation of the microwave and oven. Microwave Cook Time min.
- Page 21 Operating the oven 2. Using the button, set the desired Countdown (max. 99.00 minutes). After approx. 5 seconds the display shows the time remaining. The symbol for Countdown lights When the time has elapsed, a signal sounds for 2 minutes. "0.00" lights up and the symbol for Countdown flashes.
- Page 22 Operating the oven 2. Using the button set the desired cooking time. The symbol for Cook Time flashes. 3. When the Start button is pressed, the time set begins to count down. The symbol for Cook Time lights up. By repeatedly pressing the clock functions button the current time can be found out.
- Page 23 Operating the oven 3. Using the button set the desired cooking time. 4. When the Start button is pressed, the time set begins to count down. The symbol for Cook Time lights up. By repeatedly pressing the clock functions button the current time can be found out.
- Page 24 Operating the oven 3. Using the button, set the desired switch-off time. The symbols for End Time and Cook Time light up. The oven switches itself on automatically. By repeatedly pressing the clock functions button the current time can be found out. When the time has elapsed, a signal sounds for 2 minutes.
-
Page 25: Other Functions
Operating the oven 3. Using the End Time function , set the time at which the dish is to be ready, e. g. at 14:05. The symbols for Cook Time and End Time light up. The oven switches itself on automatically at the time calculated, e. -
Page 26: Usage, Tables And Tips
Usage, tables and tips Switching on the child safety device 1. Switch off the appliance using the Stop button, if necessary. An oven function must not be selected. 2. Press and hold the Baking/Roasting Pro- gramme buttons at the same time, until SAFE appears in the display. - Page 27 Usage, tables and tips • Light coloured metal baking tins are suitable for fan oven cooking with ring heating element Oven levels • Using the fan oven with ring heating element , you can bake on up to two baking trays at the same time: 1 baking tray: e.g.
- Page 28 Usage, tables and tips • Extend the baking time by 10-15 minutes if you are baking cakes on baking trays or in tins on more than one level. • Moist cakes and pastries, such as fruit flans or pizzas, are baked on one level. •...
- Page 29 Usage, tables and tips Baking on one oven level Type of baking Fan oven with ring heating element Shelf position Temperature °C Time in hrs: mins. Fruit flan made with shortcrust pastry 170-190 0:40-1:20 Yeast cakes with delicate toppings (e.g. curd 150-170 0:40-1:20 cheese, cream, vanilla cream)
- Page 30 Usage, tables and tips Baking on more than one oven level Type of baking Fan oven with ring heating ele- Temperature Time in hrs: in °C Min. ment Oven level from the bottom 2 levels Puff pastries 2 / 4 0:30-0:50 180-200 1) Pre-heat oven.
-
Page 31: Roasting
Usage, tables and tips Type of dish Fan oven with ring heating element Shelf position Temperature °C Time in hrs: Min. Stuffed vegetables 160-170 0:30-1:00 1) Pre-heat oven Frozen ready meals chart Food to be Oven function Shelf po- Temperature °C Time cooked sition... -
Page 32: Roasting Table
Usage, tables and tips Roasting Table Food to be roasted Fan oven with ring heating element Shelf position Temperature °C Time in hrs: mins. Pork shoulder, neck, ham joint (1,000-1,500g) 170-190 1:30-2:00 Chops,smoked loin of pork (1,000-1,500g) 1 180-200 1:00-1:30 Meat loaf (750-1,000 g) 180-200 0:45-1:00... -
Page 33: Single Economy Grill
Usage, tables and tips Food to be roasted Fan oven with ring heating element Shelf position Temperature °C Time in hrs: mins. Leg of venison (1,500-2,000 g) 200-210 1:30-2:15 1) Pre-heat oven Single Economy Grill Oven function: Single economy grill with maximum temperature setting Always grill with the oven door closed. -
Page 34: Defrosting
Usage, tables and tips Type of dish Temperature in °C Tray Oven Grilling turn after… shelf time in minutes. minutes Shelf position Rissoles 14-18 Pork fillet 16-22 6-10 Grilled sausages 14-18 Fillet steaks, veal steaks 11-13 Fillet of beef, roast beef (ap- 20-24 10-12 prox. -
Page 35: Making Preserves
Usage, tables and tips Food to be dried Temperature in °C Oven level Time in hours (guide- line) Vegetables Beans 2 / 4 Peppers (slices) 2 / 4 Vegetables for soup 2 / 4 Mushrooms 2 / 4 Herbs 40-50 2 / 4 Fruit Plums... -
Page 36: Microwave
Usage, tables and tips Temperature in Cooking time until Continue to cook at Preserves °C simmering in minutes. 100°C (in minutes). Mixed pickles 160-170 50-60 Turnips, peas, asparagus 160-170 50-60 15-20 1) The times and temperatures for making preserves are for guideline purposes only. 2) Leave standing in the oven after switching off Microwave Information about operation... - Page 37 Usage, tables and tips Suitable cookware and materials Cookware/Material Microwave Single economy Defrosting Heating Cooking grill oven Ovenproof glass and porcelain (with no met- al components, e. g. Pyrex, heatproof glass) Non-ovenproof glass and porcelain Glass and glass ceramic made of ovenproof/ frostproof material (e.
- Page 38 Usage, tables and tips Microwave Cooking Table Defrosting Dish Microwave Size (g) Power Cook Standing Things to note (Watts) time time (min.) min. Meat Whole cuts of meat 10-12 10-15 Turn halfway through Steak 5-10 Turn halfway through; remove defrosted parts Mixed minced meat 10-15...
- Page 39 Usage, tables and tips Defrosting Dish Microwave Size (g) Power Cook Standing Things to note (Watts) time time (min.) min. Cheese 30-60 Remove aluminium parts, turn halfway through Cream 7-12 20-30 Remove aluminium top, stir halfway through Cakes/pastries Yeast dough 1 piece 15-20 Turn plate halfway...
- Page 40 Usage, tables and tips Defrosting Dish Microwave Size (g) Power Cook Standing Things to note (Watts) time time (min.) min. Convenience food 400-500 Remove any alumini- um lids, turn halfway through Frozen ready meals 400-500 14-20 Remove any alumini- um lids, turn halfway through Milk 1 cup ap-...
- Page 41 Usage, tables and tips Cooking Dish Microwave Size (g) Power Cook Standing Things to note (Watts) time time (min.) min. Rice 300 g + 1000 Cook covered, stir half- 600 ml way through 1) Cook all vegetables with a cover on the container. The times given are guidelines only and depend upon the type and qualities of the foodstuffs.
- Page 42 Usage, tables and tips Type of dish Baking/ Oven Temp. Micro- Shelf Time in Remarks roasting function in °C wave posi- min. dishes Watt tion Leg of lamb Glassware on 30-40 5 min. standing with bone rack time 1,000g Leg of lamb, Glassware on 30-40 5 min.
-
Page 43: Programmes
Usage, tables and tips Dish Power Oven Oven Cook Standing Note (Watts) func- level Time time (min.) tions min. Egg custard Glass 30-40 Turn dish once after half (12.3.1) base the time has elapsed Sponge mix Glass 8-10 (12.3.2) base Cooking meat Glass 20-22... - Page 44 Usage, tables and tips Pro- Func- Recipe weight Time ac- Keep gramme tion cording Warm Preset- min. max. to preset- function ting ting "HH" Boiling Frozen 800 g 100 g 1,000 g 15 min. Vegetables, 44 sec- small + 50 onds, ml water Frozen...
-
Page 45: Cleaning And Care
Cleaning and care • 1/2 tablespoon thyme • 1 clove of garlic, peeled • Salt, pepper, nutmeg Preparation: Peel potatoes, cut into approx. 3 mm thick slices, dry and then season with salt and pepper. Place half of the potato slices in a greased, oven-proof dish. Sprinkle some grated cheese over them. -
Page 46: The Outside Of The Appliance
Cleaning and care The outside of the appliance • Wipe down the front of the appliance with a soft cloth and a solution of hot water and washing-up liquid. • For metal fronts, use normal commercially available cleaning agents. • Please do not use any scouring agents or abrasive sponges. Oven interior Clean the oven after every use. -
Page 47: Oven Lighting
If something is wrong… Replacing the side rails To insert rails, re-insert them into the mounts and lower them. Oven lighting WARNING! Risk of electric shock! Before replacing the oven light bulb: • Switching the oven off! • Take the fuses out of the fuse box or switch off. To protect the oven light bulb and the glass cover, lay a cloth on the floor of the oven. -
Page 48: Installation Instructions
Problem Possible cause Remedy The required settings have not Check the settings been made The oven's automatic switch-off See Automatic switch-off has been triggered The child safety device is activated. Switching off the child safety de- vice The fuse in the house's electrical Check fuse. -
Page 49: Safety Instructions For The Installer
Safety instructions for the installer • The set-up of the electrical installation is arranged so that the appliance can be isolated from the mains with a minimum 3mm all-pole contact separation. Suitable separation devices include e. g. cut-outs, fuses (screw fuses are to be taken out of the holder), RCD's and contactors. - Page 50 380-383 min. min.
- Page 51 380-383 min. 560 min.
- Page 52 2x3,5x25...
-
Page 53: Disposal
Disposal Disposal The symbol on the product or on its packaging indicates that this product may not be treated as household waste. Instead it should be taken to the appropriate collection point for the recycling of electrical and electronic equipment. By ensuring this product is disposed of correctly, you will help prevent potential negative consequences for the environment and human health, which could otherwise be caused by inappropriate waste handling of this product. -
Page 54: Guarantee/Customer Service
Guarantee/Customer Service Guarantee/Customer Service GREAT BRITAIN & IRELAND Standard guarantee conditions We, Electrolux, undertake that if within 12 months of the date of the purchase this Elec- trolux appliance or any part thereof is proved to be defective by reason only of faulty workmanship or materials, we will, at our option repair or replace the same FREE OF CHARGE for labour, materials or carriage on condition that: •... -
Page 55: European Guarantee
European Guarantee Tel: (Calls may be recorded for training purposes) Electrolux 08705 950 950 AEG-Electrolux 08705 350 350 Zanussi-Electrolux 08705 727 727 For Customer Service in The Republic of Ireland please contact us at the address below: Electrolux Group (Irl) Ltd, Long Mile Road, Dublin 12, Republic of Ireland Tel: +353 (0)1 4090751, Email: service.eid@electrolux.ie European Guarantee This appliance is guaranteed by Electrolux in each of the countries listed at the back of this... - Page 56 www.electrolux.com Eesti +37 2 66 50 030 Pärnu mnt. 153, 11624 Tallinn España +34 902 11 63 88 Carretera M-300, Km. 29,900 Alcalá de Henares Madrid France 08 44 62 26 53 www.electrolux.fr Great Britain +44 8705 929 929 Addington Way, Luton, Bed- fordshire LU4 9QQ Hellas +30 23 10 56 19 70...
- Page 57 Suomi www.electrolux.fi Sverige +46 (0)771 76 76 76 Electrolux Service, S:t Görans- gatan 143, S-105 45 Stockholm Türkiye +90 21 22 93 10 25 Tarlabaşı caddesi no : 35 Taksim İstanbul Россия +7 495 937 7837 129090 Москва, Олимпийский проспект, 16, БЦ...
- Page 60 www.electrolux.com To buy accessories, consumables and spare parts at our online shop please visit: www.aeg-electrolux.co.uk...
Need help?
Do you have a question about the KB9810E and is the answer not in the manual?
Questions and answers