Table of Contents
Advertisement
Quick Links
Advertisement
Chapters
Table of Contents

Related Manuals for Genicom LA36


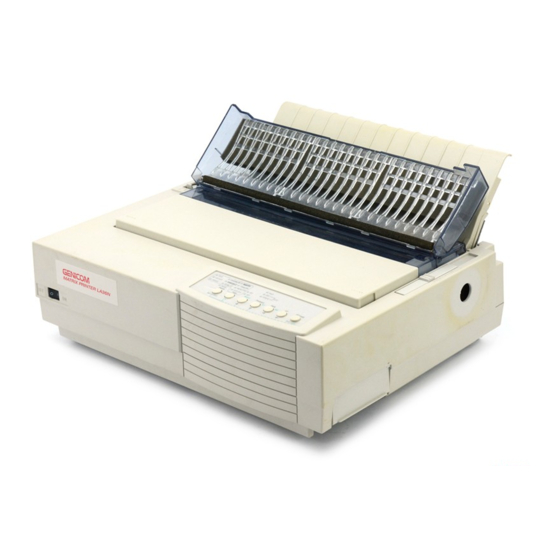
Summary of Contents for Genicom LA36
-
Page 1: User Manual
GENICOM Matrix Printer LA36 User Manual GENICOM Corporation... -
Page 2: Fcc Compliance Statement
FCC Compliance Statement This device complies with Part 15 of the FCC Rules. Operation is subject to the following two conditions: (1) This device may not cause harmful interference, and (2) This device must accept any interference received, including interference that may cause undesired operation. -
Page 3: Notice To Canadian Users
Notice to Canadian Users This digital apparatus does not exceed the class B limits for radio noise emissions from digital apparatus set out in the Radio Interference Regulations of the Canadian Department of Communications. This equipment is in the 2nd class category (information equipment to be used in a residential area or an adjacent area thereto) and conforms to the standards set by the Voluntary Control Council for Interference by Information Technology Equipment aimed at preventing radio interference in such residential area. -
Page 4: Table Of Contents
Features ... 1-1 Options ... 1-2 2. Paper Handling ... 2-1 Getting to Know the Printer’s Major Parts and the Control Panel ... 2-01 Parts of the Printer ... 2-02 Operations of the Control Panel ... 2-04 Basic States of the Printer ... 2-04 Control Panel Operations ... - Page 5 Switching from Single Sheets to Continuous Forms (Push-Feed Mode) ... 2-30 Switching between Push-Feed and Pull-Feed ... 2-31 To Reinstall the Tractor Unit for Push-Tractor Feed ... 2-31 Tips on Paper Handling ... 2-32 General Tips ... 2-32 Multipart Forms ... 2-32 Envelopes ...
- Page 6 Set-Up Mode Quick Reference ... 4-34 5. Maintenance ... 5-1 Cleaning ... 5-1 Cleaning and Vacuuming the Printer ... 5-1 Cleaning the Platen and Paper Bail Rollers ... 5-2 Cleaning the Print Head ... 5-3 Replacing the Ribbon Cartridge ... 5-3 Replacing the Print Head ...
- Page 7 A. Supplies and Options ... A-1 Supplies ... A-1 Options ... A-1 Installing Options ... A-2 Installing the Color Kit ... A-2 B. Printer and Paper Specifications ... B-1 Physical Specifications ... B-1 Functional Specifications ... B-2 Performance Specifications ... B-4 Paper Specifications ... B-5 Print Area ...
- Page 8 Miscellaneous ... C-26 Epson ESC/P2 Quick Reference Guide ... C-27 Print Mode Control ... C-27 Horizontal Control ... C-28 Vertical Control ... C-29 Tabulation ... C-29 Page Formatting ... C-30 Color Selection ... C-30 Character Set Control ... C-30 Select international character set ... C-31 Font Selection and Downloading ...
- Page 9 viii...
-
Page 10: Preface
About this Manual Thank you for buying a GENICOM LA36 Matrix Printer. You can expect years of reliable service with very little maintenance. The information provided in this guide applies both to the GENICOM LA36 Matrix Printer (80-column printer) and to the GENICOM LA36W Matrix printer (136-column printer). -
Page 11: Organization
The main difference between the LA36N and the LA36W is the “print span”. The LA36N is an 80-column printer and the LA36W a 136-column printer. As shown in the following figure, the physical specifications are thus different (size, weight, ...). -
Page 12: Notes, Cautions And Warnings
4 - Using Set-Up Mode This chapter describes how to change the printer’s optional settings, such as print features, hardware options, and top-of-form. Most settings only affect print features such as the type style and page format. Note that certain settings directly affect hardware and software compatibility. -
Page 14: Introduction
Congratulations on purchasing a GENICOM Matrix Printer LA36N/LA36W. This printer is a compact, versatile printer that offers maximum compatibility with today’s software packages and personal computers. The 24-wire print head provides crisp, clear printing for business, office, and home environments. This printer is also easy to install and use. -
Page 15: Options
Windows printer driver. Printer drivers for Windows 3.x, Windows 95 and Windows 98 are delivered with your printer. The printer driver is a control program to be installed on your computer for controlling document printing on your printer (for example, controlling the page size, the paper orientation, and so on). -
Page 16: Paper Handling
Getting to Know the Printer’s Major Parts and the Control Panel This section describes the major parts and controls of the printer and operations of the control panel. Take a moment to become familiar with the printer. -
Page 17: Parts Of The Printer
Paper Handling Parts of the Printer 9 9 9 9 9 8 8 8 8 8 7 7 7 7 7 6 6 6 6 6 Front and Rear Views 1 1 1 1 1 2 2 2 2 2... - Page 18 The figures on the previous page show front and rear views of the printer. The following parts are indicated: Front View Front cover (to protect the print head) Cut sheet stand (to hold printing and printed pages) Paper thickness lever (to adjust the print head gap)
-
Page 19: Operations Of The Control Panel
The printer is ready for printing The printer is receiving or printing data. The printer is not ready and holds printing data. The printer is not ready and it does not hold printing data. The printer is out of paper. -
Page 20: Control Panel Operations
TEAR Pause option is switched from AUTO to MANUAL in Set-Up mode, press FF/Load. Press FF/Load Park or turn the printer off and on again. Press Park Press Pause Press Pause Clear error and press Pause Load paper. - Page 21 *1 In Normal mode operation, all buttons except receiving or printing data. *2 Not printing includes the following situations: the printer is ready and awaiting data, or the pressed and the printer is awaiting data, or the *3 This operation is available in the rear-feeding push-tractor mode.
-
Page 22: Printer Acoustical Feedbacks
Printer Acoustical Feed-Backs Except for paper handling and when the factory setting for beep is not changed, the printer beeps in the following ways when you press a control panel button, as follows. • A short beep indicates that the printer accepts your pressing or specification. -
Page 23: Overview Of Paper Operations
Overview of Paper Operations The following levers and buttons are used in paper handling: Paper select lever 1 1 1 1 1 at the top left corner of the printer • Paper thickness lever 2 2 2 2 2 at the top right corner of the printer •... -
Page 24: Levers And Buttons Used For Paper Handling
Levers and Buttons Used for Paper Handling Lever/Button Purpose Form feed FF/LOAD Load paper Line feed Park Unload forms Enter Top-of-Form Set-Up/Quit (TOF) Adjustment mode Increase TOF value by 1/60 inch Decrease TOF value by 1/60 inch Save TOF value Exit/Save Advance forms to the Pause... -
Page 25: Adjusting For Paper Thickness
(original plus four copies). For details on paper thickness specifications, see Appendix B “Printer and Paper Specifications.” The paper thickness lever, located at the top right corner of the printer, allows you to adjust for different paper thicknesses. Be sure to adjust the paper thickness lever whenever you change the number of copies being printed. -
Page 26: Paper Thickness Lever Positions
2. If necessary, reset the paper thickness lever. (See the section, “Adjusting for Paper Thickness,” earlier in thischapter.) 3. Move the paper select lever forward. (This lever is at the top left part of the printer.) 4. Raise the cut sheet stand. Position the left paper guide in accordance with the Note below. - Page 27 0.1 inch. When the left paper guide is positioned all the way to the right, the left margin is 5 mm (0.2 inch). To help align paper, also use the inch-based ruler on the top cover 2 2 2 2 2 of the printer. The gradations on the ruler are for 10 columns per inch.
-
Page 28: Ejecting Single Sheets
It will not be active at next power-up of the printer. For permanent adjustment, see the section “Feeding and Positioning Paper” later in this chapter. 7. Place the printer in the Ready state. Print a sample page and check the page margins. Make the following adjustments, as necessary: •... -
Page 29: Using Continuous Forms
If the forms tractor unit is mounted at the rear of the printer, it pushes paper from the rear to the platen. This is called push-tractor feeding. If the forms tractor unit is mounted at the top of the printer, it pulls paper from the bottom or rear of the printer to the platen. -
Page 30: Positioning The Paper Stack
Positioning the Paper Stack Place the stack of continuous forms paper directly below the rear of the printer 1 1 1 1 1 for push, rear feed or below the bottom slot of the printer 2 for pull, bottom feed. -
Page 31: Loading Continuous Forms (Push Tractor And Rear Feed)
“Adjusting for Paper Thickness” earlier in this chapter.) 3. Move the paper select lever 1 1 1 1 1 to the rear of the printer. 4. To access the forms tractors 2, lock the cut sheet stand 3 and the back cover 4 together and raise them in the up position. - Page 32 12 mm Positioning the Tractor Using the Tractor Guide 6. Position the right forms tractor (as seen from the rear of the printer) in accordance with the Note below. Push the right locking lever down to secure the tractor. Center the middle forms support.
- Page 33 Paper Handling 8. Fit the paper feed holes onto the left and right tractor pins. Adjust the left forms tractor (as seen from the rear of the printer) to accommodate the width of the form. Close the paper holders 6.
-
Page 34: Loading Continuous Forms (Pull Tractor And Bottom Feed)
12. Press the ONLINE button to place the printer on line. Print a sample page and check the page margins. Make the following adjustments, as necessary: – Horizontal alignment. Move the forms tractors as required. – Top-of-form setting. Use the printer Set-Up mode (see Chapter 4, “Using Set-Up Mode”) or the Top-of-Form Adjustment mode (see the section, “Feeding and... - Page 35 Paper Handling 2. Pull up both ends of the tractor unit to detach the catches 1 1 1 1 1 of the tractor unit from the support studs 2. Then pull the tractor unit. 1 1 1 1 1 3. Set the cut sheet stand and the back cover to the down position. 2-20 2 2 2 2 2 Removing the Tractor Unit...
- Page 36 To load continuous forms paper: 1. Turn printer on. 2. Make sure that the bottom slot of the printer is adjusted with the slot of the desk or printer rack. 3. Set the paper thickness lever to position D (widest gap).
- Page 37 4. Open the front cover 1 1 1 1 1 , with taking care of not totally removing it. 5. Place the continuous forms paper below the table and pass the paper through the slot of the table then through the bottom slot of the printer up to the platen. Passing Continuous Forms Paper From Under the Printer 6.
- Page 38 9. Turn the platen knob 4 to adjust the print start position and turn the printer on. The horizontal embossed rib under the red cursor on the print head carriage corresponds to the base line of the characters to be printed.
-
Page 39: Unloading Continuous Forms (Push-Feed Mode)
Automatic-Tear-Off Advancing Your printer has a special “tear bar” that allows you to tear off printed pages without wasting paper. The tear bar is located on the top cover. Your printer is factory-set for automatic tear-off. When a printing job ends (including a form feed command), the bottom perforation of the last printed page is automatically positioned in front of the tear bar. - Page 40 Press on the button to position the next paper perforation in front of the tear bar. The paper is automatically retracted when the printer receives the next data. For tearing off the paper, see the next subsection “Manual Tear-Off Advancing.”...
-
Page 41: Feeding And Positioning Paper
Set the corresponding Set-Up option (FORM LENGH) according to the actual physical page length (distance between two perforations for continuous forms). This will allow the printer to know exactly where the print head is and to position it at the same position when a form feed occurs. - Page 42 ABCDEFGHIJ ··· ABCDEFGHIJ ··· ABCDEFGHIJ ··· Print Area Definition Paper Handling 2-27...
-
Page 43: Line Feed/Form Feed
Line Feed/Form Feed Use the line feed/form feed function to move paper forward. This function is valid whenever the printer is not receiving or printing data and has no fault. Pressing the advances the paper one line. Pressing the Except using the... -
Page 44: Switching Paper Types
– To reset the Top-of-Form value to 0, press the The paper moves to the edge of the page (position 0). Note: If you reach the limit of the permitted range, the printer beeps, and the paper stops moving. 4. Save the Top-of-Form value: –... -
Page 45: Switching From Continuous Forms To Single Sheets (Push-Feed Mode)
Paper Handling Switching from Continuous Forms to Single Sheets (Push-Feed Mode) To switch from continuous forms to single sheets: 1. Tear off your printed pages. 2. Retract the forms paper to the park position by pressing the indicator turns on. Caution: Retracting many pages by using the paper jams. -
Page 46: Switching Between Push-Feed And Pull-Feed
4. Keep the tractor unit horizontally (see the horizontal plane in the figure) so that the top catches 1 of the tractor unit are in front of the inner support studs 2 of the printer. 5. Push the tractor unit toward the front of the printer until the top catches snap into the inner studs. -
Page 47: Tips On Paper Handling
Labels mounted on single sheet backing tend to slip and printing becomes crooked. • Do not leave labels loaded in the printer. If labels curl around the platen, jamming may occur when printing is resumed. •... -
Page 48: Printing
– if ever – have to use the control panel. In fact, your software often overrides the printer settings. If your software has limited values, you can use the printer control panel to select print features. Sometimes the control panel enables you to select features not available through your software. -
Page 49: Using Commercial Software
Many commercial software packages offer a wide variety of print features, including some features that are not supported by this printer. For example, software often provides a wider range of font sizes than the printer can accommodate. Software also allows you to specify multiple fonts on a single page and multicolor printing. -
Page 50: Selecting Macro 1 Or Macro 2
However, you can easily switch to other settings before printing as described below: Selecting Macro 1 or Macro 2 When you first turn the printer on, Macro 1 is selected. To change to Macro 2 or back to Macro 1, proceed as follows: button 1 to place the printer in the macro changeable state. -
Page 51: Switching Macros And Selecting Features On The Control Panel
Printing 3. To change to a resident font, see the next section. Otherwise, press the return the printer to the Ready state. You are ready to print using the selected macro. Note: The active Macro at power-off remains active at next power-up. - Page 52 Top-of-Form value. *2 When you change the Macro selection and the paper source selection is different, the printer automatically parks the continuous forms (in Push-Feed mode only) or ejects the cut sheet. The...
-
Page 53: Installation Settings
Printing Installation Settings Print Feature Language Tear Single sheet loading Error beep Buffer Interface type Auto interface switch time Baud rate Bits and parity Buffer control Disconnected on fault Adjustments Settings Print Feature Fanfold adjust (continuous forms) Manual adjust (single sheets) Reserved 1 Reserved 2 Factory Settings... -
Page 54: Selecting A Resident Font
To select a resident font: 1. Switch the printer to the Pause state if you are currently printing. button 1. The lighted indicator 2 shows the font selected. 2. Repeatedly press the... -
Page 55: Changing The Protocol
Changing the Protocol When you first turn the printer on, the active protocol depends on what port will be used for printing. For Macro 1: If you use the serial port, the active protocol will be the DEC protocol. -
Page 56: Starting Or Stopping Printing
You can also use your software to stop printing, but there will be a slight delay before printing stops. After the printer enters the Pause state, it still receives data until the print buffer becomes full of new data. The data in the print buffer will be lost if you turn the printer off. -
Page 57: Removing Printed Pages
This section describes the best methods for removing single sheets or continuous forms paper after printing. Removing Single Sheets When you print using software, the printer automatically ejects each sheet of paper when the end of the printed page is reached. To eject sheets manually: •... -
Page 58: Using Set-Up Mode
– The Normal mode is used for daily operations like paper handling and printing as explained in Chapter 2, “Paper Handling," and Chapter 3, “Printing.” – The Set-Up mode is used to change the printer settings that affect the daily operations. N ote: For Experienced Users: Once you are familiar with the Set-Up mode, you may want to use the flowchart at the end of this chapter for quick reference. -
Page 59: How Set-Up Works
Using Set-Up Mode How Set-Up Works The Set-Up mode consists of Set-Up functions which correspond to the printer settings described in the previous page. Each function generally has many options which correspond to the print features to be changed. Each option includes many parameters values to be selected. - Page 60 Using Set-Up Mode 2. Turn the printer off. 3. Turn the printer back on while pressing the Set-Up/Quit button until the printer beeps. 4. Remove the acoustic cover in order to see the printed text. Set-Up/Quit Entering the Set-Up Mode...
- Page 61 The initial printout contains a header, help menu 1, and <FUNCTIONS> menu 2. The header tells you that the printer is in the Set-Up mode. The help menu provides a quick summary of how to use buttons in the Set-Up mode.
-
Page 62: Overview Of The Set-Up Mode
2. Press the button or the values, the printer prints the first option and its values. The MACRO 1, MACRO 2, INSTALL, ADJUST, TESTS, and MENU-ACCESS functions contain options that have selectable values. The other functions have neither options nor values. -
Page 63: Options With Pre-Determined Values
2. Press the button to select the value. The printer prints the next option and its values. You can press the button to select the value. Then the printer prints the previous option and its values. -
Page 64: Example: Changing The Vertical Pitch
8 lines per inch as the new power-on default in Macro 2, and then exit Macro 2. The printer exits the Set-Up mode and returns to the Ready state. These settings remain in effect until the next time they are changed. -
Page 65: Options With Undetermined Values
If you change the value by a wide margin, you can keep the button pressed continuously; the printer beeps at intervals of 0.2 seconds. The number of beeps corresponds to the number of times you press the button. -
Page 66: Options With Both Pre-Dtermined And Undetermined Values
20 columns as the new power-on default in Macro 2 and exit Macro 2. The printer then exits the Set-Up mode and returns to the Ready state. These settings remain in effect until the next time they are changed. - Page 67 Using Set-Up Mode Turn power on with Set-Up/Quit pressed Printer prints <FUNCTIONS> menu Select function: Press One of the following functions is selected RECALL FACTORY DEFAULTS (PRINT TEST and HEXDUMP) Press Set-Up/Quit Printer exits Set-Up mode without saving changes : Functions having options and/or values *1 Changes are valid, but will be lost at next power-off.
-
Page 68: Points To Remember
To print a list of values, first load continuous forms paper, and then enter the Set-Up mode to select the PRINT function. The printer starts to print a list of the currently selected values. The pre-selected factory settings are shown on the opposite page. - Page 69 Using Set-Up Mode Printout of Factory SettingsUsing the PRINT Function 4-12...
-
Page 70: Deciding Which Options To Change
Deciding Which Options to Change The previous page shows a printout of the printer’s factory settings. In this printout, options are listed by functional group: • MACRO 1 and MACRO 2 functions • INSTALL function • ADJUST function • MENU-ACCES function Most selectable values only alter print features such as the type style and page format. -
Page 71: Changing Macro 1 And Macro 2 Options
Select the same protocol on the printer as is selected in your software. If the protocols are not the same, the printer will not work correctly with your software. If you plan to use two different protocols on a regular basis, assign the most frequently used protocol to MACRO 1. -
Page 72: Macro 1 And Macro 2 Options List
Bottom Margin ... 4-18 Line Mode ... 4-18 Paper Source ... 4-19 Print Direction ... 4-19 DEC Defaults ... 4-20 DEC Printer ID ... 4-20 Auto Wrap ... 4-20 End of Transmission Disconnect ... 4-20 Initialization Report ... 4-20 Automatic ANSWERBACK ... 4-20 ANSWERBACK on ENQ ... -
Page 73: Macro 1 And Macro 2 Options And Values
<PROTOCOL> DEC PPL2 IBM PPX24 EPSON ESCP Epson printers using the ESC/P2 protocol AUTO PORT DEPND The printer selects a protocol according to the active <PRTCL SERL> (Protocol Serial) DEC PPL2 IBM PPX24 EPSON ESCP Epson printers using the ESC/P2 protocol... -
Page 74: Parallel
1 and Macro Macro 2 Options Values <PRTCL PARL> (Protocol Parallel) DEC PPL2 PPX24 – IBM Proprinter X24E printers (LA36N) EPSON ESCP Epson printers using the ESC/P2 protocol (factory <FONT> DRAFT HSDRAFT HI-IMPACT PICA COURIER PRESTIGE COMPRESSED Compressed 17 font BOLDFACE TIMELESS NIMBUS-SAN Nimbus-Sans PS font... -
Page 75: Form Length
Using Set-Up Mode 1 and MACRO MACRO 2 Options Values <FORM LENGH> (Form Length) ## INCHES No of LINE 1 to 256 (66) <LEFT MARGN> (Left Margin) No of COLM 1 to 256 <FORM WIDTH> 13.2 IN 13.6 IN <TOP OF FRM> (Top-of-Form) ## /60 IN <TOP MRGN>... -
Page 76: Paper Source
Unidirectional printing. Unidirectional printing is used for printing that needs precise vertical alignment. Unidirectional printing is slower than bidirectional printing. Bidirectional printing. The printer prints in either direction while seeking the next print direction for a shorter print time. The unidirectional command is ignored. -
Page 77: Dec Defaults
4-20 Values Description The following are the Set-Up options for the DEC PPL2 protocol only. Specify the printer ID to be given in response to DA commands from the computer. Characters are received but not stored in the print buffer. - Page 78 1 and MACRO MACRO 2 Options Values <DEC G0 CST> (DEC G0 Charac- US ASCII ter Set) BRITISH D-FINNISH FRENCH D-FRENCH-C DEC French-Canada GERMAN I-ITALIAN J-ROMAN D-NORW/DAN DEC Norwegian/Danish I-SPANISH D-SWEDISH NORW/DAN D-DUTCH D-SWISS D-PORTGU LEGAL D-SUPPL D-GRAPHICS DEC Special Graphics D-TECH D-7 HEBREW DEC 7-bit Hebrew D-HEBREW-S DEC Hebrew Supplement...
-
Page 79: User Preference
Using Set-Up Mode 1 and MACRO MACRO 2 Options Values <USER PREF> (User Preference) D-SUPPL D-GRAPHICS DEC Special Graphics D-TECH D-7 HEBREW DEC 7-bit Hebrew D-HEBREW-S DEC Hebrew Supplement D-GREEK-S D-7 TURKI D-TURKI-S J-KATAKANA JIS Katakana I-LATIN 1 I-LATIN 2 I-LATIN 5 I-LATIN 9 I-LATIN HB ISO Latin Hebrew... - Page 80 1 and MACRO MACRO 2 Options Values =IBM&EPSON ========= <DEFLT SET> (Default Character CP 210 Set) CP 220 CP 437 CP 850 CP 851 CP 852 CP 857 CP 858 CP 860 CP 862 CP 863 CP 865 CP 866 CP DHN TURKEY ECMA 94...
-
Page 81: Ibm Defaults
Standard character height Double character height Specify whether the Alternate Graphics Mode (AGM) is used; in other words, is the printer compatible with the IBM Graphics printers? The base of line spacing is 1/72 inch or 1/216 inch. The base of line spacing is 1/60 inch or 1/180 inch. -
Page 82: Install Options List
Changing Install Options The INSTALL function defines the printer’s installation conditions. You can select a language from five that are used to print menu functions and options during the Set-Up operation . You can adjust the start timing of auto loading or auto tear-off feeding. You can also change the operation of the error beep or allocation of the input buffer. -
Page 83: Install Options And Values
Specify the (auto) start timing of single sheet loading. Load a single sheet when the FF/Load pressed. Enable or disable the printer status buzzer when a fault condition occurs. One beep for a period of about 500 ms Buzzer off under any condition... -
Page 84: Buffer
Centronics parallel interface DEC-423 serial interface Both interfaces are ready for communication. The printer communicates with the interface from which it first receives data. The interface is active until the input buffer becomes empty. being inactive when AUTO is specified in the <PROTOCOL>... -
Page 85:
Using Set-Up Mode 1200 2400 4800 9600 19200 BPS <BIT&PARITY> 7 EVEN 7 ODD 7 SPACE 7 MARK 8 EVEN 8 ODD 8 NONE <BUFFER CTL> (Buffer Control) XON/XOF <DISC FAULT> (Disconnect on Fault) DROP DTR PULSE DTR 4-28 baud rate as that used by your computer or modem. Setting of data format for DEC-423 Number of data bits * The mark is logical 1. -
Page 86: Adjusting Top-Of-Form Origin
Adjusting Top-of-Form Origin Print positions often change gradually when you use the printer over long periods of time. The ADJUST function allows you to adjust these positions by fine-tuning the Top-of-Form origin. The following table describes the ADJUST options and values. Options are listed in the order they are printed. -
Page 87: Changing Menu Access Options
Any settings changed while in the Set-Up mode are saved as the new power-on defaults for the printer. The new defaults remain active until you change them again. 4-30 Description Specify the type of access to the Set-Up functions from the control panel or from the <FUNCTIONS>... -
Page 88: Recalling Factory Settings
Check that the red cursor is located under PRINT-T, and then press the button. The printer selects (underlines) PRINT-T and starts printing. A short help menu is printed at the top of the page. Note that the printer is not ready for the computerduring this printing test. -
Page 89: Hex Dump Mode
Using Set-Up Mode 3. Examine the test page. A sample test page is shown in step 5, “Testing the Printer,” in the Installation Guide. Hex Dump Mode The Hex Dump mode prints data and commands in hexadecimal characters and abbreviated control codes. - Page 90 Using Set-Up Mode Sample Hex Dump 4-33...
-
Page 91: Set-Up Mode Quick Reference
Using Set-Up Mode Set-Up Mode Quick Reference The following flowchart shows how the Set-Up mode is organized. Note: Asterisks (*) indicate factory settings. SETUP MODE MACRO1 MACRO2 PROTOCOL: DEC PPL2 IBM PPX24 EPSON ESCP AUTO PRTCL SERL: PORT DEPND* Valid when PORT DEPND is selected for PROTOCOL. - Page 92 SETUP MODE FUNCTIONS OPTIONS&VALUES Exit/Save PRINT INSTALL ADJUST FNFOLD ADJ: -10 /60 IN LANGUAGE: ENGLISH* DEUTSCH ESPANOL FRANCAIS ITALIANO I/F TYPE: PARALLEL AUTO SW: 2 SEC* SERIAL 4 SEC AUTO* 6 SEC 18 SEC 20 SEC DEC G0 CST: US ASCII* D-SUPPL BRITISH D-GRAPHICS...
-
Page 93: Maintenance
This section explains how to clean and vacuum the printer and how to clean the platen and paper bail rollers. It is easier to clean the printer when the front cover, the cut sheet stand, and the back cover are removed. -
Page 94: Cleaning The Platen And Paper Bail Rollers
Maintenance 4. Open the front cover of the printer and remove the ribbon cartridge. Using a soft vacuum brush, gently vacuum the platen, the print head carriage and shaft, and surrounding areas. You can easily slide the print head to the left or right when the power is off. Be careful not to press too hard on the flat ribbon cable 1 that extends from the print head carriage. -
Page 95: Cleaning The Print Head
3. To dry the platen, place a dry cloth against the platen and manually rotate the platen knob. 4. Gently wipe the paper bail rollers using the cloth moistened with alcohol or water. Dry the rollers using a dry cloth. Cleaning the Print Head If the paper is smudged or stained by ink, clean the nose of the print head with a dry cloth. - Page 96 Warning: The print head may be hot if you have been printing recently. 3. Move the paper thickness lever 1 located on the top right of the printer to position D. 4. To remove the ribbon cartridge, press the ribbon release levers 2 located on the sides of the cartridge and carefully lift the cartridge out of the printer.
-
Page 97: Replacing The Print Head
Warning: The print head may be hot if you have been printing recently. To remove the print head: 1. Turn off the printer. 2. Open the front cover and remove the ribbon cartridge. 3. Pull the right end of the head lock wire 1 forward to release it from the hook at the right of the print head carriage. -
Page 98: Trouble-Shooting
Printer failure Print Quality Problems and Solutions Poor print quality or other printing problems are often caused by incorrect printer set-up or incorrect software settings. A gradual decrease in print quality usually indicates a worn ribbon. The following table identifies common print quality problems and suggests solutions. - Page 99 See the section, “Changing Install Options,” in Chapter 4, page 4-25. If the PROTOCOL option is set to AUTO, the printer may not detect the proper protocol. Force this option according to your needs. See the section, “Changing Macro 1 and Macro 2 Options,”...
- Page 100 Solution The top margin is the sum of the printer’s top-of-form setting, the software-specified top margin, and the printer’s TOP-MRGN setting. Proceed as follows: •...
-
Page 101: Paper Handling Problems And Solutions
Paper jams while printing. Solution Make sure that the paper select lever located on the top left of the printer is set correctly. Move the lever backward for continuous forms or forward for single sheets. Make sure that the paper covers the paper-out sensor, (i.e., the left paper edge is within 52 mm for single... -
Page 102: Operating Problems And Solutions
See the section, “Using Continuous Forms,” in Chapter 2, page 2-14. Solution Make sure that the “I” on the printer power switch is depressed. Make sure that the power cord is securely connected to both the printer and the outlet. Make sure that the power outlet is functional. -
Page 103: Printer Failures
+34 V overvoltage error No error condition is displayed if any of these errors occurs. Turn the printer off and back on, then rerun the same job to check if the error was transient. If the error recurs, contact your dealer. -
Page 104: Checking Vertical Alignment
Make sure that continuous forms paper or single sheet paper is loaded in the printer. If possible, use forms at least 216 mm (8.5 inches) wide for LA36N or 356 mm (14 inches) wide for LA36W to avoid printing on the platen. -
Page 105: Vertical Alignment Adjustment
Press the button to save the new vertical alignment settings and exit the vertical Exit/Save alignment function. Note: To exit the vertical alignment function without saving changes, turn the printer off. button to switch Letter quality to Correspondence and Vertical Alignment... -
Page 106: Supplies And Options
This appendix lists the accessories and options available for the printer. Contact your dealer for information on ordering any of these items. Supplies Supplies Ribbon cartridges Black ribbon Color ribbon Print head Options Option Color kit Parallel interface cable Serial interface cable... -
Page 107: Installing Options
This section contains an introductory outline of the options available. Installing the Color Kit You can turn your monochrome printer into a color printer by installing a color kit on the print head carriage. The ribbon shift unit (shown below) of the color kit vertically swings the color ribbon cartridge to position one of the four colors of ribbon in front of the print head. -
Page 108: Printer And Paper Specifications
Printer and Paper Specifications This appendix provides the physical, functional, and performance specifications for the printer. It also contains detailed paper specifications. Physical Specifications Dimensions Height: Width: Depth: Weight AC power requirements Power consumption Heat generation Interface (dual) Data buffer size... -
Page 109: Functional Specifications
Printer and Paper Specifications Functional Specifications Print method Print direction Character cell Letter (10 cpi): Letter (12 cpi): High-impact draft: Correspondence *: Draft: High-speed draft: Paper handling Cut sheets: Continuous forms: Paper type Paper size Continuous Width: Length: Cut sheets... - Page 110 Defaults: Fonts Resident Bit map: Outline: Barcode Printer and Paper Specifications 32 character sets 26 character sets British, ASCII, DEC Dutch, DEC Finnish, French, DEC French-Canadian, German, DEC Hebrew Supplemental, DEC 7-Bit Hebrew, ISO Italian, Legal, JIS Katakana, JIS Roman, DEC Norwegian/Danish, ISO Spanish, DEC...
-
Page 111: Performance Specifications
Printer and Paper Specifications Line spacing Character pitch Characters per line 10 cpi: 12 cpi: 15 cpi: 17 cpi: 18 cpi: 20 cpi: Performance Specifications Print speed Letter: High-impact draft: Correspondence: Draft: High-speed draft: Line feed speed Form feed speed... -
Page 112: Paper Specifications
This section illustrates the recommended print area for single sheets and continuous forms. LA36N 102 to 267 mm (4 to 10.5 in) 76 to 364 mm (3 to 14.3 in) 5.08 to 32 mm (0.2 to 1.26 in) Printer and Paper Specifications May be decreased to 4.23 mm (1/6 inch). However, line spacing may be uneven. - Page 113 Printer and Paper Specifications 102 mm (4 inches) or more LA36N 102 to 267 mm (4 to 10.5 in) 5.08 to 25.4 mm (0.2 to 1 in) 25.4 mm (1 inch) Print area 25.4 mm (1 inch) Perforation 25.4 mm (1 inch) Print area Approx.
-
Page 114: Paper Thickness
Bottom kg: Weight in kilograms of 1000 sheets of 788 X 1091 mm paper (1.16 g/m lb: Weight in pounds of 500 sheets of 17 X 22 inch paper (3.76 g/m Printer and Paper Specifications Thickness 47-81 g/m (40-70 kg or 12-22 lb) - Page 115 Printer and Paper Specifications Type of Paper Number of Parts Carbon-backed Do not use in high humidity environments. Bottom Middle Bottom Middle Middle Bottom Middle Middle Middle Bottom Carbon-interleaved Avoid using single sheets format in carbon-interleaved. Carbon Bottom Carbon Middle...
-
Page 116: Command Sets
• IBM Proprinter X24E (LA36N) and IBM Proprinter XL24E (LA36W) • Epson ESC/P2 Select the same protocol on the printer and in your software. If your software protocols include DEC PPL2, select DEC PPL2 for optimum performance. Command Sets Command... -
Page 117: Dec Ppl2 Quick Reference Guide
Command Sets DEC PPL2 Quick Reference Guide Function This section contains basic information on the DEC PPL2 commands supported in the GENICOM Matrix Printer LA36. The commands are listed by function, in the following order: Positioning Controls Sheet size and margins... - Page 118 Characters used in control functions appear in monospaced type. The following table Function explains some of the conventions used. A pair of numbers separated by a slash (/) character indicates Column/Row notation. This notation refers to the location of a character in a standard code table, such as ASCII. Spaces appear between characters in sequences for clarity;...
- Page 119 Command Sets Positioning Controls Function Mnemonic Function Backspace Carriage Return Form Feed Horizontal Tab Line Feed Vertical Tab Horizontal Tab Set Index Next Line Partial Line Down Partial Line Up Vertical Tab Set DECCAHT Clear All Horizontal Tabs DECCAVT Clear All Vertical Tabs DECSHTS Set Horizontal Tab Stops...
-
Page 120: Sheet Size And Margins
Mnemonic Function Function Horizontal Position CSI Pn a Relative Vertical Position Absolute Vertical Position Relative Sheet Size and Margins Mnemonic Function DECSLPP Set Lines per Physical Page DECVPLA Set Vertical Page Length Alignment DECSLRM Set Left and Right Margins DECHPWA Set Page Width Alignment DECSTBM Set Top and Bottom Margins... -
Page 121: Type Size And Spacing, Managing Implicit Cursor Motion
Command Sets Type Size and Spacing, Managing Implicit Cursor Motion Function Mnemonic Function DECAWM Autowrap Mode CSI ? 7 h DECCRNLM Carriage Return /New Line Mode CSI ? 40 l DECPSP Proportional Spacing Mode DECSHORP Set Horizontal Pitch DECVERP Set Vertical Pitch Line Feed/New Line Mode... -
Page 122: Font Management And Attribute Selection
Font Management and Attribute Selection Function Mnemonic Function Select Graphic Rendition - Selecting Fonts Select Graphic Rendition - Selecting Attributes DECDLD Download Font DECDEN Printing Density Selection Command Command Remarks CSI Ps m Ps = 10 : Courier Ps = 11 : Timeless PS Ps = 12 : Nimbus Sans Ps = 13 : Prestige Ps = 14 : Pica... -
Page 123: Tabs
Command Sets Tabs Function Mnemonic Function DECCAHT Clear All Horizontal Tabs DECCAVT Clear All Vertical Tabs DECHTS Horizontal Tab DECSHTS Set Horizontal Tab Stops DECSVTS Set Vertical Tab Stops DECVTS Vertical Tab Set Tab Clear Command Command Remarks ESC 2 deprecated command ESC 4 deprecated command... -
Page 124: Selecting Character Sets
Selecting Character Sets Function See Figure “Designating and Invoking Character Sets” later in this section. Mnemonic Function ASCEF Announce Subset of Code Extension Facilities DECAUPSS Assign User Preference Supplemental Set ISO Latin 9 Single Shift 2 Single Shift 3 Locking Shift 0 (or Shift In) Locking Shift 1 (or Shift Out) -
Page 125: Scs Final Characters
Command Sets SCS Final Characters Function Character Set 94-Character Sets British ASCII DEC Dutch DEC Finnish French DEC French-Canadian German DEC Hebrew Supplemental DEC 7-Bit Hebrew ISO Italian Legal JIS Katakana JIS Roman DEC Norwegian/Danish ISO Spanish DEC Swedish DEC Swiss Norwegian/Danish DEC Supplemental DEC Technical... -
Page 126: Reports
ESC [ ? ps1 ; Ps2 Ps1 = 72 ; . . . ; Psn c Ps2–Psn describe extensions. See (printer to host) the Programming Supplement. CSI > Ps c Ps must = 0 ESC [ > Ps1 ; Ps2 ; Ps1 = 67: model LA30N Ps3 ;... - Page 127 Command Sets Function Mnemonic Function DECLANS Load ANSWERBACK With Password Send ANSWERBACK Message Device Status Request Device Status Report C-12 Command Remarks Command DCS Ps ; Pn2 ; Pn3 Ps = 1 : No password - Do not store v encoded_message_ message. string ST Ps = 2 : No password - Store message.
-
Page 128: Miscellaneous
Miscellaneous Function Mnemonic Function Bell DECSCL Select Conformance Level DECSTR Soft Terminal Reset Reset to Initial State DECIPEM IBM Proprinter Protocol Mode ROCS Return from Other Coding System SOCS Select Other Coding System Control Representation CSI 3 h Mode DECASFC Automatic Sheet Feeder Control DECSITF Select Input Tray input... -
Page 129: Barcode Printing
Command Sets Barcode Printing Function Mnemonic Function DECBAR Start or Stop Bar ESC % SP 0 Codes DECSBCA Select Bar Code Attributes Parameters C-14 Command Command Remarks Start barcode ESC % @ Stop barcode CSI Ps1 ; Pn2 ; . . . ; Ps9 ´ q Description Values Bar Code System... -
Page 130: Sixel Graphics Device Control String Envelope
Active position after printing a bar code is the same position as before printing bar code. Function After printing bar code, appropriate positioning control commands, see “Positioning Controls” earlier in this section, must be sent to print additional barcode strings, text or graphics. - Page 131 Command Sets Sixel Graphics Protocol Selector Ps1 Function Ps1 Value Horizontal Grid Size (inches) 0, 1 or none 1/144 1/360 3, 4 1/180 5, 6, 7, 8 1/144 1/72 > 9 1/144 Vertical Grid size = 1/72 in., unless modified by Pn3 or DECGRA. Sixel Graphics Grid Size defined by Pn3 HGS:VGS (dpi) by Aspect Ratio (defined by Ps1) Pn3 Value...
-
Page 132: Sixel Graphics Control Codes
Separates parameters - used on the above control codes (3/15 - 7/14) Sixel printable characters. The printer substracts the offset (3F hexadecimal) from the received code, assigning each of the remaining low- order six bits to a grid position :... -
Page 133: Standard 8-Bit Code Table (Left Half
Command Sets Standard 8-bit Code Table (Left Half) Function Command Standard 8-bit Code Table (Left Half) C-18... -
Page 134: Standard 8-Bit Code Table (Right Half
Command Sets Standard 8-bit Code Table (Right Half) Function Command Standard 8-bit Code Table (Right Half) C-19... -
Page 135: Designating And Invoking Character Sets
Command Sets Designating and Invoking Character Sets Function Power-up configuration is as follows: Value for DEC G0 CST Set-Up option ASCII User Preference User Preference User Preference: Value for USER PREF Set-Up option C-20 Command Designating and Invoking Character Sets... -
Page 136: National Replacement Character Sets
National Replacement Character Sets Function National Replacement Character Sets Loca- tion ASCII British Finnish £ 5/11 Ä 5/12 Ö 5/13 Å 5/14 Ü ‘ é 7/11 ä 7/12 ö 7/13 å 7/14 ü National Replacement Character Sets Loca- tion Norwegian- ISO ASCII Danish Spanish Swedish Danish... -
Page 137: Ibm Proprinter X24E And Xl24E Quick Reference Guide
IBM Proprinter X24E and XL24E Quick Reference Guide Function This section describes the printer commands for the IBM Proprinter X24E and XL24E protocol. When there is a difference, it is identified by LA36N (X24E) and LA36W (XL24E). Asterisks in the “Function” column indicate extended commands that are not supported by the original printer. -
Page 138: Horizontal Control
Function Horizontal Control Space Backspace Carriage return Elite characters on Proportionally spaced characters on/off (on: n = 1, off: n = 0) Vertical Control Line feed Form feed Advance paper n/216 inch (1 Advance paper n/180 inch (in AG mode) 255) Set line spacing to 1/8 lines Set line spacing to 7/72 inch... -
Page 139: Color Selection
Command Sets Function Vertical tab execution Set vertical tabs The values of n to n ASCII values of the lines (at the current line spacing) at which tabs are to be set. 255) (1 Clear all vertical tabs Reset tabs to default values Page Formatting Set left margin at column n and right margin at column m (0... -
Page 140: Downloading
Code page 863 Code page 865 Code page 866* ISO 8859-15** Clear input buffer Select printer Deselect printer (ignore input) Downloading Select resident or downloaded font Ex. n = 0: Resident Draft 2: Resident Courier 4: Downloaded Draft 6: Downloaded Courier... -
Page 141: Cut Sheet Feeder Control
Cut Sheet Feeder Control* Feed a sheet from bin 1* Feed a sheet from bin 2* Feed a sheet from bin 3* Eject a page from the printer* Miscellaneous Sound the bell Unidirectional printing on/off (on: n = 1, off: n = 0) -
Page 142: Epson Esc/P2 Quick Reference Guide
Epson ESC/P2 Quick Reference Guide Function This section describes the printer commands for the Epson ESC/P2 protocol. Asterisks in the “Function” column indicate extended commands that are not supported by the original printer. See the Programmer’s Reference Manual for detailed information on using these commands. -
Page 143: Horizontal Control
Command Sets Function Select printing style This command allows you to combine various printing styles. The value of n is the sum of the values of the styles you want to combine. n = 0: Pica pitch 1: Elite pitch 2: Proportional spacing 4: Condensed 8: Shadow... -
Page 144: Vertical Control
Function Vertical Control Line feed Form feed Advance paper n/180 inch (1 Set line spacing to 1/8 inch Set line spacing to n/180 inch (0 Set line spacing to n/60 inch (0 Set line spacing to 1/6 inch Set line spacing to n/360 inch (0 Tabulation Horizontal tab execution Set horizontal tabs... -
Page 145: Page Formatting
Command Sets Function Page Formatting Set right margin to column n 255) Set left margin to column n 255) Set top and bottom margins from top of page = 4, n • Top margin = (t • Bottom margin = (b Set perforation skip by n lines 127) Perforation skip off... -
Page 146: Select International Character Set
Function Select international character set n = 0: USA 1: France 2: Germany 3: United Kingdom 4: Denmark 1 5: Sweden 6: Italy 7: Spanish 1 8: Japan 9: Norway 10: Denmark 2 11: Spanish 2 12: Latin America 13: Korea 64: Legal Assign a character set to active character set number 0 to 3, n... -
Page 147: Font Selection And Downloading
Command Sets Function Clear input buffer Delete a character Force most significant bit to 1 Force most significant bit to 0 Cancel control over most significant bit **Code page contains Euro currency symbol Font Selection and Downloading Select font n = 0: Resident character set 1: Downloaded character set Select letter or draft quality n = 0: Draft... -
Page 148: Bit Image Graphics
Cut Sheet Feeder Control Feed a sheet from bin 1 Feed a sheet from bin 2 (*1) Feed a sheet from bin 3 Eject a page from the printer Miscellaneous Sound the bell Move print head to home position Unidirectional printing on/off... - Page 149 Command Sets C-34...
-
Page 150: Interface Information
This printer can communicate with a computer through either a DEC-423 serial interface or a Centronics parallel interface. The printer can use both interfaces at the same time when the I/F TYPE option is set to AUTO in the Set-Up mode. -
Page 151: Centronics Compatible Signals
INIT low resets the printer to its initial state and clears the buffer. Printer must see a pulse > 25 microseconds. ERROR L This signal is low when the printer is out of paper, not selected, or in an error state. -
Page 152: Ieee 1284-B Nibble Mode Signals
PtrBusy From printer AckDataReq From printer Xflag To printer Host Busy From printer Peripheral Logic Set to high to indicate the printer is ON High 19-29 Interface Information Description 0 volts. Same as pins 14, 19-30. Not used Not used... -
Page 153: Serial Interface
To printer Serial Interface Use the cable that comes with the printer or the Digital BC16E cable or equivalent. If you prepare a cable separately, the cable connector at the printer side should be a male Modified Modular Jack (MMJ) or the equivalent that conforms to EIA standards. -
Page 154: Serial Options
By telling the computer when the printer can receive data, the buffer control prevents the printer’s buffer from overflowing. This printer offers a choice of two different buffer controls for connection to a variety of computers: XON/XOFF and DTR. If you computer documentation does not recommend a particular buffer control, try DTR. - Page 155 1 (DTR) is used to control the flow of data rather than the transmission of a character code. When the printer is ready to receive data, pin 1 is high. When fewer than 255 (63) bytes of space remain in the buffer (or when the printer is taken offline), pin 1 is low.
-
Page 156: Character Sets
This appendix provides character sets available for this printer. Available character sets depend on the protocol selected. They are as follows: • DEC PPL2 protocol 94-Character sets and 96-Character sets • Common to IBM Proprinter X24E and XL24E protocol and Epson ESC/P2 protocol Default sets •... -
Page 157: E. Character Sets
Character Sets • DEC Special Graphics Character Set • DEC Technical Character Set • ISO Latin-1 Supplemental Character Set * • ISO Latin-9 Character Set • Legal Character Set • Hebrew Character Sets – DEC 7-Bit Hebrew Character Set – DEC Hebrew Supplemental Character Set –... - Page 158 Character Sets...
- Page 159 Character Sets...
- Page 160 Character Sets...
- Page 161 Character Sets...
- Page 162 Character Sets...
- Page 163 Character Sets...
- Page 164 Character Sets...
- Page 165 Character Sets E-10...
- Page 166 Character Sets E-11...
- Page 167 Character Sets E-12...
- Page 168 Character Sets E-13...
- Page 169 Character Sets E-14...
- Page 170 Character Sets E-15...
- Page 171 Character Sets E-16...
- Page 172 Character Sets E-17...
- Page 173 Character Sets E-18...
-
Page 174: Ibm Proprinter X24 And Xl24E Protocol
Common to IBM Proprinter X24 and XL24E Protocol and Epson ESC/P2 Protocol Default Sets The following thirty two character sets are available. Code pages 210, 220, 437, 850, 851, 852, 857, 858, 860, 862, 863, 865, and 866, CP DHN, Turkish, ECMA 94, ISO Latin 1, ISO Latin 2, ISO Latin 9, Hungarian, Slovenian, Polish, Mazovian, Kamenicky, Cyrillic, ELOT 927, ELOT 928, Latin Polish, Lithuanian 1, Lithuanian 2, MIK, and Macedonian... - Page 175 Character Sets Code Page 851 Code Page 857 Code Page 860 E-20 Code Page 852 Code Page 858 Code Page 862...
- Page 176 Character Sets Code Page 863 Code Page 865 Code Page DHN Code Page 866 Turkish ECMA 94 E-21...
- Page 177 Character Sets ISO Latin 1 ISO Latin 9 Slovenian E-22 ISO Latin 2 Hungarian Polish...
- Page 178 Character Sets Kamenicky Mazowian Cyrillic ELOT 927 Latin Polish ELOT 928 E-23...
- Page 179 Character Sets Lithuanian 1 Lithuanian 2 Macedonian E-24...
-
Page 180: Ibm Proprinter X24E And Xl24E Protocol
Character Sets IBM Proprinter X24E and XL24E Protocol IBM Set 1/2 IBM character set 1 and IBM character set 2 IBM Set 1 IBM Set 2 E-25... -
Page 181: Epson Esc/P2 Protocol
Character Sets Epson ESC/P2 Protocol National Character Sets The following fifteen character sets are available. USA, France, Germany, UK, Denmark 1, Sweden, Italy, Spain 1, Japan, Norway, Denmark 2, Spain 2, Latin America, Korea, and Legal Common Characters The following table shows characters common to the fifteen “national” character sets. NR indicates characters that differ with languages. -
Page 182: National Characters
Character Sets National Characters The following table shows “national” characters that differ with languages. Character codes correspond to NRs in the preceding table. E-27... - Page 183 Character Sets E-28...
-
Page 184: Resident Fonts
Resident Fonts Resident Fonts This appendix provides print samples of the printer’s twelve resident fonts. Draft High-Speed Draft High-Impact Draft Pica 10 Courier 10 Prestige Elite 12 Compressed 17 Boldface PS... - Page 185 Resident Fonts Timeless (outline) Nimbus Sans ® (outline) OCR A OCR B...
-
Page 186: Glossary
Baud Rate The speed, in bits per second, at which data is transmitted to a device such as a printer. Baud rates apply to serial data only. 200 baud equals approximately 120 characters per second. - Page 187 Command Set A set of print and format commands used to control the printer. Each printer has its own resident command sets embedded in the printer firmware. These command sets are actuated by codes sent from the host computer.
- Page 188 Dot Matrix The grid used to print characters on a dot matrix printer. Each dot corresponds to a wire in the print head. Downloading Transferring soft fonts from the computer to the printer’s memory. Downloading allows you to use fonts not resident in the computer.
- Page 189 Glossary Line Feed (LF) A signal to the printer that advances the paper forward one line. Line feeds can be executed either by your software or by pressing the Line Spacing The vertical spacing between lines, measured in lines per inch.
- Page 190 IBM proprinter X24E, and Epson ESC/P2. Rear Feed In rear feed, paper is fed from the rear of the printer. The forms tractor unit must be installed at the rear of the printer. The forms tractor unit pushes paper into the printer.
- Page 191 Glossary Single Sheets Single sheets are sheets of paper, envelopes, and noncontinuous multiple forms fed into the printer using the cut sheet stand or optional cut sheet feeder. Single sheets are also called cut sheets. Soft Fonts Fonts downloaded from a disk to the printer memory. Soft fonts are also referred to as downloaded fonts.
-
Page 192: Index
AUTO WRAP • 4-20 Automatic Loading Start Timing • 4-26 Automatic Tear-Off Feed Start Timing • 4-26 Basic States of the Printer • 2-4 BAUD RATE • 4-28 Bidirectional Printing • 4-19 BIT&PARITY • 4-28 BOTTOM MRG • 4-18 BUFFER • 4-27 Buffer Control (Serial) D-5 BUFFER CTL •... - Page 193 Index E-CHR (Epson Character) SET • 4-24 Envelopes • 2-32 EOT DISCON • 4-20 Epson ESC/P2 Protocol Printer Commands • C-27 Switching to • 3-8, 4-16 ERROR BEEP • 4-26 Exit/Save Button • 2-6, 2-9 Factory Settings Installation and Adjustment Options • 3-6 Macro 1 and Macro 2 Options •...
- Page 194 Starting, Stopping, or Resuming • 3-9 Printing Test • 4-31 Problems and Solutions • 6-1 Operating • 6-5 Paper Handling • 6-4 Printer Failures • 6-6 Print Quality • 6-1 Protocol Changing • 3-8, 4-16, 4-17 DEC PPL2 • C-2 Epson ESC/P2 •...
- Page 195 Adjust (Top-of-Form Origin) • 4-29 Install (Installation Conditions) • 4-25 Macro (User Environments) • 4-14 Menu Access (Restriction) • 4-30 Print the printer configuration • 4-11 Recall Factory Defaults • 4-31 Save and Exit • 4-30 Tests (Printing Test and Hex Dump) • 4-31,...
Need help?
Do you have a question about the LA36 and is the answer not in the manual?
Questions and answers