Table of Contents
Advertisement
Quick Links
Advertisement
Table of Contents
Troubleshooting

Related Manuals for Genicom 3870


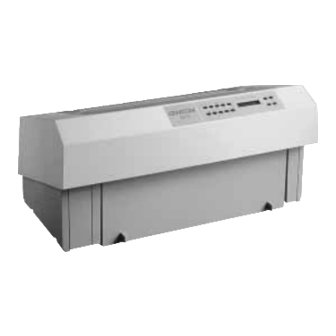
Summary of Contents for Genicom 3870
- Page 1 Model 3870 User’s Manual GEK-89384B GEK-89386B...
-
Page 4: Fcc Compliance Statement
FCC Compliance Statement This equipment generates and uses radio frequency energy and if not installed and used properly, i.e. in strict accordance with the instructions, may cause interference to radio or television reception. It has been tested and found to comply with the limits for a Class B computing device pursuant to Subpart B of Part 15 of FCC Rules, which are designed to provide reasonable protection against such interference when operated in a residential installation. - Page 5 Arbeiten und Reparaturen am geöffneten Gerät dürfen nur vom autorisierten GENICOM – Kundendienst vorgenommen werden. Bescheinigung des Herstellers/Importeurs Heirmit wird bescheinigt, daß der / die 3870 DA (Gerät, Typ. Bezeichnung) In Übereinstimmung mit Bestimmungen der vfg 1046/1984 (Amtsblattverfügung) funkentstört ist/ sind.
-
Page 6: Trademark Acknowledgments
(ESD) performance, or its radio frequency interference (RFI) performance, or both. Trademark Acknowledgments All trademarks and registered trademarks are property of their respective holders. CENTRONICS of GENICOM Corporation. Epson of Epson America, Incorporated DEC of Digital Equipment Corporation GENICOM of GENICOM Corporation... -
Page 7: Interface Connectors
Code Compliance Codes and standards the printer conforms to are listed below : • UL Standard 1950, 3rd Edition • C-UL C22.2 No. 220 • GS Sign (Safety), international model only) • FCC Rules, Part 15, Subpart B • ANSI X3.4-1977 (code set) •... -
Page 8: Table Of Contents
Table of contents Page Chapter 1. Introduction ..................... 1-2 Chapter 2. Set It Up and Get It Running ................2-1 Choose a Place for the Printer that is :................2-1 Select the Voltage (Models with Voltage Selector Switch) ..........2-2 Select the Voltage (Models without Voltage Selector Switch) ........ - Page 9 Table of contents Page Chapter 6. Formats (Continued) Change a Format - Printed Menu .................. 6-3 Save a Format from the Control Panel ................6-4 Save a Format from the Host ..................6-4 Select a Format from the Control Panel ................ 6-4 Select a Format from the Host..................
- Page 10 Table of contents Page Chapter 10. Paper Handling Features and Techniques (Continued) Manual Path Auto-loads the Next Sheet ..............10-14 Continuous Envelopes ....................10-15 Clean Up After Nonbonded Paper................10-15 Tips for Continuous Forms ..................10-16 Chapter 11. Maintenance and Troubleshooting .............. 11-1 Clean the Printer ......................
- Page 11 Introduction...
-
Page 12: Chapter 1. Introduction
10 Base T, Token • standard emulations: menu-or host-selectable ANSI X3.64, IBMGP, IBM Proprinter XL, DEC LA-210, Epson FX 286e, and GENICOM 3410. • standard fonts: menu-or host-selectable Gothic, Gothic Italic, Micro Gothic, Wide Gothic, Courier, and Courier Italic, OCR-A, OCR-B, Oversize in Draft or Near Letter quality, each;... -
Page 13: Chapter 2. Set It Up And Get It Running
Chapter 2. Set It Up and Get It Running Packaged with the printer and this manual are a power cord, a ribbon cartridge, a tractor assembly, and a programmer’s manual. Choose a Place for the Printer that is : level and solid Print head speeds are very high. -
Page 14: Select The Voltage (Models With Voltage Selector Switch)
115V. Slide it to the right for 230V operation. Select the Voltage (Models without Voltage Selector Switch) If there is No Voltage Printers without a Voltage Selector Switch will automatically switch to Selector…… the correct voltage setting. No additional action is necessary by the user. 3870 User’s Manual... -
Page 15: Power Cords
Power Cords Don't use two-wire extension cords or adapters that allow connection to ungrounded outlets. A 6.5-foot power cord is shipped with the printer. The power cord included with printers sold for 115V installations in the US. and Canada is ready to use. International model printers are shipped with a power cord which can be used in a number of European countries. -
Page 16: Plug It In And Turn It On
Check the AC outlet with another appliance. Make sure the voltage on .. selector switch is set for the right voltage. If the printer beeps ... If the printer emits a series of short beeps, something’s wrong. Note the number of beeps and call for service. 3870 User’s Manual... -
Page 17: Install The Ribbon
Install the Ribbon The printer must be powered up before a ribbon can be installed. The printhead has to back away from the striker bar to provide clearance to slide the ribbon guide onto the print head nozzle. The print head automatically backs away from the striker bar any time the printer is turned on and there is no paper in front of the print head. - Page 18 The ribbon will still work like this. Turn the ribbon advance knob to tighten the ribbon fabric. The ribbon will not work if the 1/2 twist is on the ribbon guide itself. 3870 User’s Manual...
- Page 19 WARNING If the printer has been printing for a while, the print head may be HOT ! Move the print head left The print head must be centered between pairs of rollers in order to or right until it’s centered install the ribbon guide onto the print head nozzle.
- Page 20 It should snap down into place with moderate pressure. Find the ribbon drive Look down into the printer toward the left side and notice a small spindle.. shaft sticking up vertically through a shiny plate. 3870 User’s Manual...
- Page 21 Seat the cartridge on the Place the cartridge down in the printer about where it should go and ribbon drive spindle.. wiggle it around until the ribbon drive spindle slips up into the hub of the cartridge. Turn the ribbon advance knob clockwise and feel the ribbon drive gears turning in the printer.
-
Page 22: Removing The Ribbon
When ribbon guide has been removed from the print nozzle, remove the ribbon cartridge by placed a hand at both ends of the cartridge and lifting the ribbon cartridge up and off the cartridge supports. SUPPORT FOOT RIBBON ADVANCE KNOB 2-10 3870 User’s Manual... -
Page 23: Put Paper In The Tractors
Put Paper in the Tractors Each printer is shipped with a set of tractors installed in the rear. A second set of tractors is packed in a box for installation in the front/bottom paper path – see “Install the Front Tractors”, in Chapter 10. The procedure for loading sprocket-feed paper is the same for the rear, front, or bottom paper paths. - Page 24 ... Move the far tractor as If necessary, pull the far tractor locking lever forward and adjust the necessary to fit your far tractor’s horizontal position so that it matches the width of the paper. paper. 2-12 3870 User’s Manual...
- Page 25 Put paper in the far Make sure the leading edge of the paper is parallel with the tractor tractor and close the shafts. You must have the same number of pins engaged on both door. tractors. Move the far tractor to Stretch the leading edge of the paper enough so it doesn’t sag, but tighten the paper.
-
Page 26: Load A Form
PARK / PATH key to park the form, and move the tractors as needed to align the form with the rollers. EXIT ROLLERS EXIT ROLLER ACOUSTIC FOAM 2-14 3870 User’s Manual... -
Page 27: Print A Test Pattern
If paper did not load Check the paper path selection. Make sure that the paper is loaded in the tractors that correspond to the paper path selection. If paper did not load, take it out of the tractors and pull the jammed paper out of the printer from the tractor side and try again with a new sheet. - Page 28 Enter To exit the menu Clear Press the FIRST key. First Menu Press the ENTER key. Enter FF / Load To put top-of-form in front of print head (eject the partially covered page). 2-16 3870 User’s Manual...
-
Page 29: A Note About Print Head Gap Adjustment
A Note About Print Head Gap Adjustment Print head gap is the distance from the print head nozzle to the striker bar. If this gap is too tight, characters will smudge. If the gap is too large, characters will be light and ragged, the printer will be noisy, and print head wear will accelerate. -
Page 30: Attach To A Data Source
If a paper rack will be used with the printer, connect the ground strap to the back of the printer at tab(s) provided next to the interface plate. 2-18 3870 User’s Manual... -
Page 31: Quick Status
When using the serial See Chapter 4 to set serial parameters. interface When using the parallel See Chapter 4 to set parallel parameters. interface Set the printer online The ON LINE light should be on. If it isn’t, then press the ON LINE key to turn it on. -
Page 32: Line Registration On The First Form
Precise line registration depends on the form being fully engaged by the exit rollers. The printer is not guaranteed to hold specified line registration for the first inch of the first form. This also applies to cut sheets loaded from the manual paper path. 2-20 3870 User’s Manual... -
Page 33: Chapter 3. Control Panel
Chapter 3. Control Panel The control panel keys do different things depending on whether the printer is online, offline, or in a menu. Any button function associated with the menu is shown on the panel with blue lettering. This section assumes that the printer is set up as shipped, because it is possible to selectively lock out keys from the printed menu. - Page 34 When the printer is online, it can print received data. When it is offline, printer settings can be changed, and test patterns and status reports can be Former printed. Functions as the “Former” key in the menu mode. 3870 User’s Manual...
-
Page 35: Lcd Menu
Format Selects a format. Read “Formats”, Chapter 6 before pressing this key. This can inadvertently overwrite current parameters such as margins, font, LPI, CPI, tabs, form length, and so forth. Functions as the “decimal point” in menu entry mode. Menu When online, steps the LCD through current settings for font, CPI, LPI, path, interface, and emulation. - Page 36 Browse around in the LCD menu and remember to use FORMER or FIRST to exit the sub-menus. Pushing ENTER when an option is displayed will change the printer configuration. Clear Press the FIRST key. First Menu Press the ENTER key. Enter 3870 User’s Manual...
-
Page 37: Lcd Menu Map
LCD Menu Map The following are examples of the format of the LCD messages: >active now The current selection on a multiple-choice menu is preceded by the greater-than symbol > Right: 8.500 When a number need to be entered, the current setting is preceded by a colon: Right>... - Page 38 WD GothLQ Enhanced Hex Dump OCR-B DP Tes t Prn 8" Max OCR-B LQ Shear adj* 13.6" Max Micro DP *Must be activated Margins Micro LQ Right OCR-A DP Left PrnRef OCR-A LQ Bottom Left PrMenu Exit 3870 User’s Manual...
-
Page 39: Select The Emulation
Select the Emulation When the printer is shipped, the emulation is set to ANSI (American National Standards Institute). This printer-control protocol is the native language of the printer. The printer's bar code / rotatable oversized character features are accessible via ANSI control sequences. - Page 40 Enter Clear Press FIRST to go back to the top of the LCD menu. First P r o g : E x i t Menu Press ENTER to confirm existing the LCD menu. Enter 3870 User’s Manual...
-
Page 41: Status Sheet
Status Sheet A status sheet can be printed that shows how the printer is presently configured (the active format is printed). This can be an invaluable reference when something is changed or a prior configuration needs to be used. When the printer is configured for a particular print job, print and save the status sheet for later use. -
Page 42: Chapter 4. Printed Menu
Chapter 4. Printed Menu Experiment with the printed menu to see how it works. To keep the printer as originally configured, select Abort instead of Save when exiting the printed menu. This menu is printed in English only. The menus are printed at 10 CPI, 6 LPI, in the ANSI default font. This is normally Gothic DP, but this can be changed by using the SGR Extension command described in the ANSI chapter of the Programmer’s Manuals. -
Page 43: Sometimes Values Are Entered
Press ENTER. A menu list of seven selections should be printed. If the margins are too narrow to read the list, see the next section, “Margins for Menu Listings”. The LCD indicates what numbers Enter were entered, but the printout shows what to do next. 3870 User’s Manual... -
Page 44: Margins For Menu Listings
Margins for Menu Listings In the printed menu, the lists of options are designed to be printed with a left margin of 0 inches and a right margin of at least 8.0 inches. If the margins selected are greater than the left margin of 0 inches and less than the right margin of 8.0 inches, then change the margins prior to using the printed menu. - Page 45 10. WD Gothic LQ Auto Tear-off on Form Feed 11. OCR-B DP 12. OCR-B LQ 13. Micro DP Gothic 14. Micro LQ Gothic 15. OCR-A DP 16. OCR-A LQ Character Spacing * Line Spacing * * Enter values directly 3870 User’s Manual...
- Page 46 National Character Substitutions US ASCII ROMAN 8 Hp German Mazowia French A ISO 8859-9 Latin 5 French B Turkish French Canadian Greek Dutch (Netherlands) Kamenicky Italian FX 286e France U.K. FX 286e Germany Spanish FX 286e UK Danish/Norwegian A FX 286e Denmark I Danish/Norwegian B FX 286e Sweden Danish/Norwegian C...
- Page 47 1 Start, 8 Data, 1 Stop 2.3 Emulation Link 1 Start, 8 Data, 2 Stop Print All Formats Values 3. Parity Assign Paper Path Even Single Document Inserter RESERVED Space RESERVED Mark Bottom / Front Rear Ignore Received Parity 3870 User’s Manual...
- Page 48 4. Interface Control Lead Polarity DC1 / DC3 Control CA (RTS) Lead Active High Ready / Busy CB (CTS) Lead Active High Online / Offline CC (DSR) Lead Active High Fault CD (DTR) Lead Active High Transmit DC1s Until Data Received SCA (SRTS) Lead Active High Transmit DC3s Until No Received ETX / ACK Protocol...
- Page 49 Select Emulation Ignore Received Character ANSI 3.64 (00) 4 FX286e(22) Select Character to be Ignored IBMGP (20) 5 DEC LA120(25) 6. Test Options PPXL III (21) 6 GEN 3410XL(28) Standard Hex Dump Enhanced Hex Dump 80 Column Loop-back 3870 User’s Manual...
- Page 50 PPXL – discard p1 and p2 of ESC [p1 p2 p3 2. User Selectable Emulation Options sequences (DIS). Compress characters on CPI change to avoid overlapping print (ENB) Epson – default to 12-inch form on software reset (DIS) Reserved (DIS) PPXL –...
- Page 51 20 dpi, to 24 dpi (DIS) Format Print POSTNET bar codes unidirectionally (DIS) Lock all keys Disables print head homing before retracting Unlock all keys paper during tear-off or autoview (DIS) * This option not printed, but is available 4-10 3870 User’s Manual...
- Page 52 Keys Locked when Offline Flight Time Compensation Park Velocity Range 1 Font Velocity Range 2 Quality Velocity Range 3 Velocity Range 4 Velocity Range 5 Velocity Range 6 Velocity Range 7 Fine Adjust Up Velocity Range 8 Fine Adjust Down Velocity Range 9 Tear-off Velocity Range 10...
-
Page 53: Exit The Printed Menu
The printer is now in the LCD menu. To get out of the LCD menu and back online, press FIRST, ENTER, and then ON LINE. Clear Press the FIRST key. First Menu Press the ENTER key. Enter On Line Press the ON LINE key. Former F o r m a t : 4 4-12 3870 User’s Manual... -
Page 54: Chapter 5. Control Panel Lockouts
Chapter 5. Control Panel Lockouts When LOCKED is displayed on the LCD, it is usually because the printer is online and the user is pressing one of the keys that are supposed to work offline only, like FONT or CPI. If LOCKED is displayed and the ON LINE light is on, press the ON LINE key to turn it off. - Page 55 New combination for Online Lock is 12345 Enter Clear Main Menu is printed First Park / Path Exit the Main Menu Menu LCD says PrMenu: Enter Font Save Menu LCD says Prog : PrMenu Enter Clear Exit the printed menu First 3870 User’s Manual...
-
Page 56: Lock The Printed Menu
Menu LCD shows format number. Enter If the printer is turned offline, then online, lights flash and a prompt to enter the combination is displayed. Press ENTER following the last digit (1, 2, 3 , 4, 5, Enter). The Online Lock may be set from the host by sending an escape sequence. Details are in the ANSI chapter in the Programmer's Manual. -
Page 57: Chapter 6. Formats
Chapter 6. Formats What Is A Format ? A format is a set of operating parameters, which are stored in nonvolatile RAM. There are four stored formats and one active format. All formats contain the following operating parameters: Font Modes Top Print Reference Character Set Form Length... -
Page 58: The Active Format
Prog : Utility from the main menu. The first two selections under this submenu Prnt:Stat and PR Format will print all information about all formats. It is always a good idea to keep a current copy of the status and formats printout for future reference. 3870 User’s Manual... -
Page 59: Formats Auto-Execute On Paper Path Change
Formats Auto-execute on Paper Path Change As shipped, when the paper path is changed, the printer will set the active format to the stored format that is assigned to the new paper path. If the previous active format has not been saved to a stored format, all settings in the previous active format are lost. -
Page 60: Save A Format From The Control Panel
A stored format may be selected from the host with an ANSI escape sequence. The ANSI term for this is CSU (Customer Setup Unsave). The printer must be in ANSI emulation to do this. (Emulations can be switched with escape sequences. Details are in the ANSI chapter in the Programmer's Manual.) 3870 User’s Manual... -
Page 61: Select The Assigned Format From The Host
Select the Assigned Format from the Host The format assigned to the current paper path may be selected with an ANSI escape sequence. The ANSI term for this is RIS (Restore to Initial State). The printer must be in ANSI emulation to do this. (Emulations can be switched with escape sequences. Details are in the ANSI chapter in the Programmer's Manual.) Power Up to the Currently Assigned Format As shipped, the printer will power up with the setting that was in the active format... -
Page 62: Linking Emulations To Formats
This is true whether the current state is saved by the SAVE function on the LCD menu, or by ANSI CSS command. 3870 User’s Manual... -
Page 63: Chapter 7. Lcd Head Gap Menu
Chapter 7. LCD Head Gap Menu The print head gap may be controlled from the LCD menu. Print head gap is the distance from the print head nozzle to the striker bar. Maintaining the correct print head gap is critical to good print quality and print head life. If the gap is too small, characters will smudge and the ribbon may snag on the print wires. -
Page 64: Change Ribbon
/ paper combination. The print head moves back a certain distance and then forward again for half that distance. This minimizes the effects or mechanical backlash on the accuracy of the adjustment. 3870 User’s Manual... -
Page 65: Change The Auto Head Gap Adjustment
Change the Auto Head Gap Adjustment If the print head gap is consistently too tight or loose, or as the ribbon wears, printing becomes lighter, the print head gap offset may be adjusted from the LCD menu. To make adjustments to the print gap use the following procedure: Menu Make sure the printer is in local mode (the On Line light is off). - Page 66 The active format is normally maintained through power on and power off, but will be overwritten if the paper path is changed or if a different format is loaded by the control panel or the host. 3870 User’s Manual...
-
Page 67: Semiautomatic Head Gap Adjust
Semiautomatic Head Gap Adjust To avoid a mark on the first form each time a paper path is loaded, select semiautomatic head gap adjust for that paper path. Different fixed gap settings may be assigned to any of the paper paths. With paper loaded in the desired paper path, note carefully the format number shown on the LCD. -
Page 68: Chapter 8. Line Up The Job On The Page
Chapter 8. Line Up the Job on the Page The UP ARROW and DOWN ARROW keys work like a paper advance knob. Instead of adjusting top-of-form this way every time paper is loaded for a particular job, the required offset can be stored as a top print reference. Note: For common paper sizes, the horizontal print position can be adjusted by moving the tractors on this printer. -
Page 69: What Is A Print Reference
If a non-zero value is set for the top print reference, the tear-off distance in the affected format may need to be changed accordingly (see next section). 3870 User’s Manual... -
Page 70: Set The Tear Off Distance
Set the Tear Off Distance Park and reload paper so the top print reference, if set, will take effect. With paper at top-of-form, press the TEAR OFF key. The printer advances paper according to the current tear-off distance. Use the UP ARROW and DOWN ARROW keys to set the desired tear-off distance. -
Page 71: Local Margins Are Tricky
To summarize, a top margin adds blank space beyond what is sent by the host. A top print reference, on the other hand, adds no blank space but simply moves printing down on the form. 3870 User’s Manual... -
Page 72: Use Left Print Reference Or Left Margin
Use Left Print Reference or Left Margin? Setting a non-zero value for the left print reference moves printing to the right on the paper. When deciding whether to set a left margin or a left print reference, note that if a left margin is set at the printer and the application sends horizontal tabs, the position of the horizontal tabs relative to the leftmost character on the paper may no longer be correct. - Page 73 While the FAULT light is flashing, use the UP- and DOWN-ARROW keys to align the absolute top edge of the form with the topmost wire on the print head. Press the CLEAR key to acknowledge the ISU. 3870 User’s Manual...
-
Page 74: Chapter 9. Power Up And Reset
Chapter 9. Power Up and Reset This printer stores user-adjustable parameters, from print quality to bar code expansions, in an area of nonvolatile RAM known as the active format. The State of the Printer on Power-up When the printer is shipped, it is configured so that it powers up to the active format. In other words, every time the printer is turned on, it has the same settings as when it was last turned off. -
Page 75: After A Software Upgrade
Any straps that have been modified (software options or emulation-dependent options). Formats 1-4 may need to be programmed. Note: User parameters that are not reset are the flight-time compensation adjustment (see "Adjust the Flight-Time Compensation", Chapter 11) and the load length adjustment (see Chapter 8). 3870 User’s Manual... -
Page 76: Chapter 10. Paper Handling Features And Techniques
Chapter 10. Paper Handling Features and Techniques Use the bottom paper path for thick, or heavy, hard-to-feed forms. Use the rear path for forms that are easiest to feed. The part numbers for the pedestal, rack, and basket shown below are in “Options and Supplies”, Appendix C. -
Page 77: Adjust Paper Tension
Low paper tension will cause inconsistent line feeds. High Paper tension will eventually cause the sprocket feed holes to tear out. Paper tension and print head gap settings may interact. Try different settings to find the combination that works best. PAPER TENSION LEVER 10-2 3870 User’s Manual... - Page 78 Check the Chart The chart shows starting points for the paper tension adjustment. A higher number increases the tension; moving the lever toward the rear of the printer. Open the rear door Pull the paper tension To disengage the lever pin from the hole in the side frame. adjust level away from the side frame ...
-
Page 79: Install The Front Tractors
MOUNTING PAPER MOTION DETECTOR WIRE CONNECTOR GEAR COVER (ENGAGED WITH MOUNTING PIN) MOUNTING PIN (BOTTOM FEED POSITION) MOUNTING PIN (FRONT FEED POSITION) 10-4 3870 User’s Manual... - Page 80 NOTE: Install the paper motion detector wire into the connector on the right side frame. Press the tractor set The tractor is snapped in place when the hole in the gear cover on down and into the printer the tractor set engages one of the mounting pins in the printer. until it snaps into place in the front feed position, or push it farther into the...
-
Page 81: Switch Between Front Feed And Bottom Feed
Pull up firmly on the square shaft near the ends. The assembly will pop free of the locating pins. Swing the assembly up until it snaps into the locating pins for front feed. Wiggle the ends of the assembly to make sure the pins are engaged. 10-6 3870 User’s Manual... -
Page 82: Removing The Rear Tractors
Removing the Rear Tractors The tractors installed in the rear of the printer are interchangeable with the tractors for the bottom/front paper path. If the need arises to move the rear tractors to the front, follow this procedure to remove the rear tractors. Remove the retaining The nylon straps are keyed to slide over the screws. - Page 83 Remove the Tractor Set from the Rear Path Lift up on the rear tie rod until the tractor set snaps free of the end supports. Move the tractor set forward to unhook it from the mounting rod. Reinstall the rear door. 10-8 3870 User’s Manual...
-
Page 84: Change Paper Paths From The Control Panel
Change Paper Paths from the Control Panel Tear off any forms in the The printer will retract up to one and one half times the form current path. length or six inches whichever is greater. Park / Path The printer parks the form in the current paper path. Press and release the Park/Path key until the LCD shows the desired... -
Page 85: Change Paper Paths From The Host
LCD will indicate a paper jam. To recover, press the Tear Off key and tear off the form in the current path. Press Park/ Path to load the new path and print any data sent to the new paper path. 10-10 3870 User’s Manual... -
Page 86: Auto Load On Paper Out
Auto Load on Paper Out The printer may be set so that when paper runs out in the front/bottom or rear paper paths, it will automatically load paper from the other paper path. Both sets of tractors must be installed to do this. This feature is controlled by Two Box Option, Auto-load of Continuous Forms under User Defined Options on the printed menu. -
Page 87: Manual Paper Path
If the printer is set for 0 left margin and 0 left print reference, for width and position. lining up the arrow on the left paper guide with the arrow on the top door will result in a 1/2-inch left margin. 10-12 3870 User’s Manual... -
Page 88: Chapter 10. Paper Handling Features And Techniques (Continued)
Insert a sheet of paper Hold the paper so that the leading edge is making positive contact or envelope in the slot with the paper rollers. between the paper guides. LEFT PAPER Press the paper down hard. FF / Load Press the FF / Load key to load the form. -
Page 89: Manual Path Auto-Loads The Next Sheet
Expect to use several envelopes to find the combination of paper tension and print head gap that provides optimum print quality. Start with a paper tension setting of 3. 10-14 3870 User’s Manual... -
Page 90: Continuous Envelopes
Continuous Envelopes Continuous envelopes that are packaged on sprocket-feed strips should be fed from the BOTTOM paper path. Any continuous envelopes designed for impact-matrix printing should work well in this printer, but test an envelope design before committing to it. The overfolds of envelopes can be a problem. -
Page 91: Tips For Continuous Forms
As the paper supply begins to run low, remove the remaining paper stack from the box and place it beneath the printer. • If printing bar codes, stiff forms, or thick multipart forms, place the paper supply beneath the printer and use the bottom paper path. 10-16 3870 User’s Manual... - Page 92 • When printing graphics or bar codes, don’t use tear-off to view the page. Paper moves backwards during a tear-off cycle, and sometimes this causes a tiny error in vertical registration. The error is not noticeable when printing text, but an error as small as 1/72 inch shows up as a horizontal stripe in graphics or bar codes.
-
Page 93: Chapter 11. Maintenance And Troubleshooting
Chapter 11. Maintenance and Troubleshooting This printer requires very little regular maintenance other than replacing ribbons. The print head should last about seven hundred million draft characters and is easy to replace. Beyond this, adjust the print wire flight time compensation to recover print quality lost through print head or carriage mechanism wear. - Page 94 Go-Jo® or GOOP® to remove stubborn ink stains. For best results, leave the hand cleaner on stained areas for one or two hours, and then wipe the treated areas with a clean absorbent cloth. 11-2 3870 User’s Manual...
-
Page 95: Troubleshooting
Troubleshooting Problem Cause and Possible Solutions No control panel lights The power cord is not plugged into the wall outlet. The outlet may turned on. not work. Check the outlet with a known good appliance. Check cable with a known good appliance. Printer will not print. - Page 96 “Put Paper in the Tractors”, Chapter 2. Be sure to remove all damaged paper from the printer. Ribbon tears Print Head defective; gap too small or too large; ribbon end of life. 11-4 3870 User’s Manual...
-
Page 97: Hex Dump
Printer will not print to Right margin set too tight. This often happens when switching to right end of page. compressed print; all of the emulations except ANSI set margins in columns. When trying to print a spreadsheet at 17 cpi, for instance, then go into the application and set the margin to 17 times the width of the page in inches. -
Page 98: Serial Interface Loopback Test
When experiencing gradually deteriorating print quality, however, try the following before replacing the print head: • Make sure the print head mounting screws are tight. • Perform the cleaning process described in “Clean Up After Non-bonded Paper”, Chapter 10. 11-6 3870 User’s Manual... - Page 99 • Put a fresh ribbon in the printer. • Adjust the print gap offsets if necessary. See Chapter 7. • Compare unidirectional print quality with bidirectional print quality. If undirectional looks good, adjust the flight time compensation per instructions in this chapter.
- Page 100 The front of the head has a white guide through which the print wires protrude. The white guide should be visible after cleaning the front of the print head. FRONT OF PRINT HEAD ALIGNMENT ALIGNMENT ALIGNMENT HOLE ALIGNMENT HOLE 11-8 3870 User’s Manual...
-
Page 101: Adjust The Flight-Time Compensation
Install the Print Head Attach the print head connector to the connector in the carriage. Make sure it’s firmly connected and that the wires are pressed down to avoid contact with the ribbon cartridge. Place the print head on the carriage. Insert the two small alignment pin on the top of the carriage into the two alignment holes on the bottom of the print head. - Page 102 The nine flight time patterns (rows of broken vertical lines) correspond to the nine velocity ranges used in the printer. If any of the broken vertical lines in a pattern are not straight (see enlarged samples above), adjust the flight time for that velocity range. 11-10 3870 User’s Manual...
- Page 103 Press the numbered key for the velocity range needing adjustment and then press Enter. For example, to make the correct adjustment for the sample above, press 8 and then Enter. Twelve flight time patterns print out as shown in the sample below. The pattern represented by the flight time that is currently set in the printer for the selected velocity range is designated by the symbol “>”.
-
Page 104: Chapter 12. Interface
Chapter 12. Interface The printer is equipped with both a serial and a parallel interface as standard features. This chapter provides information about both of these interfaces. RS-232C Serial Interface All signal levels conform to EIA RS-232C / CCITT V.24. The interface is extensively configurable from the printed menu. -
Page 105: Dos Machines
(even parity) or always odd (odd parity). This serves as an error check. The parity bit can also be set to always be zero (space) or always be one (mark). 12-2 3870 User’s Manual... -
Page 106: Transmitted Parity
As character-imaging devices have come to support more symbols, such as line-draw symbols and characters from non-English alphabets, a common method for transmitting these additional characters is to use the eighth bit for data. In RS-232, the least significant bit (LSB) is sent first, and the MSB is sent last. For characters 00 hex –... -
Page 107: Serial Data Cable
Secondary request to send * Pin 25 is either connected to SCA in the printer or floats depending the status of switch 3 on the back of the printer. See “Interface Option Switches” in this chapter. 12-4 3870 User’s Manual... -
Page 108: Centronics Parallel Interface
CENTRONICS Parallel Interface With this interface, 7 – or 8-bit parallel data is accepted by the printer on a READY / BUSY closed loop basis at data transfer rates of up to 3.0 kilobytes per second. When the printer is online with a parallel data source, data is strobed into the printer one character at a time. -
Page 109: Parallel Timing Diagram
+5 VOLTS: This voltage is available on two interface pins for supplying power to external devices. Parallel Timing Diagram Data 0.5 u Sec Minimum Strobe 4 u Sec 0.5 u Sec 0.5 u Sec 3.5 u Sec Max Data Exchange Rate : 200 K 12-6 3870 User’s Manual... -
Page 110: Parallel Data Cable
Parallel Data Cable This parallel interface data cable requires a 36-pin male connector (Amphenol part number 57-30360 or equivalent) to mate with the female connector on the back of the printer. NOTE: Maximum output power for pins 18 and 35 combined is +5 volts, 1.5 amps. -
Page 111: Buffer Options
There can be as much as 4K of buffer capacity downstream of the input buffer. This downstream buffer capacity is not user-adjustable. Therefore, there is always more net buffer capacity than is indicated by the buffer menu. 12-8 3870 User’s Manual... -
Page 112: Appendix A. Emulation And Software Options
Appendix A. Emulation and Software Options The emulation and software options are straps that control less frequently adjusted aspects of the printer configuration. They are controlled from the printed menu. Unlike other menu items, the menu does not print a description of each option. This chapter tells what the options do and how to set them. -
Page 113: Emulation Options
Ignore the 8th bit in all ANSI emulations and in the ANSI DEC LA210 emulation LA210 Allow Epson to print characters from 8-bit FX286e character sets Initialization – DIS=normal Epson, FX286e ENB=initialized to power down state 22-32 Reserved * Selected when printer is shipped from factory 3870 User’s Manual... - Page 114 Setting Emulation Options Emulation option settings can only be viewed from the printed menu. To change an emulation option: With the printer offline, press the Enter key to enter the LCD menu. The LCD says Prog : Exit. Press the UP ARROW once. The LCD says Prog : PrMenu. Press the ENTER key to print the main menu.
-
Page 115: Software Options
Also changes density to 24 bars/inch. Unidirectional printing of postnet Home the print head in auto view or tear off mode Slow vertical slew for autoview Enable paper cutter on form feed 25-36 Reserved * Selected when printer is shipped from factory 3870 User’s Manual... - Page 116 Setting Software Options To change a software option: With the printer offline, press the Enter key to enter the LCD menu. The LCD says Prog : Exit. Press the UP ARROW once. The LCD says Prog : PrMenu. Press the Enter key to print the main menu. Press 6 then Enter to enter the software options menu.
-
Page 117: Appendix B. Hardware Configuration Menu
Appendix B. Hardware Configuration Menu The Hardware Configuration menu is a hidden submenu (item 99) on the main printed menu. Use it to: Change hardware options Adjust the print wire flight time To change a hardware option: With the printer offline, press the Enter key to enter the LCD menu. The LCD says Prog : Exit. -
Page 118: Appendix C. Options And Supplies
Appendix C. Options and Supplies Ribbons Ribbon Cartridge ..............3A1600B01 Interface Kit RS-422..................3A0279B05 Paper Handling Options Universal pedestal ..............3A1213B01 Paper catch tray (for universal pedestal) ........3A1213B05 Forms rack (for universal pedestal)..........3A1213B06 Paper output rack (for printer)..........3A0113B01 Paper basket................3A0120B01 Print Head Print head, 18-wire, parallel .............3D1322G04 Connectivity Options GeniLink 510-IBM Coax Internal Power.........44A511894-0E1 GeniLink 520-IBM Twinax Internal Power......44A511894-0D2... -
Page 119: Appendix D. Specifications
Appendix D. Specifications Performance Maximum Printing Speed Models - 3870 • 900 cps data processing (12 CPI) • 750 cps data processing (10 CPI) • 240 cps letter quality (12 CPI) • 200 cps letter quality (10 CPI) Serial Data Buffer 63K selectable in 1K increments... -
Page 120: Paper Handling
Paper Slew: 15 in./sec. default, 5 in./sec. user selectable Paper Positioning: Horizontal any position; vertical within 1/72 in. Printer Emulations • ANSI X 3.64 • IBM GP • IBM Proprinter XL III • Epson FX286e • DEC LA210 • Genicom 3410X 3870 User’s Manual... -
Page 121: Print Technology
Print Technology Type: Matrix impact Print Head: 18-wire parallel (two 9-wire arrays) Direction of Printing: Logic-seeking bi-directional or unidirectional (operator-selectable) Print Modes: Proportional, compressed, shadow, double strike, underline, expanded, superscripts, and subscripts. Character Sets: IBM Set I, II and All-Character sets plus 30 international character sets. -
Page 122: Form Control
Left and right: any position Top and bottom: any position Horizontal Tabs: 22, 28, or 32 absolute or relative (emulation dependent) Vertical Tabs: 12, 16, or 64 absolute or relative (emulation dependent) Maximum Form Length: 22 in. 3870 User’s Manual... -
Page 123: Complete Index
Complete Index > > Arrow ................4-1 Hardware Configuration Menu.......... B-1 Hex Dump ................ 11-5 Access the Printed Menu ............ 4-2 Active Format ..............6-2 Install the Print Head ............11-9 Adjust Top-of-Form............2-17 Install the Ribbon ............... 2-5 Auto Head Gap Adjust............7-2 Interface................ - Page 124 Replacing the Print Head ..........11-6 Reset ................... 9-1 ribbon advance knob............2-9 ribbon cartridge..............2-1 Various Keys ..............5-3 ribbon drive spindle............2-8 Vertical Paper Movement ........... 8-1 ribbon guide..............2-10 Voltage Selector Switch ............. 2-2 Index-2 3870 User’s Manual...
Need help?
Do you have a question about the 3870 and is the answer not in the manual?
Questions and answers