
Related Manuals for IBM 7870B4U


Summary of Contents for IBM 7870B4U
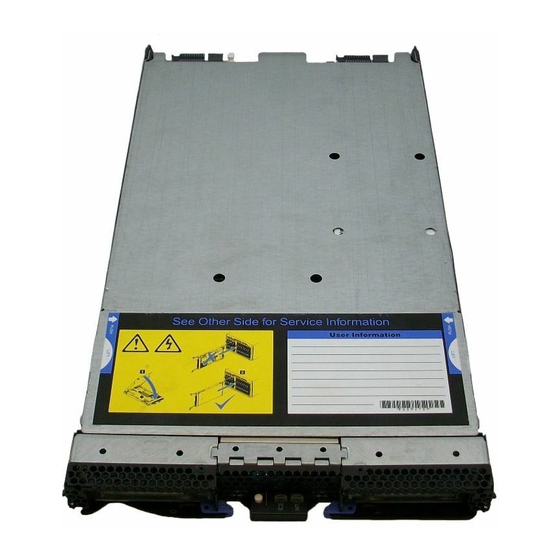
- Page 1 BladeCenter HS22 Type 7870, 1936, and 1911 Problem Determination and Service Guide...
- Page 3 BladeCenter HS22 Type 7870, 1936, and 1911 Problem Determination and Service Guide...
- Page 4 “Notices” on page 239 and the Safety Information, Environmental Notices and User Guide, Warranty Information documents on the IBM Documentation CD. The most recent version of this document is available at http://www.ibm.com/systems/support/. Fourteenth Edition (July 2011) © Copyright IBM Corporation 2011.
-
Page 5: Table Of Contents
Keyboard or mouse problems . . 168 Installation guidelines . . 49 Memory problems . . 169 System reliability guidelines . . 50 Monitor or video problems . . 170 Handling static-sensitive devices . . 50 © Copyright IBM Corp. 2011... - Page 6 . 183 Hardware service and support . 236 Blade server light path diagnostics LEDs . . 185 IBM Taiwan product service . . 237 Viewing the light path diagnostics LEDs in the BladeCenter GPU expansion unit . . 187 Notices ....239 BladeCenter GPU expansion unit light path Trademarks .
-
Page 7: Safety
Ennen kuin asennat tämän tuotteen, lue turvaohjeet kohdasta Safety Information. Avant d'installer ce produit, lisez les consignes de sécurité. Vor der Installation dieses Produkts die Sicherheitshinweise lesen. Prima di installare questo prodotto, leggere le Informazioni sulla Sicurezza. © Copyright IBM Corp. 2011... -
Page 8: Safety Statements
Les sikkerhetsinformasjonen (Safety Information) før du installerer dette produktet. Antes de instalar este produto, leia as Informações sobre Segurança. Antes de instalar este producto, lea la información de seguridad. Läs säkerhetsinformationen innan du installerar den här produkten. Safety statements These statements provide the caution and danger information that is used in this documentation. - Page 9 Statement 2 CAUTION: ® When replacing the lithium battery, use only IBM Part Number 33F8354 or an equivalent type battery recommended by the manufacturer. If your system has a module containing a lithium battery, replace it only with the same module type made by the same manufacturer.
- Page 10 Statement 3 CAUTION: When laser products (such as CD-ROMs, DVD drives, fiber optic devices, or transmitters) are installed, note the following: v Do not remove the covers. Removing the covers of the laser product could result in exposure to hazardous laser radiation. There are no serviceable parts inside the device.
- Page 11 Statement 8 CAUTION: Never remove the cover on a power supply or any part that has the following label attached. Hazardous voltage, current, and energy levels are present inside any component that has this label attached. There are no serviceable parts inside these components.
- Page 12 DANGER Overloading a branch circuit is potentially a fire hazard and a shock hazard under certain conditions. To avoid these hazards, ensure that your system electrical requirements do not exceed branch circuit protection requirements. Refer to the information that is provided with your device for electrical specifications.
- Page 13 Rack Safety Information, Statement 2 DANGER v Always lower the leveling pads on the rack cabinet. v Always install stabilizer brackets on the rack cabinet. v Always install servers and optional devices starting from the bottom of the rack cabinet. v Always install the heaviest devices in the bottom of the rack cabinet.
- Page 14 BladeCenter HS22 Type 7870, 1936, and 1911: Problem Determination and Service Guide...
-
Page 15: Chapter 1. Start Here
The documentation that comes with your operating system and software also contains troubleshooting information. Diagnosing a problem Before you contact IBM or an approved warranty service provider, follow these procedures in the order in which they are presented to diagnose a problem with your blade server. - Page 16 Note: Changes are made periodically to the IBM Web site. The actual procedure might vary slightly from what is described in this document. 1) Go to http://www.ibm.com/systems/support/. 2) Under Product support, click BladeCenter.
- Page 17 Note: Changes are made periodically to the IBM Web site. The actual procedure might vary slightly from what is described in this document. a) Go to http://www.ibm.com/systems/support/. b) Under Product support, click BladeCenter.
- Page 18 For problems with operating systems or IBM software or devices, complete the following steps. Note: Changes are made periodically to the IBM Web site. The actual procedure might vary slightly from what is described in this document. 1) Go to http://www.ibm.com/systems/support/.
-
Page 19: Undocumented Problems
If the problem remains, contact IBM or an approved warranty service provider for assistance with additional problem determination and possible hardware replacement. To open an online service request, go to http://www.ibm.com/ support/electronic/portal/. Be prepared to provide information about any error codes and collected data. - Page 20 BladeCenter HS22 Type 7870, 1936, and 1911: Problem Determination and Service Guide...
-
Page 21: Chapter 2. Introduction
If IBM installs a Tier 1 CRU at your request, you will be charged for the installation. v Tier 2 CRU: You may install a Tier 2 CRU yourself or request IBM to install it, at no additional charge, under the type of warranty service that is designated for your server. -
Page 22: Notices And Statements In This Document
This document is in PDF on the IBM Web site. This document explains how to use the functions of the IMM installed in an IBM server. The IMM works with IBM System x Server Firmware to provide systems-management capability for System x and BladeCenter servers. -
Page 23: Features And Specifications
Features and specifications Use this table to view specific information about the blade server, such as blade server hardware features and the dimensions of the blade server. Notes: 1. Power, cooling, removable-media drives, external ports, and advanced system management are provided by the BladeCenter unit. 2. - Page 24 The following table is a summary of the features and specifications of the blade server. Table 1. Features and specifications Microprocessor: Supports up to two Drives: Supports up to two hot-swap, Predictive Failure Analysis (PFA) multi-core Intel Xeon microprocessors. alerts: small form factor (SFF) Serial Attached Note: Use the Setup utility to v Microprocessors...
-
Page 25: Blade Server Controls And Leds
Advanced-Management- Module event log. The information LED can be turned off through the ® Advanced-Management-Module CLI, SNMP, or Web interface or through IBM Director Console. For more information about the Advanced-Management-Module Web interface, see http://www.ibm.com/systems/management/. For more... - Page 26 Advanced-Management-Module Web interface. NMI button (recessed): The nonmaskable interrupt (NMI) dumps the partition. Use this recessed button only as directed by IBM Support. Note: You can also send an NMI event to the selected blade server remotely using the AMM. For more information, see the BladeCenter Advanced Management Module User's Guide.
- Page 27 ownership of the media tray has been transferred to the blade server. It can take approximately 20 seconds for the operating system in the blade server to recognize the media tray. If there is no response when you press the media-tray select button, you can use the Advanced-Management-Module Web interface to determine whether local control has been disabled on the blade server.
-
Page 28: Turning On The Blade Server
The management module can turn off the blade server through the Advanced-Management-Module Web interface. For additional information, see the IBM BladeCenter Management Module User’s Guide or go to http://www-03.ibm.com/systems/management/ for more information. BladeCenter HS22 Type 7870, 1936, and 1911: Problem Determination and Service Guide... -
Page 29: Blade Server System-Board Layouts
Blade server system-board layouts Use this layout to locate connectors, LEDs and switches on the system board of the blade server. The following illustrations show the connectors, LEDs, and switches on the system board. The illustrations in this document might differ slightly from your hardware. Blade server connectors Use this information to locate blade server system-board components and connectors for optional devices. -
Page 30: System-Board Switches
System-board switches Use this information to locate and define system-board switches in the blade server. The following illustration shows the location of the light path diagnostics switch on the system board. The following table describes the function of each switch in the switch blocks (SW1, SW2, SW3). - Page 31 Switch number Description Switch setting Definition SW1 - 5 Boot block recovery The default position is When the switch is on off, allowing the blade it allows the blade server to boot from the server to boot using primary UEFI the backup UEFI.
-
Page 32: System-Board Leds
System-board LEDs Use this information to locate system-board LEDs in the blade server. You must remove the blade server from the BladeCenter unit, open the cover or remove any optional expansion units, and press the light path diagnostics switch (see “System-board switches” on page 16) to light any error LEDs that were turned on during processing. - Page 33 Fault LED: When this amber LED is lit, it indicates that an error has occurred in the expansion blade. The expansion blade error LED turns off only after the error is corrected. If an error occurs in the expansion blade, the fault LED on the blade device on which the expansion blade is installed is also lit.
- Page 34 BladeCenter HS22 Type 7870, 1936, and 1911: Problem Determination and Service Guide...
-
Page 35: Chapter 3. Configuring The Blade Server
KVM select button on the blade server (see “Blade server controls and LEDs” on page 11 for information). v If you are managing the blade server from a remote location, see the IBM BladeCenter Management Module User's Guide, IBM BladeCenter Management... -
Page 36: Setup Utility Menu
Module Command-Line Interface Reference Guide, or IBM BladeCenter Serial over LAN Setup Guide for information and instructions. 3. When the prompt <F1> Setup is displayed, press F1. If you have set an administrator password, you must type the administrator password to access the full Setup-utility menu. - Page 37 – Legacy Support Select this choice to view or set legacy support. - Force Legacy Video on Boot Select this choice to force INT video support, if the operating system does not support UEFI video output standards. - Rehook INT Select this choice to enable or disable devices from taking control of the boot process.
- Page 38 The startup sequence specifies the order in which the server checks devices to find a boot record. The server starts from the first boot record that it finds. If the server has Wake on LAN hardware and software and the operating system supports Wake on LAN functions, you can specify a startup sequence for the Wake on LAN functions.
-
Page 39: Using Passwords
Using passwords Use this information to set, change, or delete a power-on password. You can set, change, and delete a power-on password and an administrator password in the Setup utility by selecting System Settings then System Security. If you set a power-on password, you must type the power-on password to complete the system startup and to have access to the Setup Utility menu. - Page 40 Make sure that you download the version for your operating system. You can download the ASU from the IBM Web site. To download the ASU and update the UUID, complete the following steps. Note: Changes are made periodically to the IBM Web site. The actual procedure might vary slightly from what is described in this document.
- Page 41 See the Advanced Settings Utility Users Guide for more details. You can access the ASU Users Guide from the IBM Web site. Note: Changes are made periodically to the IBM Web site. The actual procedure might vary slightly from what is described in this document.
-
Page 42: Updating The Dmi/Smbios Data
UEFI-based server. The ASU is an online tool that supports several operating systems. Make sure that you download the version for your operating system. You can download the ASU from the IBM Web site. To download the ASU and update the DMI, complete the following steps. - Page 43 Utility. Note: To view more information about using the Advanced Settings Utility, scroll down to Online Help; then, click User's Guide for the IBM Advanced Settings Utility. f. In the next window under File link, click the Advanced Settings Utility link for your operating system to begin downloading the utility.
- Page 44 The KCS access method uses the IPMI/KCS interface. This method requires that the IPMI driver be installed. Some operating systems have the IPMI driver installed by default. ASU provides the corresponding mapping layer. See the Advanced Settings Utility Users Guide at http://www-947.ibm.com/ systems/support/supportsite.wss/docdisplay?brandind=5000008 &lndocid=MIGR-55021 for more details.
-
Page 45: Using The Serverguide Setup And Installation Cd
SYSTEM_PROD_DATA.SysEncloseAssetTag <asset_tag> --host <imm_ip> v Bootable media: You can also build a bootable media using the applications available through the Tools Center Web site at http://publib.boulder.ibm.com/infocenter/ toolsctr/v1r0/index.jsp. From Deployment Tools, click Bootable Media Creator. 5. Restart the server. -
Page 46: Serverguide Features
When you use the ServerGuide Setup and Installation CD, you do not need setup diskettes. You can use the CD to configure any supported IBM blade server model. The setup program provides a list of tasks that are required to set up the blade server. -
Page 47: Installing The Operating System
Windows operating system. v Use Remote Deployment Manager (RDM) Version 4.20 (or later) to install a supported operating system. To determine whether RDM supports an operating system, see http://www.ibm.com/systems/management/. v Download the latest operating-system installation instructions and install the operating system. -
Page 48: Using The Pxe Boot Agent Utility Program
Note: Changes are made periodically to the IBM Web site. The actual procedure might vary slightly from what is described in this document. 1. Go to http://www.ibm.com/support/. 2. Under Support type, select BladeCenter. 3. Under Popular links, select Operating system installation. -
Page 49: Configuring Uefi Compatible Devices
Configuring UEFI compatible devices Use this information to configure UEFI compatible devices. Your IBM BladeCenter HS22 Type 7870, 1936, and 1911 blade server is UEFI compatible. UEFI compatible expansion cards can be configured through the Setup utility. To configure a UEFI compatible expansion card, complete the following... -
Page 50: Configuring A Raid Array
RAID level-0 (striping) or RAID level-1 (mirror) arrays in operating systems that ® are listed on the ServerProven list at http://www.ibm.com/servers/eserver/ serverproven/compat/us/. For the blade server, you must configure the RAID by using the LSI Configuration Utility program. If an optional RAID expansion card is installed, you can use it to control all of the storage drives that are installed in the blade server. -
Page 51: Using Lan Over Usb To Interface The Imm
Because the IMM might obtain a different IP address for the LAN over USB interface, the IBM Advanced Settings Utility (ASU) and firmware flash utilities, DSA, and the IBM Director Agent use the Service Location Protocol (SLP) to discover the IMM IP address. These tools perform an SLP multicast discovery on the LAN over USB interface. -
Page 52: Configuring The Lan Over Usb Interface Manually
LAN over USB manually, use one of the following processes. For more information about LAN over USB configuration on different operating systems, see the IBM white paper Transitioning to UEFI and IMM on the IBM web site (see “Related documentation” on page 7 for information on how to find publications for your blade server). - Page 53 When you install Windows, there will be an unknown RNDIS device in the device manager. IBM provides a Windows INF file that identifies this device. The signed version of the INF is included in all of the Windows versions of the IMM, UEFI, and DSA update packages.
- Page 54 11. Open a command prompt, type ipconfig, and press Enter. The local area connection for the IBM USB RNDIS appears with an IP address in the range of 169.254.xxx.xxx with a subnet mask set to 255.255.0.0. LAN over USB Linux Driver Installation Use this information to install the LAN over USB driver for Linux.
-
Page 55: Chapter 4. Parts Listing
Replaceable components are of three types: v Tier 1 customer replaceable unit (CRU): Replacement of Tier 1 CRUs is your responsibility. If IBM installs a Tier 1 CRU at your request, you will be charged for the installation. v Tier 2 customer replaceable unit: You may install a Tier 2 CRU yourself or request IBM to install it, at no additional charge, under the type of warranty service that is designated for your server. - Page 56 Note: Component part numbers listed under Tier 1 CRU in the following table are classified as Tier 2 CRU for BladeCenter HS22 Type 1911 blade server. For information about the terms of the warranty and getting service and assistance, see the Warranty and Support Information document. CRU part CRU part FRU part...
- Page 57 CRU part CRU part FRU part Index Description number number number (Tier 1) (Tier 2) Expansion card, 2-Port 10Gb multi-function I/O adapter CFFh 49Y4239 (model HAx) Expansion card, 2-Port 40Gb Infiniband CFFh (option) 60Y0927 Expansion card, 4X Infiniband DDR CFFh (option) 49Y9976 Expansion card, Emulex 2-Port 40Gb Infiniband CFFh (option) 60Y0927...
- Page 58 CRU part CRU part FRU part Index Description number number number (Tier 1) (Tier 2) Microprocessor, Intel Xeon E5607 2.26 GHz/1066MHz-8MB 81Y5954 80W (quad core) (models A7x, E1Y) Microprocessor, Intel Xeon L5530 2.40 GHz/5.86GTps 49Y6807 QPI/1066MHz-8MB 60W (quad core) (model L3x) Microprocessor, Intel Xeon E5530 2.40 GHz/5.86GTps 46D1266 QPI/1066MHz-8MB 80W (quad core) (models B3x, EBx)
- Page 59 CRU part CRU part FRU part Index Description number number number (Tier 1) (Tier 2) Memory, DIMM filler (Type 7870 models 1Mx, 5Mx, 6Mx, A2x, A4x, A5x, A7x, B3x, B4x, B5x, B6x, C3x, C4x, C5x, C6x, C7x, C8x, CCx, D2x, D3x, D4x, D5x, E1Y, E2Y, E3Y, ECx, EBx, EDx, 60H2962 EEx, F2x, F3x, EGx, G2x, G4x, GCx, H2x, H4x, H5x, HAx, K4x, L2x, L3x, M2x, N2x) (Type 1911 model G2X) (Type 1936 model...
- Page 60 CRU part CRU part FRU part Index Description number number number (Tier 1) (Tier 2) Hard disk drive, 2.5 inch hot-swap SAS 73 GB, 10K, (option) 43W7537 Hard disk drive, 2.5 inch hot-swap SAS 73 GB, 15K, (option) 43W7546 Hard disk drive, 2.5 inch SFF slim hot-swap SAS 73 GB, 15K 42D0673 6Gbps (option) Hard disk drive, 2.5 inch hot-swap SAS 146 GB, 10K (option)
- Page 61 41Y8760 Emulex Advanced Virtual Fabric Adapter (CFFh) for 49Y4261 BladeCenter (model D4x) Grease Kit (all models) 41Y9292 IBM USB key for VMware ESXi 42D0545 Jumper cable, 12 volt (option) 46M6763 Kit, miscellaneous parts (all models) 46D1122 Label, system service (all models)
-
Page 62: Parts Listing - Bladecenter Gpu Expansion Unit
VMware ESX server 3i recovery CD kit, version 3.5 update 4 46M9238 VMware ESXi 4 49Y8747 Parts listing - BladeCenter GPU expansion unit The following replaceable components are available for the IBM BladeCenter GPU expansion unit. For an updated parts listing on the Web, go to http://www.ibm.com/systems/ support/. CRU part... -
Page 63: Chapter 5. Removing And Replacing Blade Server Components
Replaceable components are of three types: v Tier 1 customer replaceable unit (CRU): Replacement of Tier 1 CRUs is your responsibility. If IBM installs a Tier 1 CRU at your request, you will be charged for the installation. v Tier 2 customer replaceable unit: You may install a Tier 2 CRU yourself or request IBM to install it, at no additional charge, under the type of warranty that is designated for your server. -
Page 64: System Reliability Guidelines
For a list of supported optional devices for the blade server, see http://www.ibm.com/servers/eserver/serverproven/compat/us/. System reliability guidelines Use this information to make sure that the blade server meets the proper cooling and reliability guidelines. -
Page 65: Returning A Device Or Component
v While the device is still in its static-protective package, touch it to an unpainted metal part of the BladeCenter unit or any unpainted metal surface on any other grounded rack component in the rack in which you are installing the device for at least 2 seconds. -
Page 66: Removing The Blade Server From The Bladecenter Unit
Removing the blade server from the BladeCenter unit Use these instructions to remove the blade server from the BladeCenter unit. The following illustration shows how to remove a single-width type of blade server or blade filler from a Type 8677 BladeCenter unit. The appearance of your BladeCenter unit might be different;... -
Page 67: Installing The Blade Server In A Bladecenter Unit
≥ 18 kg (39.7 lb) CAUTION: Use safe practices when lifting. 5. Place either a blade filler or another blade server in the blade server bay within 1 minute. Installing the blade server in a BladeCenter unit Use these instructions to install the blade server in a BladeCenter unit. The following illustration shows how to install a blade server into a BladeCenter unit. - Page 68 a. When any blade server or device is in blade bay 7 through 14, power modules must be installed in all four power-module bays. For additional information, see the Installation and User's Guide that comes with the BladeCenter unit. b. If you are reinstalling a blade server that you removed, you must install it in the same blade bay from which you removed it.
-
Page 69: Removing And Replacing Tier 1 Customer Replaceable Units (Crus)
Removing and replacing Tier 1 customer replaceable units (CRUs) Use this information for removing and replacing Tier 1 CRUs. Replacement of Tier 1 CRUs is your responsibility. If IBM installs a Tier 1 CRU at your request, you will be charged for the installation. -
Page 70: Closing The Blade Server Cover
5. Lay the cover flat, or lift it from the blade server and store for future use. Statement 21 CAUTION: Hazardous energy is present when the blade server is connected to the power source. Always replace the blade cover before installing the blade server. Closing the blade server cover Use these instructions for information about how to close the blade server cover. -
Page 71: Removing A Blade Handle
2. If you removed an expansion unit from the blade server, install it now (see “Installing an optional expansion unit” on page 85). 3. Lower the cover so that the slots at the rear slide down onto the pins at the rear of the blade server, as shown in the illustration. -
Page 72: Installing A Blade Handle
Installing a blade handle Use these instructions for information about how install a blade handle. To install a blade handle, complete the following steps: 1. Orient the blade server with the cover side down and the bezel towards you. 2. Locate where you will be installing the blade handle. Note: The left handle and right handle are not the same part. - Page 73 6. If there is a plastic cover on the battery holder, use your fingers to lift the battery cover from the battery connector. 7. Release the battery by using your finger to press the top of the battery towards the middle of the blade server and out of the battery connector. 8.
-
Page 74: Installing The Battery
Statement 2 CAUTION: When replacing the lithium battery, use only IBM Part Number 33F8354 or an equivalent type battery recommended by the manufacturer. If your system has a module containing a lithium battery, replace it only with the same module type made by the same manufacturer. - Page 75 7. Orient the battery so that the positive (+) side faces in towards the center of the blade server. 8. Tilt the battery so that you can insert it into the bottom of the socket. 9. As you slide the battery into place, press the top of the battery into the socket. 10.
-
Page 76: Removing A Hot-Swap Storage Drive
Removing a hot-swap storage drive Use this information to remove a hot-swap storage drive. The blade server has two SAS hot-swap storage bays for installing or removing hot-swap storage devices, such as a SAS storage drive. To remove a hot-swap hard disk drive or drive filler, complete the following steps. -
Page 77: Installing A Hot-Swap Storage Drive
Installing a hot-swap storage drive Use these instructions to install a hot-swap storage drive into the blade server. The blade server has two SAS storage bays for installing hot-swap storage drives, such as a hot-swap SAS hard disk drive. One storage drive might already be installed in the blade server in storage bay 0. -
Page 78: Removing A Memory Module
Removing a memory module Use this information to remove a memory module from the blade server. The following illustration shows how to remove a DIMM from the blade server. This information also applies to removing a DIMM filler. DIMM Retaining clip To remove a DIMM, complete the following steps. -
Page 79: Installing A Memory Module
8. Install a DIMM or DIMM filler in each empty DIMM connector (see “Installing a memory module”). Note: A DIMM or DIMM filler must occupy each DIMM socket before the blade server is turned on. 9. If you are instructed to return the DIMM, follow all packaging instructions, and use any packaging materials for shipping that are supplied to you. - Page 80 Table 3. System memory configuration for independent channel mode (1 microprocessor) (continued) DIMM socket Installed memory 4 DIMMs 5 DIMMs 6 DIMMs Table 4. System memory configuration for independent channel mode (2 microprocessors) DIMM socket Installed memory 2 DIMMs 3 DIMMs 4 DIMMs 5 DIMMs 6 DIMMs...
- Page 81 Table 6. System memory configuration for mirrored channel mode (2 microprocessors) DIMM socket Installed memory 4 DIMMs 6 DIMMs 8 DIMMs v Spare channel mode: In spare channel mode, channel 2 is the spare of the active channels 0 and 1. The spare channel is not available as active memory. The maximum memory available (with 16 GB DIMMs) is 64 GB in a single CPU system and 128 GB in a dual CPU system.
-
Page 82: Removing A Usb Flash Key
4. Touch the static-protective package that contains the DIMM to any unpainted metal surface on the BladeCenter unit or any unpainted metal surface on any other grounded rack component in the rack in which you are installing the DIMM for at least two seconds; then, remove the DIMM from its package. 5. - Page 83 The following illustration shows the removal of a USB Flash key from the blade server. To remove the USB Flash key, complete the following steps. 1. Before you begin, read “Safety” on page v and “Installation guidelines” on page 49. 2.
-
Page 84: Installing A Usb Flash Key
7. Using your fingers, pull the USB Flash key out of the connector. 8. If you are instructed to return the USB Flash key, follow all packaging instructions, and use any packaging materials for shipping that are supplied to you. Installing a USB Flash key Use these instructions to install a USB Flash key in the blade server. -
Page 85: Removing An I/O Expansion Card
Removing an I/O expansion card The following sections describe how to remove the following expansion cards: v vertical-combination-I/O (CIOv) v horizontal-combination-form-factor (CFFh) v CIOv storage interface card Removing a CIOv-form-factor expansion card Use these instructions to remove a CIOv-form-factor expansion card in the blade server. - Page 86 6. Locate the CIOv expansion connector (see “Blade server connectors” on page 15). 7. Using your fingers, move the retaining clips away from the CIOv card; then, lift the card out of the connector. Removing a horizontal-compact-form-factor expansion card Use these instructions to remove a compact-form-factor expansion card from the blade server.
-
Page 87: Remove The Blade Server Cover
Removing a storage interface card Use this information to remove a storage interface card from the blade server. The storage interface card controls the SAS hot-swap storage drives. The following illustrations and installation instructions shows how to remove a ServeRAID-MR10ie CIOv storage interface card from the blade server. The illustrations and removal instructions are similar for other CIOv storage interface cards. - Page 88 b. Gently push the retaining clips away from the expansion card; then, lift the card out of the expansion-card connector. c. Remove the cable from the storage interface card by holding the card in one hand; then, use your other hand to pull the cable away from the card. When pulling the cable, make sure that you hold the cable where there is a blue touchpoint.
-
Page 89: Installing An I/O Expansion Card
Setup utility by selecting System Settings and Devices and I/O Ports. v Ethernet Expansion Card (CIOv) for IBM BladeCenter v QLogic 4 Gb Fibre Channel Expansion Card (CIOv) for IBM BladeCenter v SAS Connectivity Card (CIOv) for IBM BladeCenter... - Page 90 Setup utility by selecting System Settings and Devices and I/O Ports. v 2/4 Port Ethernet Expansion Card for BladeCenter v Broadcom 10 Gb 2-port Ethernet Expansion Card (CFFh) for IBM BladeCenter v Broadcom 10 Gb 4-port Ethernet Expansion Card (CFFh) for IBM BladeCenter To install a CFFh expansion card, complete the following steps: 1.
- Page 91 7. Install the blade server into the BladeCenter unit (see “Installing the blade server in a BladeCenter unit” on page 53). Installing a storage interface card Use this information to install a storage interface card in the blade server. The storage interface card controls the SAS hot-swap storage drives. The following illustrations and installation instructions shows how to install a ServeRAID-MR10ie controller into the CIOv expansion connector of the blade server.
- Page 92 a. If the interposer has a pull strap, move the pull strap away from the storage interface card. If the pull strap surrounds the storage interface card, the pull strap will interfere with the removal of the interposer card. b. Press out on the plastic latch that holds the interposer card to the storage interface card and simultaneously lift up on the controller, as shown.
- Page 93 module” on page 65). 8. Install the backup-battery cable to the backup battery. The side of the cable with the blue touchpoint should be oriented towards the center of the blade server. 9. Orient the backup-battery cable so that it lays flat over the top of the heat sink for microprocessor two.
-
Page 94: Removing And Replacing Tier 2 Crus
Use this information to determine the guidelines for installing a Tier 2 CRU into your blade server. You may install a Tier 2 CRU yourself or request IBM to install it, at no additional charge, under the type of warranty service that is designated for the server. -
Page 95: Installing The Bezel Assembly
7. Use a screwdriver to remove the four screws that secure the bezel assembly to the blade server base assembly. Save the screws in a safe place. It is recommended to use the same screws when installing the bezel assembly. 8. -
Page 96: Removing The Control Panel
4. Use your hand to keep the bezel assembly tight against the blade server; then, rotate the blade server so that the bottom is now facing up. 5. Use a screwdriver to install the four screws that secure the bezel assembly to the blade server. -
Page 97: Installing The Control Panel
Installing the control panel Use these instructions to install the control panel in the blade server. The blade server has a control panel that provides controls and information LEDs for the blade server (see “Blade server controls and LEDs” on page 11). The following illustration shows how to install the control panel. -
Page 98: Removing And Replacing Field Replaceable Units (Frus)
Removing and replacing field replaceable units (FRUs) Use this information to remove and replace field replaceable units (FRUs). FRUs must be installed only by trained service technicians. The illustrations in this document might differ slightly from your hardware. Removing an optional expansion unit Use these instructions to remove the optional expansion unit from the blade server. -
Page 99: Installing An Optional Expansion Unit
Installing an optional expansion unit Use these instructions to install an optional expansion unit. Attention: If a horizontal combination-form-factor (CFFh) expansion card is installed on the blade server system board, you cannot install an optional expansion unit. Notes: 1. All devices should be installed in an expansion unit before attaching it to the blade server. -
Page 100: Removing A Gpu Adapter From The Bladecenter Gpu Expansion Unit
6. If additional expansion units are being installed, repeat steps 4 through 8 for each expansion blade; otherwise continue with step 11. 7. Follow the instructions provided with the expansion unit to install an option in the expansion unit. 8. If this is the last expansion blade being installed, install the cover provided with the expansion unit (see “Closing the blade server cover”... - Page 101 b. Loosen the screws and remove the retention bracket, then disconnect the cable from the expansion-unit system board (B). c. Locate the tray-release button on the bottom of the expansion unit. Tray release button d. Press in and hold the tray-release button; then, pull the expansion-unit riser assembly out of the expansion-unit system board.
-
Page 102: Installing A Gpu Adapter In The Bladecenter Gpu Expansion Unit
7. Carefully turn the expansion-unit riser assembly back over. Unplug the GPU adapter from the PCI connector in the riser assembly and lift it out of the riser assembly. 8. If you are instructed to return the GPU adapter, follow all packaging instructions, and use any packaging materials for shipping that are supplied to you. - Page 103 6. If you have not already done so, touch the static-protective package that contains the GPU adapter to any unpainted metal surface of the BladeCenter unit or any unpainted metal surface on any other grounded rack-component for at least 2 seconds. 7.
-
Page 104: Removing A Microprocessor And Heat Sink
Notes: 1. The microprocessor and heat sink assembly are both field-replaceable units (FRUs) and must be replaced by a trained service technician. To contact an IBM service representative, see “Hardware service and support” on page 236. 2. The heat-sink FRU is packaged with the thermal material applied to the underside. - Page 105 defective microprocessor is replaced or if the thermal material is contaminated or has come in contact with another object other than its paired microprocessor. 3. A heat-sink FRU can be ordered separately if the thermal material becomes contaminated. To remove a microprocessor, complete the following steps. Heat sink Microprocessor 2 Microprocessor 1...
- Page 106 Attention: Do not use any tools or sharp objects to lift the release lever on the microprocessor socket. Doing so might result in permanent damage to the system board. Microprocessor retainer Microprocessor release lever 8. Rotate the locking lever on the microprocessor socket from its closed and locked position until it stops in the fully open position (approximately a 135°...
- Page 107 Installation tool Alignment pins Microprocessor 12. Twist the handle clockwise to attach the tool to the microprocessor. Note: You can pick up or release the microprocessor by twisting the microprocessor installation tool handle. Handle Installation tool 13. Carefully lift the microprocessor straight up and out of the socket, and place it on a static-protective surface.
-
Page 108: Installing A Microprocessor And Heat Sink
Installing a microprocessor and heat sink Use this information to install a microprocessor and heat sink in the blade server. The following illustration shows how to install a microprocessor and heat sink in the blade server. Heat sink Microprocessor 2 Microprocessor 1 and heat sink Microprocessor... - Page 109 d. Touch the static-protective package that contains the microprocessor to any unpainted metal surface on the BladeCenter unit or any unpainted metal surface on any other grounded rack component; then, remove the microprocessor from the package. e. Remove the dust cover from the bottom of the microprocessor. Microprocessor Alignment marks Microprocessor...
-
Page 110: Thermal Grease
4. Reinstall the memory module or DIMM filler closest to the microprocessor you installed. a. If you installed microprocessor 1, install the memory module into DIMM connector 1 (see “Installing a memory module” on page 65). b. If you installed microprocessor 2, install the memory module into DIMM connector 6 (see “Installing a memory module”... -
Page 111: Removing The System-Board Assembly
Use this information to remove the system-board assembly from the blade server. Attention: The system-board assembly is a field-replaceable unit (FRU) and must be replaced by a trained service technician. To contact an IBM service representative, see “Hardware service and support” on page 236. -
Page 112: Installing The System-Board Assembly
7. The new system-board assembly comes with an IBM Repair Identification (RID) tag. Using a ball point pen, transfer the machine type and serial number from the old system-board assembly to the two labels on the IBM Repair Identification (RID) tag provided with the new system-board assembly; then, place label 1 (larger label) on the base of the planar and label 2 (smaller label) on the bottom side of the control panel. - Page 113 (RID) tag provided with the new system-board assembly; then, place label 1 (larger label) on the base of the planar and label 2 (smaller label) on the bottom side of the control panel. 2. Install all of the components in the following list that you removed from the old system-board assembly onto the new system-board assembly.
- Page 114 the latest firmware or a copy of the pre-existing firmware before you proceed. See “Updating the DMI/SMBIOS data” on page 28 and “Firmware updates” on page 34 for more information. BladeCenter HS22 Type 7870, 1936, and 1911: Problem Determination and Service Guide...
-
Page 115: Copyright Ibm Corp
I/O modules, removable-media drives, and the blade servers, while the operating system is running. For documentation and download information for DSA, see http://www.ibm.com/systems/ management/. For more information about diagnostic programs and error messages, see “Dynamic system analysis diagnostic programs and messages” on... -
Page 116: Post
(UEFI) configuration The diagnostic programs create a merged log that includes events from all collected logs. The information is collected into a file that you can send to IBM service and support. Additionally, you can view the information locally through a generated text report file. -
Page 117: Error Logs
Error logs Error codes and messages are displayed in the following types of event logs: v POST event log: This log contains the three most recent error codes and messages that were generated during POST. You can view the POST event log through the Setup utility. - Page 118 Note: Changes are made periodically to the IBM Web site. The actual procedure might vary slightly from what is described in this document. 1. Go to http://www.ibm.com/systems/support/. 2. Under Product support, click BladeCenter.
-
Page 119: Imm Error Messages
Note: An updated list of IMM error messages and corrective actions are available on the IBM Web site at http://www.ibm.com/systems/support/supportsite.wss/ docdisplay?lndocid=MIGR-5079338&brandind=5000008. v Follow the suggested actions in the order in which they are listed in the Action column until the problem is solved. - Page 120 v Follow the suggested actions in the order in which they are listed in the Action column until the problem is solved. v See Chapter 4, “Parts listing,” on page 41 to determine which components are CRUs and which components are FRUs.
- Page 121 v Follow the suggested actions in the order in which they are listed in the Action column until the problem is solved. v See Chapter 4, “Parts listing,” on page 41 to determine which components are CRUs and which components are FRUs.
- Page 122 v Follow the suggested actions in the order in which they are listed in the Action column until the problem is solved. v See Chapter 4, “Parts listing,” on page 41 to determine which components are CRUs and which components are FRUs.
- Page 123 v Follow the suggested actions in the order in which they are listed in the Action column until the problem is solved. v See Chapter 4, “Parts listing,” on page 41 to determine which components are CRUs and which components are FRUs.
- Page 124 v Follow the suggested actions in the order in which they are listed in the Action column until the problem is solved. v See Chapter 4, “Parts listing,” on page 41 to determine which components are CRUs and which components are FRUs.
- Page 125 v Follow the suggested actions in the order in which they are listed in the Action column until the problem is solved. v See Chapter 4, “Parts listing,” on page 41 to determine which components are CRUs and which components are FRUs.
- Page 126 v Follow the suggested actions in the order in which they are listed in the Action column until the problem is solved. v See Chapter 4, “Parts listing,” on page 41 to determine which components are CRUs and which components are FRUs.
- Page 127 v Follow the suggested actions in the order in which they are listed in the Action column until the problem is solved. v See Chapter 4, “Parts listing,” on page 41 to determine which components are CRUs and which components are FRUs.
- Page 128 v Follow the suggested actions in the order in which they are listed in the Action column until the problem is solved. v See Chapter 4, “Parts listing,” on page 41 to determine which components are CRUs and which components are FRUs.
- Page 129 v Follow the suggested actions in the order in which they are listed in the Action column until the problem is solved. v See Chapter 4, “Parts listing,” on page 41 to determine which components are CRUs and which components are FRUs.
- Page 130 v Follow the suggested actions in the order in which they are listed in the Action column until the problem is solved. v See Chapter 4, “Parts listing,” on page 41 to determine which components are CRUs and which components are FRUs.
- Page 131 v Follow the suggested actions in the order in which they are listed in the Action column until the problem is solved. v See Chapter 4, “Parts listing,” on page 41 to determine which components are CRUs and which components are FRUs.
- Page 132 v Follow the suggested actions in the order in which they are listed in the Action column until the problem is solved. v See Chapter 4, “Parts listing,” on page 41 to determine which components are CRUs and which components are FRUs.
- Page 133 v Follow the suggested actions in the order in which they are listed in the Action column until the problem is solved. v See Chapter 4, “Parts listing,” on page 41 to determine which components are CRUs and which components are FRUs.
- Page 134 v Follow the suggested actions in the order in which they are listed in the Action column until the problem is solved. v See Chapter 4, “Parts listing,” on page 41 to determine which components are CRUs and which components are FRUs.
- Page 135 Type Error Message Action 0x806F010C Error Group 1 (All DIMMs) 1. Check the IBM support website for an applicable uncorrectable ECC memory retain tip or firmware update that applies to this error memory error. 2. Manually re-enable all affected memory modules if the server firmware version is older than UEFI v1.10.
- Page 136 Type Error Message Action 0x806F010C Error Group 1 (DIMM Group Sta) 1. Check the IBM support website for an applicable uncorrectable ECC memory retain tip or firmware update that applies to this error memory error. 2. Manually re-enable all affected memory modules if the server firmware version is older than UEFI v1.10.
- Page 137 Type Error Message Action 0x806F010C Error Group 1 (DIMM Status) 1. Check the IBM support website for an applicable uncorrectable ECC memory retain tip or firmware update that applies to this error memory error. 2. Manually re-enable all affected memory modules if the server firmware version is older than UEFI v1.10.
- Page 138 Type Error Message Action 0x806F010C Error Group 1 (One of the DIMMs) 1. Check the IBM support website for an applicable uncorrectable ECC memory retain tip or firmware update that applies to this error memory error. 2. Manually re-enable all affected memory modules if the server firmware version is older than UEFI v1.10.
- Page 139 Type Error Message Action 0x806F010C Error Memory device X (DIMM X 1. Check the IBM support website for an applicable Status) uncorrectable ECC retain tip or firmware update that applies to this memory error [Note: X=1-12] memory error. 2. Manually re-enable all affected memory modules if the server firmware version is older than UEFI v1.10.
- Page 140 v Follow the suggested actions in the order in which they are listed in the Action column until the problem is solved. v See Chapter 4, “Parts listing,” on page 41 to determine which components are CRUs and which components are FRUs.
- Page 141 v Follow the suggested actions in the order in which they are listed in the Action column until the problem is solved. v See Chapter 4, “Parts listing,” on page 41 to determine which components are CRUs and which components are FRUs.
- Page 142 (error code 0x806F010c or 0x806F050c), follow the procedure for that event and restart the server. 2. Check the IBM support website for an applicable retain tip or firmware update that applies to this memory event. If no memory fault is recorded in...
- Page 143 v Follow the suggested actions in the order in which they are listed in the Action column until the problem is solved. v See Chapter 4, “Parts listing,” on page 41 to determine which components are CRUs and which components are FRUs.
- Page 144 v Follow the suggested actions in the order in which they are listed in the Action column until the problem is solved. v See Chapter 4, “Parts listing,” on page 41 to determine which components are CRUs and which components are FRUs.
- Page 145 v Follow the suggested actions in the order in which they are listed in the Action column until the problem is solved. v See Chapter 4, “Parts listing,” on page 41 to determine which components are CRUs and which components are FRUs.
- Page 146 v Follow the suggested actions in the order in which they are listed in the Action column until the problem is solved. v See Chapter 4, “Parts listing,” on page 41 to determine which components are CRUs and which components are FRUs.
- Page 147 v Follow the suggested actions in the order in which they are listed in the Action column until the problem is solved. v See Chapter 4, “Parts listing,” on page 41 to determine which components are CRUs and which components are FRUs.
- Page 148 Type Error Message Action 0x806F050C Error Group 1 (All DIMMs) 1. Check the IBM support website for an applicable correctable ECC memory error retain tip or firmware update that applies to this logging limit reached memory error. 2. Install the affected memory modules (as indicated...
- Page 149 Type Error Message Action 0x806F050C Error Group 1 (DIMM Group Sta) 1. Check the IBM support website for an applicable correctable ECC memory error retain tip or firmware update that applies to this logging limit reached memory error. 2. Install the affected memory modules (as indicated...
- Page 150 Type Error Message Action 0x806F050C Error Group 1 (DIMM Status) 1. Check the IBM support website for an applicable correctable ECC memory error retain tip or firmware update that applies to this logging limit reached memory error. 2. Install the affected memory modules (as indicated...
- Page 151 Type Error Message Action 0x806F050C Error Group 1 (One of the DIMMs) 1. Check the IBM support website for an applicable correctable ECC memory error retain tip or firmware update that applies to this logging limit reached memory error. 2. Install the affected memory modules (as indicated...
- Page 152 Type Error Message Action 0x806F050C Error Memory device X (DIMM X 1. Check the IBM support website for an applicable Status) correctable ECC memory retain tip or firmware update that applies to this error logging limit reached memory error. [Note X = 1-12] 2.
- Page 153 v Follow the suggested actions in the order in which they are listed in the Action column until the problem is solved. v See Chapter 4, “Parts listing,” on page 41 to determine which components are CRUs and which components are FRUs.
- Page 154 v Follow the suggested actions in the order in which they are listed in the Action column until the problem is solved. v See Chapter 4, “Parts listing,” on page 41 to determine which components are CRUs and which components are FRUs.
- Page 155 v Follow the suggested actions in the order in which they are listed in the Action column until the problem is solved. v See Chapter 4, “Parts listing,” on page 41 to determine which components are CRUs and which components are FRUs.
- Page 156 v Follow the suggested actions in the order in which they are listed in the Action column until the problem is solved. v See Chapter 4, “Parts listing,” on page 41 to determine which components are CRUs and which components are FRUs.
- Page 157 v Follow the suggested actions in the order in which they are listed in the Action column until the problem is solved. v See Chapter 4, “Parts listing,” on page 41 to determine which components are CRUs and which components are FRUs.
- Page 158 v Follow the suggested actions in the order in which they are listed in the Action column until the problem is solved. v See Chapter 4, “Parts listing,” on page 41 to determine which components are CRUs and which components are FRUs.
- Page 159 v Follow the suggested actions in the order in which they are listed in the Action column until the problem is solved. v See Chapter 4, “Parts listing,” on page 41 to determine which components are CRUs and which components are FRUs.
-
Page 160: Post Error Codes
POST error codes Use this information to diagnose and resolve POST error codes for the blade server. The following table describes the POST error codes and suggested actions to correct the detected problems. v Follow the suggested actions in the order in which they are listed in the Action column until the problem is solved. - Page 161 v Follow the suggested actions in the order in which they are listed in the Action column until the problem is solved. v See Chapter 4, “Parts listing,” on page 41 to determine which components are customer replaceable units (CRU) and which components are field replaceable units (FRU). v If an action step is preceded by “(Trained service technician only),”...
- Page 162 v Follow the suggested actions in the order in which they are listed in the Action column until the problem is solved. v See Chapter 4, “Parts listing,” on page 41 to determine which components are customer replaceable units (CRU) and which components are field replaceable units (FRU). v If an action step is preceded by “(Trained service technician only),”...
- Page 163 v Follow the suggested actions in the order in which they are listed in the Action column until the problem is solved. v See Chapter 4, “Parts listing,” on page 41 to determine which components are customer replaceable units (CRU) and which components are field replaceable units (FRU). v If an action step is preceded by “(Trained service technician only),”...
- Page 164 1. If the memory module was disabled due to a memory fault, follow the procedure for that event and restart the server. 2. Check the IBM support website for an applicable retain tip or firmware update that applies to this memory event. If no memory fault is recorded in...
- Page 165 Description Action 0051003 Uncorrectable DIMM error 1. Check the IBM support website for an applicable retain tip or firmware update that applies to this memory error. 2. Manually re-enable all affected DIMMs if the server firmware version is older than UEFI v1.10.
- Page 166 v Follow the suggested actions in the order in which they are listed in the Action column until the problem is solved. v See Chapter 4, “Parts listing,” on page 41 to determine which components are customer replaceable units (CRU) and which components are field replaceable units (FRU). v If an action step is preceded by “(Trained service technician only),”...
- Page 167 (see “Error logs” on page 103). 0058001 PFA threshold exceeded. 1. Check the IBM support website for an applicable retain tip or firmware update that applies to this memory error. 2. Swap the affected DIMMs (as indicated by the...
- Page 168 v Follow the suggested actions in the order in which they are listed in the Action column until the problem is solved. v See Chapter 4, “Parts listing,” on page 41 to determine which components are customer replaceable units (CRU) and which components are field replaceable units (FRU). v If an action step is preceded by “(Trained service technician only),”...
- Page 169 Description Action 0058008 DIMM failed memory test 1. Check the IBM support website for an applicable retain tip or firmware update that applies to this memory error. 2. Manually re-enable all affected DIMMs if the server firmware version is older than UEFI v1.10.
- Page 170 v Follow the suggested actions in the order in which they are listed in the Action column until the problem is solved. v See Chapter 4, “Parts listing,” on page 41 to determine which components are customer replaceable units (CRU) and which components are field replaceable units (FRU). v If an action step is preceded by “(Trained service technician only),”...
- Page 171 v Follow the suggested actions in the order in which they are listed in the Action column until the problem is solved. v See Chapter 4, “Parts listing,” on page 41 to determine which components are customer replaceable units (CRU) and which components are field replaceable units (FRU). v If an action step is preceded by “(Trained service technician only),”...
- Page 172 v Follow the suggested actions in the order in which they are listed in the Action column until the problem is solved. v See Chapter 4, “Parts listing,” on page 41 to determine which components are customer replaceable units (CRU) and which components are field replaceable units (FRU). v If an action step is preceded by “(Trained service technician only),”...
- Page 173 v Follow the suggested actions in the order in which they are listed in the Action column until the problem is solved. v See Chapter 4, “Parts listing,” on page 41 to determine which components are customer replaceable units (CRU) and which components are field replaceable units (FRU). v If an action step is preceded by “(Trained service technician only),”...
- Page 174 v Follow the suggested actions in the order in which they are listed in the Action column until the problem is solved. v See Chapter 4, “Parts listing,” on page 41 to determine which components are customer replaceable units (CRU) and which components are field replaceable units (FRU). v If an action step is preceded by “(Trained service technician only),”...
- Page 175 v Follow the suggested actions in the order in which they are listed in the Action column until the problem is solved. v See Chapter 4, “Parts listing,” on page 41 to determine which components are customer replaceable units (CRU) and which components are field replaceable units (FRU). v If an action step is preceded by “(Trained service technician only),”...
- Page 176 v Follow the suggested actions in the order in which they are listed in the Action column until the problem is solved. v See Chapter 4, “Parts listing,” on page 41 to determine which components are customer replaceable units (CRU) and which components are field replaceable units (FRU). v If an action step is preceded by “(Trained service technician only),”...
- Page 177 v Follow the suggested actions in the order in which they are listed in the Action column until the problem is solved. v See Chapter 4, “Parts listing,” on page 41 to determine which components are customer replaceable units (CRU) and which components are field replaceable units (FRU). v If an action step is preceded by “(Trained service technician only),”...
- Page 178 v Follow the suggested actions in the order in which they are listed in the Action column until the problem is solved. v See Chapter 4, “Parts listing,” on page 41 to determine which components are customer replaceable units (CRU) and which components are field replaceable units (FRU). v If an action step is preceded by “(Trained service technician only),”...
-
Page 179: Checkout Procedure
Checkout procedure Use this information to perform the checkout procedure for the blade server. The checkout procedure is the sequence of tasks that you should follow to diagnose a problem in the blade server. About the checkout procedure Use this information to run diagnostics, locate error codes, and identify device errors for the blade server. -
Page 180: Troubleshooting Tables
If the part is a FRU, the part must be replaced by a trained service technician. See “Removing and replacing field replaceable units (FRUs)” on page 84. Or contact an IBM service representative, see “Hardware service and support” on page 236. -
Page 181: Storage Drive Problems
Storage drive problems Use this information to resolve storage drive problems. Follow the suggested actions in the order in which they are listed in the Action column until the problem is solved. v See Chapter 4, “Parts listing,” on page 41 to determine which components are CRUs and which components are FRUs. -
Page 182: Keyboard Or Mouse Problems
v See Chapter 4, “Parts listing,” on page 41 to determine which components are CRUs and which components are FRUs. v If an action step is preceded by “(Trained service technician only),” that step must be performed only by a trained service technician. -
Page 183: Memory Problems
Memory problems Use this information to diagnose and resolve memory problems with the blade server. Follow the suggested actions in the order in which they are listed in the Action column until the problem is solved. v See Chapter 4, “Parts listing,” on page 41 to determine which components are CRUs and which components are FRUs. -
Page 184: Monitor Or Video Problems
Monitor or video problems Use this information to diagnose and resolve monitor or video errors. Follow the suggested actions in the order in which they are listed in the Action column until the problem is solved. The video monitor is a shared BladeCenter unit resource. First, make sure that the video monitor is assigned to the blade server;... -
Page 185: Network Connection Problems
Network connection problems Use this information to diagnose and resolve network connection errors. Follow the suggested actions in the order in which they are listed in the Action column until the problem is solved. The blade server connects to the network by using shared BladeCenter unit resources. -
Page 186: Optional-Device Problems
An IBM optional device that 1. Make sure that: was just installed does not v The device is designed for the blade server. See http://www.ibm.com/ work. servers/eserver/serverproven/compat/us/. v You followed the installation instructions that came with the device and the device is installed correctly. -
Page 187: Power Error Messages
Power error messages Use this information to diagnose and resolve power error messages for the blade server. Follow the suggested actions in the order in which they are listed in the Action column until the problem is solved. Power to the blade server is provided by shared BladeCenter unit resources. - Page 188 v See Chapter 4, “Parts listing,” on page 41 to determine which components are CRUs and which components are FRUs. v If an action step is preceded by “(Trained service technician only),” that step must be performed only by a trained service technician.
- Page 189 v See Chapter 4, “Parts listing,” on page 41 to determine which components are CRUs and which components are FRUs. v If an action step is preceded by “(Trained service technician only),” that step must be performed only by a trained service technician.
-
Page 190: Power Problems
Power problems Use this information to diagnose and resolve power problems for the blade server. Follow the suggested actions in the order in which they are listed in the Action column until the problem is solved. v See Chapter 4, “Parts listing,” on page 41 to determine which components are CRUs and which components are FRUs. - Page 191 v See Chapter 4, “Parts listing,” on page 41 to determine which components are CRUs and which components are FRUs. v If an action step is preceded by “(Trained service technician only),” that step must be performed only by a trained service technician.
- Page 192 v See Chapter 4, “Parts listing,” on page 41 to determine which components are CRUs and which components are FRUs. v If an action step is preceded by “(Trained service technician only),” that step must be performed only by a trained service technician.
-
Page 193: Removable-Media Drive Problems
22. 4. For SAS storage drive problems, make sure that the correct device driver is installed. For the latest device drivers, go to http://www.ibm.com/systems/ support/. 5. Reseat the battery - See “Removing the battery” on page 58 and “Installing the battery”... -
Page 194: Serverguide Problems
ServerGuide problems Use this information to locate ServerGuide problems and suggested actions. The following table lists problem symptoms and suggested solutions. Symptom Suggested action The ServerGuide Setup and v Make sure that the CD drive is associated with the blade server that you are Installation CD will not start. - Page 195 v See Chapter 4, “Parts listing,” on page 41 to determine which components are CRUs and which components are FRUs. v If an action step is preceded by “(Trained service technician only),” that step must be performed only by a trained service technician.
-
Page 196: Universal Serial Bus (Usb) Port Problems
The operating system supports USB devices. v The correct USB device driver is installed. For the latest device drivers, go to http://www.ibm.com/support/. 4. (Trained service technician only) Replace the system-board assembly. See “Removing the system-board assembly” on page 97 and “Installing the system-board assembly”... -
Page 197: Light Path Diagnostics
Light path diagnostics Use this information as an overview of light path diagnostics. Light path diagnostics is a system of LEDs on the control panel and on various internal components of the blade server or expansion unit. When an error occurs, LEDs can be lit throughout the blade server or expansion unit to help identify the source of the error. - Page 198 The following illustration shows the locations of the system-board error LEDs. SAS 0- Microprocessor 2- Battery- error LED error LED error LED DIMM 7- DIMM 6- error LED error LED DIMM 8- DIMM 5- error LED error LED DIMM 9- DIMM 4- error LED error LED...
-
Page 199: Blade Server Light Path Diagnostics Leds
Blade server light path diagnostics LEDs Use this information to diagnose and resolve possible errors displayed by the light path diagnostic LEDs. The following table describes the LEDs on the light path diagnostics panels, on the system board, and on the optional expansion unit and suggested actions to correct the detected problems. - Page 200 v Follow the suggested actions in the order in which they are listed in the Action column until the problem is solved. v See Chapter 4, “Parts listing,” on page 41 to determine which components are CRUs and which components are FRUs.
-
Page 201: Viewing The Light Path Diagnostics Leds In The Bladecenter Gpu Expansion Unit
v Follow the suggested actions in the order in which they are listed in the Action column until the problem is solved. v See Chapter 4, “Parts listing,” on page 41 to determine which components are CRUs and which components are FRUs. -
Page 202: Bladecenter Gpu Expansion Unit Light Path Diagnostics Leds
The following illustration shows the locations of the light path LEDs and the light path diagnostics switch on the expansion unit system board. BPE4 Ck Nxt CFFh GPU error LED BladeCenter GPU expansion unit light path diagnostics LEDs Use this information to diagnose and resolve possible errors displayed by the light path diagnostic LEDs in the BladeCenter GPU expansion unit. -
Page 203: Dynamic System Analysis Diagnostic Programs And Messages
The Dynamic System Analysis (DSA) Preboot diagnostic programs are the primary method of testing the major components of the server. DSA is a system information collection and analysis tool that you can use to provide information IBM service and support to aid in the diagnosis of the system problems. -
Page 204: Running The Diagnostic Programs
You can output all of the collected XML file that you can send to the IBM service and support, view the information locally through a generated text report file, or copy the log to a removable media and view the log from a Web browser. -
Page 205: Diagnostic Text Messages
For help with the diagnostic programs, press F1. You also can press F1 from within a help screen to obtain online documentation from which you can select different categories. To exit from the help information, press Esc. To determine what action you should take as a result of a diagnostic text message or error code, see the table in “Diagnostic messages”... -
Page 206: Viewing The Test Log
In the DSA GUI, select DSA Error Log from the System Information page. You can send the DSA error log file to IBM service and support to aid in diagnosing the server problems or you can use the DSA CLI copy command to copy the log to an external USB device. -
Page 207: Imm Self Tests
3. Rerun the test. See “Diagnostic tools overview” on page 101. 4. Make sure that the DSA Diagnostic code is up-to-date, upgrade if necessary; then, rerun the test. The latest code can be found on the IBM support Web site at http://www.ibm.com/ systems/support/supportsite.wss/ docdisplay?brandind=5000008&lndocid=MIGR- 63017. - Page 208 3. Rerun the test. See “Diagnostic tools overview” on page 101. 4. Make sure that the DSA Diagnostic code is up-to-date, upgrade if necessary; then, rerun the test. The latest code can be found on the IBM support Web site at http://www.ibm.com/ systems/support/supportsite.wss/ docdisplay?brandind=5000008&lndocid=MIGR- 63017.
- Page 209 3. Rerun the test. See “Diagnostic tools overview” on page 101. 4. Make sure that the DSA Diagnostic code is up-to-date, upgrade if necessary; then, rerun the test. The latest code can be found on the IBM support Web site at http://www.ibm.com/ systems/support/supportsite.wss/ docdisplay?brandind=5000008&lndocid=MIGR- 63017.
- Page 210 3. Rerun the test. See “Diagnostic tools overview” on page 101. 4. Make sure that the DSA Diagnostic code is up-to-date, upgrade if necessary; then, rerun the test. The latest code can be found on the IBM support Web site at http://www.ibm.com/ systems/support/supportsite.wss/ docdisplay?brandind=5000008&lndocid=MIGR- 63017.
- Page 211 The installed firmware level can be found in the DSA Diagnostic Event Log within the Firmware/VPD section for this component. The latest level firmware for this component can be found on the IBM support Web site at http://www.ibm.com/systems/support/ supportsite.wss/docdisplay?brandind=5000008 &lndocid=MIGR-63017.
- Page 212 3. Rerun the test. See “Diagnostic tools overview” on page 101. 4. Make sure that the DSA Diagnostic code is up-to-date, upgrade if necessary; then, rerun the test. The latest code can be found on the IBM support Web site at http://www.ibm.com/ systems/support/supportsite.wss/ docdisplay?brandind=5000008&lndocid=MIGR- 63017.
- Page 213 3. Rerun the test. See “Diagnostic tools overview” on page 101. 4. Make sure that the DSA Diagnostic code is up-to-date, upgrade if necessary; then, rerun the test. The latest code can be found on the IBM support Web site at http://www.ibm.com/ systems/support/supportsite.wss/ docdisplay?brandind=5000008&lndocid=MIGR- 63017.
- Page 214 3. Rerun the test. See “Diagnostic tools overview” on page 101. 4. Make sure that the DSA Diagnostic code is up-to-date, upgrade if necessary; then, rerun the test. The latest code can be found on the IBM support Web site at http://www.ibm.com/ systems/support/supportsite.wss/ docdisplay?brandind=5000008&lndocid=MIGR- 63017.
- Page 215 3. Rerun the test. See “Diagnostic tools overview” on page 101. 4. Make sure that the DSA Diagnostic code is up-to-date, upgrade if necessary; then, rerun the test. The latest code can be found on the IBM support Web site at http://www.ibm.com/ systems/support/supportsite.wss/ docdisplay?brandind=5000008&lndocid=MIGR- 63017.
- Page 216 3. Rerun the test. See “Diagnostic tools overview” on page 101. 4. Make sure that the DSA Diagnostic code is up-to-date, upgrade if necessary; then, rerun the test. The latest code can be found on the IBM support Web site at http://www.ibm.com/ systems/support/supportsite.wss/ docdisplay?brandind=5000008&lndocid=MIGR- 63017.
- Page 217 The installed firmware level can be found in the DSA Diagnostic Event Log within the Firmware/VPD section for this component. The latest level firmware for this component can be found on the IBM support Web site at http://www.ibm.com/systems/support/ supportsite.wss/docdisplay?brandind=5000008 &lndocid=MIGR-63017.
- Page 218 3. Rerun the test. See “Diagnostic tools overview” on page 101. 4. Make sure that the DSA Diagnostic code is up-to-date, upgrade if necessary; then, rerun the test. The latest code can be found on the IBM support Web site at http://www.ibm.com/ systems/support/supportsite.wss/ docdisplay?brandind=5000008&lndocid=MIGR- 63017.
-
Page 219: Broadcom Ethernet Device Tests
DSA Diagnostic Event Log within the Firmware/VPD section for this component. The latest level firmware for this component can be found on the IBM support Web site at http://www.ibm.com/support/ docview.wss?uid=psg1MIGR-63017. 2. If the failure remains, refer to Chapter 5, “Removing and replacing blade server... -
Page 220: Cpu Stress Tests
14. 2. Make sure that the DSA Diagnostic code is up-to-date, upgrade if necessary; then, rerun the test. The latest code can be found on the IBM support Web site at http://www.ibm.com/ support/docview.wss?uid=psg1SERV-DSA. 3. Make sure that the system firmware level is up-to-date, upgrade if necessary;... - Page 221 14. 2. Make sure that the DSA Diagnostic code is up-to-date, upgrade if necessary; then, rerun the test. The latest code can be found on the IBM support Web site at http://www.ibm.com/ support/docview.wss?uid=psg1SERV-DSA. 3. Make sure that the system firmware level is up-to-date, upgrade if necessary;...
- Page 222 2. Make sure that the DSA Diagnostic code is up-to-date, upgrade if necessary; then, rerun the test. up-to-date, upgrade if necessary. The latest code can be found on the IBM support Web site at http://www.ibm.com/support/ docview.wss?uid=psg1SERV-DSA. 3. Make sure that the system firmware level is up-to-date, upgrade if necessary;...
-
Page 223: Memory Self Tests
101). The BIOS firmware level can be found in the DSA Diagnostic Event Log within the Firmware/VPD section for this component. The latest level firmware for this component can be found on the IBM support Web site at http://www.ibm.com/support/ docview.wss?uid=psg1MIGR-63017. 3. Rerun the test. See “Diagnostic tools overview”... - Page 224 2. Make sure that the DSA Diagnostic code is at the latest level; then, rerun the test (“Diagnostic tools overview” on page 101). The latest code can be found on the IBM support Web site at http://www.ibm.com/support/ docview.wss?uid=psg1SERV-DSA. 3. Make sure that the system BIOS firmware is at the latest level, upgrade if necessary;...
- Page 225 2. Make sure that the DSA Diagnostic code is at the latest level; then, rerun the test (“Diagnostic tools overview” on page 101). The latest code can be found on the IBM support Web site at http://www.ibm.com/support/ docview.wss?uid=psg1SERV-DSA. 3. Make sure that the system BIOS firmware is at the latest level, upgrade if necessary;...
- Page 226 101). The BIOS firmware level can be found in the DSA Diagnostic Event Log within the Firmware/VPD section for this component. The latest level firmware for this component can be found on the IBM support Web site at http://www.ibm.com/support/ docview.wss?uid=psg1MIGR-63017. 4. If the component failure remains, refer to Chapter 5, “Removing and replacing blade...
- Page 227 2. Make sure that the DSA Diagnostic code is at the latest level; then, rerun the test (“Diagnostic tools overview” on page 101). The latest code can be found on the IBM support Web site at http://www.ibm.com/support/ docview.wss?uid=psg1SERV-DSA. 3. Make sure that the system BIOS firmware is at the latest level, upgrade if necessary;...
- Page 228 2. Make sure that the DSA Diagnostic code is at the latest level; then, rerun the test (“Diagnostic tools overview” on page 101). The latest code can be found on the IBM support Web site at http://www.ibm.com/support/ docview.wss?uid=psg1SERV-DSA. 3. Make sure that the system BIOS firmware is at the latest level, upgrade if necessary;...
- Page 229 4. Make sure that the DSA Diagnostic code is at the latest level; then, rerun the test (“Diagnostic tools overview” on page 101). The latest code can be found on the IBM support Web site at http://www.ibm.com/support/ docview.wss?uid=psg1SERV-DSA. 5. Make sure that the system BIOS firmware is at the latest level, upgrade if necessary;...
-
Page 230: Optical Drive Self Tests
(media tray). 9. If the failure remains, collect the data from the DSA event log and sent it to IBM Service. For information about contacting and sending data to IBM Service, see “Hardware service and support”... - Page 231 BladeCenter documentation for information about replacing the optical drive. 12. If the failure remains, collect the data from the DSA event log and send it to IBM Service. For information about contacting and sending data to IBM Service, see “Hardware service and support”...
- Page 232 (media tray). 4. If the failure remains, collect the data from the DSA event log (“Diagnostic tools overview” on page 101) and send it to IBM Service. For information about contacting and sending data to IBM Service, see “Hardware service and support”...
- Page 233 (media tray). 8. If the failure remains, collect the data from the DSA event log and send it to IBM Service. For information about contacting and sending data to IBM Service, see “Hardware service and support”...
- Page 234 BladeCenter documentation for information about replacing the drive. 8. If the failure remains, collect the data from the DSA event log and send it to IBM Service. For information about contacting and sending data to IBM Service, see “Hardware service and support”...
- Page 235 (media tray). 8. If the failure remains, collect the data from the DSA event log and send it to IBM Service. For information about contacting and sending data to IBM Service, see “Hardware service and support”...
-
Page 236: Storage Drive Self Tests
The BIOS firmware level can be found in the DSA Diagnostic Event Log within the Firmware/VPD section for this component. The latest level firmware for this component can be found on the IBM support Web site at http://www.ibm.com/support/ docview.wss?uid=psg1MIGR-63017. 4. Rerun the test. -
Page 237: Recovering From A Uefi Update Failure
Flag 4: Library Hardware D (C) This flag is set when the tape drive fails the power-on self-test or a mechanical error occurs that requires a power cycle to recover. This flag is internally cleared when the drive is powered-off. Flag 13: Library Pick Retry (W) This flag is set when a high retry count threshold is passed during an operation to pick a cartridge from a slot before the operation succeeds. - Page 238 4. Remove the server cover. See “Removing the blade server cover” on page 55 for more information. 5. Locate the UEFI boot block recovery switch (SW1-5) on the system board (see “System-board switches” on page 16). 6. Use your finger to move switch SW1-5 to the ON position. 7.
-
Page 239: Out-Of-Band Manual Recovery Method
Out-of-band manual recovery method To recover the server firmware and restore the server operation to the primary bank, complete the following steps: 1. Download the blade server UEFI firmware update from the World Wide Web (see “Firmware updates” on page 34). 2. -
Page 240: In-Band Automated Boot Recovery Method
25. Leave the battery out of the server for 5 minutes. 26. Reinstall the CMOS battery (see “Installing the battery” on page 60. 27. Replace the cover and reinstall the blade server in the BladeCenter unit, making sure that the media tray is selected by the relevant blade server. See “Closing the blade server cover”... -
Page 241: Service Processor (Imm) Error Codes
8. At the firmware splash screen, press F3 when prompted to restore to the primary bank. The server boots from the primary bank. Service processor (IMM) error codes Use this information to view the IMM error log. The Integrated Management Module (IMM) log contains up to 512 of the most recent service processor errors, in IPMI format. -
Page 242: Keyboard Or Mouse Problems
Keyboard or mouse problems Use this information to diagnose and resolve keyboard and mouse issues. To check for keyboard or mouse problems, complete the following steps until the problem is solved: 1. Make sure that: v Both the blade server and the monitor are turned on. v The keyboard/video/mouse select button LED on the front of the blade server is lit, indicating that the blade server is connected to the shared keyboard and mouse. -
Page 243: Network Connection Problems
1) USB cable (if applicable) 2) Media tray cable (if applicable) 3) Media tray d. Continue with “Media tray problems” on page 228. 4. For problems that affect only the diskette drive, make sure that: a. The diskette is inserted correctly in the drive. b. -
Page 244: Power Problems
To check for network connection problems, complete the following steps until the problem is solved: 1. Make sure that: v The network cables are securely connected to the I/O module. v Power configuration of the BladeCenter unit supports the I/O-module configuration. -
Page 245: Video Problems
The monitor works with another blade server. v Some IBM monitors have their own self-tests. If you suspect a problem with the monitor, see the information that comes with the monitor for instructions for adjusting and testing the monitor. If the monitor self-tests show that the monitor is working correctly, consider the location of the monitor. -
Page 246: Solving Undetermined Problems
Solving undetermined problems Use this information to diagnose and resolve undetermined issues with the blade server. Note: When you are diagnosing a problem in the blade server, you must determine whether the problem is in the blade server or in the BladeCenter unit. v If all of the blade servers have the same symptom, the problem is probably in the BladeCenter unit. -
Page 247: Problem Determination Tips
Because of the variety of hardware and software combinations that you can encounter, use the following information to assist you in problem determination. If possible, have this information available when you request assistance from IBM. v Machine type and model... - Page 248 BladeCenter HS22 Type 7870, 1936, and 1911: Problem Determination and Service Guide...
-
Page 249: Appendix. Getting Help And Technical Assistance
Appendix. Getting help and technical assistance If you need help, service, or technical assistance or just want more information about IBM products, you will find a wide variety of sources available from IBM to assist you. Use this information to obtain additional information about IBM and IBM products, determine what to do if you experience a problem with your IBM system or optional device, and determine whom to call for service, if it is necessary. -
Page 250: Using The Documentation
The troubleshooting information or the diagnostic programs might tell you that you need additional or updated device drivers or other software. IBM maintains pages on the World Wide Web where you can get the latest technical information and download device drivers and updates. -
Page 251: Ibm Taiwan Product Service
7 days a week. In the U.K., these services are available Monday through Friday, from 9 a.m. to 6 p.m. IBM Taiwan product service Use this information to contact IBM Taiwan product service. IBM Taiwan product service contact information: IBM Taiwan Corporation 3F, No 7, Song Ren Rd. - Page 252 BladeCenter HS22 Type 7870, 1936, and 1911: Problem Determination and Service Guide...
-
Page 253: Notices
Consult your local IBM representative for information on the products and services currently available in your area. Any reference to an IBM product, program, or service is not intended to state or imply that only that IBM product, program, or service may be used. Any functionally equivalent product, program, or service that does not infringe any IBM intellectual property right may be used instead. -
Page 254: Important Notes
IBM makes no representations or warranties with respect to non-IBM products. Support (if any) for the non-IBM products is provided by the third party, not IBM. BladeCenter HS22 Type 7870, 1936, and 1911: Problem Determination and Service Guide... -
Page 255: Particulate Contamination
If IBM determines that the levels of particulates or gases in your environment have caused damage to the device, IBM may condition provision of repair or replacement of devices or parts on implementation of appropriate remedial measures to mitigate such environmental contamination. -
Page 256: Documentation Format
In the request, be sure to include the publication part number and title. When you send information to IBM, you grant IBM a nonexclusive right to use or distribute the information in any way it believes appropriate without incurring any obligation to you. -
Page 257: Australia And New Zealand Class A Statement
Klasse A ein. Um dieses sicherzustellen, sind die Geräte wie in den Handbüchern beschrieben zu installieren und zu betreiben. Des Weiteren dürfen auch nur von der IBM empfohlene Kabel angeschlossen werden. IBM übernimmt keine Verantwortung für die Einhaltung der Schutzanforderungen, wenn das Produkt ohne Zustimmung der IBM verändert bzw. -
Page 258: Japan Vcci Class A Statement
914-499-1900 Der verantwortliche Ansprechpartner des Herstellers in der EU ist: IBM Deutschland Technical Regulations, Department M456 IBM-Allee 1, 71137 Ehningen, Germany Telephone: +49 7032 15-2937 Email: tjahn@de.ibm.com Generelle Informationen: Das Gerät erfüllt die Schutzanforderungen nach EN 55024 und EN 55022 Klasse... -
Page 259: Korea Communications Commission (Kcc) Statement
Japan Electronics and Information Technology Industries Association (JEITA) Confirmed Harmonics Guidelines with Modifications (products greater than 20 A per phase) Korea Communications Commission (KCC) statement This is electromagnetic wave compatibility equipment for business (Type A). Sellers and users need to pay attention to it. This is for any areas other than home. Russia Electromagnetic Interference (EMI) Class A statement People's Republic of China Class A electronic emission statement... - Page 260 BladeCenter HS22 Type 7870, 1936, and 1911: Problem Determination and Service Guide...
-
Page 261: Index
165 SW1 - 3 system board switch 16 system board 105 checkout procedure 165 SW1 - 4 system board switch 16 high-speed expansion card fault 105 performing 165 © Copyright IBM Corp. 2011... - Page 262 UEFI update 223 installing 75 001100A 146 USB port 182 removing 71 005100A 146 video problems 231 IBM Taiwan product service 237 005800A 146 European Union EMC Directive ICH9 RTC reset switch 16 00580A1 146 conformance statement 243 00580A2 146...
- Page 263 IMM event log 103 IMM self test error codes LAN over USB network connection problems 171, 230 166-901-xxx 193 conflicts 37 Network operating system (NOS) 166-902-xxx 193 description 37 installation 166-903-xxx 193 Linux driver 40 with ServerGuide 33 166-904-xxx 193 manual configuration of 38 New Zealand Class A statement 243 166-905-xxx 193...
- Page 264 22 SAS hard disk drive system board (continued) product data 22 hot-swap storage device 63 switches 16 product service, IBM Taiwan 237 installing 63 system board layouts 15 publications save settings 22 system information 22 related 7...
- Page 265 Web site ServerGuide 31 Windows IPMI device driver 38 WOL disable switch 17 wrong characters 170 Index...
- Page 266 BladeCenter HS22 Type 7870, 1936, and 1911: Problem Determination and Service Guide...
- Page 268 Part Number: 90Y5614 Printed in USA (1P) P/N: 90Y5614...
Need help?
Do you have a question about the 7870B4U and is the answer not in the manual?
Questions and answers