Otto Bock C-Leg 3C98-3 Instructions For Use Manual
Hide thumbs
Also See for C-Leg 3C98-3:
- Instructions for use manual (280 pages) ,
- Certification course complete (187 pages) ,
- Instructions for use manual (144 pages)

Related Manuals for Otto Bock C-Leg 3C98-3


Summary of Contents for Otto Bock C-Leg 3C98-3
- Page 1 C-Leg 3C98-3/3C88-3 Instructions for use (user) ....................
- Page 2 order-ifu@ottobock.com Documentu 647H1662 Versionu 06 SCAN ME httpsu//product-documents.ottobock.com/IFU/INT/3C88-3/3C98-3/647H1662/06/O/S/F Lassen Sie sich durch das Fachpersonal in den sicheren Gebrauch des Produkts einweisen. DE | Weitere Sprachen dieser Gebrauchsanweisung sind online verfügbar oder können kostenlos als gedrucktes Exemplar bestellt werden (siehe Seite 2). Consult qualified personnel for instructions on how to use the product safely.
- Page 3 Тексб насбоящего руководсбва по применению на других языках досбупен онлайн или можеб быбь заказан бесплабно в печабном виде (см. сбр. 2). JA | 製品の安全な使用方法については、有資格担当者の指示に従ってください。 本取扱説明書のその他言語は、オンラインで入手可能ですが、印刷版も無料で注文できます (P2を参照)。 ZH | 由专业人员就产品的安全使用提供指导。 使用说明书的其他语言版本可在线获取,也可免费订购印刷版(参见第 2 页)。 Basic UDI-DI: C-Leg 3C88-3*: 4064411000000003C88-3NC C-Leg 3C98-3*: 4064411000000003C98-3NK...
-
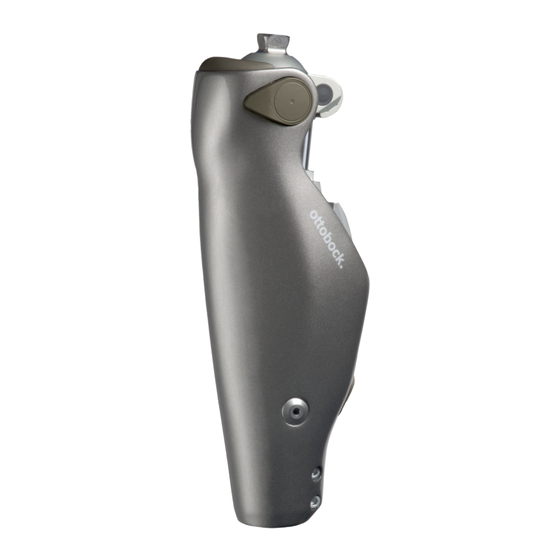
Page 4: Product Description
English 1 Foreword INFORMATION Date of last update: 2023-07-27 Please read this document carefully before using the product and observe the safety ► notices. Obtain instruction from the qualified personnel in the safe use of the product. ► Please contact the qualified personnel if you have questions about the product or in case of ►... -
Page 5: Intended Use
The product features MyMode for special motion types (e.g. cross-country skiing...). These are pre-configured by the O&P professional using the adjustment software and can be activated with special movement patterns and the Cockpit app (see page 29). In case of a product malfunction, safety mode makes restricted operation possible. Resistance parameters that are predefined by the product are configured for this purpose (see page 32). - Page 6 4 Safety 4.1 Explanation of warning symbols Warning regarding possible serious risks of accident or injury. WARNING Warning regarding possible risks of accident or injury. CAUTION Warning regarding possible technical damage. NOTICE 4.2 Structure of the safety instructions WARNING The heading describes the source and/or the type of hazard The introduction describes the consequences in case of failure to observe the safety instruc...
- Page 7 The warnings/error signals (see page 38) and corresponding change in damping settings ► must be observed. CAUTION Independent manipulation of the product and the components Falling due to breakage of load-bearing components or malfunction of the product. Manipulations to the product other than the tasks described in these instructions for use are ►...
- Page 8 Should the knee joint or tube adapter come into contact with salt water, chlorinated water ► or other solutions (such as soap or shower gel, and body and/or wound fluids), promptly remove the Protective Cover (if installed) and clean the knee joint. In order to do so, rinse the knee joint, tube adapter and Protective Cover with fresh water and let them dry.
- Page 9 NOTICE Mechanical stress on the power supply / battery charger / charging adapter Lack of proper charging functionality due to malfunction. ► Do not subject the power supply / battery charger / charging adapter to mechanical vibra tions or impacts. Check the power supply / battery charger / charging adapter for visible damage before each ►...
- Page 10 CAUTION Proximity to sources of strong magnetic or electrical interference (e.g. theft prevention systems, metal detectors) Falling due to unexpected behaviour of the product caused by interference with internal data communication. Avoid remaining in the vicinity of visible or concealed theft prevention systems at the ►...
- Page 11 CAUTION Overheating of the hydraulic unit due to uninterrupted, increased activity (e.g. extended walking downhill) > Falling due to unexpected behaviour of the product because of switching into overheating mode. > Burns due to touching overheated components. Be sure to pay attention when pulsating vibration signals start. They indicate the risk of over ►...
- Page 12 CAUTION Quickly pushing the hip forward with the prosthesis extended (e.g. serve while playing tennis) > Falling due to unexpected activation of the swing phase. Note that the knee joint may flex unexpectedly when the hip is pushed forward quickly while ►...
- Page 13 CAUTION Safety signal occurs (ongoing vibration) Falling due to unexpected behaviour of the product because of changed damping behaviour. ► Observe the warnings/error signals (see page 38). Do not continue using the product after the safety signal has been emitted. ► The product must be inspected by an authorised Ottobock Service Center.
-
Page 14: Scope Of Delivery And Accessories
The Cockpit App should only be installed on mobile devices and versions which comply with ► the specifications in the respective online stores (e.g. Apple App Store, Google Play Store, ...) 5 Scope of Delivery and Accessories 5.1 Scope of delivery •... - Page 15 6.1 Connecting the power supply and battery charger 1) Slide the country-specific plug adapter onto the power supply until it locks into place (see fig. 1). 2) Connect the round, four-pin plug of the charging cable to the OUT receptacle on the battery charger so that the plug locks into place (see fig. 2).
- Page 16 6.3 Display of the current charge level INFORMATION The charge level cannot be displayed during the charging process. 6.3.1 Display of battery charge level without additional devices 1) Rotate the prosthesis 180° (the sole of the foot must face up). 2) Hold still for 2 seconds and wait for beeps.
-
Page 17: Cockpit App
7 Cockpit app The Cockpit app enables switching from basic mode to the pre-configured MyModes. In addition, information about the product (step counter, battery charge level, etc.) can be retrieved. The everyday behaviour of the product can be changed to a certain extent using the app (e.g. - Page 18 7.2.1 Starting the cockpit app for the first time 1) Tap the symbol of the Cockpit app ( → The end user license agreement (EULA) is displayed. 2) Accept the end user license agreement (EULA) by tapping the Accept button. If the end user license agreement (EULA) is not accepted, the Cockpit app cannot be used.
- Page 19 7.3 Control elements for cockpit app Access the navigation menu (see page 20) 2. Product The component name can only be changed with the adjust Product change ment software. 1. Basic Mode 2. Golf 3. If connections to more than one component have been saved, you can switch between the saved components by tapping the change option (see page 20).
- Page 20 7.3.1 Cockpit app navigation menu Tap the symbol in the menus to display the navigation menu. Additional settings for the connected component can be con figured in this menu. Product Name of the connected component MyModes Return to the main menu to switch MyModes Functions Call up additional functions of the component (e.g.
- Page 21 INFORMATION If establishing a connection to a component is not possible, perform the following steps: Delete the component from the Cockpit app if applicable (see the section "Deleting a com ► ponent") Add the component again in the Cockpit app (see the section "Adding a component") ►...
- Page 22 8.1.1 Standing Knee control through high hydraulic resistance and correct static alignment. A stance function can be enabled using the adjustment software. Please see the following section for further information on the stance function. 8.1.1.1 Stance function INFORMATION To use this function, it must be enabled by the O&P professional. It also has to be activated using the Cockpit app (see page 26).
- Page 23 8.1.3 Sitting down The resistance in the prosthetic knee joint while sitting down ensures even bending into the sitting position. The O&P professional can use the adjustment software to configure whether the sitting process is to be supported or not. 1) Place both feet side by side at the same level.
- Page 24 8.1.6 Walking up stairs Walking up stairs step-over-step is not possible. 1) Hold the handrail with one hand. 2) Place the foot of the sound leg on the first step. Bring up the leg with the prosthesis. 8.1.7 Walking down stairs The joint makes it possible to walk down stairs step-over-step or one at a time.
- Page 25 8.1.9 Walking down flat steps To walk down ramps, flat steps or curbs, walking step-over-step with knee flexion under load is recommended for the best possible relief of the contralat eral side upon the subsequent ground contact. This knee flexion should be ini tiated immediately upon heel strike, or as long as the prosthetic leg is still in front of the body.
- Page 26 8.2.1 Changing the prosthesis setting using the cockpit app 1) Once the component is connected and in the desired mode, tap the icon in the main menu. → The navigation menu opens. 2) Tap the “Settings” menu option. → A list appears with the parameters for the currently selected mode.
- Page 27 Parameter Adjustment Setting Meaning software range, app range Volume 0 to 4 0 to 4 Volume of beep signal for confirma tion tones (e.g. when checking the charge level, switching MyModes). The “0” setting deactivates the aud ible feedback signals. However, warn ing signals are still generated if errors occur.
- Page 28 Parameter Adjustment Setting Meaning software range, app range Volume 0–4 0–4 Volume of beep signal for confirma tion tones (e.g. when checking the charge level, switching MyModes). The “0” setting deactivates the aud ible feedback signals. However, warn ing signals are still generated if errors occur.
- Page 29 8.5 Deep sleep mode INFORMATION If the Volume parameter is set to '0' in the Cockpit app, there are no beep signals (see page 25). The Cockpit app can be used to place the knee joint into a deep sleep mode, in which power consumption is minimised.
- Page 30 INFORMATION If the Volume parameter is set to '0' in the Cockpit app, there are no beep signals (see page 25). Once a connection to a prosthesis has been established, the cockpit app can be used to switch between the MyModes. 1) Tap the symbol of the MyMode (1) you want in the main menu of the app.
-
Page 31: Additional Operating States (Modes)
4) Following the beep and vibration signal, move the prosthetic leg next to the contralateral leg, set it down and keep still for about 1 second. → A confirmation signal will sound to indicate that the prosthesis has successfully switched to the corresponding MyMode (2 times = MyMode 1, 3 times = MyMode 2). -
Page 32: Storage And Bleeding
10.2 Mode for charging the prosthesis The product is non-functional during charging. The product is set to the safety mode resistance values. These may be low or high depending on the setting in the adjustment software. 10.3 Safety mode The product automatically switches to safety mode if a critical fault occurs (e.g. failure of a sensor signal). -
Page 33: Legal Information
Bluetooth is a registered trademark of Bluetooth SIG, Inc. 14.3 CE conformity Otto Bock Healthcare Products GmbH hereby declares that the product is in compliance with applicable European requirements for medical devices. The product meets the requirements of the RoHS Directive 2011/65/EU on the restriction of the use of certain hazardous substances in electrical and electronic devices. -
Page 34: Technical Data
This equipment has been tested and found to comply with the limits for a Class B digital device, pursuant to part 15 of the FCC Rules. These limits are designed to provide reasonable protection against harmful interference in a residential installation. This equipment generates uses and can radiate radio frequency energy and, if not installed and used in accordance with the instructions, may cause harmful interference to radio communications. - Page 35 Environmental conditions Operation -10°C/+14°F to +60°C/+140°F Max. 93% relative humidity, non-condensing Charging the battery +10°C/+50°F to +45°C/+113°F Product Reference number 3C98-3*/3C88-3* Mobility grade (MOBIS) 2 to 4 Maximum body weight including additional 136 kg/300 lb weight Minimum body weight 45 kg/100 lb The treatment of users below this body weight is also possible, provided a trial fitting by a cer...
- Page 36 Prosthesis battery Operating time of the prosthesis with new, fully At least 16 hours of uninterrupted walking charged battery at room temperature Approx. 2 days with average use Power supply unit Reference number 757L16-4 Type FW8001M/12 Storage and transport in original packaging -40 °C/-40 °F to +70 °C/+158 °F 10% to 95% relative humidity, non-condensing Storage and transport without packaging...
- Page 37 Compliance with the requirements according to "FCC Part 15" (USA) Compliance with the requirements under the "Radiocommunications Act" (AUS) Non-ionising radiation Dustproof, protection against temporary submersion The product’s Bluetooth wireless module can establish a connection to mobile devices with the following operating systems: iOS (iPhone, iPad, iPod...) and DUAL Android In some jurisdictions it is not permissible to dispose of these products with unsor...
- Page 38 16.2 Operating states/error signals The prosthesis indicates operating states and error messages through beeps and vibration sig nals. 16.2.1 Signals for operating states Battery charger connected/disconnected Beep signal Vibration signal Event 1x short – Battery charger is connected or battery charger already disconnected prior to start of charging mode –...
- Page 39 Beep signal Vibration signal Event Required action – 5 x long Charge level under Charge battery immedi ately; the product will be switched off after the next warning signal. 10 x long 10 x long Charge level 0% Charge the battery. After the beep and vibration signals, the product switches to empty battery mode...
- Page 40 Error while charging the product LED on LED on bat Error Resolution power tery charger supply Country-specific plug adapter not Check whether the country-spe fully engaged on power supply cific plug adapter is fully engaged on the power supply. Non-functional socket Check socket with another elec...
- Page 41 Error message Cause Correction Mode change failed An attempt was made to For safety reasons, switching MyModes is switch to a different only permitted when components are at MyMode while the com rest, e. g. while standing or sitting. ponent was in motion (e. g.
- Page 42 Battery char Battery is being charged, battery charge level is over 50% Battery is fully charged (or connection with product is interrupted). Take note of the confirmation signal for differentiation. When the battery charger is connected or disconnected, a self-test is conduc ted and confirmed by a beep and vibration signal.
- Page 43 Phenomenon EMC basic standard Interference immunity test level test procedure IEC 61000-4-6 Conducted interfer 3 V ence induced by high- 0.15 MHz to 80 MHz frequency fields 6 V in ISM and amateur frequency bands between 0.15 MHz and 80 MHz 80% AM at 1 kHz IEC 61000-4-11 Voltage drops 0% U ;...
- Page 44 Test fre Frequency Radio ser Modulation Maximum Distance Interfer quency band vice power [W] ence [MHz] [MHz] immunity test level [V/m] 2,450 2,400 to Bluetooth Pulse modu 2,570 WLAN 802.1 lation 1 b/g/n, 217 Hz RFID 2450 LTE band 7 5,240 5,100 to WLAN 802.1 Pulse modu 5,800 1 a/n lation...
- Page 48 Otto Bock Healthcare Products GmbH Brehmstraße 16 · 1110 Wien · Austria T +43-1 523 37 86 · F +43-1 523 22 64 info.austria@ottobock.com · www.ottobock.com...
Need help?
Do you have a question about the C-Leg 3C98-3 and is the answer not in the manual?
Questions and answers