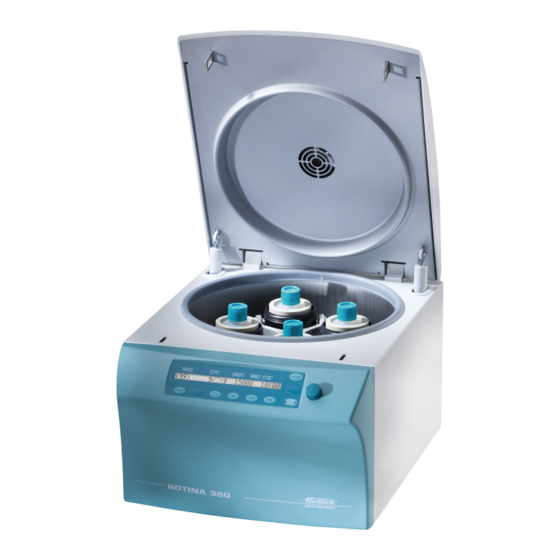
Hettich ROTINA 380 Operating Instructions Manual
Hide thumbs
Also See for ROTINA 380:
- Operating instructions manual (176 pages) ,
- Operating instructions manual (72 pages) ,
- Operating instructions manual (105 pages)

Related Manuals for Hettich ROTINA 380


Summary of Contents for Hettich ROTINA 380
- Page 1 ROTINA 380 / 380 R Inhalt des Dokuments / content of the document Operating instructions (EN) Rotoren und Zubehör / Rotors and accessories AB1701en_SA Rev.: 04 / 11.2023...
- Page 2 Rev.: 04 / 11.2023 AB1701en_SA...
- Page 3 Operating instructions ROTINA 380 / 380 R Translation of the original operating instructions AB1701en_SA Rev.: 04 / 11.2023 1 / 63...
- Page 4 ©2023 – All rights reserved Andreas Hettich GmbH & Co. KG Föhrenstrasse 12 D-78532 Tuttlingen, Germany Telephone: +49 (0)7461 705-0 Fax: +49 (0)7461 705-1125 Email: info@hettichlab.com, service@hettichlab.com Internet: www.hettichlab.com 2 / 63 Rev.: 04 / 11.2023 AB1701en_SA...
-
Page 5: Table Of Contents
Table of contents Table of contents About this document........1.1 Use of this document. - Page 6 Table of contents 6.7.3 Short-term centrifugation......6.7.4 Changing settings during centrifugation....6.8 Quick stop function.
- Page 7 Table of contents 7.7 Program links........7.7.1 Linking programs or changing a program link.
-
Page 8: About This Document
Intended use Intended use The centrifuge ROTINA 380 / 380 R is an in vitro diagnostic medical device in accordance with the In Vitro Diagnostic Medical Devices Regulation (EU) 2017/746. The device is used for centrifugation as well as enrichment of sample material of human origin for subsequent further processing for diag- nostic purposes. -
Page 9: Personnel Requirements
Any other use or use beyond this is considered improper. Andreas Hettich GmbH & Co. KG shall not be liable for any damage arising from this. -
Page 10: Operator's Responsibility
Safety Operator's responsibility Follow the instructions in this document for proper and safe use of the device. Keep the user manual for future reference. ■ Provide information Following the instructions in this document will help: – To avoid dangerous situations. –... - Page 11 Safety WARNING Dangers due to insufficient maintenance or maintenance not carried out on time. − Follow maintenance intervals. − Check the device for visible damage or defects. If any visible damage or defects are present, take the device out of service and inform a service technician. WARNING Risk of electric shock due to ingress of water or other liq- uids.
-
Page 12: Device Overview
Do not trigger the emergency release on the device while the program is running. − Do not pull out the mains plug while the program is running. Device overview Technical data Manufacturer Andreas Hettich GmbH & Co. KG, D-78532 Tuttlingen Model ROTINA 380 Type 1701-30 1701 1701-01 Mains voltage (±10%) - Page 13 Dimensions: Width 457 mm Depth 600 mm Altitude 418 mm Weight approx. 58.5 kg approx. 51 kg approx. 58.5 kg Manufacturer Andreas Hettich GmbH & Co. KG, D-78532 Tuttlingen Model ROTINA 380 R Type 1706, 1706-50 1706-01 Mains voltage (±10%) 200-240 V 1~ 100-127 V 1~ Mains frequency 50-60 Hz 60 Hz...
- Page 14 Device overview Refrigerant R452A max. capacity 4 x 290 ml max. permissible density 1.2 kg/dm³ max. speed (RPM) 15000 max. acceleration (RCF) 24400 max. kinetic energy 35000 Nm Obligation to perform checks (DGUV Rules 100-500) (valid only in Germany) Ambient conditions (EN / IEC 61010-1): Installation site indoors only Altitude...
-
Page 15: European Registration
Device overview Rating plate Fig. 1: Rating plate Item number Serial number Revision Equipment number Data matrix code any labelling indicating whether medical device or in vitro diagnostic medical device Global Trade Item Number (GTIN) Date of manufacture Serial number 10 any EAC mark, CE mark 11 Country of manufacture 12 Date of manufacture... -
Page 16: Important Labels On The Packaging
Device overview Basic-UDI-DI Basic-UDI-DI Device assignment 040506740100149T ROTINA 380 / 380 R (in vitro diagnostic medical device) Important labels on the packaging This is the correct upright position of the shipping container for transport and/or storage. FRAGILE GOODS The contents of the shipping container are fragile, so it must be handled with care. - Page 17 Device overview Attention, general danger area. Ensure you read the instructions for commissioning and operation and observe the safety instruc- tions before using the device. Biohazard warning. Warning: hot surface. Failure to observe this warning may result in damage to property and/or personal injury. Warning against excessive temperature.
-
Page 18: Operating And Indicator Elements
Device overview Operating and indicator elements 3.5.1 Control Fig. 2: Control (device with cooling) Fig. 3: Control (device without cooling) 3.5.2 Indicator elements ■ The button flashes until the rotor is read in. ■ The button lights up during the centrifugation run to pre-cool the rotor for as long as the rotor is not yet at a standstill. -
Page 19: Controls
Device overview 3.5.3 Controls ■ Setting the individual parameters. Turning anticlockwise decreases the value. Turning clockwise increases the value. Fig. 9: [Rotary knob] ■ Switch the device on and off. Fig. 10: [Mains switch] ■ Ramp-up levels, parameters Level 9 = shortest ramp-up time, Level 1 = longest ramp-up time. ■... -
Page 20: Original Spare Parts
Device overview ■ Querying the integral RCF. The integral RCF can only be queried if the integral RCF indicator is enabled. ■ Switch to RCF value. ■ Speed, parameter RPM. Adjustable from 50 RPM to the maximum rotor speed (N ), in incre- ments of 10. -
Page 21: Returns
Transport and storage ■ 1 power cable ■ 1 user manual ■ 1 instruction sheet, transport lock ■ 1 CD (for type 1701-30 only) Additionally for delivery in Germany: ■ 1 inspection book Rotors and the corresponding accessories are supplied depending on the order. -
Page 22: Fastening The Transport Lock
Transport and storage ■ Humidity must not be condensing. Humidity must be between 10% and 80%. ■ Be aware of the weight of the device. ■ When transporting using a transport aid (e.g., a pallet truck), the trans- port aid must be able to carry at least 1.6 times the transport weight of the device. - Page 23 Spacer sleeve Open the lid. 2 ). Unscrew and remove the motor cover ( For ROTINA 380 R: 3 ). Remove the bellows ( Insert 3 transport locks ( 4 ) and 3 spacer sleeves ( 6 ) and screw them 5 )
-
Page 24: Commissioning
Commissioning Commissioning Unpacking the centrifuge CAUTION Danger of crushing due to parts falling out of the transport packaging. − Keep the device balanced during the unpacking process. − Only open the packaging at the points provided for this purpose. CAUTION Risk of injury from lifting heavy loads. - Page 25 Open the lid. 1 ). Unscrew 4 screws ( 2 ). Remove the motor cover ( For ROTINA 380 R: Remove the bellows ( 3 ). 5 ). Unscrew 3 transport lock screws ( 5 ), spacer sleeves ( 6 ) and trans- Remove the transport lock screws ( 4 ) and store them safely.
-
Page 26: Setting Up And Connecting The Centrifuge
Commissioning Setting up and connecting the centrifuge Setting up the centrifuge WARNING Risk of injury due to failing to maintain a sufficient distance to the centrifuge. − As per EN / IEC 61010-2-020, no persons, hazardous materials or objects may be present within a safety zone of 300 mm around the centrifuge during a centrifugation run. -
Page 27: Switching The Centrifuge On And Off
Commissioning NOTICE Damage to the device due to condensation. There is a risk of condensation forming on electrical com- ponents when component surfaces are cold and the sur- rounding air is warmer. The condensation that forms may cause a short circuit and/or destroy electronics. −... -
Page 28: Operation
Operation Operation Opening and closing the lid Opening the lid Personnel: ■ Trained user The centrifuge is switched on The rotor is stationary. [STOP/OPEN] button. Press the �� The lid unlocks by means of a motor. [STOP/OPEN] button goes out. The light on the left side of the Closing the lid CAUTION... -
Page 29: Inserting And Removing Buckets
Operation Open the lid. Loosen the rotor clamping nut using the supplied spanner. �� After passing the working point for lifting the rotor, the rotor 2 ). detaches from the cone of the motor shaft ( Turn the clamping nut until the rotor can be lifted off the motor shaft. Remove the rotor. -
Page 30: Inserting And Removing Adapters
Operation Check that the rotor is firmly seated. Grease the trunnions (3). Insert the bucket (1) into the rotor from above. The trunnions (3) must be in the grooves (2). Push the bucket (1) down as far as it will go. Removing the bucket Pull the bucket (1) vertically upwards out of the rotor. - Page 31 Operation NOTICE Damage to the device due to highly corrosive substances. Highly corrosive substances may impair the mechanical strength of rotors, buckets and accessories. − Do not centrifuge highly corrosive substances. Standard glass centrifuge tubes can be loaded up to RCF 4000 (DIN 58970 part 2).
-
Page 32: Opening And Closing The Biosafety System
Operation Loading the angle rotors Personnel: ■ Trained user Check that the rotor is firmly seated. The centrifuge tubes must be distributed evenly over all locations on the rotor. No liquid must be allowed to enter the rotor and the centrifuging chamber when loading the rotor. -
Page 33: Lid With Screw Cap And Hole
Operation 6.6.2 Lid with screw cap and hole Fig. 23: Biosafety system Rotary handle Rotor 3 ) centrally on the rotor ( 2 ). Closing Place the lid ( 4 ) into the hole in the rotary handle ( 1 ). Insert the supplied key ( Turn the lid ( 3 ) at the key ( 4 ) clockwise until it is tightly closed. -
Page 34: Centrifugation With Time Preselection
Operation [STOP/OPEN] button to end the centrifugation run. Press the �� Ramp-down takes place with the selected ramp-down parameter. The ramp-down parameter is displayed. [STOP/OPEN] button lights up when the The right side of the centrifuge is in ramp-down. [STOP/OPEN] button lights up when the rotor is The left side of the at a standstill. -
Page 35: Changing Settings During Centrifugation
Software operation [START] button to end the centrifugation run. Release the �� The ramp-down parameter is displayed. [STOP/OPEN] button lights up when the The right side of the centrifuge is in ramp-down. [STOP/OPEN] button lights up when the rotor is The left side of the at a standstill. -
Page 36: Runtime Time
Software operation [Ramp-up and ramp-down parameters] button If required: Press the to set the next parameter. [START] button. Press the [Ramp-up and ramp-down parameters] button repeatedly Press the until the centrifugation data is displayed. ‘Ramp-down time’ function is enabled. Brake level and ramp-down time [Ramp-up and ramp-down parameters] button repeatedly Press the... -
Page 37: Speed, Rpm
Software operation [START] button. Press the [TIME] button repeatedly until the centrifugation data is Press the displayed. �� Settings are shown in the indicator. ■ ‘Dual time mode’ function is enabled. The function is enabled ex Start of runtime count works. -
Page 38: Temperature (For Centrifuges With Cooling)
Software operation [PROG] button. Enabling or disabling integral Press and hold the ‘***Machine Menu***’ is displayed after 8 seconds. �� [PROG] button repeatedly until ‘-> Settings’ is displayed. Press the [START] button. Press the ‘SOUND / BELL = on’ or ‘SOUND / BELL = off’ is displayed. ��... -
Page 39: Centrifugation Of Substances Or Mixtures Of Substances With A Density Higher Than 1.2 Kg/Dm 3
Software operation [RCF] button repeatedly until the ‘RAD’ , ‘RCF’ parameters Press the ‘RAD’ parameter is displayed in are displayed and the value of the brackets á ñ. [RCF] button lights up. �� The [Rotary knob] to set the desired centrifuging radius. Use the The value of the RCF adjusts automatically when the centrifuging radius is changed. -
Page 40: Programming
Software operation Programming 7.2.1 Preset programs (for type 1701-30 only) Programs 1 to 4 are preset and write-protected. When trying to save data to program locations 1 to 4, ‘Protected !!’ is displayed and the data is not saved. When the program is retrieved, ‘+’ indicates that this data is write-protected for program locations 1 to 4. -
Page 41: Entering Or Changing Programs
Software operation [START] button. Press the ‘Program recall...’ is displayed briefly. �� The centrifugation data of the desired program location is dis- played 7.2.4 Entering or changing programs The previous data in the program location is overwritten upon saving. If "Protected !!" is displayed, the data in the program loca- tion is write-protected and saving is not possible. -
Page 42: Standby Cooling
Software operation 7.4.2 Standby cooling When the rotor is at a standstill and the lid is closed, the centrifuging chamber is cooled to the preselected temperature if this is less than 20 °C or 68 °F. The preselected temperature is displayed during standby cooling. 7.4.3 Precooling the rotor For rapid pre-cooling of the unloaded rotor and accessories, we recom-... -
Page 43: Preventing Cooling From Switching On During Ramp-Down
Software operation [STOP/OPEN] button once to exit the ‘Settings menu’ Press the [STOP/OPEN] button twice to exit the ‘Machine Menu’ . Press the 7.4.5 Preventing cooling from switching on during ramp-down The settings can be adjusted so that the cooling no longer switches on during the ramp-down at the end of the centrifugation run after reaching a set speed. -
Page 44: Heating (For Centrifuges With Heating)
Software operation [Rotary knob] to set the desired value. Use the Adjustable from 4 °C to 25 °C, in 1 °C increments, as well as the "dis- abled" setting. Temperature monitoring is deactivated when "disabled" is set. [START] button. Press the �� The setting is stored. ‘Store Settings...’... -
Page 45: Centrifuge Address
Software operation ■ Centrifuge program version ■ Program version for the frequency inverter The rotor is stationary. [PROG] button. Press and hold the ‘***Machine Menu***’ is displayed after 8 seconds. �� [PROG] button repeatedly until ‘-> Info’ is displayed. Press the [START] button. - Page 46 Software operation Entering the maximum per- The maximum permissible number of run cycles must be entered after missible number of run cycles starting the first centrifugation run. ‘Enter max cycles = á30000ñ’ is displayed. [Rotary knob] to set the maximum permissible number of run Use the cycles indicated on the bucket.
-
Page 47: Querying Operating Hours, Centrifugation Runs And Cycle Counter
Software operation [RCF] button repeatedly until the maximum permissible Press the number of run cycles is displayed in brackets á ñ. Use the [Rotary knob] to set the maximum permissible number of run cycles indicated on the bucket. [START] button. Press the ��... -
Page 48: Enabling Or Disabling Dual Time Mode
Software operation [PROG] button repeatedly until ‘-> Operating Time’ is dis- Press the played. [START] button. Press the ‘OP Time ext =’ is displayed. �� [PROG] button. Press the ‘OP Time int =’ is displayed. �� Press the [PROG] button. ‘Number of Starts =’... -
Page 49: Enabling Or Disabling Ramp-Up And Ramp-Down Times
Software operation 7.6.5 Enabling or disabling ramp-up and ramp-down times The rotor is stationary. Press and hold the [PROG] button. ‘***Machine Menu***’ is displayed after 8 seconds. �� [PROG] button repeatedly until ‘-> Settings’ is displayed. Press the [START] button. Press the ‘SOUND / BELL = on’... -
Page 50: Pin (Personal Identification Number)
Software operation [START] button. Press the �� The setting is stored. ‘Store LOCK 2’ is briefly displayed. e.g. ‘-> Change Lock’ is then displayed. [STOP/OPEN] button once to exit the ‘Settings menu’ Press the [STOP/OPEN] button twice to exit the ‘Machine Menu’ . Press the 7.6.7 PIN (Personal Identification Number) -
Page 51: Audible Signal
Software operation [PROG] button for 8 seconds. Hold down the ‘***Machine Menu***’ is displayed after 8 seconds. [PROG] button until ‘-> Change PIN’ is displayed. Press the [START] button. Press the ‘old PIN = ---- <START>’ is displayed. �� [PROG] button. Press the ‘Get HELP # no’... -
Page 52: Centrifugation Data Displayed After Switching On
Software operation [START] button. Press the �� The setting is stored. ‘Store Settings...’ is displayed briefly. ‘-> Settings’ is then displayed. [STOP/OPEN] button once to exit the ‘Settings menu’ Press the [STOP/OPEN] button twice to exit the ‘***Machine Menu***’ . Press the 7.6.9 Centrifugation data displayed after switching on... -
Page 53: Program Links
Software operation [START] button. Press the �� The setting is stored. ‘Store Settings ...’ is displayed briefly. ‘-> Settings’ is then displayed. [OPEN/STOP] button once to exit the ‘Settings’ menu Press the [OPEN/STOP] button twice to exit the ‘Machine Menu’ . Press the Program links 7.7.1... -
Page 54: Opening A Program Link
Cleaning and care [START] button to save the program link. Press the ‘Multi program store...’ is displayed briefly. �� 7.7.2 Opening a program link [PROG] button repeatedly until ‘RCL A…Z’ is displayed. Press the [Rotary knob] to set the desired program location. Use the Press the [START] button. -
Page 55: Cleaning And Disinfection Instructions
Cleaning and care Chap. Task to execute Disinfection Disinfecting the device Disinfecting the accessories Maintenance Greasing the rubber seal of the centrifuging chamber Greasing the rubber seal of the biosafety system ... -
Page 56: Cleaning
Cleaning and care ■ Concentration is not less than 30 % ■ pH: 6 – 8 ■ Non-corrosive Cleaning Cleaning the device Open the lid. Switch off the device and disconnect it from the power supply. Remove accessories. Clean the centrifuge housing and the centrifuging chamber with soap or a mild detergent and a damp cloth. -
Page 57: Maintenance
Clean the trunnions. Remove any detergent residues with a damp cloth after using deter- gents. Grease the trunnions and suspension with Hettich Tubenfett 4051. Excess grease in the centrifuging chamber must be removed. Checking the accessories The accessories are to be checked for wear and corrosion damage. -
Page 58: Troubleshooting
Clean the motor shaft. Remove any detergent residues with a damp cloth after using deter- gents. Grease the motor shaft with Hettich Tubenfett 4051. Excess grease in the centrifuging chamber must be removed. Accessories with a limited The use of certain accessories is time-limited. For safety reasons, the... - Page 59 Troubleshooting Fault description Cause Remedy ■ No display No power. Triggering of the over- Check the supply voltage. current protection fuse. Triggering ■ Switching on the automatic cir- of the automatic circuit breaker Chapter 9.4 cuit breaker, see ⮫ (for types 1701-01 and 1706-01 ‘Switching on the automatic circuit only).
- Page 60 Troubleshooting Fault description Cause Remedy ■ FU/CCI-ERROR 60, Error/defect in electronics/motor. Perform a MAINS RESET. 61.2-61.20, 61.128-61.132, ■ FU/CCI-ERROR 61.1 Mains voltage too low. Error/ Check the mains voltage. defect in electronics/motor. ■ Perform a MAINS RESET. ■ SENSOR-ERROR 90 Error/defect in electronics.
-
Page 61: Perform A Mains Reset
Troubleshooting Fault description Cause Remedy ■ Protected !! The program is write-protected. Disable write protection for the program. ■ FC INIT ERROR Error/defect in electronics. Perform a MAINS RESET. ■ FC VERSION ERROR Error/defect in electronics. Perform a MAINS RESET. ■... -
Page 62: Switching On The Automatic Circuit Breaker (For Types 1701-01 And 1706-01 Only)
The device can be disposed of via the manufacturer. A Return Material Authorisation (RMA) form must always be requested for a return. If necessary, contact the Technical Service Department of the manufacturer. − Andreas Hettich GmbH & Co. KG − Föhrenstrasse 12 − 78532 Tuttlingen, Germany −... - Page 63 Disposal WARNING Risk of pollution and contamination for people and the envi- ronment. When disposing of the centrifuge, people and the environ- ment may be polluted or contaminated by incorrect or improper disposal. − Removal and disposal may be carried out only by a trained and authorised service personnel.
-
Page 64: Index
Index Index Laufzeit ändern....... . 34 Adresse der Zentrifuge..... . 43 Beginn der Zählung. - Page 65 Index Störungsbehebung......56 Symbole........6 Systeminformationen abfragen.
- Page 66 Rev.: 04 / 11.2023 AB1701en_SA...
- Page 67 Rotoren und Zubehör / Rotors and accessories AB1701en_SA Rev.: 04 / 11.2023...
- Page 68 1.1.1 ROTINA 380 / 380 R, Typen / types 1701, 1701-01, 1706, 1706-01, 1706-50 1726 1308 1345 1346 1366 Ausschwingrotor 6-fach / Swing out rotor 6-times 1326 1327 1357 5277 0521 Rhesus 2078 0536 90° Kapazität / capacity Maße / dimensions x L...
- Page 69 1726 1741 1742 Ausschwingrotor 6fach / Swing out rotor 6-times 0701 0716 0500 0507 0509 0518 90° 4,5 - 2,6 - 1,6 - 1,1 – 1,4 Kapazität / capacity 13 x 11 x 13 x 15 x 13 x Maße / dimensions x L 14 x 100 8 x 66 17 x 100...
- Page 70 1754 1752 1751 Ausschwingrotor 4-fach / Swing out rotor 4-times mit Bioabdichtung / with bio-containment 1761 1762 2078 0536 ---- 0553 0501 0578 90° 2,7 - 4,5 - Kapazität / capacity 11 x 11 x Maße / dimensions x L 11 x 38 11 x 38 10 x 60...
- Page 71 1754 1752 1751 Ausschwingrotor 4-fach / Swing out rotor 4-times mit Bioabdichtung / with bio-containment 1763-A 0518 90° Kapazität / capacity 4 -7 8,5 - 10 Maße / dimensions x L 16 x 125 16 x 75 16 x 100 16.5 x 10⁶ 16 x 101 15 x 102...
- Page 72 1754 1752 1751 Ausschwingrotor 4-fach / Swing out rotor 4-times mit Bioabdichtung / with bio-containment 1769 1771 1772 1773 1774-A 1775 5127 0509 0513 0546 0545 90° Kapazität / capacity Maße / dimensions x L 62 x 137 62 x 122 17 x 120 29 x 115 17 x 100...
- Page 73 1754 1752 1751 Ausschwingrotor 4-fach / Swing out rotor 4-times mit Bioabdichtung / with bio-containment 1781 1782 1783 90° 1,6 - 1,1 – 1,4 Kapazität / capacity 2,6 - 2,9 4 -7 13 x 13 x Maße / dimensions x L 8 x 66 61 x 137 61 x 118...
- Page 74 1760 1753 Ausschwingrotor 2-fach / Swing out rotor 2-times 1485 Microtest- 96-PCR- platten / plate PCR-Strips Platte / plate Terasaki 90° Kapazität / capacity Maße / dimensions 86x128x17,5/ 86x128x46 86x128x22 86x128x44,5 86x128x83 59x84x11 82x124x20 86x128x15 TxBxH / DxWxH Anzahl p. Rotor / number p. rotor 8 / 10 48 x 8 Drehzahl / speed...
- Page 75 1798 5051 5053 Ausschwingrotor 4-fach / Swing out rotor 4-times 5227 5242 5243 5243 5247 2 x 6316 0553 0501 0519 0521 0578 90° 2,7 – 3 4,5 – 5 Kapazität / capacity Maße / dimensions x L 12 x 75 12 x 82 11 x 66 11 x 92...
- Page 76 1798 5051 5053 Ausschwingrotor 4-fach / Swing out rotor 4-times 5281 5258 5258 5259 5262 5264 0513 0526 0500 2078 0536 90° Kapazität / capacity 9 - 10 4 - 5,5 7,5 - 8,2 Maße / dimensions x L 11 x 38 15 x 102 16 x 92...
- Page 77 1798 5051 5053 Ausschwingrotor 4-fach / Swing out rotor 4-times 5268 6306 6306 0509 90° Kapazität / capacity 4 - 7 Maße / dimensions x L 13 x 100 17 x 120 17 x 100 Anzahl p. Rotor / number p. rotor Drehzahl / speed 4000 4000...
- Page 78 1798 5092 5093 Ausschwingrotor 4-fach / Swing out rotor 4-times mit Bioabdichtung / with bio-containment 5121 5121-93 5122 0518 0519 90° 8,5 - Kapazität / capacity 4 - 7 16 x 16 x Maße / dimensions x L 15 x 102 17 x 100 17 x 100 16 x 75...
- Page 79 1798 5092 5093 Ausschwingrotor 4-fach / Swing out rotor 4-times mit Bioabdichtung / with bio-containment 5135 5136 2079 0507 90° 4 – 4,5 7,5 – 8,2 Kapazität / capacity 9 - 10 Maße / dimensions x L 29 x 115 17 x 70 17 x 100 16 x 80...
- Page 80 1798 5092 5093 Ausschwingrotor 4-fach / Swing out rotor 4-times mit Bioabdichtung / with bio-containment 5137 5138 90° 1,1 – Kapazität / capacity 4,5 - 5 1,6 - 5 4 - 7 2,7-3 2,6 - 2,9 1,6 - 5 11 x Maße / dimensions ...
- Page 81 0547 0549 0539 / 0538 0513 0546 0519 0545 45° ROTINA 380: 10.000 RPM ROTINA 380R: 11.000 RPM Kapazität / capacity Maße / dimensions x L 38 x 106 38 x 106 29 x 115 29 x 107 24 x 100 26 x 95 Anzahl p.
- Page 82 1466 1451 1403 1448 0509 0507 0518 45° ROTINA 380: 10.000 RPM ROTINA 380R: 11.000 RPM 7,5 - 8,2; 9 8,5 – 10 Kapazität / capacity - 10 Maße / dimensions x L 17 x 120 17 x 100...
- Page 83 1720 Winkelrotor 6-fach / Angle rotor 6-times SK 63.98 0501 45° ROTINA 380: 10.000 RPM ROTINA 380R: 11.000 RPM 1,6 – 5 2,6 – 2,9 Kapazität / capacity Maße / dimensions x L 12/13 x 75 12 x 82...
- Page 84 1721 1467 Winkelrotor 8-fach / Angle rotor 8-times 1054-A 0701 0553 45° 1,1 – 1,4 2,6 – 2,9 Kapazität / capacity 2,7 - 3 1,6 - 5 Maße / dimensions x L 12 x 60 12 x 75 8 x 66 11 x 66 13 x 65 13 x 75...
- Page 85 0549 0547 0513 0546 0539 / 0538 0539 45° mit Bioabdichtung / with bio-containment 10) ROTINA 380: 10.000 RPM ROTINA 380R: 11.000 RPM 0538 Kapazität / capacity Maße / dimensions x L 38 x 106 38 x 106 29 x 115 29 x 107 Anzahl p.
- Page 86 1792 Winkelrotor 6-fach / Angle rotor 6-times 1451 0518 45° mit Bioabdichtung / with bio-containment 10) ROTINA 380: 10.000 RPM ROTINA 380R: 11.000 RPM Kapazität / capacity 9 - 10 8,5 - 10 ROTINA 380: 10.000 RPM Maße / dimensions x L ROTINA 380R: 11.000 RPM...
- Page 87 Winkelrotor 6-fach / Angle rotor 6-times SK 63.98 0553 0501 45° mit Bioabdichtung / with bio-containment ROTINA 380: 10.000 RPM ROTINA 380R: 11.000 RPM 1,6 – 5 2,6 – 2,9 Kapazität / capacity Maße / dimensions x L 12 x 75...
- Page 88 1798 5051 5280 5053 Ausschwingrotor 4-fach / Swing out rotor 4-times 1670 1470 2 x in 5280 1665 1666 1667 1668 1471 1475 90° Kapazität / capacity 3 x 2 4 x 1 1 x 8 2 x 8 Maße / dimensions / A mm²...
- Page 89 1726 1661 1660 1660 1680 Ausschwingrotor 6-fach / Swing out rotor 6-times 1670 1285 1662 1665 1666 1667 1668 1671 1672 1673 90° Objektträger/ Kapazität / capacity 3 x 2 4 x 1 [1] 0,5 [1] 0,5 [1] 0,5 object slide Maße / dimensions ...
- Page 90 1748 1661 1660 Ausschwingrotor 8-fach / Swing out rotor 8-times 1662 1670 1663 1664 1665 1666 1667 1668 1663 1664 90° Kapazität / capacity 3 x 2 4 x 1 Maße / dimensions / A mm² 6,2 / 30 8,7 / 60 12,4 / 120 17,5 / 240...
- Page 91 1748 1661 1660 Ausschwingrotor 8-fach / Swing out rotor 8-times 1470 1471 1475 90° Kapazität / capacity 1 x 8 2 x 8 Maße / dimensions / A mm² 17,5 / 240 17,5 / 240 Anzahl p. Rotor / number p. rotor Filterkarten / filter cards Drehzahl / speed 4000...
- Page 92 1.1.2 ROTINA 380, Typ / type 1701-30 1798 5051 5053 Ausschwingrotor 4-fach / Swing out rotor 4-times 5227 5242 5243 5243 5247 2 x 6316 0553 0501 0519 0521 0578 90° 2,7 – 3 4,5 – 5 Kapazität / capacity Maße / dimensions ...
- Page 93 1798 5051 5053 Ausschwingrotor 4-fach / Swing out rotor 4-times 5281 5258 5258 5259 5262 5264 0513 0526 0500 2078 0536 90° Kapazität / capacity 9 - 10 4 - 5,5 7,5 - 8,2 Maße / dimensions x L 11 x 38 15 x 102 16 x 92...
- Page 94 1798 5051 5053 Ausschwingrotor 4-fach / Swing out rotor 4-times 5268 6306 6306 0509 90° Kapazität / capacity 4 - 7 Maße / dimensions x L 16 x 75 17 x 120 17 x 100 Anzahl p. Rotor / number p. rotor Drehzahl / speed 4000 4000...
- Page 95 93 / 149 9 (97%) 17 Temperatur / temperature °C Probenerwärmung/Sample temp. rise 1.1.3 ROTINA 380 R, Typ / type 1706-50 1795 4692 Winkelrotor 2-fach / Angle rotor 2-times 30° Kapazität / capacity Maße / dimensions x L Anzahl p.
Need help?
Do you have a question about the ROTINA 380 and is the answer not in the manual?
Questions and answers