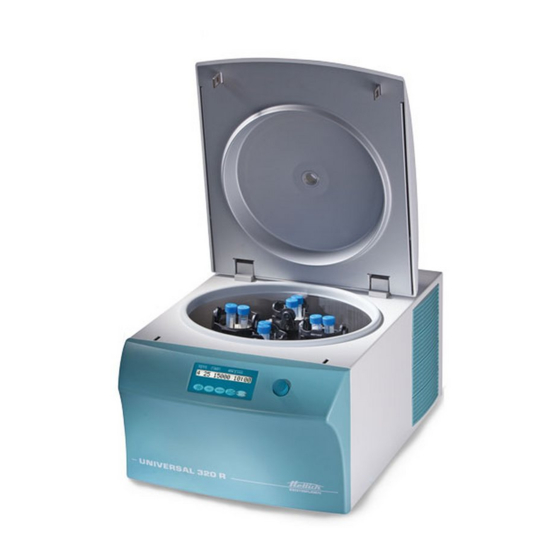
Hettich UNIVERSAL 320 R Repair Instructions
Hide thumbs
Also See for UNIVERSAL 320 R:
- Manual (217 pages) ,
- Operating instructions manual (141 pages) ,
- Operating instructions manual (81 pages)

Related Manuals for Hettich UNIVERSAL 320 R


Summary of Contents for Hettich UNIVERSAL 320 R
- Page 1 Repair instructions UNIVERSAL 320 UNIVERSAL 320 R 06.08 Andreas Hettich GmbH & Co. KG AR1401EN...
- Page 2 (07461) 705-0 (07461) 705-125 info@hettichlab.com, service@hettichlab.com www.hettichlab.com © 2005 by Andreas Hettich GmbH & Co. KG All rights reserved. No part of this publication may be reproduced without the prior written permission of the copyright owner. Modifications reserved! AR1401EN / 06.08...
-
Page 3: Table Of Contents
Contents Introduction ......................5 Symbol meanings..................... 5 Description of the centrifuge..................6 Operating panel (A2)..................6 Electronics U320 resp. U320R (A1) ..............6 Special features ....................7 Brake resistor (R1) .................... 7 Motor (M1) / tacho system (B4, B2.1) ............... 7 Imbalance sensor (B2.2) ................... - Page 4 Tachometer code configuration of the rotors ..........57 Cooling diagram....................58 Connecting diagram..................59 9.3.1 Abbreviations of the cable colours............59 9.3.2 Connecting diagram UNIVERSAL 320 / 320 R........60 9.3.3 Connecting diagram UNIVERSAL 320 R Heating/cooling ....... 62 Technical specifications .................. 64 4/66...
-
Page 5: Introduction
In such an event any guarantee claim or liability claim against the Andreas Hettich GmbH & Co. KG company expire. • Only original spare parts and original accessories licensed by the Andreas Hettich GmbH & Co. KG company are allowed to be utilised. -
Page 6: Description Of The Centrifuge
Description of the centrifuge These microprocessor controlled centrifuges mainly consist of the following electrical components: • Operating panel (A2) • Electronics U320 (A1) resp. Electronics U320R (A1) • Motor with 2 speed sensors (B2.1, B4) and imbalance sensor (B2.2) • Brake resistor (R1) •... -
Page 7: Special Features
• The braking chopper transfers the electrical energy produced during braking, in the 230 V version from a voltage of approx. 400 Volt and in the 115 V version from a voltage of approx. 209 Volt, to the brake resistor in a controlled manner. •... -
Page 8: Imbalance Sensor (B2.2)
Imbalance sensor (B2.2) • An electronic sensor monitors the imbalance. • The imbalance sensor and the speed sensor (B2.1) are together in one housing, screwed to the bottom of the motor. • Imbalance is detected only in running mode (starting, centrifuging and braking). •... -
Page 9: Safety Devices
Safety devices ⇒ with thermal overload protection Mains switch Over voltage protection and ⇒ on Electronics U320 (A1) radio interference suppression filter Additional radio interference ⇒ in mains input circuit (only with 120 V model) suppression filter ⇒ on Electronics U320 (A1), electrically protected Frequency converter Motor ⇒... -
Page 10: Error Messages
Error messages MAINS RESET • Switch off the mains switch. • Wait at least for 10 seconds and then switch on the mains switch again. Brief description Error designation No. Brief description Page TACHO-ERROR Speed sensor on top of the motor: Speedometer pulses break down during rotation TACHO-ERROR No speedometer pulses after start command... - Page 11 Error designation No. Brief description Page °C / *-ERROR Overtemperature on condenser °C / *-ERROR Overtemperature in centrifuge chamber °C / *-ERROR Temperature sensor in centrifuge chamber is defective °C / *-ERROR Temperature sensor on condenser is defective FU/CCI-ERROR Faulty release signal to frequency converter (drive-processor) FU/CCI-ERROR Frequency converter - error: computing section...
-
Page 12: Description And Elimination Of Errors
Description and elimination of errors TACHO - ERROR 1 Error During centrifugation the speedometer pulses of the speed sensor (B4) on top of the motor are interrupted. Error The rotor slows down braked until it stops. consequence No further user operation is possible. After about 3 minutes the lid lock will be enabled and the lid can be opened. - Page 13 IMBALANCE Error Imbalance on motor axle. Error The rotor slows down braked until it stops. consequence Cause of error / • Weight difference in rotor components. measurements • Check the maximum permissible imbalance values in the "SELECT MODE". • Imbalance sensor (B2.2) is defective. Measure on Electronics U320 (A1) / plug S600, pin 6 –...
- Page 14 CONTROL - ERROR 6 Error Lid lock error Error No further user operation is possible. consequence Cause of error • Mains voltage is too low. Admissible mains voltage see chapter "Technical specification". • The motor of the lid lock runs too slowly or it is blocked. Error code reset Perform a MAINS RESET.
- Page 15 ROTORCODE 10.3 Error Error during reading the rotor code. Error The rotor slows down braked until it stops. consequence Cause of error • Magnetic code on the rotor is defective. • Electronics U320 (A1) is defective. Error code reset Open the lid or perform a MAINS RESET. MAINS INTERRUPT Error Interruption of mains supply during centrifugation.
- Page 16 CONTROL – ERROR 21 Error Faulty speed measurement. Error The rotor slows down braked until it stops. consequence No further user operation is possible. Cause of error • Magnetic code on the rotor is defective. • Electronics U320 (A1) is defective. Error code reset Perform a MAINS RESET.
- Page 17 °C / * -ERROR 51 Error Overtemperature on condenser Error The rotor slows down braked until it stops. consequence No further user operation is possible. • Temperature on condenser > 58°C. Cause of error / measurements • The temperature sensor on condenser is defective. Measure on Electronics U320 (A1) / plug S603, pin 1 –...
- Page 18 °C / * -ERROR 55 Error The measured temperature on the condenser is out of range. Error The rotor slows down braked until it stops. consequence No further user operation is possible. Cause of error / • The temperature sensor on condenser is defective. measurements Measure on Electronics U320R (A1) / plug S603, pin 1 –...
- Page 19 FU / CCI - ERROR 62 Error Frequency converter - error. Undervoltage in intermediate circuit. Error The rotor slows down without braking until it stops. consequence No further user operation is possible. • Mains voltage is too low. Admissible mains voltage see chapter Cause of error "Technical specification".
- Page 20 FU / CCI - ERROR 67 Error Overtemperature in the motor. Error The rotor slows down braked until it stops. consequence No further user operation is possible. Cause of error / • Overtemperature switch opens because of overtemperature in measurements the motor.
- Page 21 FU / CCI - ERROR 84 Error Frequency converter recognises excess speed. It evaluates the signals from the speed sensor at the bottom of the motor. The error will be activated when the speed exceeds the following limit value: maximum speed of the rotor x 1,05. e.g.: With a max.
- Page 22 SENSOR – ERROR 93 Error The temperature of the imbalance sensor is out of range Error The rotor slows down braked until it stops. consequence No further user operation is possible. Cause of error • Imbalance sensor (B2.2) is defective. •...
-
Page 23: Settings And Interrogations
Settings and interrogations All settings and interrogations are performed via the keyboard. The corresponding menus are selected by pressing keys or combinations of keys. Summary of the possible settings and interrogations • Set the Acoustic signal, see chapter "6.2" • Inquiry and the change of the operating hours, see chapter "6.3" •... -
Page 24: Acoustic Signal
Acoustic signal The acoustic signal sounds: • Upon the appearance of a disturbance in 2 second intervals. • After completion of a centrifugation run and rotor standstill in 30 second intervals. The acoustic signal is stopped by opening the lid or pressing any key. The signal after completion of the centrifugation run can be activated or deactivated, if the rotor is at standstill. -
Page 25: Operating Hours
Operating hours The inquiry and the change of the operating hours is only possible if the rotor is at standstill. It is at any time possible to terminate the procedure by pressing the key. STOP / OPEN Action Display / Comment →... -
Page 26: Blank The Machine Type In The Display
Blank the machine type in the display The display of the machine type after switching on the unit can be blanked. It is at any time possible to terminate the procedure by pressing the key twice. STOP / OPEN Action Display / Comment →... -
Page 27: Automatic Repetition Of The Centrifugation Run
Automatic repetition of the centrifugation run For test purposes the automatic repetition of the centrifugation run can be selected. The break time between the centrifugation runs can be set. This automatic repetition remains activated until the centrifuge will be switched off. It is at any time possible to terminate the procedure by pressing the key. -
Page 28: Function Test
Function test The individual components of the centrifuge can be tested on its function. In order to be able to check the function of the speed sensors the lid must be opened before the starting the function test. It is at any time possible to terminate the procedure by pressing the key twice. - Page 29 Action Display / Comment → Speed RPM 9. Press the SELECT Function test of the speed sensor (B4) on top of the motor → Speed RPM XXX • Turn the rotor by Speeds ≥100 RPM will be displayed hand → LED 0 on 10.
- Page 30 Action Display / Comment → ERROR LED • Turn the control The yellow error LED lights up knob one step to the right → SOUND / BELL OFF 17. Press the SELECT → SOUND / BELL ON • Turn the control The acoustic beeper on the operating panel will be knob one step to...
- Page 31 Action Display / Comment → ADC 7 = 4956 mV • Turn the control Lid lock, right lid switch (A3 / S1): knob one step to Switch actuated (lid closed) <600 mV, the right Switch not actuated (lid open) >4900 mV →...
-
Page 32: Logging The Occurred Faults
Logging the occurred faults The data of the two last occurred faults are stored and can be queried. The inquiry of the operating hours is only possible if the rotor is at standstill. It is at any time possible to terminate the procedure by pressing the key. - Page 33 Action Display / Comment → • Turn the control E1 IMB_X Imbalance actual value X knob to the right → E1 IMB_Y Imbalance actual value Y → E1 MAX_X Imbalance maximum value X → E1 MAX_Y Imbalance maximum value X →...
-
Page 34: Checking The Motor Slippage
Checking the motor slippage The centrifuge control can readjust the speed depending on the rotor. The error (N < MIN) is displayed if the rotor speed is lower than the permitted range of control. It is only possible to check the slippage during a centrifugation run. Action Display / Comment →... -
Page 35: Parameter Interrogation
Parameter interrogation The inquiry of the parameters is only possible if the rotor is at standstill. It is at any time possible to terminate the procedure by pressing the key. STOP / OPEN Action Display / Comment → 1. Switch on the mains UNI 320R Vx.xx switch Machine type and program version... -
Page 36: Display Of The Frequency Converter Temperature And The Measured Speeds
Action Display / Comment → • Turn the control IMBALCHG Internal operating hour of the last change of the knob to the right imbalance switch-off → OffsetCHG Internal operating hour of the last offset compensation 5. Press the The menu will be terminated automatically STOP / OPEN 6.10 Display of the frequency converter temperature and the measured speeds... -
Page 37: Imbalance Values
6.11 Imbalance values 6.11.1 Setting the imbalance switch-off A change of the imbalance switch-off affects all rotors. The imbalance switch-off is specified by the indication of the difference in weight of opposite rotor positions. In the factory the imbalance switch-off will be adjusted with rotor 1494. With swing-out rotors all rotor positions must be lined with identical hangers. - Page 38 The setting of the imbalance switch-off is only possible if the rotor is at standstill. It is at any time possible to terminate the procedure by pressing the key twice. STOP / OPEN Action Display / Comment → UNI 320R Vx.xx 1.
-
Page 39: Imbalance Values Of The Last Centrifugation Run
6.11.2 Imbalance values of the last centrifugation run The inquiry of the imbalance values of the last centrifugation run is only possible if the rotor is at standstill. It is at any time possible to terminate the procedure by pressing the key. -
Page 40: Imbalance Values During Centrifugation Run
6.11.3 Imbalance values during centrifugation run Action Display / Comment → 1. Switch on the mains UNI 320R Vx.xx switch Machine type and program version → # 30 4000 01:00 Display of the centrifugation data 2. Start a centrifugation Wait until the set speed is achieved →... -
Page 41: Cooling Parameters
6.12 Cooling parameters 6.12.1 Switch-on delay of the Standby cooling After a centrifugation run the standby cooling takes place time-delayed. The delay time is preset to 1 minute. The delay time can only be set, if the rotor is at standstill and the lid is opened. It is at any time possible to terminate the procedure by pressing the key. -
Page 42: Pre-Cooling Speed
6.12.2 Pre-cooling speed The pre-cooling speed is preset to 2800 RPM. The pre-cooling speed can only be set, if the rotor is at standstill and the lid is opened. It is at any time possible to terminate the procedure by pressing the key. -
Page 43: Temperature Values During Standstill
6.12.3 Temperature values during standstill The inquiry of the temperature values is only possible if the lid is opened. It is at any time possible to terminate the procedure by pressing the key. STOP / OPEN Action Display / Comment →... -
Page 44: Temperature Values During Centrifugation Run
6.12.4 Temperature values during centrifugation run It is at any time possible to terminate the procedure by pressing the key. STOP / OPEN Action Display / Comment → 1. Switch on the mains UNI 320R Vx.xx switch Machine type and program version →... -
Page 45: Compensate The Temperature Sensors
6.12.5 Compensate the temperature sensors The offset compensation is carried out to correct the measurement deviations of the temperature sensors (T1, T3) and the Electronics U320R (A1). An OFFSET compensation must be carried out: • after replacing a temperature sensor •... - Page 46 Action Display / Comment → T1: 22,0C→ 22,0C 5. Press the SELECT Temperature sensor in the centrifuge chamber If OPEN LID !! will be displayed, press the key. STOP / OPEN • Turn the control Measure the temperature with a temperature measuring device at the temperature sensor T1 and knob set the value.
-
Page 47: Initialise And Read Out The Eeprom
6.13 Initialise and read out the EEPROM If necessary the EEPROM can be initialized and read out. During initializing the following, in the EEPROM stored, parameters will be overwritten with defined values (default values): Parameter Default value Program position (P) Running time (t/min, t/sec) 01:00 Speed (RPM) - Page 48 Action Display / Comment → GOTO EEPROM 3. Press the key so SELECT often until the following will be displayed. → * EEPROM-MODE * 4. Press the START / IMPULS → EEPROM_INIT 5. Press the SELECT Now the EEPROM can be initialized or read out. If the EEPROM should not be initialized, but only read out, the next step must be jumped over.
-
Page 49: Activate The Functions For The Operation With An External Refrigerating/Heating Circulator In The Programme
6.14 Activate the functions for the operation with an external refrigerating/heating circulator in the programme (only for types 1406-50, 1406-51, 1406-70 and 1406-71) Units for connecting to an external refrigerating/heating circulator have the following special features: • After switching on the unit the machine type UNI 320 TE will be displayed for a short period. -
Page 50: Setting The Display Contrast
Action Display / Comment 5. Press the key so → LABOSTAT OFF SELECT often until the following will be displayed → LABOSTAT ON • Turn the control ON = functions for the operation with an external knob refrigerating/heating circulator activated. OFF = functions for the operation with an external refrigerating/heating circulator deactivated →... -
Page 51: Functional Check After A Repair
Functional check after a repair After a repair a functional check of the unit must be carried out. For functional check a test run with the loaded rotor must be performed. During the test run the followings must be checked: •... -
Page 52: General Arrangement Of The Components
Starting capacitor (only UNIVERSAL 320 R) Fan (only UNIVERSAL 320 R) Temperature sensor in centrifuge chamber (only UNIVERSAL 320 R) Temperature sensor at condenser (only UNIVERSAL 320 R) Ventilation grille Right lid lock complete Gear motor Electronics motor-driven lid lock... - Page 53 Item number E2660 E2084 E2086 E2661 E2662 E1567 E840 E881 E707 E2663 E2664 E2341 E2342 E2275 E-control panel E2072 (U320); E2076 (U320R) E849 E886 E906 E2439 E2465 E2094 E604 upper anti twist E2648 lower anti twist E2649 E507 E1009 7 AMP switch E1006 12 AMP switch E2505...
- Page 54 Fig. 1 25 26 Fig. 2 Fig. 3 52/64...
- Page 55 Fig. 4 Fig. 5 Fig. 6 Fig. 7 53/64...
- Page 56 - BLANK PAGE - 56/66...
-
Page 57: Technical Documents
Technical documents Tachometer code configuration of the rotors Example: tachometer code no. 1 Rotor viewed from underneath START North Pole START-STOP combination Information tachometer code determines: 1. maximum speed of rotor 2. run up and braking ramps 3. control response of electronics e.g. -
Page 58: Cooling Diagram
Cooling diagram Zentrifuge centrifuge Elektronik Zentrifuge Electronc centrifuge Evaporator (centrifuge chamber) Capillary tube Air-cooled condenser Filter dryer (flow direction vertical from top to bottom !!!) B3 Temperature sensor on condenser (controlled by centrifuge electronics) M2 Compressor 58/66... -
Page 59: Connecting Diagram
Connecting diagram 9.3.1 Abbreviations of the cable colours Abbreviation Colour black brown blue gold green GNYE green-yellow grey orange pink silver turquoise Transp. transparent violet white yellow 59/66... -
Page 60: Connecting Diagram Universal 320 / 320 R
9.3.2 Connecting diagram UNIVERSAL 320 / 320 R 1401, 1401-01, 1401-14, 1401-15, 1406, 1406-01, 1406-20, 1406-21 60/66... - Page 61 61/66...
-
Page 62: Connecting Diagram Universal 320 R Heating/Cooling
9.3.3 Connecting diagram UNIVERSAL 320 R Heating/cooling 1406-50, 1406-51, 1406-70, 1406-71 62/66... - Page 63 63/66...
-
Page 64: Technical Specifications
Technical specifications Andreas Hettich GmbH & Co. KG Manufacturer D-78532 Tuttlingen Model UNIVERSAL 320 UNIVERSAL 320 R Type 1401 1401-01 1406 1406-01 Mains voltage (± 10%) 200-240 V 1∼ 100-127 V 1∼ 200-240 V 1∼ 240 V 1∼ 115-127 V 1∼... - Page 65 Andreas Hettich GmbH & Co. KG Manufacturer D-78532 Tuttlingen Model UNIVERSAL 320 R Type 1406-50 1406-51 1406-70 1406-71 Mains voltage (± 10%) 200-240 V 1∼ 100-127 V 1∼ 200-240 V 1∼ 100-127 V 1∼ Mains frequency 50 – 60 Hz 50 –...
- Page 66 Andreas Hettich GmbH & Co. KG Manufacturer D-78532 Tuttlingen Model UNIVERSAL 320 R Type 1406-20 1406-21 Mains voltage (± 10%) 200-240 V 1∼ 240 V 1∼ 115-127 V 1∼ Mains frequency 50 Hz 60 Hz 60 Hz Connected load 800 VA...
Need help?
Do you have a question about the UNIVERSAL 320 R and is the answer not in the manual?
Questions and answers