Table of Contents
Advertisement
Advertisement
Table of Contents

Related Manuals for Hettich UNIVERSAL 32


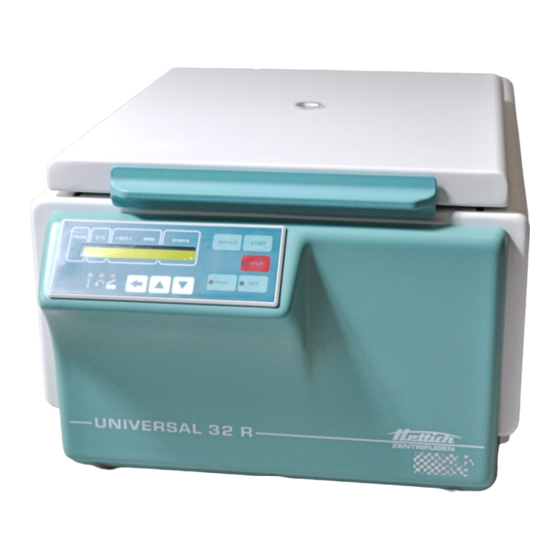
Summary of Contents for Hettich UNIVERSAL 32
- Page 1 Repair instructions UNIVERSAL 32 UNIVERSAL 32 R © 02.04 AR071GB Andreas Hettich GmbH & Co. KG • Gartenstraße 100 • D-78532 Tuttlingen • Germany Phone: (07461) 705-0 • Fax: (07461) 705-125 • Internet: www.hettichlab.com • e-mail: info@hettichlab.com, service@hettichlab.com...
-
Page 2: Table Of Contents
Contents INTRODUCTION ....................4 DESCRIPTION OF THE UNIVERSAL 32 / 32 R............ 5 2.1. Functional structure of the UNIVERSAL 32 / 32 R............. 5 2.2. Control panel (CP) ..................... 5 2.3. Supply board (SB)...................... 6 2.4. Frequency converter (FC) ..................6 2.5. - Page 3 Lid lock ........................37 12.16. Cooling board (CB) A3 (only UNIVERSAL 32 R) ............. 37 12.17. Temperature sensor B1 in centrifuge chamber (only UNIVERSAL 32 R) ....37 12.18. Temperature sensor B2 at condenser (only UNIVERSAL 32 R)......37 CIRCUIT DIAGRAMS..................38 13.1.
-
Page 4: Introduction
• This repair instruction is only intended for specialized staff authorized by HETTICH. Interventions and modifications at centrifuges, which have been conducted by persons not authorized by HETTICH, are at their own risk and entail the loss off all guarantee and liability claims. In such an event any guarantee claim or liability claim against the HETTICH expire. -
Page 5: Description Of The Universal 32 / 32 R
Description of the UNIVERSAL 32 / 32 R 2.1. Functional structure of the UNIVERSAL 32 / 32 R These microprocessor-controlled centrifuges are comprised of the following electrical components: • Control panel (CP), microprocessor-controlled • Supply board (SB) • Frequency converter (FC, motor control), microprocessor-controlled •... -
Page 6: Supply Board (Sb)
• 12 V DC and 5 V DC supply for the SB. • 12 V DC supply for the CP. • 12 V DC supply for the CB (only UNIVERSAL 32 R). • Plugging station X5 for mains power supply, LL magnet and transmission of the signalling circuit for LL-switch (open/closed over opto-coupler to the CP). -
Page 7: Special Features
• The CP issues the following via the serial interface: − Speed − Starting and braking levels − Control commands START, BRAKE, STOP • State display by LED´s: In standby mode the green LED is on In running mode the green LED is on In fault mode the green LED flashes If the FC processor detects a fault, it shuts down itself automatically and triggers the... -
Page 8: Imbalance Switch
2.7. Imbalance switch • A switch detects any imbalance. • Imbalance can only be detected in running mode (starting, centrifuging and braking). • If any imbalance is detected, the drive is changed over to braking. 2.8. Interlocking • Opening of the LL is prevented by a latch. The LL can only be opened when the relay on the SB is energized by the CP. -
Page 9: Offset Calibration
2.11. Offset calibration − Offset calibration is performed in order to equalize the tolerances of the temperature sensor and the electronics. Perform Offset calibration Where/How when replacing: − the temperature calibrate the temperature sensor. sensor − the CP calibrate temperature sensor and read out the old offset values and put them in the new CP. -
Page 10: Requirements For Error Identification
Requirements for error identification 3.1. Correct power supply • All fuses of house installation are intact. Mains voltage is present on the following circuits: • Cable leading to mains cable • Appliance plug • Mains switch • Radio interference suppression filter •... -
Page 11: Error Messages
Error messages 4.1. Brief description • Error messages in: UNIVERSAL 32 UNIVERSAL 32 R Error designation Brief description Page TACHO-ERROR Speedometer pulses break down during rotation TACHO-ERROR No speedometer pulses after start command IMBALANCE Imbalance on motor axle CONTROL-ERROR LL error, lid opened without recognizing that motor had stopped N >... - Page 12 Error designation Brief description Page FU/CCI-ERROR Faulty release signal to FC FU/CCI-ERROR FC - error: computing section FU/CCI-ERROR FC - error: undervoltage FU/CCI-ERROR FC - error: overcurrent FU/CCI-ERROR FC - error: overvoltage FU/CCI-ERROR FC - error: overtemperature in motor (only 115V) FU/CCI-ERROR FC - error: overtemperature in FC...
-
Page 13: Description And Elimination Of Errors
4.2. Description and elimination of errors TACHO - ERROR 01 Error cause During centrifugation the speedometer pulses are interrupted. Error The rotor slows down until it stops. consequence After the rotor stops, there is a DC braking for 30 sec. An MR during slowing-down causes a DC braking for 3 min. - Page 14 IMBALANCE Error cause Imbalance on motor axle. Error The centrifuge slows down until the “open the lid” release consequence occurs. Further cooling until NOMINAL temperature is reached. • Weight difference in rotor components. Error remedy • Supporting lugs not lubricated. •...
- Page 15 ROTORCODE 10 Error cause An invalid rotor code was read during start-up. Error The centrifuge slows down until the ”open the lid” release consequence occurs. Further cooling until NOMINAL temperature is reached. • Magnetic coding on rotor is defective. Error remedy •...
- Page 16 N < MIN 13 Error cause Insufficient speed; the slippage of the motor is too great. The centrifuge regulation can adjust the speed by 5% max (the limit of adjustment). The error is indicated if the ACTUAL speed is lower than the NOMINAL speed minus 5%.
- Page 17 SER I/O - ERROR 30 and ERROR 31 Error cause CP has no connection to the component FC via serial interface. Error The centrifuge slows down until the ”open the lid” release consequence occurs. • CC to FC is defective. Error remedy •...
- Page 18 NO COOLING Error cause No cooling in centrifuge chamber. Overtemperature at condenser, temperature > 60°C. Error Cooling switches off. consequence Continuance of centrifugation until temperature switch in the centrifuge chamber triggers and “ERROR 52” appears. The centrifuge slows down until the “open the lid” release occurs.
- Page 19 FU / CCI - ERROR 60 Error cause The release signal was not correctly transmitted to FC. The evaluation of the release signal only occurs once after MR. Error No further user operation is possible. consequence Error remedy • CC to FC is defective. •...
- Page 20 FU / CCI - ERROR 63 Error cause Overcurrent. • Short circuit in motor. Error remedy • Motor impedance is too low. • CC is defective. • FC is defective. FU / CCI - ERROR 64 Error cause Voltage in intermediate circuit: >410 V DC at 230 V >205 V DC at 115 V This error normally only occurs when the drive is being braked.
- Page 21 FU / CCI - ERROR 69 Error cause EEPROM in FC is defective. Error remedy • CC is defective. • FC is defective FU / CCI - ERROR 84 Error cause FC recognises excess speed. During rotation the speedometer pulses (6 per revolution) are controlled by the FC.
-
Page 22: Factory Setting
Factory setting 5.1. Control panel (Only in a cooled Display field Control field centrifuge) >RCF< t / min:s PROG T / °C T / °C T / °C T / °C IMPULS START STOP PROG Entry field The EPROM of the CP must, in all circumstances, correspond to the machine version and the cooling version. -
Page 23: Imbalance Mode 2
• Mains switch is ON → Display: INIT – MODE • Press → Display: VERS 06 °C / * 01 ↑ ↑ machine version Cooling version (01 = with cooling, 00 = without cooling) • Press the → Display: IMBALANCE MODE 2 •... -
Page 24: Offset Value
To carry out an offset compensation, measure the temperature directly on the temperature sensor with a temperature measuring device. Then enter the measured value in the display and save it. Each correction must be confirmed by the key. Requirements: 1. Rotor has stopped. 2. -
Page 25: Procedure For Performing An Offset Alignment
5.4.2. Procedure for performing an OFFSET alignment 1. Mains switch is ON → Display: * OFFSET – MODE * 2. Press → Display: → T1: 27,0 °C 25,5 °C ↑ ↑ Sensor temperature Actual temperature • The sensor temperature measured is to be adjusted with the keys to make it agree with the actual temperature. -
Page 26: Function Retrievals / Settings
Function retrievals / settings Requirements: 1. Rotor is stopped. 2. Mains switch is ON. Keep key pressed down until (after about 8 sec) the following appears in the display: 1. SOUND / BELL ON1 or OFF (acoustic signal) Press key. Every time the key is pressed, the display alters as follows: 2. -
Page 27: Slippage Of The Drive
6.3. Slippage of the drive Requirement: The centrifuge is running at its rated speed. Permissible slippage: < 5% of the rated speed. Keep the key pressed down until (after about 8 sec.) the following appears in the display: X X X X ∧... -
Page 28: Functional Check
Functional check 7.1. Functional check at factory Following assessories are required to perform the functional check: − Testing rotor − Two reaction receptacles filled with water Table 7 lists measured values, and, ranges of measured values, which have been laid down for these assessories. - Page 29 Temperature measured at room temperature RT Sample temperature after 1 h running time RT + 20 K Sample temperature in cooled centrifuges after 1 h running time 4°C 4500 RPM 2°C to 6°C 20°C 4500 RPM 19°C – 21°C 37°C 4500 RPM 35°C–...
-
Page 30: Functional Test
Functional test 8.1. Checking the proper working order By measuring and comparing the data listed under Table 7, it can be determined if a centrifuge is in proper working order. A precondition for this is that the necessary components stated under Table 7 are used for the measurements. If the measurements are carried out using other components, the numerical values from the ”Rotor and accessories”... -
Page 31: Cooling Diagram
Cooling diagram 31/49... -
Page 32: Tacho Code Configuration Universal 32 / 32 R
Tacho code configuration UNIVERSAL 32 / 32 R Example: tachometer code no. 1 Rotor viewed from underneath START North Pole START-STOP combination Information tachometer code determines: 1. maximum speed of rotor 2. run up and braking ramps 3. control response of electronics... -
Page 33: General Arrangement Of The Component
Control board 13.5, 13.6 12.2 EPROM (on CP) 12.3 Control cables 10-conductor A1-A2 13.1, 13.7 16-conductor A1-A4 13.1, 13.6 only UNIVERSAL 32 R 10-conductor A3-A4 13.6, 13.10 Lid lock X5-S1 13.1, 13.3 12.15 (X9-S1) Brake resistor P10, P1 13.7, 13.8 12.7... -
Page 34: Assembling And Disassembling Components
Assembling and disassembling components Before assembling and disassembling components the following steps must be executed: • Open the lid • Remove the rotor • Disconnect the centrifuge from mains 12.1. Front panel • Remove the three fastening screws at the lower edge of the front panel and lift the front panel up. -
Page 35: Motor M1
12.5. Motor M1 • Unscrew speed sensor (speedometer) from upper end plate of motor, and place it in centrifuge chamber. • Pull out the 3 cables from plug S101 at the FC (BU/BN/BK). • Use a socket spanner to loosen and remove the three fastening nuts on lower end plate of motor. -
Page 36: Mains Choke Coil L1
12.11. Mains choke coil L1 12.11.1. Assembly and disassembly • Pull both plugs from the mains choke coil. • Undo the fastening screws of the mains choke coil. • Replace the mains choke coil. 12.11.2. Short the mains choke coil In countries, in which the European standard EN 61000-3-2 applies it is not allowed to short the mains choke coil. -
Page 37: Appliance Plug , Overvoltage Protection F1
• Replace the CB. 12.17. Temperature sensor B1 in centrifuge chamber (only UNIVERSAL 32 R) • Remove plug from position X3 at the CB. • Remove the four bushes in the plug (unlock the bushes with appropriate tools at the front of the plug). -
Page 38: Circuit Diagrams
Circuit diagrams Used cable colours and their short codes: Colour Short code black brown orange yellow blue violet green grey white pink gold turquoise silver green-yellow GN/YE 38/49... -
Page 39: Mains Supply And Supply Board (Sb)
13.1. Mains supply and supply board (SB) Gerätestecker Überspannungsschutz appliance plug overvoltage protection Netz/mains GNYE 230V/50Hz 115V/60Hz zur Übertemperatur- Funkentstörfilter Zur Kühlungsplatine A3 / X1 sicherung F3 radio interference to cooling board A3 / X1 to overtemperature suppression filter fuse F3 Netzschalter mains switch Stecker 5 und 6 nur... -
Page 40: Circuit Diagram Supply Board (Sb)
13.2. Circuit diagram supply board (SB) FC-Fehler Fehlermeldung von FC FC-ERROR error message from FC (-)485-Bus listen/talk (+)485-Bus Hardware-stop Hardware-stop Tacho Verschlußrelais lid lock relay Deckel offen-Meldung lid open-message Unwucht GND imbalance GND Unwucht imbalance Tacho Netz mains Stillstand Zur Kühlplatine 115V Version standstill to cooling board... -
Page 41: Connecting Diagram And Component Layout Supply Board (Sb)
13.3. Connecting diagram and component layout supply board (SB) zum Frequenzumrichter A2 / S501 zur Kühlungsplatine to frequency converter A2 / S501 to cooling board zum Steuerteil A4 / X1 to control panel A4 / X1 Diagramm Pin 12 Unwuchtschalter Imbalance switch Transp Drehzahlsensor... -
Page 42: Signals In Control Cable Between Cp And Sb
13.4. Signals in control cable between CP and SB X1 Pin 4 X1 Pin 5 X1 Pin 3 FC Hardware Stop Deckel offen Deckel offen lid open lid open Deckel zu Deckel zu lid closed lid closed Verschluß offen Verschlußmagnet oder Lauf aktiviert lid locking open... -
Page 43: Blockdiagram Control Board (Cp)
13.5. Blockdiagram Control board (CP) U (5.00V) r e f Reset Verschluss / lid locking FC Stop Deckel offen / lid open µP empfangen / senden listen / talk Unwucht / imbalance FC - ERROR Tacho in & & Temp.-fühler X101 temp. -
Page 44: Connecting Diagram Control Board (Cp)
13.6. Connecting diagram Control board (CP) Steuerteil A4 control panel A4 X101 A4/X101 A4/X1 A3/X4 A1/X2 zur Kühlungspaltine zur Versorgungsplatine nur gekühlte Version to supply board to cooling board only refigerated Version 44/49... -
Page 45: Blockdiagram Frequency Converter (Fc) And Signals In Control Cable Between Fc
13.7. Blockdiagram Frequency converter (FC) and signals in control cable between FC and SB Netzdrossel L1 Signale an S501: mains choke coil L1 signals at S501: Pin 3 = A Pin 5 = B Übertemperatursicherung F3 für R1 overtemperature fuse F3 for R1 Pin 4 Pin 7 Pin 8... -
Page 46: Connecting Diagram Frequency Converter (Fc)
13.8. Connecting diagram frequency converter (FC) zur Versorgungsplatine A1 / X9 to supply board A1 / X9 S501 U = Netzspannung / S501 mains voltage A2 Frequenzumrichter/ = U x 2 S101 frequency converter Netzdrossel L1 (nur bei 230 V Ausführung, ab Werk Nr. -
Page 47: Block Diagram Cooloing Board(Cb) Only Universal 32 R
13.9. Block diagram Cooloing board(CB) only UNIVERSAL 32 R Motorschutzschalter motor protective switch zum Steuerteil A4 / X101 to control panel A4 / X101 8 9 10 BC327 VDR1 1N4148 YE (GY) GN (YE) BN (GN) WH (BN) 47/49... -
Page 48: Connecting Diagram And Component Layout Cooling Board (Cb)
13.10. Connecting diagram and component layout cooling board (CB) Anlaufkondensator startup condenser VDR1 A3 / X4 Temperaturfühler und Über- temperaturschalter im Kessel temperature sensor and overtemperature switch in centrifuge chamber A4 / X101 zum Steuerteil A4 to control panel A4 zur Versorgungsplatine A1 to supply board A1 48/49... -
Page 49: Technical Specifications
Technical specifications Manufacturer Hettich Zentrifugen D-78532 Tuttlingen Model UNIVERSAL 32 UNIVERSAL 32 R Product no. 1605 1605-01 1610 1610-01 1610-20 Mains voltage (± 10%) 220-240 V 1∼ 110-127 V 1∼ 230-240 V 1∼ 110-127 V 1∼ Mains frequency 50 - 60 Hz...
Need help?
Do you have a question about the UNIVERSAL 32 and is the answer not in the manual?
Questions and answers