Hettich ROTINA 420 Operating Instructions Manual
Hide thumbs
Also See for ROTINA 420:
- Manual (154 pages) ,
- Operating instructions manual (65 pages) ,
- Repair instructions (98 pages)
Table of Contents
Advertisement
Available languages
Available languages
Quick Links
DE
Bedienungsanleitung...................................................... 10
EN
Operating Instructions.................................................... 43
FR
Mode d'emploi ................................................................. 75
IT
Istruzioni per l'uso .......................................................... 110
Rev. 04 / 08.12
ROTINA 420 R
Andreas Hettich GmbH & Co. KG
ROTINA 420
AB4701DEENFRIT
Advertisement
Chapters
Table of Contents

Related Manuals for Hettich ROTINA 420


Summary of Contents for Hettich ROTINA 420
- Page 1 ROTINA 420 ROTINA 420 R Bedienungsanleitung............10 Operating Instructions............ 43 Mode d'emploi ..............75 Istruzioni per l'uso ............110 Rev. 04 / 08.12 Andreas Hettich GmbH & Co. KG AB4701DEENFRIT...
- Page 2 Fig. 1 START PROG t/min 4500 12:30 STOP PROG TIME OPEN Fig. 2 ROTINA 420 START PROG T/°C t/min 4500 12:30 STOP PROG T/°C TIME OPEN Fig. 3 ROTINA 420 R 2/176...
- Page 3 Herstellers / of the manufacturer / du fabricant / del costruttore Andreas Hettich GmbH & Co. KG Föhrenstraße 12 D-78532 Tuttlingen Germany Hiermit erklären wir in alleiniger Verantwortung, dass das bezeichnete Gerät, inklusive dem mit dem Gerät konformitätsbewertetem Zubehör laut Zubehörliste der technischen Dokumentation dieses Geräts, der Richtlinie über...
- Page 4 Tuttlingen, 2012-05-15 H. Eberle Geschäftsführer, Manager, Directeur, Gerente 4/176...
- Page 5 Für dieses Gerät gültige Normen und Vorschriften Das Gerät ist ein Produkt mit einem sehr hohen technischen Niveau. Es unterliegt umfangreichen Prüf- und Zertifizierungsverfahren gemäß folgenden Normen und Vorschriften in deren jeweils gültigen Fassung: Elektrische und mechanische Sicherheit für Konstruktion und Endprüfung: Normbaureihe: IEC 61010 (entspricht der Normenreihe DIN EN 61010) ...
- Page 6 Standards and regulations which apply to this device The device is a high-end technical product. It is subject to extensive testing and certification procedures according to the following standards and regulations in their respectively valid version: Electrical and mechanical safety for design and final testing: Standard series: IEC 61010 (conform to standards of DIN EN 61010) ...
- Page 7 Normes et règles en vigueur pour cet appareil Cet appareil est un produit avec un très haut niveau technique. Il est soumis à des vastes procédures de vérification et de certification, d'après les normes et prescriptions suivantes, dans leur version actuelle : Sécurité...
- Page 8 Norme e direttive valide per questo apparecchio L'apparecchio è un dispositivo di elevatissimo livello tecnico. È sottoposto a numerosi procedimenti di collaudo e certificazione, in conformità alle seguenti norme e direttive nella corrispondente versione di validità: Sicurezza elettrica e meccanica per la costruzione ed il collaudo finale: Serie di norma: IEC 61010 (corrisponde alla serie di norma DIN EN 61010) ...
- Page 9 +49 (0)7461 / 705-125 info@hettichlab.com, service@hettichlab.com www.hettichlab.com © 2006 by Andreas Hettich GmbH & Co. KG All rights reserved. No part of this publication may be reproduced without the prior written permission of the copyright owner. Änderungen vorbehalten! , Modifications reserved! , Sous réserve de modifications ! , Con riserva di modifiche! AB4701DEENFRIT / Rev.
-
Page 10: Table Of Contents
Inhaltsverzeichnis Bestimmungsgemäße Verwendung ............................. 12 Restrisiken ....................................12 Technische Daten ..................................12 Sicherheitshinweise ..................................13 Bedeutung der Symbole................................15 Lieferumfang ....................................16 Auspacken der Zentrifuge ................................16 Inbetriebnahme .................................... 16 Schnittstelle (nur bei Zentrifuge mit Schnittstelle) ........................17 Deckel öffnen und schließen..............................17 10.1 Deckel öffnen ................................... - Page 11 Zyklenzähler..................................... 28 21.1 Nach Start des ersten Zentrifugationslaufes die maximal zulässige Anzahl der Laufzyklen eingeben oder den Zyklenzähler deaktivieren ..............................28 21.2 Zyklenzähler auf "0" zurücksetzen und die maximal zulässige Anzahl der Laufzyklen eingeben ........29 21.3 Zyklenzähler deaktivieren oder aktivieren ........................29 Funktion "Timing begins at Speed"...
-
Page 12: Bestimmungsgemäße Verwendung
Die Zentrifuge ist nur für diesen Verwendungszweck bestimmt. Eine andere oder darüber hinausgehende Benutzung gilt als nicht bestimmungsgemäß. Für hieraus entstehende Schäden haftet die Firma Andreas Hettich GmbH & Co. KG nicht. Zur bestimmungsgemäßen Verwendung gehört auch das Beachten aller Hinweise aus der Bedienungsanleitung und die Einhaltung der Inspektions- und Wartungsarbeiten. -
Page 13: Sicherheitshinweise
Die Zentrifuge darf nicht mehr in Betrieb genommen werden, wenn der Schleuderraum sicherheitsrelevante Schäden aufweist. Bei Ausschwingrotoren müssen die Tragzapfen regelmäßig gefettet werden (Hettich-Schmierfett Nr. 4051), um ein gleichmäßiges Ausschwingen der Gehänge zu gewährleisten. Bei Zentrifugen ohne Temperaturregelung kann es bei erhöhter Raumtemperatur und/oder bei häufigem Gebrauch des Gerätes zur Erwärmung des Schleuderraums kommen. - Page 14 Gehängen und Zubehörteilen beeinträchtigen können, ist nicht erlaubt. Reparaturen dürfen nur von einer vom Hersteller autorisierten Person ausgeführt werden. Es dürfen nur Originalersatzteile und zugelassenes Originalzubehör der Firma Andreas Hettich GmbH & Co. KG verwendet werden. Es gelten die folgenden Sicherheitsbestimmungen: EN / IEC 61010-1 und EN / IEC 61010-2-020 sowie deren nationalen Abweichungen.
-
Page 15: Bedeutung Der Symbole
Bedeutung der Symbole Symbol am Gerät: Achtung, allgemeine Gefahrenstelle. Vor Benutzung des Gerätes unbedingt die Bedienungsanleitung lesen und die sicherheitsrelevanten Hinweise beachten! Symbol in diesem Dokument: Achtung, allgemeine Gefahrenstelle. Dieses Symbol kennzeichnet sicherheitsrelevante Hinweise und deutet auf mögliche gefährliche Situationen hin. Das Nichtbeachten dieser Hinweise kann zu Sach- und Personenschäden führen. -
Page 16: Lieferumfang
Lieferumfang 1 Anschlusskabel 1 Sechskant-Stiftschlüssel 2,5 mm 1 Sechskant-Stiftschlüssel 5 mm 1 Schmierfett für Tragzapfen 1 Bedienungsanleitung 1 Hinweisblatt Transportsicherung Rotor(en) und das entsprechende Zubehör werden je nach Bestellung mitgeliefert. Auspacken der Zentrifuge Den Karton nach oben abheben und die Polsterung entfernen. ... -
Page 17: Schnittstelle (Nur Bei Zentrifuge Mit Schnittstelle)
Schnittstelle (nur bei Zentrifuge mit Schnittstelle) Optional kann das Gerät mit einer Schnittstelle RS232 ausgerüstet werden. IOIOI Die Schnittstelle RS232 ist mit dem Symbol gekennzeichnet. RS232 Über diese Schnittstelle kann die Zentrifuge gesteuert und Daten abgefragt werden. Die LED in der Taste leuchtet während der Datenkommunikation. -
Page 18: Beladen Des Rotors
Beladen des Rotors Standard-Zentrifugiergefäße aus Glas sind belastbar bis RZB 4000 (DIN 58970 Teil 2). Den Rotor auf festen Sitz prüfen. Bei Ausschwingrotoren müssen alle Plätze des Rotors mit gleichen Gehängen besetzt sein. Bestimmte Gehänge sind mit der Nummer des Rotorplatzes gekennzeichnet. Diese Gehänge dürfen nur in den entsprechenden Platz des Rotors eingesetzt werden. -
Page 19: Verschließen Von Bio-Sicherheitssystemen
Verschließen von Bio-Sicherheitssystemen Um Dichtigkeit zu gewährleisten, muss der Deckel eines Bio-Sicherheitssystems fest verschlossen werden. Um ein Verdrehen des Dichtungsringes während dem Öffnen und Schließen des Deckels zu vermeiden, muss der Dichtungsring mit Talkum-Puder oder einem Gummi-Pflegemittel leicht eingerieben werden. Wird das Gehänge eines Bio-Sicherheitssystems ohne den Deckel verwendet, muss der Dichtring vom Gehänge entfernt werden, um eine Beschädigung des Dichtrings während des Zentrifugationslaufes zu vermeiden. -
Page 20: Bedien- Und Anzeigeelemente
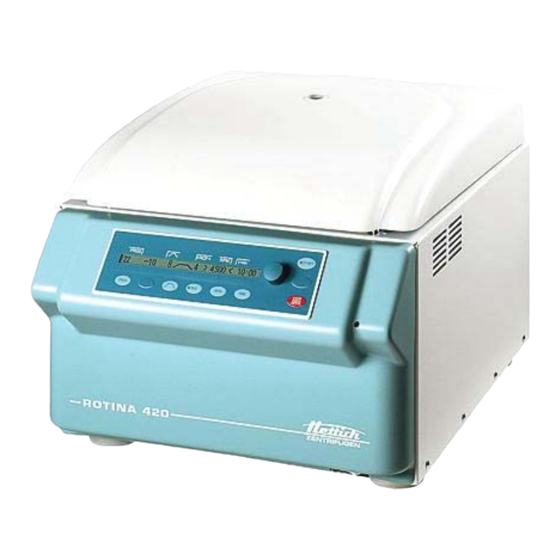
Bedien- und Anzeigeelemente Siehe Abbildung auf Seite 2. Fig. 2: Anzeige- und Bedienfeld 14.1 Drehknopf Zum Einstellen der einzelnen Parameter. Drehen entgegen dem Uhrzeigersinn erniedrigt den Wert. Drehen im Uhrzeigersinn erhöht den Wert. 14.2 Tasten und Einstellmöglichkeiten Laufzeit, Parameter t/hms. TIME h: Stunden. -
Page 21: Zentrifugations-Parameter Eingeben
Temperatur (nur bei Zentrifuge mit Kühlung) T/°C Einstellbar in Grad Celsius (°C) oder in Grad Fahrenheit (°F). Einstellung der Temperatur-Einheit, siehe Kapitel "Temperatur-Einheit einstellen". Parameter T/°C = Grad Celsius (°C). Einstellbar von -20°C bis +40°C, in 1°C-Schritten (bei Option Heizen/Kühlen von -20°C bis +90°C einstellbar). -
Page 22: Laufzeit
15.1 Laufzeit Um den Dauerlauf einzustellen müssen die Minuten, Sekunden und Stunden auf Null gestellt werden. Der Dauerlauf wird in der Anzeige durch das Symbol "" angezeigt. drücken. Der Parameter t/hms wird angezeigt. Die Minuten (m) werden in Klammern Die Taste TIME dargestellt, und können verändert werden. -
Page 23: Anlaufstufe Und Anlaufzeit
15.5.1 Anlaufstufe und Anlaufzeit Das Einstellen von Anlaufzeiten ist nur möglich, wenn diese aktiviert sind, siehe Kapitel "An- und Auslaufzeiten aktivieren oder deaktivieren". Die Taste so oft drücken, bis der Parameter oder angezeigt wird. = Anlaufstufe, = Anlaufzeit Die Taste drücken, um zwischen der Anlaufstufe und der Anlaufzeit umzuschalten. -
Page 24: Programme Eingeben Oder Ändern
16.1 Programme eingeben oder ändern Die gewünschten Parameter einstellen (siehe Kapitel "Zentrifugations-Parameter eingeben"). Die Taste so oft drücken, bis der Parameter STO angezeigt wird. PROG Mit dem Drehknopf den gewünschten Programmplatz einstellen. Wird hinter dem Programmplatz ein "+" angezeigt, so sind die Daten schreibgeschützt. In diesem Fall muss zuerst der Schreibschutz aufgehoben werden, bevor gespeichert werden kann (siehe Kapitel "Schreibschutz für Programme"). -
Page 25: Programme Verknüpfen Oder Eine Programmverknüpfung Ändern
16.4.2 Programme verknüpfen oder eine Programmverknüpfung ändern Es können 25 Programmverknüpfungen gespeichert werden (Programmplätze A bis Z, Programmplatz J gibt es nicht). Eine Programmverknüpfung kann maximal aus 20 Programmen bestehen. In einer Programmverknüpfung erfolgt die Anpassung der Drehzahl von einem Programm zum nächsten Programm immer mit dem Anlaufparameter des nächsten Programms. -
Page 26: Zentrifugation
Zentrifugation Während eines Zentrifugationslaufes dürfen sich gemäß EN / IEC 61010-2-020, in einem Sicherheitsbereich von 300 mm um die Zentrifuge herum, keine Personen, Gefahrstoffe und Gegenstände befinden. Bei Zentrifugen mit Option Heizen / Kühlen muss nach einem Zentrifugationslauf mit sehr hoher Temperatur (z.B. -
Page 27: Dauerlauf
17.2 Dauerlauf Die Minuten, Sekunden und Stunden auf "0" stellen oder ein Dauerlauf-Programm abrufen (siehe Kapitel "Zentrifugations-Parameter eingeben" oder "Programme abrufen"). Die Taste drücken. Die LED in der Taste blinkt bis der Rotor eingelesen ist, anschließend leuchtet START START die LED. -
Page 28: Anzeige Des Integral Rcf Aktivieren Oder Deaktivieren
19.2 Anzeige des Integral RCF aktivieren oder deaktivieren Die Anzeige des Integral RCF kann, bei Stillstand des Rotors, wie folgt aktiviert oder deaktiviert werden: Die Taste 8 Sekunden gedrückt halten. PROG Nach 8 Sekunden erscheint Machine Menu in der Anzeige. ... -
Page 29: Zyklenzähler Auf "0" Zurücksetzen Und Die Maximal Zulässige Anzahl Der Laufzyklen Eingeben
21.2 Zyklenzähler auf "0" zurücksetzen und die maximal zulässige Anzahl der Laufzyklen eingeben Die Taste 8 Sekunden gedrückt halten. PROG Nach 8 Sekunden erscheint Machine Menu in der Anzeige. Die Taste so oft drücken bis -> Operating Time angezeigt wird. PROG ... -
Page 30: Bremsstufen Aktivieren Oder Deaktivieren
B-Bremsstufen aktivieren oder deaktivieren Die B-Bremsstufen können, bei Stillstand des Rotors, wie folgt aktiviert oder deaktiviert werden: Die Taste 8 Sekunden gedrückt halten. PROG Nach 8 Sekunden erscheint Machine Menu in der Anzeige. Die Taste so oft drücken bis -> Settings angezeigt wird. PROG ... -
Page 31: Angezeigte Zentrifugations-Daten Nach Dem Einschalten
Angezeigte Zentrifugations-Daten nach dem Einschalten Nach dem Einschalten werden die Zentrifugations-Daten des Programms 1, oder die des zuletzt benutzten Programms angezeigt. Dies kann, bei Stillstand des Rotors, wie folgt eingestellt werden: Die Taste 8 Sekunden gedrückt halten. PROG Nach 8 Sekunden erscheint Machine Menu in der Anzeige. ... -
Page 32: Pin (Persönliche Identifikationsnummer)
PIN (Persönliche Identifikationsnummer) Um das Ändern der Programm-Verriegelung durch unberechtigte Personen zu verhindern, kann eine PIN eingestellt werden. Ab Werk ist keine PIN eingestellt. 29.1 PIN einstellen oder ändern Die PIN kann, bei Stillstand des Rotors, wie folgt eingestellt werden: ... -
Page 33: Die Betriebsstunden, Die Zentrifugationsläufe Und Die Zyklenzähler Abfragen
Die Betriebsstunden, die Zentrifugationsläufe und die Zyklenzähler abfragen Die Betriebsstunden sind in interne und externe Betriebsstunden aufgeteilt. Interne Betriebsstunden: Gesamte Zeit, die das Gerät eingeschaltet war. Externe Betriebsstunden: Gesamte Zeit der bisherigen Zentrifugationsläufe. Die Abfrage kann, bei Stillstand des Rotors, wie folgt durchgeführt werden: ... -
Page 34: Vorkühlen Des Rotors
34.2 Vorkühlen des Rotors Zum schnellen Vorkühlen des unbeladenen Rotors und des Zubehörs, empfiehlt sich ein Zentrifugationslauf mit den Einstellungen Dauerlauf und einer Drehzahl von ca. 20% der maximalen Drehzahl des Rotors. Die Vorkühlung erfolgt automatisch mit Programm PREC (PRECOOLING). Eine Vorkühlung ist nicht möglich, wenn mit Programmverknüpfungen gearbeitet wird. -
Page 35: Heizung (Nur Bei Zentrifuge Mit Option Heizen/Kühlen)
Heizung (nur bei Zentrifuge mit Option Heizen/Kühlen) Während des Zentrifugationslaufes wird bei Bedarf der Schleuderraum auf die vorgewählte Temperatur geheizt. Bei Stillstand des Rotors ist die Heizung ausgeschaltet. Verbrennungsgefahr! Die Oberflächen-Temperatur des Heizelements im Schleuderraum der Zentrifuge kann bis zu 500°C / 932°F betragen. Das Heizelement nicht berühren. Kunststoff-Nutgehänge dürfen nur bei Temperaturen bis maximal 40°C / 104°F verwendet werden. -
Page 36: Rotorerkennung
Rotorerkennung Nach Start eines jeden Zentrifugationslaufes wird eine Rotorerkennung durchgeführt. Wurde der Rotor gewechselt, wird der Zentrifugationslauf nach der Rotorerkennung abgebrochen. Der Rotorcode (Rotor), die maximale Drehzahl des Rotors (Nmax) und der voreingestellte Zentrifugierradius (R) des verwendeten Rotors werden angezeigt, z. B. Rotor 4 Nmax= 4500 R=184 mm. Wenn die maximale Drehzahl des verwendeten Rotors kleiner als die eingestellte Drehzahl ist, wird die Drehzahl auf die maximale Drehzahl des Rotors begrenzt. -
Page 37: Zentrifuge (Gehäuse, Deckel Und Schleuderraum)
40.1 Zentrifuge (Gehäuse, Deckel und Schleuderraum) 40.1.1 Oberflächenreinigung und -pflege Das Gehäuse der Zentrifuge und den Schleuderraum regelmäßig säubern und bei Bedarf mit Seife oder einem milden Reinigungsmittel und einem feuchten Tuch reinigen. Dies dient zum einen der Hygiene und es verhindert Korrosion durch anhaftende Verunreinigungen. -
Page 38: Desinfektion
Die Rotoren und das Zubehör müssen unmittelbar nach dem Entfernen der radioaktiven Verunreinigungen getrocknet werden. 40.2.4 Tragzapfen Bei Ausschwingrotoren müssen die Tragzapfen regelmäßig gefettet werden (Hettich-Schmierfett Nr. 4051), um ein gleichmäßiges Ausschwingen der Gehänge zu gewährleisten. 40.2.5 Rotoren und Zubehör mit begrenzter Verwendungsdauer Die Verwendung von bestimmten Rotoren, Gehängen und Zubehörteilen ist zeitlich begrenzt. -
Page 39: Autoklavieren
40.3 Autoklavieren Das folgende Zubehör darf bei 121°C / 250°F (20 min) autoklaviert werden: Ausschwingrotoren Winkelrotoren aus Aluminium Gehänge aus Metall Deckel mit Bioabdichtung Gestelle Reduzierungen Im Zweifelsfall muss beim Hersteller nachgefragt werden. Über den Sterilitätsgrad kann keine Aussage gemacht werden. Die Deckel der Rotoren und Behälter müssen vor dem Autoklavieren abgenommen werden. -
Page 40: Störungen
Störungen Lässt sich der Fehler laut Störungstabelle nicht beheben, so ist der Kundendienst zu benachrichtigen. Bitte den Zentrifugentyp und die Seriennummer angeben. Beide Nummern sind auf dem Typenschild der Zentrifuge ersichtlich. Einen NETZ-RESET durchführen: Den Netzschalter ausschalten (Schalterstellung "0"). ... - Page 41 Anzeige Ursache Beseitigung SENSOR-ERROR Fehler / Defekt Elektronik Einen NETZ-RESET durchführen. SENSOR-ERROR 91 - 93 Fehler / Defekt Unwuchtsensor Deckel öffnen. NO ROTOR OR Kein Rotor eingebaut. ROTORCODE Tacho defekt. Rotor einbauen. ERROR N > ROTOR MAX Drehzahl im angewählten Programm ...
-
Page 42: Sicherungsautomat Einschalten
Vor der Rücksendung des Gerätes muss die Transportsicherung eingebaut werden. Wird das Gerät oder dessen Zubehör an die Firma Andreas Hettich GmbH & Co. KG zurückgesandt, so muss dieses, zum Schutz von Personen, Umwelt und Material, vor dem Versand dekontaminiert und gereinigt werden. - Page 43 Contents Use according to specification ..............................45 Remaining risks.................................... 45 Technical specifications ................................45 Notes on safety .................................... 46 Symbol meanings ..................................48 Delivery checklist ..................................49 Unpacking the centrifuge ................................49 Initial operation..................................... 49 Interface (only for centrifuge with interface)..........................49 Opening and closing the lid..............................
- Page 44 Cycle counter ................................... 60 21.1 After starting the first centrifugation run, enter the maximum permitted number of rotor cycles or deactivate the cycle counter ..................................... 60 21.2 Reset cycle counter to "0" and enter the maximum permitted number of rotor cycles ............ 61 21.3 Activating or deactivating the cycle counter........................
-
Page 45: Use According To Specification
In particular, these include samples for preparation of in-vitro diagnostic purposes in human medicine. The centrifuge is only meant for this purpose. Another use or one which goes beyond this, is considered to be non-intended. The company Andreas Hettich GmbH & Co. KG is not liable for damage resulting from this. -
Page 46: Notes On Safety
The centrifuge may no longer be put into operation when the centrifuging chamber has safety- related damages. With swing-out rotors the trunnions must be regularly lubricated (Hettich Lubricating Grease No. 4051) in order to ensure consistent swinging out of the hangers. ... - Page 47 Repairs must only be carried out by personnel authorised to do so by the manufacturer. Only original spare parts and original accessories licensed by the Andreas Hettich GmbH & Co. KG company are allowed to be utilised.
-
Page 48: Symbol Meanings
Symbol meanings Symbol on the device: Attention, general hazard area. Before using the device, make sure you read the operating instructions and observe the safety information! Symbol in this document: Attention, general hazard area. This symbol refers to safety relevant warnings and indicates possibly dangerous situations. The non-adherence to these warnings can lead to material damage and injury to personal. -
Page 49: Delivery Checklist
Delivery checklist 1 Connecting cable 1 Hex. pin driver 2,5 mm 1 Hex. pin driver 5 mm 1 Lubricating grease for trunnions 1 Operating instructions 1 Notes on moving the equipment safely The rotor(s) and associated accessories are included in the delivery in the quantity ordered. Unpacking the centrifuge ... -
Page 50: Opening And Closing The Lid
Opening and closing the lid 10.1 Opening the lid The lid can only be opened when the centrifuge is switched on and the rotor is at rest. If it cannot be opened under these circumstances, see the section on “Emergency release”. ... -
Page 51: Loading The Rotor
Loading the rotor Standard centrifuge containers of glass will not stand RCF values exceeding 4000 (DIN 58970, pg. 2). Check the rotor for firm seating. With swing-out rotors all rotor positions must be lined with identical hangers. Certain hangers are marked with the number of the rotor position. -
Page 52: Control And Display Elements
Control and display elements See figure on page 2. Fig. 2: Display and control panel 14.1 Control knob For setting the individual parameters. Turning anticlockwise reduces the value. Turning clockwise increases the value. 14.2 Keys and setting options Running time, parameters t/hms. TIME h: hours. -
Page 53: Enter Centrifugation Parameters
Temperature (only for centrifuge with refrigeration) T/°C Adjustable in degrees Celsius (°C) or in degrees Fahrenheit (°F). For setting the temperature unit, see chapter "Temperatur-Einheit einstellen/Setting the temperature unit". Parameters T/°C = degrees Celsius (°C). Adjustable from -20°C to +40°C, in 1°C increments (for the heat/cool option, adjustable in the range from - 20°C to +90°C). -
Page 54: Running Time
15.1 Running time In order to set continual running, the minutes, seconds and hours have to be set to zero. Continual running is represented in the display by the following symbol, "". key. The parameters t/hms is displayed. The minutes (m) are shown in parentheses , and can Press the TIME be changed. -
Page 55: Start-Up And Run-Down Parameters
15.5 Start-up and run-down parameters The set start-up and run-down parameters are displayed. x: 1-9 = start-up stage, t = start-up time y: 1-9, 1b-9b = braking stage, 0 = unbraked run-down, t = run-down time 15.5.1 Start-up stage and start-up time It is only possible to set start-up times if these have been activated. -
Page 56: Temperature (Only For Centrifuge With Refrigeration)
15.6 Temperature (only for centrifuge with refrigeration) The temperature can be entered in degrees Celsius (°C) or in degrees Fahrenheit (°F). For setting the temperature unit, see chapter "Set temperature unit". Press the key. The following parameters are displayed: T/°C or T/°F. T/°C ... -
Page 57: Program Linkage
16.4 Program linkage "Program linkage" can be used to link several centrifuge operations together. A program linkage is only possible if this has been activated (parameter Multi programs = on; see the chapter on "Activating or deactivating program linkage"). 16.4.1 Activating or deactivating program linkage The program link can be activated/deactivated as follows when the rotor is at a standstill: ... -
Page 58: Automatic Temporary Storage
16.5 Automatic temporary storage The program place 0 serves as temporary storage for centrifugation data of the last centrifugation run that took place. No programs can be saved at this program place. After every start to a centrifugation run, the centrifugation data that is used for the run is automatically saved at program place "0"... -
Page 59: Continuous Operation
17.2 Continuous operation Set the minutes, seconds and hours to "0" or start a continual run program (see chapter "Enter centrifugation parameter" or " Calling up programs"). Press the key. The LED in the key blinks until the rotor has been imported, it is subsequently lit. START START The time count starts from 00:00. -
Page 60: Activate Or Deactivate The Integral Rcf Display
19.2 Activate or deactivate the integral RCF display The integral RCF display is activated or deactivated as follows when the rotor is at rest: Keep the key held down for 8 seconds. PROG After 8 seconds, Machine Menu appears in the display. ... -
Page 61: Reset Cycle Counter To "0" And Enter The Maximum Permitted Number Of Rotor Cycles
21.2 Reset cycle counter to "0" and enter the maximum permitted number of rotor cycles Keep the key held down for 8 seconds. PROG After 8 seconds, Machine Menu appears in the display. Press the key as often as necessary until the ->Operating Time is displayed. PROG ... -
Page 62: Activate Or Deactivate B-Braking Stages
Activate or deactivate B-braking stages The B-braking stages can be activated or deactivated as follows when the rotor is at a standstill. Keep the key held down for 8 seconds. PROG After 8 seconds, Machine Menu appears in the display. ... -
Page 63: Displayed Centrifugation Data After Switch-On
Displayed centrifugation data after switch-on. After switch-on the centrifugation data from program 1, or from the last program that was used, is displayed. If the rotor is at standstill, this can be set as follows: Keep the key held down for 8 seconds. PROG After 8 seconds, ... -
Page 64: Pin (Personal Identification Number)
PIN (Personal Identification Number) To prevent the program lock from being changed by unauthorized persons, a PIN can be set. No PIN is set in the factory. 29.1 Setting or changing the PIN The PIN can be set as follows when the rotor is at a standstill: ... -
Page 65: Centrifuge Address
Centrifuge address Ex works, the address is ] = 29. Address is set. Query the operating hours, centrifugation runs and cycle counter The operating hours are divided up into internal and external operating hours. Internal operating hours: Total time the device was switched on. External operating hours: Total time of previous centrifugation runs. -
Page 66: Precooling Of The Rotor
34.2 Precooling of the rotor For quick precooling of the unloaded rotor and the accessories, it is a good idea to do a centrifugation run with the continuous operation setting and a speed of about 20% of the maximum rotor speed. The precooling is done automatically with the PREC (PRECOOLING) program. -
Page 67: Heating (Only On Centrifuges With Heating/Cooling Option)
Heating (only on centrifuges with heating/cooling option) During operation of the centrifuge the centrifuge chamber can be heated as required to the preselected temperature. The heating is switched off when the rotor is stationary. Risk of burning! The surface temperature of the heating element in the centrifugal chamber of the centrifuge can reach 500°C / 932°F. -
Page 68: Centrifugation Of Materials Or Mixtures Of Materials With A Density Higher Than 1.2 Kg/Dm
Centrifugation of materials or mixtures of materials with a density higher than 1.2 kg/dm When centrifuging with maxim revolutions per minute the density of the materials or the material mixtures may not exceed 1.2 kg/dm The speed must be reduced for materials or mixtures of materials with a higher density. The permissible speed can be calculated using the following formula: Reduced speed... -
Page 69: Maintenance And Servicing
Maintenance and servicing The device can be contaminated. Pull the mains plug before cleaning. Before any other cleaning or decontamination process other than that recommended by the manufacturer is applied, the user has to check with the manufacturer that the planned process does not damage the device. ... -
Page 70: Rotors And Attachments
The rotors and accessories must be dried directly after removing the radioactive contaminants. 40.2.4 Trunnions With swing-out rotors the trunnions must be regularly lubricated (Hettich Lubricating Grease No. 4051) in order to ensure consistent swinging out of the hangers. 70/176... -
Page 71: Rotors And Accessories With Limited Service Lives
40.2.5 Rotors and accessories with limited service lives The use of certain rotors, hangers and accessory parts is limited by time. These are marked with the maximum permitted number of operating cycles or with an expiration date and the maximum permitted number of operating cycles or just with the expiration date; e.g.: - "einsetzbar bis Ende: ... -
Page 72: Faults
Faults If the fault cannot be eliminated with the help of the fault table, please inform Customer Service. Please specify the type of centrifuge and the serial number. Both numbers can be found on the name plate of the centrifuge. Perform a MAINS RESET: ... - Page 73 Message / fault Cause Remedy SENSOR-ERROR Error / defect electronics Perform a MAINS RESET. SENSOR-ERROR 91 - 93 Error / defect unbalance sensor NO ROTOR OR No rotor installed. Open lid. ROTORCODE Faulty speedometer. Install rotor. ERROR N ...
-
Page 74: Switch On Automatic Circuit Breaker
Before returning the device, a transport securing device has to be installed. If the device or its accessories are returned to Andreas Hettich GmbH & Co. KG, in order to provide protection for people, the environment and materials, it has to be decontaminated and cleaned before being shipped. - Page 75 Table des matières Usage conforme................................... 77 Risques résiduels..................................77 Données techniques ..................................77 Consignes de sécurité ................................. 78 Signification des symboles................................80 Composition de la livraison ................................81 Déballer la centrifugeuse ................................81 Mise en service .................................... 81 Interface (uniquement pour les centrifugeuses avec interface) ....................82 Ouvrir et fermer le couvercle..............................
- Page 76 Compteur de cycles.................................. 94 21.1 Saisie du nombre maximal admissible de cycles de fonctionnement ou désactivation du compteur de cycles après le démarrage du premier cycle de centrifugation......................... 94 21.2 Remettre le compteur de cycles à "0" et introduire le nombre maximal admissible de cycles de fonctionnement..95 21.3 Désactivation ou activation du compteur de cycles ......................
-
Page 77: Usage Conforme
Toute utilisation en dehors ou au delà de ce cadre est considérée comme non conforme. L'entreprise Andreas Hettich GmbH & Co. KG décline toute responsabilité pour tout dommage en résultant. L'utilisation conforme comprend également le respect de toutes les indications contenues dans le mode d'emploi et des travaux d'inspection et d'entretien. -
Page 78: Consignes De Sécurité
à la sécurité. Les goupilles de fixation des rotors à amortissement doivent être graissées régulièrement (graisse de lubrification Hettich n° 4051) de manière à assurer le balancement régulier de la suspension. Concernant les centrifugeuses sans réglage de température, il peut y avoir un réchauffement dans la cuve de centrifugeuse en cas de température ambiante élevée et/ou d'utilisation fréquente de... - Page 79 Les réparations ne peuvent être effectuées que par une personne autorisée à cet effet par le fabricant. Utiliser uniquement les pièces de rechange originales et les accessoires d'origine homologués par les Etablissements Andreas Hettich GmbH & Co. KG. Les dispositions de sécurité suivantes font foi : EN / IEC 61010-1 et EN / IEC 61010-2-020 ainsi que les dérogations nationales.
-
Page 80: Signification Des Symboles
Signification des symboles Symbole sur l'appareil : Attention, zone de danger général. Avant utilisation de l'appareil, il est indispensable de lire le mode d'emploi et de respecter les consignes relatives à la sécurité! Symbole dans ce document: Attention, zone de danger général. Ce symbole indique des consignes de sécurité... -
Page 81: Composition De La Livraison
Composition de la livraison 1 Câble de connexion 1 Clé mâle coudée 2,5 mm 1 Clé mâle coudée 5 mm 1 Graisse pour tourillon porteur 1 Mode d’emploi 1 Fiche de consignes pour le transport Le(s) rotor(s) et accessoires correspondant sont livrés selon les spécifications de la commande. Déballer la centrifugeuse ... -
Page 82: Interface (Uniquement Pour Les Centrifugeuses Avec Interface)
Interface (uniquement pour les centrifugeuses avec interface) En option, l'appareil peut être équipé d'une interface série RS232. IOIOI L'interface RS232 est désignée par le symbole RS232 Via cette interface, vous pouvez commander la centrifugeuse et chercher des données. Le DEL de la touche brille pendant le transfert de données. -
Page 83: Chargement Du Rotor
Chargement du rotor Des récipients standard de centrifugation en verre sont résistants jusqu' à un ACR de 4000 (DIN 58970, partie 2). Vérifier la stabilité d'assise du rotor. Dans le cas des rotors à balanciers, toutes les positions des rotors doivent être équipées avec les mêmes balanciers. -
Page 84: Fermeture Des Systèmes De Sécurité Biologique
Fermeture des systèmes de sécurité biologique Pour garantir l'étanchéité, le couvercle d'un système de sécurité biologique doit être solidement fermé. Pour éviter de fausser la bague d'étanchéité en ouvrant et en fermant le couvercle, il faut frotter légèrement la bague d'étanchéité avec de la poudre de talc ou un produit d'entretien pour caoutchouc. Lorsque la suspension d'un système de sécurité... -
Page 85: Organes De Commande Et Indicateurs
Organes de commande et indicateurs Voir illustration sur la page 2. Fig. 2: Console des indicateurs et organes de commande 14.1 Bouton de réglage Pour le réglage des paramètres individuels. Pour faire décroître la valeur, tourner le bouton dans le sens anti-horaire. Pour augmenter la valeur, tourner le bouton dans le sens horaire. -
Page 86: Saisir Les Paramètres De Centrifugation
Température (uniquement pour une centrifugeuse avec un refroidissement) T/°C Réglable en degré Celsius (°C) ou en degré Fahrenheit (°F). Pour le réglage de l'unité de mesure de la température, voir au chapitre "Régler l'unité de mesure de la température". Paramètre T/°C = degré... -
Page 87: Temps De Marche
15.1 Temps de marche Pour régler le fonctionnement continu, il faut mettre les minutes, les secondes et les heures à zéro. Le fonctionnement continu est indiqué dans l'affichage par le symbole " ". Appuyer sur la touche . Le paramètre t/hms s'affiche. Les minutes ( m) sont représentées entre parenthèses TIME ... -
Page 88: Paramètres De Démarrage Et De Ralentissement
15.5 Paramètres de démarrage et de ralentissement Les paramètres de démarrage et de refroidissement ajustés sont affichés. x: 1-9 = étape de démarrage, t = temps de démarrage y: 1-9, 1b-9b = étape de freinage, 0 = ralentissement sans freinage, t = temps de ralentissement 15.5.1 Étape de démarrage et temps de démarrage Le réglage des temps de démarrage est seulement possible, lorsque ceux-ci sont activés, voir chapitre... -
Page 89: Programmation
Programmation Lorsque des paramètres sont modifiés, le numéro de position du programme s'affiche entre parenthèses (). Cela signifie que les données de centrifugation de l'affichage ne correspondent plus aux données de centrifugation sauvegardées de la position du programme. 16.1 Entrer ou modifier des programmes ... -
Page 90: Activer Ou Désactiver Association De Programmes
16.4.1 Activer ou désactiver association de programmes Lorsque le rotor est à l'arrêt, vous pouvez activer ou désactiver l'association des programmes en procédant comme suit : Maintenir la touche enfoncée pendant 8 secondes. PROG Le Machine Menu s'affiche après 8 secondes. ... -
Page 91: Centrifugation
Centrifugation Durant un processus de centrifugation, aucune personne, matière dangereuse et aucun objet ne doivent se trouver dans une zone de sécurité de 300 mm autour de la centrifugeuse selon EN / IEC 61010-2-020. Dans le cas des centrifugeuses avec l'option Chauffage / refroidissement, il faut attendre, après un cycle de centrifugation avec une température très élevée (par ex. -
Page 92: Fonctionnement Continu
17.2 Fonctionnement continu Mettre les minutes, les secondes et les heures à "0" ou appeler un programme de fonctionnement continu (voir au chapitre "Saisir les paramètres de centrifugation" ou "Appeler des programmes"). Appuyer sur la touche . La DEL de la touche clignote jusqu'à... -
Page 93: Interrogation De L'intégrale Rcf
19.1 Interrogation de l'intégrale RCF On ne peut interroger l'intégrale RCF que si son affichage est activé, voir chapitre "Activer ou désactiver l'affichage de l'intégrale RCF". Le programme n'enregistre pas l'intégrale RCF. L'intégrale RCF est effacée dès le démarrage du cycle de centrifugation suivant ou après la mise hors tension de l'appareil. -
Page 94: Compteur De Cycles
Compteur de cycles L'utilisation du compteur de cycles n'est indiquée que si l'on travaille toujours avec le même jeu de balanciers. La centrifugeuse est équipée d'un compteur de cycles qui compte les cycles de fonctionnement (cycles de centrifugation) des différents codes de rotor (voir également le chapitre "Identification du rotor"). Dans le cas des rotors à... -
Page 95: Remettre Le Compteur De Cycles À "0" Et Introduire Le Nombre Maximal Admissible De Cycles De Fonctionnement
21.2 Remettre le compteur de cycles à "0" et introduire le nombre maximal admissible de cycles de fonctionnement. Maintenir la touche enfoncée pendant 8 secondes. PROG Le Machine Menu s'affiche après 8 secondes. Appuyer plusieurs fois sur la touche jusqu'à... -
Page 96: Activation Ou Désactivation De La Fonction "Timing Begins At Speed
Activation ou désactivation de la fonction "Timing begins at Speed" Rotor arrêté, on peut activer ou désactiver la fonction "Timing begins at Speed" comme suit : Maintenir la touche enfoncée pendant 8 secondes. PROG Le Machine Menu s'affiche après 8 secondes. ... -
Page 97: Signal Acoustique
Signal acoustique Le signal sonore retentit: en cas d’apparition d’un défaut à un intervalle de 2 s. au terme de la centrifugation et après immobilisation du rotor, à un intervalle de 30 s. Le signal sonore cesse après ouverture du couvercle, en appuyant sur une touche quelconque. Lorsque le rotor est à... -
Page 98: Paramétrer Verrouillage Du Programme
Paramétrer verrouillage du programme Lorsque le rotor est à l'arrêt, vous pouvez paramétrer les verrouillages des programmes suivants: LOCK 1 s'affiche dans le champ " ". LOCK 1 Vous pouvez appeler les programmes mais pas les modifier. LOCK 2 s'affiche dans le champ " ". -
Page 99: Marche À Suivre En Cas De Pin Perdu
Appuyer 1 x sur la touche pour quitter le menu "Change PIN" ou appuyer 2 x sur la touche OPEN / STOP pour quitter le "menu Machine". OPEN / STOP 29.2 Marche à suivre en cas de PIN perdu En cas de PIN perdu, on peut extraire un numéro appelé... -
Page 100: Interrogation Des Informations Système
Interrogation des informations système Les informations sur le rotor et la version du programme de la centrifugeuse et du convertisseur de fréquence peuvent être interrogées de la manière suivante, lorsque le rotor est immobile : Maintenir la touche enfoncée pendant 8 secondes. PROG Le ... -
Page 101: Réfrigération Temporisée
34.3 Réfrigération temporisée Au besoin, on peut procéder à un réglage pour temporiser la réfrigération après le démarrage du cycle de centrifugation. On peut régler le délai de temporisation par pas d'1 seconde sur une valeur comprise entre 15 et 900 secondes. Si l'on ne souhaite pas de temporisation, le réglage doit être "0". -
Page 102: Chauffage (Uniquement Sur Centrifugeuse Avec L'option Chauffer/Refroidir)
Chauffage (uniquement sur centrifugeuse avec l'option Chauffer/refroidir) Au cours du fonctionnement de centrifugation, en cas de besoin, la zone de centrifugation peut être chauffée à une température pré-sélectionnée. Lorsque le rotor est au point mort, le chauffage est éteint. Risque de brûlure ! La température de surface de l'élément chauffant dans le compartiment de centrifugation de la centrifugeuse peut monter jusqu'à... -
Page 103: Centrifugation De Matières Et De Mélanges D'une Densité Supérieure À 1,2 Kg/Dm
Centrifugation de matières et de mélanges d'une densité supérieure à 1,2 kg/dm Dans le cas de la centrifugation à la vitesse maximale, la densité des substances et des mélanges de substances ne doit pas excéder 1,2 kg/dm . Réduire la vitesse de rotation pour les matières et mélanges ayant une densité supérieure. -
Page 104: Entretien Et Maintenance
Entretien et maintenance L'appareil est peut-être contaminé. Retirer la prise de secteur avant de nettoyer. Avant d'utiliser une procédure de nettoyage ou de décontamination autre que celle recommandée par le fabricant, l'utilisateur vérifiera auprès du fabricant que la procédure prévue n'endommage pas l'appareil. ... -
Page 105: Rotors Et Accessoires
Séchez immédiatement rotors et accessoire après décontamination des substances radioactives. 40.2.4 Goupilles de fixation Les goupilles de fixation des rotors à amortissement doivent être graissées régulièrement (graisse de lubrification Hettich n° 4051) de manière à assurer le balancement régulier de la suspension. 105/176... -
Page 106: Rotors Et Accessoires À Durée D'utilisation Limitée
40.2.5 Rotors et accessoires à durée d'utilisation limitée L'utilisation de certains rotors, balanciers et accessoires est limitée dans le temps. Ces limites sont indiquées par le nombre maximum de cycles ou la date limite d'utilisation et le nombre maximum de cycles, ou simplement la date limite d'utilisation, par ex. -
Page 107: 41 Défauts
Défauts Si l'erreur ne peut pas être éliminée d'après le tableau des défauts, il faut alors avertir le service après-vente. Veuillez indiquer le type de centrifuge et le numéro de série. Les deux numéros sont indiqués sur la plaque signalétique de la centrifugeuse. Effectuer une RÉINITIALISATION DU SECTEUR : ... - Page 108 Message / Erreur Origine Solution SENSOR-ERROR Défaut / Panne de l'électronique. Effectuer une RÉINITIALISATION DU SENSOR-ERROR 91 - 93 Défaut / Panne de détecteur anti- SECTEUR. balourd NO ROTOR OR Pas de rotor intégré. Ouvrir le capot. ROTORCODE Tachymètre défectueux.
-
Page 109: Mettre Le Coupe-Circuit Automatique En Service
Avant de renvoyer l'appareil, il faut monter le dispositif de fixation pour le transport. Dans le cas où l'appareil ou ses accessoires doivent être retournés à la société Andreas Hettich GmbH & Co. KG, il faut les décontaminer et les nettoyer avant expédition, dans le but d'assurer la protection des personnes, de l'environnement et du matériel. - Page 110 Indice Uso previsto ....................................112 Rischi residui....................................112 Dati tecnici....................................112 Indicazioni inerenti la sicurezza ..............................113 Significato dei simboli................................. 115 Contenuto della fornitura................................115 Disimballo della centrifuga ................................. 115 Messa in funzione ..................................116 Interfaccia (solo per la centrifuga con interfaccia)........................116 Apertura e chiusura del coperchio ............................
- Page 111 Contacicli....................................129 21.1 Dopo l'avvio del primo ciclo di centrifugazione immettere il numero di cicli massimo consentito oppure disattivare il contacicli..................................129 21.2 Azzerare il contacicli e immettere il numero massimo di cicli consentito............... 129 21.3 Disattivare o attivare il contacicli............................ 130 Attivare o disattivare la funzione "Timing begins at Speed"....................
-
Page 112: Uso Previsto
Le centrifuga è destinata solo a questo scopo d'impiego. Un diverso od ulteriore tipo di impiego non è regolamentare. La ditta Andreas Hettich GmbH & Co. KG non si prende carico di alcuna responsabilità nel caso di danni da ciò derivanti. -
Page 113: Indicazioni Inerenti La Sicurezza
In rotori oscillanti, i perni di trascinamento devono essere lubrificati regolarmente (Grasso lubrificante Hettich no. d’ord. 4051) per consentire un’oscillazione equilibrata dei ganci. Nel caso di centrifughe senza regolazione termica, con temperature ambiente elevate e/o con frequente impiego dell'apparecchiatura può... - Page 114 Gli interventi di riparazione devono essere effettuati esclusivamente da una persona autorizzata dal costruttore. Devono essere impiegati solo ed esclusivamente pezzi di ricambio originali ed accessori autorizzati della ditta Andreas Hettich GmbH & Co. KG. Sono di validità le seguenti norme di sicurezza: EN / IEC 61010-1 e EN / IEC 61010-2-020 come anche le loro nazionali varianti.
-
Page 115: Significato Dei Simboli
Significato dei simboli Simbolo sull'apparecchio: Attenzione, punto pericoloso generico. Prima di utilizzare l'apparecchiatura leggere in ogni caso le istruzioni per l'uso ed osservare le istruzioni rilevanti per la sicurezza! Simbolo in questo documento. Attenzione, punto pericoloso generico. Questo simbolo contraddistingue le avvertenze relative alla sicurezza e indica situazioni potenzialmente pericolose . -
Page 116: Messa In Funzione
Messa in funzione Secondo la norma sugli strumenti di laboratorio EN / IEC 61010-2-020 gli impianti domestici devono essere provvisti di apposito sezionatore d’emergenza per l’interruzione della rete in caso di guasto. L'interruttore deve essere posizionato distante dalla centrifuga, preferibilmente al di fuori della stanza in cui è posizionata la centrifuga o vicino all'uscita. -
Page 117: Apertura E Chiusura Del Coperchio
Apertura e chiusura del coperchio 10.1 Apertura del coperchio E' possibile aprire il coperchio solo se la centrifuga è accesa ed il rotore è fermo. Se non dovesse essere possibile, vedi capitolo "Sblocco di emergenza". Premere il tasto . Il coperchio si sblocca a motore e il LED sinistro nel tasto si spegne. -
Page 118: Carico Del Rotore
Carico del rotore Lo standard dei recipienti di vetro centrifugati sono da caricare fino a RCF 4000 (DIN 58970 capoverso 2). Verificare che il rotore sia fissato. Nel caso di rotori oscillanti, tutti i siti del rotore devono essere muniti di ganci uguali . Particolari ganci sono contrassegnati con il numero del sito del rotore. -
Page 119: Chiudere I Sistemi Biologici Di Sicurezza
Chiudere i sistemi biologici di sicurezza Per garantire la tenuta, il coperchio di un sistema biologico di sicurezza deve essere ben chiuso. Per evitare che durante l'apertura e la chiusura del coperchio l'anello di guarnizione si giri, spalmarvi, frizionando leggermente, polvere di talco o una sostanza per la cura della gomma. Se la sospensione di un sistema di sicurezza biologico viene usata senza coperchio, la guarnizione ad anello deve essere rimossa dalla sospensione per evitare di danneggiarla durante il ciclo di centrifugazione. -
Page 120: Elementi Di Operazione E Visualizzazione
Elementi di operazione e visualizzazione Vedere illustrazione alla pagina 2 Fig. 2: Display 14.1 Manopola Per l'impostazione dei singoli parametri. La rotazione in senso antiorario riduce il valore. La rotazione in senso orario aumenta il valore. 14.2 Pulsanti e possibilità di regolazione ... -
Page 121: Immissione Dei Parametri Di Centrifugazione
Temperatura (soltanto per centrifuga con refrigerazione) T/°C Regolabile in gradi Celsius (°C) oppure in gradi Fahrenheit (°F). Impostazione dell'unità della temperatura, vedere il capitolo "Impostazione dell'unità della temperatura". Parametro T/°C = gradi Celsius (°C). Regolabile da -20° C a +40° C, in intervalli di 1° C (con l'opzione Riscaldamento/ Refrigerazione regolabile da -20°... -
Page 122: Tempo Ciclo
15.1 Tempo ciclo Per impostare il funzionamento continuo si devono azzerare i minuti, i secondi e le ore. Il funzionamento continuo è indicato sul display dal simbolo " ". . È visualizzato il parametro t/hms. I minuti (m) sono mostrati tra parentesi e possono Premere il pulsante TIME essere modificati. -
Page 123: Livello Avvio E Tempo Avvio
15.5.1 Livello avvio e tempo avvio L'impostazione dei tempi di avvio è possibile solo se questi sono attivati, vedere al capitolo "Attivare o disattivare i tempi di avvio e di arresto". Premere più volte il tasto fino a quando viene esposto il parametro oppure = livello avvio, = tempo avvio... -
Page 124: Immettere O Modificare I Dati
16.1 Immettere o modificare i dati Impostare i parametri desiderati (vedere il capitolo "Immissione dei parametri di centrifugazione"). Premere il pulsante il numero di volte necessario per visualizzare il parametro STO. PROG Impostare la posizione di programma desiderata utilizzando la manopola . Se dietro il posto di programma viene esposto un "+", i dati sono protetti dalla scrittura. -
Page 125: Concatenare Programmi O Modificare Un Concatenamento Di Programmi
16.4.2 Concatenare programmi o modificare un concatenamento di programmi Possono venire memorizzati 25 concatenamenti di programmi (posti di programma A fino a Z, posto di programma J non esiste). Un concatenamento di programmi può essere costituito al massimo da 20 programmi. -
Page 126: Centrifugazione
Centrifugazione Durante un’operazione di centrifugazione, in una zona di sicurezza di 300 mm attorno alla centrifuga non deve sostare alcuna persona, materiali pericolosi ed oggetti, in conformità alle norme EN / IEC 61010-2-020. Nelle centrifughe con opzione Riscaldamento / Raffreddamento, dopo un ciclo di centrifugazione ad altissima temperatura (p.e. -
Page 127: Funzionamento Continuo
17.2 Funzionamento continuo Impostare su "0" i minuti, i secondi e le ore, oppure richiamare un programma di funzionamento continuo (vedere il capitolo "Immissione dei parametri di centrifugazione" oppure "Richiamare i programmi"). Premere il pulsante . Il LED presente nel pulsante lampeggia fino a che il rotore non viene letto, START START... -
Page 128: Richiamare La Rcf-Integral
19.1 Richiamare la RCF-Integral É possibile richiamare la RCF-Integral solo se il display della RCF-Integral è attivato, vedi capitolo "Attivare o disattivare il display della RCF-Integral". La RCF-Integral non viene salvata. All'avvio del successivo ciclo di centrifugazione o allo spegnimento dell'apparecchio la RCF-Integral sarà... -
Page 129: Contacicli
Contacicli L'utilizzo del contacicli è opportuno solo quando si lavora sempre con lo stesso set di sospensioni. La centrifuga è dotata di un contacicli che conta i cicli (cicli di centrifugazione) dei diversi Rotorcode (vedi anche capitolo "Riconoscimento del rotore"). Nei rotori basculanti il contacicli è... -
Page 130: Disattivare O Attivare Il Contacicli
21.3 Disattivare o attivare il contacicli Tenere premuto il pulsante per 8 secondi. PROG Dopo 8 secondi sul display appare Machine Menu . Premere ripetutamente il tasto fino a visualizzare -> Operating Time. PROG Premere il tasto . -
Page 131: Attivare O Disattivare I Tempi Di Avvio E Di Arresto
Attivare o disattivare i tempi di avvio e di arresto I tempi di avvio e di arresto possono essere attivati o disattivati, durante l'arresto del rotore, come segue: Tenere premuto il pulsante per 8 secondi. PROG Dopo 8 secondi sul display appare Machine Menu . ... -
Page 132: Impostazione Dell'unità Della Temperatura (Soltanto Per Centrifuga Con Refrigerazione)
Impostazione dell'unità della temperatura (soltanto per centrifuga con refrigerazione) La temperatura può essere immessa in gradi Celsius (°C) oppure in gradi Fahrenheit (°F). A tale scopo occorre impostare l'unità della temperatura, a rotore fermo, nel modo seguente: Tenere premuto il pulsante per 8 secondi. -
Page 133: Impostare O Modificare Il Pin
29.1 Impostare o modificare il PIN Il PIN può essere impostato, durante l'arresto del rotore, come segue: Tenere premuto il pulsante per 8 secondi. PROG Dopo 8 secondi sul display appare Machine Menu . Premere il pulsante fino a che non viene visualizzato ->... -
Page 134: Richiamare Le Ore Di Esercizio, I Cicli Di Centrifugazione E Il Contacicli
Richiamare le ore di esercizio, i cicli di centrifugazione e il contacicli Le ore di funzionamento sono suddivise in ore di funzionamento interne ed esterne. Ore di funzionamento interne: tempo totale di accensione dell'apparecchio. Ore di funzionamento esterne: tempo totale dei cicli di centrifugazione finora eseguiti. Se il rotore è... -
Page 135: Preraffreddamento Del Rotore
34.2 Preraffreddamento del rotore Per un veloce raffreddamento del rotore in condizione di non caricato e dell'accessorio, consigliamo uno svolgimento di centrifugazione con le impostazioni di funzionamneto continuo ed un regime di rotazione di ca. 20% del regime di rotazione max. del rotore. Il preraffreddamento avviene in modo automatico con il programma PREC (PRECOOLING). -
Page 136: Riscaldamento (Solo Per Centrifughe Con Opzione Di Riscaldamento/ Raffreddamento)
Riscaldamento (solo per centrifughe con opzione di riscaldamento/ raffreddamento) Durante il processo di centrifuga, in caso di necessità, il vano di centrifugazione può essere riscaldato alla temperatura preimpostata. Al fermo del rotore, il riscaldamento è spento. Pericolo di combustione! La temperatura superficiale dell’elemento riscaldante nella camera di centrifugazione della centrifuga può... -
Page 137: Riconoscimento Del Rotore
Riconoscimento del rotore Con l’inizio di ogni corsa di centrifugazione avviene il riconoscimento del rotore installato. Dopo una sostituzione del rotore, il ciclo di centrifugazione si interrompe dopo il riconoscimento del rotore. Vengono visualizzati il Rotorcode (rotore), il numero massimo di giri del rotore (Nmax) e il raggio di centrifugazione preimpostato (R) del rotore utilizzato. -
Page 138: Centrifughe (Scatola, Coperchio E Vano Di Centrifugazione)
40.1 Centrifughe (scatola, coperchio e vano di centrifugazione) 40.1.1 Cura e pulizia delle superfici Pulire regolarmente il corpo della centrifuga e la camera di centrifugazione e impiegare all'occorrenza sapone o un detergente delicato e un panno umido. Ciò serve da un lato per l’igiene e dall’altro lato per evitare la corrosione causata da impurità... -
Page 139: Disinfezione
I rotori e gli accessori devono essere asciugati subito dopo la rimozione delle contaminazioni radioattive. 40.2.4 Perni di trascinamento In rotori oscillanti, i perni di trascinamento devono essere lubrificati regolarmente (Grasso lubrificante Hettich no. d’ord. 4051) per consentire un’oscillazione equilibrata dei ganci. 40.2.5 Rotori ed accessori con limitata durata di impiego L'impiego di particolari rotori, ganci ed elementi accessori è... -
Page 140: Mantenere In Autoclave
40.3 Mantenere in autoclave Il seguente accessorio può essere sterilizzato in autoclave a 121°C / 250°F (20 min): Rotori basculanti Rotori angolari di alluminio Sospensioni in metallo Coperchio con chiusura ermetica anti-contaminazione Telaio Riduzioni In caso di dubbio occorre informarsi presso la casa produttrice. -
Page 141: Guasti
Guasti Se non si riesce a eliminare l’errore seguendo le indicazioni della tabella guasti, informare il servizio assistenza clienti. Si prega di indicare il tipo di centrifuga e il numero di serie. Entrambi i numeri sono visibili sulla targhetta di modello della centrifuga. - Page 142 Visualizzazione/guasto Causa Eliminazione SENSOR-ERROR Guasto/difetto sistema elettronico. Esecuzione di un RESET RETE. SENSOR-ERROR 91 - 93 Guasto/difetto sensore squilibrio. NO ROTOR OR Non è installato alcun rotore. Aprire il coperchio. ROTORCODE ERROR Tachimetro difettoso. Installare il rotore. N >...
-
Page 143: Inserire L'interruttore Automatico
Prima di rispedire un apparecchio deve essere montata la protezione per il trasporto. Se l'apparecchio o uno dei suoi accessori viene rispedito alla ditta Andreas Hettich GmbH & Co. KG, esso deve essere prima decontaminato e pulito per la tutela di persone, ambiente e materiale. -
Page 144: Anhang / Appendix
Anhang / Appendix 45.1 Rotoren und Zubehör / Rotors and accessories 4723 4750 4751 Ausschwingrotor 4-fach / Swing out rotor 4-times mit Bioabdichtung / with bio-containment 4761 4762 0551 ---- ---- ---- 0553 0501 90° Kapazität / capacity 1,1 – 1,4 4,5 - 5 Maße / dimensions ... - Page 145 4723 4750 4751 Ausschwingrotor 4-fach / Swing out rotor 4-times mit Bioabdichtung / with bio-containment 4763 4764 0518 0519 0545 90° Kapazität / capacity 7,5 - 8,2 9 - 10 4 – 7 8,5 – 10 Maße / dimensions x L 15 x 92 16 x 92 16 x 75...
- Page 146 4723 4750 4751 Ausschwingrotor 4-fach / Swing out rotor 4-times mit Bioabdichtung / with bio-containment 4767 4768 4769 4770 4770 4770 4771 4772 0526 0530 0509 0513 0546 5127 90° Kapazität / capacity Maße / dimensions x L 44 x 100 65 x 115 17 x 120 29 x 115...
- Page 147 4723 4750 4751 Ausschwingrotor 4-fach / Swing out rotor 4-times mit Bioabdichtung / with bio-containment 4775 4776 4777 ® ® 0578 Nalgene Nunc 90° Kapazität / capacity Maße / dimensions x L 12 x 100 13 x 75 61 x 137 61 x 118 62 x 144 60 x 130...
- Page 148 4784 / 4784-A 4781 4751 Ausschwingrotor 4-fach / Swing out rotor 4-times mit Bioabdichtung / with bio-containment 4761 4762 0551 ---- ---- ---- 0553 0501 90° Kapazität / capacity 1,1 – 1,4 4,5 - 5 Maße / dimensions x L 93 x 134 10 x 60 10 x 88...
- Page 149 4784 / 4784-A 4781 4751 Ausschwingrotor 4-fach / Swing out rotor 4-times mit Bioabdichtung / with bio-containment 4763 4764 0518 0519 0545 90° Kapazität / capacity 7,5 - 8,2 9 - 10 4 – 7 8,5 – 10 Maße / dimensions x L 15 x 92 16 x 92 16 x 75...
- Page 150 4784 / 4784-A 4781 4751 Ausschwingrotor 4-fach / Swing out rotor 4-times mit Bioabdichtung / with bio-containment 4767 4768 4769 4770 4770 4770 4771 4772 0526 0530 0509 0513 0546 5127 90° Kapazität / capacity Maße / dimensions x L 44 x 100 65 x 115 17 x 120...
- Page 151 4784 / 4784-A 4781 4751 Ausschwingrotor 4-fach / Swing out rotor 4-times mit Bioabdichtung / with bio-containment 4775 4776 4777 ® ® 0578 Nalgene Nunc 90° Kapazität / capacity Maße / dimensions x L 12 x 100 13 x 75 61 x 137 61 x 118 62 x 144...
- Page 152 4753 5051 5053 Ausschwingrotor 4-fach / Swing out rotor 4-times 5227 5242 5243 5243 5247 2 x 6316 0501 0519 0521 0578 90° Kapazität / capacity 2,7 – 3 4,5 – 5 Maße / dimensions x L 12 x 75 12 x 82 11 x 66 11 x 92...
- Page 153 4753 5051 5053 Ausschwingrotor 4-fach / Swing out rotor 4-times 5247-91 5248 5248-91 5249 5257 0578 0507 ---- 0518 0507 0518 0523 90° Kapazität / capacity 8,5 - 10 Maße / dimensions x L 12 x 100 17 x 100 16 x 100 17 x 100 17 x 100...
- Page 154 4753 5051 5053 Ausschwingrotor 4-fach / Swing out rotor 4-times 5264 5266 5267 5268 90° Kapazität / capacity 4 - 7 1,1 - 1,4 2,6 -2,9 1,6 - 5 Maße / dimensions x L 16 x 75 25 x 110 25 x 110 10 x 60 8 x 66...
- Page 155 4753 5092 5093 Ausschwingrotor 4-fach / Swing out rotor 4-times mit Bioabdichtung / with bio-containment 1791 6319 5120 5121 0530 5127 0578 0507 90° Kapazität / capacity 4,5 - 5 4 - 7 2,6 – 2,9 9 - 10 Maße / dimensions x L 65 x 115 62 x 122 12 x 100...
- Page 156 4753 5092 5093 Ausschwingrotor 4-fach / Swing out rotor 4-times mit Bioabdichtung / with bio-containment 5123 5124 5125 5126 5128 5129 5134 0513 0521 0526 0523 0501 0509 90° Kapazität / capacity Maße / dimensions x L 29 x 115 34 x 100 44 x 100 40 x 115...
- Page 157 4753 5092 5093 Ausschwingrotor 4-fach / Swing out rotor 4-times mit Bioabdichtung / with bio-containment 5136 5137 0518 0501 90° Kapazität / capacity 8,5 – 10 4 -7 1,1 – 1,4 2,7 - 3 2,6 – 2,9 Maße / dimensions x L 16 x 100 16 x 75 17 x 100...
- Page 158 4753 5092 5093 Ausschwingrotor 4-fach / Swing out rotor 4-times mit Bioabdichtung / with bio-containment 5138 SK 94.89 SK 21.00 SK 94.89 Falcon® Falcon® 90° Kapazität / capacity 1,1 – 1,4 2,7 - 3 1,1 – 1,4 2,7-3 2,6 - 2,9 1,6 - 5 Maße / dimensions ...
- Page 159 4754 1425 Ausschwingrotor 4-fach / Swing out rotor 4-times 1434 1435 1436 1437 1438 0578 0519 0521 0526 90° Kapazität / capacity 2,7 - 3 2,6 – 2,9 Maße / dimensions x L 12 x 100 24 x 100 34 x 100 44 x 100 12 x 60...
- Page 160 4754 1425 Ausschwingrotor 4-fach / Swing out rotor 4-times 1441 1443 1444 1458 1736 1737 0513 2078 0536 0509 90° Kapazität / capacity 8,5 - 10 1,1 – 1,4 Maße / dimensions x L 16 x 100 29 x 115 11 x 38 11 x 38 8 x 66...
- Page 161 4754 1427 1421 Ausschwingrotor 4-fach / Swing out rotor 4-times 5229 5230 5231 5232 5233 0501 0578 0507 0518 0519 0521 90° Kapazität / capacity 2,7 - 3 Maße / dimensions x L 12 x 60 12 x 82 11 x 66 12 x 100 17 x 100...
- Page 162 4754 1427 1421 Ausschwingrotor 4-fach / Swing out rotor 4-times 5278 5279 90° Kapazität / capacity 1,1 – 1,4 4,5 - 5 7,5 – 8,2 Maße / dimensions x L 8 x 66 15 x 75 15 x 92 Anzahl p.
- Page 163 4754 1430 1382 Ausschwingrotor 4-fach / Swing out rotor 4-times 0761 0765 1329 1329 0526 0534 0535 0500 0507 90° Kapazität / capacity 7,5 – 8,2 9 - 10 Maße / dimensions x L 44 x 100 44 x 105 14 x 100 17 x 100 15 x 92...
- Page 164 4754 1430 1382 Ausschwingrotor 4-fach / Swing out rotor 4-times 1348 1351 1363 1365 2078 0536 90° Kapazität / capacity 4 – 7 8,5 - 10 Maße / dimensions x L 16 x 80 16 x 81 16 x 75 16 x 100 11 x 38 11 x 38...
- Page 165 4754 1430 1382 Ausschwingrotor 4-fach / Swing out rotor 4-times 1383 1384 1396 1457 1459 0513 0547 0549 90° Kapazität / capacity 4 - 7 1,1 – 1,4 4 – 5,5 7,5 –8,2 Maße / dimensions x L 16 x 75 13 x 75 29 x 115 38 x 106...
- Page 166 4758 1308 1345 1346 1366 Ausschwingrotor 8-fach / Swing out rotor 8-times 1326 1327 1357 5277 0521 Rhesus 2078 0536 90° Kapazität / capacity Maße / dimensions x L 34 x 100 31 x 100 21 x 100 12 x 60 10 x 60 6 x 45 6 x 45...
- Page 167 4758 1741 1742 Ausschwingrotor 8-fach / Swing out rotor 8-times 0701 0716 0500 0507 0509 0518 90° 4,5 - 2,6 - 1,6 - Kapazität / capacity 1,1 – 1,4 13 x 11 x 13 x 15 x 13 x Maße / dimensions x L 14 x 100 8 x 66 17 x 100...
- Page 168 4795 5641 5642 5643 5644 Winkelrotor 4-fach / Angle rotor 4-times 5127 0519 0545 0546 0547 0538 0549 45° Kapazität / capacity Maße / dimensions x L 62 x 122 16 x 80 24 x 100 26 x 95 29 x 107 38 x 106 38 x 106...
- Page 169 4760 + 1162 Winkelrotor 6-fach / Angle rotor 6-times 1162 PCR-Strips 4760 45° Kapazität / capacity Maße / dimensions x L ---- 6 x 18 Anzahl p. Rotor / number p. rotor Drehzahl / speed 14000 14000 RZB / RCF 18845 18845 Radius / radius...
- Page 170 4794 1446 1447 1448 1449 Winkelrotor 6-fach / Angle rotor 6-times 0547 0538 0549 0546 0519 0545 45° mit Bioabdichtung / with bio-containment 10) Kapazität / capacity Maße / dimensions x L 38 x 106 38 x 106 38 x 106 29 x 107 24 x 100 26 x 95...
- Page 171 4794 1463 1466 SK 63.98 Winkelrotor 6-fach / Angle rotor 6-times 0521 0548 0509 0501 45° mit Bioabdichtung / with bio-containment 10) Kapazität / capacity 2,6 – 2,9 1,6 - 5 Maße / dimensions x L 34 x 100 35 x 105 17 x 120 12 x 75...
- Page 172 4723 4750 5280 4751 Ausschwingrotor 4-fach / Swing out rotor 4-times mit Bioabdichtung / with bio-containment 1670 1470 1665 1666 1667 1668 1471 1475 90° Kapazität / capacity 3 x 2 4 x 1 1 x 8 2 x 8 Maße / dimensions ...
- Page 173 4753 5051 5280 5053 Ausschwingrotor 4-fach / Swing out rotor 4-times 1670 1470 2 x in 5280 1665 1666 1667 1668 1471 1475 90° Kapazität / capacity 3 x 2 4 x 1 1 x 8 2 x 8 Maße / dimensions / A mm²...
- Page 174 4754 1452 Ausschwingrotor 4-fach / Swing out rotor 4-times 1670 1285 1470 1665 1666 1667 1668 1471 1475 90° Objektträger/ Kapazität / capacity 3 x 2 4 x 1 1 x 8 2 x 8 object slide Maße / dimensions / A mm²...
- Page 175 4784 / 4784-A 4781 5280 4751 Ausschwingrotor 4-fach / Swing out rotor 4-times mit Bioabdichtung / with bio-containment 1670 1470 1665 1666 1667 1668 1471 1475 90° Kapazität / capacity 3 x 2 4 x 1 1 x 8 2 x 8 Maße / dimensions ...
- Page 176 4758 1661 1660 1680 Ausschwingrotor 8-fach / Swing out rotor 8-times 1670 1662 1665 1666 1667 1668 1671 1672 1673 90° Kapazität / capacity 3 x 2 4 x 1 [1] 0,5 [1] 0,5 [1] 0,5 Maße / dimensions / A mm²...
Need help?
Do you have a question about the ROTINA 420 and is the answer not in the manual?
Questions and answers