Table of Contents
Advertisement
Advertisement
Table of Contents
Troubleshooting

Related Manuals for Honeywell 3G SmartVFD HVFD3D3A0015


Summary of Contents for Honeywell 3G SmartVFD HVFD3D3A0015
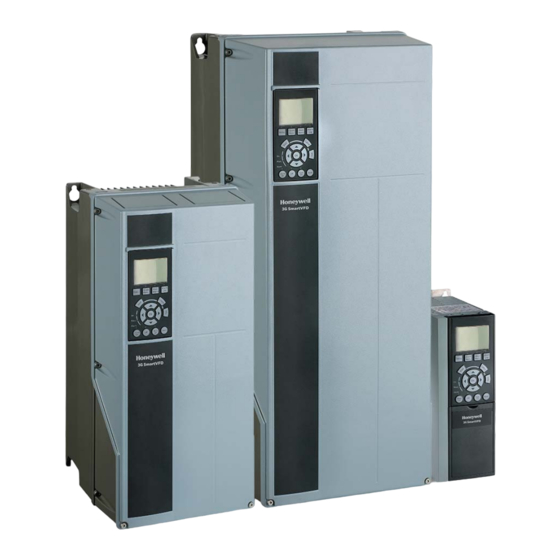
- Page 1 3G SmartVFD Installation and User Guide...
-
Page 2: Table Of Contents
TABLE OF CONTENTS 1 Introduction..................... 1 1.1 Purpose of the Manual ......................1 1.2 Additional Resources ......................1 1.3 Document and Software Version..................2 1.4 Product Overview........................2 1.5 Approvals and Certifications....................9 1.6 Disposal ............................9 2 Safety ......................11 2.1 Safety Symbols ........................ - Page 3 4.7 AC Line Input Connection....................27 4.8 Control Wiring........................28 4.9 Installation Check List .......................33 5 Commissioning .................... 35 5.1 Safety Instructions.......................35 5.2 Applying Power........................36 5.3 Local Control Panel Operation ..................36 5.4 Basic Programming......................41 5.5 Checking Motor Rotation ....................46 5.6 Local Control Test ........................46 5.7 System Start-up........................47 6 Application Set-up Examples ..............
- Page 4 9 Appendix .....................104 9.1 Symbols, Abbreviations and Conventions ...............104 9.2 Parameter Menu Structure....................105 31-00559-01...
- Page 5 31-00559-01...
-
Page 6: Introduction
• The 3G SmartVFD Design Guide provides detailed information about capabilities and functionality to design motor control systems. • Instructions for operation with optional equipment. Supplementary publications and manuals are available from Honeywell. See buildings.honeywell.com 31-00559-01... -
Page 7: Document And Software Version
1.3 Product Overview 1.3.1 Intended Use The adjustable frequency drive is an electronic motor controller intended for: • The regulation of motor speed in response to system feedback or to remote com- mands from external controllers. A power drive system consists of the adjustable frequency drive, the motor and equipment driven by the motor. - Page 8 1.3.2 Exploded Views Figure 1.1. Exploded View Enclosure Types B and C. FAN MOUNTING Local control panel (LCP) Relay 2 (04, 05, 06) Cover Lifting ring RS-485 serial bus connector Mounting slot Digital I/O and 24 V power supply Grounding clamp (PE) Analog I/O connector Cable shield connector Cable shield connector...
- Page 9 Figure 1.2. Exploded View Enclosure Type A. Local control panel (LCP) Motor output terminals 96 (U), 97 (V), 98 RS-485 serial bus connector (+68, -69) Relay 2 (01, 02, 03) Analog I/O connector Relay 1 (04, 05, 06) LCP input plug Brake (-81, +82) and load sharing (-88, +89) terminals Analog switches (A53), (A54)
- Page 10 Figure 1.3. Interior View of D1 Drive. LCP (local control panel) Mounting holes Control terminals Relays 1 and 2 Mains input terminals 91 (L1), 92 (L2), 93 (L3) Motor output terminals 96 (U), 97 (V), 98 (W) Ground terminals for IP21/54 (Type 1/12) Cable clamps Lifting ring Ground terminals for IP20 (Chassis)
- Page 11 Figure 1.4. Interior View of D2 Drive. Fieldbus top entry kit (optional) Mounting hole LCP (local control panel) Relays 1 and 2 Control terminals Terminal block for anti-condensation heater (optional) Mains input terminals 91 (L1), 92 (L2), 93 (L3) Motor output terminals 96 (U), 97 (V), 98 (W) Cable clamps Ground terminals for IP21/54 (Type 1/12) Lifting ring...
- Page 12 Figure 1.5. View of Control Shelf Frame D Drives. Local control panel (LCP) Mounting holes RS485 termination switch LCP connector USB connector Analog switches (A53, A54) RS485 connector Analog I/O connector Digital I/O and 24 V supply Relay 1 (01, 02, 03) on power card Lifting rings Relay 2 (04, 05, 06) on power card 31-00559-01...
- Page 13 1.3.3 Block Diagram of the Adjustable Frequency Drive Figure 1.6 is a block diagram of the internal components of the adjustable fre- quency drive. See Table 1.1 for their functions. Figure 1.6. Adjustable Frequency Drive Block Diagram. Table 1.1. Legend to Figure 1.6. Area Title Functions...
-
Page 14: Approvals And Certifications
1.4 Approvals and Certifications Table 1.2. Approvals and Certifications. Drives of voltage 525–690 V are UL certified for only 525–600 V. The adjustable frequency drive complies with UL508C thermal memory retention requirements. For more information, refer to the section Motor Thermal Protection in the Design Guide. - Page 15 31-00559-01...
-
Page 16: Safety
CHAPTER SAFETY 2 Safety 2.1 Safety Symbols The following symbols are used in this document: Warning: Indicates a potentially hazardous situation which could result in death or serious injury. Caution: Indicates a potentially hazardous situation which could result in minor or moderate injury. -
Page 17: Safety Precautions
2.3 Safety Precautions HIGH VOLTAGE! Adjustable frequency drives contain high voltage when connected to AC line power input, DC power supply, or load sharing. Failure to perform installation, start-up, and maintenance by qualified personnel can result in death or serious injury. - Page 18 Table 2.1. Discharge Time. Minimum waiting time (minutes) Voltage 200–240 1.5–5 hp 7.5–60 hp 75-125 hp [1.1–3.7 kW] [5.5–45 kW] [55-90 kW] 380–480 1.5–10 hp 15–125 hp 150-250 hp [1.1–7.5 kW] [11–90 kW] [110-160 kW] 525–600 1.5–10 hp 15–125 hp [1.1–7.5 kW] [11–90 kW] 525–690...
- Page 19 31-00559-01...
-
Page 20: Mechanical Installation
CHAPTER MECHANICAL INSTALLATION 3 Mechanical Installation 3.1 Unpacking 3.1.1 Items Supplied Items supplied may vary according to product configuration. • Make sure the items supplied and the information on the nameplate correspond to the order confirmation. • Check the packaging and the adjustable frequency drive visually for damage caused by inappropriate handling during shipment. -
Page 21: Mounting
Vibration and Shock The adjustable frequency drive complies with requirements for units mounted on the walls and floors of production premises, as well as in panels bolted to walls or floors. For detailed ambient conditions specifications, refer to chapter 8.4 Ambient Conditions. - Page 22 Lifting • To determine a safe lifting method, check the weight of the unit, see Chapter 8.9 Power Ratings, Weight and Dimensions. • Ensure that the lifting device is suitable for the task. • If necessary, plan for a hoist, crane, or forklift with the appropriate rating to move the unit.
- Page 23 31-00559-01...
-
Page 24: Electrical Installation
CHAPTER ELECTRICAL INSTALLATION 4 Electrical Installation 4.1 Safety Instructions See Chapter 2 Safety for general safety instructions. INDUCED VOLTAGE Induced voltage from output motor cables that run together can charge equip- ment capacitors even with the equipment turned off and locked out. Failure to run output motor cables separately or use shielded cables or metal conduits could result in death or serious injury. -
Page 25: Emc-Compliant Installation
Wire Type and Ratings • All wiring must comply with local and national regulations regarding cross- section and ambient temperature requirements. • Power connection wire recommendation: minimum 167°F [75°C] rated copper wire. See Chapter 8.1 Electrical Data and Chapter 8.5 Cable Specifications for recom- mended wire sizes and types. -
Page 26: Wiring Schematic
4.4 Wiring Schematic Figure 4.1. Basic Wiring Schematic. 3-phase 91 (L1) (U) 96 power (V) 97 92 (L2) input (W) 98 93 (L3) (PE) 99 Motor Switch Mode DC bus 88 (-) Power Supply 89 (+) Brake 10 V DC 24 V DC (R+) 82 15 mA... - Page 27 Figure 4.2. EMC-compliant Electrical Connection. Cable connector Adjustable frequency drive Motor, 3-phase and PE Output contactor Line power, 3-phase and reinforced PE Grounding rail (PE) Control wiring Cable insulation (stripped) Equalizing min. 0.025 in [16 mm Note: EMC INTERFERENCE Run cables for input power, motor wiring and control wiring in three separate metallic conduits.
-
Page 28: Access
4.5 Access Remove cover with a screwdriver (See Figure 4.3) or by loosening attaching screws (See Figure 4.4). Figure 4.3. Access to Wiring for NEMA 1 (IP21) Enclosures. Figure 4.4. Access to Wiring for NEMA 12 (IP54/55) Enclosures. See Table 4.1 before tightening the covers. Table 4.1. -
Page 29: Motor Connection
4.6 Motor Connection INDUCED VOLTAGE! Induced voltage from output motor cables that run together can charge equip- ment capacitors even with the equipment turned off and locked out. Failure to run output motor cables separately or use shielded cables or metal conduits could result in death or serious injury. - Page 30 Figure 4.6, Figure 4.7, Figure 4.8, Figure 4.9, and Figure 4.10 and represent line power input, motor, and grounding for basic adjustable frequency drives. Actual configurations vary with unit types and optional equipment. Figure 4.6. Motor Connection for Enclosure Type A2 and A3. MOTOR Figure 4.7.
- Page 31 Figure 4.8. Motor Terminals (D1 shown). Figure 4.9. Motor, Line Power and Ground Wiring for Enclosure Types B and C Using Shielded Cable. 31-00559-01...
-
Page 32: Ac Line Input Connection
Figure 4.10. Motor, Line Power and Ground Wiring for Enclosure Types B and C Using Conduit. 4.7 AC Line Input Connection • Size wiring based upon the input current of the adjustable frequency drive. For maximum wire sizes, see Chapter 8.1 Electrical Data. •... - Page 33 Figure 4.11. Connecting to AC Line Power (Frames A, B and C). Figure 4.12. AC Mains Terminals (D1 shown). 31-00559-01...
-
Page 34: Control Wiring
4.8 Control Wiring • Isolate control wiring from high power components in the adjustable frequency drive. • When the adjustable frequency drive is connected to a thermistor, ensure that the thermistor control wiring is shielded and reinforced/double insulated. A 24 V DC supply voltage is recommended. - Page 35 Table 4.2. Terminal Description. Terminal Parameter Default Setting Description Digital Inputs/Outputs 12, 13 — +24 V DC 24 V DC supply voltage for digital inputs and external transducers. Maximum output current 200 mA for all 24 V loads. 5-10 [8] Start Digital inputs.
- Page 36 4.8.2 Wiring to Control Terminals Control terminal connectors can be unplugged from the adjustable frequency drive for ease of installation, as shown in Figure 4.13. Note: Keep control wires as short as possible and separate from high power cables to minimize interference.
- Page 37 4.8.4 Voltage/Current Input Selection (Switches) The analog input terminals 53 and 54 allow setting of input signal to voltage (0– 10 V) or current (0/4–20 mA). Default parameter settings: • Terminal 53: speed reference signal in open-loop (see 16-61 Terminal 53 Switch Setting).
-
Page 38: Installation Check List
• Terminate each segment at both ends, using either the termination switch (bus term on/off, see Figure 4.16) on the adjustable frequency drives, or a biased termination resistor network. • Connect a large surface of the shield to ground, for example with a cable clamp or a conductive cable connector. - Page 39 Inspect for Parameter • Check for loose connections. Input and output • Check that motor and line power are in separate conduits or separated shielded cables. power wiring • Make sure that the unit interior is free of dirt, metal chips, moisture, and corrosion. Panel interior •...
-
Page 40: Commissioning
CHAPTER COMMISSIONING 5 Commissioning 5.1 Safety Instructions See Chapter 2 Safety for general safety instructions. HIGH VOLTAGE Adjustable frequency drives contain high voltage when connected to AC line input power. Failure to perform installation, start-up, and maintenance by qualified personnel could result in death or serious injury. •... -
Page 41: Applying Power
5.2 Applying Power UNINTENDED START When the adjustable frequency drive is connected to AC line power, the motor may start at any time, causing risk of death, serious injury, equipment, or prop- erty damage. The motor can start by means of an external switch, a serial bus command, an input reference signal from the LCP, or after a cleared fault con- dition. - Page 42 5.3.2 LCP Layout The LCP is divided into four functional groups (see Figure 5.1). A. Display area B. Display menu keys C. Navigation keys and LEDs D. Operation keys and reset Figure 5.1. Local Control Panel (LCP). Status 1(1) 0.00 A 0.0 % 0.00 kW 0.0Hz...
- Page 43 Callout Display Parameter number Default setting 0–23 Frequency 0–24 kWh counter B. Display Menu Keys Menu keys are used for menu access for parameter set-up, toggling through status display modes during normal operation, and viewing fault log data. Table 5.2. Legend to Figure 5.1, Display Menu Keys. Callout Function Status...
- Page 44 Table 5.4. Legend to Figure 5.1, Indicator Lights (LEDs). Callout Light Function Green The ON light activates when the adjustable frequency drive receives power from AC line voltage, a DC bus terminal, or an external 24 V supply. WARN Yellow When warning conditions are met, the yellow WARN light comes on and text appears in the display area identifying the problem.
- Page 45 Step 3. Select [1] All to LCP to upload data to LCP or select [2] All from LCP to download data from the LCP. Step 4. Press [OK]. A progress bar shows the uploading or downloading process. Step 5. Press [Hand On] or [Auto On] to return to normal operation. 5.3.5 Changing Parameter Settings Parameter settings can be accessed and changed from the [Quick Menu] or from the [Main Menu].
-
Page 46: Basic Programming
Recommended initialization procedure, via 14-22 Operation Mode Step 1. Press [Main Menu] twice to access parameters. Step 2. Scroll to 14-22 Operation Mode and press [OK]. Step 3. Scroll to Initialization and press [OK]. Step 4. Remove power to the unit and wait for the display to turn off. Step 5. - Page 47 5.4.2 Commissioning via [Main Menu] Recommended parameter settings are intended for startup and checkout pur- poses. Application settings may vary. Enter data with power ON, but before operat- ing the adjustable frequency drive. Step 1. Press [Main Menu] on the LCP. Step 2.
- Page 48 Step 9. If a jumper wire is in place between control terminals 12 and 27, set 5-12 Terminal 27 Digital Input to External Interlock. Otherwise, leave 5-12 Terminal 27 Digital Input at factory default No Operation. Step 10. 3-02 Minimum Reference Step 11.
- Page 49 are available, divide the line-line value by 2 to achieve the line to common (starpoint) value. It is also possible to measure the value with an ohmmeter, which takes the resistance of the cable into account. Divide the measured value by 2 and enter the result.
- Page 50 Table 5.6. Recommendations for Different Applications. Callout Low inertia applications 1-17 Voltage filter time const. to be increased by <5 factor 5 to 10 Load Motor 1-14 Damping Gain should be reduced 1-66 Min. Current at Low Speed should be reduced (<100%) Low inertia applications Keep calculated values 50>I...
-
Page 51: Checking Motor Rotation
• If warnings or alarms occur, see Chapter 7.4 List of Warnings and Alarms. • Run this procedure on a cold motor for best results. To run AMA Step 1. Press [Main Menu] to access parameters. Step 2. Scroll to parameter group 1-** Load and Motor and press [OK]. Step 3. -
Page 52: System Start-Up
5.7 System Start-up The procedure in this section requires user-wiring and application programming to be completed. The following procedure is recommended after application set-up is completed. Step 1. Press [Auto On]. Step 2. Apply an external run command. Step 3. Adjust the speed reference throughout the speed range. - Page 53 31-00559-01...
-
Page 54: Application Set-Up Examples
CHAPTER APPLICATION SET-UP EXAMPLES 6 Application Set-up Examples The examples in this section are intended as a quick reference for common appli- cations. • Parameter settings are the regional default values unless otherwise indicated (selected in 0-03 Regional Settings). • Parameters associated with the terminals and their settings are shown next to the drawings. - Page 55 Table 6.2. Analog Speed Reference (Current). Parameters Function Setting 6-12 Terminal 4 mA* +24 V 53 Low Current +24 V D IN 6-13 Terminal 20 mA* D IN 53 High Current D IN 6-14 Terminal 0 RPM D IN 53 Low Ref./ D IN Feedb.
- Page 56 Table 6.4. Speed Up/Down. Parameters Function Setting 5-10 Terminal [8] Start* +24 V 18 Digital Input +24 V D IN 5-12 Terminal [19] Freeze D IN 27 Digital Input Reference 5-13 Terminal [21] Speed D IN 29 Digital Input D IN 5-14 Terminal [22] Speed D IN...
- Page 57 Table 6.5. Start/Stop Command. Parameters Function Setting 5-10 Terminal [8] Start* +24 V 18 Digital Input +24 V 5-12 Terminal [0] No D IN D IN 27 Digital Input operation* * = Default Value D IN D IN D IN Notes/comments: D IN If 5-12 Terminal 27 Digital...
- Page 58 Table 6.6. Pulse Start/Stop. Parameters Function Setting 5-10 Terminal [9] Latched +24 V 18 Digital Input Start +24 V 5-12 Terminal [6] Stop D IN D IN 27 Digital Input Inverse * = Default Value D IN Notes/comments: D IN D IN D IN +10 V...
- Page 59 Table 6.7. Start/Stop with Reversing and Four Preset Speeds. Parameters Function Setting 5-10 Terminal 18 [8] Start* +24 V Digital Input +24 V 5-11 Terminal 19 [10] Start D IN reversing* D IN Digital Input 5-12 Terminal 27 [0] No D IN Digital Input operation*...
- Page 60 6.1.4 RS-485 Table 6.9. RS-485 Network Connection. Parameters Function Setting 8-30 Protocol +24 V 8-31 Address +24 V 8-32 Baud Rate 9600* D IN D IN * = Default Value Notes/comments: D IN Select protocol, address and D IN baud rate in the above- D IN mentioned parameters.
- Page 61 Table 6.10. RS-485 Network Connection. Parameters Function Setting 1-90 Motor +24 V Thermal Thermistor +24 V Protection trip D IN 1-93 Thermistor [1] Analog D IN Source input 53 D IN * = Default Value D IN Notes/comments: D IN If only a warning is desired, D IN 1-90 Motor Thermal Protection...
-
Page 62: Diagnostics And Troubleshooting
Replace worn or damaged parts with origi- nal spare parts or standard parts. For service and support, refer to buildings.honeywell.com. 7.2 Status Messages When the adjustable frequency drive is in status mode, status messages are gener- ated automatically and appear in the bottom line of the display (see Figure 7.1). - Page 63 Table 7.1. Operation Mode. The adjustable frequency drive does not react to any control signal until [Auto On] or [Hand On] is pressed. Auto On The adjustable frequency drive is controlled from the control terminals and/or the serial communication. Hand On The adjustable frequency drive is controlled by the navigation keys on the LCP.
- Page 64 Freeze output The remote reference is active, which holds the present speed. • Freeze output was selected as a function for a digital input (parameter group 5-1* Digital Inputs). The corresponding terminal is active. Speed control is only possible via the terminal functions Speed Up and Slow. •...
-
Page 65: Warning And Alarm Types
Speed low Motor speed is below the value set in 4-52 Warning Speed Low. Standby In Auto On mode, the adjustable frequency drive starts the motor with a start signal from a digital input or serial communication. Start delay In 1-71 Start Delay, a delay starting time was set. A start command is activated and the motor starts after the start delay time expires. -
Page 66: List Of Warnings And Alarms
Trip lock Input power is cycled. The motor coasts to a stop. The adjustable frequency drive continues to monitor the adjustable frequency drive status. Remove input power to the adjustable frequency drive, correct the cause of the fault, and reset the adjust- able frequency drive. - Page 67 Troubleshooting • Remove the wiring from terminal 50. If the warning clears, the problem is with the wiring. If the warning does not clear, replace the control card. WARNING/ALARM 2, Live zero error This warning or alarm only appears if programmed in 6-01 Live Zero Timeout Function.
- Page 68 • Increase 14-26 Trip Delay at Inverter Fault • If the alarm/warning occurs during a power sag, use kinetic backup (14-10 Line Failure) WARNING/ALARM 8, DC undervoltage If the DC link voltage drops below the undervoltage limit, the adjustable frequency drive checks if a 24 V DC backup supply is connected.
- Page 69 • Ensure that Motor data in parameters 1-20 to 1-25 are set correctly. • If an external fan is in use, check in 1-91 Motor External Fan that it is selected. • Running AMA in 1-29 Automatic Motor Adaptation (AMA) tunes the adjustable frequency drive to the motor more accurately and reduces thermal loading.
- Page 70 ALARM 15, Hardware mismatch A fitted option is not operational with the present control board hardware or soft- ware. Record the value of the following parameters and contact Honeywell: • 15-40 FC Type •...
- Page 71 Troubleshooting • Check connections on the serial communication cable. • Increase 8-03 Control Word Timeout Time. • Check the operation of the communication equipment. • Verify a proper installation based on EMC requirements. ALARM 18, Start failed The speed has not been able to exceed 1-77 Compressor Start Max Speed [RPM] during start within the allowed time (set in 1-79 Compressor Start Max Time to Trip).
- Page 72 WARNING/ALARM 26, Brake resistor power limit The power transmitted to the brake resistor is calculated as a mean value over the last 120 s of run time. The calculation is based on the intermediate circuit voltage and the brake resistance value set in 2-16 AC brake Max. Current. The warning is active when the dissipated braking energy is higher than 90% of the brake resis- tance power.
- Page 73 Check that the option is properly installed • Check for loose or missing wiring It may be necessary to contact your Honeywell supplier or service department. Note the code number for further troubleshooting directions. Table 7.4. Internal Fault Codes Serial port cannot be initialized. Contact your Honeywell supplier or Honeywell Service...
- Page 74 5124 Option in slot B: Hardware incompatible with control board hardware 5376-6231 Internal fault. Contact your Honeywell supplier or Honeywell Service Department ALARM 39, Heatsink sensor No feedback from the heatsink temperature sensor. The signal from the IGBT ther- mal sensor is not available on the power card. The problem could be on the power card, on the gate drive card, or the ribbon cable between the power card and gate drive card.
- Page 75 Low [RPM] (except when starting or stopping), the adjustable frequency drive trips. ALARM 50, AMA calibration failed Contact Honeywell supplier or Honeywell service department. ALARM 51, AMA check Unom and Inom The settings for motor voltage, motor current and motor power are wrong. Check the settings in parameters 1-20 to 1-25.
- Page 76 ALARM 58, AMA Internal fault Contact the Honeywell supplier. WARNING 59, Current limit The current is higher than the value in 4-18 Current Limit. Ensure that motor data in parameters 1–20 to 1–25 are set correctly. Possibly increase the current limit. Be sure that the system can operate safely at a higher limit.
- Page 77 ALARM 70, Illegal FC configuration The control card and power card are incompatible. To check compatibility, contact the Honeywell supplier with the type code of the unit from the nameplate and the part numbers of the cards. ALARM 80, Drive initialized to default value Parameter settings are initialized to default settings after a manual reset.
- Page 78 WARNING 98, Clock fault Time is not set or the RTC clock has failed. Reset the clock in 0-70 Date and Time. WARNING 200, Fire mode This warning indicates the adjustable frequency drive is operating in Fire mode. The warning clears when fire mode is removed. See the fire mode data in the alarm log.
-
Page 79: Troubleshooting
7.5 Troubleshooting Table 7.5. Troubleshooting. Symptom Possible cause Test Solution Display dark/ Missing input power See Table 4.4 Check the input power No function source. Missing or open fuses or See open fuses and Follow the circuit breaker tripped tripped circuit breaker in recommendations this table for possible provided. - Page 80 Symptom Possible cause Test Solution Motor not Service switch open or Check if the motor is Connect the motor and running missing motor connected and the check the service switch. connection connection is not interrupted (by a service switch or other device). No line power with If the display is Apply line power to run...
- Page 81 Symptom Possible cause Test Solution Motor is not Frequency limits set Check output limits in 4- Program correct settings. reaching wrong 13 Motor Speed High maximum Limit [RPM], 4-14 Motor speed Speed High Limit [Hz] and 4-19 Max Output Frequency. Reference input signal Check reference input Check settings in...
- Page 82 Symptom Possible cause Test Solution Motor Problem with motor or Rotate output motor If imbalanced leg follows current motor wiring leads one position: U to V, the wire, the problem is in imbalance V to W, W to U. the motor or motor wiring. greater than Check motor and motor wiring.
- Page 83 31-00559-01...
-
Page 84: Specifications
CHAPTER SPECIFICATIONS 8 Specifications 8.1 Electrical Data Table 8.1. Line Power Supply 3x200–240 V AC. Type Designation, HVFD3D… 3A0015 2A0020 3A0030 3A0050 Typical Shaft Output [HP] at 208 V Typical Shaft Output [kW] Enclosure Size IP21/NEMA 1 IP55/NEMA 12 Output Current Continuous (3x200–240 V) [A] 10.6 16.7... - Page 85 8.1.1 Line Power Supply 3x200–240 V AC Table 8.2. Line Power Supply 3x200–240 V AC - Normal overload 110% for 1 minute, 7.5 to 20 HP. Type Designation, HVFD3D… 3A0075 3A0100 3A0150 3A0200 Typical Shaft Output [HP] at 208 V Typical Shaft Output [kW] Enclosure Size IP21/NEMA 1...
- Page 86 Table 8.3. Line Power Supply 3x200–240 V AC - Normal overload 110% for 1 minute, 25 to 60 HP. Type Designation, HVFD3D… 3A0250 3A0300 3A0400 3A0500 3A0600 Typical Shaft Output [HP] at 208 V Typical Shaft Output [kW] 18.5 Enclosure Size IP21/NEMA 1 IP55/NEMA 12 Output Current...
- Page 87 Table 8.4. Line Power Supply 3x200–240 V AC - Normal overload 110% for 1 minute, 75 to 125 HP. Type Designation, HVFD3D… 3A0750 3A1000 3A1250 Typical shaft output at 230 V [hp] Typical shaft output at 230 V [kW] Enclosure Size IP21/NEMA 1 IP54/NEMA 12 Output Current...
- Page 88 8.1.2 Line Power Supply 3x380–480 V AC Table 8.5. Line Power Supply 3x380–480 V AC - Normal overload 110% for 1 minute, 1.5 to 10 HP. Type Designation, 3C0015 3C0020 3C0030 3C0050 3C0075 3C0100 HVFD3D… Typical Shaft Output [HP] at 460 V Typical Shaft Output [kW] Enclosure Size...
- Page 89 Table 8.6. Line Power Supply 3x380–480 V AC - Normal overload 110% for 1 minute, 15 to 40 HP. Type Designation, HVFD3D3… 3C0150 3C0200 3C0250 3C0300 3C0400 Typical Shaft Output [HP] at 460 V Typical Shaft Output [kW] 18.5 Enclosure Size IP21/NEMA 1 IP55/NEMA 12 Output Current...
- Page 90 Table 8.7. Line Power Supply 3x380–480 V AC - Normal overload 110% for 1 minute, 50 to 125 HP. Type Designation, HVFD3D3… 3C0500 3C0600 3C0750 3C1000 3C1250 Typical Shaft Output [HP] at 460 V Typical Shaft Output [kW] Output Current IP21/NEMA 1 IP55/NEMA 12 Output Current...
- Page 91 Table 8.8. Line Power Supply 3x380–480 V AC - Normal overload 110% for 1 minute, 150 to 250 HP. Type Designation, HVFD3D… 3C1500 3C2000 3C2500 Typical shaft output at 460 V [hp] Typical shaft output at 400 V [kW] Typical shaft output at 480 V [kW] Enclosure Size IP21/NEMA 1 IP54/NEMA 12...
- Page 92 8.1.3 Line Power Supply 3x525–600 V AC Table 8.9. Line Power Supply 3x525–600 V AC - Normal overload 110% for 1 minute, 3 to 10 HP. Type Designation, HVFD3D… 3D0030 3D0050 3D0075 3D0100 Typical Shaft Output [HP] Typical Shaft Output [kW] IP21/NEMA 1 IP55/NEMA 12 Output Current...
- Page 93 Table 8.10. Line Power Supply 3x525–600 V AC - Normal overload 110% for 1 minute, 15 to 40 HP. Type Designation, HVFD3D… 3D0150 3D0200 3D0250 3D0300 3D0400 Typical Shaft Output [HP] Typical Shaft Output [kW] 18.5 IP21/NEMA 1 IP55/NEMA 12 Output Current Continuous (3 x 525–550 V) [A] Intermittent (3 x 525–550 V) [A]...
- Page 94 Table 8.11. Line Power Supply 3x525–600 V AC - Normal overload 110% for 1 minute, 50 to 125 HP. Type Designation, HVFD3D… 3D0500 3D0600 3D0750 3D1000 3D1250 Typical Shaft Output [HP] Typical Shaft Output [kW] IP21/NEMA 1 IP55/NEMA 12 Output Current Continuous (3 x 525–550 V) [A] Intermittent (3 x 525–550 V) [A] Continuous (3x525–600 V) [A]...
-
Page 95: Line Power Supply
8.1.4 Line Power Supply 3 x 525–690 V AC Table 8.12. Line Power Supply 3x525–690 V AC - Normal overload 110% for 1 minute, 150 to 200 HP. Type Designation, HVFD3D… 3D1500 3D2000 Typical shaft output at 575 V [hp] Typical shaft output at 525 V [kW] Typical shaft output at 690 V [kW] Enclosure Size... -
Page 96: Access
8.2 Line Power Supply Table 8.13. Line power supply. Supply Terminals L1, L2, L3 Supply Voltage Nominal 208/230 V AC 200 to 240 V AC ± 10% Supply Voltage Nominal 460 V AC 380 to 280 V AC ± 10% Supply Voltage Nominal 600 V AC 525 to 600 V AC ±... -
Page 97: Ambient Conditions
Table 8.16. Torque Characteristics Frame D. Starting torque (Constant torque) 1, 2 maximum 150% for 60 s Overload Torque (Constant torque) 1, 2 maximum 150% for 60 s 1) Percentage relates to the nominal current of the drive. 2) Once every 10 minutes. 8.4 Ambient Conditions Table 8.17. - Page 98 Maximum cross-section to control terminals, flexible wire with 20 AWG [0.5 mm cable end sleeves with collar Minimum cross-section to control terminals 24 AWG [0.25 mm 8.6 Control Input/Output and Control Data Table 8.19. Digital Inputs. Programmable digital inputs 4 (6)1) Terminal number 18, 19, 271), 291), 32, 33 Logic...
- Page 99 Table 8.21. Pulse Inputs. Programmable pulse Terminal number pulse 29, 33 Max. Frequency at terminal 29, 33 110 kHz (push-pull driven) Max. Frequency at terminal 29, 33 5 kHz (open collector) Max. Frequency at terminal 29, 33 4 Hz Voltage level See digital inputs Maximum voltage on input 28 V DC...
- Page 100 Minimum output frequency at frequency output 0 Hz Maximum output frequency at frequency output 32 kHz Accuracy of frequency output Max. error: 0.1% of full scale Resolution of frequency outputs 12 bit All digital outputs are galvanically isolated from the supply voltage (PELV) and other high-voltage terminals.
-
Page 101: Connection Tightening Torques
Control Card, RS-485 serial communication Terminal number 68 (P,TX+, RX+), 69 (N,TX-, RX-) Terminal number 61 Common for terminals 68 and 69 The RS-485 serial communication circuit is functionally separated from other central circuits and galvanically isolated from the supply voltage (PELV). Control Card, 24 V DC output Terminal number 12, 13... -
Page 102: Fuses And Circuit Breakers
Table 8.25. Tightening of Terminals, Enclosure Types A, B and C. Power [HP] Torque [in-lb (Nm)] 208/ Enclosure Line Motor Brake Ground Relay V AC V AC power Connection V AC 1.5 to 3 1.5 to 26.5 (0.6) (0.6) (0.6) (1.8) (0.6) 7.5 to... - Page 103 Recommendations • Fuses of the type gG. • Circuit breakers of Moeller types. For other circuit breaker types, ensure that the energy into the adjustable frequency drive is equal to or lower than the energy provided by Moeller types. Use of recommended fuses and circuit breakers ensures possible damage to the adjustable frequency drive is limited to damages inside the unit.
- Page 104 Table 8.28. 380–480 V, Enclosure Types A, B and C. Recommended Enclosure Power Recommended Recommended Max. Trip Circuit breaker Type (hp [kW]) Fuse Size Max. Fuse Size Level [A] (Moeller) 1.5–5 gG-10 (1.5–4 [1.1–3]) gG-25 PKZM0-25 [1.1–4.0] gG-16 (5 [4]) 7.5–10 gG-16 gG-32...
- Page 105 8.8.2 UL Compliance Table 8.30. 3x200–240 V, Enclosure Types A, B and C. Recommended Max. Fuse Bussmann Power Bussmann Bussmann Bussmann Bussmann Bussmann (hp [kW]) Type J Type T Type CC Type CC Type CC Type RK1 1.5 [1.1] KTN-R-10 JKS-10 JJN-10 FNQ-R-10...
- Page 106 Table 8.32. 3x380–480 V, Enclosure Types A, B and C. Recommended Max. Fuse Bussmann Power Bussmann Bussmann Bussmann Bussmann Bussmann (hp [kW]) Type J Type T Type CC Type CC Type CC Type RK1 1.5 [1.1] KTS-R-6 JKS-6 JJS-6 FNQ-R-6 KTK-R-6 LP-CC-6 2–3 [1.5–2.2]...
-
Page 107: Power Ratings, Weight And Dimensions
Table 8.34. 3x525–600 V, Enclosure Types A, B and C. Recommended Max. Fuse 3 [2.2] KTS-R-10 JKS-10 JJS-10 FNQ-R-10 KTK-R-10 LP-CC-10 5017906-010 KLS-R-010 A6K-10-R HSJ-10 5 [4] KTS-R20 JKS-20 JJS-20 FNQ-R-20 KTK-R-20 LP-CC-20 5017906-020 KLS-R-020 A6K-20-R HSJ-20 7.5 [5.5] KTS-R-25 JKS-25 JJS-25 FNQ-R-25 KTK-R-25 LP-CC-25 5017906-025... - Page 108 Enclosure Type Width of backplate with two C B 5.91 7.48 9.53 9.53 9.53 12.13 14.57 options [150] [190] [242] [242] [242] [308] [370] Distance between mounting b 2.76 [70] 4.33 8.47 8.27 8.27 10.71 13.15 holes [110] [215] [210] [210] [272] [334]...
- Page 109 31-00559-01...
- Page 110 CHAPTER APPENDIX 9 Appendix 9.1 Symbols, Abbreviations and Conventions Table 9.1. Symbols and Abbreviations. Alternating Current Nominal Motor Power Automatic Energy Optimization Nominal Motor Voltage American Wire Gauge PM Motor Permanent Magnet Motor Automatic Motor Adaptation PELV Protective Extra Low Voltage °C Degrees Celsius Printed Circuit Board...
- Page 111 9.2 Parameter Menu Structure 0-** Operation/Display 0-65 Personal Menu Password 0-66 Access to Personal Menu w/o 0-0* Basic Settings Password 0-01 Language 0-67 Bus Access Password 0-02 Motor Speed Unit 0-03 Regional Settings 0-7* Clock Settings 0-04 Operating State at Power-up 0-70 Date and Time 0-05 Local Mode Unit 0-71 Date Format...
- Page 112 1-35 Main Reactance (Xh) 1-87 Trip Speed Low [Hz] 1-36 Iron Loss Resistance (Rfe) 1-37 d-axis Inductance (Ld) 1-9* Motor Temperature 1-39 Motor Poles 1-90 Motor Thermal Protection 1-40 Back EMF at 1000 RPM 1-91 Motor External Fan 1-46 Position Detection Gain 1-93 Thermistor Source 2-** Brakes 1-5* Load-Indep.
- Page 113 3-52 Ramp 2 Ramp-down Time 5-** Digital In/Out 3-8* Other Ramps 5-0* Digital I/O mode 3-80 Jog Ramp Time 5-00 Digital I/O Mode 3-81 Quick Stop Ramp Time 5-01 Terminal 27 Mode 3-82 Starting Ramp-up Time 5-02 Terminal 29 Mode 3-9* Digital Pot.
- Page 114 5-6* Pulse Output 6-24 Terminal 54 Low Ref./Feedb. 5-60 Terminal 27 Pulse Output Value Variable 6-25 Terminal 54 High Ref./Feedb. 5-62 Pulse Output Max Freq #27 Value 5-63 Terminal 29 Pulse Output 6-26 Terminal 54 Filter Time Con- Variable stant 5-65 Pulse Output Max Freq #29 6-27 Terminal 54 Live Zero 5-66 Terminal X30/6 Pulse Output...
- Page 115 8-** Comm. and Options 8-83 Slave Error Count 8-84 Slave Messages Sent 8-0* General Settings 8-85 Slave Timeout Errors 8-01 Control Site 8-89 Diagnostics Count 8-02 Control Source 8-03 Control Timeout Time 8-9* Bus Jog 8-04 Control Timeout Function 8-90 Bus Jog 1 Speed 8-05 End-of-Timeout Function 8-91 Bus Jog 2 Speed 8-06 Reset Control Timeout...
- Page 116 10-05 Readout Transmit Error 12-05 Lease Expires Counter 12-06 Name Servers 10-06 Readout Receive Error 12-07 Domain Name Counter 12-08 Host Name 10-07 Readout Bus Off Counter 12-09 Physical Address 10-1* DeviceNet 12-1* Ethernet Link Parameters 10-10 Process Data Type Selection 12-10 Link Status 10-11 Process Data Config Write 12-11 Link Duration...
- Page 117 12-94 Broadcast Storm Protection 14-25 Trip Delay at Torque Limit 12-95 Broadcast Storm Filter 14-26 Trip Delay at Inverter Fault 12-96 Port Config 14-28 Production Settings 12-98 Interface Counters 14-29 Service Code 12-99 Media Counters 14-3* Current Limit Ctrl. 13-** Smart Logic 14-30 Current Lim Ctrl, Propor- tional Gain 13-0* SLC Settings...
- Page 118 15-1* Data Log Settings 15-76 Option in Slot C1 15-10 Logging Source 15-77 Slot C1/E1 Option SW Ver- 15-11 Logging Interval sion 15-12 Trigger Event 15-13 Logging Mode 15-8* Operating Data II 15-14 Samples Before Trigger 15-80 Fan Running Hours 15-81 Preset Fan Running Hours 15-2* Historic Log 15-20 Historic Log: Event...
- Page 119 16-41 Logging Buffer Full 18-** Info & Readouts 16-43 Timed Actions Status 16-49 Current Fault Source 18-0* Maintenance Log 18-00 Maintenance Log: Item 16-5* Ref. & Feedb. 18-01 Maintenance Log: Action 16-50 External Reference 18-02 Maintenance Log: Time 16-52 Feedback [Unit] 18-03 Maintenance Log: Date and 16-53 Digi Pot Reference Time...
- Page 120 20-23 Setpoint 3 21-11 Ext. 1 Minimum Reference 21-12 Ext. 1 Maximum Reference 20-3* Feedb. Adv. Conv. 21-13 Ext. 1 Reference Source 20-30 Refrigerant 21-14 Ext. 1 Feedback Source 20-31 User-defined Refrigerant A1 21-15 Ext. 1 Setpoint 20-32 User-defined Refrigerant A2 21-17 Ext.
- Page 121 21-6* Ext. CL 3 PID 22-61 Broken Belt Torque 21-60 Ext. 3 Normal/Inverse Con- 22-62 Broken Belt Delay trol 21-61 Ext. 3 Proportional Gain 22-7* Short Cycle Protection 21-62 Ext. 3 Integral Time 22-75 Short Cycle Protection 21-63 Ext. 3 Differentation Time 22-76 Interval between Starts 21-64 Ext.
- Page 122 23-5* Energy Log 25-** Cascade Controller 23-50 Energy Log Resolution 23-51 Period Start 25-0* System Settings 23-53 Energy Log 25-00 Cascade Controller 23-54 Reset Energy Log 25-02 Motor Start 25-04 Pump Cycling 23-6* Trending 25-05 Fixed Lead Pump 23-60 Trend Variable 25-06 Number Of Pumps 23-61 Continuous Bin Data 23-62 Timed Bin Data...
- Page 123 25-9* Service 26-5* Analog Out X42/9 25-90 Pump Interlock 26-50 Terminal X42/9 Output 25-91 Manual Alternation 26-51 Terminal X42/9 Min. Scale 26-52 Terminal X42/9 Max. Scale 26-** Analog I/O Option 26-53 Terminal X42/9 Bus Control 26-54 Terminal X42/9 Timeout Pre- 26-0* Analog I/O Mode 26-00 Terminal X42/1 Mode 26-01 Terminal X42/3 Mode...
- Page 124 35-2* Temp. Input X48/7 35-24 Term. X48/7 Filter Time Con- stant 35-25 Term. X48/7 Temp. Monitor 35-26 Term. X48/7 Low Temp. Limit 35-27 Term. X48/7 High Temp. Limit 35-3* Temp. Input X48/10 35-34 Term. X48/10 Filter Time Constant 35-35 Term. X48/10 Temp. Monitor 35-36 Term.
- Page 125 31-00559-01...
- Page 127 Honeywell 715 Peachtree Street NE Atlanta, GA 30308 buildings.honeywell.com ™ 31-00559-01 08/22...
Need help?
Do you have a question about the 3G SmartVFD HVFD3D3A0015 and is the answer not in the manual?
Questions and answers