Roland DiscLab CDX-1 Owner's Manual
Multitrack cd recorder/audio sample workstation
Hide thumbs
Also See for DiscLab CDX-1:
- Function manual (24 pages) ,
- Quick start manual (2 pages) ,
- Manual (5 pages)
Table of Contents
Advertisement
Quick Links
Download this manual
See also:
Function Manual
Owner's Manual
Before using this unit, carefully read the sections entitled: "USING THE UNIT
SAFELY" and "IMPORTANT NOTES" (Owner's manual p. 2, 3, 9, 10). These
sections provide important information concerning the proper operation of
the unit. Additionally, in order to feel assured that you have gained a good
grasp of every feature provided by your new unit, Owner's manual should be
read in its entirety. The manual should be saved and kept on hand as a
convenient reference.
Copyright © 2001 ROLAND CORPORATION
All rights reserved. No part of this publication may be reproduced in any form without the
written permission of ROLAND CORPORATION.
Roland Web Site: http://www.roland.co.jp/
Advertisement
Chapters
Table of Contents

Related Manuals for Roland DiscLab CDX-1


Summary of Contents for Roland DiscLab CDX-1
- Page 1 The manual should be saved and kept on hand as a convenient reference. Copyright © 2001 ROLAND CORPORATION All rights reserved. No part of this publication may be reproduced in any form without the written permission of ROLAND CORPORATION.
- Page 2 • Do not attempt to repair the unit, or replace parts within it (except when this manual provides specific instructions directing you to do so). Refer all servicing to your retailer, the nearest Roland Service Center, or an authorized Roland distributor, as listed on the "Information" page.
- Page 3 012b • Immediately turn the power off, remove the AC adaptor from the outlet, and request servicing by your retailer, the nearest Roland Service Center, or an authorized Roland distributor, as listed on the “Information“ page when: • The AC adaptor, the power-supply cord, or the plug has been damaged;...
-
Page 4: Table Of Contents
How to expand the memory ... 15 Removing the memory... 16 Verifying that the memory is recognized by the CDX-1 ... 16 Verify that the memory module has been installed in the socket correctly ... 16 Memory read/write test—DIMM diagnostics... 17 Learning about CD-R/RW discs...18... - Page 5 Naming a pad bank ... 55 Sampling to a pad... 56 Sampling an external sound ... 56 Sampling from a CD audio clip collection inserted in the CDX-1 ... 57 Loading a Windows WAVE file... 58 Using free audio sources from the Internet... 59 Making settings in the Sampling screen ...
- Page 6 Preventing specific samples from sounding simultaneously—Mute Groups ... 74 Playing a sample from a connected foot switch ... 75 Specifying the Function of the Foot Switch... 75 Specifying the pad sample that will be played by the foot switch ... 75 Editing the sample of a pad ...76 Adjusting the volume of a sample—Sample Level ...
- Page 7 Tuning an instrument—Tuner... 114 Adjusting the Tuning... 114 Setting the reference pitch of the tuner ... 115 Using the rhythm guide ... 116 Playing/stopping the rhythm guide ... 116 Adjusting the Volume of the Rhythm Guide ... 116 Changing the time signature ... 116 Changing the rhythm pattern...
- Page 8 Using the CDX-1 with other MIDI devices...151 MIDI Fundamentals... 151 Switching MIDI OUT/THRU... 152 Using MIDI to control the CDX-1 from another device... 153 Play samples ... 153 Switch the pad bank ... 153 Synchronized playback with the CDX-1 as the master... 154 Using MTC (master) ...
-
Page 9: Important Notes
(including padding) that it came in, if possible. Otherwise, you will need to use equivalent packaging materials. • Use a cable from Roland to make the connection. If using some other make of connection cable, please note the following precautions. - Page 10 Avoid getting paper clips, coins, or any other foreign objects inside the drive. • When you carry CDX-1, remove the disc from the loading tray. Do not carry the device with the loading tray downward.
-
Page 11: Introduction
Introduction... -
Page 12: Before You Begin
Before you begin Check the contents of the package The CDX-1 is packaged with the following items. Please make sure that you have all of them. CDX-1 (one unit) CD-RW blank disc (one) Demo disc (Songs, Samples) (one) CDX-1 Owner’s Manual (this document) - Page 13 Two versatile digital effects processors The CDX-1 contains two types of effect unit. One type is for recording (insert effect; p. 141) and the other type is independent send/return effects (loop effect; p. 145). These two types can be used simultaneously. This means that the CDX-1 is all you need to produce a sophisticated song without using external effect devices.
-
Page 14: Expanding The Memory
Expanding the memory The CDX-1 comes with 32 MB of memory into which audio samples can be loaded. However, in some cases, 32 MB of memory will be insufficient for loading large amounts of data. In such a case, you will have to add separately sold memory (DIMM). -
Page 15: How To Expand The Memory
How to expand the memory 1. Turn off the power to the CDX-1 and any connected equipment, and then disconnect all cables attached to the CDX-1. 2. Turn the CDX-1 upside-down, and remove the expanding memory cover. fig.12-02a screws to be removed (two) fig.12-03... -
Page 16: Removing The Memory
2. Remove the memory module from the socket. Verifying that the memory is recognized by the CDX-1 Before re-connecting the CDX-1 to any peripheral devices, check to verify that the added memory is being correctly recognized. Verify that the memory module has been installed in the socket correctly 1. -
Page 17: Memory Read/Write Test-Dimm Diagnostics
Memory boards that have not passed the write/read test are marked “NG” at the “Diagnosis.” * Memory for which “NG” is displayed cannot be used with the CDX-1. In this case, turn off the power as described in “Turning off the power” (p. 34). Then remove the memory as described in “Removing the memory”... -
Page 18: Learning About Cd-R/Rw Discs
A CD-RW disc can be written and erased approximately 1000 times. Writing to a CD-R disc There are several ways to write to a CD-R disc. The CDX-1 uses track at once when it creates an original audio CD. Track at once: This method allows writing to be added on a single CD-R disc. -
Page 19: Discs For Use On The Cdx-1
Discs for use on the CDX-1 The CDX-1 contains various functions, and the discs it uses will differ depending on the function. List of usable discs for each operation fig.13-01e Disc Operation Playing a audio (CD-DA) Multitrack recording Creating a original audio CD... -
Page 20: Cd-R/Rw Disc Handling And Cleaning
Learning about CD-R/RW discs CD-R/RW disc handling and cleaning Disc handling Do not place a disc in direct sunlight for an extended period of time. Hold a disc by inserting a finger in the center hole and pressing your thumb against the outer edge. -
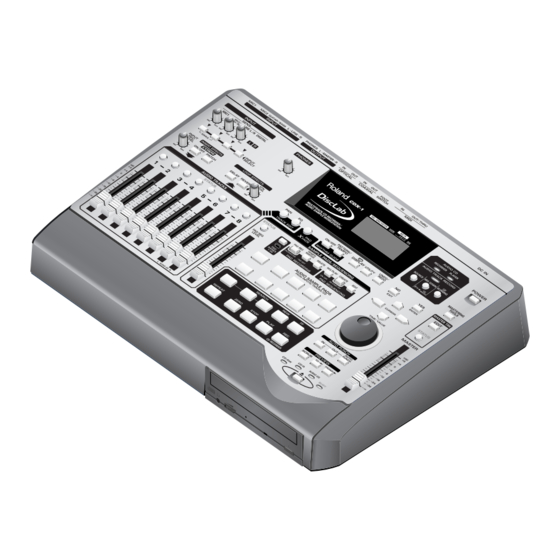
Page 21: Panel Descriptions
Panel Descriptions Top Panel INPUT section fig.14-01e INPUT SENS knobs PEAK indicators INPUT SELECT button INPUT REC LEVEL knob PEAK indicators These indicate whether distortion is occurring in the sound that is being input to the respective input jacks (MIC1, MIC2, GUITAR/BASS, LINE). - Page 22 Panel Descriptions INSERT EFFECTS section Here you can make settings for the insert effect. “Using the insert effects” (p. 141), “Insert effect algorithm list” (p. 175) fig.14-02e ON/OFF button PATCH button ON/OFF button This button switches Insert Effect on and off. PATCH button Here you can switch the parameters displayed in the edit section, and change the type of curve.
- Page 23 AUDIO TRACK section fig.14-04e STATUS buttons AUDIO TRACK faders STATUS buttons 1–8 These switch the status of each audio track. The current status is shown by the color of the button. • Extinguished: Sound will not be output (i.e., muted). •...
- Page 24 Panel Descriptions DISPLAY, UTILITY and UNDO/REDO Button fig.14-06e DISPLAY UTILITY button button SAMPLE PADS/SEQUENCING Section fig.14-07e TEMPO MATCH/PAD EDIT button PAD REC button PAD XFADE button PAD BANKS button STATUS button CLIP BOARD button PAD/SEQ LEVEL fader PAD X FADE (pad crossfade) button Use this button to play pad samples while crossfading.
- Page 25 STATUS Button The color of the button will indicate the current status. Lit in green: Play back samples and the sequence track. Lit in red: Record to the pads or sequence track. * In order to play back a sequence track, turn PAD SEQUENCING [SEQ PLAY] on (lit).
-
Page 26: Transport Section
MIX DOWN button button AUDIO TRACK RECORD indicator This will light when a CD-RW disc for use by the CDX-1 (formatting; p. 110) is inserted. BOUNCE Button This button switches to Bounce recording. Use this when you wish to combine multiple audio tracks (1–6 tracks) into two audio tracks. - Page 27 FF (fast-forward) button The song will fast-forward while you hold down the button. REPEAT button You can specify a region that you wish to hear, and play it back repeatedly. “Specify a region and play it back repeatedly—the Repeat function” (CD Player; p. 51), “Repeatedly play back a specified region—the Repeat function”...
-
Page 28: Control Section
Panel Descriptions Control section fig.14-13e NO/EXIT YES/ENTER button button NO/EXIT Button Press this when you wish to return to the previous screen (i.e., the next higher screen in the hierarchy). You can also press this to respond “no” to a message displayed in the screen. YES/ ENTER Button Press this to execute a menu selection. -
Page 29: Master Section
At the factory settings, one second is set to 30 frames (non- drop). This is one type of a specification known as MTC (MIDI Time Code), and when you use the CDX-1 to play in synchronization with another MIDI device, you will need to set both devices to the same MTC type. -
Page 30: Front Panel
If you are unsure of the connection method, contact the nearest Roland Service Center, or an authorized Roland distributor, as listed on the “Information” page. Unsuitable places for connection •... - Page 31 This connector transmits MIDI messages. Connect it to the MIDI IN connector of your external MIDI device. On the CDX-1, a single connector doubles in use for MIDI OUT and MIDI THRU. At the factory settings, this functions as a MIDI OUT connector.
-
Page 32: Basic Operation Of The Cdx-1
Basic operation of the CDX-1 Connecting peripheral equipment Make connections as shown in the diagram below. Before you begin making connections, be sure that the power of all equipment is turned off. fig.15-01e Foot Switch (DP-2 etc.) Rhythm Machine etc. -
Page 33: Turning The Power On And Off
2. Lower the MASTER fader to the lowest position. 3. Turn on the power of the equipment connected to the INPUT jacks. 4. Press the POWER switch to turn on the power of the CDX-1. fig.15-04 After several seconds, the CDX-1 will start up normally and the post-fader screen appears. -
Page 34: Turning Off The Power
1. If you are ready to turn off the power, press [YES/ENTER]. The power will turn off. * If a CD-RW disc is inserted in CDX-1, a message “Save SONG before shutdown?” appears. In this case, see following process of “If the display asks Save SONG before shutdown?”... -
Page 35: Inserting/Removing A Disc
The disc tray will also close if you press lightly on the front of the tray. Time to mount disc CDX-1 carries out the followings when mounting the discs. • Inspecting CD-RW disc to improve preciseness of writing • Optimize CD-RW drive •... -
Page 36: Removing A Disc
1. Press the EJECT button. The disc tray will open. * If a CD-RW disc is inserted in CDX-1, a message “Save SONG before eject?” appears. In this case, see following process of “If the display asks Save SONG before eject?”... -
Page 37: Switching Among The Basic Screens
Switching among the Basic screens The basic display screens of the CDX-1 are accessed by pressing [DISPLAY], located below the screen. As described below, there are five Basic screens, which you can cycle through by pressing [DISPLAY]. * The AUDIO CD PLAYER indicator and/or the AUDIO CD RECORDER indicator is lit, pressing [DISPLAY] will cycle you through the CD Player screen and Sequence Play List screen displays. -
Page 38: If You Are Confused About Operations Or Screens-Going Back To The Basic Screen
Basic operation of the CDX-1 If you are confused about operations or screens —Going back to the Basic screen While you are still unfamiliar with operation, you may come upon a screen you do not recognize. If this occurs, you can press [DISPLAY] to return to one of the Basic screens (the most-recently selected one). -
Page 39: Viewing Information On The Cd-Rw Disc-Song Information Screen
Viewing information on the CD-RW disc —Song Information screen You can view information about the CD-RW disc (song) inserted in the CDX-1. 1. Press [DISPLAY] to switch among the Basic screen. The Information screen appears. fig.12-07 This displays remaining capacity (time) for editing in min./sec. -
Page 40: Returning The Cdx-1 To The Factory Settings-Initialize
Basic operation of the CDX-1 Returning the CDX-1 to the factory settings—Initialize The current settings of the CDX-1 can be returned (initialized) to the factory settings. The following parameters can be initialized. Global Parameter • Tuner parameters • System parameters •... - Page 41 When you select this icon, the global parameters, effect patches, and mixer parameters will all be initialized. The display screen contrast will also be initialized to the factory setting. Basic operation of the CDX-1 “What is a patch?” (p. 141) “Mixer parameters” refer to...
-
Page 42: What You Need To Do To Create Your Own Cd
What you need to do to create your own CD Steps taken in producing an original CD The following introduces you to a number of paths that you could choose to follow in carrying out the steps needed to create your own original CD, using a CD-R disc. Path 1 fig.16-01 WAVE AUDIO... - Page 43 Path 2 fig.16-01 WAVE AUDIO Sample sounds from a sampling CD (“clip audio” collection) or load Windows WAVE files, and assign the sounds to pads. “Sampling to a pad” (p. 56) fig.16-06 Use pad crossfade to make the samples crossfade as they play. “Crossfading the pad sample you play”...
- Page 44 What you need to do to create your own CD Path 4 fig.16-09 AUDIO Record external audio sources directly to a CD-R disc, without using the audio tracks. “Recording an external audio source to a CD-R disc” (p. 161) fig.16-10 This completes your original audio CD.
-
Page 45: Listening To The Demo Disc
1. Make sure that your sound reproduction system (i.e., amp or headphones) is correctly connected. 2. As described in “Turning On the Power” (p. 33), turn on the power of the CDX-1. 3. Insert the demo disc as described in “Inserting a disc” (p. 35). - Page 46 What you need to do to create your own CD Adjusting the volume of each audio track—AUDIO TRACK faders The volume of audio tracks 1–8 is adjusted with the AUDIO TRACK faders (1–8). * If the [STATUS] of an audio track is extinguished, no sound will be heard, regardless of the position of the AUDIO TRACK fader.
-
Page 47: Playing An Audio Cd
Playing an audio CD... -
Page 48: How To Play An Audio Cd-The Cd Player
How to play an audio CD—the CD Player About the Display CD Player screen When you insert an audio CD, the CD Player screen appears. fig.2-01e current track number total number of tracks on the disc Time display selection Switching the time display You can select one of four types of time display. -
Page 49: Playing And Stopping A Song
Playing and stopping a song Here’s how to play an audio CD on the CDX-1. Playing/stopping an audio CD 1. Insert an audio CD as described in “Inserting a disc” (p. 35). fig.2-02 The CD Player screen appears. 2. Move the AUDIO CD fader (AUDIO TRACK 7-8 fader) to approximately 0 dB. -
Page 50: Changing The Playback Location
How to play an audio CD—the CD Player Changing the playback location Moving to the previous/next track When the song is stopped Press SEARCH [ ] to move to the previous track. Press SEARCH [ ] to move to the next track. When a song is playing Press SEARCH [ ] to move to the beginning of the currently playing track. -
Page 51: Repeatedly Playing A Specified Region-The Repeat Function
Repeatedly playing a specified region —the Repeat function You can specify a region that you wish to hear, and hear it repeatedly. Registering the repeat region 1. Use REW [ ] /FF [ ] to move to the location where you wish to begin repeating. 2. -
Page 52: Changing The Way In Which Audio Cd Volume Is Adjusted
How to play an audio CD—the CD Player Changing the way in which audio CD volume is adjusted At the factory settings, the audio CD volume is set to be adjusted by the AUDIO CD fader (AUDIO TRACK 7-8 fader) and the MASTER fader. If you wish to adjust the volume of audio CDs by using only the MASTER fader (without using the AUDIO CD fader), use the following procedure to change the setting. -
Page 53: Collecting Audio Material
Collecting audio material... -
Page 54: Recording A Sound To A Pad-Sampling
Today, the method of creating music by repeatedly playing back sampled materials (samples) and by using a sequencer to freely combine samples has become one of the most commonly used methods. Since the CDX-1 provides a Sequencer function (p. 88), you can freely arrange samples to create a song. -
Page 55: Naming A Pad Bank
Naming a pad bank Each of the 64 pad banks can be given a name of up to ten characters. If you have assigned names to the pad banks, it will be easier to select the desired bank. For clarity, you may wish to use pad bank names like the examples given below. •... -
Page 56: Sampling To A Pad
Sampling an external sound As an example, we will explain how to connect a synthesizer and sample it. 1. Connect your synthesizer to the CDX-1 as described in “Connecting peripheral equipment” (p. 32), and then press INPUT SELECT [LINE L/R]. -
Page 57: Sampling From A Cd Audio Clip Collection Inserted In The Cdx-1
Sampling from a CD audio clip collection inserted in the CDX-1 Here’s how you can sample audio materials from a CD audio clip collection (copyright-free) inserted in the CDX-1. 1. Insert the audio clip CD into the CDX-1. 2. Press PAD RECORDING [PAD REC]. -
Page 58: Loading A Windows Wave File
Some commercially available sampling CD audio clip collections (copyright-free) designed for use in music production are mixed-mode CDs that saving both audio and WAVE files. The CDX-1 lets you load these WAVE files and assign them to the pads. 1. Insert a mixed-mode CD (AUDIO+WAVE) as described in “Inserting a disc”... -
Page 59: Using Free Audio Sources From The Internet
2. Using a CD-R drive connected to (or installed in) your computer, write the downloaded Windows WAVE file(s) to a CD-R disc. 3. Insert the above CD-R disc into the CDX-1. 4. Follow the procedure described in steps 2–10 of “Loading a Windows WAVE file.”... -
Page 60: Making Settings In The Sampling Screen
The Sampling screen appears in step 3 of “Sampling an external sound” (p. 56) or step 2 of “Sampling from a CD audio clip collection inserted in the CDX-1” (p. 57). As necessary, make settings for the various items in the Sampling screen to modify the sampling settings. -
Page 61: Specifying Stereo Or Mono-Type
3. Prepare the audio source for sampling so that it can be played immediately. 4. Press [PAD REC]. The display will indicate “Waiting trigger...,” and the CDX-1 will be in sampling- ready mode. To abort the procedure from this state, press [PAD REC]. -
Page 62: Making Sure To Capture The Beginning Of The Sound-Pre Trigger
Recording a sound to a pad—Sampling Making sure to capture the beginning of the sound —Pre Trigger Depending on the sampling conditions, the beginning of the sampled sound may not be captured. By setting the pre-trigger time appropriately, you can avoid this problem by causing sampling to begin slightly ahead of the time when you initiated sampling or when the audio input was detected. -
Page 63: Sampling From A Pad To Another Pad-Resampling
If necessary, press [PAD BANKS] to change the pad bank. ( banks”; p. 54) 6. Press [PAD REC]. The display will indicate “Waiting for PAD to start.”, and the CDX-1 will be in sampling-ready mode. To abort the procedure from this state, press [PAD REC]. -
Page 64: If The Display Indicates "Memory Full
Recording a sound to a pad—Sampling If the display indicates “Memory Full.” If the remaining memory is completely used up during sampling, the display indicates “Memory Full.” (no remaining memory), and sampling stops. This indication disappears when you press any button such as [DISPLAY] or [NO/EXIT] (the sounds recorded up to that point is kept on in the internal memory). -
Page 65: Deleting A Sample-Delete Sample
Deleting a sample—Delete Sample Here’s how you can delete an unwanted sample to free up that pad. Deleting samples individually 1. Hold down PAD RECORDING [DELETE] and Press a pad to specify the sample that you wish to delete. The sample is deleted. You wish to cancel to delete a sample, press [UNDO/REDO] (p. -
Page 66: Preventing Accidental Erasure Of Pads-Bank Protect
Recording a sound to a pad—Sampling Preventing accidental erasure of pads —Bank Protect The samples assigned to the pads can be protected against accidental erasure so that they are not lost by unintended operations or by inadvertently overwriting them. A protected pad bank and its samples are handled as follows. -
Page 67: Saving Pad/Sequence On A Cd-Rw Disc
When you sample and create a sequence (p. 88), the Pad/Sequence is temporarily stored in the internal memory of the CDX-1. This means that you can sample and create a sequence (p. 88) even if a CD-RW disc is not inserted. -
Page 68: Loading Pad/Sequence From A Cd-Rw Disc
CD-RW disc. For details refer to “Saving Pad/Sequence” (p. 67). In case any Pad/Sequence is held in internal memory of CDX-1, it will be overwritten by those loaded from CD-RW disc. It is recommended to save Pad/Sequence in internal memory to another CD-RW disc before loading. -
Page 69: Playing The Pad Samples
5-6, or 7-8. Playing pads while you play back an audio CD Sample data assigned to pads will remain in the internal memory of the CDX-1 unless mixdown (p. 133) is performed or the power is turned off (p. 34). Here’s how you can use the Pad/Sequence in internal memory to play the pads while an audio CD plays back. -
Page 70: Changing How A Pad Starts And Stops Sounding-Pad Play
Playing the pad samples Changing how a pad starts and stops sounding—Pad Play 1. Press PAD RECORDING [TEMPO MATCH] twice. Alternatively, you can press [TEMPO MATCH] and then press CURSOR [ fig.31-03 The Pad Edit menu are displayed as icons. fig.32-01 2. -
Page 71: Crossfading The Pad Samples You Play-Pad Crossfade
Crossfading the pad samples you play —Pad Crossfade By using Pad Crossfade, you can play pad samples without creating gaps between the sounds of each pad. Each time you press a pad, its sample will be automatically crossfaded (faded in and faded out). Pad samples can be recorded directly to a CD-R disc only when Pad Crossfade is turned on. -
Page 72: Making The Sound Continue Even After You Release The Pad-Hold
Playing the pad samples Making the sound continue even after you release the pad—Hold In some cases, you may want a sample whose Pad Play setting (p. 70) is set to “GATE” (start sounding when you press the pad, and stop sounding when you release it) to continue sounding even after you take your hand away from the pad. -
Page 73: Playing Repeatedly-Loop Mode
Playing repeatedly—Loop mode Loop refers to a state in which a sample is played repeatedly from its start point (the beginning of the sound) to its end point (the end of the sound) (or a specified region). This function is convenient when you wish to repeatedly play a sample to create the basic rhythm. -
Page 74: Preventing Specific Samples From Sounding Simultaneously-Mute Groups
Samples that do not need to sound simultaneously (or that you do not want to be heard simultaneously) can be assigned to the same mute group. The CDX-1 has seven mute groups, and samples that are assigned to the same mute group will not sound together with each other. -
Page 75: Playing A Sample From A Connected Foot Switch
Playing a sample from a connected foot switch If a separately sold foot switch (e.g., DP-2 or BOSS FS-5U) is connected, you can play the sample of a specified pad by pressing the foot switch. Specifying the Function of the Foot Switch 1. -
Page 76: Editing The Sample Of A Pad
Editing the sample of a pad The 512 samples (8 pads x 64) stored in the CDX-1 can be edited in a variety of ways, such as by adjusting their volume or length. Samples can be edited either by creating a new sample for another pad, or by simply modifying the settings of the same pad. -
Page 77: Displaying The Correct Tempo Of A Sample
However, for this to be displayed accurately, you must tell the CDX-1 the number of beats in that sample and the note value of each beat. * The tempo (BPM) display is always calculated as 1 beat = quarter note. For example, an eighth note is calculated and displayed as half a beat, and a half note as double the length of one beat. -
Page 78: Adjusting The Start/End Points Of The Sound-Trim Sample
Editing the sample of a pad Adjusting the start/end points of the sound—Trim Sample You can specify the portion of the sample that are played when you press the pad. What are the Start/Loop points and Length? fig.33-04e The beginning of the sample Length Length... -
Page 79: Automatically Removing Empty Portion At The Beginnings And Ends Of Samples
Automatically removing Empty Portion at the Beginnings and Ends of Samples This automatically removes any bank portions that may come before the sample starts ti play or after the sample is finished. 1. Press PAD RECORDING [TEMPO MATCH] twice. Alternatively, press [TEMPO MATCH] and then press CURSOR [ fig.31-03 The Pad Edit menu are displayed as icons. -
Page 80: Expanding And Compressing A Sample To Modify The Length Or Tempo
It is easier to edit your song if the materials you collected are of a consistent tempo. The CDX-1 makes it easy to match the tempo of different samples. Since this function needs to accurately calculate the tempo in order to perform a high-quality compression or expansion, you must first perform the procedure of “Displaying the correct tempo of a sample”... -
Page 81: Expanding/Compressing By A Specified Percentage Or Tempo-Time Stretch
Expanding/compressing by a specified percentage or tempo—Time Stretch Since this function needs to accurately calculate the tempo in order to perform a high-quality compression or expansion, you must first perform the procedure of “Displaying the correct tempo of a sample” (p. 77) to specify the number of beats in the original sample. -
Page 82: Copying A Sample To Another Pad-Clipboard
Editing the sample of a pad Copying a sample to another pad— Clipboard By temporarily pasting a sample into the clipboard, you can easily copy a sample from one pad to another. 1. Hold down the pad of the sample you wish to move (the pad lights), and press [CLIP BOARD]. -
Page 83: Splitting A Sample Among Several Pads-Divide Sample
Splitting a sample among several pads—Divide Sample Sometimes after sampling an extended performance, you may wish to divide the sample into two parts, and assign them to separate pads as new samples. The Divide Sample function lets you do this. This is convenient when you wish to record a sample without pausing, and then later divide it into shorter samples and assign them to pads. -
Page 84: Automatically Dividing A Sample At Silent Portions
Editing the sample of a pad Automatically dividing a sample at silent portions 1. Press PAD RECORDING [TEMPO MATCH] twice. Alternatively, press [TEMPO MATCH] and then press CURSOR [ fig.31-03 The Pad Edit menu are displayed as icons. fig.33-09 2. Press CURSOR [[ ] to select the Divide icon. -
Page 85: Dividing A Sample At The Timing That You Press A Button
Dividing a sample at the timing that you press a button 1. Press PAD RECORDING [TEMPO MATCH] twice. Alternatively, press [TEMPO MATCH] and then press CURSOR [ fig.31-03 The Pad Edit menu are displayed as icons. fig.33-09 2. Press CURSOR [ ] to select the Divide icon. -
Page 86: Creating A "Reverse Tape" Style Sample-Create Reversal
Editing the sample of a pad Creating a “reverse tape” style sample—Create Reversal By using this function you can create a sample that sounds as though a tape recorder were being played backward. 1. Press PAD RECORDING [TEMPO MATCH] twice. Alternatively, you can press [TEMPO MATCH] and then press CURSOR [ fig.31-03 The Pad Edit menu are displayed as icons. -
Page 87: Boosting The Sample Level As High As Possible-Normalize
Boosting the sample level as high as possible—Normalize Normalize is a function that raises the level of the entire sample as high as possible without exceeding the maximum level. 1. Press PAD RECORDING [TEMPO MATCH] twice. Alternatively, press [TEMPO MATCH] and then press CURSOR [ fig.31-03 The Pad Edit menu are displayed as icons. -
Page 88: Arranging Audio Samples To Create A Song-Sequence
About the tempo of the sequence Setting the tempo of the sequence The CDX-1 uses the measure (MEAS), beat (BEAT), and tick (TICK) * as the units of its basic system for measuring the current location in a sequence. Thus, sequences on the CDX-1 are based on the concept of tempo, and in changing the tempos of sequences containing multiple phrases, the intervals between the beginning of one phrase and the beginning of the next are lengthened and shortened. - Page 89 The Relationship Between Sequences and Phrases The sequence tempo can be changed in the Rhythm Guide setting screen or Tempo Map screen.When the tempo is slowed down, the interval during which the phrase sounds is lengthened. Conversely, increasing the tempo makes the interval shorter.However, in either case, you cannot change the performance tempo of the phrases (the tempo when the phrase is audio-recorded) themselves.
-
Page 90: Recording Pad Operations As You Play Pads-Realtime Recording
Arranging audio samples to create a song—Sequence Recording pad operations as you play pads—Realtime Recording Realtime recording of pad operations is when the timing at which pads are pressed and released is recorded in the sequence track. Since the actual sounds that you are hearing are not being recorded anew in the sequence track, this does not reduce the remaining time available for recording. -
Page 91: Recording While You Listen To The Playback Of Another Sequence Track
Recording while you listen to the playback of another sequence track You can select a sequence track for playback, and then perform realtime recording while you listen to the playback of the selected sequence track. 1. As described in steps 1–3 of “Playing a sequence track” (p. 96), select the sequence track that you wish to play. -
Page 92: Correcting Timing Inaccuracies While You Record-Quantize
This means that it is rather difficult to record pad operations exactly at precise measure beginnings, quarter notes, or eighth notes when you are using realtime recording. This is why the CDX-1 provides a Quantize function that can correct the timing of your pad operations while you record. -
Page 93: Recording Pad Operations At The Specified Interval-Step Recording
Recording pad operations at the specified interval—Step Recording The CDX-1 allows you to record pad operations on a sequence track while the playback remains stopped. This is analogous to pasting the pad samples at previously specified intervals (steps). This is called step recording. -
Page 94: Step Recording
Arranging audio samples to create a song—Sequence Step recording In the explanation that follows, we will assume that pads [1] and [2] contain samples, and that you wish to record on the sequence track as shown in the diagram. fig.34-04e Phrase Step 1 Step 2... -
Page 95: Adding Dynamics While You Step-Record
The volume level of step-recorded phrases will be the same as the volume level of the samples you use (p. 76). On the CDX-1, samples will sound at a fixed volume regardless of the strength with which you press the pad. If you wish to add dynamics to each step during step- recording, it is best to prepare several pads containing the same sample but different volume levels, and use these pads appropriately. -
Page 96: Playing A Sequence Track
Arranging audio samples to create a song—Sequence Playing a sequence track The number of sounds that can be played simultaneously is a total of four stereo sounds for audio track playback, pad playback, and sequence track playback. When the sequence is on, the playback priority will be in the order of sequence tracks audio tracks pads. -
Page 97: Playing Sequence Tracks And Audio Tracks Simultaneously
Playing sequence tracks and audio tracks simultaneously When sequence is turned on, the [STATUS] of all audio tracks will go dark. If you wish to play back audio tracks at the same time, press [STATUS] of an audio track enough times to get it to light in green. However, an audio track cannot be played back simultaneously with the corresponding sequence track selected as the playing back destination. -
Page 98: Editing A Sequence Track
Arranging audio samples to create a song—Sequence Editing a sequence track The samples arranged in a sequence track can be edited by moving the location at which they will play, by pasting them in a different location, or by deleting them. This makes it easy to make corrections to entire phrases without re-recording. -
Page 99: Pasting A Phrase At A Different Location-Paste
Pasting a phrase at a different location—Paste If something has already been recorded at the paste destination, it will be overwritten by the pasted phrase. fig.34-12 1. Press PAD SEQUENCING [EDIT]. [EDIT] lights, and the Sequence Edit menu are displayed as icons. fig.34-10 2. -
Page 100: Cutting A Phrase-Cut
Arranging audio samples to create a song—Sequence Cutting a phrase—Cut When you cut a phrase, subsequent phrases will be moved forward. fig.34-14 1. Press PAD SEQUENCING [EDIT]. [EDIT] lights, and the Sequence Edit menu are displayed as icons. fig.34-10 2. Press CURSOR [ ] to select the Cut icon. -
Page 101: Erasing Phrases-Erase
Erasing Phrases—Erase The phrase that you cut will be silent. Even if there are phrases following it, they will not be moved forward. fig.34-16 1. Press PAD SEQUENCING [EDIT]. [EDIT] lights, and the Sequence Edit menu are displayed as icons. fig.34-10 2. -
Page 102: Inserting A Phrase In Another Location-Insert
Arranging audio samples to create a song—Sequence Inserting a phrase in another location—Insert If something has already been recorded at the insert destination, subsequent phrases will be moved backward by the length of the phrase that is pasted. fig.34-18 1. Press PAD SEQUENCING [EDIT]. [EDIT] will light, and the Sequence Edit menu will be displayed as icons. -
Page 103: Dividing The Phrase At The Current Location-Split
Dividing the phrase at the current location—Split This function splits the phrase at “NOW” (the current location). By dividing a phrase, you can delete a portion of the phrase or paste it into another location. fig.34-20 1. Press PAD SEQUENCING [EDIT]. [EDIT] lights, and the Sequence Edit menu are displayed as icons. -
Page 104: Finely Adjusting The Timing Of Each Phrase-Adjust Timing
Arranging audio samples to create a song—Sequence Finely Adjusting the Timing of Each Phrase—Adjust Timing The positioning of phrases on the sequence tracks is determined with the following formats. • From which measure, beat, and tick number (Start) • The length of expression in beats and ticks (Duration) The Adjust Timing function is for changing these values. -
Page 105: Adjusting The Volume Setting For Each Phrase
Offset and End Point “WaveOffset” and “WaveEnd,” the parameters selected in Step 9, determine which part of the waveform data is used for to a phrase. fig.34-21g Start 00000000 Wave Offset In both Offset and End point are indicated by 8-digits values likewise the sample reading start points (p. -
Page 106: Edit On Sequence Play List Screen-Quick Edit
Arranging audio samples to create a song—Sequence Edit on Sequence Play List screen—Quick Edit It is convenient to select a phrase to edit seeing whole part of Play List. 1. Press PAD SEQUENCING [SEQ PLAY]. ig.34-10 [SEQ PLAY] lights, and the Sequence Play List screen appears. -
Page 107: Deleting A Sequence Track
Deleting a sequence track An unwanted sequence track can be deleted as follows. 1. Press PAD SEQUENCING [EDIT]. [EDIT] lights, and the Sequence Edit menu are displayed as icons. fig.34-23 2. Press CURSOR [ ] to select the Erase Track icon. 3. -
Page 108: Recording The Sequence Playback Sound On Audio Track
CD-RW disc?) appears. 12. If you wish to save the take, press [YES/ENTER]. When CDX-1 complete to save, [BOUNCE] will go to dark, and the [STATUS] of the selected recording destination tracks will go light in green. If you press [NO/EXIT], saving to CD-RW discs will be cancelled. -
Page 109: Creating An Audio Cd
Creating an audio CD... -
Page 110: Prepare For Recording-Multitrack Recording
Prepare for recording—Multitrack recording What is multitrack recording? The CDX-1 provides eight “audio tracks” that are used to independently record and manage the parts that make up a song. You can record separate parts on each audio track, for example recording the vocal on audio track 1 and the guitar on audio track 2. - Page 111 9. Press [YES/ENTER] to return to the Basic screen. What is the data type The CDX-1 allows you to specify the data type when a CD-RW disc is formatted. This enables you to select the combination of audio quality and recording time that is most suitable for the material you are recording.
-
Page 112: Erasing The Entire Contents Of A Cd-Rw Disc
(p. 138) to revert to the state before executing format. • While formatting, do not turn off the power with unplugging the AC adaptor. CDX-1 carries out the followings when formatting discs. • Insert CD-RW disc to improve preciseness of writing. -
Page 113: Monitoring The Sound Of A Connected Instrument
Monitoring the sound of a connected instrument Selecting the input source Press the INPUT SELECT button(s) for the instrument you will record. The indicator of the selected button(s) will light. Adjusting the input sensitivity 1. Turn the INPUT SENS knob to adjust the input sensitivity. Adjust the INPUT SENS knob as high as possible without causing the peak indicator to light when the sound is input. -
Page 114: Tuning An Instrument-Tuner
Prepare for recording—Multitrack recording Tuning an instrument—Tuner The CDX-1 has a built-in chromatic tuner function that allows you to tune your instrument quickly. The built-in tuner supports both guitar and bass guitar. As an example here, we will explain how to use the tuner to tune your guitar. -
Page 115: Setting The Reference Pitch Of The Tuner
About the tuner display Screen display The built-in tuner of the CDX-1 displays the reference pitch, note name, and a tuning guide (see the illustration). fig.4-08e Standard pitch (Tuner pitch) Note name Tuning Guide Tuning guide display If the difference between the input pitch and the correct pitch is less than +/-50 cents, the tuning guide will indicate the discrepancy between the actual and the correct pitches (refer to step 5 of previous page). -
Page 116: Using The Rhythm Guide
Prepare for recording—Multitrack recording Using the rhythm guide When you record, it is convenient to use the built-in rhythm guide. If you record along with the rhythm guide, you will be able to use various convenient functions such as track editing in units of measures, or synchronizing the performance with external devices. -
Page 117: Changing The Rhythm Pattern
Changing the rhythm pattern 1. Press RHYTHM GUIDE [PATTERN/TEMPO]. The Rhythm Guide Setting screen appears. fig.41-13c 2. Press CURSOR [ ] to move the cursor to “Pattern” line. 3. Turn the TIME/VALUE dial to select the desired rhythm pattern. 4. Press [DISPLAY] to return to the Basic screen. Changing the tempo 1. -
Page 118: Deleting A Tempo Map
MEAS (measure): Specify the starting measure (1–9999) of the tempo map. The measures and beats shown in the display, the rhythm guide sound, and the MIDI clock data transmitted from the CDX-1 will follow the settings of this measure. TEMPO: Specify the tempo (20.00–250.00) of the tempo map. -
Page 119: Recording/Playing Back A Performance
Recording/playing back a performance Recording a Performance Here’s how a performance on a connected instrument can be recorded on an audio track. The input source selected by the INPUT SELECT button can be recorded in mono or stereo. Select the audio track for recording 1. -
Page 120: Record
(on separate audio tracks), and then pan the two tracks to left and right. This is known as doubling. The CDX-1 provides a “DOUBL’N (doubling)” (p. 202) insert effect that lets you produce a doubling effect without having to record the same performance twice. -
Page 121: Re-Recording Only A Mistake-Punch-In/Out
Re-recording only a mistake —Punch-in/out You may occasionally make a mistake while recording, or the performance may not turn out as you expect. In such cases, it is convenient to re-record only the portion where the mistake occurred. The action of switching to record mode while an audio track plays is called Punch-in. -
Page 122: Using A Foot Switch To Punch-In/Out
Recording/playing back a performance Using a foot switch to punch-in/out If you are playing an instrument at the same time that you operate the controls of the recorder, it will be difficult for you to perform punch-in/out operations using the REC [ ] button. -
Page 123: How To Record
2. Press AUTO PUNCH [IN]. fig.42-08 The current location will be registered as the punch- in location, and the button will light. If you wish to re-do the setting, move to the punch-in location you registered, and press AUTO PUNCH [IN]. The registration will be cancelled, and AUTO PUNCH [IN] will go out. -
Page 124: Recording An Additional Performance While Listening To An Existing Performance-Overdubbing
Recording/playing back a performance Recording an additional performance while listening to an existing performance —Overdubbing The process of listening to a previously recorded performance while you record additional material on another audio track is called overdubbing. If you record drums, bass guitar, keyboard, guitar, and vocal parts on separate audio tracks, you can then adjust the volume balance between instruments and set the left/right position (pan). -
Page 125: Combining The Performances Of Multiple Audio Tracks-Bounce Recording
A message of “Keep take? (NO/YES)” appears. 12. If you wish to save the take, press [YES/ENTER]. When CDX-1 complete to save, [BOUNCE] will go to dark, and the [STATUS] of the selected recording destination tracks will go light in green. -
Page 126: Playing Back And Stopping A Recorded Performance
Tempo Map parameter • Effects Location parameter • Master parameter When BUSY indicator is lit, CDX-1 is preparing for playback. Thus, the playback do not immediately start when it is lit. In this case, PLAY [ ] blinks. It is not possible to change the [STATUS] during the song is playing. -
Page 127: Increasing The Free Space On A Cd-Rw Disc-Optimize Disc
Increasing the free space on a CD-RW disc —Optimize Disc When you perform overdubbing (p. 124) or punch-in/out (p. 121), the data that you rewrite (replace) actually remains on the CD-RW disc. In some cases, this unwanted data may occupy a significant amount of space on the CD-RW disc. This will cause the time available for recording to be less than it should be. -
Page 128: Repeatedly Playing A Specified Region-The Repeat Function
Recording/playing back a performance Repeatedly playing a specified region —the Repeat function By using the Repeat function you can repeatedly play back a specified region. This is convenient when you wish to check the mix balance over and over. Registering the repeat region 1. -
Page 129: Assigning Markers Within A Song-Marker
Assigning markers within a song—Marker The Marker function lets you assign a marker at desired locations in the song. When this function is used, you can move instantly to the location of a marker that you registered, simply by specifying the appropriate marker number. This is also a great convenience for editing. -
Page 130: Changing The Location Of A Marker
Recording/playing back a performance Changing the location of a marker 1. Press [UTILITY]. The Menu are displayed as icon. fig.42-14 2. Press CURSOR [ ] to select the Marker Edit icon. 3. Press [YES/ENTER]. fig.42-15 The Marker Edit screen appears. Make sure that the cursor is located at the “NO.”... -
Page 131: Stopping The Song Automatically-Marker Stop
Stopping the song automatically— Marker Stop You can make playback stop at marker locations (Marker Stop). When you play back after stopping, the song will play back to the next marker, and will then automatically stop again. 1. Press [UTILITY]. The Menu are displayed as icon. -
Page 132: Editing A Recorded Performance To Create An Audio Cd
4. Press [DISPLAY] to return to the Basic screen. Adjusting the tone of each audio track—Equalizer The mixer section of the CDX-1 provides a two-band equalizer (EQ) for each audio track, allowing you to independently adjust the tone of the low-frequency and high- frequency ranges. -
Page 133: Mixing Down
1. Press AUDIO TRACK RECORD [MIX DOWN]. [MIX DOWN] will light, and you will be in mixdown-ready mode. * If the pad/sequence contained in the CDX-1’s internal memory, a message of “Save PAD/SEQ Data?” appears, [MIX DOWN] will blink. If you wish to save the pad/sequence on a CD-RW disc, press [YES/ENTER]. [MIX DOWN] will light. -
Page 134: Adjusting The Mastering Tools
Editing a recorded performance to create an audio CD Adjusting the mastering tools The mastering tools are a convenient set of tools that divide the sound into high- frequency, mid-frequency, and low-frequency ranges, and make the volume consistent so that the audio CD can be created with the optimal levels. There are 19 mastering tool patches, so you can select the patch that is most appropriate for your situation. -
Page 135: Completing Your Original Cd-Cd Burning
* The CDX-1 uses Track At Once to write song data to a CD-R disc. A CD-R disc that was written using Track At Once allows additional song data to be written as long as you have not yet finalized the disc. -
Page 136: Finalizing A Cd-R Disc
Editing a recorded performance to create an audio CD Finalizing a CD-R disc Here’s how to finalize an original CD that you created, so that it can be played on a conventional CD player. 1. Insert the CD-R disc that you wish to finalize. 2. -
Page 137: Taking Full Advantage Of The Cdx-1
Taking full advantage of the CDX-1... -
Page 138: More Functions For The Cdx-1
More functions for the CDX-1 Undoing a recording/editing operation When you record or sample a performance, the recorded (or sampled) results may not always be as you expect. Or, you may make a mistake in editing. In such cases, you can use the Undo function to cancel the result of the preceding operation and return the data to its original state. -
Page 139: Cueing To A Precise Location-Preview
Sound data Time 1second PREVIEW FROM “Playing a sequence More functions for the CDX-1 [TO] is convenient when you wish to set the current location to the beginning of a sound, and [FROM] is convenient when you wish to set the current location to the end of a sound. -
Page 140: Using Scrub To Make Fine Adjustments In The Cue Location-Scrub Preview
More functions for the CDX-1 Using Scrub to make fine adjustments in the cue location—Scrub Preview An extremely short region (45 milliseconds) either before or after the current location will play back repeatedly. This is called the Scrub function. fig.5-02e... -
Page 141: Using The Insert Effects
For example, by applying an insert effect to an electric guitar connected to the CDX-1, you can distort the sound or transform the sound into the tone of an acoustic guitar. You can also modify the settings of an insert effect to create your own original sounds. -
Page 142: Using An Insert Effect
More functions for the CDX-1 Using an insert effect 1. Press INSERT EFFECTS [ON/OFF]. [ON/OFF] will light, and the sound processed by the effect will be output. 2. Press INSERT EFFECTS [PATCH]. fig.5-04 The patch select screen appears. 3. Turn the TIME/VALUE dial to select a patch. -
Page 143: Saving Insert Effect Settings
7. Press [DISPLAY] to return to the Basic screen. ] a number of ] to input the desired More functions for the CDX-1 Song patch data is not saved immediately when you write it; rather, it is saved to CD-RW... -
Page 144: Changing The Insert Effect Connections
More functions for the CDX-1 Changing the insert effect connections By changing the connections of the insert effect, you can meet the needs of a wide variety of situations. For example, you can apply effects to the playback of specific audio tracks or audio sample pads, or adjust the sound during mixdown (p. -
Page 145: Using The Loop Effects
When a loop effect is used, its output is generally mixed with the original sound. The mixer section of the CDX-1 provides chorus/delay/doubling and reverb as loop effects. By using these you can add spaciousness to the sound. Since the send level is independent for each audio track, you can vary the effect depth for each track. - Page 146 (on separate audio tracks), and then pan the two tracks to left and right. This is known as doubling. The CDX-1 provides a “DOUBL’N (doubling)” (p. 174) loop effect that lets you produce a doubling effect without having to record the same performance twice.
-
Page 147: Creating A Backup Cd-Rw Disc
6. Press [YES/ENTER]. A message of “Please insert the source disc.” appears, and the disc tray opens. * If the pad/sequence contained in the CDX-1’s internal memory, a message of “You'll lose PAD/ SEQ data. Are you sure?” appears. If you press [YES/ENTER], all Pad/Sequence will be lost, and you will go to step 7. -
Page 148: Connecting With A Digital Audio Device
CDX-1. In Order to Make a Digital recording with CD player At the factory settings, the CDX-1 cannot record the output of a digital audio device via the OPTICAL IN or COAXIAL IN connectors. If you wish to make connections with a digital audio device, you must perform the following procedure. -
Page 149: To Prevent Digital Recording With Cd Players
5. Turn the TIME/VALUE dial to select “OFF.” Subsequently it will not be possible to use digital connections from a digital audio device such as a CD player. 6. Press [DISPLAY] to return to the Basic screen. More functions for the CDX-1... -
Page 150: Prohibiting Digital Copying-Digital Copy Prohibit
DAT recorder, it will not be possible to record the digital output of the CDX-1 on a DAT recorder if “D.Copy Protect” is turned “ON.” In such cases, you will need to turn this setting “THRU.”... -
Page 151: Using The Cdx-1 With Other Midi Devices
Using the CDX-1 with other MIDI devices MIDI Fundamentals What is MIDI? MIDI stands for “Musical Instrument Digital Interface.” This is a worldwide standard that was developed in order to allow music data and sound data to be exchanged among electronic musical instruments and computers. Devices that are MIDI-compatible can exchange music data according to their capabilities, even if they are different types of device or were made by different manufacturers. -
Page 152: Switching Midi Out/Thru
MIDI messages received at the MIDI IN connector are re-transmitted without change from this connector. The CDX-1 provides a single connector that can be used either as MIDI OUT or MIDI THRU. At the factory settings, it functions as MIDI OUT. You can change this setting as necessary. -
Page 153: Using Midi To Control The Cdx-1 From Another Device
MIDI device. Play samples By sending MIDI note messages from a keyboard or drum pad to the CDX-1, you can play the eight samples of the selected pad bank. To play the samples of the CDX-1, you can choose one MIDI channel from channels 1–16. -
Page 154: Synchronized Playback With The Cdx-1 As The Master
(transmitting) device, but not as the slave (receiving) device. Also, the MIDI sequencer must be set as the slave (receiving) device. Using MTC (master) 1. Use a MIDI cable to connect the CDX-1 and your MIDI sequencer as shown in the diagram. fig.5-27e... - Page 155 10. Make settings on your MIDI sequencer so that it can receive MTC from an external device, and prepare it to play back MIDI song data. When the CDX-1 begins playing, the MIDI sequencer will also begin playing in sync with it.
-
Page 156: Using Mmc
MMC will be transmitted. The CDX-1 will be the master for external MIDI devices. SLAVE: MMC will be received. The CDX-1 operates as the slave of an external MIDI device. 7. Make settings to allow MTC synchronization. Use the procedure of step 5 and following in “Using MTC (master)” (p. 154). -
Page 157: Using The Cdx-1 As An Mmc Slave
] to move the cursor to “MMC Mode” line. 6. Turn the TIME/VALUE dial to select “SLAVE.” For details on the MMC Mode, refer to step 6 of “Using the CDX-1 as the MMC master,” above. 7. Make settings to allow MTC synchronization. -
Page 158: Using An External Midi Sound Module To Play The Rhythm Guide
Using an external MIDI sound module to play the rhythm guide The rhythm guide can be played using your favorite sounds on another MIDI device. 1. Use a MIDI cable to connect the CDX-1 and your MIDI sound module as shown in the diagram. fig.5-32e... -
Page 159: Cd Direct Recording
CD direct recording... -
Page 160: Recording To A Cd-R Disc-Cd Recorder
You must use CD-R discs that carry these logos. • The CDX-1 writes song data to a CD-R using Track At Once. As long as the disc has not yet been finalized, additional song data can be added to a music CD-R that has been written using Track At Once. -
Page 161: Recording An External Audio Source To A Cd-R Disc
MD recorder to be recorded onto a CD-R in digital form. * In order to record a digital audio signal into the CDX-1, it is not enough to simply connect the digital audio device to the OPTICAL IN or COAXIAL IN connectors. To allow digital audio signals to be recorded, you must make the setting described in “Connecting with a digital audio... -
Page 162: Recording Samples Played Using Pad Crossfade On A Cd-R Disc
“Sampling to a pad” (p. 56) “Loading Pad/Sequnece from a CD-RW disc” (p. 68) 2. Insert an unused CD-R disc or a CD-R disc that has been written by the CDX-1. * When insert an CD-R disc written audio data, CD player screen appears. -
Page 163: Recording The Sequence Playback On A Cd-R Disc
Alternatively, you can move to a desired location so that recording will start from that point. 10. Insert an unused CD-R disc or a CD-R disc that has been written by the CDX-1. * When insert a CD-R disc written audio data, CD player screen appears. - Page 164 Memo... Memo...
-
Page 165: Appendices
Appendices... -
Page 166: Troubleshooting
Troubleshooting If you encounter problems with the operation of the CDX-1, first check the following points. If after these steps the problem is still unresolved, consult your nearest Roland service center or authorized Roland distributor. Problems with the sound There is no sound whatsoever... - Page 167 There is no sound only when the effects are in use Is the output level of the inserted effects patch raised? Raise the output level of the patch as described in “Editing insert effect settings” (p. 142). Sampling does not begin, even when [PAD REC] is pressed Is the appropriate “Start with”...
-
Page 168: Other Problems
COAXIAL IN connectors. You must change the settings as described in “In order to make a Digital recording with CD player” (p. 148). Dose the sampling rate of the CDX-1 match that of the digital audio device. Set the digital audio device to a sampling rate of 44.1kHz. - Page 169 Unable to make Audio CD Are you using CD-R disc? It is impossible to make Audio CDs on CD-RW disc or on unwritable CD-ROM, Audio CD. Are you using CD-R disc that has been finalized? The data on the CD-RW disc is corrupted or damaged Damaged data may be caused by the following: Was the power turned off while the CD-RW disc drive...
-
Page 170: Major Message List
Major Message List Bank is protected. The operation cannot be executed since the pad bank is protected. Canceled. The operation was canceled. Can't execute. Cannot execute this operation. Can't insert to this point. Cannot insert to this point. Can't UNDO. Undo is not possible. - Page 171 Obey copyrights? See Manual for details. Do you agree to obey copyright law? Please refer to the owner's manual for details. Optical input locked. Locked to digital input (optical). Optical input unlocked. Unable to lock to digital input (optical). Optimize failed. Failed to optimize.
-
Page 172: Rhythm Pattern List
Rhythm Pattern List Beat Name Metronom Metronom Metronom Metronom Metronom Metronom Metronom Metronom Beat Name Metronom Rockbly Metronom Metronom Metronom Metronom Metronom Metronom Metronom Beat Name Metronom Bossa 1 Bossa 2 Bossa 3 Metronom Rock 1 Rock 2 Rock 3 Jazz Ballad Gospel... - Page 173 Beat Name Measure Funk 1 Funk 2 Funk 3 Funk 4 Funk 5 Funk 6 Funk 7 Funk 8 Funk 9 Funk 10 Reggae Samba 1 Samba 2 EleRock 1 EleRock 2 Techno 1 Techno 2 Techno 3 House 1 House 2 House 3 Eurobt 1...
-
Page 174: Mixer Effect Parameter Functions
Mixer effect parameter functions EQ (Equalizer): This is a two-band equalizer that is independent for each track. Parameter (full name) EQ StereoLink (EQ Stereo Link) EQ On/Off (EQ On/Off) Low Gain (Low Gain) Low Freq (Low Frequency) High Gain (High Gain) High Freq (High Frequency) Loop Effect CHORUS/DELAY/DOUBL’N (Chorus / Delay / Doubling) -
Page 175: Insert Effect Algorithm List
Insert effect algorithm list Here we will explain the effects used by each algorithm and the order in which they are connected. The effect groups and the algorithms in each group are shown below. To select the desired algorithm, refer to the separate “Effect patch list“ and switch to a patch that uses the desired algorithm. -
Page 176: Stereo Multi
Insert effect algorithm list 1. STEREO MULTI This algorithm connects seven types of effect, all in full stereo. Ring Compressor Modulator Noise Chorus Suppressor Parameter (full name) COMP (Compressor): Compressor the entire output signals when the input volume exceeds a specified value. Effect On/Off (Effect On/Off) Sustain (Sustain) Attack (Attack) - Page 177 WAH (Wah): The wah effect creates a unique tone by changing the frequency response characteristics of a filter. Effect On/Off (Effect On/Off) OFF, ON Polarity (Polarity) DOWN Sensitivity (Sens) 0–100 Frequency (Frequency) 0–100 Peak (Peak) 0–100 Level (Level) 0–100 NS (Noise Suppressor): This effect reduces the noise and hum. Effect On/Off (Effect On/Off) OFF, ON Threshold (Threshold) *...
-
Page 178: Lo-Fi Box
Insert effect algorithm list 2. LO-FI BOX This allows you to model sounds that appear to be playing on an AM radio, the sounds of old records played on an old-fashioned gramophone, and even extreme deformations of the sound produced by a Lo-Fi Digital. Parameter (full name) LOFI (Lo-Fi Box): Produces a lo-fi sound. - Page 179 NS (Noise Suppressor): This effect reduces the noise and hum. Effect On/Off (Effect On/Off) OFF, ON Threshold (Threshold) * 0–100 Release (Release) 0–100 * High settings for the Threshold parameter may result in there being no sound when you play with your instruments volume turned down. Creating lo-fi sounds Follow the steps below to create lo-fi sounds essential to dance music including hip-hop and DJ music.
-
Page 180: Vo+Gt.amp (Vocal+Guitar Amp)
Insert effect algorithm list 3. VO+GT.AMP (Vocal+Guitar Amp) This algorithm is for use when simultaneously recording a vocal and electric guitar. For the guitar, you can produce an amp sound using a preamp and speaker modeling. Parameter (full name) COMP (Compressor): Compressor the entire output signals when the input volume exceeds a specified value. Effect On/Off (Effect On/Off) Sustain (Sustain) Attack (Attack) - Page 181 DLY (Delay): This creates a thicker sound by applying a delayed sound to the direct sound. Effect On/Off (Effect On/Off) OFF, ON Delay Time (Delay Time) SINGLE: 1–1400 mS TAP: 1–700 mS Feedback (Feedback) 0–100 Effect Level (Effect Level) 0–120 GUITAR Parameter (full name) Setting...
- Page 182 Insert effect algorithm list 4. VO+AC.MDL (Vocal+Acoustic Guitar Modeling) This algorithm is for use when simultaneously recording a vocal and electric guitar. For the guitar, you can make the electric guitar sound like an acoustic guitar. Parameter (full name) COMP (Compressor): Compressor the entire output signals when the input volume exceeds a specified value. Effect On/Off (Effect On/Off) Sustain (Sustain) Attack (Attack)
- Page 183 DLY (Delay): This creates a thicker sound by applying a delayed sound to the direct sound. Effect On/Off (Effect On/Off) OFF, ON Delay Time (Delay Time) SINGLE: 1–1400 mS TAP: 1–700 mS Feedback (Feedback) 0–100 Effect Level (Effect Level) 0–120 GUITAR Parameter (full name) Setting...
- Page 184 Insert effect algorithm list 5. VO+ACOUSTIC (Vocal+Acousitc Guitar) This algorithm is for use when simultaneously recording a vocal and acoustic guitar. For the guitar, you can produce a warm sound as though a mic were being used, even when an electric-acoustic is connected by a direct line. Parameter (full name) COMP (Compressor): Compressor the entire output signals when the input volume exceeds a specified value.
-
Page 185: Cosm Guitar Amp
6. COSM GUITAR AMP This is a multi-effect designed for electric guitar. This provides an amp sound using a preamp and speaker modeling. Speaker Compressor PreAmp Modeling Noise (*1) Equalizer Suppressor Parameter (full name) COMP (Compressor): Compressor the entire output signals when the input volume exceeds a specified value. Effect On/Off (Effect On/Off) Sustain (Sustain) Attack (Attack) - Page 186 Insert effect algorithm list EQ (Equalizer): A 4-band equalizer. Effect On/Off (Effect On/Off) Low Gain (Low Gain) Low-Mid Gain (Low-Mid Gain) Low-Mid Freq (Low-Mid Freq) Low-Mid Q (Low-Mid Q) High-Mid Gain (High-Mid Gain) High-Mid Freq (High-Mid Freq) High-Mid Q (High-Mid Q) High Gain (High Gain) Level (Output Level) WAH (Wah): The wah effect creates a unique tone by changing the frequency response characteristics of a filter.
- Page 187 Models the preamp section of a guitar amp. Set the desired type for Amp Type. JC-120 : The sound of the Roland “JC-120” (Jazz Chorus 120), a favorite of pro musicians around the world. CLEAN : The sound of a conventional built-in tube amp.
-
Page 188: Acoustic Mdl (Acoustic Guitar Modeling)
Insert effect algorithm list 7. ACOUSTIC MDL (Acoustic Guitar Modeling) This is a multi-effect designed for electric guitar. It allows you to use an electric guitar to produce sounds similar to those of an acoustic guitar. Acoustic Guitar Modeling Compressor Equalizer Noise Chorus Suppressor... - Page 189 EQ (Equalizer): A 4-band equalizer. Effect On/Off (Effect On/Off) OFF, ON Low Gain (Low Gain) -20–+20 dB Low-Mid Gain (Low-Mid Gain) -20–+20 dB Low-Mid Freq (Low-Mid Freq) 100–10.0 kHz Low-Mid Q (Low-Mid Q) 0.5–16 High-Mid Gain (High-Mid Gain) -20–+20 dB High-Mid Freq (High-Mid Freq) 100–10.0 kHz High-Mid Q (High-Mid Q)
-
Page 190: Bass Mdl (Bass Guitar Modeling)
Insert effect algorithm list 8. BASS MDL (Bass Guitar Modeling) Models the sound of a bass guitar. Obtain the sound of a bass guitar while playing an electric guitar. Bass (*1) Modeling Compressor Parameter (full name) B.MDL (Bass Modeling): Models the sound of a bass guitar. Effect On/Off (Effect On/Off) Character (Character) Level (Level) - Page 191 NS (Noise Suppressor): This effect reduces the noise and hum. Effect On/Off (Effect On/Off) OFF, ON Threshold (Threshold) * 0–100 Release (Release) 0–100 * High settings for the Threshold parameter may result in there being no sound when you play with your instruments volume turned down. Modulation effect type The Modulation effect type can be selected from the following effects.
-
Page 192: Acoustic Guitar
Insert effect algorithm list 9. ACOUSTIC GUITAR This is a multi-effect designed for acoustic guitar. Even when an electric-acoustic is connected at line level, this provides a warm sound similar to what is obtained through a microphone. Parameter (full name) ACP (Acoustic Processor): With this feature, you can change the sound from a pickup on an electric-acoustic guitar into a richer sound. - Page 193 NS (Noise Suppressor): This effect reduces the noise and hum. Effect On/Off (Effect On/Off) OFF, ON Threshold (Threshold) * 0–100 Release (Release) 0–100 * High settings for the Threshold parameter may result in there being no sound when you play with your instruments volume turned down. DLY (Delay): This creates a thicker sound by applying a delayed sound to the direct sound.
-
Page 194: Bass Multi (Bass Guitar Multi)
Insert effect algorithm list 10. BASS MULTI (Bass Guitar Multi) This is a multi-effect designed for bass guitar. Appropriate for creating standard bass sound. (*1) Enhancer Compressor Octave Noise (*3) Chorus Suppressor Parameter (full name) COMP (Compressor): Compressor the entire output signals when the input volume exceeds a specified value. Effect On/Off (Effect On/Off) Sustain (Sustain) Attack (Attack) - Page 195 High-Mid Gain (High-Mid Gain) -20–+20 dB High-Mid Freq (High-Mid Freq) 100–10.0 kHz High-Mid Q (High-Mid Q) 0.5–16 High Gain (High Gain) -20–+20 dB Level (Output Level) -20–+20 dB WAH (Wah): The wah effect creates a unique tone by changing the frequency response characteristics of a filter. Effect On/Off (Effect On/Off) OFF, ON Polarity (Polarity)
-
Page 196: Cosm Bass Amp (Cosm Bass Guitar Amp)
Insert effect algorithm list 11. COSM BASS AMP (COSM Bass Guitar Amp) This is a multi-effect designed for bass guitar. This features an amp sound that uses a preamp and speaker modeling. Compressor PreAmp Noise Chorus Suppressor Parameter (full name) COMP (Compressor): Compressor the entire output signals when the input volume exceeds a specified value. - Page 197 Speaker modeling The characters of the following types of speakers can be modeled. Set the desired type for Speaker Type. Speaker Type Cabinet Large Sealed enclosure Open-back enclosure Open-back enclosure Open-back enclosure * “On Mic” models sound when a dynamic microphone is used. “Off Mic”...
- Page 198 Insert effect algorithm list NS (Noise Suppressor): This effect reduces the noise and hum. Effect On/Off (Effect On/Off) Threshold (Threshold) * Release (Release) * High settings for the Threshold parameter may result in there being no sound when you play with your instruments volume turned down. Modulation effect type The Modulation effect type can be selected from the following effects.
-
Page 199: 12. Vocal Multi
12. VOCAL MULTI This is a multi-effect designed for vocals. It provides the basic effects needed for vocals. Compressor De-esser Enhancer Noise Chorus Suppressor Parameter (full name) COMP (Compressor): Compressor the entire output signals when the input volume exceeds a specified value. Effect On/Off (Effect On/Off) Sustain (Sustain) Attack (Attack) - Page 200 Insert effect algorithm list NS (Noise Suppressor): This effect reduces the noise and hum. Effect On/Off (Effect On/Off) Threshold (Threshold) * Release (Release) * High settings for the Threshold parameter may result in there being no sound when you play with your instruments volume turned down. Modulation effect type The Modulation effect type can be selected from the following effects.
-
Page 201: Voice Transformer
13. VOICE TRANSFORMER This is a multi-effect designed for vocals. Special effects can also be created using the Voice Transformer. Voice Noise transformer Suppressor Chorus Parameter (full name) VT (Voice Transformer): This controls the formants, allowing a variety of voice characters to be created. Effect On/Off (Effect On/Off) Formant 1 (Formant 1) Formant 2 (Formant 2) - Page 202 Insert effect algorithm list Available types of modulation and their effect Parameter (full name) [FLG] FLANGER (Flanger): The flanger effect gives a twisting, jet-airplane-like character to the sound. Effect On/Off (Effect On/Off) Rate (Rate) Depth (Depth) Manual (Manual) Resonance (Resonance) Separation (Separation) [CHO] CHORUS (Chorus): A sound with a subtly shifted pitch is added to the direct sound, making the final output...
- Page 203 [TRM] TRM/PAN (Tremolo/Pan): Tremolo is an effect that creates a cyclic change in volume. Pan cyclically moves the stereo position between left and right (when stereo output is used). Effect On/Off (Effect On/Off) OFF, ON Mode (Mode) TRM-TRI TRM-SQR PAN-TRI PAN-SQR Rate (Rate) 0–100...
-
Page 204: Glossary
On the CDX-1, a newly purchased CD-RW disc or one that has been used by a different device must be formatted by this system before it can be used. - Page 205 MIDI system exclusive messages used to operate multiple devices form a single device. The CDX-1 supports MMC. By using MMC, a MIDI device connect to the CDX-1 can be controlled by the CDX-1 to perform operations such as start, and fast-forward. Since MMC is intended to...
- Page 206 The process of using a multitrack recorder to record each part or instrument on a separate track. Mute To silence something. On the CDX-1, you can mute individual audio tracks by pressing the relevant [STATUS] button, extinguishing its light. Note number A number included in a MIDI note message to specify the note location on a keyboard.
- Page 207 XLR Jack The collective name for the “XLR” series jacks developed by Cannon Electric Corporation (USA) and compatible jacks manufactured by other companies. Also called “Cannon.” On the CDX-1, 3-pin XLR jacks are used for the mic inputs (1, 2). Glossary...
-
Page 208: Parameter List
Parameter List • The setting of the Tuner parameter, LCD Contrast parameter, System parameter and MIDI parameter are stored in internal memory. • When you operate saving the setting of Song, the settings of parameters with Mixer Parameter Parameter name Input Level Audio Track Fader Level Pad/Sequence Fader Level... -
Page 209: Time Stretch
Pad Recording Parameter Parameter name Data Type Sampling Type Start With Pre Triger Edit Pad Parameter Tempo Match Parameter name Base Sample Source Sample Divide Sample Parameter name Divide Type Source Sample Destination Pad Number Threshold Trim *1 Valid when “Threshold” is “ON.” *2 Valid when “Type”... -
Page 210: System Parameter
Parameter List Pad Bank Parameter Parameter name Bank Number Bank Name Foot Switch PAD Pad Bank Erase Parameter Parameter name Erase Bank Pad Bank Protect Parameter Parameter name Bank Number Pad Bank Protection Sequence Parameter Parameter name Sequence play ON/OFF Sequence track status Pad Sequencing Parameter Parameter name... -
Page 211: Midi Parameter
MIDI Parameter Parameter name Display Rhythm MIDI Channel Rhythm Ch. Pads Rx Channel Pads Rx Ch. Pads Note Number RxNote(Pad1) Pads Tx Channel Pads Tx Ch. MMC Mode MMC Mode Sync Out Sync Out MTC Type MTC Type Out/Thru Select Out/Thru CD-RW Disc Format Parameter Parameter name... -
Page 212: Midi Implementation
Device ID (10H or 7FH) MMC Command Message STOP (MCS) EOX (End of System Exclusive Message) If the device ID on the message was as same as that of the receiving 10H or 7FH, the CDX-1 stops immediately. PLAY (MCS) Status... -
Page 213: Transmitted Data
Device ID (10H or 7FH) MMC Command Message REWIND (MCS) EOX (End of System Exclusive Message) If the device ID on the message was as same as that of the receiving 10H or 7FH, the CDX-1 goes into the rewind condition. RECORD STROBE Status... -
Page 214: System Exclusive Message
Hours (0-23) Minutes (0-59) Seconds (0-59) Frames (0-29) EOX (End of Exclusive) If the time locate is operated effectively, the CDX-1 transmits as the device ID 7FH. MIDI Machine Control Commands Status Data Bytes Status 7FH, Dev, 06H, aaH, ..., bb... - Page 215 5. Appendices Decimal and Hexadecimal table (Hexadecimal number is shown with H.) In MIDI documentation, data values and addresses/sizes of system exclusive messages etc. are expressed as hexadecimal values for each 7 bits. The following table shows how these correspond to decimal numbers. +——————+——————++——————+——————++——————+——————++—————————————+ dec | hex ||...
-
Page 216: Midi Implementation Chart
MIDI Implementation MULTITRACK CD RECORDER / AUDIO SAMPLE WORKSTATION MIDI Implementation Chart Model CDX-1 Function... Basic Default Channel Changed Default Mode Messages Altered Note Number: True Voice Note On Velocity Note Off After Key's Touch Channel's Pitch Bend Control Change... -
Page 217: Mixer Block Diagram
Mixer Block Diagram INPUT 1 LINE L DIGITAL L INSERT Opt. / Coax. INPUT 2 GUITAR INPUT MIXER (IN 1 - IN 2) LINE R DIGITAL R Opt. / Coax. EQ SWITCH REC L INSERT REC R (2BAND) MIX L MIX R TRACK MIXER (TR 1 - TR 8) TRACK MIXER (TR 1 - TR 8) -
Page 218: Specifications
Specifications CDX-1: MULTITRACK CD RECORDER / AUDIO SAMPLE WORKSTATION Audio Data Format CDX-1 Original Format (R-DAC) Maximum Polyphony Monaural x 8 (Stereo x 4) (Total) Audio Tracks Number of Tracks: Maximum Simultaneously Playback Tracks: 8 Maximum Simultaneously Recording Tracks: 2... - Page 219 CD-RW Drive x12 (Write), x10 (Rewrite), x32 (Read), Power Supply DC 12 V: Supplied AC Adaptor (PSB-2U) Current Draw 2.8 A Dimensions 456.0 (W) x 330.0 (D) x 94.0 (H) mm 18 (W) x 13 (D) x 3-3/4 (H) inches Weight 5.0 kg/11 lbs (excluding AC adaptor) Accessories...
-
Page 220: Index
Index AC ADAPTOR Jack ... 30 ACOUSTIC GUITAR ... 192 ACOUSTIC MDL ... 188 Adjust Timing ... 104 Adjust Timing icon ... 104 AUDIO CD indicator ... 28 AUDIO CD PLAYER indicator ... 25 AUDIO CD RECORDER indicator ... 25 audio sample ... - Page 221 faded-in ... 71 faded-out ... 71 FF button ... 27 Finalize ... 136, 204 foot switch ... 75 FOOT SWITCH Jack ... 31 Formant ... 204 Format ... 110 Format Type ... 110 FROM button ... 27 GATE ... 70 GUITAR/BASS Jack ...
- Page 222 Power off ... 34 on ... 33 POWER Switch ... 26 Pre Trigger ... 62 Preset patches ... 141 Preview ... 139 Quantize ... 92 Realtime Recording ... 90 REC/CD RECORDER button ... 27 Redo ... 138 REPEAT button ... 27 Repeat function ...
- Page 223 Memo...
- Page 224 Memo...
- Page 225 Memo...
- Page 226 Information When you need repair service, call your nearest Roland Service Center or authorized Roland distributor in your country as shown below. SINGAPORE AFRICA AFRICA Swee Lee Company 150 Sims Drive, EGYPT SINGAPORE 387381 TEL: 846-3676 Al Fanny Trading Office P.O.
- Page 227 This product complies with the requirements of European Directive 89/336/EEC. FEDERAL COMMUNICATIONS COMMISSION RADIO FREQUENCY INTERFERENCE STATEMENT This equipment has been tested and found to comply with the limits for a Class B digital device, pursuant to Part 15 of the FCC Rules.
- Page 228 It is built into MD recorders and other consumer digital-audio equipment as a copyright- protection feature.) • Do not use this unit for purposes that could infringe on a copyright held by a third party. Roland assumes no responsibility whatsoever with regard to any infringements of third-party copyrights arising through your use of this unit.
- Page 229 As the result of recent upgrades, the descriptions in the Owner's Manual may not accurately represent the performance of some of the features of the CDX-1. To make sure you are fully aware of the newly added functionality, please read this booklet in conjunction with the Owner's Manual while you use the CDX-1.
-
Page 230: Compressing/Expanding A Sample According To The Tempo At Which Playback Was Stopped
Compressing/expanding a sample according to the tempo at which playback was stopped While playback is stopped, you can adjust the length of the sample according to the tempo of the location at which playback was stopped. This function makes it easy to adjust the sample length to match the tempo of a sequence track. -
Page 231: Modifying The Pitch Of A Sample To Create A New Sample-Pitch Change
Modifying the pitch of a sample to create a new sample—Pitch Change You can modify the pitch of a sample to create a new sample. 1. Press PAD RECORDING [TEMPO MATCH] twice. Alternatively, press [TEMPO MATCH] and then press CURSOR [ fig.31-03 The Pad Edit menu are displayed as icons. -
Page 232: Making Fine Adjustments To The Location At Which A Sample Starts/Ends
Making fine adjustments to the location at which a sample starts/ends When you arrange samples in a sequence track to create a song, you will sometimes need to make fine adjustments to the sample's start/loop points, or to its length. By using the {Preview function} or {Scrub function}, you can make precise and detailed adjustments while listening to the sound. - Page 233 Using scrub to set a point—Scrub Preview Scrub Preview repeatedly plays an extremely brief region (45 milliseconds) either before or after the point. At the same time, the sample waveform will be displayed in the screen. While monitoring the displayed waveform and the sound, you can turn the TIME/VALUE dial to easily make precise adjustments to the point.
-
Page 234: Adjusting The Crossfade Time
Adjusting the crossfade time You can adjust the time over which two pads will be exchanged by the Pad Crossfade function (Owner's Manual; p. 71). 1. Press [UTILITY]. The Menu are displayed as icon. fig.1-06 2. Press CURSOR [ System icon. 3. -
Page 235: Sequence Track
Exchanging the contents of sequence tracks —Exchange Track A sequence track and its corresponding audio track cannot be played back at the same time. For example, sequence track A and audio tracks 1-2 cannot be played back simultaneously. In such cases, you can exchange the contents of the sequencer track with another track, so that the sequence track and audio tracks can be played simultaneously. -
Page 236: Copying The Contents Of A Sequence Track-Copy Track
Copying the contents of a sequence track —Copy Track The contents of a sequence track can be copied to another sequence track. 1. Press PAD SEQUENCING [EDIT]. [EDIT] lights, and the Sequence Edit menu are displayed as icons. fig.34-10 2. Press CURSOR [ Copy Track icon. -
Page 237: Editing A Specified Region Of A Sequence Track-Region In/Out
Editing a specified region of a sequence track —Region In/Out In the Sequence Play List screen, you can specify a region, then edit only that region. You can also edit multiple tracks at once. Specifying the editing region 1. Press PAD SEQUENCING [SEQ PLAY]. [SEQ PLAY] lights, and the Sequence Play List screen appears. - Page 238 Editing a specified region of a sequence track Canceling an editing region To cancel an editing region that you've specified, perform the following. 1. Press PAD SEQUENCING [SEQ PLAY]. [SEQ PLAY] lights, and the Sequence Play List screen appears. 2. Press [YES/ENTER]. A mini-menu appears.
- Page 239 Cutting Segments—Cut This operation cuts the phrases of the specified region. Any phrases that followed the region will be moved forward. 1. Specify the region that you want to cut, as described in “Specifying the editing region” (p. 9) of this booklet. 2.
- Page 240 Editing a specified region of a sequence track Pasting to a Another Location—Paste This operation pastes the phrases of the specified region to another location. If there were any phrases in the paste-destination, they will be overwritten by the phrases from the specified region.
-
Page 241: Muting (Silencing) A Specific Audio Track
Muting (silencing) a specific audio track During playback, you can switch audio tracks between muted (silent) and playing statuses. 1. During playback, press [STATUS] for the audio track that you want to mute (silence). [STATUS] will change from green to blinking, and the sound of that audio track will be muted (silenced). -
Page 242: Using [Status] To Select The Track Whose Parameters You Want To Adjust
Using [STATUS] to select the track whose parameters you want to adjust When you want to adjust an audio track's mixer settings (pan, equalizer), or loop effect settings, you can also press [STATUS] for that audio track to select it directly. Setting the left/right position (pan) of each audio track Hold down TRACK EDIT [PAN] and press AUDIO TRACK [STATUS] that you want to adjust. -
Page 243: Preventing Tempo Data From Being Read From A Cd-Rw Disc
Preventing tempo data from being read from a CD-RW disc When pads or sequences are stored in internal memory, you can specify that the tempo data of a song saved on a CD-RW disc not be loaded when you insert a CD- RW disc on which pads or sequences have been saved. -
Page 244: Using The Tempo Of A Sample To Modify The Tempo Map
Using the tempo of a sample to modify the tempo map Here's how you can easily modify the tempo map to match a drum loop sample on which your song is based. 1. Press [UTILITY]. The Menu are displayed as icon. fig.1-06 2. -
Page 245: Using Pads/Sequences While You Mix Down
Song Information screen (Owner's Manual; p. 39). 1. Press AUDIO TRACK RECORD [MIX DOWN]. If the pads/sequences contained in the CDX-1’s internal memory, a message of “Also use PAD/SEQ for Mixdown?” appears, [MIX DOWN] blinks. -
Page 246: Editing The Mastering Tool Settings
Editing the Mastering Tool settings You can edit the mastering tool settings while you listen to the mixdown. Select one of the preset patches (P01–P21) that is closest to what you have in mind, and edit the patch settings Mastering Tools The mastering tools are a convenient set of tools that divide the sound into high- frequency, mid-frequency, and low-frequency ranges, and make the volume consistent so that the audio CD can be created with the optimal levels. -
Page 247: Saving The Mastering Tool Settings
Saving the mastering tool settings You can assign a name (patch name) to the mastering tool settings you've edited, and save your settings. This procedure is a continuation of “Editing the mastering tool settings,” above. Your edited patch can be saved at one of twenty-one patch numbers U01–U21, and recalled at any time, just like a preset patch. -
Page 248: Mastering Tools Parameter List
Mastering Tools parameter list The Mastering Tools is compressor that splits sounds into different frequency band to unify their volumes. Bass Cut Equalizer Filter Enhancer Compressor Mixer Limiter Parameter (full name) EQ (Equalizer): A 4-band equalizer. Effect On/Off (Effect On/Off) Input Gain (Input Gain) Low Type (Low Type) Low Gain (Low Gain) - Page 249 IN (Input): Specify the frequency points at which the original sound will be divided, so that the expander/compressor can be applied independently to the low, mid, and high frequency ranges. Input Gain (Input Gain) Input Delay (Input Delay) Lo Split Freq (Low Split Frequency) Hi Split Freq (High Split Frequency) Effect of “Input Delay”...
- Page 250 Mastering Tools parameter list COMP (Compressor) : Compressor the entire output signals when the input volume exceeds a specified value. Effect On/Off (Effect On/Off) Low Threshold (Low Threshold) Mid Threshold (Middle Threshold) Hi Threshold (High Threshold) Low Ratio (Low Ratio) Mid Ratio (Middle Ratio) High Ratio (High Ratio) Low Attack (Low Attack)
-
Page 251: Remembering The Icon That Was Last Selected In A Menu Screen
Remembering the icon that was last selected in a menu screen You can cause the icon that was last selected in the following menu screens to be remembered. This is convenient when you are repeatedly using the same menu item to edit, since you will not have to re-select the desired icon each time. -
Page 252: Synchronization With A Sequence Or Drum Machine
Synchronization with a Sequence or Drum Machine You can cause a MIDI sequencer or rhythm machine to operate in synchronization with the button operations of the CDX-1. 1. Use a MIDI cable to connect the CDX-1 and your MIDI sequencer as shown in the diagram. fig.5-02e...
Need help?
Do you have a question about the DiscLab CDX-1 and is the answer not in the manual?
Questions and answers