KaVo ESTETICA E70 Vision Short Instructions For Use
Hide thumbs
Also See for ESTETICA E70 Vision:
- Instructions for use manual (178 pages) ,
- Manual (176 pages) ,
- Care instructions (48 pages)
Table of Contents
Advertisement
Quick Links
Advertisement
Table of Contents

Related Manuals for KaVo ESTETICA E70 Vision


Summary of Contents for KaVo ESTETICA E70 Vision
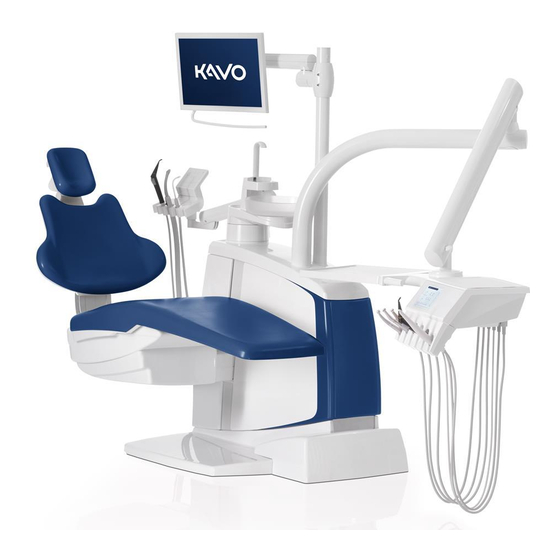
- Page 1 Short instructions for use ESTETICA E70 Vision / E80 Vision...
- Page 2 Distributed by: Manufacturer: KaVo Dental GmbH KaVo Dental GmbH Bismarckring 39 Bismarckring 39 88400 Biberach 88400 Biberach Germany Germany Phone +49 7351 56-0 www.kavo.com Fax +49 7351 56-1488...
-
Page 3: Table Of Contents
Table of contents Table of contents Controls ....................... 4 Dentist element T table and cart ............... 4 Dentist element S-table ................ 5 Assistant element.................. 6 Groups of keys .................. 7 Foot control ................... 9 Moving the patient chair ................ 10 Setting the function level ............... -
Page 4: Controls
Short instructions for use 1 Controls 1 Controls CAUTION These brief instructions for use only contain the es- sential operating functions. It does not substitute for the Instructions for Use and Servicing that are part of the scope of delivery. ▶... -
Page 5: Dentist Element S-Table
Short instructions for use 1 Controls 1.2 Dentist element S-table Tab "Treatment" ① ② Direct keys "Chair functions" "Most recent position" und "Rinse posi- tion" keys ③ ④ Display "Time of day" Display "User" ⑤ ⑥ Selection of type of treatment "Automatic positions"... -
Page 6: Assistant Element
Short instructions for use 1 Controls 1.3 Assistant element ① Direct keys "Chair functions" ② "Last position" key ③ "Rinse position" key ④ "Automatic positions" keys ⑤ "Timer" keys ⑥ "Bowl rinsing" key ⑦ "Tumbler filler" key ⑧ "Operating light dimming" key ⑨... -
Page 7: Groups Of Keys
Short instructions for use 1 Controls 1.4 Groups of keys Direct keys for chair functions ① ② Illuminated segment indicating the "Mode" key function level Name "SP" key (rinsing position) "LP" key (last position) "AP 1" key (automatic position 1) "AP 0"... - Page 8 Short instructions for use 1 Controls Name "Mode" key Direct keys for operating lights (selectable in "Settings" tab) Name Control element "Operating light" key Dentist element and assistant element "Operating light dimming" Dentist element and assistant element "Laser mode" key dentist element only Direct keys (selectable in "Settings"...
-
Page 9: Foot Control
Short instructions for use 1 Controls 1.5 Foot control Cable-connected foot control and wireless foot control ① ② Stirrup switch "LP/preselected spray" foot switch ③ ④ "Chair position/direction of motor rota- "SP/blown air" foot switch tion" cross switch ⑤ "Level preselection/handpieces" foot pedal "Chair position"... -
Page 10: Moving The Patient Chair
Short instructions for use 2 Moving the patient chair 2 Moving the patient chair 2.1 Setting the function level The keys of the button wheel have up to four functions. Therefore, when adjusting the chair position, always be aware of the active function level of the button wheel. The act- ive function level is indicated by the lighted quadrants. -
Page 11: Positioning The Patient Chair With The Foot Control
Short instructions for use 2 Moving the patient chair Dentist unit key Assistant unit key Function The chair moves up. The chair moves down. The backrest moves upward. The backrest moves down- ward. Setting the seat height and horizontal chair position (E80 Vision only) To treat small persons and children or to optimise the lumbar support, the seat can be lifted and lowered. - Page 12 Short instructions for use 2 Moving the patient chair Function Move to most recent position before actuation of the SP. Move to automatic position 0. Move to automatic position 1. Move to automatic position 2. Move to the collapsed position. ▶...
-
Page 13: Positioning The Motorised Headrest Manually
Short instructions for use 2 Moving the patient chair 2.5 Positioning the motorised headrest manually Pos. no. Setting Joystick Control element The headrest back- Press the joystick in Prerequisite: 2. ① wards the desired direction. Quadrant ⑥ lights up (function level 3). ②... -
Page 14: Moving The Patient Unit
Short instructions for use 3 Moving the patient unit 3 Moving the patient unit CAUTION The left armrest can collide with the manually adjus- ted patient's unit when the chair moves. Injury hazard. ▶ Each time before the chair is adjusted (automatic and manual), swing the manually adjusted patient's unit into resting position. -
Page 15: Operating The Touchscreen
Short instructions for use 4 Operating the touchscreen 4 Operating the touchscreen The use of the touchscreen is simple and always follows the same pattern. The touchscreen is subdivided into five menus (tabs): • Treatment menu • Timer menu • CONEXIO menu •... -
Page 16: Selecting The Dentist
Short instructions for use 4 Operating the touchscreen Menu Description Settings • User • Global settings Navigation and operation Symbol Function Description Tap the key to open func- tions or make settings. Selection list Click the "List" key to select an option from a list. -
Page 17: Setting/Operatings The Handpieces
Short instructions for use 4 Operating the touchscreen ▶ Tap the status message and follow the request. ð As soon as the error is remedied, this is recognised and the status message disap- pears from the display. 4.3 Setting/operatings the handpieces The various types of treatment and the handpiece-specific values can be displayed and set in the "Treatment"... - Page 18 Short instructions for use 4 Operating the touchscreen Extracted instrument Display Setting options SL 600 surgery motor in sur- • Treatment steps gery mode • Close surgery mode • Image selection for treatment step • Transmission ratio • Speed • Torque •...
-
Page 19: Using The Timer
Short instructions for use 4 Operating the touchscreen Symbol Function Tap the "Clockwise motor rotation" key to set the motor to clockwise rotation. Tap the "P1" key to set operating mode P1. Tap the "P2" key to set operating mode P2. Tap the "P3"... -
Page 20: Conexio Menu
Short instructions for use 4 Operating the touchscreen • Stopwatch (counts the time) ▶ Tap the arrow keys to set the timer time. ▶ Tap the "Save" key to save the value. ▶ Tap the "Cancel" key to quit without saving. ð... - Page 21 Short instructions for use 4 Operating the touchscreen Operations Presentation Feature Icon Selection of the image types that should be displayed (x-ray, intraoral camera) Tap the "Dental chart" key to filter im- ages according to teeth This icon is used to save newly recor- ded images.
- Page 22 Short instructions for use 4 Operating the touchscreen Icon Presentation Feature Presentation of the images in "tile view" Single image presentation Two image presentation Four image presentation Six image tile presentation Navigation and operation Icon Feature Change to image viewing mode Return to image overview Confirm action Cancel action...
-
Page 23: Settings Menu
• Dimmed light: approx. 4,000 Kelvin; equivalent to the light of a halogen operating light • Laser mode: Light mode with no detrimental effect on the KaVo KEY Laser III, the KEY Laser 3+ or the KaVo DIAGNOdent Turning the operating light On and Off Sensor KaVoLUX 540 LED ▶... - Page 24 Short instructions for use 4 Operating the touchscreen ▶ Tap the "Operating light" key again. ▶ Hold your hand just in front of the sensor. ð Operating light is switched off, key is not active. Setting the operating light ▶ Tap the "Operating light" key for long. ð...
- Page 25 Short instructions for use 4 Operating the touchscreen Switching COMPOsave mode ON/Off via the home screen or by sensor Requirement Use the Settings menu to activate the COMPOsave mode. ▶ Press the "Dim operating light" key. ▶ Put your hand in front of the sensor for 2 seconds. ð...
- Page 26 Short instructions for use 4 Operating the touchscreen ð Treatment light can be rotated 45° to the left or 45° to the right. ▶ Turn the switching ring to the right and it will spring back to its original position. ð...
-
Page 27: Operate Instruments With The Foot Control
Short instructions for use 5 Operate instruments with the foot control 5 Operate instruments with the foot control ▶ With the handpieces stored, press the foot pedal. ð The type of treatment advances upon each actuation of the foot pedal. ▶... -
Page 28: Menu "Conexio" Operate With Foot Control
Short instructions for use 5 Operate instruments with the foot control ▶ Press the "Blown air" foot button. ð As long as the footswitch is pressed, blown air exits the removed hand- piece (not with the PiezoLED) ▶ Slide the cross switch to the right. (spotlight function) ð... -
Page 29: Hygiene
Short instructions for use 6 Hygiene 6 Hygiene Reprocessing items/medical Cleaning Disinfection Sterilisa- devices tion manual auto- manual auto- auto- matic matic matic Surfaces Equipment Cushion Gripping sleeve, white Gripping sleeve, grey Light Monitor Dentist element Handpiece sleeve of the three- function or multifunctional hand- piece Cannula of the three-function or... -
Page 30: Cleaning Menu
Short instructions for use 6 Hygiene 6.1 Cleaning menu A selection from four different cleaning programmes can be made in the "Cleaning" menu: • After treatment • Morning • Evening • Weekly The following buttons are available for the hygiene functions: Function Tumbler filler The tumbler is being filled. - Page 31 Short instructions for use 6 Hygiene ▶ Take off the cover of the hygiene centre and place it down. ▶ Tap the button of the desired cleaning programme. ð The individual preparation steps are shown on the touchscreen and can be run in se- quence.
- Page 32 Short instructions for use 6 Hygiene ▶ Grasp the three-function or multifunctional handpiece on the adapter between hose and handpiece and take off the cannula and the gripping sleeve. ▶ Place the three-function or multifunctional handpieces without cannulas or gripping sleeves in the middle holders of the hygiene centre.
-
Page 33: Interrupt Cleaning Programs
Short instructions for use 6 Hygiene ▶ Place the COMFORTbase in the seat adapter. 6.3 Interrupt cleaning programs ▶ Tap the x" button to discontinue a cleaning programme. ▶ Tap the "Confirm" icon to discontinue the cleaning or tap the "x" button to continue the cleaning. -
Page 34: Cleaning Programs "Morning" And "Evening
Short instructions for use 6 Hygiene 6.5 Cleaning programs "Morning" and "Evening" Set rinsing time ▶ Tap "Settings" to open the "Settings" menu. ▶ Then tap "General settings" followed by "Advanced settings". ▶ Scroll down until "Morning" and "Evening" are displayed. ▶... -
Page 35: Intensive Germ Reduction During Prolonged Periods Of Non-Use
Short instructions for use 6 Hygiene ▶ During the active phase, do not place hoses in holders and, if applicable, do not switch off the treatment centre. ▶ Wait for the end of the active phase or switch on the treatment centre. ð... -
Page 36: Manual Internal Cleaning Of The Suction Hoses
Short instructions for use 6 Hygiene ▶ Switch on the water supply for the treatment unit after the system pressure is achieved. ▶ Replace the handpiece hoses of the dentist and assistant element in the places provided in the hygiene centre. ▶... -
Page 37: Replace The Dekaseptol Gel Bottle
Short instructions for use 6 Hygiene 6.9 Replace the DEKASEPTOL gel bottle Requirement The device must be turned on when changing DEKASEPTOL Gel bottle. ▶ Turn the device on. ▶ Remove the cover from the unit base. ▶ Unscrew the lid of the new DEKASEPTOL gel bottle. ▶... - Page 38 Short instructions for use 6 Hygiene Accessories: DEKASEPTOL refill canister (Mat. no. 1.000.7205) with drain tap (Mat. no. 0.224.6876) The touchscreen shows a status message when the bottle is taken out of the unit. In or- der to display the "No Dekaseptol bottle" status message, tap first the arrow and then the status message.
-
Page 39: Replace The Oxygenal 6 Bottle
Short instructions for use 6 Hygiene 6.10 Replace the OXYGENAL 6 bottle Only KaVo OXYGENAL 6 (Mat. no. 0.489.3451) should be used for KaVo water germ re- duction systems. ▶ Wipe up any spilled OXYGENAL immediately in order to prevent discolouration of the surfaces. -
Page 40: Check The Oxygenal 6 Concentration
Short instructions for use 6 Hygiene 6.11 Check the OXYGENAL 6 concentration ▶ Test the standard concentration 0.02% H (200ppm): Fill a measuring cup (40 ml) with 39 ml water and 1 ml treated water. ▶ Immerse a Merckoquant Peroxide Test Strip in the liquid. - Page 41 Short instructions for use 6 Hygiene ð Compare the colours and read the value: 5 mg/l is shown for a con- centration of 200ppm. Other concentrations can be tested using the following table: H2O2 concentra- Measuring cup Ratio water : Value shown on tion treated water...
-
Page 42: Charging The Wireless Foot Control
7 Charging the wireless foot control The wireless foot control has a built-in rechargeable battery. Note Charge the wireless foot control with the charger supplied by KaVo only. The wireless foot control charger may only be used indoors and must be protected from moisture. - Page 43 Short instructions for use 7 Charging the wireless foot control CAUTION Critical charge status of the battery If the battery reaches a critical charge status, a beep is issued every time a function key is pressed. ▶ Always charge batteries in due time! ▶...
-
Page 44: Warning Messages
Short instructions for use 8 Warning messages 8 Warning messages 8.1 Safety shut-down Safety shutdowns ① Patient element ② Inner side cover B E70 Vision: Inner side cover A ③ ④ E80 Vision: Support cover Backrest ⑤ ⑥ Bench Kickplate ⑦... -
Page 45: Troubleshooting
Short instructions for use 8 Warning messages Item Safety shutdown actuated Display LED on the as- sistant element Bench ⑤ Kickplate ⑥ ⑦ Seat base Stirrup on foot control ⑧ ▶ To deactivate an active safety shutoff, remove the trigger from the range of move- ment of the chair. - Page 46 Short instructions for use 8 Warning messages Malfunction Cause Remedy No spray in the in- No spray preselec- ▶ Preselect spray. struments. ted. Open the spray regu- ▶ Open the spray regulation in the instru- ment. lation in the instru- ment is closed.
-
Page 47: Additional Warning Messages
Short instructions for use 8 Warning messages Malfunction Cause Remedy The treatment unit is The wireless foot ▶ Check the on/off switch on the foot control and turn it on if necessary. not connected to the control is turned off. wireless foot control. - Page 48 Short instructions for use 8 Warning messages Malfunction Cause Remedy Status message: Malfunction in the ▶ Call a service technician. "Amalgam separator" amalgam separator. ▶ Note the amalgam separator warning notice. Also refer to: Operating instructions of the amalgam separator Emergency shut off ▶...
Need help?
Do you have a question about the ESTETICA E70 Vision and is the answer not in the manual?
Questions and answers