
Subscribe to Our Youtube Channel
Related Manuals for Arturia TAE ORIGIN


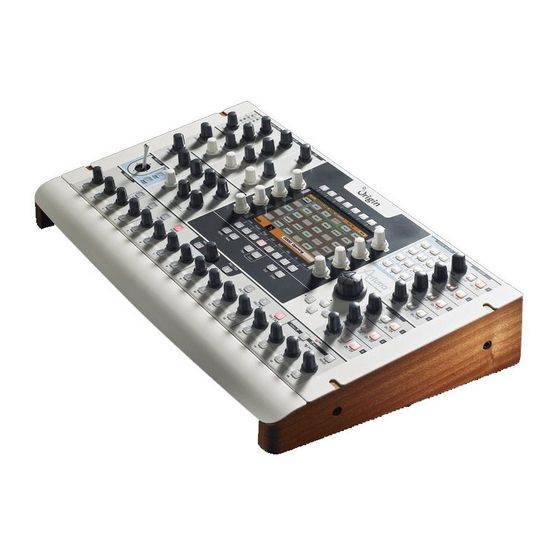
Summary of Contents for Arturia TAE ORIGIN
- Page 1 ’ ’ ARTURIA – ORIGIN – USER’S MANUAL...
- Page 2 Information contained in this manual is subject to change without notice and does not represent a commitment on the part of ARTURIA. The hardware unit and the software product described in this manual are provided under the terms of a license agreement or non-disclosure agreement.
- Page 3 Montagu, Pierre Cossard, Gavin Burke, Mickael Le Goff, Emilie de Fouchecour, Amélie Serpolet, Dapeng Hou, Guillaume Piolat, Guillaume Tonck, Nicolas Bronnec, Bruno Minatchy, Julian McDole, Damien Vandenbeyvanghe, Olivier Mary, Raphaël Loyet, Florent Balestrieri, Joffrey Saboukoulou, Thierry Duquesnes, Benjamin Gross, Jean-Philippe Rykiel, Celmar Engel, Bryan Borcherds. ARTURIA – ORIGIN – USER’S MANUAL...
-
Page 4: Table Of Contents
Connecting external MIDI equipment ............... 23 5.6.1 Using Origin as a sound module ..............23 5.6.2 Using Origin as a MIDI controller ..............23 5.6.3 MIDI channel settings – Getting ready to play..........23 ARTURIA – ORIGIN – USER’S MANUAL... - Page 5 [2D Env] tab ..................60 8.3.4 Galaxy tab .................... 62 8.3.5 LFO tabs ....................64 8.3.6 Common section..................65 8.3.6.1 [Mode] (Performance mode) ............... 66 8.3.6.2 Common parameters................. 66 [Edit] page....................67 8.4.1 [Rack] View ..................67 ARTURIA – ORIGIN – USER’S MANUAL...
- Page 6 [MIDI] EDIT ..................100 8.7.4 Advanced Joystick .................100 8.7.4.1 Overview ..................100 8.7.4.2 [Modes 1/2/3]................101 8.7.4.3 Selecting and configuring control destinations ........101 8.7.5 Encoders .....................102 8.7.5.1 Overview ..................102 8.7.5.2 Assigning Live Encoders from the front panel ..........102 ARTURIA – ORIGIN – USER’S MANUAL...
- Page 7 The filter or VCF ...................143 11.1.3.1 The filter types ................144 11.1.3.2 Resonance .................145 11.1.4 The amplifier or VCA ................146 11.2 Other modules ..................147 11.2.1 The keyboard ..................147 11.2.2 The envelope generator ................147 11.2.3 The low frequency oscillator..............148 ARTURIA – ORIGIN – USER’S MANUAL...
- Page 8 12.3.7 Origin to Origin transfer ................158 12.3.8 Computer to Origin transfer ..............158 12.4 Preset erase ....................158 12.5 Origin update...................159 ARTURIA ORIGIN SOFTWARE – LEGAL INFORMATION ..........160 13.1 SOFTWARE LICENSE AGREEMENT..............160 13.2 FCC INFORMATION (USA) ................162 13.3 CANADA ....................162 13.4 EUROPE....................162 Appendix ....................163...
-
Page 9: Special Message Section
Please consult a local electrician for more information on your power requirements. This product should be used only with the components supplied or recommended by ARTURIA. When used with any components, please observe all safety markings and instructions that accompany the accessory products. - Page 10 13. Do not expose the instrument to hot sunlight. 14. Do not use the instrument when there is a gas leak nearby. 15. ARTURIA is not responsible for any damage or data loss caused by improper operation of the instrument.
-
Page 11: Introduction
Before you explore and play the ARTURIA ORIGIN instrument, take time to read through this manual carefully, it’s packed with important information on how to get the most from this amazing instrument. -
Page 12: Tae
Below is the analysis of a waveform from one of the original instruments that ARTURIA’s software emulates, and that of the Origin. Both are equally deformed by the distortion caused by the capacitor discharge. -
Page 13: Direct Filter Circuit Modeling
Due to advances in DSP processing power, Origin can now employ direct filter modeling techniques to achieve unprecedented accuracy in the emulation of a hardware synthesizer’s filter. By modeling the operation of the individual hardware components of the filter circuit, the warm nuances ARTURIA – ORIGIN – USER’S MANUAL... - Page 14 ARTURIA’s virtual instruments and the one it is emulating. These harmonics are characteristic for analog filters and are due to the non-linear behavior inherent to its analog circuitry. The harmonics generated add to the richness and warmth of the sound produced by the filter.
-
Page 15: Hardware Settings
Unscrew right wood sides; Set the left screw for the exposure; Set the right screw for the contrast. ARTURIA – ORIGIN – USER’S MANUAL... -
Page 16: Origin's User Interface
The [Input Level] knob adjusts the input volume. The [Input bar graph] shows the level of the signal at Origin’s audio inputs. 4.1.3 Joystick section The [Joystick] controls up to four assignable parameters on its two axes Y and X. ARTURIA – ORIGIN – USER’S MANUAL... -
Page 17: Analog" Section
“Attack Level”. These two parameters can be controlled by the [Time] and [Level] envelope knobs. (See the “Modules Description” Chapter 10 for more details) 4.1.5 “Screen” section In this area you can find the LCD screen and its dedicated pages, buttons and features. ARTURIA – ORIGIN – USER’S MANUAL... -
Page 18: Sound Select] Section
The [On/Off] buttons mute the corresponding program preset when in multi mode. In program mode these buttons have no effect. 4.1.8 [Effects] section With this panel, you can control the return volume and the activity of the three effects outputs of a Program preset. ARTURIA – ORIGIN – USER’S MANUAL... -
Page 19: Sequencer] Section
[DC IN] Connection for the included AC/DC 6.5V power adaptor. [USB]: Input for connection with a computer. It can be used for MIDI IN and OUT communications or for data transfer (e.g. preset dump, software updates…) ARTURIA – ORIGIN – USER’S MANUAL... - Page 20 [Master out L/R]: Origin's main balanced stereo outputs. [Inputs L/R]: These connectors are mainly used to connect external audio devices (CD player, synthesizers, etc.) so they can be processed through Origin’s filters and effects. [Headphones]: ¼ inch stereo headphone output. ARTURIA – ORIGIN – USER’S MANUAL...
-
Page 21: Connections
Origin synthesizer or other audio equipment. Please use caution. 5.1 Connecting the AC/DC power supply Connect the included AC/DC power supply to the Origin synthesizer. After you’ve connected the AC/DC power supply to Origin, plug it into an AC outlet. ARTURIA – ORIGIN – USER’S MANUAL... -
Page 22: Connecting Origin To Headphones
5.5 Connecting pedals and switches Two jacks ([EXPRESSION] and [FOOT SWITCH]) are provided so that you can connect both a foot switch and an expression pedal (both sold separately) to Origin for additional control. ARTURIA – ORIGIN – USER’S MANUAL... -
Page 23: Connecting External Midi Equipment
You can connect any audio source (synthesizer, CD player, output of a mixer, etc.) to the [INPUT] jacks. By using this connection, you can process the audio coming from this external source the same way as Origin’s internal sound generators. ARTURIA – ORIGIN – USER’S MANUAL... -
Page 24: The Origin Structure
You can access this area by pressing the [EDIT] button, just below the LCD screen. The modular synthesis structure allows venturing in one of the most powerful technology for sound creation. First, you can choose the basic audio modules: ARTURIA – ORIGIN – USER’S MANUAL... - Page 25 1 Key follow and 1 keyboard trigger The red lines are the audio connections, the green ones are the modulation connections and the yellow ones are the keyboard follow and keyboard trigger connections. A modular structure example ARTURIA – ORIGIN – USER’S MANUAL...
-
Page 26: The Multi Preset
MIDI channel for up to four parts of multi timbral operation. Alternatively you can assign all programs to the same MIDI channel to set up layering or keyboard-split patches. An example using an external MIDI sequencer for a multitimbral arrangement ARTURIA – ORIGIN – USER’S MANUAL... -
Page 27: Quick Start
The start-up screen appears in the display, when the machine is ready, the [Home] page is displayed. Each time you turn the power on, ORIGIN will be in the Program Play mode. Turn on the other audio equipment that’s connected to ORIGIN. Turn the power “On” ARTURIA – ORIGIN – USER’S MANUAL... -
Page 28: Adjusting The Volume
To stop the song, press the jog dial (or press the [Exit] button). You can select another song using the jog dial or the cursor buttons. To listen to it, follow the steps above. Select the demo song ARTURIA – ORIGIN – USER’S MANUAL... -
Page 29: Playing Program Presets
We’ll choose [JMB]. Following the above steps, select [Key 2] and choose [Type]. Here you can select which types of sounds are displayed. We’re looking for a pad, so we’ll scroll down to choose [Pad]. ARTURIA – ORIGIN – USER’S MANUAL... -
Page 30: Editing The Preset
Change the cutoff of the sound In the same way, you can increase or decrease the frequency of oscillator 1 by turning [Frequency] knob on the [Oscillator] panel. To adjust the frequency of oscillator 2 turn the [Select] ARTURIA – ORIGIN – USER’S MANUAL... -
Page 31: Saving Your Program
Then, choose its location. For example, select the number [600]. The name [-EMPTY-] appears on the screen. Press on the jog dial and select the rename area. Press the key pads them as you wish in the three sections. ARTURIA – ORIGIN – USER’S MANUAL... -
Page 32: Add A Module To Your Preset
The [RACK] view The [PATCH] interface shows the synthesis diagram with all used modules with their audio, modulation and trigger’s connections. It is the best way to a global view of your sound construction. ARTURIA – ORIGIN – USER’S MANUAL... -
Page 33: Using The Minimoog Template
[PGRM], [MULTI] and [NEW]. Press the contextual button situated directly above [NEW]. On the [NEW] tab you can open different synthesizer templates, for this quick start we will use the Minimoog template. ARTURIA – ORIGIN – USER’S MANUAL... - Page 34 There is already a sound loaded so you can start playing straight away. To modify the sound a bit more to our personal taste, try turning the [Cutoff] and [Resonance] knobs on the [Filter] section of the “Analog Section”, on the front panel. ARTURIA – ORIGIN – USER’S MANUAL...
- Page 35 [Envelope] section. By default, the amplitude envelope is selected for editing. To change this, turn the [Select] encoder in the [Envelope] section. When the LCD screen displays the envelope you want to edit, press the [Select] encoder. ARTURIA – ORIGIN – USER’S MANUAL...
- Page 36 [Velocity] control. Now go to the right slot of the upper row and select [Cutoff] using the same method. Select the velocity modulation source The knob in the middle allows you to change the amount of the modulation. ARTURIA – ORIGIN – USER’S MANUAL...
-
Page 37: The [Multi] Mode
Select the preset n°053 named “Cosmology” on the second mixer slot by pressing on the jog dial and using the [▲/▼] arrows. Press the jog dial another time to validate this choice. The new [MULTI] preset ARTURIA – ORIGIN – USER’S MANUAL... -
Page 38: Using The Step Sequencer
[Seq1 / Seq2 / Seq 3] switches activate or deactivate the corresponding sub- sequence. [Edit > Seq1, Seq2, Seq3 > Pattern] switch selects which sub-sequence can be controlled by the [Sequencer] section. When [Pattern] is selected, this button activates pattern selection mode. ARTURIA – ORIGIN – USER’S MANUAL... - Page 39 However, if you want quantized filter modulation, or unquantized oscillator modulation, you can activate or deactivate this function for each sequence separately. ARTURIA – ORIGIN – USER’S MANUAL...
- Page 40 (from I to P) and number (from 1 to 16) Press the [Save] button another time to confirm the saving action. NOTE: When you save your Program sound, the appropriate sequence will be saved with it. Save sequence as ARTURIA – ORIGIN – USER’S MANUAL...
-
Page 41: Adding Modulation With The Galaxy Module
7.12 The effects section A section of 3 effects slots allows you to add up to 3 master effects to your sound. They are accessed by pressing the [Effect] page button situated below the LCD screen. ARTURIA – ORIGIN – USER’S MANUAL... -
Page 42: The Chorus
Set the [Link] option to “Off” and turn the 2 knobs [TIME L] /[ TIME R] to set the speed of the repetitions for the right and left side: (Time Right/Time Left) It is also possible to set the number of repetitions (Feedback) for each side ([Feedbk R] and [Feedbk L]) ARTURIA – ORIGIN – USER’S MANUAL... - Page 43 Origin interface. In this area, you can also directly open the desired effect slot by pressing the [Edit] switches and bypass their activity by using the [ON / OFF] switches. ARTURIA – ORIGIN – USER’S MANUAL...
-
Page 44: Editing
You can also view and edit various system parameters through the [System tab]. This section of the manual describes all of these features and functions in detail. The home page ARTURIA – ORIGIN – USER’S MANUAL... -
Page 45: Main] Tab
1255). When a PROGRAM is selected, the panel shows the preset ID, name, designer, project type and synth template. The [PROGRAM INFO] area When a [MULTI] is selected, the panel shows the preset ID, name, designer and project. ARTURIA – ORIGIN – USER’S MANUAL... -
Page 46: Demo] Tab
The [Demo] button can be used to stop songs as well. When a demo is playing, the back light behind the [Demo] button is active and the selected demo has a red square at the far right of its name. ARTURIA – ORIGIN – USER’S MANUAL... -
Page 47: The [System] Tabs
[HOME] when operating within the [SYSTEM SETTINGS] tabs. This allows you to navigate back to the [MAIN] Home tabs after you have modified the desired SYSTEM settings. ARTURIA – ORIGIN – USER’S MANUAL... -
Page 48: The [Midi] Tab
Origin's operation. It is the first screen you see when you turn on your Origin for the first time. This is to give you the chance to enter your [Owner Name] (see below). All of the [SETTING] tab fields and their respective values are described below. ARTURIA – ORIGIN – USER’S MANUAL... - Page 49 [Auto Connect]: ON /OFF: When this setting is set to on, Origin automatically makes the most vital connections necessary when creating your own programs. For example, the oscillator and filter frequencies are connected to the keyboard follow, the envelope ARTURIA – ORIGIN – USER’S MANUAL...
-
Page 50: Reset] Button
There are some additional information fields in the lower right area of the display. Software ID and Serial Numbers are provided for reference when updating software. It can also be useful for troubleshooting when requesting support from and providing information to ARTURIA. 8.1.4.3... -
Page 51: The Three Types Of Presets - Program, Multi And New
Program/Multi data. Selecting a preset number from 0000-0999 jumps to the [PGRM] tab (if it is not already the active tab), values from 1000-1255 jumps to the [MULTI] tab (if it is not already the active tab). The preset tabs ARTURIA – ORIGIN – USER’S MANUAL... -
Page 52: Program] Preset
In a Multi, the FX as well as step Sequencer, arpeggiator, and 2D Envelope and Galaxy modulation settings are shared among all Programs. The [MULTI] preset tab ARTURIA – ORIGIN – USER’S MANUAL... -
Page 53: New] Preset
Using the “Stereo Filters” templates, the audio inputs are directly connected into two filters. Those filters are connected in parallel thru 2 output VCAs modules. This preset uses 3 effects: Distortion, delay and reverb. ARTURIA – ORIGIN – USER’S MANUAL... -
Page 54: Factory And User Presets
The [▲/▼] cursors allow you to scroll though lists of presets, this allows for faster searching. Using these knobs, the preset is not loaded automatically. To load the preset, press the data “dial” or the [Enter] button. ARTURIA – ORIGIN – USER’S MANUAL... -
Page 55: Program And Multi Filters
Below is a listing of the Key categories and their respective values. [Synth]: Origin, Minimoog (future firmware versions will offer more ARTURIA Classic Analog Synth templates) [Type]: Ambient, Arpeggio, Bass, Bell, Brass, FM, FX, Guitar, Keyboard, Lead, Pad, Percussive, Sequence, String, Other. -
Page 56: Multi Filtering
8.2.4.3 Delete a preset You can delete a User Program (any preset location above [0399]) or Multi location (above [0999]) by pressing the Delete button, on the upper right corner of the Preset page. ARTURIA – ORIGIN – USER’S MANUAL... -
Page 57: Program] Page
Some of the controls available on this page are duplicates of hardware controls that are on the front panel of the Origin, such as the audio and Fx [MIXER] sections. The program page ARTURIA – ORIGIN – USER’S MANUAL... -
Page 58: Audio And Fx [Mixer]
[Pan]: These knobs control the panoramic placement of the VCA. This knob controls the same parameter as the pan knob found on the corresponding VCA module in the [Edit] page. ARTURIA – ORIGIN – USER’S MANUAL... -
Page 59: Serial] Routing
These knobs control the same parameter as the [Dry/wet] knobs on the [FX] page. You can also use the hardware knobs found on the [Effects] section of Origin’s front panel to control this parameter. ARTURIA – ORIGIN – USER’S MANUAL... -
Page 60: [2D Env] Tab
Press on the jog dial again (or on the [Enter] button) to open the destination menu. Choose a destination ([VCF1 FM] for example) using the jog dial and press on it again to validate this choice. ARTURIA – ORIGIN – USER’S MANUAL... - Page 61 The time settings are created by selecting one of the four dedicated [T1…T5] boxes located in the bottom right of the joystick graphic. You can also select the number value using the jog dial and set the corresponding value from 1 to around 10,000ms. ARTURIA – ORIGIN – USER’S MANUAL...
-
Page 62: Galaxy Tab
By changing phi, we can rotate the A/B plane with respect to the X/Y plane. However, when phi is static (not modulated), the outputs of the Galaxy is still quite simple waveforms. ARTURIA – ORIGIN – USER’S MANUAL... - Page 63 Set the waveforms and the frequencies of the respective LFOs using the [▲/▼] buttons and to the jog dial. Set the waveforms and the frequencies of the respective LFOs Set the initial position of the Phi angle using the [▲/▼] buttons and to the jog dial. ARTURIA – ORIGIN – USER’S MANUAL...
-
Page 64: Lfo Tabs
When sync is set to off, the [Freq] knob has its own (logarithmic) scale. [Shape]: This selection box allows you to select the shape (or waveform) of the LFO. Origin’s LFOs offer 5 waveforms; sine, triangle (tri), sawtooth (saw), square and random. ARTURIA – ORIGIN – USER’S MANUAL... -
Page 65: Common Section
To go on the common area interface, press on the [▲/▼] buttons and press the jog dial (the common area is highlighted in red) to enter in edition. To go out of this area, press again on the jog dial or on the [Enter] button. ARTURIA – ORIGIN – USER’S MANUAL... -
Page 66: Mode] (Performance Mode)
[Sustain]: This selection box determines if the current program responds to sustain pedal messages. [Pitch Bend]: This selection box determines if the current program responds to pitch bend messages. ARTURIA – ORIGIN – USER’S MANUAL... -
Page 67: Edit] Page
There are three rows of eight module slots, making a total of 24 positions where modules can be instantiated. However, it should be noted that you are limited to population of 20 modules per program. ARTURIA – ORIGIN – USER’S MANUAL... -
Page 68: Patch] View
“shuffles” into the correct position or it “snaps” to the first available open slot in the [rack] view. The virtual analog modules that are based on the classic synthesizer emulations of ARTURIA's world- class plug-ins (Minimoog V, CS-80 V, ARP 2600 V, Jupiter-8V and Prophet-V/VS) are labeled and have the general look and feel of the classic synths they emulate. -
Page 69: Editing Functions
This control allows you to select a module to instantiate within a program. When you activate the left most button along the top of the LCD screen, a drop down menu appears that allows you to ARTURIA – ORIGIN – USER’S MANUAL... - Page 70 The Filters (up to 4 Filters modules simultaneously): Origin ARP 2600 CS-80 Minimoog Jupiter-8 The Envelopes (up to 8 envelope modules simultaneously) The VCAs (up to 4 VCA modules simultaneously) The LFOs (up to 4 LFO modules simultaneously) ARTURIA – ORIGIN – USER’S MANUAL...
-
Page 71: Open/Edit/Close A Module
(and could ruin an otherwise sublime editing session). 8.4.3.3 [Change] module It is possible to exchange the virtual analog oscillators and filters, whether to adjust for routing/sound capabilities or to compensate for relative DSP/CPU consumption. ARTURIA – ORIGIN – USER’S MANUAL... -
Page 72: Move]
The [Move] function is only available in the [patch] view. When pressing the [Move] button you can move the currently highlighted module to any position in the patch view. This can be useful when you have a complicated patch and want to get a clear overview of its structure. ARTURIA – ORIGIN – USER’S MANUAL... -
Page 73: Remove]
Simply highlight the targeted module using the jog dial or [▲/▼] or [◄/►] buttons on the front panel of the Origin, and press the [Remove] button. Removing a module NOTE: If you have an empty RACK slot highlighted, the [Remove] button is inactive. ARTURIA – ORIGIN – USER’S MANUAL... -
Page 74: View]
Regardless of the Memory Protect setting, you cannot save to Factory preset locations. You can save/load presets in locations 0400-0999 for Programs and [1100-1255] for Multis when Memory Protect is set to OFF. ARTURIA – ORIGIN – USER’S MANUAL... -
Page 75: Save As / Name A New Program Preset
This directs you to the location number of the new preset. Turn the jog dial to select a new location number (or use the key pads). Then, press the [Enter] button to validate the number selection. ARTURIA – ORIGIN – USER’S MANUAL... -
Page 76: Multi] Page
You can get a sense of the power of Origin multis through experimenting with the Factory presets. Try using them with your host sequencer or recording application - or - try some as splits and layers on your keyboard or other MIDI controller in a live performance context. ARTURIA – ORIGIN – USER’S MANUAL... -
Page 77: Creating A [Multi] Preset
At this point, you haven’t created a multi yet. Navigate to the second slot of the multi mixer and press the [Enter] button or the data dial. A pop-up appears: “Create a new multi?” ARTURIA – ORIGIN – USER’S MANUAL... -
Page 78: Adding Programs (Presets 0000 - 0999) To A Multi
A screen appears that functions similar to the [PRGM] tab on the [Preset] page, here you can choose the program you want to load in the selected slot (see chapter 6.2 for more details on the preset page). Select a new Program on a Multi preset ARTURIA – ORIGIN – USER’S MANUAL... -
Page 79: Multi Mixer Functions
This combination of presets provides a sound result which could be impossible to get on a single Program preset. To create a Multi preset using a layering between several Program presets, simply set the same [MIDI] channel for each Mixer slot. In this way, all Programs play simultaneously. ARTURIA – ORIGIN – USER’S MANUAL... -
Page 80: Split
The [On/Off] buttons on Origin’s front panel mixer can be used to toggle programs on or off. This setting is saved with the multi and recalled when you load it again. The hardware Multi mixer ARTURIA – ORIGIN – USER’S MANUAL... -
Page 81: Editing Programs From The [Multi] Page
Press the [Save] button on the front panel and you are directed to a screen that prompts you to save the Multi, as well as its corresponding Programs and any Sequencer presets that may have been used for one of those Programs. ARTURIA – ORIGIN – USER’S MANUAL... -
Page 82: Saving A Multi As
(or use the key pads). Then, press the [Enter] button to validate the number selection. Then, go to the change the name, press the different key pads to enter the characters you wish – letters or numbers- and press the [Enter] button to validate the name entry. ARTURIA – ORIGIN – USER’S MANUAL... -
Page 83: The Step Sequencer
VCF, or on the square waveform width of a VCO. The interface of the sequencer consists of three main parts: The sequencer page ARTURIA – ORIGIN – USER’S MANUAL... -
Page 84: The Sequencer's Hardware Real Time Controllers
It gives an effect of portamento between the selected step and the following step. The [Lock] button allows holding a particular step to it self. This button locks the currently playing step until the [Lock] button is pressed again to deactivate it. This option ARTURIA – ORIGIN – USER’S MANUAL... -
Page 85: Edit A Sequence
Three tabs are available for editing the sequencer. You can find them above the main screen: The [All] tab gives you an overview of the sub [Seq] 1, 2 and 3 screens. The [All] sequences page The [Seq 1 … 3] tabs select the corresponding sub-sequence 1…3 for editing. ARTURIA – ORIGIN – USER’S MANUAL... -
Page 86: Edit A Sub-Sequence
The sub-sequence edition screens allow you to go deeply and precisely into the sequencer settings. To edit a particular sub-sequence, press the [Seq 1 > 3] tabs to select the corresponding sub- sequence 1…3. ARTURIA – ORIGIN – USER’S MANUAL... - Page 87 Use the jog dial to cycle through the values of the amount of modulation sent by the sub- sequence. Changing values takes immediate effect. Press the “data” or the [Enter] button to commit the value. ARTURIA – ORIGIN – USER’S MANUAL...
-
Page 88: The [Global] Settings Of The Sequencer
The [Rate] sets the subdivision of the steps length from the internal or MIDI tempo. [Modes] allows to select the playing mode of the sequence: [FWD] Playing the sequence forward [BWD]: Playing the sequence backward [FWD/ BWD]: Playing the sequence forward and backward ARTURIA – ORIGIN – USER’S MANUAL... -
Page 89: Save] And [Save As] A Sequence
Browse a new bank letter using the jog dial, then, press the jog dial again or the [Enter] button to validate the choice. Choose a memory number from [1 to 16] using the jog dial then, press the jog dial again or the [Enter] button to validate the choice. ARTURIA – ORIGIN – USER’S MANUAL... -
Page 90: The [Swap] Option
To open the arpeggiator interface, enter the [Sequencer] page and press the [ARPEG.] tab situated above the main screen. ARTURIA – ORIGIN – USER’S MANUAL... -
Page 91: Effects [Fx] Page
You can have direct hands-on control over the effects using the knobs and buttons in the hardware [EFFECTS] section of the front panel as well as the ability to assign parameters to the front panel LIVE encoders (see section 9.8 of this manual for more information). ARTURIA – ORIGIN – USER’S MANUAL... -
Page 92: Fx Page Layout, Navigation And General Control
For quickly setting return or dry/wet levels, as well as activating or bypassing effects, the easiest method is to use the [Effects] front panel controls. Simply adjust the correct return knob to adjust the effects returns or press the On/Off button to deactivate the effect completely. When you select ARTURIA – ORIGIN – USER’S MANUAL... -
Page 93: Effects Modules In Detail
OFF, the base rate of the internal LFO can be set independently. [Shape]: This switch controls whether the internal LFO is based on a sine wave or a low frequency noise signal. ARTURIA – ORIGIN – USER’S MANUAL... -
Page 94: Delay
Remember that you can also assign "Live" front panel encoders to any of these virtual knobs for real time control of the effect during performance. ARTURIA – ORIGIN – USER’S MANUAL... -
Page 95: Distortion
You can use it for many different purposes, from wild effects to the classic phasing of the 70’s (Genesis, Pink Floyd, Yes, Weather Report…). Origin’s dual phaser includes two phasers that can operate in parallel or serial modes. ARTURIA – ORIGIN – USER’S MANUAL... -
Page 96: Live Page
These tabs are selected by the corresponding button along the top of the LCD screen. These include: The [Live] tab (which is the default for the Live page) The Oscillator Macro Edit [OSC] tab ARTURIA – ORIGIN – USER’S MANUAL... -
Page 97: The [Live] Tab
The [Live] page details This page is divided into three sections: The far left and right sections show the assigned parameter of the 8 individual live encoders. ARTURIA – ORIGIN – USER’S MANUAL... -
Page 98: Macro Edit Tabs
8.7.3.3 [Filter] Tab This screen allows you to decide which Filter module in the current Program is affected by the filter “macro mode” setting: ARTURIA – ORIGIN – USER’S MANUAL... -
Page 99: Lfo] Tab
You are able to control up to 6 LFOs simultaneously, depending on the number of LFOs that are selected for your program preset. 8.7.3.5 [ENV] Tab This screen allows you to decide which Envelope module from the current Program is affected by the envelope “macro mode” setting: ARTURIA – ORIGIN – USER’S MANUAL... -
Page 100: Midi] Edit
The [Joystick] tab is where the destination of the X and Y axis of each joystick “mode” is selected and edited. In most cases, you can jump to this tab directly by selecting the [Assign] button in the [JOYSTICK] area of the front panel of the Origin. ARTURIA – ORIGIN – USER’S MANUAL... -
Page 101: Modes 1/2/3]
NOTE: You can select more than one destination for any given axis in any particular joystick mode. Each destination can have its own scaling factor and "B/U" designation. This can make for some extremely varied, subtle, and complex levels of control - and puts the “advanced” the Advanced Joystick. ARTURIA – ORIGIN – USER’S MANUAL... -
Page 102: Encoders
Then press down on the desired Live encoder until you feel a “click” underneath the knob and see the selected parameter changes color to reflect the encoder you have selected. Assigning the left “red” and “blue” encoders to filter 1 ARTURIA – ORIGIN – USER’S MANUAL... - Page 103 Also note that when you return to the Live tab on the Live page, the new assignment is now reflected in the location of the display corresponding to that Live Encoder. ARTURIA – ORIGIN – USER’S MANUAL...
-
Page 104: Modules
Go to the “connection” menu’s box using the jog dial or the [▲/▼] or the [◄/►] buttons. Press the jog dial or the [Enter] button to open the menu and select a new modulation input. ARTURIA – ORIGIN – USER’S MANUAL... -
Page 105: Modular Synthesis Modules
47%, what gives it a very particular sound), the [Wide rectangle] and [Narrow rectangle]. NOTE: Origins’s Minimoog oscillator offers a pulse width modulation input that was not available on the original Minimoog. ARTURIA – ORIGIN – USER’S MANUAL... - Page 106 The “White noise” waveform ([white no]) produces acoustic energy across a broad spectrum of frequencies with no discernible “fundamental” or harmonic signature. For this reason, the noise module is used to create different noises like the imitation of wind or special effects. ARTURIA – ORIGIN – USER’S MANUAL...
-
Page 107: Arp 2600 Oscillator
The sound of the ARP oscillator can be very precise and sharp (especially due to its precise tuning when compared to, for example, the Moog oscillators). This is especially true for the sawtooth waveform which sounds more “aggressive” than the other oscillators. The ARP 2600 oscillator ARTURIA – ORIGIN – USER’S MANUAL... - Page 108 [Audio]: This is the audio output of the oscillator. You can for example connect this output to a mixer module to mix the oscillator signal with other audio modules. Alternatively you can connect it directly to a filter or VCA module. ARTURIA – ORIGIN – USER’S MANUAL...
-
Page 109: Oscillator
LFO for vibrato effects, of use another oscillator for FM sounds. This can yield interesting results for inharmonic sonorities like bell sounds, but it can also be quickly distorted if you introduce a square or sawtooth signal. ARTURIA – ORIGIN – USER’S MANUAL... -
Page 110: Jupiter-8 Oscillator
The [Sawtooth] presents the richest audio signal of the waveforms. It contains all of the harmonics at decreasing volume levels in high frequencies. Its sound is ideal for brass sounds, bass sounds or rich lead and pads. ARTURIA – ORIGIN – USER’S MANUAL... - Page 111 When the two oscillators are not in tune, this phase reset causes sudden jumps in the waveform which generates the typical sharp sync sound. ARTURIA – ORIGIN – USER’S MANUAL...
-
Page 112: Origin Oscillator
The [Width] knob allows you to manually modify the waveform cycle of the square wave. This feature is only available when the square waveform is selected. ARTURIA – ORIGIN – USER’S MANUAL... -
Page 113: Wavetable Oscillator
VCO's. The original Prophet VS used four of these oscillators which could be mixed by a joystick. This configuration was capable of creating interesting and highly controllable sonic spectra. Using Origin’s Joymixer, you can emulate the same configuration. The Wavetable oscillator ARTURIA – ORIGIN – USER’S MANUAL... -
Page 114: Filters
24dB etc. Most filters used in classic analog synthesizers have 24 dB/Oct or 12 dB/Oct slopes. The filter slope can also be expressed in poles; you can calculate the slope in ARTURIA – ORIGIN – USER’S MANUAL... -
Page 115: Minimoog Filter
The result is interesting for filter sweeps or “wah-wah” like sonorities. The Amount knob allows you to set the depth of the selected modulation. The Bipolar or Unipolar selector allows you to set the polarity of the selected modulation. • The Output connections: ARTURIA – ORIGIN – USER’S MANUAL... -
Page 116: Arp 2600 Filter
The result is interesting for filter sweeps or “wah-wah” like sonorities. The Amount knob allows you to set the depth of the selected modulation. The Bipolar or Unipolar selector allows you to set the polarity of the selected modulation. ARTURIA – ORIGIN – USER’S MANUAL... -
Page 117: Filter
“wah-wah” like sonorities. The Amount knob allows you to set the depth of the selected modulation. The Bipolar or Unipolar selector allows you to set the polarity of the selected modulation. • The Output connections: ARTURIA – ORIGIN – USER’S MANUAL... -
Page 118: Jupiter-8 Filter
The envelope or LFO are the most common modules to modulate the cutoff frequency. The result is interesting for filter sweeps or “wah-wah” like sonorities. The Amount knob allows you to set the depth of the selected modulation. ARTURIA – ORIGIN – USER’S MANUAL... -
Page 119: Origin Filter
The Input connections: [Audio]: This is the audio input of the filter. You can connect it to the output of an oscillator or a mixer if you use several oscillators (or other audio modules). ARTURIA – ORIGIN – USER’S MANUAL... -
Page 120: Output (Amplifiers)
The Minimixer allows you to set and mix the volume of 5 audio modules. The most common use of the mixer is to set the output volume from several VCO outputs. NOTE: You can use up to four mixers in a Program. ARTURIA – ORIGIN – USER’S MANUAL... -
Page 121: The Modulation Modules
Each possessing has a slope setting with the “Slope” knob, an Axis note can be chosen in the “Axis” display. ARTURIA – ORIGIN – USER’S MANUAL... -
Page 122: Envelope
The envelope1 is automatically connected to the first VCA by default and controls the volume amplitude. The envelope [Attack]: Sets the attack time when a note is trigged ON. This control is affected by default to the hardware [Attack] knob, located in the [Envelope] area. ARTURIA – ORIGIN – USER’S MANUAL... -
Page 123: Lfo
VCA; etc. The poly(phonic) LFO [Rate]: setting parameter for the LFO frequency • [Shape]: This is the selection for the audio output of the three wave forms: Saw tooth Triangle ARTURIA – ORIGIN – USER’S MANUAL... -
Page 124: Ring Modulator
Once connected, “Mul Signal Input” becomes the source of the multiplicative signal. The depth and the frequency of the internal sinusoid can be modulated with the corresponding modulation inputs. The ring modulator [Depth]: Sets the amplitude for the multiplication of the audio signals ARTURIA – ORIGIN – USER’S MANUAL... -
Page 125: Bode Frequency Shifter
The Amount knob allows you to set the depth of the selected modulation. The Bipolar or Unipolar selector allows you to set the polarity of the amount of modulation. • The Output connections: ARTURIA – ORIGIN – USER’S MANUAL... -
Page 126: Joymixer
[Audio A…D]: These are the dedicated inputs for an audio module on each of the 4 joystick points. [Mod X]: Connect a modulation sources to automate the modulation of the X axis. [Mod Y]: Connect a modulation sources to automate the modulation of the Y axis. ARTURIA – ORIGIN – USER’S MANUAL... - Page 127 The Amount knob allows you to set the depth of the selected modulation. The Bipolar or Unipolar selector allows you to set the polarity of the amount of modulation. • The Output connections: [Output]: This is the output connection of the JoyMixer. ARTURIA – ORIGIN – USER’S MANUAL...
-
Page 128: The Minimoog Template
[NEW]. On the [NEW] tab you can open different synthesizer templates, select the Minimoog using the jog dial or the cursors, then validate by pressing the jog dial or the [Enter] button. ARTURIA – ORIGIN – USER’S MANUAL... -
Page 129: Minimoog Structure
10.3.1 Minimoog structure The Minimoog template offers the following modules: 3 Oscillators (Oscillator 3 can also be used as modulator) Noise generator External input 24 dB/Oct resonant lowpass filter ARTURIA – ORIGIN – USER’S MANUAL... -
Page 130: The Interface
To view the interface of the Minimoog template, go to the [Edit] page. The [Edit] page shows the main interface which is a graphic representation of the original Minimoog. This main interface shows the following screen sections: Modulation matrix Controls Oscillator bank Mixer ARTURIA – ORIGIN – USER’S MANUAL... -
Page 131: Oscillator Bank
(only works on the [Edit] page). Below is a detailed description of each screen section of Origin’s Minimoog template 10.3.2.1 Oscillator Bank This section contains all the parameters of the three independent oscillators of the Minimoog template. ARTURIA – ORIGIN – USER’S MANUAL... -
Page 132: Mixer
[Osc Modulation]: This switch at the bottom activates or deactivates the frequency modulation of oscillator 1 and 2 by oscillator 3. 10.3.2.2 Mixer The mixer sets the balance between all the sound sources of the Minimoog template before the signal is sent to the filter. ARTURIA – ORIGIN – USER’S MANUAL... -
Page 133: Filter / Modifiers (Envelopes)
[Amount]: (amount of contour): This knob sets the amount of filter modulation by the filter envelope. [Attack]: This knob sets the attack time of the filter envelope. [Decay]: This knob sets the decay time of the filter envelope. ARTURIA – ORIGIN – USER’S MANUAL... -
Page 134: Output (Vca Amplifier)
The controllers [Tune]: This knob adjusts the main tune of the Minimoog template. In the default center setting, the Minimoog template is tuned to 440Hz which is the most common tuning in modern music. ARTURIA – ORIGIN – USER’S MANUAL... -
Page 135: Keyboard Section
Minimoog template. It is organized in 8 rows: each row contains a source selector, a modulation amount knob and a destination selector. By default all selectors are set to [Off] and all modulation amounts knobs are set to zero position. ARTURIA – ORIGIN – USER’S MANUAL... -
Page 136: Lfo
The Minimoog’s LFO [Rate]: This knob sets the rate (or frequency) of the LFO. When the [MIDI Sync] selection box (see below) is switched to [On] the rate is synced to the internal or external clock ARTURIA – ORIGIN – USER’S MANUAL... - Page 137 When sync is On, turning the [Rate] knob chooses only frequencies that are integer multiples or divisions of the master tempo. When sync is set to Off, the [Rate] knob has its own (logarithmic) scale. ARTURIA – ORIGIN – USER’S MANUAL...
-
Page 138: The Basics Of Subtractive Synthesis
We can think of the oscillator like a violin string that once stroked or plucked, vibrates to create its sound. An Oscillator module on Origin The main oscillator settings are: ARTURIA – ORIGIN – USER’S MANUAL... -
Page 139: The Pitch
(or wave length). This can be done manually with the help of a knob [PW] or by modulation (with an envelope or LFO). This pulse width variation translates to a spectrum modification, resembling a waveform change. ARTURIA – ORIGIN – USER’S MANUAL... - Page 140 The sinusoid is the purest of them all. It is a single harmonic and produced a very “damped” sound. It can be used to reinforce the low frequencies of a bass sound or as a frequency modulator in order to create harmonics that don’t exist in the original waveforms. ARTURIA – ORIGIN – USER’S MANUAL...
-
Page 141: Synchronization
(this signifies that it is not tuned to the same tonality!) The more you tune oscillator2 upwards, the more you can encounter composite waveforms. ARTURIA – ORIGIN – USER’S MANUAL... -
Page 142: Frequency Modulation
Origin contains two types of mixers: The [Minimixer] where you can individually set the volume coming from up to 5 oscillators (or any other audio sources). The [Minimixer] doesn’t have a modulation input so the settings are done manually. ARTURIA – ORIGIN – USER’S MANUAL... -
Page 143: The Filter Or Vcf
(or dB/Oct). The filters used in classic analog synthesizers have 24 dB/Oct or 12 dB/Oct slopes. Origin gives you access to several types of filtering: 6, 12 and 24 dB/Oct slopes. The removal of undesirable frequencies at the cut-off frequency ARTURIA – ORIGIN – USER’S MANUAL... -
Page 144: The Filter Types
The band pass [BP] filter is the combination of a low pass filter and a high pass filter: it eliminates the frequencies found on either side of the cut-off frequency. Use it to make a certain band of frequencies that you wish to emphasize appear. This makes the sound more “pinched”. ARTURIA – ORIGIN – USER’S MANUAL... -
Page 145: Resonance
(below the cut-off frequency) or reduced (above the cut-off frequency). When you increase the resonance, the filter becomes more selective, the cut-off frequency is amplified, and the sound begins to “whistle”. The resonance amplifies frequencies close to the cut-off frequency ARTURIA – ORIGIN – USER’S MANUAL... -
Page 146: The Amplifier Or Vca
(or directly from the oscillator if it is not being filtered) to be adjusted before the volume is sent to the speakers. The Origin’s VCA In conclusion, here is a diagram that should help you to understand the composition of a basic sound: Basic sound signal path ARTURIA – ORIGIN – USER’S MANUAL... -
Page 147: Other Modules
The ADSR Envelope Both envelopes of the [Joymixer] and [2D envelop] contain 5 points numbered 0 to 4. The 0 corresponds to the initial level of the parameter associated to the envelope. The Release ARTURIA – ORIGIN – USER’S MANUAL... -
Page 148: The Low Frequency Oscillator
A sine waveform from an LFO modulating the frequency of an oscillator would produce a vibrato effect. With an LFO sinusoid wave modulating the cut-off frequency of a lightly resonant low-pass filter, you can obtain a “wah-wah” effect. ARTURIA – ORIGIN – USER’S MANUAL... -
Page 149: Complements To Wavetable Synthesis
The connections of these modulations are available in the “POLY MOD” module. 11.3 Complements to Wavetable Synthesis The Origin synthesizer uses the wave table synthesis technology on the same principles as subtractive synthesis. The difference resides in the type of oscillators used: the Wavetable ARTURIA – ORIGIN – USER’S MANUAL... - Page 150 These samples were recorded from different acoustic (instruments, voice) or electronic (noise, atonal sounds, basic wave forms) sources and allow you to enrich the sonic pallet offered in the “analog” oscillators while remaining complementary. The wavetable oscillator of Origin ARTURIA – ORIGIN – USER’S MANUAL...
-
Page 151: Origin Connection - User's Manual
The Sound Banks and Backups are stored in the application preset folder. Typically: (for Windows users) C:\Program Files\ARTURIA\Origin Connection\Presets\ (for Mac OS X users) /User/Documents/Origin Connection/Presets/ There are two subfolders: Sound Banks for the sound banks, and Backup for the dumps. -
Page 152: Origin Update
Computer panel is showed on the left and an Origin panel on the right. There is a status bar at the bottom which gives some info to the user. Origin Connection main panel ARTURIA – ORIGIN – USER’S MANUAL... -
Page 153: Origin Panel
[Search 1 / 2]: these two buttons are key search buttons. It allows users to select among keys to find presets. The keys are Synth (Origin, Minimoog…), Type (Ambient, Arpeggio, Bass, Bell…), Project or Designer. [Erase]: erases the selected program(s) on Origin. ARTURIA – ORIGIN – USER’S MANUAL... -
Page 154: Computer Panel
The list of dumps and banks in the Computer panel corresponds to the file in the directory Backups and Sound Banks in the user preset folder. On each one, you will find all your Programs, Multi and Sequence presets. ARTURIA – ORIGIN – USER’S MANUAL... -
Page 155: Uses Cases And Menus
When you click on [OK] button the Backup process starts. It takes from one minute to several depending on the number of presets to be saved. You can cancel the Backup process by pressing the cancel button on the progress window. Creating a new backup ARTURIA – ORIGIN – USER’S MANUAL... -
Page 156: Reloading Existing Backups
To reload an existing Backup on Origin, you have to click on the menu Action > Reload Existing Backup. Choose Backup to be able to reload all Dumps. When the [OK] button is clicked, the process starts. The process time is approximately the same as the backup time. ARTURIA – ORIGIN – USER’S MANUAL... -
Page 157: Preset Transfer
Consequently, the sequence number in a Bank is limited to 128 (from I1 to P16). In the same way, a Bank can not contain two sequences from the same slot. For instance, if ARTURIA – ORIGIN – USER’S MANUAL... -
Page 158: Computer To Computer Transfer
The slots corresponding to selected presets will become empty. It is the same thing for deleting presets in Banks, you will just need to select the presets and press the Erase button. ARTURIA – ORIGIN – USER’S MANUAL... -
Page 159: Origin Update
The firmware update generally takes about 20 minutes, but it may take more time depending on the computer’s performance. The firmware update menu WARNING! Never interrupt the update process once the operation starts! It could produce some irremediable troubles on the Origin’s DSP. ARTURIA – ORIGIN – USER’S MANUAL... -
Page 160: Arturia Origin Software - Legal Information
13.1 SOFTWARE LICENSE AGREEMENT Grant of License In consideration of payment of the Licensee fee, which is a portion of the price you paid, ARTURIA, as Licensor, grants to you, the Licensee, a nonexclusive right to use this copy of the ORIGIN Software application (hereinafter the “SOFTWARE”) on a single computer at a time. - Page 161 (b) replacement of the disk that does not meet the Limited Warranty and which is returned to ARTURIA with a copy of your receipt. This limited Warranty is void if failure of the SOFTWARE has resulted from accident, abuse, modification, or misapplication. Any replacement software will be warranted for the remainder of the original warranty period or thirty (30) days, whichever is longer.
-
Page 162: Fcc Information (Usa)
1. Important notice: DO NOT MODIFY THE UNIT! This product, when installed as indicate in the instructions contained in this manual, meets FCC requirement. Modifications not expressly approved by ARTURIA may avoid your authority, granted by the FCC, to use the product. -
Page 163: Appendix
6.5VDC 3.85A Origin Laptop/ Rack 482 x 290 x 87 mm Dimensions (W × D × H) Origin Keyboard 1020 x 325 x 420 mm Origin Laptop/ Rack 8 kg Weight Origin Keyboard 18 kg ARTURIA – ORIGIN – USER’S MANUAL... -
Page 164: Midi Implementation Chart
Foot Switch 98, 99 RRPN (LSB, MSB) Program Change 0-127 0-127 System Common: Song Position Song Select Tune System Internal Clock Aux Messages: Local On/Off All Notes Off * Origin Keyboard / Origin Laptop ARTURIA – ORIGIN – USER’S MANUAL...
Need help?
Do you have a question about the TAE ORIGIN and is the answer not in the manual?
Questions and answers