Weinmann MEDUMAT Standard2 Instructions For Use Manual
Hide thumbs
Also See for MEDUMAT Standard2:
- Instructions for use manual (272 pages) ,
- Step-by-step instructions (28 pages) ,
- Additional information (24 pages)

Related Manuals for Weinmann MEDUMAT Standard2


Summary of Contents for Weinmann MEDUMAT Standard2
- Page 1 MEDUMAT Standard Ventilator Instructions for use for devices from software version 4.15...
-
Page 2: Table Of Contents
Table of Contents Table of Contents Introduction About this document ..............6 Explanation of warnings ..............7 Safety Safety information ................. 8 Intended purpose ................8 Requirements for the user ............10 Safety information ............... 11 General instructions ..............21 Description Overview .................. - Page 3 Table of Contents 4.12 After use ..................97 4.13 Using the SD card ................ 98 4.14 Enabling options ............... 100 4.15 Updating the software ............... 102 4.16 Pairing an external data documentation system with the device for the first time (using the Bluetooth data transmission option) ..105 4.17 Using the simulation mode ............
- Page 4 Table of Contents 8.12 Cleaning and disinfection plan ........... 196 Function check Intervals ..................201 Preparing for the function check ..........201 Performing a function check ............202 Failed function check ..............210 Testing the reusable hose system ..........210 Checking the system for leaks ............
- Page 5 Table of Contents 14.3 Exported log files ............... 259 14.4 Scope of supply ................. 261 14.5 Warranty ................... 267 14.6 Declaration of Conformity ............268 MEDUMAT Standard...
-
Page 6: Introduction
1 Introduction Introduction 1.1 About this document This document describes all possible versions of the device. Functions, accessories and other parts which are described in this document or shown in the images depend on the version purchased and are not always available. If device functions can only be enabled through procurement of a certain option, this is marked in this document by the amendments "(optional)"... -
Page 7: Explanation Of Warnings
1 Introduction 1.2 Explanation of warnings Danger! DANGER indicates a hazardous situation that, if not avoided, will result in death or serious injury. Warning! WARNING indicates a hazardous situation that, if not avoided, could result in death or serious injury. Caution! CAUTION indicates a hazardous situation that, if not avoided, could result in minor or moderate injury. -
Page 8: Safety
2 Safety Safety 2.1 Safety information The instructions for use form part of the device. If the instructions for use and the following safety information are not fully complied with, the treatment may fail or be compromised. This could cause severe or life-threatening injuries to the patient, user or bystanders. - Page 9 2 Safety 2.2.2 User Qualified medical personnel (e.g., paramedics, emergency physicians). 2.2.3 Intended application areas • Primary care at the site of the emergency, e.g., to resuscitate or induce and maintain anesthesia • Transport between hospital rooms and departments • Transport between the hospital and other sites in an ambulance, ship, airplane or helicopter •...
-
Page 10: Requirements For The User
2 Safety • Overinflation of the lung tissue (e.g., lung rupture) • Overinflation of the stomach during mask ventilation (e.g., aspiration of stomach contents) 2.2.6 Exclusions and restrictions for intended purpose The device is not approved for the following applications: •... -
Page 11: Safety Information
2 Safety 2.4 Safety information 2.4.1 How to use the device Warning Risk of poisoning if the device is used in a toxic atmosphere! If the device is used in a toxic atmosphere, it can suck in toxic gases from the ambient air. These toxic gases may reach the lungs of the patient and poison them. - Page 12 2 Safety Risk of injury if the pneumatic connections within the device are closed off or blocked! When oxygen is supplied via a central gas supply system which has not been properly cleaned or is moist, the pneumatic connections within the device may become blocked by contaminants or particles or suck in moisture.
- Page 13 2 Safety Risk of injury from operating the device, accessories and components outside of the prescribed ambient conditions! Use of the device, accessories and components outside of the prescribed ambient conditions may mean that tolerances are not adhered to and result in device failure and injury to the patient. ⇒...
- Page 14 WEINMANN Emergency MODUL range! If the device is used together with devices from the WEINMANN Emergency MODUL range, the flow used by devices from the WEINMANN Emergency MODUL series may cause pressure variations in the device. This can injure the patient.
- Page 15 The power supply contains a safety device to prevent electric shock. The use of a non-original power supply may result in injury to the user. ⇒ Only operate the device on line power using the power supply recommended by WEINMANN Emergency. MEDUMAT Standard...
- Page 16 This can lead to injuries to the user, patient or third parties. ⇒ Only operate the device using the battery recommended by WEINMANN Emergency. ⇒ Only use an unopened, undamaged battery. Caution Risk of injury from touching the contacts in the battery compartment and the patient at the same time! The contacts in the battery compartment are live.
- Page 17 2 Safety Caution Risk of injury from touching the contacts on the FlowCheck sensor connection line/FlowCheck sensor connection line with MEDUtrigger and the patient at the same time! The contacts on the FlowCheck sensor connection line/FlowCheck sensor connection line with MEDUtrigger are live. Touching the contacts and the patient at the same time can injure the user or the patient.
- Page 18 2 Safety Risk of injury due to ventilation pressures which are too high or too low! Ventilation pressures which are too high or too low may result in injury to the patient. ⇒ Check correct ventilation on the display. ⇒ Adjust the maximum ventilation pressure (pMax) to suit the connected patient.
- Page 19 2 Safety Risk of injury due to unsuitable concentrator gas! Unsuitable concentrator gas may distort treatment and result in injury to the patient. ⇒ Only use concentrator oxygen (90% to 96% oxygen) or medical oxygen. Risk of injury if the patient valve is covered! The patient valve may be covered due to the position of the patient and prevented from functioning properly.
- Page 20 2 Safety ⇒ Do not use open flames. ⇒ Ensure adequate ventilation. ⇒ Keep the device and screwed unions free from oil and grease. ⇒ Always close the SD card cover again following the insertion and removal of the SD card. Risk of injury if oxygen escapes from damaged oxygen cylinders or pressure reducers! Oxygen can escape unchecked from damaged oxygen cylinders or...
-
Page 21: General Instructions
• Repairs, servicing and maintenance should only be carried out by the manufacturer, WEINMANN Emergency, or by a technician expressly authorized by WEINMANN Emergency. The device’s service and repair instructions are available to the latter; these contain all the information required. - Page 22 2 Safety • The power supply unit/charger is not intended for use in vehicles or outdoors. Only use the power supply unit/charger in closed rooms and observe the technical data (see "14.1 Technical data", page 232). • Risks due to software errors have been minimized by means of extensive qualification measures.
-
Page 23: Description
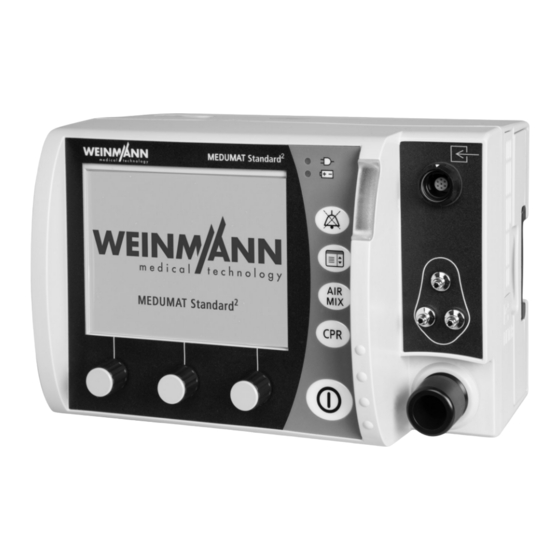
3 Description Description 3.1 Overview 3-1 Device Designation Description Displays settings and current values Display (see "3.4 Symbols on the display", page 31). Used for servicing purposes. May only be opened by Service cover the manufacturer or persons authorized by the manufacturer. - Page 24 3 Description Designation Description Filter compartment Houses the hygiene filter. Battery compartment with battery Houses the battery. Power connection Connects the device to the power supply. Used for connecting the oxygen supply (e.g., an Compressed gas connection oxygen cylinder). SD card slot For inserting an SD card.
-
Page 25: Control Panel
3 Description 3.2 Control panel 3-2 Controls Designation Description • Steady green light: Indicates that the device is connected to line power. • Not illuminated: The device is operating on Line power indicator battery power and not on line power. The device is in NVG mode. - Page 26 3 Description Designation Description • Pressing the button briefly (< 1 s) mutes the alarm for 120 s. Alarm mute button • Keeping the button depressed (≥ 1 s) opens the alarm limit menu. • In the start menu: Provides access to the operator menu.
-
Page 27: Display
3 Description 3.3 Display 3.3.1 Start menu 3-3 Start menu display Designation Description Battery status Displays the charge level of the battery. Indicates whether the audio alarm output is active or Alarm has been muted. Time Displays the current time. 100% O Indicates whether operation with 100% oxygen or Air Mix... - Page 28 3 Description 3.3.2 Ventilation mode (example) 3-4 Display in the views 1 (pressure, CO curve) (top left), 2 (pressure gauge, measurements) (top right), 3 (etCO trend) (center left), 4 (pressure, flow curve) (center right), 5 (CPR CCSV) (bottom left), 6 (pressure curve, measurements) (bottom right) MEDUMAT Standard...
- Page 29 3 Description Designation Description • Indicates ventilation pressure progress. • Indicates pMax as a dotted line. • Indicates the currently attuning airway pressure as a green area. Pressure gauge • Indicates the maximum airway pressure in the middle. • Indicates the end-tidal CO concentration (etCO in the middle (only with capnography option).
- Page 30 3 Description Designation Description • Indicates the total respiratory rate. • Indicates the number of spontaneous breaths per Respiratory rate (f(fsp)) (only with flow measurement + ASB option) minute. • Indicates the associated upper alarm limit. • Displays whether manual or automatic chest compression is set.
-
Page 31: Symbols On The Display
3 Description 3.4 Symbols on the display Symbol Designation Description Audio alarm output active Audio alarm output muted for 120 s (with the Alarm symbol exception of an alarm at a supply pressure < 2.7 bar) Acoustic alarm output permanently muted (NVG mode only) Battery status >... - Page 32 3 Description Symbol Designation Description Device is ready for use Device is not ready for use Function check symbol Fault found during function check Observe the instructions for use Repair necessary Metronome sound in CPR mode is switched on Metronome sound in CPR mode is switched off Period during which the device is in the CPR mode Ventilation mode symbols...
-
Page 33: Components
3 Description Symbol Designation Description Manual chest compression Operation with manual chest compression Automatic chest Operation with chest compression device compression 3.5 Components 3.5.1 Overview 3-5 Components MEDUMAT Standard... - Page 34 3 Description Designation Description FlowCheck sensor connection line with Connects MEDUtrigger and the FlowCheck sensor to MEDUtrigger the device. FlowCheck sensor connection line Connects the FlowCheck sensor to the device. Inhalation adapter Facilitates inhalation. Ventilation mask Connects the patient hose system to the patient. Protects the device from viral and bacterial Hygiene filter contamination.
- Page 35 3 Description 3.5.2 Reusable hose system and disposable hose system 17 16 * Optional components 3-6 Reusable hose system (top) and disposable hose system (bottom) MEDUMAT Standard...
- Page 36 3 Description Designation Description Service label (only with reusable hose Indicates the date when the next maintenance is due. system) Hose protection sleeve (only with Protects the ventilation hose against soiling reusable hose system) and damage. • Fixes the patient hose system to the patient's clothing.
- Page 37 3 Description Designation Description The device measures the patient's vital parameters via the measuring hose system. The measuring hose system comprises: • Measuring hose system connector Measuring hose system • PEEP control hose • Pressure-measurement hose • measuring hose (only with capnography option) The water filter protects the measuring chamber of the Water filter (only with capnography...
- Page 38 3 Description Designation Description Due to the check valve diaphragm, the respiratory gas Check valve diaphragm only flows towards the patient. No rebreathing takes place. Connects the patient valve to the ventilation hose and Holder for check valve diaphragm contains the check valve diaphragm. 3.5.4 Disposable hose system with reduced dead space 3-8 Disposable hose system with reduced dead space...
- Page 39 3 Description Designation Description Patient valve Switches between inspiration and expiration. Connects MEDUtrigger and the FlowCheck sensor to FlowCheck sensor connection line with the device. Alternatively, you can also connect the MEDUtrigger (only with flow FlowCheck sensor connection line or the connection measurement + ASB option) line of MEDUtrigger here.
-
Page 40: Accessories
3 Description Designation Description Hose clip Keeps the hoses and the connection line together. The respiratory gas flows from the device to the Ventilation hose patient valve through the ventilation hose. 3.6 Accessories 3-9 Accessories Designation Description Charging station Facilitates external battery charging. Used for reading session data and log files and SD card updating the device software. -
Page 41: Options
Description FlowCheck sensor Measures the flow to the patient and to the device. Simulates a ventilated patient for presentation EasyLung for WEINMANN Emergency purposes and during a function check. Power supply Supplies power to the device. Serves to ensure that the respiratory air is filtered and Breathing system filter conditioned. -
Page 42: Labels And Symbols
3 Description 3.8 Labels and symbols 3.8.1 Labels on the product 3-10 Labels on the product Symbol Description Device information label Serial number Type BF applied part Input (12 V to 15 V) DC voltage Type of protection against electric shock: Protection class II device MEDUMAT Standard... - Page 43 3 Description Symbol Description Do not dispose of device in household waste. Manufacturer Degree of protection against: • Ingress of solid objects IP54 • Ingress of dust • Ingress of water with harmful effect CE mark (confirms that the product complies with the applicable European directives) Other labels and symbols 2.7 bar-6 bar O...
- Page 44 3 Description Symbol Description 13 / 14 Type BF applied part 3.8.2 Symbols on the battery 3-11 Symbols on the battery Symbol Description Battery fault, if fault indicator light is red Battery status 3 / 9 Observe the instructions for use. Date of manufacture Serial number Manufacturer...
- Page 45 3 Description Symbol Description China RoHS label (confirms that the product does not emit toxic substances for the number of years indicated) Battery clicks audibly into place 3.8.3 Symbols on the patient hose system 3-12 Symbols on the patient hose system MEDUMAT Standard...
- Page 46 3 Description Symbol Description Reusable hose system and disposable hose system Indicates the correct installation direction of the PEEP control diaphragm. CE mark (confirms that the product complies with the applicable European directives) Calendar clock for year and month Observe the instructions for use. Additional symbols, for reusable hose system only Indicates the correct flow direction during inspiration.
- Page 47 3 Description 3.8.4 Symbols on the device information label of MEDUtrigger Symbol Description Device information label Degree of protection against electric shock: Type BF device Do not dispose of device in household waste. CE mark (confirms that the product complies with the applicable European directives) Degree of protection against: •...
- Page 48 3 Description Symbol Description Storage humidity range limits Fragile Serial number CE mark (confirms that the product complies with the applicable European directives) Battery Article number Storage temperature range limits Keep dry Storage humidity range limits Serial number Manufacturer Patient hose system (reusable hose system and disposable hose system) Latex-free Latex Storage temperature range limits...
- Page 49 3 Description CE mark (confirms that the product complies with the applicable European directives) Manufacturer Additional symbols, for disposable hose system only Disposable item, do not reuse Expiration date Hygiene filter Article number Observe the instructions for use Storage humidity range limits Disposable item, do not reuse Manufacturer Storage temperature range limits...
-
Page 50: Preparation And Operation
4 Preparation and operation Preparation and operation 4.1 Mounting the device The device is mounted on a portable unit as standard and is ready for use. Observe the instructions for use of the portable units. 4.2 Connecting to a power supply Loss of power due to combination of the device with an incorrect power supply! If you use a portable unit which combines MEDUMAT Standard... -
Page 51: Using The Rechargeable Battery
4 Preparation and operation 4. If necessary: If operating on the portable unit, mount the portable unit on a wall mounting with charging interface. Connect the device to the power supply using the charging adapter (WM 28979) and the 100 W power supply. Connect the device up to the vehicle’s electrical system with the charging adapter (WM 28979) and 12 V cable. - Page 52 4 Preparation and operation • Battery is not yet fully charged (< 95% charge level) • Battery temperature between 0°C and 45°C If the device is switched on, the green arrow appears in the battery status symbol on the display (example: ) and the battery status indicator on the device flashes green.
- Page 53 4 Preparation and operation Fault indicator Status LEDs Status button 4-1 Status indicator on the battery Status indicator Explanation Meaning 4 LEDs are lit Battery status > 90% Battery status approx. 3 LEDs are lit 60%-90% Battery status approx. 2 LEDs are lit 40%-60% Battery status approx.
- Page 54 4 Preparation and operation Device If the device is switched on, you can see the battery status on the display: Status indicator Meaning Battery status > 90% Battery status approx. 60%-90% Battery status approx. 40%-60% Battery status approx. 10%-40% Battery status < 10% •...
-
Page 55: Connecting Components
4 Preparation and operation 4.3.5 Changing the battery Requirement The replacement battery is fully charged. 1. Switch off the device (see "4.6 Switching the device off", page 70). Connect the device to the line power. 2. Take battery out of the battery compartment. 3. - Page 56 4 Preparation and operation 3. Perform a function check (see "9.3 Performing a function check", page 202). Result The hygiene filter has been inserted. 4.4.2 Connecting the patient hose system Risk of injury posed by ventilation with inhalation mask, tube or nasal cannula! Ventilation with an inhalation mask, tube or nasal cannula connected may cause an injury to the patient.
- Page 57 4 Preparation and operation 3. If necessary: Connect the FlowCheck sensor (see "4.4.3 Connecting the FlowCheck sensor", page 58). 4. If necessary: Connect MEDUtrigger (see "4.4.5 Connecting MEDUtrigger", page 62). 5. If necessary: Connect the CO measuring hose (see "4.4.4 Connecting the CO measuring hose", page 60).
- Page 58 4 Preparation and operation 7. If necessary: Attach the patient hose system with Velcro strap with clip to the patient's clothing. Result The patient hose system is connected and ready for use. 4.4.3 Connecting the FlowCheck sensor The FlowCheck sensor enables flow measurement (only with flow measurement + ASB option).
- Page 59 4 Preparation and operation 2. Connect the FlowCheck sensor to the patient valve. Risk of injury from touching the contacts on the FlowCheck sensor connection line/FlowCheck sensor connection line with MEDUtrigger and the patient at the same time! The contacts on the FlowCheck sensor connection line/FlowCheck sensor connection line with MEDUtrigger are live.
- Page 60 4 Preparation and operation 4. With the reusable hose system: Guide the connection line with measuring hose system and ventilation hose into the hose protection sleeve of the patient hose system. 5. If necessary: Activate flow measurement + ASB option (see "6.3.9 Options", page 139).
- Page 61 4 Preparation and operation 1. Connect the water filter to the CO measuring hose. 2. Connect the CO measuring hose with water filter to the measuring hose system connector. 3. With the reusable hose system: Connect the connector with connection: •...
- Page 62 4 Preparation and operation 5. With disposable hose systems: Detach the blanking plug on the connection and connect the CO measuring hose to the connection. When doing so, note: Tighten the screw connection by hand. To minimize the dead space, you can also connect the CO measuring hose to a breathing system filter with gas connection (e.g., WM 22162).
- Page 63 4 Preparation and operation MEDUtrigger button LEDs 4-2 Connection line of MEDUtrigger (1) and FlowCheck sensor connection line with MEDUtrigger (2) 1. Connect the connector of one of the following connection lines to the accessory connection on the device: • Connection line of MEDUtrigger •...
- Page 64 4 Preparation and operation 3. Place MEDUtrigger between the mask and the following end of the patient hose system closest to the patient: • Patient valve • FlowCheck sensor • Connector with CO connection • Elbow If you use a breathing system filter, always place MEDUtrigger between the mask and the breathing system filter.
- Page 65 4 Preparation and operation 4. With the reusable hose system: Guide the connection line with measuring hose system and ventilation hose into the hose protection sleeve of the patient hose system. 5. If necessary: Activate MEDUtrigger option (see "6.3.9 Options", page 139).
- Page 66 4 Preparation and operation 3. Perform inhalation (see "4.7.7 Performing inhalation (only with Inhalation option)", page 79). Result Inhalation via the inhalation adapter is prepared. 4.4.7 Connecting the etCO nasal cannula 1. Position the etCO nasal cannula. 2. If necessary: Fix the tubes of the etCO nasal cannula to the face using adhesive plasters.
- Page 67 4 Preparation and operation 4.4.8 Connecting the nebulizer Only use the device in combination with the following nebulizer: • Pneumatic drug nebulizer WM 15827 1 ® • Aerogen Solo (Fa. Aerogen Ltd.) 2 • Tube Inhaler (VBM Medizintechnik GmbH) 3 Risk of injury due to erroneous readings! If the filter is installed incorrectly or no filter is used, the membrane may stick in the patient valve or the FlowCheck sensor could...
-
Page 68: Switching The Device On
4 Preparation and operation 2. Connect the open end of the nebulizer 1, 2 or 3 with the filter 7 (breathing system filter, bacteria filter or a combined breathing system/bacteria filter). 3. Place the filter 7 (breathing system filter, bacteria filter or a combined breathing system/bacteria filter) on the patient hose system’s FlowCheck sensor 8. - Page 69 4 Preparation and operation If you switch the device on in NVG mode, the following displays are deactivated: • Alarm light • Line power indicator • Battery status indicator • Audio alarm output The start screen with the selected NVG brightness appears (see "6.3.7 Device configuration", page 130).
-
Page 70: Switching The Device Off
4 Preparation and operation 4.6 Switching the device off 1. Press and hold the On/Off button for at least 2 seconds. 2. Shut off the oxygen supply. Result The device is completely switched off. 4.7 Ventilating the patient 4.7.1 Selecting the emergency mode from the start menu Requirement The device is switched off. - Page 71 4 Preparation and operation 2. Select emergency mode: • Emergency Infant • Emergency Child • Emergency Adult Depending on the preset in the operator menu, the device switches to one of the following modes with the ventilation parameters preset for the patient group (see "14.1.10 Factory settings for emergency modes and ventilation modes", page 257)
- Page 72 4 Preparation and operation If the device was switched off for > 30 seconds, the countdown for the last patient is deactivated. 2. Select Previous patient field. Allow the countdown to run. 3. If necessary: Adjust the settings of the last patient and confirm. Result The ventilation mode, ventilation parameters and the view of the last ventilated patient are loaded.
- Page 73 4 Preparation and operation 4.7.3 Selecting a ventilation mode for a new patient Requirement The device is switched off. 1. Switch on the device. After the self-test, the device displays the start menu: If the device was switched off for < 30 seconds (e.g., for a battery change), a countdown in the Previous patient field counts down 20 seconds.
- Page 74 4 Preparation and operation 3. Select the height and gender: The height is given in 5 cm increments between 50 cm and 250 cm. (see "14.2 Calculation of body weight on the basis of body height", page 258). Navigate to the field Height and turn the navigation knob further to select the desired patient group: •...
- Page 75 4 Preparation and operation • Child • Infant 4. Press the navigation knob next. 5. Select a ventilation mode. 6. If necessary: Set the parameters of the ventilation mode. MEDUMAT Standard...
- Page 76 4 Preparation and operation 7. Select the start field. Result A ventilation mode for a new patient has been set. If the curve display option is activated, the device shows a curve view. 4.7.4 Selecting an emergency mode from a ventilation mode Requirement •...
- Page 77 4 Preparation and operation Depending on the preset in the operator menu, the device switches to one of the following modes with the ventilation parameters preset for the patient group (see "14.1.10 Factory settings for emergency modes and ventilation modes", page 257) and shows a pressure gauge view: •...
- Page 78 4 Preparation and operation 4. If necessary: Set the parameters of the ventilation mode. 5. Select the start field. Result The ventilation mode is changed. 4.7.6 Operating the device in oxygen or Air Mix mode Requirement • The device is switched on. •...
- Page 79 4 Preparation and operation Oxygen mode is activated as standard for all emergency modes. Result The device is operated in oxygen or Air Mix mode. 4.7.7 Performing inhalation (only with Inhalation option) Using a nebulizer prevents treatment in Inhalation mode! The device is not suitable for nebulizers in inhalation mode.
- Page 80 4 Preparation and operation 3. Select the field Inhalation using the left-hand navigation knob. The device switches to Inhalation mode. 4. Select flow for inhalation using the right-hand navigation knob. Result The inhalation is performed. 4.7.8 Performing CO monitoring (only with capnography option) Requirement •...
- Page 81 4 Preparation and operation When using an etCO nasal cannula, the CO measurement may be distorted by the intake of additional air. Only the CO trend can be assessed. 1. Assess CO measurements diagnostically. 2. If necessary: Configure etCO Trend (see "5.3.6 etCO trend (only with capnography option)", page...
- Page 82 4 Preparation and operation Delay in treatment due to simultaneous metronome outputs from the ventilator and the defibrillator! If the ventilator is used together with a defibrillator (MEDUCORE Standard or MEDUCORE Standard ) which can also emit a metronome sound, the simultaneous metronome outputs from the defibrillator and the ventilator may confuse the user and cause delays in treatment.
- Page 83 4 Preparation and operation The device always switches to IPPV mode upon exiting CPR mode. Result Ventilation is performed in CPR Manual mode. 4.7.10 Performing ventilation in CPR IPPV mode Delay in treatment due to simultaneous metronome outputs from the ventilator and the defibrillator! If the ventilator is used together with a defibrillator (MEDUCORE Standard or MEDUCORE Standard ) which can also...
- Page 84 4 Preparation and operation Pausing ventilation in CPR IPPV mode During the analysis of the defibrillator, you can pause ventilation in order to avoid artifacts in the analysis. Requirement • The device is switched on. • The CPR mode is set. •...
- Page 85 4 Preparation and operation 3. To start continuous ventilation again: Press the field twice. Result Ventilation pauses. When the countdown reaches zero, ventilation automatically restarts. 4.7.11 Performing ventilation in CPR CCSV mode Delay in treatment due to simultaneous metronome outputs from the ventilator and the defibrillator! If the ventilator is used together with a defibrillator (MEDUCORE Standard or MEDUCORE Standard...
- Page 86 4 Preparation and operation Treatment delays due to triggered alarms for spontaneously breathing patients which do not apply in the this application scenario! In CPR CCSV mode, triggered etCO alarms can confuse the user and result in delays in treatment. ⇒...
- Page 87 4 Preparation and operation Insert screenshot with "Automatic" 3. If you want chest compressions to be carried out automatically: Switch to using the middle navigation knob. If you want chest compressions to be carried out manually: Switch to using the middle navigation knob. 4.
- Page 88 4 Preparation and operation If the trigger is still not functioning properly in CPR CCSV mode in spite of reducing the trigger and increasing the PEEP, you can switch from CPR CCSV mode to CPR IPPV mode (see "4.7.12 Changing the ventilation mode in CPR mode", page 88).
- Page 89 4 Preparation and operation 2. Switch between the Manual, CCSV and IPPV fields using the right-hand navigation knob to change the mode. Result The required CPR mode is set. 4.7.13 Performing ventilation in RSI mode Requirement • The device is switched on. •...
- Page 90 4 Preparation and operation 1. Select RSI mode field using the right-hand navigation knob. 2. To select the Manual function, switch to the Manual field using the right-hand navigation knob. To enable the selection of the Manual function, a MEDUtrigger must be connected and activated in the operator menu.
-
Page 91: Monitoring The Patient
4 Preparation and operation 3. To perform continuous ventilation following successful airway management, select the Contin. field. Depending on the preset in the operator menu, the device switches to one of the following modes with the ventilation parameters preset for the patient group (see "14.1.10 Factory settings for emergency modes and ventilation modes", page... -
Page 92: Audio Alarm Output
4 Preparation and operation All the measurements shown for flow, tidal volume and minute volume relate to standard body temperature and ambient pressure (BTPS (Body Temperature and Pressure, saturated): Volume at current ambient pressure and 37°C, with 100% saturated gas). High airway resistances, e.g., due to obstructions of the airways or during external chest compression, may change the respiratory minute volume, depending on the ventilation mode. -
Page 93: Transporting The Device
4 Preparation and operation 4.9.2 Canceling the muting of the audio alarm output Requirement An alarm is active and is muted. 1. Briefly (< 1 s) press the alarm mute button Result The muting of the audio alarm output is canceled. The symbol appears on the display. -
Page 94: Feeding In Oxygen
4 Preparation and operation 4.11 Feeding in oxygen 4.11.1 Connecting an oxygen supply Risk of injury posed by the combination of highly compressed oxygen and hydrocarbon compounds! When combined with highly compressed oxygen, hydrocarbon compounds (e.g., oil, grease, cleaning alcohols, hand cream or adhesive plasters) can cause explosions and injuries to the patient, user and bystanders. - Page 95 4 Preparation and operation Requirement • The patient is not connected to the device. • The oxygen cylinder is full. 1. Briefly open and then close the valve of the oxygen cylinder in order to blow away any particles of dust. 2.
- Page 96 4 Preparation and operation 4.11.2 Removing the oxygen supply 1. Close the valve on the oxygen cylinder. 2. Briefly press the On/Off button and operate the device without an oxygen supply. The remaining oxygen is flushed out of the device. 3.
-
Page 97: After Use
4 Preparation and operation Air Mix mode: Oxygen supply (I) x 2 Time (min)= Vt (l) x f (min ) + 0.3 l/min Example Oxygen supply 2000 l 500 ml 12 min 634 min = 10 h 34 min Time 63 min per liter of cylinder volume Result The operating time has been calculated. -
Page 98: Using The Sd Card
4.13 Using the SD card 4.13.1 Inserting an SD card Loss of data due to incorrect SD card! SD cards not purchased from WEINMANN Emergency may have reduced functionality or result in the loss of data. ⇒ Only use SD cards from WEINMANN Emergency. - Page 99 4 Preparation and operation 4.13.2 Removing the SD card Requirement An SD card is in the SD card slot. 1. Open the splash guard of the SD card slot. Incorrect use may result in loss of data or damage to the device! If you remove the SD card whilst exporting log files or updating the software of the device, data may be lost or the device may be...
-
Page 100: Enabling Options
4 Preparation and operation 4.14 Enabling options Requirement • The operator menu has been called up (see "6.1 Navigating the operator menu", page 121). • The latest software version is installed on the device (see "4.15 Updating the software", page 102). - Page 101 4 Preparation and operation 3. Turn the right-hand navigation knob to enter the first digit of the option code. 4. Press the navigation knob next to confirm the first digit of the option code. 5. Enter the other digits of the option code in the same way. 6.
-
Page 102: Updating The Software
4 Preparation and operation The device uses a green checkmark to display whether the input option code is correct and changes the color of the option as per the color scale shown above. When doing so, note: • Prerequisite for the unlocking of the curve display option: Flow measurement + ASB option is enabled. - Page 103 121). 1. If necessary: Download the software from the Login area of the WEINMANN Emergency website to the SD card. 2. If the software is available as a ZIP file: Unzip the software. The software is available in the folder as a file named WM28981-x.x.hex.
- Page 104 4 Preparation and operation Damage to the device caused by moving the device and/or pressing buttons during the update! Moving the device and/or pressing buttons during the update may cancel the update and damage the device. ⇒ Do not move the device. ⇒...
-
Page 105: Pairing An External Data Documentation System With The Device For The First Time (Using The Bluetooth Data Transmission Option)
4 Preparation and operation 4.16 Pairing an external data documentation system with the device for the first time (using the Bluetooth data transmission option) 4.16.1 Pairing in the operator menu Requirement • The external data documentation system supports the device’s communication protocol. -
Page 106: Using The Simulation Mode
4 Preparation and operation • The Allow bluetooth pairing option, located under Device configuration in the operator menu, is activated. 1. Start ventilation (see "4.7 Ventilating the patient", page 70). 2. Activate Bluetooth in the user menu (see "5.3.7 Bluetooth (only with Bluetooth data transmission option)", page 117). - Page 107 4 Preparation and operation 1. Switch on the device and during start-up press the right-hand and left-hand navigation knobs at the same time. The device switches to simulation mode. The words Simulation Mode! flash in the display. 2. Simulate settings. 3.
-
Page 108: User Menu
5 User menu User menu 5.1 Navigating the user menu Requirement A ventilation mode is set. 1. Briefly press the menu button 2. To select a submenu, turn one of the three navigation knobs. 3. To confirm the settings, press one of the three navigation knobs. -
Page 109: Structure Of The User Menu
5 User menu 5.2 Structure of the user menu Mode IPPV BiLevel + ASB CPAP CPAP + ASB aPCV PRVC + ASB Mode IPPV SIMV BiLevel + ASB SIMV + ASB RSI Demand CPAP CPAP + ASB S-IPPV aPCV RSI Man. PRVC + ASB RSI IPPV SIMV... -
Page 110: Settings In The User Menu
5 User menu 5.3 Settings in the user menu 5.3.1 Mode 5-2 Mode submenu MEDUMAT Standard... - Page 111 5 User menu You can select the following ventilation modes and additional functions here (see "7 Description of the modes", page 141): Mode submenu IPPV BiLevel + ASB (only if the pressure- controlled ventilation modes option is activated) CPAP CPAP + ASB (only with flow measurement + ASB option) aPCV (only if the pressure-controlled ventilation modes option is activated)
- Page 112 5 User menu 5.3.2 Alarm limits 5-3 Alarm limits submenu Here you can set the alarm limits. You can also open the alarm limit menu by keeping the alarm mute button depressed. Risk of injury due to alarm limits which are too high or too low! Alarm limits which are either too high or too low can prevent the device from emitting an alarm, thereby putting the patient at risk.
- Page 113 5 User menu Alarm Setting range Activating automatic limits The device sets the alarm limits for the alarms relating to respiratory physiology automatically. The deviation is 10%, 20% or 30% from Automatic limits the ventilation values at the time of activation.
- Page 114 5 User menu 5.3.3 Views 5-4 Views submenu (example) You can select preconfigured views of measurements here. The views depend on the activated options and the ventilation mode selected. MEDUMAT Standard...
- Page 115 5 User menu 5.3.4 Ventilation parameters 5-5 Ventilation parameters submenu (example) You can change the ventilation parameters of the selected ventilation mode here. 5.3.5 Apnea ventilation 5-6 Apnea ventilation submenu MEDUMAT Standard...
- Page 116 5 User menu In this menu you can activate or deactivate apnea ventilation in the CPAP, CPAP + ASB and Demand ventilation modes. When apnea ventilation is activated, the device automatically switches to IPPV mode once the set apnea time has elapsed. If the BiLevel + ASB mode is unlocked in the operator menu and activated, you can choose between the IPPV mode and the BiLevel + ASB mode as the apnea ventilation mode in the operator...
- Page 117 5 User menu In this menu you can set the scale for the time axis of the etCO trend. The following settings are possible: auto, 5 min., 10 min., 30 min., 60 min.,120 min. At a time setting of 5 minutes or 10 minutes, the device records the determined value every 15 seconds.
- Page 118 5 User menu If you have activated the Allow bluetooth pairing function in the operator menu (see "6.3.7 Device configuration", page 130), the MAC address of the device will also be displayed in this menu. You can then pair MEDUMAT Standard with an external data documentation system during the application.
- Page 119 5 User menu 5.3.9 NVG (Night Vision Goggles) 5-9 NVG submenu Risk of injury from deactivated alarm light, deactivated audio alarm output and darkened display in NVG mode! The alarms are barely perceptible as a result of the deactivated alarm light, the deactivated audio alarm output and the darkened display in NVG mode.
- Page 120 5 User menu This submenu only appears if you activate the NVG option in the operator menu (see "6.3.9 Options", page 139). This option is only permitted for use in the military sector. A device in NVG mode does not comply with the following standards with respect to alarm output: •...
-
Page 121: Operator Menu
6 Operator menu Operator menu 6.1 Navigating the operator menu 1. Switch on the device. The start menu appears. 2. Briefly press the menu button 3. Turn the right-hand navigation knob to enter the first digit of the access code. 4. - Page 122 6 Operator menu 7. To select a submenu, turn one of the three navigation knobs. 8. To call up a submenu, press one of the three navigation knobs. 9. To select a desired value, turn one of the three navigation knobs.
-
Page 123: Structure Of The Operator Menu
6 Operator menu 6.2 Structure of the operator menu Device information Battery information Export log files FlowCheck information Export mission log files Export configuration Export configuration Import / Export Import configuration Date / Time Software update Volume Change access code Brightness NVG brightness Device configuration... -
Page 124: Settings In The Operator Menu
6 Operator menu 6.3 Settings in the operator menu 6.3.1 Device information 6-2 Device information submenu You will find all the information on the device in this submenu. 6.3.2 Battery information 6-3 Battery information submenu You will find all the information on the battery in this submenu. MEDUMAT Standard... - Page 125 6 Operator menu 6.3.3 FlowCheck information (only with flow measurement + ASB option) 6-4 FlowCheck information submenu You will find all the information on the FlowCheck sensor and the following connection lines in this submenu: • FlowCheck sensor connection line •...
- Page 126 6 Operator menu 6.3.4 Import / Export 6-5 Import / Export submenu Export log files The device always saves the log files in its internal memory. You can export data to an SD card in order to analyze it. Detailed information on exported log files can be found in the appendix (see "14.3 Exported log files", page 259).
- Page 127 6 Operator menu Export configuration The Export configuration function allows you to export all the configuration settings made on the device to an SD card. When exporting, all the configuration settings (including the options) are transferred with the exception of the following configuration settings: •...
- Page 128 6 Operator menu Exporting data to an SD card Requirement • An SD card is in the SD card slot. • The operator menu has been called up (see "6.1 Navigating the operator menu", page 121). 1. Select the menu item Import / Export. 2.
- Page 129 6 Operator menu 6.3.5 Software update 6-6 Software update submenu You can update your software here (see "4.15 Updating the software", page 102). MEDUMAT Standard...
- Page 130 6 Operator menu 6.3.6 Change access code 6-7 Submenu for changing the access code Here you can change the access code for the operator menu. On delivery, the access code for the operator menu is 0000. 6.3.7 Device configuration 6-8 Device configuration submenu MEDUMAT Standard...
- Page 131 6 Operator menu In the submenu Device configuration, you can set the following parameters for the device: Parameter Possible values Description Year Month Date/Time Here you can set the current date and time. Hour Minute Here you can set the volume of the acoustic Volume 100% signals.
- Page 132 6 Operator menu Parameter Possible values Description When maintenance becomes due, you can suppress the maintenance notice within a maintenance cycle one time for a maximum of 180 days from the date maintenance is due. The device then behaves as if the maintenance were not due in terms of the reminders.
- Page 133 6 Operator menu Parameter Possible values Description German (de DE) English (en US) French (fr FR) Dutch (nl NL) Spanish (es ES) Brazilian Portuguese (pt BR) Polish (pl PL) Here you can set the language of the display Russian (ru RU) texts.
- Page 134 6 Operator menu In the Presets patient submenu, you can determine which presets are assigned to the ventilation parameters of the different patient groups: Risk of injury from different alarm presets in the same or similar devices! Different alarm presets in the same or similar devices in different application areas can confuse the user and result in injury to the patient.
- Page 135 6 Operator menu Parameter Possible values Description Here you can set the maximum pMax 10 mbar - 65 mbar ventilation pressure. Here you can set the maximum pMax CPR 10 mbar - 65 mbar ventilation pressure in CPR mode. CPR mode Here you can set with which submenu the CPR mode should be started.
- Page 136 6 Operator menu Parameter Possible values Description Pressure gauge View (only with Here you can choose between a Pressure/CO curve activated pressure gauge view and a curve Pressure/etCO capnography option) view for the CPR mode. trend Here you can determine whether or ☑...
- Page 137 6 Operator menu Parameter Possible values Description Here you can set the inspiratory pInsp 40 mbar or 60 mbar pressure. Here you can set the positive end- PEEP 0 mbar - 5 mbar expiratory pressure. Here you can set when the hands-off Hands-off time 5 s - 55 s time alarm...
- Page 138 6 Operator menu Parameter Possible values Description Here you can determine whether an etCO (only ☑ alarm should be output in the event with capnography ☐ of rising or dropping end-expiratory option) Apnea mode (only if the pressure-controlled ventilation modes option is activated) Here you can set the apnea IPPV ventilation mode for the CPAP and...
- Page 139 6 Operator menu For the smallest height which can be set, the tidal volume is always at least 50 ml. 6.3.9 Options 6-10 Options submenu As the operator, you can unlock new options for the user in the menu item Unlock option (see "4.14 Enabling options", page 100) and activate or deactivate the unlocked options.
- Page 140 6 Operator menu Options Description Enables the aPCV pressure-controlled aPCV ventilation mode. Enables the PRVC + ASB pressure- PRVC + ASB controlled ventilation mode. Enables CO measurement and display of the CO curve. For CO Capnography measurement you require a device with CO measuring.
-
Page 141: Description Of The Modes
7 Description of the modes Description of the modes 7.1 Classification of the ventilation modes Breathing effort 100% Patient Ventilator Assisted ventilation Controlled ventilation Spontaneous respiration The following ventilation modes are possible with this device: Control Controlled Assisted Spontaneous parameter ventilation ventilation respiration... - Page 142 7 Description of the modes There are the following trigger options in the individual ventilation modes: Trigger time Ventilation Expiration slot for Inspiration trigger ASB breath mode trigger mandatory breaths IPPV BiLevel + ASB 20% of Te CPAP CPAP + ASB Can be set from aPCV 0%-100% of Te...
-
Page 143: Ventilation Parameters
7 Description of the modes 7.2 Ventilation parameters Ventilation Unit Description parameters Tidal volume (breath volume) Freq. 1/min Respiratory rate pMax mbar Maximum ventilation pressure PEEP mbar Positive end-expiratory pressure (CPAP) Ventilation through the addition of Air Mix ambient air 93% oxygen Ventilation with concentrator oxygen 100% oxygen... - Page 144 7 Description of the modes • If the flow measurement + ASB option is not activated: With a set PEEP value > 0 mbar, the patient must create an underpressure of at least -1.3 mbar below the set PEEP value through his/her spontaneous respiratory effort in order to initiate an inspiratory trigger in the device.
-
Page 145: Ventilation Modes
7 Description of the modes 7.3 Ventilation modes 7.3.1 IPPV mode Description Abbreviation IPPV Intermittent Positive Pressure Long form Ventilation Type Volume-controlled Requirement None Ventilation parameters Left-hand navigation knob Central navigation knob Freq. • PEEP • pMax Right-hand navigation knob •... - Page 146 7 Description of the modes When the maximum ventilation pressure (pMax) is achieved, the device maintains the pMax up until the end of the inspiration time and then switches to expiration. As such, the set tidal volume is possibly not fully applied if the maximum ventilation pressure (pMax) is not achieved during inspiration.
- Page 147 7 Description of the modes BiLevel + ASB Pressure pMax Mechanical ventilation Assisted spontaneous breathing pInsp Pressure ramp ∆pASB PEEP Time TI=T 1/Freq. insp (spontaneous) 1/Freq. (set) The BiLevel + ASB mode is used for pressure-controlled ventilation combined with free spontaneous respiration at pressure levels pInsp and PEEP during the entire breathing cycle and for adjustable pressure support at PEEP level.
- Page 148 7 Description of the modes 7.3.3 CPAP mode Description Abbreviation CPAP Long form Continuous Positive Airway Pressure Type Pressure-controlled Requirement None Ventilation parameters Left-hand navigation knob Central navigation knob • PEEP Right-hand navigation knob • pMax • Emergency mode CPAP Pressure pMax CPAP...
- Page 149 7 Description of the modes 7.3.4 CPAP + ASB mode Description Abbreviation CPAP + ASB Continuous Positive Airway Pressure + Long form Assisted Spontaneous Breathing Type Pressure-controlled Flow measurement + ASB option is Requirement activated Ventilation parameters Left-hand navigation knob InTr Central navigation knob ∆...
- Page 150 7 Description of the modes • The ASB function is used for pressure support of insufficient or exhausted spontaneous respiration. The patient is able to breathe spontaneously without any restriction, but is supported in his breathing effort by the device. The CPAP + ASB mode is used exclusively on patients with adequate spontaneous respiration.
- Page 151 7 Description of the modes Description Abbreviation aPCV Assisted Pressure Controlled Long form Ventilation Type Pressure-controlled • Flow measurement + ASB option is activated Requirement • Pressure-controlled ventilation modes option is activated • Curve display option is activated Ventilation parameters Left-hand navigation knob pInsp Central navigation knob...
- Page 152 7 Description of the modes The aPCV mode is used for pressure-controlled, assisted ventilation at a fixed mandatory ventilation rate. In case of spontaneous respiration, the patient has the possibility of increasing the rate and consequently the minute volume. If the patient displays a spontaneous respiratory effort within a specified time slot of the expiration, the mandatory mechanical breath is synchronized with the patient's respiration.
- Page 153 7 Description of the modes Pressure pMax pInsp Pressure ramp PEEP Time 1/Freq. (set) 1/Freq. (set) The PCV mode is used for mandatory pressure-controlled ventilation with fixed pressure levels with a fixed set ventilation rate. This mode is used on patients who have no spontaneous respiration.
- Page 154 7 Description of the modes 7.3.7 PRVC + ASB mode Description Abbreviation PRVC + ASB Pressure Regulated Volume Controlled Long form Ventilation + Assisted Spontaneous Breathing Type Pressure-controlled • Flow measurement + ASB option is activated Requirement • Pressure-controlled ventilation modes option is activated •...
- Page 155 7 Description of the modes The controlled PRVC + ASB mode combines the advantages of both pressure-controlled ventilation and volume-controlled ventilation. The set tidal volume is applied with the minimum ventilation pressure possible. Ventilation begins with three volume-controlled breaths with the set tidal volume and decreasing flow.
- Page 156 7 Description of the modes 7.3.8 SIMV mode Description Abbreviation SIMV Synchronized Intermittent Mandatory Long form Ventilation Type Volume-controlled Requirement SIMV option is activated Ventilation parameters Left-hand navigation knob Central navigation knob Freq. • PEEP • pMax Right-hand navigation knob •...
- Page 157 7 Description of the modes The SIMV mode is used for volume-controlled ventilation with a fixed mandatory minute volume. The patient can breathe spontaneously between the mandatory mechanical breaths and thereby increase the minute volume. During spontaneous respiration, the mandatory mechanical breath is synchronized with the patient's breathing.
- Page 158 7 Description of the modes SIMV + ASB Pressure p Max Mechanical ventilation Assisted Synchronized mechanical spontaneous ventilation breathing Spontaneous pPlat respiration ∆pASB PEEP Time ∆T 1/Freq. (current) 1/Freq. (set) Trigger time slot The SIMV + ASB mode is used for volume-controlled ventilation with a fixed mandatory minute volume.
- Page 159 7 Description of the modes 7.3.10 S-IPPV mode Risk of hyperventilation! When using the S-IPPV mode, the CO concentration in the patient's blood can drop and injure the patient. ⇒ Monitor the patient continuously. Risk of air trapping! When using the S-IPPV mode, air can become trapped in the patient's lung.
- Page 160 7 Description of the modes S-IPPV Pressure Synchronized mechanical Mechanical ventilation ventilation pMax Plateau PEEP Time ∆T 1/Freq. (current) 1/Freq. (set) Trigger time slot The S-IPPV mode is used for volume-controlled ventilation with a variable mandatory minute volume. Throughout the entire expiration phase, a trigger is active which enables the patient to trigger a new breath.
- Page 161 7 Description of the modes 7.3.11 CCSV mode Risk of injury due to unsecured airway! If the CCSV mode is used, an unsecured airway can result in insufflation of the stomach and cause injury to the patient. ⇒ Only use CCSV mode with an endotracheal tube or with pressure-tight (blocked) tracheostomy hoses.
- Page 162 7 Description of the modes CCSV Pressure pInsp CCSV CCSV CCSV Trigger Trigger Time TI = 205 ms TE 225 ms 1/Freq. (min. 430 ms; (140/min) The CCSV mode is a pressure-controlled ventilation mode employed specially and exclusively for resuscitation ventilation during continuing chest compression.
-
Page 163: Additional Functions
7 Description of the modes 7.4 Additional functions 7.4.1 CPR mode Risk of injury from deactivated alarms in the additional functions CPR and RSI! Through deactivation in the operator menu, no alarms for flow and CO monitoring are output in the additional functions CPR and RSI. - Page 164 7 Description of the modes The CPR mode supports you during cardiopulmonary resuscitation according to the Resuscitation Guidelines (see "4.7 Ventilating the patient", page 70). The CPR mode differentiates between a CPR Manual mode for 30:2 and 15:2 ventilation and a continuous CPR IPPV mode for continuous chest compression.
- Page 165 7 Description of the modes In CPR Manual mode, individual breaths can be manually applied via MEDUtrigger. This mode is applied at the start of a resuscitation if the airway is not secured. Algorithms 15:2 and 30:2 are supported in CPR Manual mode. With these algorithms, 15 or 30 metronome beats are emitted in each case, of which the last 5 sounds have a rising tone frequency and thus announce the imminent ventilation phase.
- Page 166 7 Description of the modes 7.4.2 RSI mode Risk of injury from deactivated alarms in the additional functions CPR and RSI! Through deactivation in the operator menu, no alarms for flow and CO monitoring are output in the additional functions CPR and RSI.
- Page 167 7 Description of the modes Air Mix cannot be activated in the Demand and Manual functions. Following successful airway management, switch to continuous ventilation mode with the Contin. function. The device automatically switches to one of the following modes with the ventilation parameters preset for the patient group (see "14.1.10 Factory settings for emergency modes and ventilation modes", page...
- Page 168 7 Description of the modes 7.4.4 Apnea ventilation Description • IPPV Abbreviation • BiLevel + ASB (if pressure- controlled ventilation option is activated) • Intermittent Positive Pressure Ventilation Long form • BiLevel ventilation at two pressure levels • Volume-controlled Type •...
- Page 169 7 Description of the modes Apnea ventilation is a safety function which causes the device to take over and continue ventilation in the CPAP, CPAP + ASB and Demand modes if the patient stops breathing (apnea). If the patient is no longer breathing spontaneously and the set Apnea time in the "Alarm Limits"...
- Page 170 7 Description of the modes 7.4.5 Inhalation mode Description Abbreviation Long form Inhalation Type Requirement Inhalation option is activated Ventilation parameters Left-hand navigation knob Central navigation knob Right-hand navigation knob Inhalation flow The Inhalation mode is used for the application of a defined oxygen flow of 1-10 l/min via a corresponding interface.
- Page 171 7 Description of the modes monitoring is used for the sidestream CO measurement during oxygen inhalation or bag-valve-mask ventilation (see "4.7.8 Performing CO monitoring (only with capnography option)", page 80). To use the CO measurement during oxygen inhalation, you require an interface with a male Luer lock connector for CO measurement (see "4.4.7 Connecting the...
-
Page 172: Hygienic Reprocessing
Read this section in full before starting hygienic reprocessing. If you have any queries on hygienic reprocessing, please contact the manufacturer WEINMANN Emergency or a technician who has been expressly authorized by WEINMANN Emergency. Malfunction or failure of treatment due to the incorrect use of... - Page 173 8 Hygienic reprocessing Disruption or failure of therapy due to unsuitable cleaning agents and disinfectants! The use of incorrect cleaning agents and disinfectants can cause the device to malfunction. This can result in serious or life- threatening injury to the patient. ⇒...
- Page 174 8 Hygienic reprocessing Risk of infection resulting from insufficient hygienic reprocessing! The use of a device and accessories which have not been subjected to hygienic reprocessing may lead to infections if they come into contact with the skin of the patient or user or the patient's airways.
-
Page 175: General Instructions
8 Hygienic reprocessing Risk of injury and damage to property due to residues of disinfectants and cleaning agents in the device or hose system. Disinfectant or cleaning agent residues can get into the patient’s lung. This can result in severe or life-threatening injury to the patient and cause material damage to the device. -
Page 176: Intervals
8 Hygienic reprocessing 8.2 Intervals Part Interval After transportation of an infected patient or upon After each use At least 1 x weekly expiry of the filter’s service life (at least every 6 months) All parts (except the hygiene filter) Hygiene filter 8.3 Preparing hygienic reprocessing Requirement... -
Page 177: Disassembly Of The Reusable Hose System
8 Hygienic reprocessing 8.4 Disassembly of the reusable hose system The images in this subchapter show all the possible components of the reusable hose system. Depending on the system type, your reusable hose system may not include certain components (see "3.5.2 Reusable hose system and disposable hose system", page 35). - Page 178 8 Hygienic reprocessing 5. If available: Detach one of the following connection lines from the FlowCheck sensor: • FlowCheck sensor connection line • FlowCheck sensor connection line with MEDUtrigger 6. If available: Detach the CO measuring hose from the connector with CO connection.
- Page 179 8 Hygienic reprocessing 7. Detach the pressure-measurement hose (2) and PEEP control hose (1) from the patient valve. 8. If available: Remove the protective cap from the end of the reusable hose system closest to the patient. 9. If available: Detach MEDUtrigger. MEDUMAT Standard...
- Page 180 8 Hygienic reprocessing 10. If available: Detach the elbow. 11. If available: Detach the connector with CO connection. 12. If available: Detach the FlowCheck sensor from the patient valve. 13. Disconnect the patient valve from the ventilation hose. MEDUMAT Standard...
- Page 181 8 Hygienic reprocessing 14. If available: Remove the protective cap strap from the patient valve: • Position 1 • Position 2 (only with reusable hose systems with flow measurement and CO measurement) 15. Disassemble the patient valve. Result The reusable hose system is disassembled. MEDUMAT Standard...
-
Page 182: Cleaning Parts Manually
8 Hygienic reprocessing 8.5 Cleaning parts manually Requirement • The parts are visibly soiled. • The hygienic reprocessing is prepared (see "8.3 Preparing hygienic reprocessing", page 176). 1. The parts approved for manual cleaning can be found in the cleaning and disinfection plan (see "8.12 Cleaning and disinfection plan", page 196). - Page 183 8 Hygienic reprocessing • Use a new cloth for each cleaning procedure. • Carefully wipe down all the surfaces. • All surfaces must be wetted with cleaning solution. • Ensure compliance with the exposure time specified in the cleaning and disinfection plan. •...
- Page 184 8 Hygienic reprocessing • Wet the lumen brush (e.g., article number 26024, Interlock Medizintechnik GmbH) with cleaning solution. • Clean the hose on the inside with the lumen brush until the hose is visibly clean. • Connect a sterile disposable syringe (20 ml) to a free end of the hose.
-
Page 185: Wipe Disinfecting Parts
8 Hygienic reprocessing 8.6 Wipe disinfecting parts Requirement The parts have been manually cleaned and are visibly clean (see "8.5 Cleaning parts manually", page 182). 1. The parts approved for wipe disinfection can be found in the cleaning and disinfection plan (see "8.12 Cleaning and disinfection plan", page 196). -
Page 186: Immersion Disinfecting Parts
8 Hygienic reprocessing 8.7 Immersion disinfecting parts Requirement The parts intended for immersion disinfection have been manually cleaned (see "8.12 Cleaning and disinfection plan", page 196). 1. The parts approved for immersion disinfection can be found in the cleaning and disinfection plan (see "8.12 Cleaning and disinfection plan", page 196). - Page 187 8 Hygienic reprocessing 8.7.1 Immerse disinfecting the reusable measuring hose system Risk of infection and contamination due to insufficient hygienic reprocessing of the measuring hose system! Rinsing the measuring hose system in alternating directions does not guarantee any bacteria reduction and may injure the patient. ⇒...
-
Page 188: Reprocessing Parts Mechanically
8 Hygienic reprocessing 7. After the exposure time: Rinse the hose with drinking-water quality at least eight times with a syringe. When doing so, note: Only rinse in one direction. 8. Repeat the process based on this principle for each hose. 9. -
Page 189: Steam Sterilizing Parts (Optional)
8 Hygienic reprocessing 5. Start the manual reprocessing program. 6. Allow parts to dry fully at room temperature. 7. Check the parts for residue and any remaining soiling. 8. If visible soiling remains: Repeat the machine cleaning and disinfection. Result The parts are machine cleaned and disinfected. -
Page 190: Preparing Parts For Reuse
8 Hygienic reprocessing • At 132°C with a hold time of 4 min. • The sterilizer manufacturer’s instructions must be observed and followed. Result The parts are steam sterilized. 8.10 Preparing parts for reuse Requirement The parts have been subjected to hygienic reprocessing according to the cleaning and disinfection plan. - Page 191 8 Hygienic reprocessing 1. Assemble the patient valve. When doing so, note: • the side of the PEEP control diaphragm labeled "TOP" must face upward toward the control cover. • the arrow on the control cover must point toward the patient.
- Page 192 8 Hygienic reprocessing 4. If available: Connect the FlowCheck sensor. 5. If available: Connect the connector with CO connection. 6. If available: Connect the elbow. MEDUMAT Standard...
- Page 193 8 Hygienic reprocessing 7. If available: Connect MEDUtrigger 8. Connect the pressure-measurement hose (2) and PEEP control hose (1) to the patient valve. When doing so, note: The hoses must be firmly attached to the patient valve. MEDUMAT Standard...
- Page 194 8 Hygienic reprocessing 9. If available: Connect the CO measuring hose to the connector with CO connection. 10. If available: Connect one of the following connection lines to the FlowCheck sensor: • FlowCheck sensor connection line • FlowCheck sensor connection line with MEDUtrigger MEDUMAT Standard...
- Page 195 8 Hygienic reprocessing 11. If available: Connect the CO measuring hose with water filter to the measuring hose system connector. 12. If available: Seal the end of the reusable hose system closest to the patient with a protective cap. 13. Place all the hoses and one of the connection lines in the hose protection sleeve.
-
Page 196: Cleaning And Disinfection Plan
8 Hygienic reprocessing 8.12 Cleaning and disinfection plan Carry out hygienic reprocessing according to the following table after every use: 8.12.1 Device and accessories Manual cleaning (only Wipe Immersion Mechanical Part Sterilization necessary disinfection disinfection reprocessing with visible soiling) Device Wipe down with ®... - Page 197 8 Hygienic reprocessing Manual cleaning (only Wipe Immersion Mechanical Part Sterilization necessary disinfection disinfection reprocessing with visible soiling) Inhalation Disposable item, do not reuse. Dispose of correctly (see 13, p. 231). adapter Portable unit Ventilation mask Observe the instructions for use from the manufacturer. Tube Breathing system filter...
- Page 198 8 Hygienic reprocessing 8.12.2 Patient hose systems Manual cleaning (only Wipe Immersion Mechanical Part Sterilization necessary disinfection disinfection reprocessing with visible soiling) Reusable hose system Ventilation hose Immerse in and clean with Patient valve Cleaning: ® neodisher Elbow ® neodisher MediClean forte Protective cap MediClean forte...
- Page 199 8 Hygienic reprocessing Manual cleaning (only Wipe Immersion Mechanical Part Sterilization necessary disinfection disinfection reprocessing with visible soiling) Wash at 60°C in industrial washing machine Cleaning agent: Derval SOLO (RKI) (Kreussler) Dosage: Hose protection Not permitted Not permitted Not permitted 2 ml/l Not permitted sleeve...
- Page 200 8 Hygienic reprocessing Manual cleaning (only Wipe Immersion Mechanical Part Sterilization necessary disinfection disinfection reprocessing with visible soiling) Disposable hose system Disposable hose system Disposable measuring hose system Hose clips FlowCheck Disposable item, do not reuse. Dispose of correctly (see 13, p. 231).
-
Page 201: Function Check
9 Function check Function check 9.1 Intervals Carry out a function check at regular intervals: Part concerned Interval • Before each use Device • After each hygienic reprocessing • After each repair • Before each use • After each hygienic reprocessing Patient hose system (reusable hose system) •... -
Page 202: Performing A Function Check
• Testing bag WM 1454 • EasyLung for WEINMANN Emergency WM 28625 Risk of injury from incorrect test lungs! Test lungs other than those named here may not reliably detect errors and thus distort the result of a function check. This can injure the patient. - Page 203 9 Function check • The function check is ready (see "9.2 Preparing for the function check", page 201). 1. Disconnect the device from the line power. When doing so, note: If the device is switched on with the line power connected, the function check cannot be started. The following notice appears on the device display: 2.
- Page 204 9 Function check 4. Prepare the device: • Connect and open the oxygen cylinder. • Connect the patient hose system up to the device. • Connect the test lung up to the patient hose system. Do not touch the patient hose system and the test lung during the function check.
- Page 205 9 Function check 6. Check the alarm system: • The alarm light must flash red. • The device must emit at least one audible alarm in alarm system test 1 and alarm system test 2. 7. If the alarm system is functioning: Press the navigation knob yes each time.
- Page 206 9 Function check 9. In the key function check, press all of the controls one after the other except for the On/Off button If MEDUtrigger is not displayed in the function check, activate it in the operator menu and repeat the function check.
- Page 207 9 Function check 11. Proceed with the hygiene filter according to the following table: Color Action Green Continue to use the hygiene filter. • Keep the hygiene filter at the ready. Yellow • Order the hygiene filter. Replace the hygiene filter. 12.
- Page 208 ≤ 60 days until expiry of without restrictions until xx days. the maintenance interval expiry of the maintenance interval. • To continue using the device without restrictions: Contact WEINMANN Emergency or a technician authorized WEINMANN Emergency in good time for maintenance. MEDUMAT Standard...
- Page 209 Function check passed To continue using the device without restrictions: Contact • Maintenance required • Maintenance interval WEINMANN Emergency or a • Maintenance symbol is expired technician authorized by flashing in the display WEINMANN Emergency for (only in the start menu) maintenance.
-
Page 210: Failed Function Check
2. Repeat the function check. 3. If the function check ends with Device is not ready for use again: Contact your authorized dealer or WEINMANN Emergency. 9.5 Testing the reusable hose system Requirement The patient valve of the reusable hose system is dismounted (see "8.4 Disassembly of the reusable hose system", page... -
Page 211: Checking The System For Leaks
9 Function check 9.6 Checking the system for leaks Requirement The device is connected to the oxygen supply. 1. Open the valve of the oxygen cylinder slowly. The contents gauge on the pressure reducer indicates the pressure in the oxygen cylinder. 2. - Page 212 9 Function check 4. Briefly press the On/Off button and operate the device without an oxygen supply. The remaining oxygen is flushed out of the device. 5. Press and hold the On/Off button for at least 2 seconds to switch off the device. 6.
-
Page 213: Alarms And Error Messages
10 Alarms and error messages 10 Alarms and error messages 10.1 General instructions The device's alarm system is based on the concept of self- preserving alarms. The device emits an alarm for as long as the cause continues to exist. Once the cause of the alarm no longer exists, the device no longer emits the alarm. - Page 214 10 Alarms and error messages The device displays alarms as follows: • As text in the alarm line on the display • Acoustically as an audible alarm (via the loudspeaker on the underside of the device) • With the alarm light (in the top right-hand corner on the front of the device) 10-1 Alarm line with airway pressure alarm The device additionally displays physiological alarms through the...
-
Page 215: Alarm Messages
10 Alarms and error messages 10.2 Alarm messages 10.2.1 High-priority alarm (red) Alarm Cause Remedy Obstruction of the patient's Free the patient's airways of airways obstructions. Tube wrongly positioned Position tube correctly. Airway pressure pMax set too low Adjust pMax. Route hoses so that they are not Hoses kinked or pinched kinked or pinched. - Page 216 10 Alarms and error messages Alarm Cause Remedy Operate device within permitted Device temperature critical Device temperature > 75°C temperature range (see 14.1.1, 232). (only with flow • Check the condition of the Upper limit value exceeded measurement + ASB option) patient.
- Page 217 10 Alarms and error messages 10.2.2 Medium-priority alarm (yellow) Alarm Cause Remedy • Check the condition of the patient. No inspiration since the set apnea Apnea mode active alarm time • Select mandatory ventilation mode. Let the device run on battery power without line power until it switches off.
- Page 218 10 Alarms and error messages Alarm Cause Remedy Chest compression too slow Perform chest compression faster. Compression frequency (only No oscillating volume in the Increase PEEP setting. with CCSV option) airways Not all trigger signals are detected Reduce trigger level. MEDUtrigger removed from the Reconnect MEDUtrigger to the Disconnection MEDUtrigger...
-
Page 219: Faults
If you are not able to clear an error message with the aid of the table, you should contact the manufacturer WEINMANN Emergency or your authorized dealer to have the device repaired. To avoid serious damage, do not continue using the device. - Page 220 10 Alarms and error messages 10.3.1 Device Fault Cause Remedy Set the volume to 100% in the Alarm output too quiet Volume set to 50% operator menu (see 6.3.7, p. 130). No acoustic alarm output Deactivate NVG (see 5.3.9, NVG mode activated 119).
- Page 221 10 Alarms and error messages Fault Cause Remedy Battery empty and device not Check power supply. connected to the line power The device switches off in NVG mode Switch off the device and have it Device defective repaired. ® Activate Bluetooth in user menu ®...
- Page 222 10 Alarms and error messages Fault Cause Remedy Charge battery within permitted Battery temperature < 0°C or temperature range (see 14.1.2, Battery not charging although it is > 45°C 237). not full Battery defective Replace battery. 10.3.3 Ventilation Fault Cause Remedy Locate and rectify leak (see 9.7,...
- Page 223 10 Alarms and error messages Fault Cause Remedy Tube not sufficiently blocked Check cuff pressure. Esophagus intubation Check correct intubation. Chest compression is not being Restart chest compression. No ventilation in CCSV performed. • Use standard 2 m hose Use hose system with reduced dead space or the 3 m hose system system.
-
Page 224: Maintenance
11 Maintenance 11 Maintenance 11.1 General instructions Maintenance, safety checks, inspections and repairs must only be carried out by the manufacturer or a technician specifically authorized by the manufacturer. 11.2 Intervals Part concerned Interval Maintenance by Manufacturer or a technician Maintenance and safety check Device specifically authorized by the... -
Page 225: Sending In Device
WEINMANN Emergency or a technician specifically authorized by WEINMANN Emergency. If you send in parts which are visibly contaminated, they will be disposed of by WEINMANN Emergency or a technician specifically authorized by WEINMANN Emergency at your expense. 11.4 Maintaining the reusable hose system... -
Page 226: Replacing The Hygiene Filter
11 Maintenance 2. Replace the PEEP control diaphragm and check valve diaphragm (maintenance set WM 15779). 3. Assemble reusable hose system (see "8.11 Assembling reusable hose system", page 190). 4. Punch out the date at which the next maintenance is due on the service label (maintenance set WM 15779). - Page 227 11 Maintenance 4. With the filter side facing forwards, slide the hygiene filter into the device's filter compartment until the hygiene filter is flush with the device. 5. Perform a function check (see "9.3 Performing a function check", page 202). Result The hygiene filter has been replaced.
-
Page 228: Storage
12 Storage 12 Storage 12.1 General instructions • Store the device and accessories under the prescribed ambient conditions (see "14.1.1 Technical data on device", page 232). • Following storage in extreme ambient conditions (outside of the ambient operating conditions, (see "14.1.1 Technical data on device", page 232): Store the device at room temperature for at least 12 hours... -
Page 229: Storing Patient Hose Systems
12 Storage 12.3 Storing patient hose systems Material damage due to incorrectly stored patient hose system! Material changes can result from incorrect storage of the patient hose system. ⇒ In the case of reusable hose systems: Also observe storage periods and maintenance intervals for patient hose systems in storage. -
Page 230: Storing The Battery
12 Storage 12.4 Storing the battery Requirement • The device and the battery have been cleaned and disinfected (see "8.3 Preparing hygienic reprocessing", page 176). • The battery is fully charged. • If available: The replacement battery is fully charged. 1. -
Page 231: Disposal
Connection lines 13.2 Battery Do not dispose of used batteries in the household waste. Contact WEINMANN Emergency or a public waste disposal authority. 13.3 Patient hose system After use, dispose of the patient hose system in the correct manner for plastics. -
Page 232: Appendix
14 Appendix 14 Appendix 14.1 Technical data 14.1.1 Technical data on device Specification Device Product class according to Directive 93/42/EEC Dimensions (W x H x D) 206 mm x 138 mm x 130 mm Weight: Without battery Approx. 2 kg With battery Approx. - Page 233 14 Appendix Specification Device Vehicle electrical system operation: Rated voltage 12 V Max. internal resistance of vehicle electrical system 500 mΩ Operating mode Continuous operation Classification acc. to EN 60601-1: • Type of protection against electric shock Protection class II •...
- Page 234 14 Appendix Specification Device • EN 1789 • EN 60601-1-12 (Categories: Secured in a rescue vehicle, secured in an aeroplane, secured in a helicopter, portable at Resistance to shock and vibration the site of the emergency) • EUROCAE ED-14G (RTCA DO 160 G) (Section 8 - Vibration Aeroplanes Cat.
- Page 235 14 Appendix Specification Device Pressure gauge: Airway pressure Frequency tachometer (only with CCSV option) Curves: • Airway pressure (only with flow measurement + ASB option Monitoring and curve display option or capnography option) • Flow (only with flow measurement + ASB option and curve display option) •...
- Page 236 14 Appendix Specification Device Maximum limiting pressure (pLim, 65 mbar max.) Means for limiting pressure Pressure control Means for ensuring the minimum value Pressure control PEEP 0 mbar to 30 mbar (±3 mbar or ±15%) PEEP CCSV (only with CCSV option) 0 mbar to 5 mbar (±3 mbar or ±15%) Pressure support ∆...
- Page 237 100% oxygen Concentrator oxygen (90% to 96% oxygen) Pressurized gas thread External thread G 3/8 Connection for ventilation hose WEINMANN Emergency-specific Patient valve connections WEINMANN Emergency-specific Service life of hygiene filter 24 h in Air Mix mode or 6 months Efficiency of hygiene filter >...
- Page 238 14 Appendix Specification Battery Transport/storage: Temperature range -40°C to +70°C (max. one week at more than +60°C) Humidity 0% RH to 95% RH without condensation Service life At least 300 charging cycles* When stored in the device without a power connection: Every 3 months If stored outside the device: Charging intervals...
- Page 239 14 Appendix 14.1.4 Technical data for patient hose system Patient hose system Patient hose system Specification Length 2 m Length 3 m Operation: • Temperature range -20°C to +50°C 15% to 95% • Relative humidity Storage/Transport: Temperature range up to 48 h •...
- Page 240 14 Appendix Patient hose system Patient hose system Specification Length 2 m Length 3 m Internal volume of the complete respiratory system: • Reusable hose system Approx. 582 ml Approx. 874 ml • Disposable hose system Approx. 588 ml Approx. 885 ml •...
- Page 241 14 Appendix Dead space in the patient hose systems (2 m and 3 m) Without elbow With elbow Reusable patient valve Approx. 16 ml Approx. 28 ml Disposable patient valve Approx. 19 ml Approx. 27 ml Disposable patient valve with reduced Approx.
- Page 242 14 Appendix Pressure drop [hPa] over the inspiratory and expiratory flow path at different flow rates [l/min] acc. to EN 794-3 (in combination with MEDUMAT Standard , measuring point 1: Patient connection opening) Patient hose systems (2 m) without FlowCheck sensor and without CO measurement Patient hose system...
- Page 243 14 Appendix Pressure drop [hPa] over the inspiratory and expiratory flow path at different flow rates [l/min] acc. to EN 794-3 (in combination with MEDUMAT Standard , measuring point 1: Patient connection opening) Patient hose systems (2 m) with FlowCheck sensor and with CO measurement Patient hose system...
- Page 244 14 Appendix Pressure drop [hPa] over the inspiratory and expiratory flow path at different flow rates [l/min] acc. to EN 794-3 (in combination with MEDUMAT Standard , measuring point 1: Patient connection opening) Patient hose systems (3 m) without FlowCheck sensor and without CO measurement Patient hose system Patient hose system...
- Page 245 14 Appendix Pressure drop [hPa] over the inspiratory and expiratory flow path at different flow rates [l/min] acc. to EN 794-3 (in combination with MEDUMAT Standard , measuring point 1: Patient connection opening) Patient hose systems (3 m) with FlowCheck sensor and with CO measurement Patient hose system Patient hose system...
- Page 246 14 Appendix Pressure drop [hPa] over the inspiratory and expiratory flow path at different flow rates [l/min] Article Inspiratory Exspiratory Part Flow [l/min] number (STP) (BTPS) 0.01 0.01 ® Aerogen Solo, t-piece for 0.02 0.03 adults 0.05 0.06 0.01 ® Aerogen Solo, t-piece for 0.12...
- Page 247 14 Appendix Specification Device Maximum drift of measuring accuracy < 0.4 vol% in 6 h Start-up time of the CO module 10 s Response time of the complete system • 2 m hose systems • 4.5 s • 3m hose systems •...
- Page 248 14 Appendix Calibration of the CO module The CO module is only calibrated within the scope of the 2-year maintenance intervals and does not have to be calibrated by the user. Neither calibration nor zero-point adjustment are performed during operation. The CO module features automatic adjustment for barometric pressure.
- Page 249 14 Appendix 14.1.6 Block diagram MEDUMAT Standard...
- Page 250 14 Appendix 14.1.7 O consumption of the device Consump on [l/min] MEDUMAT Standard...
- Page 251 14 Appendix 14.1.8 Oxygen concentration in Air Mix mode The following diagram shows the oxygen concentration for Air Mix mode at different counterpressures and respiratory minute volumes. The oxygen concentration is also reduced accordingly in Air Mix mode when concentrator oxygen is used. 60 mbar counterpressure 30 mbar counterpressure 15 mbar counterpressure...
- Page 252 14 Appendix 14.1.9 Technical data on electromagnetic compatibility (EMC) Medical electrical equipment is subject to special precautions in relation to electromagnetic compatibility (EMC). It must be installed and put into operation in accordance with the EMC information contained in the accompanying documentation. Guidelines and manufacturer's declaration –...
- Page 253 14 Appendix Guidelines and manufacturer's declaration – electromagnetic immunity MEDUMAT Standard is intended for operation in the electromagnetic environment specified below. The customer or the user of the MEDUMAT Standard device must ensure that it is also used in such an environment.
- Page 254 14 Appendix Guidelines and manufacturer's declaration – electromagnetic immunity MEDUMAT Standard is intended for operation in the electromagnetic environment specified below. The customer or the user of the MEDUMAT Standard device must ensure that it is also used in such an environment.
- Page 255 14 Appendix Note 1: The higher frequency range applies at 80 MHz and 800 MHz. Note 2: These guidelines may not be applicable in all cases. The size of electromagnetic fields depends on the extent to which they are absorbed and reflected by buildings, objects and persons. The ISM frequency bands (for industrial, scientific, and medical applications) between 150 kHZ and 80 Mhz are: 6.765 MHz to 6.795 MHz;...
- Page 256 14 Appendix Guidelines and manufacturer's declaration – electromagnetic immunity MEDUMAT Standard has been tested for immunity against the radio services listed below. If the field strength measured at the site where MEDUMAT Standard is used exceeds the upper compliance level, MEDUMAT Standard should be monitored to ensure it is functioning as intended.
- Page 257 14 Appendix Guidelines and manufacturer's declaration – electromagnetic immunity MEDUMAT Standard has been tested for immunity against the radio services listed below. If the field strength measured at the site where MEDUMAT Standard is used exceeds the upper compliance level, MEDUMAT Standard should be monitored to ensure it is functioning as intended.
-
Page 258: Calculation Of Body Weight On The Basis Of Body Height
14 Appendix 14.2 Calculation of body weight on the basis of body height In the start menu, you can set the height of the patient under the menu item New patient (see “4.7.3 Selecting a ventilation mode for a new patient”, page 73). -
Page 259: Exported Log Files
14 Appendix 14.3 Exported log files If you have exported log files to an SD card (see “6.3.4 Import / Export”, page 126), you will find the following files on the SD card: File name Description debug Supports communication in the event of servicing. status Supports communication in the event of servicing. - Page 260 14 Appendix Column name Description alarmsystem Test of the visual and audible alarms buttontest Test of the buttons and navigation knobs temperature sensor Test of the internal temperature of the device airway / mixing chamber Test of the internal pressure sensors pressure sensors int./ext.
-
Page 261: Scope Of Supply
14 Appendix 14.4 Scope of supply 14.4.1 Standard product MEDUMAT Standard with capnography WM 29500 option Article Part number MEDUMAT Standard basic device with CO WM 28710-02 measurement Reusable patient hose system for MEDUMAT Standard without flow measurement and with CO measurement, WM 28905 MEDUtrigger for 2 m patient hose system for manual... - Page 262 14 Appendix Article Part number MEDUtrigger for 2 m patient hose system for manual WM 28992 triggering of breath Inhalation adapter WM 28263 Battery WM 45045 Testing bag WM 1454 Set of CPAP/NIV disposable masks with air cushion WM 15807 Ventilation mask with self-inflating silicone cushion for WM 5074 adults, size 5...
- Page 263 14 Appendix MEDUMAT Standard without capnography option, with compressed WM 29350 gas connection on rear Article Part number MEDUMAT Standard basic device without CO WM 28710-03 measurement Reusable patient hose system for MEDUMAT Standard without flow measurement and without CO WM 28860 measurement, 2 m MEDUtrigger for 2 m patient hose system for manual...
- Page 264 14 Appendix 14.4.3 Patient hose systems Reusable hose system Article number With flow With CO Number measurement measurement WM 28860 WM 28861 WM 29197 WM 29198 WM 28905 WM 28906 WM 29190 WM 29191 Disposable hose system Article number With flow With CO Number measurement...
- Page 265 WM 28979 100 W power supply WM 28937 12 V cable WM 28356 Charging station WM 45190 EasyLung for WEINMANN Emergency WM 28625 SD card WM 29791 T-distributor with self-sealing coupling WM 22395 Set, wall mounting for power supply unit/charger...
- Page 266 14 Appendix Article Part number AD22 protective cap WM 28942 2 l oxygen cylinder, full, G 3/4", Article number max. filling pressure 200 bar on request 2 l lightweight oxygen cylinder, full, G 3/4", Article number max. filling pressure 200 bar on request Set of 5 2 m CO measuring hoses with filter, disposable WM 15695...
-
Page 267: Warranty
Internet at www.weinmann-emergency.com or from your authorized dealer. 14.5 Warranty Starting from the date of purchase, WEINMANN Emergency offers the customer a limited manufacturer’s warranty on a new original WEINMANN Emergency product or replacement parts installed by... -
Page 268: Declaration Of Conformity
14 Appendix 14.6 Declaration of Conformity WEINMANN Emergency Medical Technology GmbH + Co. KG declares herewith that the product complies fully with the respective regulations of the Medical Device Directive 93/42/EEC. The unabridged text of the Declaration of Conformity can be found on our website at www.weinmann-emergency.com. - Page 272 Manufacturer Center for Production, Logistics, Service WEINMANN Emergency WEINMANN Emergency Medical Technology GmbH + Co. KG Medical Technology GmbH + Co. KG Frohbösestraße 12 Siebenstücken 14 22525 Hamburg 24558 Henstedt-Ulzburg GERMANY GERMANY T: +49 40 88 18 96-120 E: customerservice@weinmann-emt.de...
Need help?
Do you have a question about the MEDUMAT Standard2 and is the answer not in the manual?
Questions and answers