
Subscribe to Our Youtube Channel
Related Manuals for Pentair EasyTouch PNP 5


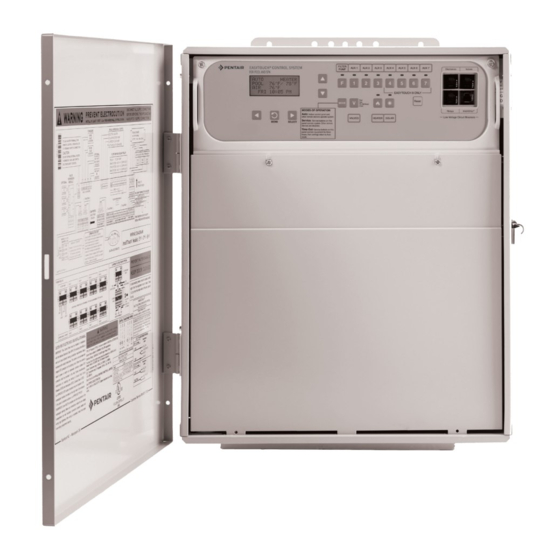
Summary of Contents for Pentair EasyTouch PNP 5
- Page 1 AQUATIC SYSTEMS EasyTouch ® EasyTouch PNP 5 ® & EasyTouch PNP 10 ® Pool and Spa Control Systems...
- Page 2 Notices and Warnings Important Notice This manual provides installation and operation instructions for the product. Consult Pentair with any questions regarding this product. Attention Installer: This manual contains important information about the installation, operation and safe use of this product. Leave this manual with the owner and/or oper- ator of this product after installation.
- Page 3 Notices and Warnings Notices and Warnings (Continued) Control System is intended to control heaters with built-in high limit circuits WARNING ONLY. Failure to do so may cause property damage or personal injury. Do not use this product to control an automatic pool cover. Swimmers may WARNING become entrapped underneath the cover.
- Page 4 Contents and Accessories EasyTouch Contents and Accessories EasyTouch Pool and Spa Control System Kit Contents ® • EasyTouch control panel (mounted in the load centre). • EasyTouch load centre enclosure. • Water sensor with 8m cable, o-ring and hose clamp. •...
-
Page 5: Table Of Contents
Table of Contents Table of Contents Hydraulic Set-Up Plumbing Requirements System Schematic Electrical Installation EasyTouch Load Centre High Voltage Connections EasyTouch Load Centre Location Preparing the EasyTouch Load Centre Enclosure Mounting the EasyTouch Load Centre Installing Conduit and Wire to the EasyTouch Load Centre Relay Wiring Relay Wiring Schematic EasyTouch Motherboard Connections... -
Page 6: Hydraulic Set-Up
Hydraulic Set-Up Hydraulic Set-Up Plumbing Requirements It is important that the pool and spa plumbing system be in accordance with local codes and the Recommended Hydraulic Schematics (page 7). Before starting, please review the diagrams and the following recommended guidelines: 1. -
Page 7: System Schematic
Hydraulic Set-Up System Schematic All equipment should be installed in an appropriate pool zone, depending on IP rating as per the Wiring Rules AS/NZS 3000. CHLORINATOR Recommended Hydraulic Schematic for Shared Equipment System Page 7... -
Page 8: Electrical Installation
Electrical Installation Electrical Installation EasyTouch Load Centre High Voltage Connections The EasyTouch load centre enclosure includes Active, Neutral and Earth bus terminals, pre-wired power relays, electrical outlets and control system transformer. BEFORE REMOVING THE HIGH VOLTAGE COVER PANEL FROM THE ENCLOSURE switch the main power OFF into the home at the main circuit WARNING breaker box. -
Page 9: Preparing The Easytouch Load Centre Enclosure
Electrical Installation Preparing the EasyTouch Load Centre Enclosure Before mounting the EasyTouch load centre, first remove the front door and the high voltage panel to access the electrical connections and low voltage raceway. To remove the EasyTouch load centre front door and high voltage panel 1. -
Page 10: Mounting The Easytouch Load Centre
Electrical Installation Mounting the EasyTouch Load Centre The EasyTouch load centre can be mounted on a flat vertical surface, such as a wall or post. To mount the EasyTouch load centre: 1. Position the EasyTouch load centre against the vertical flat surface. If wall an- chors are being used, support the EasyTouch load centre enclosure in position (horizontally level and square) against the surface and mark the bracket hole pattern on the wall. -
Page 11: Installing Conduit And Wire To The Easytouch Load Centre
Electrical Installation Installing Conduit and Wire to the EasyTouch Load Centre Before installing electrical conduit, read the following recommended guidelines: • Determine the number of low and high voltage circuits being used in the EasyTouch load cen- tre. • Determine the appropriate number of RCD’s (Residual Current Devices) required to provide protection to each outlet connected to the EasyTouch load centre. -
Page 12: Relay Wiring
Electrical Installation Relay Wiring Always supply A/N conductors to CNTRL for power to elec- tronics and actuators. Provide power from switchboard to con- nected circuits using Active wire links on terminal block (A & N) Neutral 25mm Conduit Connection Earth Bar - Connect to Supply (Supply Conductor Entry Point) Earth (always) and Equipoten- tial Bonding of Pool (if appli-... -
Page 13: Relay Wiring Schematic
Electrical Installation Relay Wiring Schematic Page 13... -
Page 14: Easytouch Motherboard Connections
Electrical Installation EasyTouch Motherboard Connections The EasyTouch system motherboard is mounted onto the back of the main load centre control panel. The motherboard provides the voltage connections to switch the filter pump, heater, auxil- iary relays, motorized valves, and connections for temperature sensors, EasyTouch Indoor Control Panel and iS4 Spa Side remote. -
Page 15: Accessing The Easytouch Motherboard
Electrical Installation Accessing the EasyTouch Motherboard The EasyTouch motherboard provides connectors for the auxiliary relays, valve actuators and sensors. To access the motherboard connectors, fold down the main control panel. To access the motherboard connectors: 1. Loosen the two retaining screws securing from the top edge of the control panel. 2. -
Page 16: Installing Valve Actuators
Electrical Installation Installing Valve Actuators For shared equipment systems there are two motorized valve actuators (CVA-24T, P/N 263045). To install the valve actuators: 1. Remove the valve knob, handle and the four screws, from the valve cover (indicated with ar- rows). -
Page 17: Installing And Connecting Temperature Sensors
Electrical Installation Installing and Connecting Temperature Sensors Water Temperature Sensor To install the water sensor: 1. Select a convenient location to mount the water sensor in the plumbing system between the filter pump and filter. Drill a 8mm diameter hole in one side of the pipe, 2. -
Page 18: Connecting The Gas Heater Or Heat Pump
Electrical Installation Connecting the Gas Heater or Heat Pump The following installation instructions are for gas heaters and heat pumps. To connect the heater fireman switch or external control cable plug to the motherboard: 1. Run a two-conductor cable from the heater fireman switch / external control to the low voltage raceway to the motherboard in the EasyTouch load centre. -
Page 19: Easytouch System Start-Up
Electrical Installation EasyTouch System Start-Up Perform the following start-up procedures to ensure that the EasyTouch load centre is installed correctly. If you need more detailed operating information, refer to the EasyTouch Pool and Spa Control System User’s Guide. Before you power up the EasyTouch load centre check the following: Check Electronics Check that the following plugs are seated correctly on the motherboard: •... -
Page 20: Easytouch System Wiring Diagram
Electrical Installation EasyTouch System Wiring Diagram Page 20... -
Page 21: Easytouch ® Control System Outdoor Control Panel
Controls EasyTouch Control System Outdoor Control Panel ® You can fully automate your pool, spa, and lighting operations from the EasyTouch control system outdoor control panel or from the optional EasyTouch control system indoor control panel and EasyTouch wireless control panel. The EasyTouch control system menu features let you create customized schedules for your pool and spa equipment, heat temperatures, and chlorination settings to switch on and off at a set day and time. - Page 22 10 minutes to allow the heater to cool down. Pentair heaters do not require a cool down time. To override the “heater cool-down,” press the Filter Pump button again to switch off the pump.
- Page 23 Controls Controls and buttons (Continued) When in normal operating mode, the Valves (V) - (Pool/Spa/Fill (Spillway)/Drain) button: Valves (V) button is in “Pool” mode. In this mode the valves are automatically rotated so that only the pool water is circulated through the system and the filter pump is activated. Pressing this button once enables “Spa”...
-
Page 24: Easytouch Indoor Control And Wireless Control Panel (Optional)
Controls EasyTouch Indoor Control and Wireless Control Panel (Optional) The EasyTouch Wireless or the Indoor Control Panel allows you to control your pool and spa daily operations from around your pool area or inside your home. Use the “P” (Pool) and “Spa” (Pool) buttons to heat and filter your pool and spa. -
Page 25: Easytouch Menus
Menus EasyTouch Menus MAIN SCREEN FEATURE CIR MANUALLY TURN A FEATURE CIRCUIT ON/OFF. FEATURE 1-8 [OFF] USE FEATURE CIRCUITS TO CONTROL PUMP SPEEDS AND VALVES. MODES [6 LIGHT SHOWS, HOLD, RECALL, COLOR SWIM, COLOR SET] LIGHTS COLORS [5 FIXED COLORS, HOLD, RECALL, COLOR SWIM, COLOR SET] ALL ON (SWITCH ALL LIGHTS ON) ALL OFF... -
Page 26: Programming Easytouch (Step By Step)
Programming EasyTouch Programming EasyTouch (Step By Step) 1. Set the system date and time (Page ). Getting There MENU SETTINGS CLOCK 2. Set temperature units to metric/Celsius (Page ). Getting There MENU SETTINGS ENGLISH/METRIC F°/C° 3. Assign circuit names (Page ) Getting There MENU SETTINGS... -
Page 27: Set The System Date And Time
Programming EasyTouch: Time Set the System Date and Time Use the Clock menu to set the EasyTouch system date and time. The day, time and AM/PM is displayed on the main screen. The system clock settings are used for the EasyTouch system scheduled operations. The EasyTouch system clock will continue to run if power is removed from the EasyTouch system at the load center. -
Page 28: Circuit Names
Circuit #: 1/18 to select AUX 1. The generic circuits names are: Spa (1/18), Pool (2/18), Aux 1-7 Circuit : SPA (EasyTouch PNP 10), Aux 1-3 (EasyTouch PNP 5), Ft 1. (10/18) - Ft. 8 (17/18), [SPA JET AuxX (18/18 - Aux Extra). The circuit number 1/18 corresponds to its assigned circuit name. -
Page 29: Easytouch Circuit Names
Programming EasyTouch: Circuit Names EasyTouch Circuit Names AERATOR DRAIN LINE MALIBU LTS SPA LOW AIR BLOWER DRIVE LIGHT MIST SPA SAL AUX 1 EDGE PUMP MUSIC SPA SAM AUX 2 ENTRY LIGHT NOT USED SPA WTRFLL AUX 3 OZONATOR SPILLWAY AUX 4 FIBER OPTIC PATH LIGHTS... -
Page 30: Circuit Functions
Programming EasyTouch: Circuit Functions Circuit Functions Assigning Circuit Functions Getting There MENU SETTINGS CIRCUIT FUNC. From the “Circuit Functions” menu you can assign special logic to the cleaner pump, spa spillway, lights and MagicStream laminar circuits. For example, when setting up an automatic pool cleaner pump you would assign the circuit function “MASTER CLEANER.”... - Page 31 Light Allows special lighting features to work, such as ALL lights on or ALL lights off. IntelliBrite Activates special colour lighting program for Pentair IntelliBrite, GloBrite, Color- Cascade, ColorVision and MagicStream* lights. MagicStream Activates special program for Pentair MagicStream* laminars.
-
Page 32: Heat Menu
Programming EasyTouch: Heat Heat Menu Use the heat menu settings to specify the set point temperature and select the heat source for the pool and spa water. The water will begin to heat whenever the water temperature is below the set-point. There is a different set point for “Pool”... -
Page 33: Solar
Programming EasyTouch: Heat Solar Use the solar settings to setup solar or configure solar as a heat pump: Setting Up Solar Control: Ensure that the solar temperature sensor is installed. About Installing Solar Heating: First, install the solar sensor at the collectors and connect to the EasyTouch load center. -
Page 34: Intelliflo ® Menu
EasyTouch automation system, the drive must be powered up to receive and respond to the RS-485 serial communication from the automation system. The EasyTouch PNP includes dedicated 15A permanent power outlets (one on the EasyTouch PNP 5 and two on the EasyTouch PNP 10). How many IntelliFlo pumps will EasyTouch support? EasyTouch can support a total of two IntelliFlo pumps in any combination with up to eight GPMs or RPMs per pump. -
Page 35: Intelliflo Vf Pump Settings
Programming EasyTouch: IntelliFlo IntelliFlo VF Pump Settings TO CHANGE THE PUMP TYPE: Press the Right button to Select Pump Type. Pump Type Filt. Circuit Press the Up/Down button and select Y, then press the Right button. Press the Flows Up/Down button to change the pump type to VS or VF. - Page 36 Programming EasyTouch: IntelliFlo Priming - System Prime Time: (0 - 5 minutes) Default 0 min.: Remember that the average unit will prime in a short period of time because the IntelliFlo has the ability to monitor itself to make sure it is primed. “System Prime Time” is for systems that require high flows that priming flow can provide but it is deemed that more time is needed to fully relieve all the air.
- Page 37 names are: The generic circuits names are: NONE, SPA, POOL, AUX 1-7 A: [CLEANER (EasyTouch PNP 10), AUX 1-3 (EasyTouch PNP 5), FEATURE 1-8, AUX EXTRA (or B: [FOUNTAIN SOLAR) and HEATER. USED SOLAR is displayed when SOLAR is enabled from Set Valves the Solar menu.
-
Page 38: Schedules Menu
Programming EasyTouch: Schedules Schedules Menu Use the Schedules menu to create programs to schedule start and stop times to automatically run equipment, such as pumps and lights. Any circuit can be programmed to switch on and off at a specific time on every or any specific day of the week. - Page 39 Programming EasyTouch: Schedules Schedules Menu (Continued) Schedule your spa/pool pump to turn on Use the Schedule feature to set the time and day(s) when to switch the filter pump on and rotate the pool or spa valves into the “Spa” or “Pool” position. The heater will automatically heat the spa or pool water up to the set point temperature as set in the “Heat”...
- Page 40 Programming EasyTouch: Schedules Schedules Menu (Continued) Using the Once Only feature The “Once Only” feature allows you to program a circuit to switch on at a particular time and day on a onetime basis. A typical use for this feature is to have the spa and heater switch on before you get home from work for one evening.
- Page 41 Programming EasyTouch: Schedules Using the Egg Timer (countdown) Feature The “Egg Timer” feature allows you switch off a circuit automatically after a specified time. The time period is from one minute to 24 hours or run continuously. The “Egg Timer” (countdown) feature is useful for switching off lighting and spa therapy jets.
-
Page 42: Is4 Spa-Side Remote Controller
The generic circuits are: NONE, SPA, POOL, AUX 1-7 (EasyTouch PNP 10), AUX 1-3 (EasyTouch PNP 5), FEATURE 1-8, SOLAR (if selected in “Heat” menu), AUX EXTRA, HEAT BOOST, HEAT ENABLED, PUMP INCRS, PUMP DECRS. -
Page 43: 10 Button Pump Cntrl
The generic circuits are: NONE, SPA, POOL, AUX 1-7 (EasyTouch PNP 10), AUX 1-3 (EasyTouch PNP 5), FEATURE 1-8, AUX EXTRA (or SOLAR if selected in “Heat” menu), HEAT BOOST and HEAT ENABLED. Selecting “None”... -
Page 44: Quicktouch (Qt4) Wireless Remote
The generic circuits are: NONE, SPA, POOL, AUX 1-7 (EasyTouch PNP 10), AUX 1-3 (EasyTouch PNP 5), FEATURE 1-8, AUX EXTRA (or SOLAR if selected in “Heat” menu), HEAT BOOST and HEAT ENABLED. -
Page 45: Advanced Settings
From the Lights screen you can manually switch all lights on or off, synchronize coloured lights, and activate colour light shows. Up to eight (EasyTouch PNP 10) or four (EasyTouch PNP 5) light circuits can be configured from the “Config” light menu. Each light must have its own relay and separate circuit. - Page 46 Advanced Settings: Lights Setting up lights (Continued) Modes (Color Set) The “Color Set” feature allows any combination of up to eight (EasyTouch PNP 10) or four (EasyTouch PNP 5) IntelliBrite lights, and SAm, SAL and or Fiberworks lighting to be preset to specific colours. Fixed light colours are selected and activated from the Colors screen.
- Page 47 From the “Config” screen you can setup the IntelliBrite light position, and specify the colour of each pool and spa light. Any combination of up to eight (EasyTouch PNP 10) or four (EasyTouch PNP 5) IntelliBrite lights, SAM, SAL and or Fiberworks lights can be preset for specific colours and position when using the “Color Swim”...
-
Page 48: Setting Up Magicstream Laminars
Advanced Settings: Lights Setting up MagicStream Laminars The MagicStream Laminar provide a clear, turbulence-free stream of water that is lit with a fiber optic ® cable, or an LED light for a dazzling nighttime effect. The 12 VAC powered LED light can generate a series of multicoloured light shows, or can be set to display a continuous, single colour. - Page 49 Advanced Settings: Feature Circuits Feature Circuits There are eight (8) “Feature Circuits” that can be used to control IntelliFlo pump speeds or valves actuators for a spa spillway. Unlike an auxiliary relay circuit, a “Feature” circuit does not connect directly to a relay. “Feature”...
-
Page 50: Delays
Heat Pump COM (UltraTemp Heat Pump) ® The Pentair UltraTemp Heat Pump is currently unavailable in Australia and New Zealand. Other brand heat pumps still be used with the EasyTouch though. Refer to Page 18 for heat pump connection and configuration. -
Page 51: Intellichlor
Advanced Settings: Salt Chlorinator IntelliChlor While the EasyTouch system is in normal operating mode (“Pool,” “Spa” mode or “Spa Fill (Spillway),” it will control the IntelliChlor chlorine output level. The amount of chlorine introduced into the pool is determined by the amount of salt in the water, water temperature, and the amount of time the pool pump is running in “Pool”... -
Page 52: Intellichem
Advanced Settings: IntelliChem IntelliChem ® IntelliChem provides the EasyTouch system with continual analysis of your swimming pool water sanitation and pH levels, providing real-time status information to dispense the proper amount of muriatic acid (pH reducer) and chlorine or bromine for the correct sanitization and pH balance. IntelliChem operates with or without a salt chlorine generator to provide a self-replenishing supply of chlorine generated from salt. -
Page 53: Settings Menu: 2-Speed Pump
Up/Down buttons: Select the circuit to assign to a two-speed pump. The generic circuits names are: NONE, SPA, POOL, AUX 1-7 (EasyTouch PNP 10), AUX 1-3 (EasyTouch PNP 5), FEATURE 1-8, SOLAR, HEATER, POOL HEATER, SPA HEATER and FREEZE. AUX EXTRA is displayed only available if the Solar output (J17) plug on the EasyTouch motherboard is not being used for solar equipment. -
Page 54: Man Heat (Off/On)
Advanced Settings: Man Heat Getting There MENU SETTINGS MAN HEAT (On/Off) 10B Pump Cntrl QuickTouch Man Heat [On] Calibration Getting There MENU SETTINGS CALIBRATION CALIBRATION Calibration Water: 20°C Air: 25°C Solar: 45°C Page 54... -
Page 55: Erase Eeprom (Erase System Memory)
Advanced Settings: Erase EEPROM Erase EEPROM (Erase System Memory) EasyTouch system configuration data is stored and retained in “Flash” memory in an EEPROM located on the control panel motherboard and optional Indoor Control Panel. The EasyTouch user system configuration data can be erased to restore the factory defaults settings. System information automatically downloads from programmed components to non-programmed components in case of accidental memory loss and to ease board replacement. -
Page 56: Wireless Addr
Advanced Settings: EasyTouch Wireless Wireless Addr Use this feature to assign the EasyTouch wireless control panel a unique communication address to allow the wireless device to operate with the EasyTouch outdoor control panel. Getting There MENU SETTINGS WIRELESS ADDR Press Right Arrow Button Setting up the EasyTouch wireless control panel for the first time Setting up the EasyTouch wireless control panel In order for the EasyTouch wireless control panel to communicate with the EasyTouch system outdoor... -
Page 57: Synchronizing Control Panels
Advanced Settings: EasyTouch Wireless Synchronizing control panels If the EasyTouch outdoor control panel was previously setup with specific pool and spa information and an additional indoor or wireless control panel with factory default information is installed, during the installation process the outdoor control panel will automatically download the system information to the connected control panel. -
Page 58: Spa Side [Off/On]
Diagnostics Spa Side [Off/On] Enable or disable the iS4 Spa Side remote. This feature is useful for families with young children or when you go on vacation. It allows you to switch off the iS4 Spa Side remote at the control panel so that the remote cannot be used. - Page 59 Diagnostics Diagnostics Menu: Chlorinator Displays the current IntelliChlor chlorination system status. For more information, refer to the IntelliChlor Electronic Chlorine Generator User’s Guide (P/N 520589). Menu: Press this button to return to the Settings menu options. Press the button again to return to the main menu options or press again to return to the main Chlorinator screen.
- Page 60 Diagnostics Diagnostics Menu: Air Temp Displays the current outside air temperature. Air Temperature Press the Menu button to return to the Settings menu options. Press the button again to return to the main menu options or press again to return to the main screen.
- Page 61 Troubleshooting Troubleshooting Error Message Possible Cause Solution Air sensor not con- Check that the air sensor plug is connected to J21 con- Air Err (Displays on the Main nected to the Easy- nector on the motherboard. Check that the sensor wire Screen) Touch motherboard.
- Page 62 Troubleshooting Defective wiring on one or more SpaCommand Verify wiring on motherboard and SpaCommand. leads SpaCommand fails to operate only some of the switches, but others work fine. Incorrect configuration or circuit to switch as- Verify motherboard connection. signment. Maximum Programs Exceeded The “Maximum Programs Exceeded”...
- Page 63 Spare Parts EASYTOUCH CONTROL SYSTEMS ® REPLACEMENT PARTS Part Part Item Description Item Description NEW EASYTOUCH CONTROL SYSTEMS REPLACEMENT PARTS 520108 4-PIN SCREW TERMINAL (ICP & SCREENLOGIC2) 521233 NEW LOAD CENTER SYS XFMR 520283 LABEL SET OF 10 OUTDOOR CONTROL PANEL 521081Z KIT LC DOOR LATCH 520658...
- Page 64 +61 3 9709 5888 © Information contained here-in remains the property of Pentair Australia Pty. Ltd. Any reproduction, display, publica- tion, modification or distribution is strictly prohibited without the prior written permission of Pentair Australia Pty.. Ltd. Disclaimer: Every endeavour has been made to publish the correct details in this document. No responsibility will be taken for errors, omissions or changes in product descriptions, specifications.
Need help?
Do you have a question about the EasyTouch PNP 5 and is the answer not in the manual?
Questions and answers