Solar-Log 2000 Installation Manual
Hide thumbs
Also See for 2000:
- Manual (319 pages) ,
- Installation manual (224 pages) ,
- User manual (158 pages)
Table of Contents
Advertisement
Advertisement
Chapters
Table of Contents

Related Manuals for Solar-Log 2000


Summary of Contents for Solar-Log 2000
- Page 1 Installation manual Solar-Log 300, 1200 and 2000...
- Page 2 Tel.:+49 7428 9418 -200 Fax:+49 7428 9418 -280 E-mail: info@solar-log.com Technical support: End customers and non-certified installers Tel.: +49-900-1737564* Installation problems from certified installers and Solar-Log™ partners Tel.: +49-7428-9418-660 Service and planning inquiries Tel.: +49-7428-9418-660 International support for countries without Tel.: +49-7428-9418-640...
-
Page 3: Table Of Contents
Solar-Log™ PM+ ��������������������������������������������������������������������������������������������������������������������������������������������������������� 25 Connector Assignments and Wiring �������������������������������������������������������������������26 8�1 Notes on wiring the connections ������������������������������������������������������������������������������������������������������������������������ 27 8�2 RS485 A (only Solar-Log 1200 and 2000) ����������������������������������������������������������������������������������������������������� 28 8�3 RS485/422 B ��������������������������������������������������������������������������������������������������������������������������������������������������������������� 29 8�4 RS485/422 C (only Solar-Log 2000) ���������������������������������������������������������������������������������������������������������������� 30 8�5... - Page 4 12�3�1 Carrying out the initial set up of the Solar-Log 1200 ����������������������������������������������������������������������������������59 12�4 Initial set up of the Solar-Log 2000 ������������������������������������������������������������������������������������������������������������������ 59 12�4�1 Carrying out the initial set up of the Solar-Log 2000 ���������������������������������������������������������������������������������60 12�5 Starting the configuration �������������������������������������������������������������������������������������������������������������������������������������� 61 12�6...
- Page 5 Device definition �������������������������������������������������������������������������������������������������������������������������������������������������������� 76 16�1�1 Configuring the device interface ��������������������������������������������������������������������������������������������������������������������������76 16�2 Defining the Smart Home switches �������������������������������������������������������������������������������������������������������������������� 78 16�3 Defining the Solar-Log™ Meter (only Solar-Log™ Meter) �������������������������������������������������������������������������� 79 16�4 Device detection �������������������������������������������������������������������������������������������������������������������������������������������������������� 81 16�5 Configuring devices ������������������������������������������������������������������������������������������������������������������������������������������������� 82 16�5�1 Configuring inverters ������������������������������������������������������������������������������������������������������������������������������������������������82 16�5�2 Configuring power meters ��������������������������������������������������������������������������������������������������������������������������������������83...
- Page 6 21�4 Profile ������������������������������������������������������������������������������������������������������������������������������������������������������������������������������ 124 21�5 Direct Marketing ��������������������������������������������������������������������������������������������������������������������������������������������������������� 126 21�6 Programming the Smart Home control logic �������������������������������������������������������������������������������������������������� 126 Direct Device Configurations (Solar-Log 1200 and 2000) ������������������������ 128 22�1 Display menu structure �������������������������������������������������������������������������������������������������������������������������������������������� 128 22�2 Display control elements ����������������������������������������������������������������������������������������������������������������������������������������� 129 22�3 Settings on the device ���������������������������������������������������������������������������������������������������������������������������������������������...
- Page 7 Faults �������������������������������������������������������������������������������������������������������������������������������� 141 23�1 Restarting and resetting ������������������������������������������������������������������������������������������������������������������������������������������� 141 23�1�1 Reset buttons ��������������������������������������������������������������������������������������������������������������������������������������������������������������141 23�1�2 Reset �������������������������������������������������������������������������������������������������������������������������������������������������������������������������������141 23�1�3 Restoring the factory settings ������������������������������������������������������������������������������������������������������������������������������142 23�2 Rebooting and Resetting via the web menu ��������������������������������������������������������������������������������������������������� 143 23�2�1 Fault messages GPRS �����������������������������������������������������������������������������������������������������������������������������������������������144 23�2�2 Fault messages WiFi �������������������������������������������������������������������������������������������������������������������������������������������������145 23�2�3 Fault messages Export to External Server and Backup ������������������������������������������������������������������������������146 23�3 Portal Transfer Fault messages ���������������������������������������������������������������������������������������������������������������������������...
-
Page 8: Introduction
This installation manual is intended for use by solar energy technicians and professional electricians. Device-specific user manuals are available for operating the Solar-Log™. The Solar-Log™ must only be used by persons who have fully read and understood this installation manual before installing, operating and/or servicing the device. -
Page 9: Safety Information
This manual is intended for solar energy technicians and qualified electricians who are installing a Solar-Log 300, Solar-Log 1200 and Solar-Log 2000, wiring them to inverters, configuring them to operate in particular systems, and putting them into operation. - Page 10 Safety information Caution Indicates an imminently hazardous situation to people, or a risk of material damage Non-com- pliance with this warning can lead to irreversible injuries or to material damage.
-
Page 11: Electric Current
Electric current 3 Electric current DANGER Risk of death by electric shock if inverters are opened. Never open the inverter housing when the in- verter is connected to power. See Switching off the inverters Page 34. Always read the installation and safety instruc- tions given in the manual for the corresponding inverter. - Page 12 Electric current Caution Damage to the electrical components of the Solar-Log™ due to the wiring of the Solar-Log™! Switch the Solar-Log™ off; See Chapter 9.1 on page 34 Warning: Risk of electric shock. Do not use the unit if the housing of the exter- nal power supply unit is damaged.
-
Page 13: Package Contents
Report any damage or missing parts to the forwarding agent and dealer immediately. The unit is supplied with the following components: • Solar-Log™ basic unit • 2x cover panels to be fitted to the top and bottom of the unit to protect the connections and reset button •... -
Page 14: Wall Mounting
Log™ in order for it to operate. GPRS and WiFi models do not require the network connection. • Put the housing where it is to be fitted and mark the drill holes. Solar-Log™ wall mounting • The Solar-Log™ should be fitted in an easily accessible place. • Drill the holes and insert the wall plugs... - Page 15 Wall mounting Note concerning Solar-Log GPRS The SIM card should be inserted (Page 7.1 on page 22) before attaching the unit, as the insertion slot will no longer be accessible after wall mounting. • Fasten the housing with the screws •...
-
Page 16: Unit Connections
Unit connections 6 Unit connections 6�1 Solar-Log 300 Bottom connections Bottom connections Solar-Log 300 Solar-Log 300 RS485/422 B RS485 interface, 6 pin: Connection for inverters and additional accessories Power 12 V 12 volt DC input Network Ethernet network interface, 10/100 Mbit... - Page 17 Unit connections Top connections Top Connections Solar-Log 300 Solar-Log 300 S0_Out/In S0 pulse input for connec- tion to an external power meter. S0 pulse output for connecting to a large ex- ternal screen. Please note the connection character- istics of the S0 connec- tion.
-
Page 18: Solar-Log 1200
Unit connections 6�2 Solar-Log 1200 Bottom connections Bottom Connections Solar-Log 1200 Solar-Log 1200 Relay Relay with change-over contact RS485 A RS485 interface, 4 pin: Connection for inverters and/or accessories (inac- tive if the optional Blue- tooth interface is used) RS485/422 B... -
Page 19: Top Connections Solar-Log 1200
Unit connections Top connections Top connections Solar-Log 1200 Solar-Log 1200 S0_Out/In S0 pulse input for connec- tion to an external power meter. S0 pulse output for connecting to a large ex- ternal display. Please note the connection character- istics of the S0 connection. -
Page 20: Solar-Log 2000
Unit connections 6�3 Solar-Log 2000 Bottom connections Top Connections Solar-Log 2000 Solar-Log 2000 Relay Relay with change-over contact RS485 A RS485 interface, 4 pin: Connection for inverters and/or accessories (inactive if the optional Bluetooth interface is used) RS485/422 B RS485 interface, 6 pin:... - Page 21 Unit connections Top connections Top Connections Solar-Log 2000 Solar-Log 2000 S0_Out/In S0 pulse input for connec- tion to an external power meter. S0 pulse output for connecting to a large ex- ternal screen. Please note the connection character- istics of the S0 connection.
-
Page 22: Optional Connections
Solar-Log™ GPRS Antenna connection and SIM card slot In addition to the connections on the standard Solar-Log™, the Solar-Log™ GPRS model with an inte- grated GPRS modem has a SIM card slot and a screw connection for an antenna. •... -
Page 23: 7�2 Solar-Log™ Meter (Solar-Log 300 And 1200)
Optional Connections 7�2 Solar-Log™ Meter (Solar-Log 300 and 1200) The Solar-Log Meter version of the Solar-Log™ has an integrated interface to connect up to six cur- rent transformers (CTs). This optional Meter interface makes it possible to measure generating units (production meter) and consumption from individual appliances. - Page 24 The current transformers have to be set up in a way so that only one current-carrying conductor is measured. Cables with multiple wires cannot be measured. The maximum cable length between the current transformers and Solar-Log™ depends on the cable diagram and the load of the current transformer.
-
Page 25: Solar-Log™ Pm
Solare-Datensysteme offers the following current transformers that are specially tailored to the Solar- Log™ Meter: Current transformer Name Description Article Number: Solar-Log™ CT 16 A Current measurement 16 A, transformer: 255639 16A/200mA Solar-Log™ CT 100 A-c Current measurement 100 A, transformer: 255640... -
Page 26: Connector Assignments And Wiring
• To connect a router, you need a network cable with the appropriate length. If you want to con- nect the Solar-Log™ directly to your PC or laptop, you need to use a crossover cable. • Cable to connect the Solar Log™ to an inverter. -
Page 27: Notes On Wiring The Connections
Notes on wiring the connections The wiring of the inverters and accessories needs to be carried out with the greatest care and atten- tion. The most frequent source of errors when installing the Solar-Log™ is faulty wiring. For this reason, we recommend: •... -
Page 28: Rs485 A (Only Solar-Log 1200 And 2000)
Connector Assignments and Wiring 8�2 RS485 A (only Solar-Log 1200 and 2000) Use the provided terminal block connectors when connecting inverters or accessories to the RS485 A interface. 4-pin Terminal block connector RS485 A Assignment Data + 12 V Ground... -
Page 29: Rs485/422 B
Connector Assignments and Wiring 8�3 RS485/422 B Use the provided terminal block connectors when connecting inverters or accessories to the RS485/422 B interface. 6-pin Terminal block connector RS485/422 B Assignments RS485 Assignments RS422 Data + T/RX+ 12 V Ground Ground Data - T/RX- R/TX+... -
Page 30: Rs485/422 C (Only Solar-Log 2000)
Connector Assignments and Wiring 8�4 RS485/422 C (only Solar-Log 2000) Use the provided terminal block connectors when connecting inverters or accessories to the RS485/422 C interface. 6-pin Terminal block connector RS485/422 C Assignments RS485 Assignments RS422 Data + T/RX+ 12 V... - Page 31 S0_Out_In interfaces. 8�5�1 S0 In The S0 In interface is a hardware interface used for recording measurement values from power me- ters. Use the supplied terminal block connector for the connection to the Solar-Log™. 4-pin Terminal block connector S0_In...
-
Page 32: 8�5�2 S0 Out
Schematic diagram of the S0 output Note We recommend not using the S0 output for sending current feed amount response signals to your grid operator. Due to the internal calculating processes of the Solar-Log™, there would be a delay in sending the pulses. -
Page 33: 6-Pin Pm+ Interface
Connector Assignments and Wiring 8�6 PM+ The Solar-Log™ PM+ models come with a 6-pin PM+ interface on the top side of the Solar Log The interface has been designed to link the ripple control receivers or telecontrol plants with poten- tial-free signal contacts. -
Page 34: Connecting The Inverters
• See Chapter”8 Connector Assignments and Wiring” on page 26 for terminal block connector wiring diagrams for the connection to the Solar-Log™ • Please refer to the Inverter Connection Manual when connecting inverters supported by the Solar- Log™. -
Page 35: Connecting Accessories
Solar-Log™ • The sensors are connected to the Solar-Log™ via the RS485 interface parallel to the inverter bus or via a free RS485 interface. Please consult the instructions in our inverter database. Some in- verters cannot be connected to the same bus as the sensor. -
Page 36: Sensor Box Commercial
Solar-Log™ to calculate the deviations in the current output compared to the potential output. Up to 9 Sensor Box Commercials can be connected to the Solar-Log™. The solar radiation sensor must be fitted in such a way that the sensor's solar cell and the plant's modules are aligned as simi- larly as possible to the sun, i.e. -
Page 37: Mounting Instructions For The Sensor Box Commercial
If there are various module alignments at a plant, every alignment should be fitted with a Sensor Box Commercial. The Solar-Log™ can record and save additional environmental data with the Sensor Box Commercial (with optional accessories). This environmental data includes: •... - Page 38 However, if the housing is opened there can be no guarantee of water tightness and proper operation. Wiring the Sensor Box Commercial to the Solar-Log™ The sensor box can also be integrated in the bus wiring of the inverters. Note When using inverters with RS422 communica- tion, do not operate the sensor on the same bus.
-
Page 39: Ripple Control Receiver
Wiring The relay contacts for the ripple control receiver are connected to the Solar-Log™ PM+ via the 6 pin PM+ interface on the top side of the Solar Log 6-pin PM+ interface The ripple control receivers used by grid operators utilize various numbers of relays. -
Page 40: Large External Displays
Connecting accessories In order that the Solar-Log™ PM+ can evaluate the signal from the ripple control receiver, it needs to be wired to the control voltage (for active and reactive power) from the PM+ interface. The control contracts normally operate as make contracts; that means the closed for the respective command. - Page 41 Connection via the RS485/422 interface Wiring for displays made by Schneider Displaytechnik The wiring consists of a 3-pin control cable, (3 0.5 mm ) and terminal block connector. Schneider Large displays RS485 Solar-Log™ Terminal block connec- Schneider Display Assignment 1 (Data +)
- Page 42 Connecting accessories Pulse factor In the standard setting, Solar-Log™ sends 1000 pulses/kWh over the S0 output. The pulse factor must be configured according to the size of the plant (kWp) in the Configuration | Devices | Definition | External Display menu.
-
Page 43: External Power Meter
Connecting accessories 10�5 External power meter External power meters can be connected to every Solar-Log™ model via the S0 input and/or the RS- 485 bus. Solar-Log™ devices have a varying number of SO inputs: S0 inputs Solar-Log™ Number of S0 inputs Solar-Log™... -
Page 44: Wiring For S0 Meter
Power meter Solar-Log™ Assignment Connecting a bridge be- tween pins 3 and 4. The maximum cable length between the power meter and Solar-Log™ is 10 meters. Wiring Inepro 75D meter via S0 and S0 Article Number: 255420 Inepro 75D or S0 Power meter Solar-Log™... - Page 45 Wiring for Inepro 1250D meter via S0 and S0 Article Number: 255421 Inepro 1250D or S0 Power meter Solar-Log™ Assignment Pin 9 - S0+ Pin 8 - S0- Connecting a bridge be- tween pins 3 and 4. Wiring for Iskra WS0021 meter via S0...
-
Page 46: Wiring For Rs485 Meter
After the detection is finished, the detected me- ter can be configured under Configuration | Device | Definition. 10�7 Wiring for RS485 meter The meter's RS485 output can be connected to any RS485 interface on the Solar-Log™. Overview • 2-pin wiring •... - Page 47 10 - 485B 23 - A • Insert terminal block connector into the RS485A or RS485/422B socket of the Solar-Log™. • Perform a device detection: The power meter is connected to the system as if it were an inverter. •...
- Page 48 Note Inepro meter Inepro meters are automatically given the mod bus address 234 by Solar-Log™ during the detec- tion process. This address is therefore not allowed to be used for other devices.
- Page 49 Connecting accessories Note RS485 meter All RS485 meters have to be terminated with an 120Ω resistor between the two pins used.
-
Page 50: Installation Utility Meter (Only 2000)
Connecting accessories 10�8 Installation Utility Meter (only 2000) The Solar-Log™ Utility Meter is a universal metering device. It can be integrated in both low- and medium-voltage networks (via a transformer) and is needed for various functions: • controlling voltage-dependent reactive power via the Q(U) function •... -
Page 51: Utility Meter Connection Diagram For Voltage Measurements
Connecting accessories Connecting the Utility Meter to the power grid Utility Meter connection diagram for voltage measurements Utility Meter connection diagram for current measurements... - Page 52 Connecting accessories Procedure • Enter the supply voltage into the Utility Meter Note We recommend using a fuse to safeguard the connection lines for the supply voltage. Please follow the instructions in the Janitza UMG 104 manual. Note Supply voltage that does not correspond to the specifications on the rating plate can cause malfunctions and damage the device.
-
Page 53: Solar-Log™ Smart Home Relay Box
Connecting accessories • Connect the Utility Meter to the RS485 bus of the Solar-Log™ according to the following diagram: Wiring the Utility Meter Terminal block connec- Utility meter tor RS485 Solar-Log™ terminal block connec- only Solar-Log 2000 Article Number: 255385... -
Page 54: Relay Output Diagram
Connecting accessories Procedure: • Connect the Relay Box to the RS485 bus of the Solar-Log™ according to the following diagram: Relay Box Wiring Terminal block connec- Relay Box tor RS485 Solar-Log™ Terminal block connec- only Solar-Log 2000 Article Number: 255385... -
Page 55: Other Connections
11 Other connections 11�1 Alarm contact (only Solar-Log 2000) The Solar-Log 2000 has an alarm contact which is triggered if the connection is broken. This function can be used for various applications: • Anti-theft protection for the modules or inverters •... -
Page 56: 11�2 Relay (Only Solar-Log 1200 And 2000)
Other connections 11�2 Relay (only Solar-Log 1200 and 2000) The Solar-Log™ has a potential-free control relay, which is activated under the following conditions: • Alarm contact triggered • Active power reduction activated • Optimization of self-consumption The relay may be loaded with a maximum of 24 V DC and 5 A. -
Page 57: Set Up
• Connection through a wireless network (Solar-Log™ WiFi) If the Solar-Log™ is operated via a router, ensure that the necessary ports have been activated (see Chapter “26.1 Internet ports” on page 156). Since the Solar Log™ obtains its IP address while booting, it needs to be connected to the network before being turned on. -
Page 58: Initial Set Up Of The Solar-Log 300
• The DHCP service is enabled on the Internet router. • The DHCP service is enabled when connecting directly to the Solar-Log™ with a PC. (We recom- mend using a patch cable.) Easy Installation After selecting the language and country, the initial set up can be carried out with the Easy Installa- tion configuration wizard. -
Page 59: Initial Set Up Of The Solar-Log 1200
Web browser. All of the device connections 1200 need to be established and it is best to connect the Solar-Log 2000 to an internet router. All settings made at the initial startup can be changed at a later time. -
Page 60: 12�4�1 Carrying Out The Initial Set Up Of The Solar-Log 2000
Set Up 12�4�1 Carrying out the initial set up of the Solar-Log 2000 The initial configuration of Solar Log is made via a Web browser. 2000 Procedure: • Enter the address http://solar-log in the address bar of the web browser. -
Page 61: Starting The Configuration
Set Up 12�5 Starting the configuration The various options to open the main menu of the Solar-Log™ are listed below: Device URL • Start the web browser • Enter http://solar-log in the address bar and press the ENTER key •... -
Page 62: Solar-Log™ Model Tag
Start the web browser • Enter http://solar-log-wxyz in the address bar and press the ENTER key Here wxyz stands for the last 4 digits from serial number of the Solar-Log™. The serial number is printed on the model tag. •... -
Page 63: Using The Browser Menu
The sections Yield data and Diagnostic are described in the user manuals of the respective models. The browser menu has various operation menus. Layout of the main menu In the Solar-Log™ manuals, the following convention is used in describing how to navigate the menu. Main menu | Left Navigation | Tab For example:... -
Page 64: Control Elements In The Browser Menu
Set Up Control elements The following control elements are used in the browser menu: Control elements in the browser menu Control element Meaning Text field Text field with incorrect or missing entry Drop-down selection list Virtual switch deactivated and activated The question mark boxes display additional informa- tion... -
Page 65: Main Menu
Main menu 13 Main menu The main menu is divided into the following sections: • Configuration • Diagnostic • Yield data The sections Diagnostic and Yield data are described in the user manuals. -
Page 66: Configuration Menu
14�1 Configuring network settings Open the dialog box Select Configuration | Network from the menu The Network menu is divided into the following sub-sections: • Ethernet • GPRS (only Solar-Log™ GPRS) • WiFi (only Solar-Log™ WiFi) • Proxy (advanced configuration activated) -
Page 67: Ethernet
The Subnet mask is 255.255.255.0 by default and must be the same for every device in the subnet. Gateway The gateway is typically the IP address of the router to which Solar-Log™ is connected. That IP ad- dress is to be entered here. -
Page 68: Gprs (Only Solar-Log™ Gprs)
If an Alternate DNS server is needed, switch the function to activated and enter the IP ad- dress of the DNS server. Once finished, click onSave. 14�3 GPRS (only Solar-Log™ GPRS) GPRS settings In many cases where no DSL or telephone connection is available, a GPRS mobile network is the only option to connect to the Internet to send e-mails, text messages (SMS) and data to the homepage. - Page 69 If this option is activated, the GPRS modem is continuously connected to the service provider. This setting is only recommended for flat-rate data plans. Roaming allowed By activating the roaming function, the Solar-Log™ can also connect to other mobile networks when the home network is unavailable. Note Activating the roaming function could potentially result in enormous additional costs.
-
Page 70: Wifi (Only Solar-Log Wifi)
Configuration Menu 14�4 WiFi (only Solar-Log WiFi) WiFi settings The Solar-Log™ WiFi models are equipped to be connected in a wireless local area network. Status section The WiFi function can be switched on and off with the Activate WiFi function. In the status box, the current status of this function is displayed. - Page 71 IP address, Subnet mask, Gateway and DNS server The settings can also be manually configured in these boxes. The DHCP function then needs to be deactivated in the Solar-Log™. If necessary, please consult a network specialist who can assign a suitable network address in regard to IP address, Subnet mask and Gateway, for example.
-
Page 72: Proxy
Configuration | System. The proxy settings need to be configured in the Solar-Log™ to enable internet communication via the proxy server. Proxy servers are typically used in the networks of organizations and companies. The data transfer only refers to the FTP transfer. -
Page 73: Internet Configuration
Text message (SMS) • Export • Back-up 15�1 Access type The type of internet access that the Solar-Log™ uses to connect to a portal or server is adjusted in this tab. Procedure • Internet Access Select the type of Selection options:... -
Page 74: E-Mail
In addition, you also have the option of saving your own address. E-mail settings section Enter the settings for sending e-mail via the Solar-Log™'s e-mail client in this section. The data for the boxes SMTP Server, SMTP user name, SMTP password and sender is in the confirmation message from the portal registration. -
Page 75: Backup
FTP server access data. • An FTP directory only has to be entered here if the Solar-Log™ homepage is not to be located directly in the main directory of your homepage. Otherwise, this box can be left empty. -
Page 76: Configuring Connected Devices
Configuring connected devices 16 Configuring connected devices From the menu Configuration | Devices, the PV plant components connected to the Solar-Log™ can • defined • detected • and configured. We recommend the following procedures for new installations: • First define the interface to be used for the connected devices •... -
Page 77: Example Of A Device Definition
If an inverter is connected to the Solar-Log™ via Network / LAN, please select the corresponding inverter brand here. CAN section (only Solar-Log 2000) If an inverter is connected to the Solar-Log™ via the CAN Bus, please select the corresponding in- verter brand here. Procedure •... -
Page 78: Defining The Smart Home Switches
• Gude 1002 • Allnet 3075/3076 V2 • Allnet 3073 • Solar-Log™ Smart Home Relay Box (The connection via RS485 cannot be combined with in- verters connected to the RS485 bus) • Select the corresponding switch type • Activate the switch •... -
Page 79: 16�3 Defining The Solar-Log™ Meter (Only Solar-Log™ Meter)
Solar-Log™ CT 100A - o user-defined • The settings for the Solar-Log™ CTs have been pre-defined for the current ratio • When using other CTs, select user-defined. An additional input box appears for the current ratio of the installed CT. - Page 80 Solar-Log™ • or set in the box reference voltage [V]. If the Solar-Log™ does not receive voltage values from the inverters (for example during night), an average value is calculated and used. Always use stored voltage...
-
Page 81: Device Detection
During the Device Detection process, all of the predefined devices in the Device Definition menu which are connected to the Solar-Log™ interfaces are searched for and recognized. During the Device Detection process, the Solar-Log™'s internal data structure is prepared for these devices. -
Page 82: Configuring Devices
Configuring connected devices 16�5 Configuring devices After the Device Detection has been successfully completed, the detected devices have to be defined in the Configuration | Devices | Configuration menu. Depending on the device, different settings might be needed for the configuration. The following devices were detected: •... -
Page 83: 16�5�2 Configuring Power Meters
Configuring connected devices • generator power tracker for every needs to be entered if the inverter has several MPP track- ers. • A distinct label can be assigned to every generator/MPP tracker in the Label box. • SAVE settings 16�5�2 Configuring power meters A function needs to be assigned to power meters to configure them. -
Page 84: Example Of The Module Field Division
32° inclination, 0° South deviation. This results in two module fields according to the following table: Division of the module fields Location Inverters MPP Tracker Module field output Barn 1. SB5000TL 2000 Barn 1. SB5000TL 2000 Barn 1. SB5000TL 2200 Barn 2. SB5000TL 2000 Barn 2. -
Page 85: Configuring Plant Data
17�3 Plant groups Since the Solar-Log™ can manage up to 100 inverters at the same time, it is helpful to divide these in- verters into groups. To provide a clearer overview, these groups are then shown in all selection dialog boxes. -
Page 86: Defining The Pv Plant's Forecast Data
Configuring Plant Data Procedure: • Select Configuration | Plant | Plant groups from the menu • use Plant buttons, the button needs to be activated. • Under Name, a plant group can be uniquely labeled. • The devices recognized during the Device Detection are now allocated into the device groups. •... -
Page 87: 17�5 Defining Tariffs And Costs
From date and the corresponding rate for the feed-in tariff need to be defined. The Solar-Log™ calculates the amount of power fed into the grid based on the inverter information. Feed-in tariff + Self-consumption refund mode Here a distinction is made between generated power that is fed into the grid and that is directly con- sumed (self-consumption). -
Page 88: Configuring Notifications
• Deviation from target power E-mail The e-mail addresses can be entered in the box. The Solar-Log™ sends all e-mail notifications to these e-mail addresses. Text message (SMS) A mobile number can be entered in the box. The text message (SMS) is then sent to this mobile num- ber. - Page 89 Configuring Notifications In group A, inverter specific messages are numbered in ascending order, starting with 0. The code which is automatically determined is used for the filter function. In group B, the actual messages from the inverters are displayed. The meaning of these fault mes- sages can be found in the particular manufacturer's manual.
-
Page 90: Yield
Configuring Notifications • The Max. per day box defines how many notifications per day should be sent from this code range. Note If the maximum number of notifications per day is defined too low, this can lead to important messages not being sent. •... -
Page 91: 18�4 Alarm (Only Solar-Log 2000)
Configuring Notifications 18�4 Alarm (only Solar-Log 2000) The Solar-Log™ continuously monitors its internal alarm contact. If this contact is opened, it sets off an alarm which can be indicated in various ways. In the Alarm tab, the alarm contact can be activated and different types of notification can be configured. - Page 92 Configuring Notifications • Enter the fault duration in intervals This indicates how long a fault should be continuously present, before it is recognized as a fault. The minimum fault duration is 5 minutes, but a longer one should be selected. An interval corresponds to 5 minutes.The fault duration is determined by the number of intervals entered and display under the input box.
- Page 93 Configuring Notifications 18�6 PM E-mail notifications are sent when a power reduction activated has been activated via the PM+ inter- face can be configured in this tab. Procedure • Activate this function to receive an e-mail notification for every change to the power reduction. •...
-
Page 94: Editing Data
Reset 19�1 Initial yield This function manually imports initial yields from previous recorded daily data into the Solar-Log. This is useful any time that a large amount of data has to be changed and would take too long with the "Data correction"... -
Page 95: Data Correction
Delete all of the old data and initialize structure Import daily data Calculate monthly/yearly data restart • The Solar-Log™ resets itself • Check the imported data in the yield data section. 19�2 Data correction Here you can adjust the values for previous days or change daily totals. - Page 96 Finish current measurement Select the USB storage device Save configuration • The solarlog_config.dat file is saved in the root directory of the USB stick. • The configuration file can be saved elsewhere as a backup or imported into the Solar-Log™ again.
-
Page 97: Backup
Procedure • Click on RESTORE • Backup files are searched for on the USB stick that is directly plugged into the Solar-Log™ • Start this search • When a configuration file is found on the USB stick, click on Restore to import it. - Page 98 End current measuring Select the USB storage device Save configuration • The solarlog_config.dat file is saved in the root directory of the USB stick. The Solar-Log™ backup can be copied to another storage medium or imported into the Solar-Log™ again.
-
Page 99: Reset
Procedure • Click on RESTORE • Backup files are searched for on the USB stick that is directly plugged into the Solar-Log™ • Start this search • When a configuration file is found on the USB stick, click on Restore to import it. - Page 100 If you are sure that the data should be deleted, click on Delete. Otherwise click on Cancel. • The event log is being deleted. • The Solar-Log™ reboots itself Restore factory settings section This function restores the Solar-Log™ to its factory settings. All of the yield data and configuration is deleted. Procedure • Click on RESET •...
-
Page 101: System Configuration
Access protection for the display (only Solar-Log 1200 and 2000) A pin code can be activated to restrict access to the Solar-Log™'s display. The pin code may contain a maximum of 8 digits. The following display menus can be restricted with a pin code: •... -
Page 102: 20�2 Language/Country/Time
Configuration | Special Functions | Direct Marketing 20�2 Language/Country/Time The following options are available from the Configuration | System | Language/Country/Time menu: • System language of the Solar-Log™ • Country/Location of the Solar-Log™ • System time of the Solar-Log™ •... -
Page 103: Configuring The Time On The Solar-Log
Configuring the time on the Solar-Log™ Adjust the time in the Configuration | System | Language/Country/Time menu. -
Page 104: 20�3 Display
To automatically synchronize the system time, the Solar-Log™ regularly contacts a network time pro- tocol (NTP) server. If the Solar-Log™ is connected to the internet via a router, the synchronization occurs during the night. With a GPRS connection, the time synchronization occurs during a data transfer. -
Page 105: 20�4 Licenses
Certain Solar-Log™ functions have to be activated by entering a license code. You receive a license certificate after purchasing a license for a particular function. The licenses are always linked to the se- rial number of the particular Solar-log™ and can only be used with the device with this serial number. Procedure •... - Page 106 Check for Update from USB With this function, the Solar-Log™ checks the USB stick connected directly to the device if a new ver- sion is available. When this function is used, the progress and status of the update are displayed •...
-
Page 107: Special Functions
Q/U protection. When it comes to such functions, special protection hard- ware needs to be installed. All protection com- mands, for example the emergency stop, cannot be switched on with or via the Solar-Log™. -
Page 108: 21�1�1 Plant Parameters
As a rule the network voltage at medium voltage levels corresponds to 20,000 V. • The reference voltage to be entered depends on the sensor used. The medium voltage measuring factory setting is 100.0 V for the Solar-Log™ Utility Meter. UC and UNS settings Medium voltage Medium volt-... -
Page 109: 21�1�3 Remote Controlled Active Power Reduction
Interface section Depending on the type of Solar-Log™, the interfaces for communication with the connected inverters are shown here. Depending on the model used, this list can also contain different entries. Select the interface or interfaces that correspond to those of the connected inverters. -
Page 110: Channel Settings For Power Reduction
Examples of ripple control receiver connections and the corresponding configuration are in the ap- pendix of this manual. Channel settings for power reduction section The relay outputs for the ripple control receiver are connected to the PM+ input of the Solar-Log™. This allows the grid operator's signals to be evaluated by the Solar-Log™. -
Page 111: Schematic Diagram Of A Ripple Control Receiver With Four Relays
Ripple control receivers generally possess 2 to 5 relays. The assignment of the individual relay states for certain reduction levels is specified by the respective grid operator and stored in the Solar-Log™ using this matrix. In this way the connected inverters can be adjusted to meet the specified reduction levels. - Page 112 Closing relay during power reduction (only Solar-Log 2000 PM+) Select this option in order to signal any power reduction via the relay output on the Solar-Log 2000 PM+. • The relay may be loaded with a maximum of 24 V DC and 5A.
-
Page 113: 21�1�4 Remote Controlled Active Power Reduction With The Calculation Of Self-Consumption
Remote controlled active power reduction function described in the previous chapter. Note The Solar-Log™ needs to be linked to a consumption meter to implement this function. Please note the instructions in chap- ter”10.5 External power meter” on page 43. The configuration of this corresponds to that already described for the remote controlled active power reduction. -
Page 114: 21�1�6 70% Fixed Reduction With The Calculation Of Self Consumption
This function is an enhancement to the 70% fixed reduction described in the previous chapter. The Solar-Log™ needs to be linked to a consumption meter to implement this function. Please note the instructions in chapter”10.5 External power meter” on page 43. - Page 115 • SAVE settings Note The Solar-Log™ needs to be linked to a consumption meter to implement this func- tion. Please note the instructions in chapter”10.5 External power meter” on page 43.
-
Page 116: Reactive Power
Q(U) (only Solar Log 2000 PM+) • Remote controlled fixed value cos (Phi) shift factor(only Solar-Log™ PM+) Note The active power reduction mode that needs to be implemented for a particular PV plant is de- termined by the national laws and guidelines. -
Page 117: 21�2�1 Reactive Power Deactivated
Special functions 21�2�1 Reactive power deactivated When this menu item is selected, reactive power control is deactivated. This is how the Solar Log set at the time of delivery. 21�2�2 Fixed value cos (Phi) shift factor With this function it is possible to adjust the connected inverters to a fixed shift factor. Using this matrix it is possible to specify a fixed cos (Phi) for certain periods of time. -
Page 118: 21�2�4 Variable Cos (Phi) Shift Factor Over Characteristic Curve P
With a characteristic curve P/Pn, the ratio of the currently generated power (P) to nominal power (maximum output) (Pn) is determined. A Cos (Phi) is assigned to ratio by a characteristic curve. The currently generated power (P) is calculated by the Solar-Log™ based on the inverter data. Mea- suring the power output intended. -
Page 119: 21�2�5 Variable Reactive Power Via The Characteristic Curve Q(U) (Only Solar-Log 2000 With Utility Meter)
In order to be able to achieve this function, the Solar Log™ Utility Meter is required in addition to a Solar-Log 2000. The Solar-Log™ Utility Meter is linked to the Solar-Log™ via the RS485 bus and continually transmits the measured voltage values to the Solar-Log™. The measured values can be recorded at either the low or medium voltage side (when the corresponding converter and its configuration are present). -
Page 120: 21�2�6 Remote-Controlled Fixed Value Cos (Phi) Shift Factor (Only Solar-Log™ Pm+)
Command impulses cannot be processed. Channel settings for power reduction section The relay outputs for the ripple control receiver are connected to the PM+ input of the Solar-Log™. This allows the grid operator's signals to be evaluated by the Solar-Log™. -
Page 121: Channel Settings For Remote Controlled Cos (Phi)
Ripple control receivers generally possess 2 to 5 relays. The assignment of the individual relay states for certain reduction levels is specified by the respective grid operator and stored in the Solar-Log™ using this matrix. In this way the connected inverters can be adjusted to meet the specified reduction levels. -
Page 122: Switching To Reactive Power Characteristic Curves With Certain Signals
The settings for the characteristic curves correspond to the procedures described in “21.2.5 Variable reactive power via the characteristic curve Q(U) (only Solar-Log 2000 with Utility Meter)” on page 119. Examples of ripple control receiver connections and the corresponding configuration are in the ap-... -
Page 123: Linking (Only Solar-Log 2000)
Special functions 21�3 Linking (only Solar-Log 2000) The linking function is to be used when there are not enough interfaces on one Solar-Log™ or the cable lengths between the Solar-Log™ and the various inverters exceeds the RS485 specifications. The link between the data loggers is established with an Ethernet connection. This TCP/IP connection can be established with various technologies such as fiber optics, wireless LAN, radio relay. -
Page 124: Profile
Special functions 21�4 Profile For feed-in management, PM+ profiles come with the Solar-Log™ PM Package equipment. These profiles contain the pre-configured settings for feed-in management and enable the PM+ Package I/O Boxes The profiles are delivered in the config_pmprofil_NameGridOperator.dat file format. - Page 125 Special functions Note If a new PM+Profile needs to be imported, the current profile has to be reset first Note A special operator specific installation manual is included for the installation of the PM+ Package.
-
Page 126: Direct Marketing
The threshold is defined with an upper threshold for activation and a lower thresh- old for deactivation. A temperature limit is defined as an additional parameter. When the defined temperature limit is reached, the Solar-Log™ switches the deep freezer on for a period of time according to the settings. - Page 127 • Performance Visualization The performance visualization profile can be used in connection with the Solar-Log™ Smart Home Relay Box. The Relay Box has 8 relays. The relays can be switched on in stages. The value for the activation the individual relays needs to be defined.
-
Page 128: Direct Device Configurations (Solar-Log 1200 And 2000)
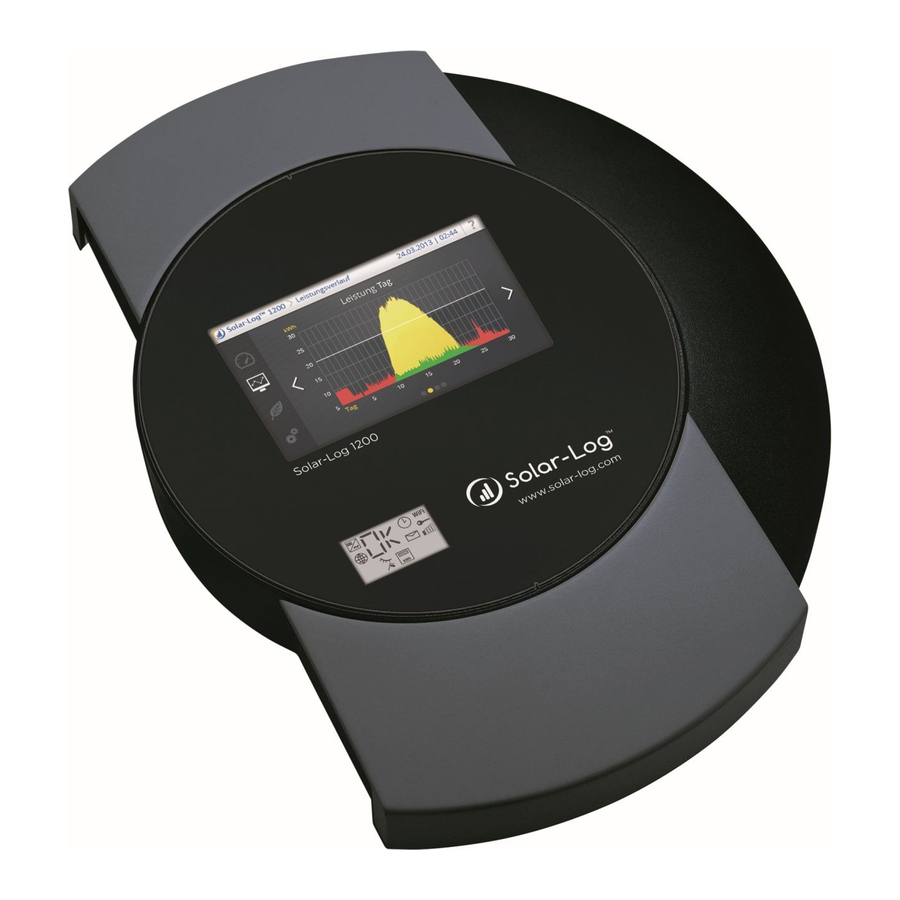
Direct Device Configurations (Solar-Log 1200 and 2000) 22 Direct Device Configurations (Solar-Log 1200 and 2000) The display on the Solar Log 1200 und 2000 consists of a touchscreen, which is operated by touching the appropriate control element with the finger. 22�1 Display menu structure... -
Page 129: Display Control Elements
22�4�1 Initial configuration (only Solar-Log 1200) The "Initial configuration" menu is opened automatically at the initial startup. However, it can be opened again at any time by going to Start | Initial configuration. Procedure: • After the Solar-Log 1200, 2000 starts, select the system language... -
Page 130: Display: Initial Configuration Language Selection
DHCP service enabled. Display: IP address settings in the initial configuration • The next step refers to the interfaces of the connected devices. The Solar-Log™ inquiries about each connected device per interface. Select the respective device or manufacturer. -
Page 131: Display: Device Selection In The Initial Configuration
Direct Device Configurations (Solar-Log 1200 and 2000) Display: Device selection in the initial configuration Display: Power meter selection in the initial configuration • The connected meters are selected on the last page. Touch Save to apply these settings. -
Page 132: 22�5 Device Detection (Only Solar-Log 1200)
Direct Device Configurations (Solar-Log 1200 and 2000) 22�5 Device Detection (only Solar-Log 1200) • Access this function from the Configuration | Start | Device Detection menu. • The components entered during the initial configuration are searched for on each interface of the Solar-Log™. -
Page 133: 22�5�1 Easy Installation (Only Solar-Log 1200)
• Automatic Device Detection To do this, the inverters must be connected to the Solar-Log™ and feeding into the grid so that the communication module is working. Please note chapter “26.2 Country specific inverter detec- tion with Easy Installation” on page 157. -
Page 134: Basic Settings Menu
• Network Router – Obtain IP address automatically (DHCP) • Gateway and alternate DNS Figure 52: Network settings Page1 on Solar-Log 1200 display Procedure Configuring the IP Address and Subnet Mask • Touch the... -
Page 135: 22�6�2 Basic Settings | Portal Menu
Importing the yield data section This function imports the yield data from the solarlog_backup.dat file into the Solar-Log™. Note: The Solar-Log™ has to be configured or the configuration file needs to be imported before yield data can be imported. Procedure: •... - Page 136 • configuration file has been imported. Firmware update section This function imports a new firmware version into the Solar-Log™ without using a computer. Solar-Log™ firmware files have the following names: firmware_2000e_3.0.0-60-130910.bin Note: The firmware file needs to be in the USB stick's root directory.
-
Page 137: 22�8 Meaning Of The Symbols On The Lcd Display
Direct Device Configurations (Solar-Log 1200 and 2000) Notifications on the LCD display The Solar-Log 300, 1200 and 2000 have an LCD status display for notification on the during installa- tion and operation. 22�8 Meaning of the symbols on the LCD display The following symbols are shown on the Solar-Log™... -
Page 138: Lcd Display - Meaning Of The Symbols
Direct Device Configurations (Solar-Log 1200 and 2000) Booting progress SIM card Easy Installation active GPRS available Notifications from the Solar-Log™ Signal strength in combination with GPRS, WiFi or Bluetooth Encrypted WiFi connec- tion Wireless internet Time Input box for fault codes... -
Page 139: 22�9 Notifications On The Lcd Display
Direct Device Configurations (Solar-Log 1200 and 2000) 22�9 Notifications on the LCD display There is a difference between the Easy Installation mode and normal operation in regard to the notifi- cations on the LCD display. 22�10 Normal operation The symbol for the connected components is continuously illuminated. -
Page 140: 22�10�1 Fault Messages
Direct Device Configurations (Solar-Log 1200 and 2000) 22�10�1 Fault messages Fault messages from the connected devices If a device cannot be contacted by the Solar-Log™ (offline), the respective symbol blinks. OK is not displayed. Fault codes for connected devices The respective component symbol blinks and an "E" is in the first position of the text box. -
Page 141: Faults
Faults 23 Faults 23�1 Restarting and resetting 23�1�1 Reset buttons Effects of reset button: • Device is restarted (reset) • Factory settings are restored The reset button is located on the top of the housing. If the cover is in place, it must be removed to allow access to the reset button. Reset buttons 23�1�2 Reset A reset is necessary if Solar Log™... -
Page 142: 23�1�3 Restoring The Factory Settings
Pres the reset button with a paper clip or similar pointed object • The Solar-Log™ beeps and the following is displayed on the LCD: • After about 5 seconds, the Solar-Log™ beeps three times and the following is displayed: • Now release the button, the following is then displayed •... -
Page 143: 23�2 Rebooting And Resetting Via The Web Menu
Press and hold the reset button with a paper clip or similar pointed object • The Solar-Log™ beeps and the following is displayed on the LCD: • After about 15 seconds, the Solar-Log™ beeps three times and the following is displayed: • Now release the button, the following is then displayed •... -
Page 144: 23�2�1 Fault Messages Gprs
Faults 23�2�1 Fault messages GPRS These fault messages are shown in the LCD display and also in the Status box under Configuration | Network | GPRS. Fault messages GPRS Error code Message Possible cause or remedy -101 Too many failed attempts After several failed attempts, the modem goes into an error state. -
Page 145: 23�2�2 Fault Messages Wifi
Faults 23�2�3 Fault messages WiFi These fault messages are shown in the LCD display and also in the Status box under Configuration | Network | WiFi. Fault messages WiFi Error code Message Possible cause or remedy Initialization error Incorrect WiFi configura- Please check if all of the required pa- tion rameters were configured. -
Page 146: 23�2�3 Fault Messages Export To External Server And Backup
Faults 23�2�4 Fault messages Export to External Server and Backup These messages are shown in the Status box under Configuration | Network | Export Configura- tion | Network | Backup Fault messages Export (FTP) Error code Message Possible cause or remedy The server address could The access type was not configured. -
Page 147: 23�3 Portal Transfer Fault Messages
Faults 23�3 Portal Transfer Fault messages Portal Transfer Fault messages Error code Message Possible cause or remedy The server address could The access type was not configured. An al- not be resolved. ternative DNS server is required. The wrong server was entered. The network connection was disconnected and could not be reestab- lished. -
Page 148: 23�3�1 Special Cases
During a firmware update, the installation status is shown on the LCD display. Step 1 of the firmware update Step 2 of the firmware update The progress is displayed as a percentage. After the firmware has been completely imported, the Solar-Log™ reboots itself and BOOT in dis- played in the text field. - Page 149 Faults...
- Page 150 Direct Device Configurations (Solar-Log 1200 and 2000)
-
Page 151: Disposal
Disposal 24 Disposal Warning: Solar-Log™ contains electronic components that can release highly toxic substances if burned or disposed of along with domestic waste. Please send the Solar-Log™ back to the manufacturer: Solare Datensysteme GmbH Fuhrmannstraße 9 72351 Geislingen-Binsdorf Germany... -
Page 152: Technical Data
Technical Data 25 Technical Data Product comparison Solar-Log 300 Solar-Log 1200 Solar-Log 2000 PM+ / WiFi PM+ / GPRS Bluetooth (BT) WiFi (wireless LAN) Bluetooth (BT) / WiFi GPRS Solar-Log Meter (CT) Central inverter SCB and SMB 1 x RS485... - Page 153 2) Other important information about Bluetooth and compatibility, Power Management, self-consumption and SCB and SMB inverters can be found on our website www.solar-log.com. 3) Using every inverter on the same bus is not always possible, see the inverter database www.solar-log.com...
-
Page 154: Internet Ports
IP address on the local network. Registration is done with its name. The IP address of the Solar-Log™ no longer needs to be known Local network accessibility unless there are several Solar-Logs in the network. The Solar-Log be accessed directly from a web browser with this address: http://solar- log. - Page 155 2 x 3 phases or 6 single phases Network Connection to the internet (Ethernet, fixed IP address or DHCP) Antenna connection and SIM card slot GPRS (optional) for Solar-Log™ with integrated GPRS * not with GPRS models...
-
Page 156: Appendix
Appendix 26 Appendix 26�1 Internet ports If the Solar Log™ is connected to the Internet via a router, you must ensure that the following ports on the router have been unblocked for the Solar Log™: Port Protocol Connection type FTP data transfer (passive mode) SMTP e-mail protocol UDP/TCP... -
Page 157: 26�2 Country Specific Inverter Detection With Easy Installation
Appendix 26�2 Country specific inverter detection with Easy Installation During the Easy Installation, the Solar-Log 1200 and 2000 interfaces are check for connected county specific inverters. The countries and country specific settings for the available inverters brands are listed in the table. -
Page 158: Wiring Meters To Record Self-Consumption
Wiring diagram for recording self-consumption The PV output meter displayed is optional. There is no standard solution when a sub-distribution is fed into the grid. If required, the total con- sumption can be recorded with several meters or the Solar-Log™ Meter current transformer. -
Page 159: 26�4 Connection Examples For Ripple Control Receivers
26�4 Connection examples for ripple control receivers Grid operators have not agreed on an universal standard for ripple control receiver signals. As as result, there are several variations with the respective wiring and configuration in the Solar-Log™ firm- ware. All of the examples refer to active power reduction. When ripple control receivers are used for reac- tive power, they are configured in the same way. -
Page 160: 26�4�1 Variation With 4 Relays (Enbw >100Kwp)
Appendix 26�4�1 Variation with 4 relays (ENBW >100kWp) Specifications Ripple control receiver signals Level Power 100% Wiring Wiring a ripple control receive with 4 relays - example 1 Connecting PM+ terminal connector and ripple control receiver Assignment Meaning Control voltage for ac- tive power D_IN_1 Level 1... - Page 161 Appendix Configuration in browser menu Remote controlled active power reduction Configuration | Special Functions | Feed-in Management | Active Power Channel settings for active power reduction - example 1...
-
Page 162: 26�4�3 Variation With 3 Relays
Appendix 26�4�2 Variation with 2 relays Specifications Ripple control receiver signals Level Power 100% Wiring Wiring a ripple control receive with 2 relays - example 2 Connecting PM+ terminal connector and ripple control receiver Assignment Meaning Control voltage for ac- tive power D_IN_1 K5 switched... - Page 163 Appendix Configuration in browser menu Remote controlled active power reduction Configuration | Special Functions | Feed-in Management | Active Power Channel settings for active power reduction - example 2...
- Page 164 Appendix 26�4�3 Variation with 3 relays Specifications Ripple control receiver signals Level Power 100% Wiring Wiring a ripple control receive with 3 relays - example 3 Connecting PM+ terminal connector and ripple control receiver Assignment Meaning Control voltage for ac- tive power D_IN_1 Level 2...
- Page 165 Appendix Configuration in browser menu Remote controlled active power reduction Configuration | Special Functions | Feed-in Management | Active Power Channel settings for active power reduction - example 3...
-
Page 166: 26�4�4 Variation With 5 Relays (Including Emergency Stop)
Wiring a ripple control receive with 5 relays - example 4 Warning: Emergency stop commands may not be processed via the Solar-Log™ These commands have to function directly with the correspond- ing protection equipment such as grid and plant protection, section switches and Q/U protection. - Page 167 Appendix Connecting PM+ terminal connector and ripple control receiver Assignment Meaning Control voltage for ac- tive power D_IN_1 Level 1 100% D_In_2 Level 2 D_In_3 Level 3 D_In_4 Level 4 Control voltage for reac- tive power (unused) Configuration in browser menu Remote controlled active power reduction Configuration | Special Functions | Feed-in Management | Active Power...
- Page 168 Top Connections Solar-Log 2000 ..................................20 Top Connections Solar-Log 2000 ..................................21 Insertion slot for SIM card inside on the right (Solar-Log™ GPRS) ......................22 Antenna connection on the top of the device (Solar-Log™ GPRS) ....................22 Connection for current transformers (Solar-Log™ Meter) ........................23 Two 6-pin terminal block connectors for the Meter interface .......................23...
- Page 169 List of figures Wiring a ripple control receive with 4 relays - example 1........................158 Channel settings for active power reduction - example 1 ........................159 Wiring a ripple control receive with 2 relays - example 2 ........................160 Wiring a ripple control receive with 3 relays - example 3........................162 Channel settings for active power reduction - example 3 ........................
- Page 170 Tel: +49-7428-9418-200 systems without the written consent of Solare Fax: +49-7428-9418-280 Datensysteme GmbH. info@solar-log.com Non-compliance resulting in contradiction of the www.solar-log.com above-mentioned specifications shall result in www.solarlog-WEB.com obligation to provide compensation for damages. Hotline: +49-7428-9418-660...
Need help?
Do you have a question about the 2000 and is the answer not in the manual?
Questions and answers