Record DFA127 Instructions Manual
Automatic door systems
Hide thumbs
Also See for DFA127:
- User manual (56 pages) ,
- Operating instructions manual (21 pages) ,
- Technical manual (12 pages)
Table of Contents
Advertisement
Quick Links
See also:
User Manual
Advertisement
Table of Contents

Related Manuals for Record DFA127


Summary of Contents for Record DFA127
- Page 1 Instructions DFA 127 record – automatic door systems your global partner for entrance solutions...
-
Page 2: Table Of Contents
Table of contents Table of contents General ......................Product identification......................1.1.1 Manufacturer agtatec ag ....................1.1.2 Document identification....................Important information DFA 127 ..................1.2.1 Copyright.......................... 1.2.2 Target group........................1.2.3 Storage of the manual...................... Description of the equipment ................... 1.3.1 Low energy drive (Low Energy) ..................Types of arms, including accessories ................ - Page 3 Table of contents General and additional requirements ................3.2.1 Detection zone for sensor activation ................3.2.2 Additional requirements for doorsets in escape routes and emergency exits ....3.2.3 Marking of glass ....................... 3.2.4 Guards ..........................3.2.5 Commissioning and information for use................Technical Data DFA 127 ..................
- Page 4 Table of contents Assembly dimension diagrams ................10.1 Dimension diagram 1 for standard arms ................10.2 Dimension diagram 2 for standard arms ................10.3 Dimension diagram 1 for slide arm, pulling and pushing ..........10.4 Dimension diagram 2 for slide arm, pulling and pushing ..........Installation DFA 127 ...................
- Page 5 Table of contents 13.3 Simplified Start-Up ......................13.4 Checking the LEDs on the STG ..................13.5 Checking the BDE functions and actuation devices............13.6 Programming door speeds and hold-open times ............. 13.7 Configuration of specific customer settings..............13.8 Safety check........................13.9 Checking automatic reverse.....................
- Page 6 Table of contents Interlock mode with 2 single-leaf doors............... 18.1 2 single doors, connection with CAN-isolator..............18.2 Putting into operation the interlock mode................. 18.3 Functions of the electronic BDE-D in interlock mode............18.4 2 single doors, communication with FEM 1..............18.5 Configuration........................
- Page 7 Table of contents Drawings ......................25.1 Cable layout ........................25.2 Wiring diagram ......................... 100 102-127108955 V1.1 7/ 102...
-
Page 8: General
General General Product identification For an exact identification please read the following data on the type plate, which is located on the rear side of the product: Beispiel: Type: Serial number: Year of manufacture: Mains connection: Power consumption: Classification according 18650- 1:2005: Identification: „ü“... -
Page 9: Target Group
Description of the equipment The record DFA 127 (Full Power) is a compact, self-monitoring, microprocessor-controlled swing door operator (abbreviated to DFA). With its many special and additional functions, it is suitable for a very wide application spectrum. The path of every door movement is con- trolled by the microprocessor, which evaluates the current door position, the door speed and the final position at every instant and precisely calculates the optimum motion. -
Page 10: Accessories And Special Applications For The Dfa 127
In master / slave mode, two DFA 127 units may be controlled without additional mechanical components using an electronic sequential control. For double-leaf automatic door control systems the integrated record SFR 127 mechanical sequential control is available in two installation kits for right stationary wing leaf and left sta- tionary wing leaf. -
Page 11: Safety Instructions
Safety instructions Safety instructions Presentation of warning signs Various symbols are used in this guide for easier understanding: NOTICE Advice and information which are useful to ensure correct and efficient workflow of the system. IMPORTANT Specific details which are essential for trouble-free operation of the system. IMPORTANT Important details, which must be read, for proper function of the system. - Page 12 Safety instructions CAUTION Unexpected OPEN/CLOSE of the doors • Bruises and contusions through the door leaf No objects must be placed within the opening zone/path of the swing door! The safeguard against crushing and shearing strains at the side edge must be provided by the manufacturer.
-
Page 13: Product Safety
Safety instructions Product safety 2.3.1 State of the technology The installation has been constructed with state of the art technology and recognized techni- cal safety regulations. The system complies with the requirements of Machine Guideline 2006/42/EG as well as of EN 16005 and DIN 18650 (D). Nevertheless, danger can arise if not used as intended. -
Page 14: Security Inspection According En 16005
Security inspection according EN 16005 Security inspection according EN 16005 Like the german standard DIN 18650, the EN 16005 describes the requirements and the test methods for the safe use of power-operated pedestrian doors. The EN 16361 describes the requirements for the production process and towards the documentation / classification of the doors. -
Page 15: Monitored Zones At The Primary Closing Edge
Security inspection according EN 16005 3.1.2 Monitored zones at the primary closing edge Key: protective device slow area fast area doorset slow area protected Minimum width of doorset leaf to be protected vs. radius of doorset and doorset travelling time Time [s] doorset slow area... -
Page 16: Protective Measures At Secondary Closing Edge (Hinges)
Security inspection according EN 16005 3.1.3 Protective measures at secondary closing edge (hinges) Danger points between the leaf and frame, up to a height of 2.5 m, presenting a finger trap hazard shall be avoided structurally or by an appropriate protective device or safeguards provided by means of protective measures. -
Page 17: Safety Distances
Security inspection according EN 16005 3.1.4 Safety distances Dimensions in millimetres Rubber cover Rubber or textile cover Profile 3.1.5 Safety distances in the detection field (with radar motion sensor) Attention shall be paid to the provision and positioning of sufficient automatic activation de- vices for different types of doorsets. -
Page 18: Additional Requirements
Security inspection according EN 16005 3.1.7 Additional requirements Opening time Doorsets shall open from closed to back check, or 80° whichever occurs first, in 3 s or longer as required in the table below. Closing time The minimum closing time from 90° to 10° open (+ min. 1.5 s from 10° to 0°) shall be ad- justed on site according to the table below. -
Page 19: Additional Requirements For Doorsets In Escape Routes And Emergency Exits
Security inspection according EN 16005 3.2.2 Additional requirements for doorsets in escape routes and emergency exits When an operating mode selector is used, the mode of operation shall be clearly identified and marked on the operating mode selector. If a "locked" mode of operation is available, the mode of operation shall be protected, e.g. by an access code or a key, so that changes can only be made by authorised personnel. -
Page 20: Technical Data Dfa 127
Technical Data DFA 127 Technical Data DFA 127 Dimensions: Operator 600 x 85 x 124 mm (wxhxd) Operating voltage: 230VAC, 50/60 Hz Power consumption: Standby 13 W, rated power 67 W Max. torque: 50 Nm Mass inertia: 65 kgm Opening angle: adjustable from 70°... -
Page 21: Instructions For Low Energy Operators (Low-Energy)
Technical Data DFA 127 Instructions for low energy operators (Low-Energy) When using a low-energy operator the door must open, in case of a power cut or of an op- erator breakdown, with a manual pressure of max. 67 N to release a locking device, of max. 90 N to set the door in motion, or of max. -
Page 22: Generally Authorised Speed Settings
Technical Data DFA 127 Generally authorised speed settings The default values of low-energy operators for authorised speeds are shown in the EN 16005. They are calculated depending on door leaf weight and door width, in which the ki- netic energy of a moving door should not exceed 1.6 J. Time T corresponds to the minimum opening time (in seconds) until beginning of the open- ing damping or until 80°... -
Page 23: Construction And Function
Status signal and Reset button Functions The record DFA 127 has been designed to close without electrical power. It can be easily opened by hand and closes using the energy stored in the spring, with the motion damped by the motor acting as a generator. -
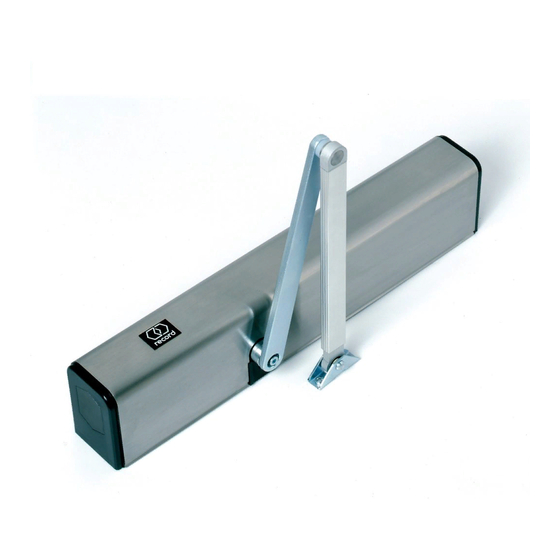
Page 24: Types Of Arms
Types of arms Types of arms Standard arm Slide arm pulling Slide arm pushing 102-127108955 V1.1 24/ 102... -
Page 25: Lever Adapters For Arms
Lever adapters for arms Lever adapters for arms The lever adapters are the joining elements between the operator drive shaft and the arm lever. They also serve as extension pieces to compensate height differences between the operator and the connector to the arms. A lever adapter 20 is included in each delivery. -
Page 26: Skirt Ring As Reinforcement
Lever adapters for arms Skirt ring as reinforcement In case of extreme stress on the connection between lever aarm and lever adapter, it is pos- sible to fix an optional skirt ring (102-127110748). During assembly, centrically attach lever adapter and carefully hit it in with a soft face mallet. NOTICE Reinforcement in case of ▪... -
Page 27: Installation Plan For Arm Systems
Installation plan for arm systems Installation plan for arm systems Standard arm (pushing) Standard arm Lintel dimension X Article number (Dimensions in mm) SG 1 0…120 102-127808184 SG 2 100…220 102-127808215 SG 3 210…330 102-127808216 8.1.1 Installation of operator on door leaf IMPORTANT Consult the assembly dimension diagrams in chapter Assembly dimensions dia- grams. -
Page 28: Slide Arm Pulling
Installation plan for arm systems Slide arm pulling Slide arm pushing Slide arm Lintel dimension X Article number (Dimensions in mm) +/-10 102-127808183 GG2 (with pin shaft 10) +/-10 102-127808980 102-127108955 V1.1 28/ 102... -
Page 29: Profiles For Operator Height 85 Or 108 Mm
Chassis 85 mm Chassis 108 mm IMPORTANT To mount a closing sequence control record SFR 127 into a swing door operator DFA 127, profiles and fitting parts in 108 mm construction height are required. Casings 85 or 108 mm 84 x 124 mm (H x T) -
Page 30: Assembly Dimension Diagrams
Assembly dimension diagrams Assembly dimension diagrams 10.1 Dimension diagram 1 for standard arms 102-127108955 V1.1 30/ 102... -
Page 31: Dimension Diagram 2 For Standard Arms
Assembly dimension diagrams 10.2 Dimension diagram 2 for standard arms 102-127108955 V1.1 31/ 102... -
Page 32: Dimension Diagram 1 For Slide Arm, Pulling And Pushing
Assembly dimension diagrams 10.3 Dimension diagram 1 for slide arm, pulling and pushing 102-127108955 V1.1 32/ 102... -
Page 33: Dimension Diagram 2 For Slide Arm, Pulling And Pushing
Assembly dimension diagrams 10.4 Dimension diagram 2 for slide arm, pulling and pushing 102-127108955 V1.1 33/ 102... -
Page 34: Installation Dfa 127
Installation DFA 127 Installation DFA 127 11.1 Checking the installation site ▪ Does the door leaf move easily over its entire swing range? ▪ Does the door leaf fall cleanly into the lock? ▪ Have all damping devices been removed (not simply reset)? ▪... - Page 35 Installation DFA 127 ▪ Install the NET mains supply. ▪ Install the STG controller and connect the connector cables from the mains supply NET. ▪ Insert the motor circuit board MOT, fix it with screw. Adjustment of the arms ▪ Prepare the arm (refer to chapter: ), fix the arm in correct position with regard to the DFA (initial load), screw the arm to the door leaf and adjust the angle of the arm to the door leaf.
- Page 36 Installation DFA 127 Preparation ▪ Attach the side caps and screw tightly (refer to chapter: ▪ Slide on the casing and fix it. 102-127108955 V1.1 36/ 102...
-
Page 37: Adjustment Of The Initial Spring Tension According En 4 To En
Installation DFA 127 11.4 Adjustment of the initial spring tension according EN 4 to EN 6 Depending on the width of the door leaves, the spring force must be adjusted corresponding EN 1154 in the range of EN 4 to EN 6. The adjustment range can be taken from the table in Door leaf weights and door widths chapter based on the width of the door leaf. -
Page 38: Checking The Mechanical Functions
Installation DFA 127 11.5 Checking the mechanical functions ▪ Are the arms fixed at the correct angle to the door leaf? ▪ When moved by hand, does the door leaf move easily over its full swing? ▪ Does the operator damp the opening by spring force? If not, the slide switch position S1 on the motor print MOT must be changed. -
Page 39: Preparation
Installation DFA 127 11.7 Preparation NOTICE Safety instructions Read and pay attention to chapter The power supply must be fused with max. 10 A. 1. Interrupt the power supply with the main switch or power plug. 2. The power supply cable must be con- nected to the power supply DFA (feed the cable to the connectors complete with its sheath). -
Page 40: Connection Of Safety Sensors
Installation DFA 127 11.10 Connection of safety sensors These sensors are installed on both sides of the door leaves in the swing door system and monitor the swing range of the door. When an obstacle is detected upon opening, the door will stop and when closing, a re-opening is triggered. - Page 41 Installation DFA 127 Safety sensor in the opening direction Safety sensor in the closing direction IMPORTANT Specifications apply only to BEA 4SAFE safety sensors! The test output AUX1_OUT must be configured for “Test Sensors”. 102-127108955 V1.1 41/ 102...
-
Page 42: Linkage Rod Adjustment Possibilities
Linkage rod adjustment possibilities Linkage rod adjustment possibilities 12.1 Angle adjustment The serration of the lever bushing allows a grad- ual adjustment angle of 6°. CAUTION The screw connections may become loose during operation. • Incomplete door movements or damage from falling parts. ... -
Page 43: Length Adjustment
Linkage rod adjustment possibilities 12.2 Length adjustment The standard linkage rod can be adjusted in length within a certain range in order to allow the optimal adaptation to the lintel dimension. For this purpose, the two screws indicated are to be released with an Allen key by 5 mm and the profile adjusted by sliding so that this linkage rod part comes to rest at an angle of about 90°... -
Page 44: Commissioning Dfa 127
Commissioning DFA 127 Commissioning DFA 127 13.1 Principles of commissioning 13.1.1 Requirements of the technician The technician must know the functions and the operation of service and flash-programmer FPC and control unit BDE-D exactly. 13.1.2 Mechanical final test Manually check the following points: ▪... -
Page 45: The Can-Bus
Commissioning DFA 127 13.2 The CAN-Bus 13.2.1 The bus topology IMPORTANT Every bus component has two plug connections, which must both be plugged for correct wiring. The bus must basically be terminated at both ends with a terminating resistance (120 Ω). IMPORTANT Make sure that no CAN sockets are left unplugged. - Page 46 Commissioning DFA 127 Installation with BDE-D Installation with 2 motion sensors and one BDE-D Installation with 2 motion sensors, 2 safety sensors and 2 BDE-D Master/Slave installation with motion sensors, safety sensors and BDE-D 102-127108955 V1.1 46/ 102...
-
Page 47: The Correct Cable
Commissioning DFA 127 13.2.2 The correct cable IMPORTANT Selecting the correct connection cable is important for a trouble-free operation. Use only the cables delivered by agtatec! Cable selection RJ10 2x4P crossed plug connections (ready-made) Art. 102-020808481: CAN cable 1000 mm (delivered with FEM-0) Art. -
Page 48: Addressing Bus Components
Commissioning DFA 127 13.2.4 Addressing bus components IMPORTANT ▪ Addressing CAN sensors (correct positioning of DIP switches) must be carried out BE- FORE connecting them to the CAN bus ▪ DO NOT assign multiple addresses Addressing sensors 290 – Position of DIP switches Surface-mounted version AC AKI 1 (inside) AKI 2 (inside) -
Page 49: Changing Addresses
Commissioning DFA 127 13.2.5 Changing addresses The address must be changed if a wrong position has been assigned by mistake to a sensor while the system has already been activated. The correct procedure is explained in the fol- lowing example: Example of wrong addressing: Inside-RAD 290 →... -
Page 50: Simplified Start-Up
Commissioning DFA 127 13.3 Simplified Start-Up IMPORTANT The simplified start-up is only possible as of software version 2.10. Learning running parameters Learning sensors After the first installation of the BDE-D, the follow- ing display appears: ▪ Navigation through the menu with button and button ▪... - Page 51 Commissioning DFA 127 Legend: Master-operator Slave-operator Multifunctional switch on controller record programming device (Flash-Programmer) Operator Instructions Description Operators are turned off Adjustment Adjust initial spring tension Procedure according to chapter of the initial spring tension according to EN 4 to EN 6...
- Page 52 Commissioning DFA 127 Operator Instructions Description Turn on the operator With Master/Slave-Installations turn on the Slave first. Set the locking mechanism and door type Switch to manual mode With operation switch BDI If available, connect the sensor-bars SIO These sensors should work properly, be- and SIS.
-
Page 53: Checking The Leds On The Stg
Commissioning DFA 127 13.4 Checking the LEDs on the STG Controls on the STG 127 Check LED 1...3 according to the table in chapter 13.5 Checking the BDE functions and actuation devices BDE-position (permanently open) 1. Door must open and remain open 2. -
Page 54: Operating Instructions Dfa 127
Operating instructions DFA 127 Operating instructions DFA 127 14.1 Controls of the STG 127 General The STG 127 operates with an active HIGH level, i.e. a +24 V level must be applied to acti- vate a function. Safety inputs are activated during interruptions. The signal ground (0V) is connected to the protective earth. -
Page 55: Electronic Controller Bde-D (Option)
Operating instructions DFA 127 * Learn spring type must be carried out without connection to the door leaf! (Before initiating this function, the arms must be dismounted, i.e. the door leaf must not be con- nected to the operator!). If a control unit is exchanged, this function hast to be initiated! ** In order to definitively carry out this function, a Reset must be initiated within 9 seconds. -
Page 56: Operating Modes And Behaviour Of The Door During Input Signals
Operating instructions DFA 127 14.2.2 Operating modes and behaviour of the door during input signals Table of signals (X marks a release reaction) Abbreviations Explanation of the abbreviations see chapter Automatic / AUTO Normal operation. The door opens and closes automatically, either by triggering of an activa- tion device or by pushing the door, if the "touch control (push to activate)"... - Page 57 Operating instructions DFA 127 Locked The locking is activated in the Locked operation mode. Table of signals (X marks a release reaction) CLOSED OPENING OPEN CLOSING TIPP This operation mode can be used only in the USA. The operator is switched to manual op- eration (without configurations).
-
Page 58: Mech. Control Elements And Indication
Mech. control elements and indication Mech. control elements and indication ① Mechanical BDI with 3 positions (control toggle switch) ② Reset button ③ Status display ④ Connector for Service- and Flashprogrammer FPC 902 15.1 Mechanical BDI (control toggle switch) If available, the following operational modes can be set up with the 3-position toggle switch: Manual operation: In this operation mode, the DFA works as a normal door-closer. -
Page 59: Reset-Button
Mech. control elements and indication Mechanical BDI (toggle switch) Electronic BDE-D BDE2 (S2) BDE1 (S1) Function Priority (1=highest) Locked One-Way Continuously open Manual Automatic The BDE-D indicates the current operating mode. If an operating mode that has no current priority is set on the BDE-D, status message 62 is displayed. -
Page 60: Configurations
Configurations Configurations 16.1 Parameter Description Factory settings: Basic operator (Full Power) 102-127108955 V1.1 60/ 102... -
Page 61: Description Of Parameters
Configurations Configurations on the swing door operator can only be made with the electronic BDE-D, the service- and flashprogrammer FPC 902 or the optional Testbox. If a toggle switch is con- nected, the BDE-D, service- and flashprogrammer FPC 902 or Testbox must be connected briefly for the configuration. - Page 62 NOTICE The open duration can be reduced when sensors are used which keep the door Time delay open, for example, with record sensors. DRIVE → Opening angle The opening angle is read during the learning cycle and corre- sponds to the value 40.
- Page 63 Configurations → Brake This parameter determines in which stop positions and in which operating modes the motor brake should be actuated. → Without Never brake. → Closed position Activate the brake in all operating modes when the door is closed. →...
- Page 64 Configurations ▪ This feature can be configured if the option MS Mech. → Mech. end stop door stop (102-127808234) is built-in or a door stop is installed. → Disabled Function deactivated → Active The door is held more firmly in the open position. ▪...
- Page 65 Configurations → Interlock (two single-leaf swing From software version 1.41, the DFA 127 allows the operation doors) of two single-leaf swing doors in interlock function with only one BDE-D / BDI. One door can be opened only with AKI and SSK when the other door is closed.
- Page 66 Configurations → Interlock (with FEM 1) Two doors, each fitted with function extension module FEM1, can be interconnected in an interlock system. The parameter determines in which operating modes the interlock function is activated. ▪ Interlock together with RED door and STM 21 is not possible.
- Page 67 Configurations → USA Setting for Full Power applications to meet the normative re- quirements in the USA. Parameter Default value Driving cycle → Acceleration Driving cycle → Creep drive Drive → Opening angle Manual drive → Closing speed 15 Control unit → BDE-M 3-position OFF-A Control unit →...
- Page 68 Configurations → EU Low Energy Setting for Low Energy applications to meet the normative requirements in the EU. ▪ See notes in the chapter Notes for Low Energy Drives (Low Energy) Parameter Default value Driving cycle → Closing speed 10 Driving cycle →...
- Page 69 Configurations Manual drive → When Auto- Activated matic Manual drive → Collision Activated Manual drive → Closing speed 10 → Brussels Airport Setting for Full Power Applications at Brussels airport. Parameter Default value Miscellaneous → Alarm display → Time activation Miscellaneous →...
- Page 70 Configurations When closing, the moving leaf waits until the stationary leaf is closed. ▪ With low door thickness and slight overlap, the value of 2 can be adjusted to achieve a continuous closing process. → Opening sequence Delayed approach to stationary leaf. 0 = no delay 40 = max.
- Page 71 Configurations → When locked The parameter defines how the door is to react in the operat- ‘Locked’ ing mode → Disabled The door closes with motor drive and programmed closing speed. → Active In the locked operating mode, the door can be opened manu- ally.
- Page 72 Configurations → Active sensors The sensors for tripping or safety are connected so that their behaviour can be influenced in ‘Manual mode’. → Disabled No sensor enabled → SIS disabled All sensors excluding SIS enabled → SIS enabled All sensors including SIS enabled →...
- Page 73 Configurations CONTROL UNIT 24 V ‘Continuously open’ 24 V ‘Automatic’ 24 V 24 V ‘Manual mode’ Automatic; OFF; Continuously open → 3-position (OFF-A) Operating modes: Manual; OFF; Continuously open → 3-position* (OFF-M) Operating modes: Automatic; Locked; Continuously open → 3-position* (VRR-A) Operating modes: Manual;...
- Page 74 Configurations → Contrast BDE 2 Contrast of the display screen for 2nd BDE-D. → Brightness BDE 1 Brightness of backlight for 1st BDE-D. 0 = pale backlight for application with dull ambient light 40 = intense backlight for applications with bright ambient light →...
- Page 75 Configurations NOTICE The entrance VAK waits for a maximum of 5 s before the feedback signal from the electrical door opener before the door opens. ▪ Recommended for doors to be closed manually. → Manual locking → Disabled Function deactivated →...
- Page 76 Configurations → SI 2 RIC: safety sensor 2 – inside → AKA 2 RAD: motion sensor 2 – outside → SA 2 RIC: safety sensor 2 – outside INPUT/OUTPUT → STG → AUX1_IN Configurable input signals on STG. ▪ Not all signals can be configured at each input. ▪...
- Page 77 Configurations → Locked The output signal shows whether the door is locked. Output 0 V = door not locked. Output 24 V = door closed and locked. ▪ The output is only set correctly for locking by VAK signal. → Closed This output signal shows whether the door is closed.
- Page 78 Configurations → AUX11_IN Configurable input signal for FEM1 Connector J1, terminals 66 and 67 (only FEM1) Floating, optically disconnected 24V input → Disabled → SEA Input signal for synchronisation of an interlock. ‘block activation’ ▪ The signal prevents any door open- ing as long as the interlock is in use from the other door.
- Page 79 Configurations → SAMP Signal for connecting an optical and/or acoustic indicator in an interlock control. ▪ This signal shows that an opening command is regis- tered, but cannot yet be carried out, because the in- terlock is occupied from the opposite door. →...
-
Page 80: Special Remarks
Configurations → Alarm display In this menu, some error messages can be adapted to special requirements. ▪ Display for AKI/AKA/SSK or SIO/SIS If the alarm output has been configured, it switches after expiry of the set time. → Time activation Triggering signals activated for a relatively long time (AKI, AKA, SSK) are displayed with an error message. -
Page 81: Function Chart
Configurations 16.3.1 Function chart: Mechanical BDE (external BDE) MS BDE-M (102-016841000) BDE2 / clamp 2 BDE1 / clamp 1 Function locked continuously open manual automatic Toggle switch BDI on the side cover or external BDE2 / clamp 2 BDE1 / clamp 1 Function if the external Function if the external mech. -
Page 82: Master / Slave Application
Master / Slave Application Master / Slave Application 17.1 The Master/Slave control allows the DFA 127 to perform sequential controls without the need for external supplementary devices. This Master/Slave control is used with double-leaf doors that require specific opening and closing sequences. A particular feature of the Mas- ter/Slave control of the DFA 127 is that all the safety functions recognised by the DFA also function with double leaf doors. -
Page 83: Distinctive Features
Master / Slave Application 17.3 Distinctive features For Master/Slave installations, note that the commissioning differs from that of the standard DFA as follows: ▪ The operators of a Master/Slave installation must be connected together via the commu- nication line and the CAN-isolator 102-127808247 (see Master/Slave circuit diagram in this user manual). -
Page 84: Interlock Mode With 2 Single-Leaf Doors
Interlock mode with 2 single-leaf doors Interlock mode with 2 single-leaf doors 18.1 2 single doors, connection with CAN-isolator Starting from software version 1.41, the DFA 127 enables two single-leaf doors to be oper- ated in an interlock mode with only one BDE-D/BDI. This means that one door can be opened with AKI and SSK only if the other door is closed. -
Page 85: Single Doors, Communication With Fem
Interlock mode with 2 single-leaf doors 18.4 2 single doors, communication with FEM 1 If 2 drive units are operated as an interlock it is important that each time only one door is opened. The other door remains closed until the first door is closed again. If one door is opened, it will block through the output SAA the other door until it is closed again. -
Page 86: Deactivation Of The Interlock Mode
Interlock mode with 2 single-leaf doors NOTICE The basic wiring for the interlock is always necessary. For following applications additional wiring is necessary accordingly. 18.7 Deactivation of the interlock mode The interlock mode is deactivated by the switch “Interlock-Off” (contact closed). This permits to open the doors simultaneously. -
Page 87: Lamp
Interlock mode with 2 single-leaf doors Lamp 18.10 Optical or acoustic signal, that the interlock is occupied. Installation A Installation B 102-127108955 V1.1 87/ 102... -
Page 88: Accessories
Accessories Accessories 19.1 Gearbox cover with position switch Gearbox cover with position switch MS gearbox cover with switch (position switch) Art. 102-127808254 The normal gearbox cover is replaced by the gearbox cover with position switch. The ad- justable switch clasp in the gearbox housing actuates the microswitch with floating contact. Solutions with externally mounted microswitches and appropriate operation or magnetic con- tacts need to be implemented by the customer onsite. -
Page 89: Extended Function Module Fem 1
Accessories 19.2 Extended function module FEM 1 Nameplate, connections and controls FEM 1 Mounting kit FEM 1 with 1 m cable FEM 1 module 102-020809040 102-020809033 Place and install the FEM 1 directly beside the control unit. IMPORTANT For reasons of space the extended version should always use at least 780 mm drive length. -
Page 90: Status And Fault Signals
Status and fault signals Status and fault signals 20.1 Detail description of status indications General In case of an irregularity, the display changes automatically from operation mode level to er- ror display. Depending on the control unit connected BDE-E or BDE-M various indications are given. - Page 91 Status and fault signals Press key about 2 seconds Browse through informations by tapping the key Back to main display by pressing the key or automatically after 20 seconds. 102-127108955 V1.1 91/ 102...
-
Page 92: Maintenance Instructions
Maintenance instructions Maintenance instructions The following points must be checked: Base fixing Is the DFA 127 securely fixed to the backing construction? Chassis Is the attachment still normal? Door hinge Can the door leaf be moved smoothly? Gearbox Function rotate + lubricate for grease spreading in gearbox ▪... -
Page 93: Verifications For A New Assembly
Is the diode fitted over the door lock connection? Functional test of the electrical door lock and the monitoring Casing Have the casing and the side cover been installed properly? Logo Is the record logo correctly attached? 102-127108955 V1.1 93/ 102... -
Page 94: Specification For Fire Doors
Specification for fire doors Specification for fire doors 23.1 Operator types In order to clearly differentiate them from standard operators, an „F“ has been added to the type designation and the gear box is marked with the words „FIRE SAFETY“. These opera- tors must be fitted onto fire doors in new installations and as replacements. -
Page 95: Parameter Setting For Utilisation On Fire Doors
Specification for fire doors 23.4 Parameter setting for utilisation on fire doors Parameter Factory default Change configuration to DOOR SYSTEM Fire alarm Disabled Enabled NOTICE Configuration For parameter setting please also see chapter 23.5 Hints for low-energy operators NOTICE The fire door and low-energy operator combination is only authorised according to the data shown in the table below. -
Page 96: Abbreviations Dfa
Abbreviations DFA Abbreviations DFA Abbreviation Description Absolute pulse generator Actuating-contact „outside“ Actuating-contact „common“ Actuating-contact „inside“ Terminals inside header Drive unit BDE-D Electronic control unit Control unit (rocker switch) BDI-M Circuit board for mechanical control unit Control unit LED CAN-H Serial data interface CAN-L Serial data interface Central processing unit... - Page 97 Abbreviations DFA Abbreviation Description Fuse Safety open Safety close Key operated contact Control unit Control pc board Door locking Door opening width Door open time delay µP Microprocessor Locking contact Wiring list Instructions for wiring and assembly Locking 102-127108955 V1.1 97/ 102...
-
Page 98: Drawings
Drawings Drawings 25.1 Cable layout 102-127108955 V1.1 98/ 102... - Page 99 Drawings 102-127108955 V1.1 99/ 102...
-
Page 100: Wiring Diagram
Drawings 25.2 Wiring diagram 102-127108955 V1.1 100/ 102... - Page 101 Drawings 102-127108955 V1.1 101/ 102...
- Page 102 Drawings 102-127108955 V1.1 102/ 102...
- Page 103 Contact Manufacturer Î agta record ltd – Allmendstrasse 24 – 8320 Fehraltorf – Switzerland tel. +41 44 954 91 91 – info@agta-record.com Distribution / Service Hotline: your global partner for entrance solutions...
Need help?
Do you have a question about the DFA127 and is the answer not in the manual?
Questions and answers