Table of Contents
Advertisement
manual
modbar av
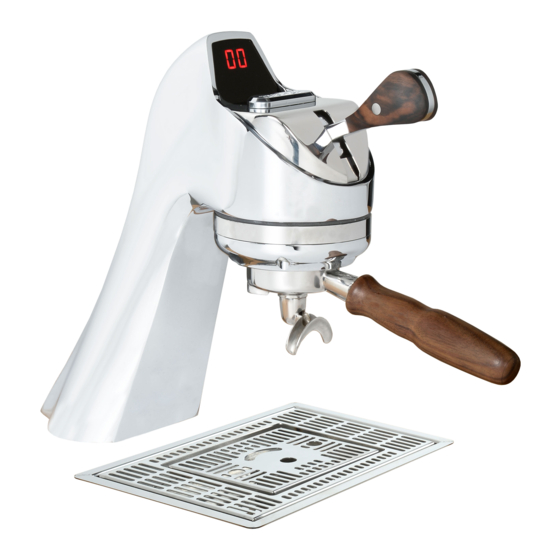
- espresso system
Modbar AV is an elegant espresso machine which hides the complexity
of the traditional machine under the counter.
It exists for the barista, the visionary and the dreamer who wants to
redefine the aesthetics of the coffee space, while still requiring the
quality, consistency and reliability of a proven industry leader.
Advertisement
Table of Contents

Related Manuals for modbar av Series


Summary of Contents for modbar av Series
- Page 1 - espresso system Modbar AV is an elegant espresso machine which hides the complexity of the traditional machine under the counter. It exists for the barista, the visionary and the dreamer who wants to redefine the aesthetics of the coffee space, while still requiring the...
-
Page 2: Table Of Contents
- espresso system Operating Manual V1.0 - 03/2018 MAN.21.1 Chapters 1. General Warnings and Safety Specifications page 3 La Marzocco S.r.l. 2. Definition of Available Models page 7 Via La Torre 14/H Località La Torre 50038 Scarperia e San Piero 3. -
Page 3: General Warnings And Safety Specifications
1. General Warnings and Safety Specifications children more than WARNING WARNING years of age) with reduced As already mentioned in This machine is for professional physical, sensory or mental the preceding notes, the use only and should be installed capabilities, or lack of manufacturer shall not be held in locations where its use and experience and knowledge,... - Page 4 must be supplied to users. dealer or retailer immediately. They and must be performed by Users are asked to read will send out specialized personnel qualified authorized the enclosed warnings and authorized to perform service on personnel. the espresso machine. 8) Incorrect installation may cautions carefully, as they provide valuable information...
- Page 5 such connection. for. Any other application is • do not expose the device to 10) Furthermore, you must inappropriate and dangerous. atmospheric agents (rain, ensure that the capacity of The manufacturer shall not be held sun, etc.); responsible for any damages caused the available electrical system •...
- Page 6 15) In case the machine is 17) In order to avoid dangerous operating in a faulty manner overheating problems, it is or breaks down, disconnect recommended that the power it from the electrical network supply cable be fully unfurled. (as described in the preceding 18) Do not obstruct air intake point) and close the water and exhaust grilles and, in...
-
Page 7: Definition Of Available Models
2. Definition of Available Models This operating manual refers exclusively to the following models, of our own manufacture: MODBAR AV, Espresso System Legend Espresso Actuator Lever Digital Display Selection Indicator USB Key Connection Timer Power Switch Selector Pressure Gauge Keypad... - Page 8 This operating manual refers exclusively to the following models, of our own manufacture: MODBAR AV 1 group, Espresso System Legend Espresso Module Espresso Tap 1 Tap 1 Brewing Tap 1 Low Voltage Tap 1 High Voltage Preheater Tap 1 Coffee Boiler...
- Page 9 This operating manual refers exclusively to the following models, of our own manufacture: MODBAR AV 2 groups, Espresso System Legend Espresso Module Espresso Tap 1 Espresso Tap 2 Tap 1 Brewing Tap 2 Brewing Tap 1 Low Voltage Tap 2 Low Voltage...
- Page 10 1) General Description • Pressure is displayed through a pressure The machine is built in 1 and 2 coffee gauge with a scale from 0 to 18 bar. group versions and is essentially composed • Safety device, based on an expansion type mechanical valve,...
-
Page 11: Installation
WATTAGE In order to prevent cracks or leakage: do not store or SEE ELECTRICAL 2682,5 11,7 2131,5 2682,5 AC220-240V/50-60Hz 2 BOILER MODBAR AV 1801 451,5 2252,5 install the Coffee machine AC208/60Hz 2252,5 10,8 CONNECTIONS FOR DETAILS in places where in boiler or POWER CORD: hydraulicsystem to freeze. - Page 12 WARNING Recommended Clearances Installation on the counter: For cutting the counter refer to cutting template placed inside the package. 350 mm - 14 in. WARNING Minimum clearance between Installation on the counter with Espresso Taps scales: The thickness of the counter must 150 mm - 6 in.
- Page 13 WARNING WARNING WARNING The machine is intended to be At each installation, the machine Hazardous voltage disconnect permanently connected to fixed should be equipped with a new from power supply before wiring, and it is mandatory that set of tubes for plumbing and servicing.
- Page 14 The two-position power switch on the This appliance is not intended the circuit breakers for the electrical Modbar module front panel has two for use by persons (including system need to be located in the most separate functions: ON and OFF.
- Page 15 2) Installation guide 3) General Use • At this point, the elements will begin to Upon installation, the Modbar module must During general use, the module is already heat. When each heat zone reaches set be primed before use. This is accomplished primed, and it is not necessary to prime the temperature, the module is ready for use.
- Page 16 2) Accessories • Three-phase, 380VAC - 50 Hz electrical Total Chlorine, pH & Total Alkalinity, Check the package to make sure that the connection with neutral + ground, near Chlorides. following accessories are included: the bench on which the machine is Ideally, you should perform a test on the •...
- Page 17 pH should be between 6.5 and 8.5 and 5) Electrical connections through the use of the connectors, as a) Power supply cord the quantity of chlorides be less than shown in the following figures: 50mg/l . Respecting these values allows •...
- Page 18 6) Waste water drain connection In case such a system is not available, The espresso machine drain is to be drained liquids may be collected in a connected by means of the included suitable bucket and any necessary drain pipe reinforced plastic tubing.
-
Page 19: Machine Operation And Coffee Preparation
4. Machine Operation and Coffee Preparation group assemblies. CAUTION WARNING To remove the air from the boiler, or “bleed Never remove the filter holder This machine is designed only for the groups”, it will be necessary to activate when water is being delivered. preparing coffee and hot drinks. - Page 20 portafilter(s) for a few seconds each time, 6) Water pump in order to preheat the portafilter. Whenever you are brewing coffee, and you can adjust the pump pressure by turning the by-pass screw (below the plug located Note: It is important to leave the portafilters installed in the espresso machine when on the side to which the pump power not in use.
- Page 21 - Dose 4; (we recommend at least 6-7g). The best - Continuous Operations; grinding is that which allows coffee to flow The Modbar espresso tap is able to - Rinsing; out from the filter holder spouts neither command multiple functions using a - Cleaning cycle.
- Page 22 Continuous Operations Continuous mode dispenses water until the barista terminates the extraction by again momentarily moving the tap handle. Rinsing This operation activates the rinse cycle. Cleaning cycle The Modbar also has integrated cleaning/ back flushing cycle functionality built in.
-
Page 23: Maintenance And Periodic Cleaning Operations
5. Maintenance and Periodic Cleaning Operations WARNING WARNING WARNING Jets of water should not be used The machine must be installed Do not remove the filter holder to clean the machine, nor should so that qualified technical while relative group is brewing it be placed where water jets presonnel can easily access it hot liquids. - Page 24 be hot. We recommend allowing the a neutral detergent may also be used.For screw. equipment to fully cool before performing extraordinary cleaning see the Portafilter - Put 2 or 3 teaspoons of cleaning any maintenance procedures. Manual. detergent for coffee machines in about 1/2 a litre of water inside a heat-resistant 1) Cleaning groups and drain wells 4) Cleaning the drain collector...
- Page 25 • When finished, run a steady stream of IMPORTANT water through the brewhead. If the machine has not been used for • Re-insert the the blind filter and run more than 8 hours or, in any case, after the automatic cleaning cycle once more, long periods of being idle, in order to this time removing the filter during the use the machine to its full potential it...
-
Page 26: De-Commissioning And Demolition
6. De-commissioning and Demolition 1) De-commissioning and demolition Remove the hose connecting the espresso Recycling notice: Warning for the protection of the machine to the water pump. Remove environment: Start by setting the main switch to the “0” the reinforced plastic tubing on the drain Used Electrical and electronic waste con- or OFF position. -
Page 27: Mandatory Maintenance And Check-Up Operations
7. Mandatory Maintenance and Check-up Operations These operations are in addition to the Maintenance and Periodic Cleaning Operations as specified in Chapter 6. The following maintenance and check-up operations sould be carried out by a qualified technician. The time required for the periodic maintenance is determinated by the quantity of daily work and/or coffee consumption. N.B. -
Page 28: Precision Scale
8. Precision Scale 1) Use precautions - The weighing system is a precision device that requires a lot of caution in terms of - Do not place on the scale objects The weighing system in static conditions use, cleaning and maintenance. weighing more than 1kg;... -
Page 30: Software Programming Guide
9. Software Programming Guide “Barista” Programming MODBAR █ █ 163Puls 0Puls page 34 Press and hold the T3 button for 5 seconds. Group Dose Coffee Boiler Scale Settings Settings Configuration page 46 page 58 page 56 CB1 Temperature CB Settings 94,5°C... - Page 31 “Barista” Programming Pre-Inf Keypad LEDs Exit Settings ENABLED Menu page 60 page 62 page 64 Group Pre-Inf Pre-Inf Pre-Inf Settings 0s Wet 0s Hold WITHOUT PUMP Exit page 60 page 61 page 61 ↑ Short Program ↑ Short Mass ↑ Short Dose ↑...
- Page 32 “Technical” Programming MODBAR █ █ 163Puls 0Puls page 34 Press and hold the T3 button for 10 seconds. Enter Password page 42 Language Temp Units Name Number of Groups ENGLISH CELSIUS Modbar page 65 page 67 page 69 page 71...
- Page 33 “Technical” Programming Group Dose Scale Coffee Boiler Head Heater Settings Configuration Settings Settings page 73 page 83 page 87 page 89 Auto On/Off Keypad LEDs Clock Time Pre-Inf Settings ENABLED 00:00 SUNDAY Settings page 97 page 96 page 95 page 93...
-
Page 34: Programming Introduction
• The following is a brief introduction to the controls and display and how they interact with the operator. Digital Display Digital display Digital display Tap Group 1 head Timer MODBAR █ █ 95.7°C 95.4°C Heating indicator (on during heating,... -
Page 35: Programming Keypad
Programming Keypad The keypad has two functions. The first is for control of the espresso. The second is for programming individual software parameters. The programming of the individual parameters is possible only using the buttons in the group 1 (group starting from the left). Button Description This button is used to control the brewing of the single espresso. - Page 36 Programming Keypad Button Description Press and hold this button for 5 seconds to activate the Backflush function of Espresso Tap number 1. Press and hold this button for 5 seconds to activate the Backflush function of Espresso Tap number 2 (if present). Press and hold this button for 5 seconds to enter the “Barista”...
- Page 37 Use Lever to group, activate again the tap lever to stop the water flows. Fill Boiler 00:00 Are the Boilers Filled? To complete the start up process, press any button. MODBAR █ █ 163Puls 0Puls WARNING HAZARDOUS VOLTAGE DISCONNECT FROM POWER...
-
Page 38: Start Up Procedures
Start Up Procedures Description Turning the Espresso Machine On -Standby Mode In this position, the module is in standby mode. When in standby mode, all operations function as normal, but no power is applied to the heating elements. This mode is used for priming the system upon installation, and can also be useful for some diagnostic applications. - Page 39 To complete the start up process, press any button. The screen shown to the left will be displayed. When the set temperature is reached, these rectangles turn off and all the lights of the buttons turn on (if enabled in the MODBAR █...
-
Page 40: Shut Down Procedures
00:00 machine. machine. Display Operating Procedure The following is the procedure for safely turning off the espresso machine. MODBAR The message shown to the left will be displayed when the espresso machine is switched on. █ █ 163Puls 0Puls The message shown to the left will be displayed when the espresso machine is switched off. -
Page 41: Accessing Programming Mode
• The two programming levels are as follows: Display Operating Procedure Barista” Programming Level MODBAR █ █ While the espresso machine is on, press and hold the button T3 . After approximately 5 seconds the 163Puls 0Puls following display appears. - Page 42 Description Programming Mode • Technical Programming - The parameters contained within this level are ones the operator can change to affect the performance of the espresso machine. G1█ MODBAR G2█ These parameters are set in the factory 163Puls 0Puls their...
-
Page 43: Cleaning Cycles
Cleaning Cycles Description Cleaning Cycles • This parameter allows the operator • The rinsing procedure is provided to give to carry out the washing of the coffee the operator more flexibility and freedom groups, in an automatic way, by running with regard to this operation. - Page 44 “Barista” Programming (only on ABR espresso machine models) Description Brewratio The procedure for weighing the filter • To brew in brew ratio mode, set this holder either empty or filled with coffee mode by entering the software settings. powder is shown below. •...
- Page 45 “Barista” Programming (only on ABR espresso machine models) Description Brewratio The procedure for weighing the filter • To brew in brew ratio mode, set this holder either empty or filled with coffee mode by entering the software settings. powder is shown below. •...
- Page 46 Dose Settings Reset Display Operating Procedure When the espresso machine is turned on, press and hold the T3 button to access the “Barista” programming. MODBAR █ █ 163Puls 0Puls After about 5 seconds the following screen is displayed. Group Dose Press the T3 button to enter the doses programming procedure.
- Page 47 Press T1 or T2 to continue with the programming of the other parameters. Press T2 and T3 at the same time to exit the programming mode and return to the normal use of the MODBAR █ █ 163Puls 0Puls espresso machine.
- Page 48 Settings Display Operating Procedure When the espresso machine is turned on, press and hold the T3 button to access the “Barista” programming. MODBAR █ █ 163Puls 0Puls After about 5 seconds the following screen is displayed. Group Dose...
- Page 49 “Barista” Programming Description Program Dose • This parameter allows the operator to • It is possible to set the dose for both program the amount of coffee (brewing a short and a long shot on the same amount) for each Selection Indicator. Selection Indicator.
- Page 50 “Barista” Programming Description Program Dose • This parameter allows the operator to • It is possible to set the dose for both program the amount of coffee (brewing a short and a long shot on the same amount) for each Selection Indicator. Selection Indicator.
- Page 51 “Barista” Programming Description Program Dose • This parameter allows the operator to • It is possible to set the dose for both program the amount of coffee (brewing a short and a long shot on the same amount) for each Selection Indicator. Selection Indicator.
- Page 52 Press T1 or T2 to continue with the programming of the other parameters. Press T2 and T3 at the same time to exit the programming mode and return to the normal use of the MODBAR █ █ 163Puls 0Puls espresso machine.
- Page 53 Settings Display Operating Procedure When the espresso machine is turned on, press and hold the T3 button to access the “Barista” programming. MODBAR █ █ 163Puls 0Puls After about 5 seconds the following screen is displayed. Group Dose...
- Page 54 “Barista” Programming (only on ABR espresso machine models) Description Program Dose • This parameter allows the operator to • It is possible to set the dose for both program the amount of coffee (brewing a short and a long shot on the same amount) for each Selection Indicator.
- Page 55 Press T1 or T2 to continue with the programming of the other parameters. Press T2 and T3 at the same time to exit the programming mode and return to the normal use of the MODBAR █ █ 163Puls 0Puls espresso machine.
- Page 56 Selection Indicator. Scale Configuration Display Operating Procedure When the espresso machine is turned on, press and hold the T3 button to access the “Barista” programming. MODBAR █ █ 163Puls 0Puls After about 5 seconds the following screen is displayed. Group Dose...
- Page 57 Press T1 or T2 to continue with the programming of the other parameters. Press T2 and T3 at the same time to exit the programming mode and return to the normal use of the MODBAR █ █ 163Puls 0Puls espresso machine.
-
Page 58: Coffee Boiler
Coffee Boiler Settings Display Operating Procedure When the espresso machine is turned on, press and hold the T3 button to access the “Barista” programming. MODBAR █ █ 163Puls 0Puls After about 5 seconds the following screen is displayed. Group Dose... - Page 59 Press T1 or T2 to continue with the programming of the other parameters. Press T2 and T3 at the same time to exit the programming mode and return to the normal use of the MODBAR █ █ 163Puls 0Puls espresso machine.
- Page 60 Display Operating Procedure When the espresso machine is turned on, press and hold the T3 button to access the “Barista” programming. MODBAR █ █ 163Puls 0Puls After about 5 seconds the following screen is displayed.
- Page 61 Press T1 or T2 to continue with the programming of the other parameters. Press T2 and T3 at the same time to exit the programming mode and return to the normal use of the MODBAR █ █ 163Puls 0Puls espresso machine.
- Page 62 Keypad LEDs ENABLED Display Operating Procedure When the espresso machine is turned on, press and hold the T3 button to access the “Barista” programming. MODBAR █ █ 163Puls 0Puls After about 5 seconds the following screen is displayed. Group Dose...
- Page 63 Group Dose Settings Keypad LEDs ENABLED Display Operating Procedure Press T2 and T3 at the same time to exit the programming mode and return to the normal use of the MODBAR █ █ 163Puls 0Puls espresso machine.
- Page 64 “Barista” programming and return to the normal use of the espresso Exit Menu machine. Alternatively, you can exit the “Barista” programming and return to the normal use of the espresso machine by MODBAR █ █ 163Puls 0Puls...
- Page 65 Language ENGLISH Display Operating Procedure When the espresso machine is turned on, press and hold the T3 button . After about 10 seconds the MODBAR █ █ 163Puls 0Puls following screen is displayed. Enter the technician password using the buttons T1 ,T2 and T3 .
- Page 66 Press the T3 button to exit the menu and return to the normal use of the espresso machine. Alternatively, you can exit the “Technical” programming and return to the normal use of the espresso machine MODBAR █ █ 163Puls...
- Page 67 “Technical” Programming Description Temperature Measurement Units • This parameter allows the technician to change the temperature display from degrees Celsius to degrees Fahrenheit Enter Password and vice versa. Temp Units CELSIUS Display Operating Procedure After accessing the “Technical” programming menu and entering the password, use the buttons T1 and T2 Enter Password until the following screen is displayed.
- Page 68 Enter Password and vice versa. Temp Units CELSIUS Display Operating Procedure Alternatively, you can exit the “Technical” programming and return to the normal use of the espresso machine MODBAR █ █ 163Puls 0Puls by pressing T2 and T3 at the same time.
- Page 69 • The user name is displayed continuously program a 16 character user name. on the display on the second line. Enter Password Name Modbar Display Operating Procedure After accessing the “Technical” programming menu and entering the password, use the buttons T1 and T2 Enter Password until the following screen is displayed.
- Page 70 • The user name is displayed continuously program a 16 character user name. on the display on the second line. Enter Password Name Modbar Display Operating Procedure Alternatively, you can exit the “Technical” programming and return to the normal use of the espresso machine MODBAR █...
- Page 71 “Technical” Programming Description Number of Groups • This parameter allows the technician to set the number of groups. Enter Password Number of Groups Display Operating Procedure After accessing the “Technical” programming menu and entering the password, use the buttons T1 and T2 Enter Password until the following screen is displayed.
- Page 72 Enter Password Number of Groups Display Operating Procedure Alternatively, you can exit the “Technical” programming and return to the normal use of the espresso machine MODBAR █ █ 163Puls 0Puls by pressing T2 and T3...
- Page 73 “Technical” Programming Description Program Dose • This parameter allows the operator to cancel all the doses set. Group Dose Settings Dose Settings Reset Display Operating Procedure After accessing the “Technical” programming menu and entering the password, use the buttons T1 and T2 Enter Password until the following screen is displayed.
- Page 74 Press T1 or T2 to continue with the programming of the other parameters. Press T2 and T3 at the same time to exit the programming mode and return to the normal use of the MODBAR █ █ 163Puls 0Puls espresso machine.
- Page 75 “Technical” Programming Description Program Dose • This parameter allows the operator to • It is possible to set the dose for both program the amount of coffee (brewing a short and a long shot on the same amount) for each Selection Indicator. Selection Indicator.
- Page 76 “Technical” Programming Description Program Dose • This parameter allows the operator to • It is possible to set the dose for both program the amount of coffee (brewing a short and a long shot on the same amount) for each Selection Indicator. Selection Indicator.
- Page 77 “Technical” Programming Description Program Dose • This parameter allows the operator to • It is possible to set the dose for both program the amount of coffee (brewing a short and a long shot on the same amount) for each Selection Indicator. Selection Indicator.
- Page 78 “Technical” Programming Description Program Dose • This parameter allows the operator to • It is possible to set the dose for both program the amount of coffee (brewing a short and a long shot on the same amount) for each Selection Indicator. Selection Indicator.
- Page 79 Press T1 or T2 to continue with the programming of the other parameters. Press T2 and T3 at the same time to exit the programming mode and return to the normal use of the MODBAR █ █ 163Puls 0Puls espresso machine.
- Page 80 “Technical” Programming (only on ABR espresso machine models) Description Program Dose • This parameter allows the operator to • It is possible to set the dose for both program the amount of coffee (brewing a short and a long shot on the same amount) for each Selection Indicator.
- Page 81 “Technical” Programming (only on ABR espresso machine models) Description Program Dose • This parameter allows the operator to • It is possible to set the dose for both program the amount of coffee (brewing a short and a long shot on the same amount) for each Selection Indicator.
- Page 82 Press T1 or T2 to continue with the programming of the other parameters. Press T2 and T3 at the same time to exit the programming mode and return to the normal use of the MODBAR █ █ 163Puls 0Puls espresso machine.
- Page 83 “Technical” Programming (only on ABR espresso machine models) Description Scale Configuration • This parameter allows the operator to • This parameter enables the technician view and manually change each dose for to set some scale parameters like: each Selection Indicator. Enabling/disabling offset Enter Password...
- Page 84 “Technical” Programming (only on ABR espresso machine models) Description Scale Configuration • This parameter allows the operator to • This parameter enables the technician view and manually change each dose for to set some scale parameters like: each Selection Indicator. Enabling/disabling offset Enter Password...
- Page 85 “Technical” Programming (only on ABR espresso machine models) Description Scale Configuration • This parameter allows the operator to • This parameter enables the technician view and manually change each dose for to set some scale parameters like: each Selection Indicator. Enabling/disabling offset Enter Password...
- Page 86 Press T1 or T2 to continue with the programming of the other parameters. Press T2 and T3 at the same time to exit the programming mode and return to the normal use of the MODBAR █ █ 163Puls 0Puls espresso machine.
- Page 87 “Technical” Programming Description though the temperature of the boiler Coffee Boiler may vary slightly, the temperature of the • This parameter enables the technician water exiting the group is constant. to set various parameters of the coffee • To properly calibrate the temperature boiler.
- Page 88 Press the T3 button to exit the menu and return to the normal use of the espresso machine. Alternatively, you can exit the “Technical” programming and return to the normal use of the espresso machine MODBAR █ █ by pressing T2 and T3 at the same time.
- Page 89 “Technical” Programming Description Head Heater • This parameter enables the technician to set various parameters of the Espresso Tap for increasing temperature Enter Password performances depending on machine configuration. Head Heater Settings Display Operating Procedure After accessing the “Technical” programming menu and entering the password, use the buttons T1 and T2 Enter Password until the following screen is displayed.
- Page 90 “Technical” Programming Description Head Heater • This parameter enables the technician to set various parameters of the Espresso Tap for increasing temperature Enter Password performances depending on machine configuration. Head Heater Settings Display Operating Procedure Press the T3 button to enter the menu, move with the buttons T1 and T2 to set the desired tempera- Head1 STO1...
- Page 91 “Technical” Programming Description Head Heater • This parameter enables the technician to set various parameters of the Espresso Tap for increasing temperature Enter Password performances depending on machine configuration. Head Heater Settings Display Operating Procedure Press the T3 button to enter the menu, move with the buttons T1 and T2 to set the value, press the Head1 MST...
- Page 92 Head Heater Settings Display Operating Procedure Alternatively, you can exit the “Technical” programming and return to the normal use of the espresso machine MODBAR █ █ 163Puls 0Puls by pressing T2 and T3 at the same time.
- Page 93 “Technical” Programming Description Pre-Infusion or Pre-Brewing • This parameter allows the operator to pre-brewing cycle; during this time the program the time of pre-brewing of pump is active. Once the pre-brewing water with the coffee. Each group can cycle is over, the normal brewing cycle Enter Password have a different programming.
- Page 94 Press the T3 button to exit the menu and return to the normal use of the espresso machine. Alternatively, you can exit the “Technical” programming and return to the normal use of the espresso machine MODBAR █ █ by pressing T2 and T3 at the same time.
- Page 95 Press the T3 button to exit the menu and return to the normal use of the espresso machine. Alternatively, you can exit the “Technical” programming and return to the normal use of the espresso machine MODBAR █ █ by pressing T2 and T3 at the same time.
- Page 96 Press the T3 button to exit the menu and return to the normal use of the espresso machine. Alternatively, you can exit the “Technical” programming and return to the normal use of the espresso machine MODBAR █ █ by pressing T2 and T3 at the same time.
- Page 97 “Technical” Programming Description Auto On/Off • This parameter allows the technician to • This feature also allows the espresso program the espresso machine to turn on machine to remain in the off condition at a preset time and turn off at a preset for one repeating closed day.
- Page 98 Press the T3 button to exit the menu and return to the normal use of the espresso machine. Alternatively, you can exit the “Technical” programming and return to the normal use of the espresso machine MODBAR █ █ by pressing T2 and T3 at the same time.
- Page 99 “Technical” Programming Description Eco Mode • This parameter allows the technician to • It is possible to set this parameter also set up a temperature to be maintained during the normal operation of the in case of a temporary non utilization of machine by pressing T1 and T2 at the Enter Password the espresso machine.
- Page 100 Press the T3 button to exit the menu and return to the normal use of the espresso machine. Alternatively, you can exit the “Technical” programming and return to the normal use of the espresso machine MODBAR █ █ 163Puls...
- Page 101 “Technical” Programming Description Coffee Dose Counter • This parameter allows the technician • This parameter displays different values: to review the total doses dispensed for • Total coffee doses; each button. • Coffee doses for each button. Enter Password Coffee Dose Counter Display Operating Procedure...
- Page 102 “Technical” Programming Description Coffee Dose Counter • This parameter allows the technician • This parameter displays different values: to review the total doses dispensed for • Total coffee doses; each button. • Coffee doses for each button. Enter Password Coffee Dose Counter Display Operating Procedure...
- Page 103 Press the T3 button to exit the menu and return to the normal use of the espresso machine. Alternatively, you can exit the “Technical” programming and return to the normal use of the espresso machine MODBAR █ █ 163Puls...
-
Page 104: Filter Alarm
“Technical” Programming Description Filter Alarm • This parameter enables the technician • A value of 0 (zero) disables the filter to program an alarm that will alert the alarm parameter. user about the need for maintenance or • This feature can be enabled or disabled. Enter Password replacement of the water filter. - Page 105 Press the T3 button to exit the menu and return to the normal use of the espresso machine. Alternatively, you can exit the “Technical” programming and return to the normal use of the espresso machine MODBAR █ █ by pressing T2 and T3 at the same time.
- Page 106 “Technical” Programming Description Reset • This parameter allows the technician to • It is possible to reset the settings you reset all the values returning to initial made in the “Barista” programming or factory settings. the settings you made in the “Technical” Enter Password programming.
- Page 107 Press the T3 button to exit the menu and return to the normal use of the espresso machine. Alternatively, you can exit the “Technical” programming and return to the normal use of the espresso machine MODBAR █ █ 163Puls...
- Page 108 “Technical” Programming Description Update Firmware • This parameter allows the technician to update the control unit of the espresso machine via a USB Pendrive. Enter Password Update Firmware Display Operating Procedure After accessing the “Technical” programming menu and entering the password, use the buttons T1 and T2 Enter Password until the following screen is displayed.
- Page 109 “Technical” Programming Description Exit Menu • This parameter allows the technician to exit the “Technical” programming and return to the normal use of the espresso Enter Password machine. Exit Menu Display Operating Procedure Press the T3 button to exit the “Technical” programming and return to the normal use of the espresso Exit Menu machine.
Need help?
Do you have a question about the av Series and is the answer not in the manual?
Questions and answers