
Subscribe to Our Youtube Channel
Related Manuals for Taylor C723


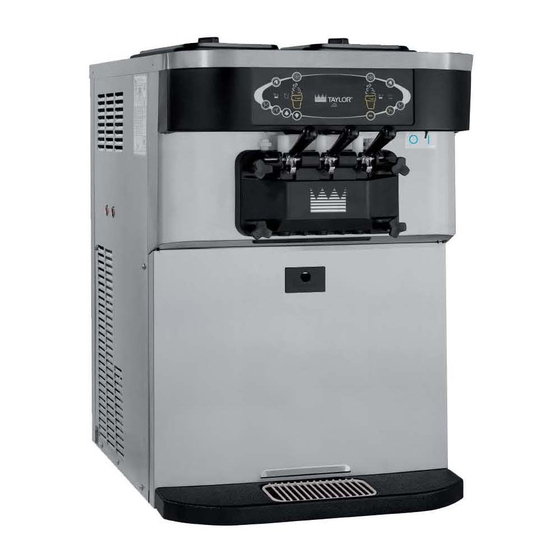
Summary of Contents for Taylor C723
- Page 1 OPERATOR'S MANUAL Model C723 Soft Serve Freezer Original Operating Instructions 069127-M 3/18/11 (Original Publication) (Updated 02/05/16)
- Page 2 Phase Maximum Fuse Size: Minimum Wire Ampacity: E 2011 Taylor Company 069127-M Any unauthorized reproduction, disclosure, or distribution of copies by any person of any portion of this work may be a violation of Copyright Law of the United States of America and other countries, could result in the awarding of Statutory Damages of up to $250,000 (17 USC 504) for infringement, and may result in further civil and criminal penalties.
-
Page 3: Table Of Contents
............Model C723 - Factory Equipped With Agitator . - Page 4 Note: Only instructions originating from the factory or its authorized translation representative(s) are considered to be the original set of instructions. E 2011 Taylor Company (Original Publication) Updated February, 2016 069127-M...
-
Page 5: To The Installer
6” (152 mm) on the left and right sides and 0” on practices are followed during the installation and the back. The Model C723 unit equipped with top air servicing activities related to the installation and discharge requires 6” (152 mm) on the left side, 0”... -
Page 6: Water Connections (Water Cooled Units Only)
Check the data label(s) on the replaced by the manufacturer, its service freezer for branch circuit overcurrent protection or agent, or similarly qualified person, in order fuse, circuit ampacity, and other electrical to avoid a hazard. 130225 To the Installer Model C723... -
Page 7: Beater Rotation
C20600-AFB: ADA compliant height cart, not equipped with a door. C20600-000: Standard height cart with Taylor reminds technicians to be cautious of reversible front door panel and rear panel. government laws regarding refrigerant recovery, Note: If the door is required on the rear of the recycling, and reclaiming systems. -
Page 8: To The Operator
Your Taylor warranty is valid only if the parts are authorized Taylor parts, purchased from the local It should also be noted that Taylor does not warrant authorized Taylor Distributor, and only if all required the refrigerant used in its equipment. -
Page 9: Safety
We, at Taylor Company, are concerned about the safety of the operator when he or she comes in contact with the freezer and its parts. Taylor has gone to extreme efforts to design and manufacture built-in safety features to protect both you and the All repairs must be performed by an service technician. - Page 10 The Model C723 air cooled unit requires a minimum of 6” (152 mm) on the left and right sides and 0” on the back. The Model C723 unit equipped with top air This unit has many sharp edges that can discharge requires 6”...
- Page 11 Notes: Model C723 Safety...
-
Page 12: Operator Parts Identification
Section 4 Operator Parts Identification Model C723 Figure 1 140519 Operator Parts Identification Model C723... - Page 13 Model C723 Exploded View Parts Identification ITEM DESCRIPTION PART NO. ITEM DESCRIPTION PART NO. COVER-HOPPER 041682-BLA SCREW-1/4-20X3/8 SLTD 011694 ORIFICE 022465-100 SCREW-WING HEAD 081582 O-RING-3/8 OD X .070W 016137 TRAY-DRIP 080781 (100 TO BAG) SHIELD-SPLASH-WIRE 046177-SP TUBE A.-FEED-SS-5/32 HOLE X29429-2 PAN A.-DRIP 15 1/8 LONG...
-
Page 14: Model C723 - Factory Equipped With Agitator
Model C723 - Factory Equipped With Agitator Figure 2 140519 Operator Parts Identification Model C723... - Page 15 Model C723 Factory Equipped With Agitator Exploded View Parts Identification ITEM DESCRIPTION PART NO. ITEM DESCRIPTION PART NO. COVER-HOPPER-14 QT-GRAY 041682-GRY SCREW-1/4-20X3/8 SLTD 011694 ORIFICE 022465-100 SCREW-WING HEAD 081582 O-RING-3/8 OD X .070W 016137-SER TRAY-DRIP 080781 (100 TO BAG) SHIELD-SPLASH-WIRE 046177-SP TUBE A.-FEED-SS-5/32 HOLE...
-
Page 16: Model C723 - Door And Beater Assembly
Model C723 - Door and Beater Assembly Figure 3 ITEM DESCRIPTION PART NO. ITEM DESCRIPTION PART NO. PLUG-PRIME TWIN 059936 CAP-DESIGN 1.010"ID-6 POINT 014218 O-RING-1/2OD X .070W 024278 SEAL-DRAW VALVE-LARGE 034698 (50 TO BAG) H-RING GASKET-DOOR HT 4"-DOUBLE 048926 VALVE A.-DRAW-CENTER... -
Page 17: Optional Carts
CASTER-3" SWV 3/4-10 STEM 021279 W/BRAKE NOTE: ADA COMPLIANT HEIGHT CART, NOT PANEL-SIDE-STD CART 069428 EQUIPPED WITH A DOOR. PANEL-REAR-STD CART 069429 NOTE: STANDARD HEIGHT CART WITH REVERSIBLE FRONT DOOR PANEL AND REAR PANEL. 140519 Model C723 Operator Parts Identification... -
Page 18: Accessories
Accessories Figure 5 ITEM DESCRIPTION PART NO. ITEM DESCRIPTION PART NO. LUBRICANT-TAYLOR 4 OZ. 047518 PAIL-10 QT 013163 TOOL-O-RING REMOVAL 048260-WHT KIT A.-TUNE-UP X49463-80 SANITIZER-STERA SHEEN SEE NOTE *A sample container of sanitizer is sent with the unit. For reorders, order Stera Sheen part no. 055492 (100 2 oz. -
Page 19: Brushes
Brushes Figure 6 ITEM DESCRIPTION PART NO. ITEM DESCRIPTION PART NO. BLACK BRISTLE BRUSH 013071 WHITE BRISTLE BRUSH 023316 (3” x 7”) DOUBLE END BRUSH 013072 WHITE BRISTLE BRUSH 013073 (1” x 2”) Model C723 Operator Parts Identification... -
Page 20: Important: To The Operator
Section 5 Important: To the Operator Model C723 Figure 7 ITEM DESCRIPTION ITEM DESCRIPTION POWER SWITCH SELECT KEY LIQUID CRYSTAL DISPLAY SERVICE MENU KEY KEYPADS BRUSH CLEAN COUNTER MIX OUT INDICATOR ARROW KEYS STANDBY KEY SYRUP HEATER KEY (INACTIVE) MIX LOW INDICATOR... -
Page 21: Symbol Definitions
To better communicate in the International arena, symbols have replaced words on many of our operator switches, function, and fault indicators. = TOPPING HEATER Your Taylor equipment is designed with these International symbols. The following chart identifies the symbol definitions. Power Switch... - Page 22 Failure to follow this instruction may result in AUTO symbol to resume normal operation. If the lower product quality when normal operation is freezer shuts down again, contact your authorized resumed. service technician. 130703 Important: To the Operator Model C723...
- Page 23 IMPORTANT: Make sure the level of mix in the hopper is below the mix inlet hole in the feed tube. Failure to follow this instruction may result in lower product quality when normal Figure 11 operation is resumed. 130703 Model C723 Important: To the Operator...
-
Page 24: Operating Screen Descriptions
“CORRUPTED LANGUAGE,” CONFIG CRC ERR,” last brush cleaned. After hour 99, it will change to a “SYSTEM CRC ERR, “FAULT HISTORY, letter and a number (example: A0, A1, ... B0, B1, ”LOCKOUT CRC ERR,” or “POWER FAILURE.” etc.). Important: To the Operator Model C723... -
Page 25: Manager's Menu
However, the control keys will not be lit and are Selecting “EXIT FROM MENU” will exit the non-functional when the Manager's Menu is Manager's Menu and then return the control panel displayed. symbols to normal operation. 130425 Model C723 Important: To the Operator... - Page 26 “Enable” selects that option and displays the second screen. (See Figure 25.) SET CLOCK 12:01 2/10/2011 MAR Second Sunday NO CHANGES ALLOWED NOV First Sunday Press Any Key Change > Exit Figure 21 Figure 25 Important: To the Operator Model C723...
- Page 27 “Enable.” Touch (See Figure 28.) the SEL symbol to advance to the next screen. (See Figure 31.) DST END MONTH AUTO START TIME 00:00 > Change > Exit Figure 28 Figure 31 Model C723 Important: To the Operator...
- Page 28 Enable LOCKOUT HISTORY Disable 02/27/11 12:58 < HPR THERM FAIL Figure 34 > Exit Disable the audible tone feature by selecting the UP arrow symbol to move the arrow to “Disable.” Select Figure 37 Important: To the Operator Model C723...
- Page 29 Use the arrow symbols to advance forward or SOFTWARE VERSION backward to view each screen. The following list C723 CONTROL UVC4 indicates the variable messages that may appear. VERSION V00.00.000 Press the SEL key to return to the Manager's Menu.
- Page 30 Note: If “Yes” is selected, it may take a few > No moments for the memory to clear and the defaults to load. The display may show the message Figure 42 “COMMUNICATIONS FAILURE” during this time. Important: To the Operator Model C723...
-
Page 31: Operating Procedures
Section 6 Operating Procedures The Model C723 is a medium capacity soft serve Step 3 machine. Mix is stored in the hoppers. The mix flows Heavily lubricate the inside portion of the boot seal. by gravity through a feed tube into the freezing Also lubricate the flat end of the boot seal that cylinders. - Page 32 Slide the front bearings over the baffle rods. Figure 46 The flanged edges should be against the door. DO Repeat this step for the second scraper blade. NOT lubricate the gaskets or bearings. 130425 Operating Procedures Model C723...
- Page 33 Step 14 Slide the two o-rings into the grooves on each prime To install the freezer door, insert the baffle rods plug. Apply an even coat of Taylor Lube to the through the beaters in the freezing cylinders. o-rings and shafts.
- Page 34 Step 17 Slide the fork of the draw handles in the slot of the Lubricate the inside of the freezer door spouts, top draw valves, starting from the right. and bottom. Figure 53 Figure 55 140519 Operating Procedures Model C723...
- Page 35 Snap the design caps over the bottom of the door spouts. Step 24 Slide two o-rings on one end of the feed tube. Slide two o-rings on the other end of the feed tube. Figure 57 Figure 60 130425 Model C723 Operating Procedures...
-
Page 36: Sanitizing
Lay the feed tube (with air orifice installed) and the agitator (factory-equipped agitator units, only) in the bottom of the mix hopper for sanitizing. Step 28 Repeat steps 24 through 27 for the other side of the machine. Figure 64 Operating Procedures Model C723... - Page 37 Momentarily open the center draw valve to sanitize the center Step 14 door spout. Draw off the remaining sanitizing Repeat these steps for the other side of the solution. machine. Model C723 Operating Procedures...
-
Page 38: Priming
Place an empty pail beneath the door spouts. With the prime plug in the up position, pour 2-1/2 gallons (9.5 liters) of FRESH mix into the mix hopper and To disassemble the Model C723, the following items allow it to flow into the freezing cylinder. will be needed:... -
Page 39: Rinsing
WASH symbol , cancelling the Wash mode. the water being discharged is clear. Step 5 Step 8 Repeat these steps for the other side of the Repeat these steps on the other side of the machine. machine. Model C723 Operating Procedures... -
Page 40: Disassembly
Figure 69 Note: If the drip pan is filled with an excessive amount of mix, it is an indication that the drive shaft seal(s), or o-ring(s) should be replaced or properly lubricated. 151124 Operating Procedures Model C723... - Page 41 Repeat these steps on the other side of unit. cleaning solution. Using the black brush, clean the Step 6 rear shell bearing at back of freezing cylinder. Wipe all exterior surfaces of the freezer with a clean, sanitized towel. Figure 70 Model C723 Operating Procedures...
-
Page 42: Important: Operator Checklist
Be sure there is a rear shell bearing and the female hex drive generous amount of cleaning solution on the socket clean and free of lubricant and mix brush. deposits. 130108 Important: Operator Checklist Model C723... -
Page 43: Winter Storage
Your local Taylor Distributor can perform this winter storage service for you. Caution: Always disconnect Wrap detachable parts of the freezer such as the... -
Page 44: Troubleshooting Guide
The viscosity control is set b. Call an authorized service - - - technician. too cold. - - - c. Freeze-up in mix inlet c. Call an authorized service technician. hole. Important: Operator Checklist Model C723... - Page 45 - - - technician. assembly work forward. - - - e. Worn rear shell bearing. e. Call an authorized service technician. - - - f. Gear box out of alignment. f. Call an authorized service technician. Model C723 Important: Operator Checklist...
- Page 46 Machine is unplugged. a. Plug into wall receptacle. - - - with power switch ON. - - - b. Circuit breaker OFF or b. Turn the breaker ON or replace the fuse. blown fuse. Important: Operator Checklist Model C723...
-
Page 47: Parts Replacement Schedule
Minimum if Necessary White Bristle Brush, 1” x 2” Inspect & Replace Minimum if Necessary Black Bristle Brush, 1” x 2” Inspect & Replace Minimum if Necessary Double-Ended Brush Inspect & Replace Minimum if Necessary Model C723 Parts Replacement Schedule... -
Page 48: Section 10 Limited Warranty On Equipment
Taylor, through an authorized Taylor distributor or service agency, will provide a new or re-manufactured part, at Taylor’s option, to replace the failed defective part at no charge for the part. Except as otherwise stated herein, these are Taylor’s exclusive obligations under this limited warranty for a Product failure. - Page 49 LEGAL REMEDIES The owner must notify Taylor in writing, by certified or registered letter to the following address, of any defect or complaint with the Product, stating the defect or complaint and a specific request for repair, replacement, or other correction of the Product under warranty, mailed at least thirty (30) days before pursuing any legal rights or remedies.
-
Page 50: Limited Warranty On Parts
Taylor warrants the Parts against failure due to defect in materials or workmanship under normal use and service as follows. All warranty periods begin on the date of original installation of the Part in the Taylor unit. If a Part fails due to defect during the applicable warranty period, Taylor, through an authorized Taylor distributor or service agency, will provide a new or re-manufactured Part, at Taylor’s option, to replace the failed defective Part at no... - Page 51 Parts or the units in which they are installed repaired or altered in any way so as, in the judgment of Taylor, to adversely affect performance, or normal wear or deterioration.
-
Page 52: Taylor Company 750 N. Blackhawk Blvd
LEGAL REMEDIES The owner must notify Taylor in writing, by certified or registered letter to the following address, of any defect or complaint with the Part, stating the defect or complaint and a specific request for repair, replacement, or other correction of the Part under warranty, mailed at least thirty (30) days before pursuing any legal rights or remedies.
Need help?
Do you have a question about the C723 and is the answer not in the manual?
Questions and answers