Taylor C712 Service Manual
Soft serve freezers
Hide thumbs
Also See for C712:
- Operating instructions manual (57 pages) ,
- Service manual (120 pages) ,
- Operator training (41 pages)

Related Manuals for Taylor C712


Summary of Contents for Taylor C712
- Page 1 SERVICE MANUAL Model C712 & C713 Soft Serve Freezers Original Service Instructions 062179-S 6/15/05 (Original Publication) (Updated 7/1/16)
-
Page 3: Table Of Contents
........Control A. - X67560-27 (Model C712) . - Page 4 ........... . CAUTION: Information in this manual is intended to be used by Taylor Authorized Service Technicians only.
-
Page 5: Section 1: Introduction
Section 1: Introduction Safety Refrigerant Specifications General Installation Instructions Running Specifications Important to the Operator Models C712/C713 Introduction... -
Page 6: Safety
GFI to equipment. The many built‐in safety features that protect against the leakage of current and are part of all Taylor equipment are aimed at be installed by authorized personnel to the protecting operators and trained service technicians local codes. - Page 7 Two or more people are required to safely proper PPE (Personal Protective Equipment) is move this unit. Failure to comply may result in available and worn when required during installation personal injury or equipment damage. and service. 110725 Models C712/C713 Introduction...
-
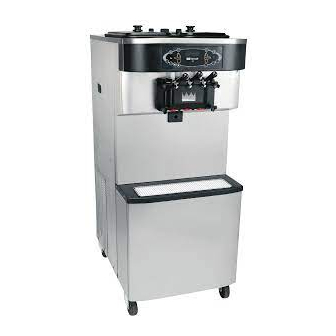
Page 8: Model C712 Specifications
Model C712 Specifications Freezing Cylinder This unit may be manufactured in other electrical characteristics. Refer to the local Taylor Distributor Two, 3.4 quart (3.2 liter) for availability. (For exact electrical information, always refer to the data label of the unit.) -
Page 9: Model C713 Specifications
Model C713 Specifications Freezing Cylinder This unit may be manufactured in other electrical characteristics. Refer to the local Taylor Distributor for availability. (For exact electrical information, Two, 3.4 quart (3.2 liter) always refer to the data label of the unit.) -
Page 10: Running Specifications
Running Specifications Pressures/Temperatures Low Side (Suction) Suction pressure equals expansion valve setting. The following are the Taylor recommended settings High Side (Discharge) for various components within these models. The freezers in this manual use refrigerant R404A. High side pressure varies for air cooled units, depending on the ambient temperature. -
Page 11: General Installation Instructions
ALL WIRING AND PLUMBING MUST personal injury or equipment damage. CONFORM TO NATIONAL AND LOCAL CODES. Uncrate the machine. Inspect the unit for damage. Report any damage to the Taylor factory INSTALL POTABLE WATER CONNECTION immediately. WITH ADEQUATE BACK-FLOW PROTECTION TO COMPLY WITH... - Page 12 If the supply cord is damaged, it must be replaced by an authorized Taylor service CAUTION: THIS EQUIPMENT MUST BE technician in order to avoid a hazard. PROPERLY GROUNDED! FAILURE TO DO SO...
- Page 13 IEC 61770 standard. The water expansion valve setting should be set at Taylor reminds technicians to be cautious of 255 PSIG (1758 kPa). government laws regarding refrigerant recovery, recycling, and reclaiming systems. If you have any...
- Page 14 Beater Rotation Pump Motor Rotation (C712 Only) Remove the air/mix pump assembly. Connect power to the freezer and place the Beater rotation must be clockwise as power switch in the ON position. viewed looking into the freezing cylinder. Press the PUMP symbol. This will activate the pump motor only.
-
Page 15: Environmental Notices
If the crossed-out wheeled bin symbol is It should be noted that Taylor does not warrant the affixed to this product, it signifies that this product is refrigerant used in its equipment. For example, if the... -
Page 16: Important To The Operator
C712/C713 ITEM DESCRIPTION ITEM DESCRIPTION POWER SWITCH MIX LOW INDICATOR FLUORESCENT DISPLAY SELECT KEY KEYPADS SERVICE MENU KEY MIX OUT INDICATOR BRUSH CLEAN COUNTER STANDBY KEY ARROW KEYS NOTE: *C713 DOES NOT HAVE THE MIX PUMP KEY. Introduction Models C712/C713... -
Page 17: Power Switch
Fluorescent Display operator switches, function, and fault indicators. Your Taylor equipment is designed with these The fluorescent display is located on the front International symbols. control panel. During normal operation, the display is blank. - Page 18 Beater Motor Overload Air/Mix Pump Reset Mechanism (C712 Only) The beater motor overloads are located in the rear panel. The reset buttons for the pumps are located in the rear panel. The beater motor overload protects the beater motor from an overload condition. Should an overload The reset protects the pump from an overload occur, the reset mechanism will trip.
-
Page 19: Section 2: Controls, Systems And Operations
Section 2: Controls, Systems and Operations Universal Control Programming Power Interrupt Pump Operation Timers Beater Stir Cycles Setting Viscosity Jumper Pin Function and Configuration Chart Control Overview Refrigeration Schematic Refrigeration System Components Models C712/C713 Controls, Systems and Operations... -
Page 20: Universal Control Programming
English is the After the memory integrity has been tested, the factory default setting. Safety Timeout screen will be displayed. Controls, Systems and Operations Models C712/C713... - Page 21 Note: The unit will continue operation in the mode it was in when the Manager's Menu was selected. UNIT CLEANED However, the control keys will not be lit and are non-functional when the Manager's Menu is displayed. 050722 Models C712/C713 Controls, Systems and Operations...
-
Page 22: Select Key
The SERVING COUNTER screen is used to check or reset the number of servings dispensed from the unit. The SERVING COUNTER will automatically reset to zero when the unit is brush cleaned. SERVINGS COUNTER > Next Figure 3 141015 Controls, Systems and Operations Models C712/C713... - Page 23 Pressing the UP or DOWN keys appropriate week for the start of DST. increases or decreases the selected digits. SET CLOCK DST START WEEK 12:01 10/24/2014 > Second Sunday Third Sunday > Exit Fourth Sunday 141015 Models C712/C713 Controls, Systems and Operations...
- Page 24 Disabled and require starting the AUTO that side of the unit into Standby and return to the mode manually. main menu screen. AUTO START TIME STANDBY MODE DISABLED LEFT Enable RIGHT > Disable > EXIT 141015 Controls, Systems and Operations Models C712/C713...
- Page 25 (L/R) BRL>41F (5C) AFTER PF - The mix switch in the OFF position. Replace the barrel temperature in the freezing cylinder was above 41°F thermistor probe. (5°C) more than four hours following a power failure. 141015 Models C712/C713 Controls, Systems and Operations...
- Page 26 (L/R) COMP ON TOO LONG - The compressor run time exceeded the 11 minute timer. SOFTWARE VERSION C712 / C713 UVC4 Note: Refer to your local health codes regarding VERSION X X X temperature recommendations for procedures to >...
-
Page 27: Service Menu Key
If “Yes” is selected, the unit will appear to “hang” until the memory is cleared and the MANUAL CONTROL defaults are loaded. The display may show the SOFTWARE UPDATE message “COMMUNICATIONS FAILURE” during RESET TO DEFAULTS this time. 141015 Models C712/C713 Controls, Systems and Operations... - Page 28 L/R with either screen showing ignores any changes and choice screen. Pressing the SEL key again returns returns to the Menu screen. to the Service Menu screen. 141015 Controls, Systems and Operations Models C712/C713...
- Page 29 Pressing the SEL key again returns to the Service Menu screen. Comp On Delay Mix Pump Off Delay (C712 Only) This option allows the technician to adjust the main Compressor On Delay. After selecting the This option allows the technician to set the amount...
- Page 30 Repeat the operation as described previously. Once Svenska (Swedish), Deutnsch (Dutch), Nederlands the correct Store ID has been entered, pressing the (Netherlands), Italiano (Italian), Portuguese, Polski SEL key returns to the Service Menu screen. (Polish), and Russian. 141015 Controls, Systems and Operations Models C712/C713...
- Page 31 > EXIT ARE YOU SURE? L BEATER MOTOR > L COMPRESSOR L MIX PUMP (C712 Only) L AGITATOR R BEATER MOTOR Pressing the UP key moves the arrow to “Yes.” R COMPRESSOR Pressing the SEL key will start the update process.
-
Page 32: Power Interrupt
Cleaned”. simultaneously for 5 minutes. These criteria will be met when the unit is properly brush cleaned according to the Taylor Operator's Manual. UNIT CLEANED Completion of a successful brush clean resets the Brush Clean Cycle timer and removes the locked condition. -
Page 33: Pump Operation
PART NO. ITEM DESCRIPTION PART NO. SCREW-1/4-20X-3/4 SOCKET 020128-2 SEAL-MOTOR REDUCER 048836 INPUT SHAFT MOTOR-REDUCER 32 RPM 036955-34 SEAL-MOTOR REDUCER- 048837 MOUNT-MOTOR 036934 OUTPUT SHFT SLEEVE A.-MIX PUMP X44761 NUT-PUMP SLEEVE 036933 COUPLING-MOTOR-FLEXIBLE 047936 131106 Models C712/C713 Controls, Systems and Operations... -
Page 34: Timers
The factory setting (setpoint) for soft serve viscosity CURRENT is 2.8 amps. The amperage measurement is determined by monitoring the L1 leg of power being delivered to the beater motor. To adjust the serving 120124 Controls, Systems and Operations Models C712/C713... -
Page 35: Jumper Pin Charts
JP3 - 3 & 4 ** Jumper initially installed at factory. Personality Board 0 - 6 Beater Motor Amperage (do not use) 0 - 12 Beater Motor Amperage ** Jumper initially installed at factory. 131028 Models C712/C713 Controls, Systems and Operations... - Page 36 Heat and Standby keys and Reserved (do not install) DBGEN - 1 & 2 hopper temperature display. Note: C712/C713 Standby keys are always enabled. C712/C713 ** Jumper initially installed at factory. do not have Heat keys. Jumper should be installed on shake units to enable proximity sensor.
-
Page 37: Control Overview - Uvc4
Control Overview - UVC4 Figure 6 150303 Models C712/C713 Controls, Systems and Operations... -
Page 38: Universal Control Board - Uvc4
Universal Control Board - UVC4 Universal Control Board Connections - UVC4 (X69355-SER) Beginning in January 2011, Taylor transitioned from Note: UVC4 can only be used to replaced UVC3 the UVC3 to the UVC4. boards. UVC4 is not compatible with UVC1 or UVC2. - Page 39 When disconnecting a cable, always pull on the Note: Use Part No. 040084-001 CONNECTOR- cable connector or strain-relief loop, not on the PROGRAMING SHUNT to jumper pins. cable itself. 111214 Models C712/C713 Controls, Systems and Operations...
- Page 40 Boards installed at the factory have two cables IMPORTANT! See UVC4 Electrostatic Discharge connected to the UVC4 board. Connected at J13 is and Proper Handling Procedures on page 35 the USB cable part number 069023. before handling a UVC4 board. 111109 Controls, Systems and Operations Models C712/C713...
- Page 41 When replacing a UVC3 board in the field, and Proper Handling Procedures on page 35 adapter cables are needed. Cable part number before handling a UVC4 board. 069024 (1) connects to the existing USB cable. 111109 Models C712/C713 Controls, Systems and Operations...
- Page 42 C712/C713 UVC4 Update Instructions Step 8 Reconnect power to the unit and turn power on. Verify that the display says “UNIT CLEANED”. Total Estimated Time: 35 minutes Step 9 Remove the jumper from W2 on the left side IMPORTANT! interface board.
-
Page 43: Refrigeration Schematic
Refrigeration Schematic 110531 Models C712/C713 Controls, Systems and Operations... -
Page 44: Refrigeration System Components
Receiver The liquid receiver is a The use of a liquid reciever storage tank for liquid makes the quantity of refrigerant. refrigerant in a system less critical. Controls, Systems and Operations Models C712/C713... -
Page 45: Section 3: Troubleshooting
Section 3: Troubleshooting General Troubleshooting Electrical Troubleshooting Pump Style Freezer Troubleshooting Bacteria Troubleshooting Troubleshooting Models C712/C713... -
Page 46: General Troubleshooting Guide
Repair the leak and recharge the unit. d. Air in the system. d. Purge and recharge the system. e. High overrun product (C712). e. Check pump operation for correct air/mix ratio. 3. Head pressure is too high. a. Condenser is dirty. - Page 47 Lubricate properly. o‐rings. c. Wrong type of lubricate being c. Use proper lubricant. Example: used. Taylor Lube High Performance. 9. Product is not being fed into the a. Inadequate mix in the hopper (mix a. Fill hopper with mix. freezing cylinder.
- Page 48 Set the draw rate at 5 ‐ 7‐1/2 ounces of product per 10 seconds. b. Pump is assembled/lubed b. Assemble pump according to incorrectly (C712). instructions in the Operator's Manual. c. Freezer has been turned on and c. Place the unit in the “OFF” position off several times.
- Page 49 Make sure the door switch is fully installed. inserted. d. The 24V relay is faulty. d. Replace the relay. e. There is low voltage from the 24V e. Check the power supply transformer. connections, shorts, replace transformer. 050829 Troubleshooting Models C712/C713...
-
Page 50: Electrical Troubleshooting Guide
Electrical Troubleshooting Guide MODES OF OPERATION: COMPONENT STANDBY WASH AUTO PUMP Compressor Beater Motor Air/Mix Pump Motor Agitator Troubleshooting Models C712/C713... -
Page 51: C712/C713 Electrical Troubleshooting Guide
C712/C713 Electrical Troubleshooting Guide Power Cord Plugged In/Power Switch in the Power Switch in the ON Position/Mode OFF Position Select: PUMP With L1 power supplied to the L1 terminal of the L1 power from the power cord connection travels interface board, power is supplied through pin 5 of through the EMI filter to the 16 volt transformer. -
Page 52: Pump Style Freezer Troubleshooting
Lubricate properly. of pump cylinder. b. Ball crank rotates clockwise. b. Rewire ball crank rotation to rotate counterclockwise. 3. Not enough pressure in the a. Malfunctioning draw switch. a. Reposition or replace the freezing cylinder. microswitch. Troubleshooting Models C712/C713... -
Page 53: Bacteria Troubleshooting
3. Worn, damaged, or cracked parts. a. Provide a food grade lubricant (Example: Taylor Lube). b. Inspect o‐rings for holes or tears. O‐rings, seals and other wear items must be supplied by the freezer company to meet food industry standards. - Page 54 45_F. will allow cell division in as little as one hour. f. Once the mix is placed in the hopper, covers must be properly installed to maintain adequate refrigeration and to prevent airborne contaminants from entering the mix. Troubleshooting Models C712/C713...
-
Page 55: Section 4: Parts
Section 4: Parts Parts Warranty Explanation Parts Identification Parts List Wiring Diagrams Parts Models C712/C713... -
Page 56: Parts Warranty Explanation
Class 000 Parts: Wear Items ‐ no warranty. CAUTION: Warranty is valid only if required service work is provided by an Authorized Taylor Service Technician. NOTE: Taylor reserves the right to deny warranty claims on equipment or parts if a non-approved refrigerant was installed in the machine, system modifications were performed beyond factory recommendations, or it is determined that the failure was caused by neglect or abuse. - Page 57 Notes: Parts Models C712/C713...
-
Page 58: Model C712 Exploded View
Model C712 Exploded View Figure 10 150715 Parts Models C712/C713... - Page 59 Model C712 Exploded View Parts Identification ITEM DESCRIPTION PART NO. ITEM DESCRIPTION PART NO. SHELL A.-INSULATED X63324-SER SHROUD-TOP 059838 BEARING-REAR SHELL 031324 PLATE-ADAPTOR-BLOWER 059926-SP WASHER-BEARING LOCK 012864 GUIDE A.-FILTER-LEFT X59931 NUT-BEARING 028991 VALVE-EXP-AUTO-1/4S X1/4 046365 GUIDE-DRIP SEAL 028992 SWITCH-PRESSURE 440 PSI...
-
Page 60: Operator Parts (Model C712)
Operator Parts (Model C712) Figure 11 160627 Parts Models C712/C713... - Page 61 C712 Exploded View Parts Identification ITEM DESCRIPTION PART NO. ITEM DESCRIPTION PART NO. KIT A.-COVER-HOPPER*DUAL X67061-SP CASTER-4" SWV 3/4-10 STEM 046437 W/BRAKE PUMP A.-MIX SIMPLIFIED X57029-14 PANEL A.-FRONT LOWER X59854-SER PANEL-REAR 064258-SER SHIELD-SPLASH-WIRE-19-3/4 L 033813 PAN-DRIP 7.875 059737 TRAY-DRIP-19-5/8 L X 4-7/8...
-
Page 62: Model C713 Exploded View
Model C713 Exploded View Figure 12 150715 Parts Models C712/C713... - Page 63 CONTROL A. (SEE PG 64) X67561-27 SCREW-10-32X2-1/4 SLOT 057610 COVER-CONTROL BOX 067984-SP1 O-RING-1-3/8 OD X .070W 017395 CONDENSER-AC (LEFT) 055813-1 NUT-10-32 HEX SCREW 005598 CONDENSER-AC (RIGHT) 055813-2 NUT-1/4-20 FINISHED HEX 000707 GUIDE A.-FILTER-RIGHT X59930 PANEL A.-FRONT X63879 150715 Parts Models C712/C713...
-
Page 64: Operator Parts (Model C713)
Operator Parts (Model C713) Figure 13 131106 Parts Models C712/C713... - Page 65 PAN-DRIP 12.5 059736 TRAY-DRIP-19-5/8 L X 4-7/8 033812 PANEL A.-FRONT X63879 PAN-DRIP 19-1/2 LONG 035034 PANEL A.-FRONT X59836 PANEL-CORNER-FRNT-L 063088 STUD-NOSE CONE 055987 PANEL-SIDE-LEFT 059906 FILTER-AIR-POLY-FLO 052779-11 FASTENER-DOOR LATCH 030787 PANEL A.-FILTER-LOUVERED X59928 FASTENER-DOOR STRIKE 030788 150715 Parts Models C712/C713...
-
Page 66: Control A. - X67560-27 (Model C712)
Control A. - X67560-27 (Model C712) Figure 14 140912 Parts Models C712/C713... - Page 67 Control Assembly X67560-27 (C712) Parts Identification ITEM DESCRIPTION PART NO. ITEM DESCRIPTION PART NO. CONTROL-INTERF-HT-SS 063967-SER SCREW-6X5/16 SLTD ROUND 013646 PCB A.-ROHS-PERSON-HT-SS 063922-SER STARTER-1 PHASE 6.3 TO 10A 066794-27K CNTRL-ROHS-INTF-HOTGAS 063926-SER OVERLOAD-THERMAL-1P 067461-1K STANDOFF-NYLON-SNAP-1/2L 053413 SCREW-10-32X5/8 UN SL HWH 039382 CABLE-RIBBON-50C-25"L...
-
Page 68: Control A. - X67561-27- (Model C713)
Control A. - X67561-27- (Model C713) Figure 15 140912 Parts Models C712/C713... - Page 69 BUSHING-SNAP 11/16 ID X 7/8 010548 CABLE-RIBBON-20C-16"L 040040-049 TRANS.-CONT.-32VA 054834 SCREW-8X1/4 SLTD HEX 009894 CABLE-RIBBON-20C-17"L 040040-013 BUSHING-SNAP 15/16 ID 023396 HOLDER-FUSE-INLINE-HFA 064538 TRANS.-120/208/240V 051660 FUSE-BUSS-ABC-15-R ROHS 076414 BLOCK-TERMINAL 1P 073423 *NOT SHOWN, NOT INCLUDED IN X67561-27 140912 Parts Models C712/C713...
- Page 70 Box A.-Cap & Relay - X6540227SP - (Model C712 & C713/Bristol) Figure 16 ITEM DESCRIPTION PART NO. ITEM DESCRIPTION PART NO. CAPACITOR-START 189-227UF 033044-1 SCREW-8X1/4 SLTD HEX 009894 CAPACITOR-RUN 25UF/440V 037431 LUG-GROUNDING 017667 STRAP-CAPACITOR 7-11/32 037890 SCREW-10-32X3/8 UNSL 039381 SCREW-10X3/8 SLOTTED HEX...
-
Page 71: Box A.-Cap & Relay - X81081-27 (Model C713/Copeland)
033044-1 SCREW-8X1/4 SLTD HEX 009894 PLUG-HOLE 1.093/1.125 DIA 049187 RELAY-START-COMPRESSOR 052401-27 CAPACITOR-RUN 40MF/440V 036049 LUG-GROUNDING 4-14GA 017667 SCREW-8X1 1/4 PHLP HD RD B 039420 SCREW-10-32X3/8 UNSL HWH 039381 BLOCK-TERMINAL 2P L1,L2 039422 HARNESS-WIRE 06543627SP *NOT SHOWN 140912 Parts Models C712/C713... -
Page 72: Pump A.-Mix Simplified - X57029- (Model C712)
Pump A.-Mix Simplified - X57029- (Model C712) Figure 18 ITEM DESCRIPTION PART NO. ITEM DESCRIPTION PART NO. PUMP A.-MIX SIMPLIFIED S.S. X57029-14* SHAFT-DRIVE-MIX PUMP- 041948 HOPPER CYLINDER-PUMP HOPPER 057943 O-RING 1/2 ID X .139W-SHAFT 048632 PIN-RETAINING X55450 O-RING-1-3/4 OD X .139W-... -
Page 73: Door And Beater Assembly (Model C712)
Door and Beater Assembly (Model C712) ITEM DESCRIPTION PART NO. ITEM DESCRIPTION PART NO. HANDLE A.-DRAW-WELDED X56421-1 KIT A.-BEATER-FRONT X50350 SHOES-BEARING PLUG-PRIME TWIN 059936 BEATER A.-3.4QT-1 PIN X46231 NUT-STUD-BLACK 3.250 LONG 058765 BLADE-SCRAPER-PLASTIC 046235 NUT-STUD-BLACK 2.563 LONG 058764 CLIP-SCRAPER BLADE 7.00 046236 DOOR A.-3SPT*LG BAF... -
Page 74: Door And Beater Assembly (Model C713)
(50 TO BAG) BEARING-FRONT 050216 NUT-STUD-BLACK 3.250 LONG 058765 BLADE-SCRAPER-PLASTIC 035174 NUT-STUD-BLACK 2.563 LONG 058764 BEATER A.-3.4QT-HELICORE X31761 DOOR A.-3SPT*LG BAF*W/PRG X59921-SER SHAFT-BEATER 032564 BAFFLE A.-LONG 4 IN W/RAD X50882 SEAL-DRIVE SHAFT 032560 VALVE A.-DRAW X69615 151217 Parts Models C712/C713... -
Page 75: Plate A.-Dec (Model C712)
Plate A.-Dec (Model C712) Figure 20 ITEM DESCRIPTION PART NO. ITEM DESCRIPTION PART NO. PLATE-DEC *SYRUP RAIL 062121 SCREW-6-32X3/8 BIN.HD SLOT 002201 CONTROL-ROHS-INTF 063925-SER CABLE-RIBBON-14C-3"L 056864 INSULATOR-PCB-INTERFACE 057168 131106 Parts Models C712/C713... -
Page 76: Plate A.-Dec (Model C713)
Plate A.-Dec (Model C713) Figure 21 ITEM DESCRIPTION PART NO. ITEM DESCRIPTION PART NO. PLATE-DEC *SYRUP RAIL 062122 SCREW-6-32X3/8 BIN.HD SLOT 002201 CONTROL-ROHS-INTF 063925-SER CABLE-RIBBON-14C-3"L 056864 INSULATOR-PCB-INTERFACE 057168 131106 Parts Models C712/C713... -
Page 77: Rail-Syrup - X63883-27 (Optional)
THERMOSTAT-HI LIMIT-SNAP 049992 NUT-WING 10-32 NYLON 034534 HEATER-STRIP-175W-240V 042782 BOX-HEATER 043954 RELIEF-STRAIN-.560X.730-BLK 023764 NUT-10-32 HEX 005598 HARNESS-WIRE-SYR-HEATERS 068342-27 WASHER-#10 EXT TOOTH LOC 002681 PLUG-DRAIN-WYOTT 023953-5 NUT-8-32 HEX M/S NUT SMALL 000969 WASHER-#8 EXT TOOTH LOCK 000964 131106 Parts Models C712/C713... -
Page 78: Switch A.-Dual Lever - X69838 (Model C712 & C713)
Switch A.-Dual Lever - X69838 (Model C712 & C713) Figure 23 ITEM DESCRIPTION PART NO. ITEM DESCRIPTION PART NO. SWITCH-LEVER-SPDT-10A-125 028889 ACTUATOR-TANDEM LEAF 062408 WASHER-#6 SAE FLAT 18-8 SS 023546 140912 Parts Models C712/C713... -
Page 79: Actuator A.-Draw Switch - X69835 (Model C712 & C713)
Actuator A.-Draw Switch - X69835 (Model C712 & C713) Figure 24 ITEM DESCRIPTION PART NO. ITEM DESCRIPTION PART NO. SPRING-RETURN-LEFT 038923 ARM-DRAW SWITCH-LEFT 069166 BRACKET A.-SPRING-RETURN X69481 ARM-DRAW SWITCH-RIGHT 069167 SPRING-RETURN-RIGHT 038924 ROD-SPRING RETAINER 038254-SP PIN-PIVOT-DRAW SWITCH 038484 SPRING-EXTENSION.467X.062 069392 BRACKET A.-SWITCH... -
Page 80: Blower A. X53725-27 (Model C712 & C713)
Blower A. X53725-27 (Model C712 & C713) Figure 25 ITEM DESCRIPTION PART NO. ITEM DESCRIPTION PART NO. MOTOR-FAN 208-230V 50/60 HZ 053481-27 BOOT-CAPACITOR- 031314 INSULATING BRACKET-CAPACITOR 031205 CAPACITOR-RUN 7.5UF/370V 034749 1-1/4X2-1/16 131106 Parts Models C712/C713... -
Page 81: Condenser A. - X68077-27G (Model C712 & C713)
Condenser A. - X68077-27G (Model C712 & C713) Figure 26 ITEM DESCRIPTION PART NO. ITEM DESCRIPTION PART NO. MOTOR A.-CONDENSER FAN X68008-27G SHROUD-DANFOSS 027386 GND (INCLUDES ITEMS 1-8) SCREW-10-32X3/8 UNSL 039381 CONDENSER-AC 7X6X1.25 027155 SCREW-8X1/4 SLTD HEX 009894 KIT A.-MOTOR-FAN... -
Page 82: Accessories (Model C712 & C713)
Accessories (Model C712 & C713) Figure 27 ITEM DESCRIPTION PART NO. ITEM DESCRIPTION PART NO. PAIL-10 QT. 013163 LUBRICANT-TAYLOR 4 OZ. 047518 TOOL-O-RING REMOVAL 048260-WHT SANITIZER-STERA SHEEN SEE NOTE TOOL-MIX PUMP SHAFT 057167 KIT A.-TUNE-UP C712 X49463-81 REMOVAL *Note: A sample container of sanitizer is sent with the unit. - Page 83 Brushes (Model C712 & C713) Figure 28 ITEM DESCRIPTION PART NO. ITEM DESCRIPTION PART NO. BRUSH-REAR BRG 1"D X 2"LG 013071 BRUSH-END-DOOR-SPOUT-SS 039719 BRUSH-DBL END-PUMP & 013072 BRUSH-SET LVB 050103 FEED TUBE BRUSH-PUMP SPOUT 054068 BRUSH-DRAW VALVE 1"OD X 014753 2"X1...
- Page 84 C71227F000 & C71327F000 DESCRIPTION PART C712 C713 WARR. REMARKS NUMBER QTY. QTY. CLASS ACTUATOR A.-DRAW SWITCH *C71X* X69835 M0114575 & UP ARM-DRAW SWITCH-LEFT 069166 ARM-DRAW SWITCH-RIGHT 069167 BRACKET A.-SPRING-RETURN X69481 E-RING 1/4 BLACK PHOS 032190 PIN-PIVOT-DRAW SWITCH 038484 ROD-SPRING RETAINER...
- Page 85 DESCRIPTION PART C712 C713 WARR. REMARKS NUMBER QTY. QTY. CLASS BLOCK-TERMINAL 2P L1,L2 039422 208-230V 60HZ 1PH BLOCK-TERMINAL 1P 073423 208-230V 60HZ 3PH - 3 WIRE BLOWER A. X53725-27 CAPACITOR-RUN 7.5UF/370V 034749 BOOT-CAPACITOR-INSULATING 031314 MOTOR-FAN 208-230V 50/60 HZ 053481-27 BOOT-VALVE-EXPANSION 050900 BRUSH-DBL END-PUMP &...
- Page 86 DIAGRAM-WIRING *C712* 059898-27 208-230V 60HZ 1PH DIAGRAM-WIRING *C712* 059898-33 208-230V 60HZ 3PH - 3 WIRE DIAGRAM-WIRING *C713* 059899-27 DIAGRAM-WIRING *C713* 059899-33 DOOR A.-3SPT*LG BAF*W/PRG*C712 X59921-SER BAFFLE A.-LONG 4 IN W/RAD THD X50882 +BEARING-FRONT-SHOE KIT X50350 +BEARING-FRONT 050216 +DECAL-DOOR-3 SPOUT-TWIN TWIST 062239 +GASKET-DOOR-4"-DART...
- Page 87 GUIDE A.-DRIP PAN-RIGHT X59911 HARNESS-WIRE*C712-C717*CR 06543627SP 208-230V 60HZ 1PH HARNESS-WIRE *C712-C717*C 065436-33 208-230V 60HZ 3PH - 3 WIRE HARNESS-LIQ SOL VALVE *C712* 063370 HARNESS-WIRE-BEATER MTR*C71* 066440-27G 208-230V 60HZ 1PH HARNESS-WIRE-BEATER MTR*C71* 066440-33G 208-230V 60HZ 3PH - 3 WIRE HARNESS-WIRE-BLOWER C712/C713...
- Page 88 KIT A.-BEATER-FRONT SHOES X50350 KIT A.-COVER-HOPPER*DUAL*BLK X67061-SP KIT A.-MOTOR-FAN X62253-27 REPLACES 062253-27 KIT A.-PROBE-THERMISTOR IP68 X82397-SER REPLACES 038061-BLK KIT A.-TUNE C712 SIMPL PUMP X49463-81 GASKET-DOOR HT 4"-DOUBLE 048926 KIT A.-BEATER FRONT SHOES X50350 KIT A.-DRAW VALVE C712 X56200-17 CAP-DESIGN 1.010"ID-6 POINT 014218 O-RING-7/8 OD X .103W-SIL...
- Page 89 LABEL-WARN-ELEC-SGL-SMALL 032717 LABEL-WARN-CONDENSER-SHARP 059287 LABEL-WARN-COVER 051433 LABEL-WARN-ELEC-TW-SMALL 032718 LABEL-WIRING SINGLE PHASE 052396-1 208-230V 60HZ 1PH LUBRICANT-TAYLOR 4 OZ. 047518 MAN-OPER C712 062179-M MAN-OPER C713 062180-M MOTOR-1.5 HP CAPS@10&2 O'CLOCK 021522-27 208-230V 60HZ 1PH MOTOR-1.5 HP 021522-33 208-230V 60HZ 3PH - 3 WIRE...
- Page 90 063088 PANEL-REAR *C712/C716* 064258-SER PANEL-SIDE-LEFT *C712/C717* 059906 PANEL-SIDE-RIGHT *C712/C717* 059907 PCB A.-CONTROL *C712* UVC4 X69355-SER C712 - S/N M3067204 & UP CONTROL-UVC4 X68114-SER PCB A.-CONTROL *C712* UVC4 X69355SER1 USE TO UPDATE FROM UVC3 TO UVC4 PIN-COTTER-HAIRPIN-1/8DIA 044731 PIN-RETAINING-HOPPER COVER 043934...
- Page 91 DESCRIPTION PART C712 C713 WARR. REMARKS NUMBER QTY. QTY. CLASS PUMP A.-MIX SIMPLIFIED S.S. X57029-14 ADAPTOR-MIX INLET-SS-RED 054825 CAP-VALVE BODY SS 056874-14 CYLINDER-PUMP HOPPER SOFTSERVE 057943 GASKET-SIMPLIFIED PUMP VALVE 053527 O-RING-2-1/8 OD X .139W-#225 020051 PIN A.-RETAINING X55450 PISTON-PUMP-SIMPLIFIED 053526...
- Page 92 WARR. REMARKS NUMBER QTY. QTY. CLASS +SEAL-DRIVE SHAFT 032560 SHELF-TRAY-DRIP*712-13*716-17 063877 +TRAY-DRIP-19-5/8 L X 4-7/8 033812 SHELL A.-INSULATED *C712* X63324-SER +STUD-NOSE CONE *C602* 055987 SHELL A.-INSULATED X63337-SER +STUD-NOSE CONE *C602* 055987 SHIELD-SPLASH-WIRE-19-3/4 L 033813 SHOE-FRONT HELIX USE X50350 KIT SPRING-COMP.970X.115X2.00 025707 STARTER-1 PHASE 6.3 TO 10 AMP...
- Page 93 DESCRIPTION PART C712 C713 WARR. REMARKS NUMBER QTY. QTY. CLASS TRIM-CORNER-REAR-R 059897 TUBE A.-FEED-LEFT *C712/C717* X59808 +O-RING-11/16ODX.103W-RED 016132 TUBE A.-FEED-RIGHT *C712/C717* X59809 +O-RING-11/16ODX.103W-RED 016132 TUBE A.-FEED-SS-5/32 HOLE DIA X29429-2 +O-RING-.643 OD X .077W 018572 VALVE-ACCESS-1/4 MFLX1/4 S-90 047016 VALVE-ACCESS 1/4FL X 1/4SOLDER...
- Page 94 C71240FW00 & C71340FW00 - 220-240V 50HZ 1PH, C71258FW00 & C71358FW00 - 380-415V 50HZ 3N~ (4WIRE), C71260FW00 & C71360F000 - 220-380V 60HZ 3PH-4 WIRE BELT-AX33 024396 220-240V 50HZ 3PH/C712 220-240V 50HZ 1PH/380-415V 50HZ 3N~(4WIRE) BELT-AX32 032769 200V 50HZ 3PH/200V 50/60HZ 3PH / 220-380V 60HZ...
- Page 95 220-240V 50HZ 1PH /220-380V 60HZ 3PH-4WIRE MOTOR-1.5 HP 021522-35 220-240V 50HZ 3PH/380-415V 50HZ 3N~(4 WIRE) MOTOR-2.0 HP 017650-33 220-380V 60HZ 3PH-4 WIRE PANEL A.-UPPER FRONT C712 X63978 220-240V 50HZ 3PH/200V 50-60HZ 3PH/220-240V 50HZ 1PH/380-415V 50HZ 3N~(4WIRE)/220-380V 60HZ 3PH(4WIRE)/C713 220-380V 60HZ 3PH-(4WIRE) PULLEY-2AK74-5/8...
- Page 96 X50276-27 KIT A.-HOPPER LOCK-TWIN X59106 KIT A.-LOCK-DRAW VALVE-TW X62504-SER TRAY-PARTS-BARREL-3.4 QT* 067431 TRAY-PARTS-PUMP-SIMPLIFIE 056525 ADAPTOR-SPOUT-HOSE-DRAIN 063018 C71233F836 M C712 DQ DIAGRAM-WIRING *C712*DQ* 05989833DQ DOOR A.-LG BAF*W/PRG*C712*DQ X59921SER1 +BAFFLE A.-LONG 4 IN W/RAD TH X50882 +BEARING-FRONT-SHOE 050348 +DECAL-DOOR-3 SPOUT-TWIN TWIS 062239 +GASKET-DOOR HT 4"-DOUBLE...
- Page 97 080827 MAGNET A.-AGITATOR-INNER 066937 MOTOR-AGITATOR-24VAC 50/60 H 050535-03 O-RING-1-3/8 OD X .070W 017395 PLATE-HOLDING-AGITATOR *C708 056587 SCREW-4-40X1/4 SOCKET HEAD 600165 SCREW-8-32X3/16 SOCKET SET 006812 SHELL A.-INSULATED *C712* X65598 SHELL A.-INSULATED *C713* X65599 TUBE A.-FEED-SS-7/32 HOLE X29429-4 ADDED AS OF M3071813...
- Page 98 DESCRIPTION PART C712 C713 WARR. REMARKS NUMBER QTY. QTY. CLASS INTEGRATED SYRUP RAIL JAR-SYRUP*PLASTIC*SHALLOW 036573 JAR-SYRUP*STAINLESS*SHALL 036574 LADLE-1 OZ-120D BEND IN H 033637-1 LID-SYRUP JAR 042706 PANEL A.-FRONT-SYR RAIL * X63884-27 PUMP A.-SYRUP-HEATED-BRN X53800-BRN PUMP A.-SYRUP-HEATED-TAN X53800-TAN TRAY-DRIP-SYR-C716 063876 OPTIONAL REAR MIX LOW LIGHTS TRIM A.-CORNER-LIGHTS...
-
Page 99: Taylor Company
START STARTER MOTOR RELAY COIL OVERLOAD SWITCH DRAW SWITCH BARREL LIQUID SOLENOID SOFT SERVE GRN/YEL BEATER MOTOR BEATER MOTOR SOFT SERVE STARTER COMPRESSOR BEATER MOTOR STARTER COMPRESSOR CONTACTOR Taylor Company Model C712 059898-27 © 2014 Carrier Commercial Refrigeration Inc. 09/14... -
Page 100: Taylor Company
START STARTER BEATER RELAY COIL MOTOR OVERLOAD SWITCH DRAW SWITCH BARREL LIQUID SOLENOID SOFT SERVE GRN/YEL BEATER MOTOR BEATER MOTOR SOFT SERVE STARTER COMPRESSOR BEATER MOTOR STARTER COMPRESSOR CONTACTOR Taylor Company Model C712 059898-33 09/14 2014 Carrier Commercial Refrigeration, Inc. -
Page 101: Taylor Company
SWITCH BARREL LIQUID SOLENOID GRN/YEL SEE FIG. 3 SOFT SERVE BEATER MOTOR BEATER MOTOR BEATER MOTOR SOFT SERVE STARTER COMPRESSOR STARTER SEE FIG. 2 COMPRESSOR GRN/YEL CONTACTOR GRN/YEL Taylor Company Model C712 059898-40 © 2014 Carrier Commercial Refrigeration Inc. 09/14... -
Page 102: Taylor Company
COIL RELAY MOTOR OVERLOAD SWITCH DRAW SWITCH GRN/YEL BARREL LIQUID SOLENOID SOFT SERVE BEATER MOTOR GRN/YEL GRN/YEL BEATER MOTOR STARTER BEATER MOTOR STARTER SOFT SERVE COMPRESSOR COMPRESSOR CONTACTOR GRN/YEL Taylor Company Model C712 059898-58 09/14 2014 Carrier Commercial Refrigeration, Inc. -
Page 103: Taylor Company
SWITCH DRAW SWITCH BARREL LIQUID SOLENOID SEE FIG. 3 SOFT SERVE GRN/YEL BEATER MOTOR SOFT SERVE BEATER MOTOR BEATER MOTOR STARTER COMPRESSOR STARTER COMPRESSOR CONTACTOR SEE FIG. 2 Taylor Company Model C713 059899-27 09/14 © 2014 Carrier Commercial Refrigeration Inc. -
Page 104: Taylor Company
MOTOR JACK STARTER BEATER COIL MOTOR OVERLOAD SWITCH DRAW SWITCH BARREL LIQUID SOLENOID SOFT SERVE GRN/YEL BEATER MOTOR BEATER MOTOR SOFT SERVE STARTER BEATER MOTOR COMPRESSOR STARTER COMPRESSOR CONTACTOR Taylor Company Model C713 059899-33 09/14 2014 Carrier Commercial Refrigeration, Inc. -
Page 105: Taylor Company
BARREL LIQUID DRAW SOLENOID SWITCH GRN/YEL SEE FIG. 3 SOFT SERVE BEATER MOTOR BEATER MOTOR SOFT SERVE BEATER MOTOR COMPRESSOR STARTER STARTER COMPRESSOR GRN/YEL SEE FIG. 2 CONTACTOR GRN/YEL Taylor Company Model C713 059899-40 09/14 2014 Carrier Commercial Refrigeration, Inc. -
Page 106: Taylor Company
BEATER COIL MOTOR OVERLOAD SWITCH DRAW SWITCH SOFT SERVE BEATER MOTOR GRN/YEL BEATER MOTOR STARTER BARREL LIQUID SOLENOID BEATER MOTOR GRY/WHT STARTER SOFT SERVE COMPRESSOR GRN/YEL COMPRESSOR CONTACTOR GRN/YEL Taylor Company Model C713 059899-58 09/14 2014 Carrier Commercial Refrigeration, Inc.
Need help?
Do you have a question about the C712 and is the answer not in the manual?
Questions and answers