Taylor C708 Operator's Manual
Heat treatment soft serve freezers
Hide thumbs
Also See for C708:
- Operating instructions manual (80 pages) ,
- Operator's manual (68 pages) ,
- Quick start manual (2 pages)

Related Manuals for Taylor C708


Summary of Contents for Taylor C708
- Page 1 OPERATOR'S MANUAL Model C708 & C716 Heat Treatment Soft Serve Freezers Original Operating Instructions 059061-M January, 2005 (Original Publication) (Updated 8/3/15)
- Page 2 Complete this page for quick reference when service is required: Taylor Distributor: Address: Phone: Service: Parts: Date of Installation: Information found on the data label: Model Number: Serial Number: Electrical Specs: Voltage Cycle Phase Maximum Fuse Size: Minimum Wire Ampacity: E 2005 Carrier Commercial Refrigeration, Inc.
-
Page 3: Table Of Contents
........X57029-XX Pump A. - Mix Simplified (Models C708 & C716) . - Page 4 Statutory Damages of up to $250,000 (17 USC 504) for infringement, and may result in further civil and criminal penalties. All rights reserved. Taylor Company a division of Carrier Commercial Refrigeration, Inc. 750 N. Blackhawk Blvd. Rockton, IL 61072 Table of Contents Models C708 & C716...
-
Page 5: To The Installer
Failure to follow this instruction may result in Uncrate the unit and inspect it for damage. Report personal injury or death from electrical shock or any damage to your Taylor Distributor. hazardous moving parts as well as poor performance or damage to the equipment. -
Page 6: Air Cooled Units
Electrical Connections DO NOT obstruct air intake and discharge openings: Model C708: Requires a minimum of 6” (152 mm) of In the United States, this equipment is intended to clearance on both sides and 0” in the rear of the be installed in accordance with the National unit. -
Page 7: Beater Rotation
Electrical connections are made directly to the terminal block provided in the main control box, located: C708 - behind the rear panel. C716 - behind the lower front panel. Stationary appliances which are not equipped with a power cord and a plug or... -
Page 8: To The Operator
The unauthorized use of alternate refrigerants will void your Taylor compressor warranty. It is the Note: Your Taylor warranty is valid only if the parts unit owner's responsibility to make this fact known to are authorized Taylor parts, purchased from the any technician he employs. -
Page 9: Safety
We, at Taylor Company, are concerned about the safety of the operator when he or she comes in contact with the freezer and its parts. Taylor has gone to extreme efforts to design and manufacture DO NOT operate the freezer unless it is built-in safety features to protect both you and the properly grounded. - Page 10 This unit has many sharp edges that can DO NOT obstruct air intake and discharge openings: cause severe injuries. C708: A minimum of 6” (152 mm) air space is DO NOT put objects or fingers in the door required on both sides and 0” on the rear.
- Page 11 Notes: Models C708 & C716 Safety...
-
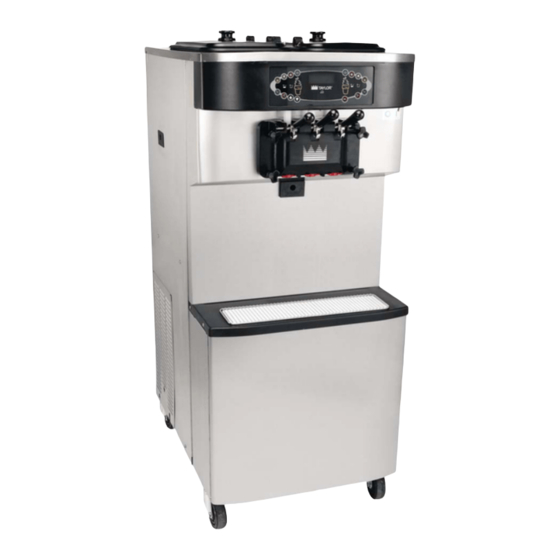
Page 12: Operator Parts Identification
Section 4 Operator Parts Identification Model C708 Figure 1 Operator Parts Identification Models C708 & C716... - Page 13 Model C708 Exploded View Parts Identification ITEM DESCRIPTION PART NO. ITEM DESCRIPTION PART NO. PANEL-SIDE-LEFT 056963 PANEL A.-FRONT-UPPER X59423 PAN-DRIP 11-5/8 LONG 027503 COVER-ACCESS-FRONT R. 056933 PIN-RETAINING-HOPPER CVR 043934 STUD-NOSE CONE 055987 KIT A.-COVER-HOPPER X65368 SCREW 10 X 3/8 SLOTTED 015582 BLADE A.-AGITATOR...
-
Page 14: Model C716
Model C716 Figure 2 130129 Operator Parts Identification Models C708 & C716... - Page 15 X59928 STUD-NOSE CONE 055987 FASTENER-DOOR STRIKE 030788 PIN-RETAINING-HOPPER CVR 043934 FILTER-AIR-POLY-FLO 052779-11 PANEL-SIDE-LEFT 059906 CASTER-4” SWV 3/4-10 STEM 044106 FASTENER-CLIP 1/4-20 045865 FASTENER-DOOR LATCH 030787 *NOT SHOWN SCREW-1/4-20 X 3/8 RHM-SS 011694 120409 Models C708 & C716 Operator Parts Identification...
-
Page 16: Model C708 Single Spout Door And Beater Assembly
Model C708 Single Spout Door and Beater Assembly Figure 3 ITEM DESCRIPTION PART NO. ITEM DESCRIPTION PART NO. HANDLE A.-DRAW-WELDED X56246 SHOE-FRONT HELIX *FRONT* 050347 NUT-STUD-BLACK 2.563“ 058764 BEATER A.-3.4QT-1 PIN X46231 DOOR A.-W/BAFFLE X57332-SER BLADE-SCRAPER-PLASTIC 046235 VALVE A.-DRAW X55820 CLIP-SCRAPER BLADE 7.00... -
Page 17: Model C716 Door And Beater Assembly
BEATER A.-3.4QT-1 PIN X46231 GASKET-DOOR HT 4"-DOUBLE 048926 BLADE-SCRAPER-PLASTIC 046235 PIN-HANDLE-TWIN 059894 CLIP-SCRAPER BLADE 7.00” 046236 VALVE A.-DRAW X59888 SHAFT-BEATER 032564 VALVE A.-DRAW*CENTER X59890 SEAL-DRIVE SHAFT 032560 O-RING--7/8 OD X .103W 014402 140121 Models C708 & C716 Operator Parts Identification... -
Page 18: X57029-Xx Pump A. - Mix Simplified (Models C708 & C716)
X57029-XX Pump A. - Mix Simplified (Models C708 & C716) Figure 5 ITEM DESCRIPTION PART NO. ITEM DESCRIPTION PART NO. 1 - 7 PUMP ASSEMBLY - MIX X57029-XX* CRANK-DRIVE 039235 SIMPLIFIED SOFT SERVE SHAFT-DRIVE 041948 CYLINDER-PUMP-HOPPER-SS 057943 O-RING 1-3/4 OD X .139W... -
Page 19: Accessories
KIT A.-TUNE-UP (C708) X63146 TOOL-SHAFT-DRIVE-PUMP- 057167 KIT A.-TUNE-UP (C716) X49463-82 HOPPER KIT A.-PARTS TRAY (C708) X57797 LUBRICANT-TAYLOR HI-PERF 048232 KIT A.-PARTS TRAY (C716) X67432 *Note: A sample container of sanitizer is sent with the unit. For reorders, order Stera Sheen part no. 055492 (100 2 oz. -
Page 20: Brush A.-Package-Ht X44127
WHITE BRISTLE BRUSH 1” x 2” 013073 YELLOW BRISTLE BRUSH 039719 WHITE BRISTLE BRUSH 014753 WHITE BRISTLE BRUSH 3” x 7” 023316 1-1/2” x 3” PUMP SPOUT BRUSH 054068 WHITE BRISTLE BRUSH 1/2 x 3 033059 100507 Operator Parts Identification Models C708 & C716... -
Page 21: Important: To The Operator
C716 Figure 8 ITEM DESCRIPTION POWER SWITCH LIQUID CRYSTAL DISPLAY KEYPADS MIX OUT INDICATOR STANDBY INDICATOR MIX LOW INDICATOR SELECT KEY SERVICE MENU KEY BRUSH CLEAN COUNTER ARROW KEY(S) TOPPING HEATER KEY Models C708 & C716 Important: To the Operator... -
Page 22: Symbol Definitions
To better communicate in the International arena, = STANDBY symbols have replaced words on many of our operator switches, function, and fault indicators. Your Taylor equipment is designed with these International symbols. Power Switch The following chart identifies the symbol definitions. -
Page 23: Operating Screen Descriptions
Reset Mechanism The reset button is located in the service panel on the left side of the C708. The reset buttons are located in the back panel of the C716. A reset button protects the beater motor from an overload condition. - Page 24 SAFETY TIMEOUT ANY KEY ABORTS If Configuration data is corrupted, all user and service settings are set to defaults. A “CONFIG CRC ERR” fault is set and displayed on the VFD. 050628 Important: To the Operator Models C708 & C716...
- Page 25 HEAT key will no longer be illuminated. The ARE YOU SURE machine will enter the STANDBY mode (STANDBY > key illuminates). The machine can be placed in AUTO or left in STANDBY. 050628 Models C708 & C716 Important: To the Operator...
-
Page 26: Freezer Locks
The freezer must be disassembled in order to activate the five minute timer on the display Touching the SEL key will display the following screen. Once the timer counts down to zero, the screen. lockout is cleared. 121008 Important: To the Operator Models C708 & C716... - Page 27 If the following screen appears, a soft lock has cleared. occurred during the heat treatment cycle. HEAT TREAT FAILURE FREEZER LOCKED > HEAT FOR HEAT CYCLE WASH TO BRUSH CLEAN FREEZER LOCKED 050628 Models C708 & C716 Important: To the Operator...
-
Page 28: Manager's Menu
DOWN ARROW - decreases the value above the cursor and is used to scroll downward in text displays. SEL - advances the cursor position to the Figure 11 right and is used to select menu options. 050628 Important: To the Operator Models C708 & C716... - Page 29 SEL key brush cleaned. to advance the cursor to the month. SERVINGS COUNTER SET CLOCK 12:01 6/10/2010 Draws > Next > Exit 150413 Models C708 & C716 Important: To the Operator...
- Page 30 AUTO HEAT DOWN key to move the arrow to the appropriate TIME screen. Touch the SEL key to exit the screen month for the end of DST. and return to the Menu. Important: To the Operator Models C708 & C716...
- Page 31 Touch the SEL key to return to the previous screen with the new time setting displayed. Touch the SEL key to exit the screen and return to the Menu. Models C708 & C716 Important: To the Operator...
- Page 32 Low and Mix Out will illuminate as the mix level drops in the hopper, but the audible tone will be COMP ON TOO LONG - The compressor run time disabled. exceeded the 11 minute timer. 150408 Important: To the Operator Models C708 & C716...
- Page 33 MIX OUT FAILURE - A Mix Out condition was present. NO HEAT CYCLE TRIED - The Auto Heat Time was set to attempt a heat cycle more than 24 hours after the last successful heat cycle. 140303 Models C708 & C716 Important: To the Operator...
- Page 34 (L/R) BRL>59F (15C) - The mix temperature in the screens. The second screen shows the left side (L) freezing cylinder (barrel) exceeded 59°F (15°C). side of the freezer. 051025 Important: To the Operator Models C708 & C716...
- Page 35 DOWN arrow key to view the previous PRODUCT DOOR OFF page. A Heat Cycle Failure message will display on A product door is not in place or is loose. the first screen if a failure occurred. 150413 Models C708 & C716 Important: To the Operator...
- Page 36 The Menu keys will not be lit when this option is selected but the panel touch keys are fully > Next functional. Exit the CURRENT CONDITIONS screen and return to the Menu by touching the SEL key. 150413 Important: To the Operator Models C708 & C716...
-
Page 37: Operating Procedures
Section 6 Operating Procedures The C708 stores mix in a hopper and has a 3.4 Step 3 quart (3.2 liter) capacity freezing cylinder with a Heavily lubricate the inside portion of the boot seal and also lubricate the flat end of the boot seal that single spout door. - Page 38 Place the rear scraper blade over the rear holding beater shoes. (See Figure 17.) pin on the beater. (See Figure 15.) Figure 15 Note: Scraper blades should be replaced every 3 months. Figure 17 150421 Operating Procedures Models C708 & C716...
-
Page 39: Freezer Door Assembly
Figure 18 Repeat these steps for the other side of the Model C716. Freezer Door Assembly The assembly of the C708 freezer door is different Figure 20 from the C716 freezer door. Please follow the appropriate instructions for your machine. - Page 40 Insert the draw valve from the top, with the draw handle slot facing forward. (See Figure 22.) Figure 24 Note: The C708 features an adjustable draw handle to provide portion control, giving a better consistent quality to your product and controlling costs.
- Page 41 Tighten equally in a criss-cross pattern damaged parts. to insure the door is snug. Step 2 Place the door gaskets into the grooves on the back of the freezer door. Figure 27 Figure 29 150421 Models C708 & C716 Operating Procedures...
- Page 42 The draw handles should be adjusted to provide a flow rate of 5 to 7-1/2 oz. (142 g. to 213 g.) of product by Figure 31 weight per 10 seconds. 140121 Operating Procedures Models C708 & C716...
-
Page 43: Mix Pump Assembly
Step 3 door spouts. (See Figure 35.) Apply a thin layer of lubricant to the inside of the pump cylinder at the retaining pin hole end. (See Figure 37.) Figure 35 Figure 37 150421 Models C708 & C716 Operating Procedures... - Page 44 Slide the pump valve gasket into the holes on the The adapter must be positioned into the notch cap. DO NOT lubricate the gasket. (See Figure 40.) located at the end of the pump cylinder. Operating Procedures Models C708 & C716...
- Page 45 Assemble the feed tube assembly. Slide the check the mix hopper for sanitizing. (See Figure 46.) ring into the groove of the feed tube. (See Figure 44.) Figure 44 Figure 46 150421 Models C708 & C716 Operating Procedures...
-
Page 46: Sanitizing
Repeat these steps for the other side of the sure the clip fits into the grooves in the collar. Model C716. (See Figure 50.) 080617 Operating Procedures Models C708 & C716... - Page 47 Failure to follow this instruction may result in FACTURER'S SPECIFICATIONS. damage to the freezing cylinder. Step 7 Note: Be sure your hands are clean and Pour the sanitizing solution into the mix hopper. sanitized before going on in these instructions. 150622 Models C708 & C716 Operating Procedures...
-
Page 48: Priming
Fill the hopper with fresh mix and place the mix Figure 54 hopper cover in position. Repeat these steps for the other side of the Repeat these steps for the other side of the Model C716. Model C716. 150622 Operating Procedures Models C708 & C716... -
Page 49: Daily Closing Procedures
(example: Kay-5® or Stera-Sheen®). USE WARM WATER AND FOL- Step 10 LOW THE MANUFACTURER'S SPECIFICATIONS. Remove, clean and reinstall all drip pans. Brush clean the agitator(s) and the hopper cover(s). (See Figure 57.) 140722 Models C708 & C716 Operating Procedures... -
Page 50: Daily Opening Procedures
Note: To assure sanitary conditions are maintained, disassemble the machine during the HEAT cycle. brush clean each item for a total of 60 seconds, The product is hot and under extreme pressure. repeatedly dipping the brush in sanitizing solution. 080222 Operating Procedures Models C708 & C716... -
Page 51: Manual Brush Cleaning
Excessive pressure will build up, causing product to spurt out when the draw valve is opened. Step 2 Drain the product from the freezing cylinder and the mix hopper. 121008 Models C708 & C716 Operating Procedures... -
Page 52: Rinsing
Using the double ended brush, clean the mix inlet hole. (Note: Do not brush clean the mix inlet hole while the machine is in the Figure 62 WASH mode.) 140718 Operating Procedures Models C708 & C716... -
Page 53: Disassembly
Remove the o-ring from the piston and valve seal(s), or o-ring(s) should be replaced or properly cap. lubricated. 121008 Models C708 & C716 Operating Procedures... -
Page 54: Brush Cleaning
Using the black brush, clean the rear shell bearing at the back of the freezing Step 5 cylinder. (See Figure 66.) Wipe all exterior surfaces of the freezer with a clean, sanitized towel. Figure 66 080617 Operating Procedures Models C708 & C716... -
Page 55: Important: Operator Checklist
6. The temperature of the mix in the mix hopper electrical power prior to cleaning the and walk-in cooler should be below 40_F condenser. Failure to follow this instruction (4.4_C). may result in electrocution. 121008 Models C708 & C716 Important: Operator Checklist... -
Page 56: Winter Storage
Your local Taylor Distributor can perform this winter storage service for you. Wrap detachable parts of the freezer such as beater, blades, drive shaft, and freezer door, and Winter Storage place them in a protected dry place. -
Page 57: Troubleshooting Guide
There was a power failure. f. Check fault messages and product temperature. Disassemble and brush clean, or initiate a heat treatment cycle. Models C708 & C716 Troubleshooting Guide... - Page 58 6. The product is too soft. a. Draw rate is set too fast. a. Adjust draw rate of 5 to 7 1/2 oz. (142 g. to 213 g.) of product by weight in 10 seconds. Troubleshooting Guide Models C708 & C716...
- Page 59 - - - technician. assembly work forward. e. Worn rear shell bearing. e. Call an authorized service - - - technician. f. Gear box out of alignment. f. Call an authorized service - - - technician. Models C708 & C716 Troubleshooting Guide...
- Page 60 10 drawn. seconds. b. Pump assembled b. Assemble and lubricate according to instructions incorrectly. in this manual. c. Freezing cylinder not c. Drain the freezing cylinder and reprime the machine. primed correctly. 150623 Troubleshooting Guide Models C708 & C716...
-
Page 61: Parts Replacement Schedule
Inspect & Replace Minimum if Necessary Double-Ended Brush Inspect & Replace Minimum if Necessary Yellow Bristle Brush Inspect & Replace Minimum if Necessary Brush Set (3) Inspect & Replace Minimum if Necessary 130227 Models C708 & C716 Parts Replacement Schedule... -
Page 62: Section 10 Limited Warranty On Equipment
Taylor, through an authorized Taylor distributor or service agency, will provide a new or re-manufactured part, at Taylor’s option, to replace the failed defective part at no charge for the part. Except as otherwise stated herein, these are Taylor’s exclusive obligations under this limited warranty for a Product failure. - Page 63 LEGAL REMEDIES The owner must notify Taylor in writing, by certified or registered letter to the following address, of any defect or complaint with the Product, stating the defect or complaint and a specific request for repair, replacement, or other correction of the Product under warranty, mailed at least thirty (30) days before pursuing any legal rights or remedies.
-
Page 64: Limited Warranty On Parts
Taylor warrants the Parts against failure due to defect in materials or workmanship under normal use and service as follows. All warranty periods begin on the date of original installation of the Part in the Taylor unit. If a Part fails due to defect during the applicable warranty period, Taylor, through an authorized Taylor distributor or service agency, will provide a new or re-manufactured Part, at Taylor’s option, to replace the failed defective Part at no... - Page 65 Parts or the units in which they are installed repaired or altered in any way so as, in the judgment of Taylor, to adversely affect performance, or normal wear or deterioration.
-
Page 66: Taylor Company
LEGAL REMEDIES The owner must notify Taylor in writing, by certified or registered letter to the following address, of any defect or complaint with the Part, stating the defect or complaint and a specific request for repair, replacement, or other correction of the Part under warranty, mailed at least thirty (30) days before pursuing any legal rights or remedies.
Need help?
Do you have a question about the C708 and is the answer not in the manual?
Questions and answers