
Related Manuals for Cardiac Science Atria 6100


Summary of Contents for Cardiac Science Atria 6100
- Page 1 Operating Instructions Atria 3100 Electrocardiograph Atria 6100 Electrocardiograph Part Number 70-00082-01 A...
- Page 2 This manual contains instructions for both the Atria 3100 and the Atria 6100. Copyright © 2007 Cardiac Science Corporation All rights reserved. Cardiac Science Corporation 3303 Monte Villa Parkway MDSS GmbH Bothell, WA 98021, USA Schiffgraben 41 D-30175 Hannover Toll Free: +1.800.426.0337 Germany Telephone: +1.425.402.2000...
-
Page 3: Table Of Contents
Display Atria 6100 ........ - Page 4 Chapter 6 Patient Preparation ......6-1 Overview ..........6-1 Patient Preparation .
-
Page 5: Intended Use
Intended Use Under the supervision of a qualified physician trained in ECG interpretation the Atria electrocardiograph can be used to record the electrical activity of the heart for the purpose of correlating the resultant waveforms with the health of the heart muscle tissue structures. This equipment produces a resting 12-lead electrocardiogram which can be used as a first step for assessment of patients with cardiac arrythmias, intraventricular conduction block, pre-excitation syndrome and ischemic... -
Page 6: Definitions Of Symbols Used
Definitions of Symbols Used Warning. Indicates serious injury or death hazard. Caution. Indicates potential equipment damage or minor injury hazard. Danger! High voltage. Hazardous voltage. Defibrillation-Protected Type CF Equipment. Equipotentiality (used to label the grounding lug). Alternating Current (AC). Direct Current (DC). Automatic Operation. - Page 7 Manufacture date Manufactured for Meets or exceeds Council Directive 93/42/EEC, MDD, Class IIa. 0086 Certified for both the U.S. and Canadian markets, to the applicable U.S. and Canadian safety standards. Component is certified for both the U.S. and Canadian markets, to the applicable U.S.
- Page 8 viii Atria Electrocardiograph Operating Instructions 70-00082-01 A...
-
Page 9: Quick Steps
Quick Steps Atria Electrocardiograph Connect Patient Refer to the lead placement chart. Precordial Lead Positioning Power On Press Acquire a STAT ECG Press two times. Add Patient Demographics (to Stat ECG) Select Edit Demographics from ECG Review menu. Press Enter patient information. Press to ECG Review menu. - Page 10 Select Leads Press to move the cursor within an edit field. Press to select the lead (Atria 6100 only) triplet indicated on the key (for rhythm display and printouts). Send Records Press to select user-defined leads (Custom Lead 1 and Custom Lead 2, respectively).
-
Page 11: General Information
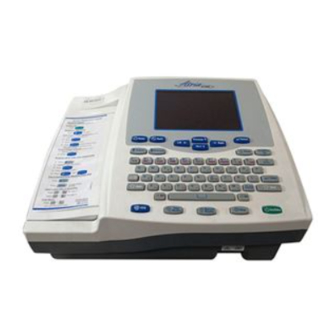
Misdiagnosis, equipment damage, and warranty void. Only use approved accessories and cables. Using non-approved accessories or cables may cause increased electromagnetic emissions, damage the Atria, or void the warranty. General Description Figure 1-1 Atria 6100 Electrocardiograph Figure 1-2 Atria 3100 Electrocardiograph 70-00082-01 A... -
Page 12: Interpretive Analysis Program
General Information • Battery or AC operation • Atria 3100: 2 x 40 character backlit LCD screen Atria 6100: 640 x 480 backlit color LCD screen • Thermal printer using 8.5 x 11, Z-fold paper • Manual and automatic rhythm mode •... -
Page 13: Using Multiple Electrical Apparatus
Using Multiple Electrical Apparatus Using Multiple Electrical Apparatus WARNING Shock hazard. Connect the Atria only to non-medical equipment compliant with IEC 60950 or 60601-1. In addition, the enclosure leakage current of non-medical equipment connected to the Atria must not exceed 150µA in fault condition. If necessary, use an additional isolating transformer or floating power supply to maintain a proper enclosure leakage current and provide additional protection. -
Page 14: Help Menu
General Information Help Menu To access the menu: Help 1. Press [ALT] + [H]. 2. Use the navigation keys to select a topic and then press [Select] to print topic information. NOTE: Help is available at any time except during alphanumeric entry (for example, when entering the patient’s name). -
Page 15: Equipment Setup
Chapter Equipment Setup External Connections Equipotential Ground The Atria Electrocardiograph is considered CLASS II (ungrounded) equipment. The exposed metal on the Atria is not likely to become energized because all the exposed metal is double insulated from the internal live circuitry (i.e., will not become energized under single fault conditions). - Page 16 Equipment Setup WARNING Misdiagnosis. Using unshielded or excessively long cables may cause or increase susceptibility to electromagnetic interference. Always use the shortest possible shielded cables. Caution Equipment damage. The Atria must be operated only at the line voltage and frequency specified on the external medical grade power supply (part number: 010-1684-00).
-
Page 17: Patient Cable
Patient Cable Patient Cable Figure 2-2 Front View Connect the patient cable via connector on the front of the Atria. Ensure the connector on the cable is arrow-side-up then firmly push the connector until the arrow point is aligned with the edge of the Atria. Powering the Atria On and Off Power On Press [On/Stby] to power on the Atria. -
Page 18: Charging The Battery
Equipment Setup Power Indicator A green light on the back of the Atria (see Figure 2-1 on pg. 2-2) is on whenever the Atria is receiving power from the external power source. Charging the Battery Caution Data loss. The battery pack must be installed at all times for proper operation. -
Page 19: Loading Recording Paper
Loading Recording Paper Loading Recording Paper Caution Warranty void. Using unapproved recording paper may damage the Atria and void the warranty. The Atria is intended for use only with approved ECG supplies. Use only the following approved, thermal ECG paper: •... - Page 20 Equipment Setup 5. Pull the paper out so it covers the door. IMPORTANT: THE EDGES OF THE PAPER MUST BE CEN- TERED BETWEEN AND PARALLEL TO THE DOOR GUIDES ON THE PAPER DOOR. 6. Slide the door firmly until it snaps into place. 7.
- Page 21 Loading Recording Paper 5. Pull the paper so it covers the door. NOTE: The edges of the paper must be parallel to the lines printed on the paper door. 6. Slide the door into place until it clicks. 7. Press [On/Stby] to power on the unit and then wait until the unit beeps.
- Page 22 Equipment Setup 2-8 Atria Electrocardiograph Operating Instructions 70-00082-01 A...
-
Page 23: User Interface
Chapter User Interface The Atria user interface consists of an LCD display and keyboard. There are two versions of the Atria keyboard. Both versions are illustrated below. Figure 3-1 User Interface (Keyboard Version 1) < > Se ttings Ente r Help S hift S hift... - Page 24 H e lp Form Shift Shift Fe e d On/Stb y Aut o Manual Stop Rhythm Rhythm Display (Atria 6100: Includes ECG Settings) Navigation keys Menus Keyboard Power ECG Keys Sensor (Atria 3100 only) Atria Electrocardiograph Operating Instructions 70-00082-01 A...
-
Page 25: Keyboard
Keyboard Keyboard The following table describes the Atria keys. NOTE: Not all key functions are available on every screen. Function Description [On/Stby] Main Power Powers on the Atria When the Atria is on, press this key to: • Power off the Atria when operating on battery power. •... - Page 26 [Select] Accept or edit the current selection [Previous] [Next] Scroll up or down [Left] [Right] Move cursor to left or right (Atria 6100) [Home] Go to the Home (or main) display Status [Sensor] Display Sensor status (Atria 3100) Menu [Patient]...
- Page 27 Keyboard NOTE: Do not enter European (accented) characters in any password for this device. Function Description Special Characters [Alt] [Alt] (Keyboard V2) Hold down then press to step through the settings: è (e grave) é (e acute) ê (e circumflex) ë...
- Page 28 User Interface Function Description Special Characters [Alt] [Alt] (Keyboard V2) Hold down then press to step through the settings: à (a grave) á (a acute) â (a circumflex) ã (a tilde) ä (a umlaut) å (a ring) [Alt] [Shift] [Alt] [Shift] Hold down then press...
-
Page 29: Display Atria 6100
Display Atria 6100 Display Atria 6100 The Atria 6100 display has two types of screens, the screen and Home various menu screens. WARNING Misdiagnosis. Do not use Atria screen images for diagnosis. The screen image is provided for reference only. Use the printout to ensure accurate diagnosis. - Page 30 AC - the Atria is connected to external power. Low - low battery Bat - the Atria is powered by the battery Atria 6100 Menu Screens Use the Menu keys to go to one of the main menus: • [Patient] — Enter patient demographics •...
- Page 31 Display Atria 6100 Figure 3-4 Atria 6100 Ja ne S mi th (9 999 999 99 ) Patient Source Selection Menu P at ie nt S our c e S e le c tio n Enter New P ati e nt...
-
Page 32: Display Atria 3100
User Interface Display Atria 3100 The Atria 3100 display has two types of screens, the screen and Home various menu screens. Atria 3100 Home Screen After the Atria is powered up it performs self-tests, and then displays the screen. Home NOTE: Press [Home] from most menu screens to return to screen. - Page 33 Display Atria 3100 Atria 3100 Menu Screens Use the Menu keys to go to one of the main menus: • [Patient] — Enter patient demographics • [Directory] — Display the patient directory • [Setup] — Change system settings • [Send/Rec] — Communications options NOTE: Press [ALT] + [H] to access the menu.
- Page 34 User Interface 3-12 Atria Electrocardiograph Operating Instructions 70-00082-01 A...
-
Page 35: User Settings
• Atria 3100: Press [Setup]. The current user displays to the right of the menu title. • Atria 6100: The current user is shown in the lower right corner of the display. 2. Press [Home] and then press [Alt] + [1] to select User 1 or press [Home] and then press [Alt] + [2] to select User 2. -
Page 36: Setup Menu
User Settings Setup Menu menu includes the following items. Setup • Print Setup Report • • Waveform Preferences • Rhythm • Patient • Directory • System • Send Receive • Printer • Print Communication Log • Print System Statistics • Product Keys •... - Page 37 ECG Settings Description Selections Menu Items: Report Format Report Format Select the format to use for the report generated by STANDARD 4 CHANNEL (12-lead) [ECG] pressing the button. STANDARD 3 CHANNEL For sample printouts, see Chapter 9. STANDARD 3 + 3 STANDARD 6 CH 5S/LD •...
- Page 38 User Settings Description Selections Menu Items: Report Format Rhythm Lead This selection displays for the following formats only: LEAD I Channel 2 • 3+3 format LEAD II Rhythm leads display at the bottom of the printout. LEAD III -aVR Rhythm Lead This selection displays for the following formats only: LEAD I Channel 3...
- Page 39 ECG Settings Sequence Configure automatic functions. Description Selections Menu Items: Sequence Wait for good When enabled (ON), the system delays the ECG reports data until the system has collected ten seconds of low noise waveform data (all electrodes must be connected). To [ECG] force an immediate report, press again when the...
- Page 40 User Settings Interpretation Preferences Settings below are available only on interpretive units. Menu Items: Description Selections Interpretation Preferences Analysis Select the format for the Analysis Statements BRIEF Statements • BRIEF—Displays minimal explanations in mixed case FULL (for example, “Normal ECG”) •...
-
Page 41: Waveform Preferences
Waveform Preferences Waveform Preferences Configure the appearance of the waveform settings at power on. Waveform Description Selections Preferences Menu Items Speed Set the chart paper speed. 12.5 mm/s 25 mm/s 50 mm/s Gain Set the waveform gain. 5 mm/mV • 5 mm/mV 10 mm/mV •... - Page 42 ECG, and the data analyzed. • 0.05 Hz—Use the 0.05 Hz filter when signal delay is unacceptable. NOTE: Cardiac Science Corp. recommends use of the STABLE Baseline filter except when a signal delay of 1.5 seconds is unacceptable.
-
Page 43: Rhythm
Rhythm Rhythm To print rhythm reports for the selected lead group ([1] through [4] for presets or [5] and [6] for custom settings): • Press [Manual Rhythm] or [Auto Rhythm]. menu includes the following items: Rhythm • Auto Rhythm Pages •... - Page 44 User Settings Rhythm Menu Items: Description Selections Setup Custom 1 (and 2) Set Up ustom 1 The custom lead format used for: CUSTOM 3-CHANNEL (or 2) [Auto Rhythm] [Manual Rhythm] STANDARD LIMB 6-CHANNEL Custom 1 is the default displayed lead set. STANDARD NOTE: Selecting the ALTERNATE CHEST LEADS PRECORDIAL...
-
Page 45: Patient Settings
Patient Settings Rhythm Menu Items: Description Selections Setup Custom 1 (and 2) Channels 7 For ALTERNATE CHEST LEAD (3X4, 1R) format select through 12 leads for channels 7 through 12. Patient Settings menu sets the patient demographic fields displayed when Patient entering patient demographics. -
Page 46: Directory Settings
User Settings Patient Description Selections Menu Items Last Name Select the patient information fields to display in the First Name Enter New Patient menu. Date of Birth Age Format Gender Race Medication 1 Medication 2 Class 1 Class 2 Height Weight Systolic BP Diastolic BP... -
Page 47: System Settings
System Settings System Settings Use the menu to set display preferences, password protections and System battery life settings. System Description Selections Menu Items User 1-2 Select Selects either User 1 or User 2. After a new user is selected, the Atria must restart for the settings to take effect. -
Page 48: Chapter 8 Patient Records
Adjust Contrast [Shift] [Previous] [Shift] [Next] Press to adjust Press Shift- screen contrast anytime after power up. Previous/Next [Select] To continue press Waveform Grid Displays or hides the waveform grid. (Atria 6100 only) 4-14 Atria Electrocardiograph Operating Instructions 70-00082-01 A... -
Page 49: Communications Setup
Chapter Communications Setup WARNING Misdiagnosis. Electromagnetic interference may cause trace noise or input overload conditions. This may be caused by the presence of strong EMI fields, or generated by RF noise on the line power, or by electronic, surgical, or diathermy instruments in close proximity to the Atria. Position the Atria away from other electrical or electronic equipment, if possible. -
Page 50: Equipment Connections
Communications Setup Equipment Connections WARNING Trip hazard. Route all cables away from main work areas to minimize risk of tripping and injury. Figure 5-1 Back Panel Modem RJ11 port to connect telephone cable. Network RJ45 port to connect network cable. NOTE: Do not insert the telephone cable in the Network port. -
Page 51: Grounding
Grounding Grounding All connected equipment must be IEC 60950 approved or equivalent. Consult a qualified technician to verify equipment compatibility. Network Setup The following communication options require network setup: • Email • Printing to network printers • Sending to EMR via network connection •... - Page 52 Communications Setup UTC/GMT Time Zone Offset The default is 6 for Central Standard Time For other time zones, use the Time Zone listed on your computer. NOTE: The Windows UTC/GMT Time Zone Offsets are the inverse of the Atria. For example, Windows Central Standard Time is -6, but the Atria notates Central Standard Time as 6.
- Page 53 Network Setup 3. Enter the following: a. When DHCP is enter: (IP Address for the Atria, typically IP address assigned by the network administrator.) (typically 255.255.255.0). Subnet Mask (IP address for the Gateway.) Gateway b. Select appropriate options based on the Wireless Security settings.
- Page 54 Communications Setup PPP SETUP Use the PPP setting to connect the Atria to a PPP Server. 1. Select > > Network Type Ethernet Use DHCP • (Recommended) Select for dynamic IP address assignment. • Select for fixed IP address assignment. 2.
- Page 55 Network Setup CREATE A SUPPLICANT CONFIGURATION FILE • On a PC, use a text editor to create a configuration file. a. Follow the examples in the “Wireless Network Custom Configuration Examples” in the Atria help page or the WPA_supplicant Reference Manual on the CD. b.
-
Page 56: External Printer Setup
Communications Setup CONFIGURE THE ATRIA TO USE THE SUPPLICANT CONFIGURATION 1. Press [Home] and then press [Setup]. 2. Select > from the menu. Send Receive Setup Network Connection Setup 3. Select the following options: select Network Type 802.11 select Use DHCP select Wireless Security Supplicant Config... -
Page 57: Printer Connection
External Printer Setup • This starts the process to find local Start Find Local Printers— printers. The Atria automatically selects the printer. If the Atria finds more than one printer, use the navigation buttons to select the printer, and then press [Select] FOR NETWORKED PRINTERS ONLY:... -
Page 58: Setup Fax
Communications Setup Setup Fax WARNING Misdiagnosis. Records sent by fax may not be suitable for diagnostic use due to the low resolution of some fax receiving equipment. Enter up to four 20-digit fax numbers (include outside line access number, if necessary). 1. - Page 59 Email Comment of the email. enter the “from” address. Sender Address (Atria 3100) or (Atria 6100) to Email ‘Reply to’ Reply to Address enter the address for replies. e. For each email address, enter the Email Destination Label descriptions.
-
Page 60: Setup Emr Communications
Communications Setup Setup EMR Communications Network setup is required in order to send records to an EMR system or a shared location on the network. See “Network Setup” on pg. 5-3 and “Equipment Connections” on pg. 5-2. Set up Web Services Follow the instructions below to configure communication with an EMR ®... - Page 61 Setup EMR Communications 7. Enter the Institution Number The Institution number is transmitted to the EMR system with the ECG record. Enter , unless the server services multiple institutions. 8. Enter a Device ID The Device ID is transmitted to the EMR system with the ECG record. Enter a unique number to identify this specific ECG device.
- Page 62 Communications Setup 3. Select the appropriate custom header. The Atria prompts to restart. NOTE: If the Atria reports errors, the communications log contains more information regarding the errors. To print the communications log: Press [Setup] and then select Print . For more information, press [ALT] + [H] Communications Log to access the menu and select...
-
Page 63: Patient Preparation
Chapter Patient Preparation WARNING Explosion hazard. Do not use in the presence of flammable anesthetics, other gasses that support combustion, or in a high-oxygen atmosphere. WARNING Misdiagnosis. Electromagnetic interference may cause trace noise or input overload conditions. This may be caused by the presence of strong EMI fields, or generated by RF noise on the line power, or by electronic, surgical, or diathermy instruments in close proximity to the Atria. -
Page 64: Patient Preparation
Patient Preparation Patient Preparation The following steps are necessary for patient comfort and to minimize muscle artifacts: • Assure the patient there is no danger or discomfort involved. • Explain that full cooperation will produce a valuable diagnostic record. • Ensure the patient is comfortable and relaxed. Lay the patient on a cot or padded table large enough to support both arms and legs. -
Page 65: Sensor Application
Sensor Application Sensor Application WARNING False Readings. The lead status check does not detect lead reversals. Always ensure the correct lead placement is used for the lead configuration selected. WARNING Misdiagnosis. Dirty, compromised, or unprepared skin may cause incorrect readings. Before applying sensors, ensure the skin is clean, unbroken, and properly prepared. -
Page 66: Resting Ecg Lead Placement & Coding Chart
Patient Preparation Resting ECG Lead Placement & Coding Chart LEAD CODING AND MEASUREMENTS STANDARD LIMB LEADS STANDARD LIMB LEADS SENSORS SENSORS CONNECTED / LEAD LEAD CONNECTED / MEASURED MEASURED AHA COLOR CODE LEAD I LA-RA LEAD I LEAD BAND LABEL LOCATION LEAD II LL-RA... -
Page 67: Disposable Resting Ecg Sensors
Disposable Resting ECG Sensors Disposable Resting ECG Sensors ® CardioSens disposable sensors are more effective than bulbs, plates, straps, creams, and gels. CardioSens disposable sensors reduce cross- contamination and infection and improve diagnostic results. Disposable sensors must be stored according to the guidelines on the packaging and must not be used after the expiration date. -
Page 68: Reusable Ecg Sensors
Electrolyte NOTE: Watches or jewelry may be damaged by contact with electrolyte. ® Cardiac Science Corporation recommends using Signa gel electrode gel with reusable sensors because it provides excellent conductivity between the skin and sensor. Reusable sensors (Welsh bulbs and limb plates) must be kept clean. Dirt or electrolyte build-up may degrade ECG quality: •... - Page 69 Reusable ECG Sensors 3. Squeeze out a small amount of Signa gel electrode gel on limb plate as illustrated. Spread it evenly over the limb plate surface. Apply the same amount of electrolyte to each sensor. 4. Place sensors firmly on the limb sites. Choose fleshy areas above wrists and ankles.
-
Page 70: Connecting Cables And Lead Wires
Patient Preparation Connecting Cables and Lead Wires After applying sensors, connect the lead wires from the patient cable to the sensors. Make sure the lead cables follow the contours of the patient’s body and lie flat. Make sure the patient cable is plugged securely into the connector on the front of the Atria (see “Patient Cable”... - Page 71 Alternative Lead Placements Acquire a standard 12-lead ECG according to the “Resting ECG Lead Placement & Coding Chart” on pg. 6-4. For the Alternate Chest Lead ECG, retain the placement of the limb sensors. Reposition the chest sensors using 6 of the placements described in the table “Placement Options”...
- Page 72 Patient Preparation 6-10 Atria Electrocardiograph Operating Instructions 70-00082-01 A...
-
Page 73: Acquiring Ecg Reports
Chapter Acquiring ECG Reports Acquiring a Stat ECG The Atria does not require patient demographic information for an immediate ECG. Enter patient demographic information at any time. (See “ECG Tips” on pg. 7-4.) If no patient ID is entered, the Atria prints “#STAT#, date, time” in the field. - Page 74 Acquiring ECG Reports Enter Patient Demographics Once patient demographics are entered, it is not necessary to immediately acquire an ECG. The Atria allows multiple patients to be entered at the same time. When acquiring an ECG for a particular patient, select the appropriate patient from the patient directory.
-
Page 75: Acquiring An Ecg Using Pediatric Lead Placements
Acquiring an ECG Using Pediatric Lead Placements Acquiring an ECG Using Pediatric Lead Placements In order to use pediatric lead placements, the V3 placement feature must be enabled. See “V3 Placement” on pg. 4-12. To configure the Atria to always acquire ECGs using pediatric lead refer to “ECG Settings” on pg. -
Page 76: Ecg Tips
Acquiring ECG Reports Plain Paper Printing The Atria can be configured to print ECGs to a plain paper printer. Caution Data loss. Always check plain paper printouts before disconnecting the patient and ending the procedure. Printing Problems (Thermal Printer) If the Atria runs out of paper or if the paper jams while printing an ECG, either reload the paper and continue printing, or press [Stop] to save the record without printing. -
Page 77: Change Recorder Speed, Gain, Frequency Response
Change Recorder Speed, Gain, Frequency Response Acquiring a Clean Trace • To obtain a clean trace with very little noise, ensure Wait for is set to in the menu. If there is a problem Good Data during a recording, the Atria displays a message. If necessary, override the error message and continue recording by pressing the [ECG] key again (for more information, see “Wait for good data”... -
Page 78: Acquiring A Rhythm Report
Acquiring ECG Reports Acquiring a Rhythm Report The Atria does not save rhythm report data. 1. Select the leads: • Keys [1] through [4] select preconfigured lead groups. • Keys [5] and [6] select user-customized lead settings. For more information, see “Custom Lead Settings” on pg. 4-9. 2. -
Page 79: Patient Demographics
Patient Demographics Patient Demographics WARNING Misdiagnosis. Some patient information directly affects ECG analysis. Your patient’s physician uses this information when interpreting ECG reports. Likewise, an interpretive Atria provides more accurate and complete analysis statements when you enter complete patient information. •... - Page 80 Acquiring ECG Reports Race Enter the patient’s race. blank BLACK CAUCASIAN ASIAN OTHER RACE UNKNOWN Medication 1 Select medication taken by the patient. blank NO MEDICATION UNKNOWN DIGITALIS DIURETIC BETA BLOCKER QUINIDINE PROCAINAMIDE AMIODARONE DISOPYRAMIDE LIDOCAINE OTHER ANTIARRHYTHMIC PSYCHOTROPIC STEROID CALCIUM BLOCKERS NITRATES ACE INHIBITORS...
- Page 81 Patient Demographics Weight Enter weight using the units displayed. [text entry] Enter up to 3 numeric characters. (Range = 0- 550 lb. or 0-249 kg.) Systolic BP Enter the systolic blood pressure limit. [text entry] Enter up to 3 numeric characters. (Range = 0 –...
- Page 82 Acquiring ECG Reports 7-10 tria Electrocardiograph Operating Instructions 70-00082-01 A...
-
Page 83: Patient Records
Chapter Patient Records Working with Patient Records Use the menu to create new patient records, access existing Directory records, or to work with some or all patient records at once. You can use the menu to print a directory report, print ECGs, create demographic Directory records, and delete patient records. -
Page 84: How To Display A Patient Record
Patient Records • Permanently deletes all records. Delete All Records— Caution Data loss. Deleting a patient record permanently removes the record. Once deleted, a record can not be recovered. How to Display a Patient Record 1. Press [Home] and then press [Directory]. 2. - Page 85 How to Display a Patient Record • —To review the averaged beats Print Median Complex Report for a record on an interpretive Atria, the median complex is used as the basis for all computerized analyses. NOTE: Chart speed is fixed at 50 mm/s and the artifact filter is always off.
- Page 86 Patient Records Code Record Status Detail Hold Hold Prevents sending the record if Send All New or Selected ECGs is selected. Prevents auto-deletion of the record. • —Deletes the selected patient record. Delete Record Caution Data loss. Deleting a patient record permanently removes the record. Once deleted, a record can not be recovered.
- Page 87 How to Display a Patient Record Print All New ECGs To print all ECGs in the directory which have not been printed yet (i.e., Record Status is not PR), select the option in the Print All New ECGs directory. 1. Press [Directory]. 2.
- Page 88 Patient Records Delete All Records NOTE: The below information is for use by authorized personnel only. With Atria, it is possible to delete all contents in the directory. Caution Data loss. Deleting a patient record permanently removes the record. Once deleted, a record can not be recovered. 1.
-
Page 89: Communications Options
Communications Options message displays if a new patient is started and all records Directory Full in the directory do not meet any of the automatic deletion criteria. A new record is allowed only if one of the following actions is taken: •... - Page 90 Patient Records SELECT RECORDS TO SEND This menu allows you to review each record for send status. For each record, you may select to send or place the record on hold. The send status defaults to send. You may change the send status for a record at any time. 1.
- Page 91 Communications Options Email a Patient Record WARNING Misdiagnosis. ECG reports images viewed or printed in .pdf format at a size other than 100% may be appear distorted. Also, records sent by fax may not be suitable for diagnostic use due to the low resolution of some fax receiving equipment.
- Page 92 To select or de-select individual records, highlight the record and press [Select]. Selected records display with a brace (Atria 3100) or a checkmark (Atria 6100) in front of the record. Press [Send/Rec]. After a few seconds the Atria begins downloading the records and indi- cates the progress of the download.
- Page 93 To select or de-select individual records, highlight the record and press [Select]. Selected records display with a brace (Atria 3100) or a checkmark (Atria 6100) in front of the record. 7. Press [Send/Rec]. After a few seconds, the Atria begins downloading the records and indi- cates the progress of the download.
- Page 94 Patient Records 8-12 Atria Electrocardiograph Operating Instructions 70-00082-01 A...
-
Page 95: Sample Printouts
Chapter Sample Printouts NOTE: The sample reports in this chapter are from the Atria 6100. They are identical to the reports for the Atria 3100. 70-00082-01 A Atria Electrocardiograph Operating Instructions... -
Page 96: Print Directory Report
Sample Printouts Print Directory Report Prints a list of all patient records stored in the directory. 9-2 Atria Electrocardiograph Operating Instructions 70-00082-01 A... -
Page 97: Setup Report
Setup Report Setup Report The Setup Report is a list of all current settings. The sample Setup Report printouts (below and following page) lists the settings as they are set at the factory. 70-00082-01 A Atria Electrocardiograph Operating Instructions... - Page 98 Sample Printouts Setup Report, Continued 9-4 Atria Electrocardiograph Operating Instructions 70-00082-01 A...
-
Page 99: Standard 12-Lead, 4-Channel Ecg, Brief Statements
Standard 12-Lead, 4-Channel ECG, Brief Statements Standard 12-Lead, 4-Channel ECG, Brief Statements 70-00082-01 A Atria Electrocardiograph Operating Instructions... -
Page 100: Standard 12-Lead, 6-Channel Ecg, Brief Statements
Sample Printouts Standard 12-Lead, 6-Channel ECG, Brief Statements 9-6 Atria Electrocardiograph Operating Instructions 70-00082-01 A... -
Page 101: Standard 3-Channel Rhythm & Manual Ecg
Standard 3-Channel Rhythm & Manual ECG Standard 3-Channel Rhythm & Manual ECG 70-00082-01 A Atria Electrocardiograph Operating Instructions... -
Page 102: Measurement Matrix
Sample Printouts Measurement Matrix 9-8 Atria Electrocardiograph Operating Instructions 70-00082-01 A... -
Page 103: Median Complex, Brief Statements
Median Complex, Brief Statements Median Complex, Brief Statements 70-00082-01 A Atria Electrocardiograph Operating Instructions... - Page 104 Sample Printouts 9-10 Atria Electrocardiograph Operating Instructions 70-00082-01 A...
-
Page 105: Troubleshooting
Chapter Troubleshooting This chapter lists common problems and recommended solutions. For additional questions contact Cardiac Science Technical Support at (800) 777-1777 or (608) 764-1919. Basic Troubleshooting PROBLEM PROBABLE CAUSE The Atria will not power up. • The Atria is not connected to external power (refer to “Back Panel”... -
Page 106: Trace Problems
• Verify the Atria is connected to a phone modem/fax function not working. jack. • Verify the Atria contains an internal fax/modem; contact your local representative or Cardiac Science Corp. Technical Support Department for assistance. • Verify the phone number and description fields are correctly filled in. - Page 107 Trace Problems PROBLEM PROBABLE CAUSE Waveforms are flat for all leads and/or • Acquiring ECG too quickly. Pressing “OVERLOAD” message will not clear. [ECG] twice prevents the Atria from waiting for good data before printing [ECG] ECG. Press one time only. •...
-
Page 108: Printing
Troubleshooting Printing NOTE: For information on troubleshooting your plain paper printer, refer to the printer’s Operator Manual. PROBLEM PROBABLE CAUSE Paper jammed or misaligned. • The Atria not used for extended period of time with paper installed. Reload paper, see “Loading Recording Paper” on pg. -
Page 109: Recognizing And Reducing Ecg Artifacts
Recognizing and Reducing ECG Artifacts Recognizing and Reducing ECG Artifacts OVERLOAD message Defibrillating the patient will interfere with the Atria sensors and may result in loss of the trace or erratic trace deflections. The OVERLOAD message indicates the waveforms may not be accurate. An overload condition may also be caused by: •... - Page 110 Troubleshooting Baseline wander Normally, the baseline will stabilize within a few seconds. The following conditions may also cause an baseline wander: • Patient breathing • Dried out or peeling off electrodes • Improperly prepared skin • Improperly applied electrodes, with poor skin contact •...
- Page 111 Recognizing and Reducing ECG Artifacts To reduce electrical interference: • Keep the power cord away from the patient and patient cable. • Connect the Atria to a properly grounded wall outlet. • Arrange the patient cable leads together, closely following the body contour.
- Page 112 Troubleshooting 10-8 Atria Electrocardiograph Operating Instructions 70-00082-01 A...
-
Page 113: Maintenance And Service
Chapter Maintenance and Service Cardiac Science Corporation recommends performing the following routine maintenance procedures per the schedule listed or as needed. Once per Shift Clean and Disinfect Clean and disinfect the Atria at least once per shift, or as needed. - Page 114 Maintenance and Service PRINTHEAD Caution Equipment Damage. Abrasive cleaners or harsh chemicals may damage the printhead. If cleaning is required use a lint free swab dampened with isopropyl alcohol. Check the printout to ensure the printing is legible and dark. Light printing (particularly at the baseline) may indicate a dirty printhead.
-
Page 115: Annually
Annually Testing The Atria performs a self-test at power up. No additional testing or calibration is necessary. Check the Patient cable If the patient cable appears damaged in any way (including nicks, cuts, bulging, or fraying), contact your local representative for replacement. •... - Page 116 Maintenance and Service WARNING Hazardous voltage. The interior of the Atria may retain hazardous voltages even after the Atria is shut off and the power cord disconnected. There are no internal user serviceable parts other than the battery. Do not remove any other cover or try to disassemble the Atria.
- Page 117 Component Replacement Figure 11-1 Atria Paper Tray and Paper Removed 3. Remove the battery cover plate. a. Slide the plate toward the front of the Atria. b. Lift up the back end of the plate to remove. Figure 11-2 Removing Atria Battery Cover Plate Figure 11-3 Removing Atria...
- Page 118 Maintenance and Service Caution Equipment damage. Do not disconnect the plug by pulling the lead wires. This could cause loose or broken connections. 5. Insert the new battery into the battery compartment. WARNING Fire or explosion hazard. Use only an approved replacement battery pack. Replace the battery pack only with the battery specified on the label inside the battery compartment.
-
Page 119: Notice To Responsible Service Personnel
The contents of this document are not binding. If you find a significant difference between this service information and your Atria, please contact Cardiac Science Technical Support. We reserve the right to improve or modify products without amending this document or advising the user. - Page 120 Maintenance and Service WARNING False readings. The lead status check does not detect lead reversals. Always ensure the correct lead placement is used for the lead configuration selected. NOTE: Deviations from the technical specification ranges listed can affect device performance. The Atria is tested for IEC 60601-1-2 electromagnetic compatibility.
- Page 121 Performance Disclosures 40 Hz Artifact Filter WARNING Misdiagnosis. Using an artifact filter may affect the ECG output; the physician is responsible for taking this into account when reviewing and interpreting the ECG. The primary purpose of the 40 Hz artifact filter is to remove skeletal muscle artifacts, i.e., undesired signals.
-
Page 122: Emc Declaration Tables
Maintenance and Service EMC Declaration Tables WARNING Electromagnetic interference. Position the Atria away from other electrical or electronic equipment, if possible. The presence of strong EMI fields, or generated by RF noise on the line power, or by electronic, surgical, or diathermy instruments in close proximity to the Atria may cause trace noise or input overload conditions. - Page 123 EMC Declaration Tables Electromagnetic Immunity IEC 60601 Compliance Electromagnetic environment - Immunity test test level level guidance Electrostatic ±6 kV contact ±6 kV contact Floors should be wood, concrete or ceramic discharge (ESD) tile. If floors are covered with synthetic ±8 kV air ±8 kV air material, the relative humidity should be at...
- Page 124 Maintenance and Service Immunity IEC 60601 Compliance Electromagnetic environment - test test level level guidance Portable and mobile RF communications equipment should be used no closer to any part of the Atria, including cables, than the recommended separation distance calculated from the equation applicable to the frequency of the transmitter.
-
Page 125: Recommended Separation Distances
EMC Declaration Tables Recommended Separation Distances Refer to the following table for recommended separation distances between the Atria and portable and mobile RF communications equipment. The Atria is intended for use in an electromagnetic environment in which radiated RF disturbances are controlled. The user of the Atria can help prevent electromagnetic interference by maintaining a minimum distance between portable and mobile RF communications equipment (transmitters) and the Atria as recommended below, according to the maximum output... -
Page 126: Technical Specifications
11 lbs (5 kg) (including external power supply) Atria 3100: 2 x 40 character backlit LCD screen Display Atria 6100: 640 x 480 backlit color LCD screen Keyboard Full alphanumeric keypad plus designated quick keys Atria 3100: 50 records standard... - Page 127 Technical Specifications Environmental Operating temperature 50°F to 104°F (10°C to 40°C) Operating relative humidity 20% to 75% non-condensing Operating atmospheric 1060 hPa to 700 hPa (-500 ft to 10,000 ft reference to sea pressure level) Storage temperature -4°F to 113°F (-20°C to 45°C) Storage relative humidity 10% to 90% non-condensing Storage atmospheric...
- Page 128 Maintenance and Service 11-16 Atria Electrocardiograph Operating Instructions 70-00082-01 A...
-
Page 129: Measurement Matrix
Chapter Measurement Matrix Atria models with interpretation and measurement capabilities also have the Measurement Matrix printing option. This option is available after acquiring the ECG via the menu (see also “How to Display a Patient Review Patient Record” on pg. 8-2 to print the measurement matrix using a saved patient record). - Page 130 Measurement Matrix MEASUREMENT Units DESCRIPTION SAMP µV S wave amplitude. R'AMP µV R' wave amplitude. S'AMP µV S' wave amplitude. STAMP µV ST amplitude (at J point). 2/8STT µV ST amplitude (at a point which is 2/8 of the ST-T interval). 3/8STT µV ST amplitude (at a point which is 3/8 of the ST-T interval).
- Page 131 Index calibration pulse, insert change waveform settings AC mains frequency 4-14 current acquire AC power, connect cleaning 11-1 acquire new using existing patient acquire ECG communication options acquire rhythm printouts setup print copy print new add patient communication setup sample 3 channel rhythm 802.11 administrative password 4-13...
- Page 132 print report patient sample report print new ECG gain medical grade print options change current power supply print settings default setting miscellaneous settings 4-13 plain paper printer general features modem, connect printed reports multiple electrical apparatus printer problems 10-4 See interpretive analysis muscle artifact 10-5 printhead, clean...
- Page 133 Setup Printer menu waveform settings change current setup report web services Setup Send Receive menu retrieving ECG records 8-11 somatic tremor 10-5 retrieving orders 8-10 specifications 11-14 Welsh bulbs speed workflow, paperless change current default setting STABLE Baseline filter standards 11-15 standby mode Stat ECG, acquire...
- Page 134 Atria Electrocardiograph Operating Instructions 70-00082-01 A...
- Page 135 Load Numbers of all of the devices does not exceed 100. SERVICE STATION: If you have any questions or trouble, please contact Cardiac Science Corp. at (800) 777-1777 or (608) 764-1919.
- Page 136 Toll Free: +1.800.426.0337 Telephone: +1.425.402.2000 Cardiac Science Corporation Website: www.cardiacscience.com 3303 Monte Villa Parkway Email: techsupport@cardiacscience.com Bothell, WA 98021, USA 70-00082-01 A...
Need help?
Do you have a question about the Atria 6100 and is the answer not in the manual?
Questions and answers
how to print a selected ECG from directory