Cardiac Science Burdick 8300 Service Manual
Hide thumbs
Also See for Burdick 8300:
- Quick steps (2 pages) ,
- Network setup manual (40 pages) ,
- Product safety manual (48 pages)
Table of Contents
Advertisement
Advertisement
Table of Contents

Related Manuals for Cardiac Science Burdick 8300


Summary of Contents for Cardiac Science Burdick 8300
- Page 1 8300 8500 URDICK URDICK ERVICE ANUAL 70-00844-02 B...
- Page 2 This document contains instructions for both the Burdick 8300 and Burdick 8500. Information in this document is subject to change without notice. Names and data used in the examples are fictitious unless otherwise noted. CE Mark Declaration The CE marking of conformity indicates that the device having this symbol on its immediate label meets the applicable requirements of the European Medical Device Directive.
-
Page 3: Table Of Contents
Contents Contents Chapter 1: General Information About the Burdick electrocardiographs ..........1-1 System description ................. 1-2 Chapter 2: Service & Maintenance When to perform service procedures ............2-2 Functional checkout ................2-3 Required equipment................ 2-3 Functional checkout procedure ............2-3 Calibration pulse check procedure........... - Page 4 Contents Remove ECG device 8500 mainboard assembly ......4-18 Remove power supply board............4-20 Remove the paper door..............4-21 Contents 70-00844-02 B...
-
Page 5: About The Burdick Electrocardiographs
About the Burdick electrocardiographs ◆ System description For a complete list of warnings and cautions see the Burdick 8300 and Burdick 8500 Product Information and Safety manual. DANGER! Explosion hazard Do not use this device in the presence of flammable anesthetics. -
Page 6: System Description
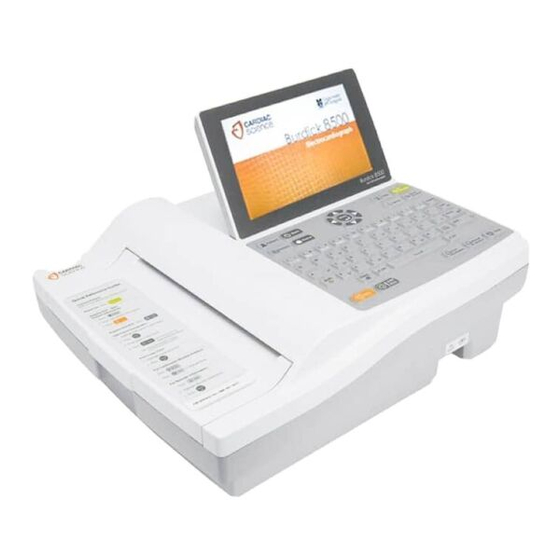
Paper Drive Assembly: Includes the printhead, queue sensor to correctly position the paper, and the paper drive motor to feed the paper. The Top Cover Assembly: Contains the keyboard and video display. 70-00844-02 B Burdick 8300/8500... - Page 7 Service & Maintenance Contents ◆ When to perform service procedures ◆ Functional checkout ◆ Electrical leakage current tests ◆ Queue sensor calibration Burdick 8300/8500 70-00844-02 B...
-
Page 8: When To Perform Service Procedures
Queue sensor calibration on page 2-8: Used to ensure paper feeds correctly. Must be performed if: The paper tray assembly is removed or replaced The queue sensor board is replaced The power supply board is replaced The mainboard is replaced. 70-00844-02 B Burdick 8300/8500... -
Page 9: Functional Checkout
Note: The test characters may appear lighter or darker, depending on the type of paper used, but the printing should still be clear and even across the page. Press the Home key. Turn on the patient simulator. Connect the patient simulator to the ECG device. Burdick 8300/8500 70-00844-02 B... - Page 10 Correct date and time when the ECG was acquired. Interpretation indicates Normal ECG. Press the Home key. Press the Directory key to verify the ECG is saved in the patient directory. Press the Home key. Disconnect the patient simulator. 70-00844-02 B Burdick 8300/8500...
-
Page 11: Calibration Pulse Check Procedure
Functional checkout Calibration pulse check procedure Cardiac Science recommends performing a calibration pulse (cal pulse) check procedure annually to test the sensitivity of the system. To perform the cal pulse check, apply a cal pulse individually to Leads I, II, and V1-V6 (C1-C6) and verify they reproduce a 1 mV within a tolerance of ±5% of the input signal. -
Page 12: Electrical Leakage Current Tests
Polarity Normal, Open Ground, ECG device power on Polarity Normal, Open Neutral, ECG device power on Polarity Reversed, ECG device power on Polarity Reversed, Open Ground, ECG device power on Polarity Reversed, Open Neutral, ECG device power on 70-00844-02 B Burdick 8300/8500... -
Page 13: Patient Sink Current Procedure
Turn the Select knob to select Isolation in the ECG leads group and wait for the numbers to display. Press the ISO test button and verify that the highest measured value is less than 50 μA. Burdick 8300/8500 70-00844-02 B... -
Page 14: Queue Sensor Calibration
Scroll to Queue sensor calibration and press Select. Press Select to start the calibration. The DAC value should be approximately 100. Press Home. Press the Form Feed key and verify the paper queues correctly. Select Setup | Waveform Preferences | Speed | 12.5mm/s. 70-00844-02 B Burdick 8300/8500... - Page 15 Verify additional headers are not printed on the pages. Press Stop. Verify the paper queues correctly. Select Auto Rhythm. Verify a one page report prints and the paper correctly queues. Repeat for waveform speeds of 25 mm/s and 50 mm/s. Burdick 8300/8500 70-00844-02 B...
- Page 16 Service & Maintenance 70-00844-02 B Burdick 8300/8500 2-10...
- Page 17 Troubleshooting Contents ◆ Preliminary checks ◆ Troubleshooting chart Burdick 8300/8500 70-00844-02 B...
-
Page 18: Preliminary Checks
Swap out the power cable, external transformer, and patient cable with known good cables. Check for any other visible damage such as cracks in the case, broken or cracked cable connectors, or rattling when the ECG device is moved. 70-00844-02 B Burdick 8300/8500... -
Page 19: Troubleshooting Chart
AC power indicator is off Ensure the power outlet is working. (Green LED on back panel) Replace power cord. Replace the external power supply. This solution must be performed by qualified service personnel: Replace power supply board. Burdick 8300/8500 70-00844-02 B... - Page 20 Video Display cable improperly connected--the cable is not fully inserted into the jack and the right tab is not fully engaged to lock in the cable. Replace the top cover assembly. Replace the power supply board. Replace the mainboard. 70-00844-02 B Burdick 8300/8500...
- Page 21 These solutions must be performed by qualified service personnel: Verify the keyboard cable is securely connected. Clean the underside of the keypad and the keypad contacts with isopropyl alcohol. Replace the keyboard cable. Replace the top cover assembly. Replace the mainboard. Burdick 8300/8500 70-00844-02 B...
- Page 22 Ensure cables from the paper tray assembly to the power supply board are securely connected. Replace cables from the paper tray assembly to the power supply board. Replace queue sensor. Replace paper tray assembly. Replace power supply board. 70-00844-02 B Burdick 8300/8500...
- Page 23 Communications Errors To display the IP Address of the ECG device: Select Setup. Use the arrow keys (Next and Previous) to scroll to Service Functions and then press Select twice. Select Get IP Address Burdick 8300/8500 70-00844-02 B...
- Page 24 Troubleshooting 70-00844-02 B Burdick 8300/8500...
- Page 25 Component Replacement Contents ◆ Parts list ◆ Component replacement ◆ Disassembly 4-12 This section contains instructions for removing, ordering, and replacing the ECG device sub assemblies. Burdick 8300/8500 70-00844-02 B...
-
Page 26: Parts List
Component Replacement Parts list To locate components, refer to Disassembly on page 4-12 and to this parts list: Table 4-1: Parts list Part Description and location Mainboard Battery, CR2032 Mainboard includes CR2032 Battery. Note: Power supply board 70-00844-02 B Burdick 8300/8500... - Page 27 Parts list Table 4-1: Parts list Part Description and location ECG device top cover assembly Burdick 8300/8500 70-00844-02 B...
- Page 28 Component Replacement Table 4-1: Parts list Part Description and location ECG device Top Cover Assembly (with Video Display) ECG device Top Cover Assembly Paper tray assembly Queue sensor Paper Tray Assembly Queue Sensor 70-00844-02 B Burdick 8300/8500...
- Page 29 Table 4-1: Parts list Part Description and location Paper door ECG device battery access cover (8300) ECG device Battery Pack, 14.4V, NiMH, 1500mAH (8500) ECG device Battery Pack, 14.4V, NiMH, High Capacity Mainboard to power supply board cable Burdick 8300/8500 70-00844-02 B...
- Page 30 Component Replacement Table 4-1: Parts list Part Description and location Keyboard cable with ferrite 70-00844-02 B Burdick 8300/8500...
-
Page 31: Component Replacement
Apply the Burdick label (the new label must be the same as the label on the old top cover). Re-install the paper door. Perform the following tests before returning the ECG device to service: Functional checkout on page 2-3 Electrical leakage current tests on page 2-6 Queue sensor calibration on page 2-8 Burdick 8300/8500 70-00844-02 B... -
Page 32: Replace The Paper Drive Assembly
Re-install the battery pack. Re-install the paper door. Perform the following tests before returning the ECG device to service: Functional checkout on page 2-3 Electrical leakage current tests on page 2-6 Queue sensor calibration on page 2-8 70-00844-02 B Burdick 8300/8500... -
Page 33: Replace The Ecg Device Mainboard
Re-install the battery pack. Re-install the paper door. Perform the following tests before returning the ECG device to service: Functional checkout on page 2-3 Electrical leakage current tests on page 2-6 Queue sensor calibration on page 2-8 Burdick 8300/8500 70-00844-02 B... -
Page 34: Replace The Power Supply Board
Re-install the battery pack and cover. Re-install the paper door. Perform the following tests before returning the ECG device to service: Functional checkout on page 2-3 Electrical leakage current tests on page 2-6 Queue sensor calibration on page 2-8 70-00844-02 B Burdick 8300/8500 4-10... -
Page 35: Replace The External Power Supply
Remove the ferrite from the old external power supply cable by unsnapping fasteners. Place the ferrite around the new power supply cable 2 inches (+/- 1/2 inch), from the 5 pin din connector. Re-install the power supply cable. Burdick 8300/8500 70-00844-02 B 4-11... -
Page 36: Disassembly
WARNING! Shock hazard. Verify the external power cord is disconnected before removing or replacing battery pack. A blank display is not a reliable indication of disconnected external power. Pull out the paper door and remove the paper. 70-00844-02 B Burdick 8300/8500 4-12... - Page 37 Disconnect the battery pack connector. Remove the ferrite from the old battery pack by unsnapping fasteners. Figure 4-1: Example of ferrite removal for the Burdick 8300 Place the ferrite around the new battery pack cable approximately in the middle of the cable.
-
Page 38: Remove The Keyboard Assembly
Do not attempt to loosen one side and force it off, this can cause a locating pin form the keyboard to fall inside the unit. Unplug the keyboard ribbon cable noting the polarity of the cable. 70-00844-02 B Burdick 8300/8500 4-14... -
Page 39: Remove The Ecg Device Top Cover Assembly
Remove the two screws and the paper door rails from the paper well. Lift the top cover assembly and disconnect the keyboard cable. Remove the top cover assembly and set upright behind the ECG device. Burdick 8300/8500 70-00844-02 B 4-15... -
Page 40: Remove The Paper Drive Assembly
(3) before tightening the screw. Note: The paper drive assembly power cables remain connected to the power supply board. Disconnect the cable connectors on the power supply board. 70-00844-02 B Burdick 8300/8500 4-16... -
Page 41: Remove Ecg Device 8300 Mainboard Assembly
Remove ECG device 8300 mainboard assembly To remove the mainboard: Disconnect the keyboard cable connector. Disconnect the power supply board cable. Disconnect the LCD Display cable located just above the keyboard connector. Remove the screws holding the board in place. Burdick 8300/8500 70-00844-02 B 4-17... -
Page 42: Remove Ecg Device 8500 Mainboard Assembly
Component Replacement Remove ECG device 8500 mainboard assembly The mainboard assembly includes the video adapter board (A, in the figure below). 70-00844-02 B Burdick 8300/8500 4-18... - Page 43 Note: When reinstalling the video cable, ensure the connector is fully inserted and the side clips are completely engaged. The figure below shows an incorrectly installed cable: Figure 4-2: Video cable installation Remove the screws holding the board in place. Burdick 8300/8500 70-00844-02 B 4-19...
-
Page 44: Remove Power Supply Board
When reinstalling the power supply board, ensure the spacer is in place to prevent the board from warping when the screw is tightened. Figure 4-4: Power supply board detail 70-00844-02 B Burdick 8300/8500 4-20... -
Page 45: Remove The Paper Door
Disassembly Remove the paper door To remove the paper door: ◆ Pull the door out and lift the door through the side rail at the back of the unit. Burdick 8300/8500 70-00844-02 B 4-21... - Page 46 Component Replacement 70-00844-02 B Burdick 8300/8500 4-22...
- Page 47 Cardiac Science Corporation • 3303 Monte Villa Parkway, Bothell, WA 98021 USA • 425.402.2000 • US toll-free 800.426.0337 • Fax: 425.402.2001 • info@cardiacscience.com Orders and Customer Care (US and International) • 425.402.2000 • US toll-free 800.426.0337 • Fax: 425.402.2001 • care@cardiacscience.com Technical Support •...
Need help?
Do you have a question about the Burdick 8300 and is the answer not in the manual?
Questions and answers