Table of Contents
Advertisement
Quick Links
Advertisement
Table of Contents

Subscribe to Our Youtube Channel
Related Manuals for Insportline IN 16443


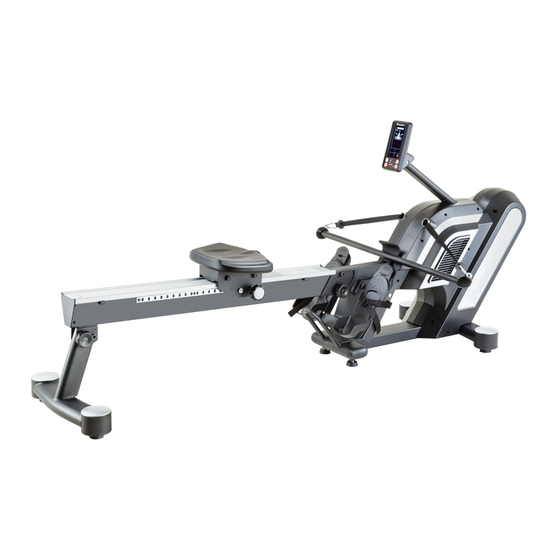
Summary of Contents for Insportline IN 16443
- Page 1 USER MANUAL – EN IN 16443 Rowing Machine inSPORTline Yakapa...
-
Page 2: Table Of Contents
CONTENTS SAFETY INSTRUCTIONS ........................3 PARTS DESCRIPTION ........................... 3 HARDWARE AND TOOLS ........................6 ASSEMBLY STEPS ..........................7 FOLDING ............................... 10 CORRECT ROWING GUIDE ........................ 12 SINGLE SCULL EXERCISE ...................... 14 ROWING EXERCISE ........................ 14 KAYAKING ROWING EXERCISE ..................... 14 CORRECT ROWING EXERCISE GUIDE ..................... -
Page 3: Safety Instructions
SAFETY INSTRUCTIONS • Follow basic safety instructions and read this manual carefully before first using. Retain it for future reference. • Do warm-up exercises before each workout to avoid muscle injury and exercise reasonably. Never overstretch yourself. • Regularly check all bolts, nuts and components. They should be well tightened. Regularly check it for damage or wearing. - Page 4 Rear stabilizer 1 set A04/C07 Upholstered seat 1 set Guide rail 1 set A06/A19/D02 Upright post computer 1 set A07/A08/C15/C16 Left/right pedal 2 set Plum knob 62 mm 1 Pc Plum knob 75 mm 1 Pc Foot pedal shaft 1 Pc...
- Page 5 Single scull exercise handle 1 set Rowing handle 1 set Kayaking exercise handle 1 set PVC pads 2 Pcs Paddle 1 set End cap ø4” 1 set AC adapter 1 Pc...
-
Page 6: Hardware And Tools
HARDWARE AND TOOLS Picture Description Quantity Screw M5x16 mm 4 Pcs Screw M4x8 mm 2 Pcs Screw M8*16 mm 4 Pcs Washer 5/16”*23*2.0T 4 Pcs Hex tool 19 mm 1 Pc Allen key M10 1 Pc Allen key M5 1 Pc Tool 1 Pc... -
Page 7: Assembly Steps
ASSEMBLY STEPS Front stabilizer installation • End caps (C04) installation. • Place a Styrofoam to raise the main frame (A01) for easier installation. • Assemble the front stabilizer tube (A02) to front curve plate of the main frame (A01) using two screws 3/8”... - Page 8 Upholstered seat installation • Assemble the upholstered seat (A04) to the guide rail (A05) using two PVC pads (C10) and two screws M4 (B14). • Tighten nuts with the hex tool with Phillips screwdriver that provided. Upright post installation • Lift the upright post (A06) and connect matching connectors then extra slide extra length cables into the opening of the main frame (A01).
- Page 9 Foot pedal installation • Slide the foot pedal pivot shaft (A23) into the welded tubing of the main frame (A01). Assemble the foot pedal (A07/A08) to the shaft with two bolts M8 (B27) and two washers (B13). • Tighten screws with the M5 Allen key that provided. Foot pedal strap position adjustment •...
-
Page 10: Folding
Different exercise models handle installation • Please secure the hook of the handlebar of different rowing exercise models to the clip hook of the rowing tension strap (Fig. 01-03). • Assemble the C03 part to the front curve plate of the paddle-kayaking exercise handle (A11) with two screws M5 (B29). - Page 11 Fig. 02 Fig. 03 Fig. 04 Fig. 05...
-
Page 12: Correct Rowing Guide
Fig. 06 CORRECT ROWING GUIDE FAULT: OVER REACHING: The body stretches too far forward. The shins may be past vertically. The head and shoulders tend to drop towards the feet. The body is in a weak position for the stroke. SOLUTION: The shins are vertical. - Page 13 FAULT: PULLING THE BODY TO THE HANDLE: At the finish, the user, instead of pulling the handle to the body, pulls themselves forward to the handle for the stroke. SOLUTION: At the finish, the user leans back slightly, holds the legs down and draws the handle to the body using the upper body as a firm platform.
-
Page 14: Single Scull Exercise
NOTE: Secure the hook of the handlebar of different rowing exercise models to the clip hook of the rowing tension strap. 1. SINGLE SCULL EXERCISE This new rowing machine can simulate the exercise of the single scull rowing exercise. Fig. 1 2. -
Page 15: Correct Rowing Exercise Guide
CORRECT ROWING EXERCISE GUIDE Three phases of correct rowing exercise for muscle group training: 1. Drive (lower body muscle group training): Bend your knee and stretch your arms. Hold the handle of the rowing machine with back straight up (Fig. 01). 2. -
Page 16: Ac Adapter Installation
AC ADAPTER INSTALLATION • Connect the AC adapter (D03) to the AC plug cable (D11) on the rear of the main frame (A01). • Make sure the specifications of power supply on the adapter is correct before plugging it in. •... -
Page 17: Computer Operation Manual
• Prevent this machine and especially the computer console from direct sunlight. • Inspect all assembly bolts and pedals of the machine every week. Retighten them, if necessary. • Store it in a clean and dry place away from children. COMPUTER OPERATION MANUAL 1. -
Page 18: Key Function
KEY FUNCTION UP KEY/SELECT UP: To select the exercise model or program before exercising or to increase the resistance level during workout. DOWN KEY/SELECT DOWN: To select the exercise model or program before exercising. To decrease the resistance level during exercising. The cycle for selecting programs is from K1 to K9. -
Page 19: Program Description
DISTANCE The DISTANCE chart is displaying the accumulated distance during exercising. The range is form 0~9999 m to 999.9 km. CYCLE The CYCLE chart is only for the K7, R7 and S7 as Tabat user modes. The preset 8 cycles with the range from 8-99 cycles. - Page 20 PAUSE MODE The computer will enter the PAUSE mode if there are no program in function within 5 seconds. Counting of all exercise data will be paused. The computer will enter the STANDBY mode if there is no program function in 120 seconds. END MODE There will be three beep sounds and entering the END mode after reaching the set-up parameters.
- Page 21 GOAL DISTANCE Press any button of ENTER, UP/SELECT and DOWN/SELECT to activate the computer. Press UP/SELECT UP or DOWN/SELECT DOWN key to select the major exercise mode (K, R, S). Push ENTER to confirm it. Press UP/SELECT UP or DOWN/SELECT DOWN button to select the manual exercise mode as K3, R3 or S3.
- Page 22 Press any button of ENTER, UP/SELECT and DOWN/SELECT to activate the computer. Press UP/SELECT UP or DOWN/SELECT DOWN key to select the major exercise mode (K, R, S). Push ENTER to confirm it. Press UP/SELECT UP or DOWN/SELECT DOWN button to select the manual exercise mode as K5, R5 or S5 for high tension Tabata exercise.
- Page 23 time. Press UP/SELECT UP or DOWN/SELECT DOWN button to increase or decrease the time. Press ENTER to confirm or RESET to go to previous step. Press ENTER button to select the cycle rest time. Press UP/SELECT UP or DOWN/SELECT DOWN button to increase or decrease the rest time.
-
Page 24: Error Message
BLUETOOTH FUNCTION (OPTIONAL) There is an optional Bluetooth module for connecting the computer with Fit Hi Way App. Find the code at the computer back cover. Connect the Bluetooth with iOS or Android device. The display will be turned off when the App is connected to the computer. The levels can be adjusted by the App. The display will be turned on when the App is disconnected from the computer. -
Page 25: Warm-Up Exercise
WARM-UP EXERCISE Quadriceps Stretch With one hand against a wall for balance. Reach behind you and pull your right foot up. Bring your heel as close to your buttock as possible. Hold for 15 seconds and repeat with your left foot. Inner Thigh Stretch Sit with the soles of your feet together with your knees pointing outwards. - Page 26 These Conditions of Warranty and Warranty Claims are an integral part of every Purchase Agreement made between the Seller and the Buyer. All Warranty Conditions are valid and binding, unless otherwise specified in the Purchase Agreement, in the Amendment to this Contract or in another written agreement.
- Page 27 VAT ID: CZ26847264 Phone: +420 556 300 970 E-mail: eshop@insportline.cz reklamace@insportline.cz servis@insportline.cz Web: www.insportline.cz INSPORTLINE s.r.o. Headquarters, Warranty & Service centre: Elektricna 6471, 911 01 Trencin, Slovakia CRN: 36311723 VAT ID: SK2020177082 Phone: +421(0)326 526 701 E-mail: objednavky@insportline.sk reklamacie@insportline.sk servis@insportline.sk Web: www.insportline.sk...
Need help?
Do you have a question about the IN 16443 and is the answer not in the manual?
Questions and answers