Polycom Pano Administrator's Manual
Hide thumbs
Also See for Pano:
- Administrator's manual (78 pages) ,
- Deployment manual (42 pages) ,
- User manual (38 pages)
Table of Contents
Advertisement
Advertisement
Table of Contents

Subscribe to Our Youtube Channel
Related Manuals for Polycom Pano


Summary of Contents for Polycom Pano
- Page 1 ADMINISTRATOR GUIDE 1.0 | June 2017 | 3725-42460-002A Polycom Pano ® ™...
- Page 2 Open Source Software Used in this Product This product may contain open source software. You may receive the open source software from Polycom up to three (3) years after the distribution date of the applicable product or software at a charge not greater than the cost to Polycom of shipping or distributing the software to you.
-
Page 3: Table Of Contents
Set the System Language....................16 Set the Web Interface Language..................16 Set the Date and Time...................... 16 Set Device and Room Names...................17 Register a Polycom Pano Device with the Polycom Cloud Service........18 Enable Screen Mirroring....................18 Disable Screen Mirroring....................19 Polycom, Inc. - Page 4 Configure IP Address Settings..................20 Configure DNS Settings....................22 Configure LAN Options..................... 22 Configuring Monitor Settings................24 Polycom Pano HDMI Interfaces..................24 Supported HDMI Input Resolutions................24 Supported HDMI Output Resolutions..............25 Supported Displays......................25 Recommendations for Using an Optional Touch-Capable Monitor......25 Configure Monitor Settings....................25...
- Page 5 Connect a Polycom Video System Using Two Monitors (Non-Touch Monitor Setup)........................49 Connect a Polycom Video System Using Two Monitors (Touch Monitor Setup)... 51 Connect a Polycom Video System Using Three Monitors..........54 Connect a Polycom Video System Using Three Monitors........55 Test Content Sharing......................
-
Page 6: Before You Begin
Polycom recommends that you record the serial number of your Polycom Pano system and keep it available as you will need it during the setup process and during troubleshooting. The serial number is printed on the system and the shipping container, and listed on the Dashboard of the Polycom Pano web interface. -
Page 7: Getting Started With Polycom ® Pano
Remote administrator access for managing standalone Polycom Pano systems Polycom Pano Hardware Features The Polycom Pano system is designed to be always connected, always powered. The system includes limited cable connections to simplify setup. Its compact design fits most space requirements. - Page 8 USB 3.0 flash drive is connected to the USB 3.0 port, the wireless pointing device may not function properly. 10/100/1000 Ethernet port. Note: The Polycom Pano device ships with a covering for this Ethernet port to indicate it is reserved for future use. Polycom, Inc.
-
Page 9: System Indicator Lights
Powering On and Off Polycom Pano systems are designed to stay in a wake state and do not have a power button, or support monitor sleep or a power saving mode. The system is considered powered on when you connect the power source. -
Page 10: Power On The System
(for example, https://10.11.12.13). 2. Enter your admin credentials. The default Admin ID is admin and the default admin password are the last six digits of the Polycom Pano serial number. The serial number is displayed on a sticker Polycom, Inc. -
Page 11: Access The Polycom Cloud Service Administration Portal
Pano system that is registered to the Polycom Cloud Service. Procedure 1. Access the Polycom Pano web interface by opening a web browser and entering the IP address of the system using the format https://IPaddress (for example, https://10.11.12.13). 2. Go to General Settings > Cloud. -
Page 12: Setting Up System Hardware
Procedure 1. Use the HDMI cable to connect the Polycom Pano system to the monitor. 2. Connect the LAN cable to the Polycom Pano system for network connectivity, or as a PoE+ power source. 3. Optionally, connect a power adapter to the Polycom Pano system as the power source. -
Page 13: Mount The System On A Table
Setting Up System Hardware 3. Connect the LAN cable to the Polycom Pano system for network connectivity, or as a PoE+ power source. 4. Optionally, connect a power adapter to the Polycom Pano system. Mount the System on a Table You can mount the Polycom Pano system on a tabletop, such as a desk or shelf. -
Page 14: Mount The System On A Monitor
Using a #2 Phillips screwdriver and the screws in the mounting kit, screw the mounting plate to the wall. 3. With the back panel facing up, insert the heads of the two shoulder screws on the Polycom Pano system into the corresponding holes on the mounting plate. Then, gently push the device down until you hear a lock that indicates the system is secure. - Page 15 2. Using the four 4.5mm screws included in the mounting kit, attach the mounting plate to the back of the monitor. 3. With the back panel facing up, insert the heads of the two shoulder screws on the Polycom Pano system into the corresponding holes on the mounting plate. Then, gently push the Polycom Pano system down until you hear a lock that indicates the device is secure.
-
Page 16: Running The Setup Wizard
Run the Setup Wizard Keep the following in mind about the setup wizard: ▪ You must have a web browser and a network connection to access the Polycom Pano web interface. ▪ The setup wizard allows you to set an Admin password to limit access to the administrator settings. - Page 17 Cloud Service portal. This enables the system to locate your account. Enter your Email ID and Password. 9. Enter a Room Name that users will use to connect to the Polycom Pano system from a smart device or Polycom Pano App. Polycom recommends that you use a name that is associated with the location of the system.
-
Page 18: Configuring General System Settings
You can change the language that appears on the Polycom Pano local interface. Procedure 1. In a web browser, enter the IP address of the Polycom Pano system using the format https:// IPaddress (for example, https://10.11.12.13). 2. In the Polycom Pano web interface, go to General Settings > System Language. -
Page 19: Set Device And Room Names
Current Time are configurable. Set Device and Room Names You can set the device and room names associated with a standalone Polycom Pano system using the web interface. You must use the Polycom Cloud Service Administration portal to change the room name of systems that are registered with the Polycom Cloud Service. -
Page 20: Register A Polycom Pano Device With The Polycom Cloud Service
5. Enter your Email ID and Password. 6. Enter a Room Name that users will use to connect to the Polycom Pano device from a smart device or Polycom Pano App. Polycom recommends that you use a name that is associated with the location of the system. -
Page 21: Disable Screen Mirroring
Procedure 1. Access the web interface by opening a web browser and entering the IP address of the Polycom Pano system using the format https://IPaddress (for example, https://10.11.12.13). 2. In the Polycom Pano web interface, go to General Settings > Screen Mirroring. -
Page 22: Configuring The Network
Configure IP Address Settings You can configure IPv4 and IPv6 settings in the web interface. Procedure 1. Select one of the following options to specify how the IP address of the Polycom Pano system is obtained: ▪ Obtain IP address automatically. - Page 23 Displays the IPv6 address used for communication within the site or organization. This setting is configurable only when Enter IP address manually is selected. Global Address Displays the IPv6 Internet address. This setting is configurable only when Enter IP address manually is selected. Polycom, Inc.
-
Page 24: Configure Dns Settings
This setting is configurable only when Enter IP address manually is selected. 4. Save your settings. Configure DNS Settings ® ™ You can configure DNS settings in the Polycom Pano web interface. Procedure 1. Configure the following DNS settings in the web interface: Setting... - Page 25 Configuring the Network Setting Description Speed and Duplex Mode settings become read-only. Polycom recommends that you use autonegotiation to avoid network issues. LAN Speed Specifies whether to use 10 Mbps, 100 Mbps, or 1000 Mbps for the LAN speed. Note that the duplex mode you choose must be supported by the switch.
-
Page 26: Configuring Monitor Settings
Supported HDMI Input Resolutions The content sharing HDMI interface supports audio streaming. Sharing content from personal computing devices refers to sharing content using a computer with an HDMI connection. The Polycom Pano system supports a variety of resolutions. Supported HDMI Input Resolutions and Frame Rates... -
Page 27: Supported Hdmi Output Resolutions
You can configure Polycom Pano monitor settings to optimize the video image. Procedure 1. Access the web interface by opening a web browser and entering the IP address of the Polycom Pano system using the format https://IPaddress (for example, https://10.11.12.13), and go to General >... - Page 28 ▪ Manual Enables you to select the Resolution setting. Resolution Specifies the resolution for the monitor. This setting is unavailable when you select Automatic for the Configure monitor setting. 3. Save your settings. Polycom, Inc.
-
Page 29: Securing The System
Note: A message is displayed when you attempt to access the web interface using a browser with cookies disabled. This message does not appear for Microsoft Edge browsers. You access the web interface from a web browser and enter the IP address of the Polycom Pano system using the format https://IPaddress (for example, https://10.11.12.13). -
Page 30: Disable The Security Code
2. Save your settings. Disable the Security Code The security code that is displayed on the Polycom Pano home screen is enabled by default. You can disable the code as needed in the Polycom Pano web interface or the Polycom Cloud Service Administration portal, depending on the system setup. -
Page 31: Disable Wireless Communication Settings
IP address for the system. Procedure 1. Access the web interface by opening a web browser and entering the IP address of the Polycom Pano system using the format https://IPaddress (for example, https://10.11.12.13). 2. Go to Security Settings > Wireless. -
Page 32: Content Sharing
The following diagram provides an overview of the system's workflow. Content Sharing Options Once a Polycom Pano system is up and running, no additional administrator setup is required for users to share content from their personal devices and systems using the following methods: ▪... - Page 33 Microsoft OneDrive for Business account. The latter option requires a Polycom Cloud Service account. Polycom Cloud Service Content Sharing is a Polycom Labs feature. For more information, see the Polycom Pano Release Notes.
-
Page 34: System Maintenance
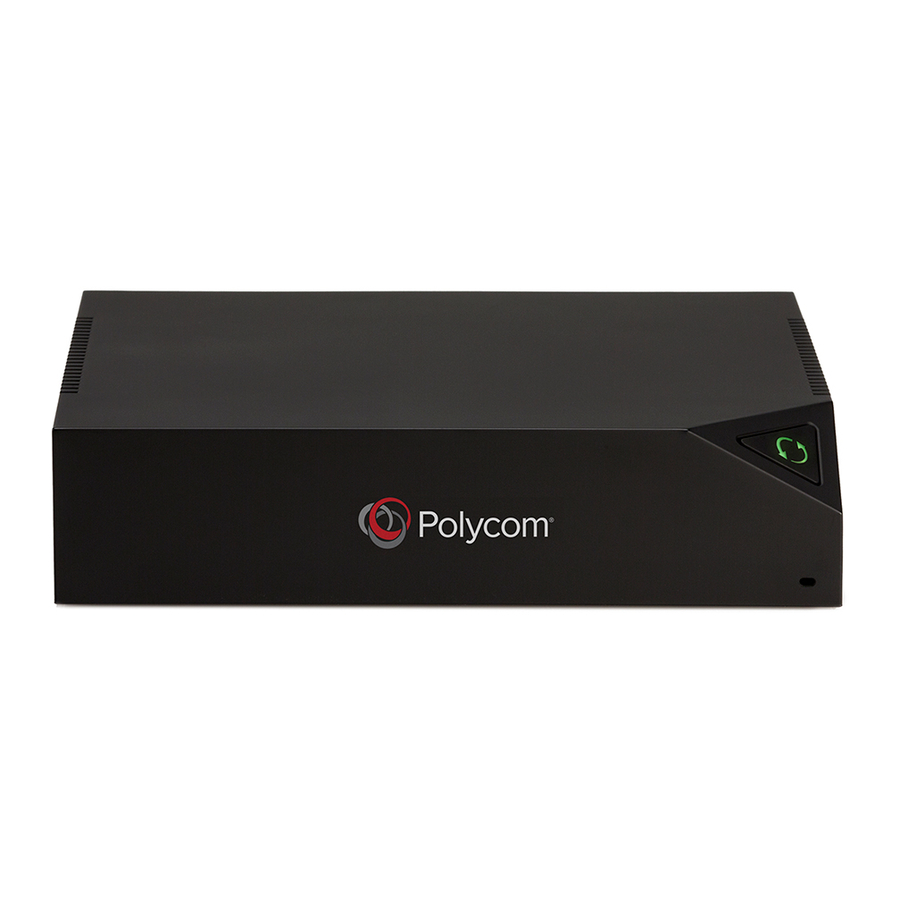
The following items are not saved: ▪ Software updates ▪ Logs The Polycom Pano reset button that you use to initiate the factory reset process is located on the front of the device, as displayed in the following figure: Polycom, Inc. -
Page 35: Delete System Settings
Logs Procedure 1. Access the web interface by opening a web browser and entering the IP address of the Polycom Pano system using the format https://IPaddress (for example, https://10.11.12.13). 2. Select Diagnostics > System Reset, and then select Reset All Sysem Configurations. - Page 36 System Maintenance Procedure 1. Access the web interface by opening a web browser and entering the IP address of the Polycom Pano system using the format https://IPaddress (for example, https://10.11.12.13). 2. Select General Settings > Software Update. 3. Select Check for updates.
-
Page 37: Update System Software From A Usb Storage Device
4. Select OK. Follow the setup wizard instructions to complete the update. Downgrade to an Older Software Version You can downgrade the software on a Pano device to an earlier version using any of the supported software update methods. Determine the Software Version Before you downgrade system software, Polycom recommends that you check the current system software version you are running. -
Page 38: Port Usage
The following topic on port usage is useful when you configure your network equipment for communication with the Polycom Pano system, Polycom Pano App, and AirPlay-compatible devices. Port Usage The following table describes the ports that are required to handle connections between the Polycom Pano system and other systems and network services. Connections... - Page 39 If a default port used by an application is already in use, it will dynamically use another port in this range that is available. 49159 mDNS (Windows) Bonjour/AirPlay 49163 mDNS (Windows) Bonjour/AirPlay Polycom, Inc.
-
Page 40: Polycom Cloud Service
The Polycom Cloud Service uses the industry-standard OAuth 2.0 protocol to enable access to your enterprise Office 365 services via the Polycom Pano App. This allows users to sign in directly to Office 365 without the Polycom Pano App or the Polycom Cloud Service ever having access to user credentials. -
Page 41: Polycom Cloud Service Administration Portal
Polycom Cloud Service Administration Account Activation Process Your Polycom Cloud Service account is created for you as part of your purchase of Polycom Pano and its maintenance service. You should have received a “Welcome to Polycom Cloud Service Administration” email message that will guide you through the steps of activating your account, sent to the email address you provided at the time of purchase. -
Page 42: Activate Account
Always use your email address and the password (that you used to activate your account) for signing in. Procedure 1. Now that your account is activated, you can sign into your account at any time in the Polycom Cloud Service Administration portal: https://console.plcm.cloud... -
Page 43: Integrate With Microsoft Office 365 Onedrive For Business
(Redirect URLs for the Authentication and Document Service provider) 2. With the assistance of your company's Microsoft Azure Active Directory administrator, registering the Polycom Cloud Service as a trusted web application that allows users to sign in and access their OneDrive for Business folders and files. - Page 44 You will enter just the company-specific part into the Tenant field but not the entire domain name. 6. Return to the Polycom Cloud Service Administration portal and finish the rest of the authentication provider configurations. a. Click Authentication Providers.
-
Page 45: Authentication Providers
The configuration area will prompt with different settings depending on the selected authentication provider. 4. Register the Polycom Cloud Service as an OAuth 2.0 client using the procedures specific to the authentication service being integrated (either ADFS or Office 365/Azure Active Directory). To do... -
Page 46: Edit Or Delete A Connected Authentication Provider
Microsoft Azure Active Directory. Client Secret This is the API Access Key created for the Polycom Cloud Service as part of registering it within Microsoft Azure Active Directory. Make sure you save the Client Secret in a text file. Once you entered the Client Secret, you cannot retrieve it from Polycom Cloud Service Administration portal. -
Page 47: Document Services
3. To delete an authentication provider, click Delete Document Services Document Services is where you can integrate the Polycom Cloud Service with the document service provider. The Polycom Cloud Service supports a single document service provider: Microsoft Office 365 OneDrive for Business. -
Page 48: Edit Or Delete An Integrated Document Service
3. To delete the document service, click Delete Device Management Device Management is where you can monitor and edit your registered Polycom Pano devices. Registered Device Information Each registered Polycom Pano device is listed in a table with the following information:... - Page 49 Description IP Address The IPv4 Address of the Polycom Pano device. Clicking on this address will establish a web UI session to the Polycom Pano device (created in a separate tab in your browser) Type Device Type (Polycom Pano) The MAC address of the Polycom Pano device...
-
Page 50: Account
You can change your password or sign out of your account from the Account menu. Change Password You can change your password. Procedure 1. In the Polycom Cloud Service Administration portal, select Account > Change Password. 2. Enter your current password and new password. 3. Click Update. Related Links... -
Page 51: Sending Content To A Polycom Video System
▪ Unpair a Polycom Video System A Polycom Pano system can send content to a Polycom video system. Once the required setup is complete, no further action is required to enable content sharing. The Polycom Pano system detects when content is available and automatically presents to the Polycom video system. - Page 52 1. Make sure the Polycom Pano systerm is running the latest software. 2. Connect one end of an HDMI cable to the HDMI In port on the Polycom Pano monitor. Connect the other end to an HDMI Out port on the Polycom video system.
-
Page 53: Connect A Polycom Video System Using Two Monitors (Touch Monitor Setup)
You must continue with the following steps to pair the systems and complete the setup process. 7. Open a supported web browser, enter the IP address of the Polycom Pano system, and go to General Settings > Pairing. 8. Enter the IP address, Admin ID, and Admin password that are associated with the Polycom video system. - Page 54 HDMI In port on the Polycom Pano monitor. 5. Configure the Polycom Pano monitor settings: a. Open a supported web browser and enter the IP address of the Polycom Pano system. b. Go to General Settings > Monitor.
- Page 55 7. Restart the Polycom video system. 8. Connect one end of an HDMI cable to the HDMI Input port on the Polycom video system (see images below for port location). Connect the other end of the cable to an Output port on the splitter.
-
Page 56: Connect A Polycom Video System Using Three Monitors
Connect a Polycom Video System Using Three Monitors You can pair a Polycom Pano system with a Polycom video system using a three-monitor setup that allows you to display Far video, Far and near content, and Polycom Pano content during a meeting. -
Page 57: Connect A Polycom Video System Using Three Monitors
3. Connect one end of an HDMI cable to the splitter. Connect the other end of the HDMI cable to the HDMI Out port on the Polycom Pano system, shown in the following figure: 4. Connect one end of an HDMI cable to HDMI 1 on the splitter. Connect the other end of the HDMI cable to the HDMI In port on the Polycom Pano monitor. - Page 58 Save your settings. The monitor will adjust to the resolution. 6. Connect one end of an HDMI cable to the HDMI Input port on the Polycom video system (see images below for port location). Connect the other end of the cable to an Output port on the splitter.
-
Page 59: Test Content Sharing
Sending Content to a Polycom Video System Test Content Sharing You can perform a test to confirm that content from a Polycom Pano system is displaying on a Polycom video system. This is helpful when you are pairing the systems from a remote location. -
Page 60: Troubleshooting
Retrieve Log Files You can use the web interface to download log files to a location on your computer. Note: The date and time of the system log entries for Pano devices are shown in GMT. Procedure 1. Access the web interface by opening a web browser and entering the IP address of the Polycom Pano system using the format https://IPaddress (for example, https://10.11.12.13), and go to...
Need help?
Do you have a question about the Pano and is the answer not in the manual?
Questions and answers