
Subscribe to Our Youtube Channel
Related Manuals for Baum VarioUltra 20


Summary of Contents for Baum VarioUltra 20
-
Page 1: User Guide
VarioUltra User Guide Item number: 106020H24 User guide version: 1.4 English 06/2017... - Page 3 About BAUM BAUM Retec AG has been a leading provider of products and services for blind and visually impaired people for more than 35 years. The high quality and innovative braille products, desktop magnifiers, reading machines, and software solutions are developed and manufactured in Germany, and are ideal for educational, professional and private use.
- Page 4 Congratulations! You are now the proud owner of the new VarioUltra, the smart braille display from BAUM Retec in Germany. The purpose of this user guide is to introduce you to the main functions of the device, with several step-by-step examples that you can follow along with on your VarioUltra.
- Page 5 BAUM Retec AG. All efforts have been made to ensure that information contained in this document is correct at the time of issue. Neither BAUM Retec AG nor its representatives assume any responsibility for errors or omissions. Nor is any liability assumed for damages resulting from the use of information contained herein.
-
Page 6: Table Of Contents
TABLE OF CONTENTS Chapter 1: First Impressions ..................... 11 1.1 What’s in the Box? ......................11 1.2 Physical Tour of VarioUltra....................11 1.3 Switching on VarioUltra for the First Time................13 1.4 Charging the Device......................14 1.5 Checking Battery Level....................... 15 1.6 Braille Notetaker Commands. - Page 7 3.5 Default Braille Codes ......................49 3.6 Braille in BRF and RTF Documents ..................51 3.7 Braille Inside Menus, Messages, and Dialogs ..............51 Chapter 4: Word Processor Application................52 4.1 Typing a Document......................52 4.2 Navigating within a Document................... 53 4.3 Remembering Last Reading Position.
- Page 8 7.2 Entering Numbers and Operators ..................77 7.3 Inputting Calculations......................78 7.4 Editing Calculations......................78 7.5 Navigating within Current and Previous Calculations............78 7.6 Using the Clipboard......................79 7.7 Settings..........................79 7.8 Memory List and Memory Functions.................. 79 7.9 Scientific Mathematical Functions.
- Page 9 10.11.2 System > Disk Cleanup....................128 10.11.3 System > Reset Device....................128 10.12 Exit Settings ........................ 129 Chapter 11: Help Menu....................130 11.1 Exit Help ........................130 Chapter 12: Contact BAUM ..................... 130 Chapter 13: Acknowledgements ..................132 Chapter 14: Appendices ....................132...
- Page 10 14.1 VarioUltra iOS Commands ....................132 14.2 VarioUltra BrailleBack Commands .................. 134 14.3 VarioUltra Commands ....................136 14.4 JAWS Commands ......................138 14.5 VarioUltra Commands for Mac OSX ................139 14.6 VarioUltra Menu Structure ..................... 141 Compliances ........................149 CE Conformity ........................149 FCC Conformity ........................
-
Page 11: Chapter 1: First Impressions
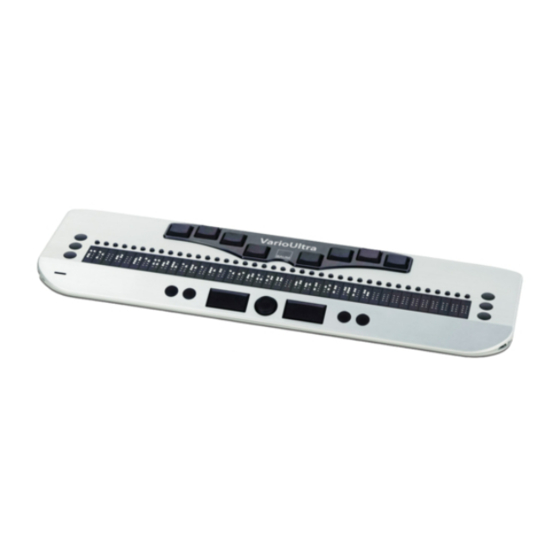
Chapter 1: First Impressions 1.1 What’s in the Box? VarioUltra is shipped inside 2 cardboard boxes to help protect it during transit. We recommend you keep these in case VarioUltra ever needs to be sent to us for service. The contents of the box include: 1) A braille Quick Reference Guide 2) A braille Product Registration Card. - Page 12 VarioUltra includes a braille keyboard, a braille line with cursor routing buttons, and a variety of other buttons and switches. A BAUM braille keyboard is ergonomic by design. The 8 braille keys are laid out in a slightly curved fashion. If you hold your hands parallel with each other, you may miss dots 1 and 4 which sit more forward than the other keys.
-
Page 13: Switching On Varioultra For The First Time
During the boot up process, you will witness a progress bar of dots 7 and 8, followed by a flashing cursor at cell position 1, and the name “VarioUltra 20” or “VarioUltra 40” displayed beside it. When this message disappears, your device is ready to use. If your device is in Braille Notetaker mode, you will be at the top of the main menu, which means Word Processor is displayed. -
Page 14: Charging The Device
10 minutes of inactivity. It’s possible to lengthen this time default, or switch it off completely so that your device only switches off when you press the power button. Suspend mode will not happen if you are actively connected to a USB or Bluetooth device. To turn VarioUltra off completely, press and hold system key S4 and then tap and release the power button. -
Page 15: Checking Battery Level
minutes for VarioUltra to attain a minimum amount of power. If you notice the cells fill up with all dots showing in each cell, you will need at least 5 cells to be filled before switching on VarioUltra. 1.5 Checking Battery Level. You can check the battery level of VarioUltra in both Braille Notetaker and Braille Display modes. -
Page 16: Braille Notetaker Main Menu Elements
1. Word Processor: the hotkey is ‘w’; the global command is w+B789. 2. PDF Viewer: the hotkey is ‘p’; the global command is y+B789. 3. Excel Viewer: the hotkey is ‘x’; the global command is x+B789. 4. Calculator: the hotkey is ‘c’; the global command c+B789. 5. -
Page 17: Confirmation Prompts
1) MI: this element means you are on a menu item. Menu items are displayed vertically, which means you navigate up and down to move from one item to another. In most cases, you can select by entering the corresponding hotkey or shortcut command, by pressing the left thumb key B9, or by pressing in on the Navistick. -
Page 18: Updating Varioultra
Scroll down and confirm with OK to exit. 1.11 Updating VarioUltra. From time to time, new VarioUltra software updates will become available for download from the BAUM USA web site, http://www.baumusa.com/support/varioultra-update/. Update files are provided in the form of a zip archive file. -
Page 19: Update Via Windows Pc
2) Use the BAUM-supplied USB cable to connect VarioUltra to your PC. VarioUltra will be recognized as a Portable Device; in most cases, it will appear under your computer in Windows Explorer as a portable device called “VarioUltra”. -
Page 20: Update Via Usb Stick
1.13 Update via USB Stick. This section provides instructions for copying a VarioUltra update or upgrade file to VarioUltra via USB Stick, and then performing the update process. 1. If you use a Windows computer, download the update zip file to your Windows PC. -
Page 21: Update Via Settings > System > Update
source during the update process, either connect it via USB to a computer or to an electrical outlet. Start the upgrade by simultaneously pressing braille keys B7 B8, and display buttons D3 D6. If you correctly press these keys together, the update process will commence. First a row of dots 7 and 8, then a group of 5 braille characters that move from left to right, and then finally VarioUltra will restart and be ready to use. - Page 22 damaged, the process stops. If all went well, you get a status message “ready to install”. 7. Confirm the “update now” button with thumb key B9, or press in on the Navistick. During the installation, you get different progress information. When everything is complete, VarioUltra reboots with the new software version.
-
Page 23: Chapter 2: Braille Display Mode
Chapter 2: Braille Display Mode 2.1 Introduction to Braille Display Mode. VarioUltra is a very smart braille display. Unlike other braille devices that limit you to one single connection via Bluetooth or USB, VarioUltra lets you connect simultaneously with up to 5 different devices. VarioUltra was the first braille device in the world to offer multiple device connectivity. -
Page 24: Using Varioultra As A Usb Braille Display
2.2.1 VarioUltra with JAWS (USB). An updated JAWS driver version 15.52 is available for VarioUltra. This and other JAWS drivers are available for download from the BAUM USA web site at http://www.baumusa.com/support/jaws-drivers/ If you do not install the JAWS VarioUltra driver, you will not find VarioUltra listed among supported braille displays, and it will not work with JAWS. -
Page 25: Varioultra With Mac Os & Voiceover (Usb)
For VarioUltra to work optimally with Window-Eyes, first download and install the VarioUltra driver for Window-Eyes prior to use. A link to the download can be found on the BAUM USA web site at http://www.baumusa.com/support/windoweyes-screen-reader/. Save the file to your computer and run the executable to install. -
Page 26: Varioultra With Nvda
4) Open the Properties again and confirm which channel number is being used for the output port of VarioConnect. 5) In Window-Eyes, open Device > Braille Display and select BAUM VarioConnect 24/32/40 from the list. 6) Select the serial output Bluetooth port using the output port number confirmed in step 4. -
Page 27: Bluetooth: Pairing And Connecting, Defined
2) VarioUltra is detected automatically. 2.3 Bluetooth: Pairing and Connecting, Defined We often encounter customers who use the terms pairing and connecting, believing them to mean the same thing. They are different, and it’s important to understand why. 1) When you first get a VarioUltra, it is neither paired or connected with your devices. -
Page 28: Using Varioultra As A Bluetooth Braille Display
If you’re using older technology, or an Android device, you may need to use the Bluetooth Emulation option in VarioUltra, which disguises VarioUltra as an older BAUM braille display or notetaker. There are three emulation modes for Bluetooth: 1) VarioUltra: this is the default mode, and works when connecting via... -
Page 29: Connecting With A Paired Bluetooth Device / Wake Up An Ios/Android Device From Standby
When the display shows the desired emulation, tap the left thumb key B9 to confirm and exit back to the Settings menu. If you use older technology, or an Android device, pairing must always be initiated from VarioUltra. 2.5.1 Connecting with a Paired Bluetooth Device / Wake up an iOS/Android device from Standby There is a required order of things when connecting a paired Bluetooth device. -
Page 30: Varioultra With Windows Pc (Bluetooth)
2) The pairing was performed with VarioUltra emulation in the default mode, which is VarioUltra. If you have never changed the emulation mode, you should not need to worry about this step. 3) The iOS or Android device is assigned to a Bluetooth channel on VarioUltra. -
Page 31: Varioultra With Jaws (Bluetooth)
4) A new Select Components dialog window appears. Scroll down the long list of supported braille displays to find VarioUltra 20 or VarioUltra 40. Press space to check the box at whichever display option you choose, and then press enter to move to the next window. -
Page 32: Varioultra V1.33 With An Ios Device (Bluetooth)
worth doing. You can find both settings under JAWS Settings Center > Braille > General. 2.5.5 VarioUltra v1.33 with an iOS Device (Bluetooth). For this section, we are using an iPhone 6 with iOS 9.3.2 along with a VarioUltra 40 with version 1.33 software. Although VarioUltra can be paired with iOS devices running iOS 7 or later through iOS 8.2, doing so requires you to change the Bluetooth emulation to VarioConnect or Pronto. -
Page 33: Varioultra With An Ios Device (Bluetooth, Old Method)
5) On VarioUltra, immediately tap the left thumb key, B9 to accept the pairing. You’re all done! You may now switch to Braille Display mode on VarioUltra and start using it with your iOS device. Please refer to the Appendix section of this user manual for a list of iOS commands that can be entered from VarioUltra. -
Page 34: Paste Contents Of Clipboard To Mobile Device
9) VarioUltra will tell you that Bluetooth pairing with your iOS device was successful. Navigate down a line to select ‘OK’, and then switch to Braille Display mode. On your iOS device, go to VoiceOver > Braille settings. If you’re new to VoiceOver on an iOS device, this can be found under Settings >... -
Page 35: Braille Key Simulation
VarioUltra and paste to an iPhone that is programmed for English, errors will occur such as accented characters not translating correctly. 3) The transfer can take some time. In BAUM (USA) tests, sending 5,000 characters took about 7 minutes. -
Page 36: Hid Key Simulation
4) While the S2+D2 command will stop the transfer, there is a point when all text has already been sent. All you can do then is to wait until the end. 5) If you copy and paste more than 10,000 characters, only the first 10,000 characters will be sent to your mobile device. -
Page 37: Varioultra With Mac Os & Voiceover (Bluetooth)
5) Braille tables need to match on VarioUltra and your mobile device. If you copy contracted text from your VarioUltra, your iPhone needs to be set to contracted braille as well. If not, the braille translation will be affected. 6) The braille language needs to be the same also. If you copy Spanish text from VarioUltra and paste to an iPhone that is programmed for English, errors will occur such as accented characters not translating correctly. - Page 38 If your VarioUltra is not yet updated to version 1.33, or if you simply prefer to initiate Bluetooth pairing from the VarioUltra, here are the old instructions. They work for any Mac running OSX Yosemite or newer. 1) On your Mac computer, go to System Preferences > Bluetooth. Enable Bluetooth if it is turned off.
-
Page 39: Varioultra With An Android Device (Bluetooth)
CTRL-OPTION-SHIFT and down arrow on the Mac. When you hear “BAUM VarioUltra”, select the “Select” button to connect. On VarioUltra, Braille Display Mode, press and hold system key 2 (S2) and then tap braille key 4, 5, 6, or 8 to select the appropriate Bluetooth channel 1, 2, 3, or 4. -
Page 40: Switching Between Connected Bluetooth Devices
4) BrailleBack should reconnect to VarioUltra. Best of all, if you’re using a VarioUltra 20, your display will now be formatted for 20 cells instead of 24. Thanks to customer Scott McCormack for his assistance testing this functionality. ** New ** with v1.4: A further option is to install additionally BRLTTY for Android 5.2 or higher. -
Page 41: Using Varioultra With Linux
Let’s say that your iPhone is connected on Bluetooth channel 3, but you want it to be on Bluetooth channel 1. It’s easy to change it. For example: a new device is connected to Bluetooth channel 3 (BT3) and you want to assign it to Bluetooth channel 1 (BT1). - Page 42 BRLTTY. If you are not using a debian based distribution such as Ubuntu, your instructions will vary. Debian/Ubuntu users type: sudo apt-get remove brltty You will be prompted for your password and prompted to confirm the removal of BRLTTY and any associated packages. Press enter or type y to proceed and once everything is removed you should be returned to the command prompt.
- Page 43 Now that we have BRLTTY installed, let’s test it. Enter the following to start BRLTTY: sudo brltty BRLTTY should show a version number, make a ‘bloop’ sound, and your VarioUltra should spring to life. If it does congratulations you now have braille inside a Linux environment.
-
Page 44: Suppressing Connection Messages
VarioUltra displays a message that contains channel information. The message will say things such as “USB”, “BT1 BAUM iPhone”, etc. It is possible to suppress these messages if preferred. From the Braille Notetaker mode main menu, go to Settings > Braille Display Mode >... -
Page 45: Chapter 3: Braille Notetaker Mode
Chapter 3: Braille Notetaker Mode. By now, you already know that VarioUltra is a very smart braille display. Another benefit of VarioUltra ownership is the Braille Notetaker functionality, which includes a suite of applications including: 1) Word Processor: use this application to create new files and save them as Rich Text Format (RTF) Text (TXT), or one of two braille formats (BRL and BRF). -
Page 46: Command Menus
the beginning of the line, a single letter hotkey, the app name, and the shortcut command for accessing this application from anywhere. You can select the app or menu item by: 1) Tapping the left thumb key, B9. 2) Pressing a cursor routing button above the application name. 3) Typing the single letter hotkey. -
Page 47: Braille Tables / Supported Braille
4) Calculator a) Math Functions b) User Constants c) Conversion d) Edit e) View f) Tools 5) Timers a) No command menus 6) File Manager a) File b) Edit c) View d) Tools 7) Settings a) No command menus 8) Help a) No command menus Refer to application chapters for more detail about command menus. -
Page 48: Master Switch: Changing Settings
Note: These profiles dictate which braille is used in Braille Notetaker mode. The Master Switch feature – explained in section 3.4 – allows you to toggle between US English Contracted (Grade 2) and Computer Braille (Default, Profile #1), or UEB and Computer Braille (Profile #2). 1) To select Computer Braille, hold down B9 and then press display button 1 (D1). -
Page 49: Default Braille Codes
clarify, if the checkbox remains checked, all you will see below “Master Switch” are the options OK and Cancel. 3) With the checkbox unchecked for “Master Switch”, move down the list to “Language” and confirm that English is selected. 4) Move down the list to “Reading Default” and select USA English Contracted Braille, or the newly added Unified English Braille (UEB). - Page 50 Reading braille code Writing braille code Text Box / Menus / Messages braille code Technical braille message on/off Confirm button OK Confirm button Cancel Here are additional details for each of these menu list items: 1) Master Switch Computer Braille. By default, the checkbox is checked. When checked, the only options displayed are OK and Cancel.
-
Page 51: Braille In Brf And Rtf Documents
braille code specified above. It is checked on by default. If you uncheck this option, VarioUltra will display all text boxes, menu items, and messages in Computer braille. 8) Computer braille message on/off is a checkbox. When checked, VarioUltra will display a hint message whenever technical braille is displayed. -
Page 52: Chapter 4: Word Processor Application
Chapter 4: Word Processor Application. In addition to previously described methods for opening the Word Processor from the Main Menu, you can also enter the shortcut command w+B9B7B8. Since it’s the most used application, the Word Processor can also be opened from anywhere in the Braille Notetaker by a long press of S1. -
Page 53: Navigating Within A Document
New text is always inserted at the current cursor position. To ensure that your cursor is at the end of text, enter command B9+B4B5B6. So long as the document is not read-only, it’s possible to set the input mode to “Append”. This means text is always inserted at the end of the document, regardless of the cursor location. -
Page 54: Remembering Last Reading Position
the current unit of text. A subsequent previous command will move back by the chosen unit of text. 4.3 Remembering Last Reading Position. New with VarioUltra version 1.33 is the remembering of your last reading position inside documents in the Word Processor. It’s an automatic setting that applies when you close the document prior to shutting down VarioUltra. - Page 55 The File Menu for Word Processor includes the following options: Open Close Save Save As Protect Text Previous File List Open Files Additional information and instruction now follows for the File Menu options. New. To avoid the menu in future, enter shortcut command is n+B9B8. 1) New.
- Page 56 or when you choose to close the only open file, you will be taken back to a blank document in the word processor after closing the file. 4) Save. To avoid the menu in future, enter shortcut command is s+B9B8. a) To save the current document, choose File >...
-
Page 57: Edit Menu
c) Use the Navistick to move left or right among the list of open documents. d) When you get to the file you wish to use, tap B9. You will then be returned to this open document in the Word Processor. 4.6.2 Edit Menu. - Page 58 b) Position the cursor at the beginning of text that is to be highlighted. Go to Edit > Mark Block Start/End to mark the beginning position. c) Position the cursor at the end of text that is to be highlighted. Go to Edit >...
- Page 59 Jump to Bookmark. To avoid the menu in future, enter shortcut command m+B9B8. a) From anywhere within an open document that contains a bookmark, go to Edit > Jump to Bookmark. b) VarioUltra takes you to the saved bookmark position. 4.6.2.1 More About Highlighting Text.
-
Page 60: Insert Menu
4.6.4 Insert Menu. The insert menu includes a variety of things you can add to a document, including the following: o New Line o New Paragraph o New Page o Date o Time Additional information and instruction now follows for the Insert Menu options. - Page 61 The Tools menu includes the following items: o Braille and Display Options o Word Wrap On/Off o Show Formatting Characters o Follow Cursor During Continuous Reading o Use Soft Line Breaks o Grade 2 o Settings o Contract File o Decontract File o Braille Document Settings o Strip Formatting When Opening a BRF File o Add Formatting When Saving a BRF File...
-
Page 62: Exit Word Processor
PowerPoint, will be displayed using Computer Braille. Uncheck the box and you can specify other braille tables to use. b) Contract File. You receive an uncontracted braille document that you wish to convert into US English Contracted braille. Use this option to do just that, and the save the document as something else. -
Page 63: Chapter 5: Pdf Viewer
Chapter 5: PDF Viewer. In addition to previously described methods for opening the PDF viewer from the Main Menu, you can also enter the shortcut command y+B9B7B8 to open this application from anywhere in the Braille Notetaker. The PDF Viewer application can be used to: 1) Open accessible PDF documents 2) Open password-protected PDF documents, so long as you know the password... -
Page 64: Opening A Password Protected Pdf File
document, any previously opened PDF document will be closed automatically. ** New ** with v1.4: Within the document line breaks, tabulators and other information about the document structure are shown by special braille characters. With the option in menu Tools > Settings > Checkbox Show Formatting, you can hide these characters. -
Page 65: Page Navigation
the current word, sentence, or paragraph. A subsequent “previous” command will move back by the chosen unit of text. 5.5 Page Navigation The navigation commands outlined in the previous section are generally all you need for moving within a document. Entering commands B9+B5B6 to move forward one page or B9+B2B3 to move back one page is easy enough. -
Page 66: Link Navigation
If the text order is not satisfactory, please select another reading order and then reopen the PDF document. Three reading order options are available: Default, Newspaper, and Top-Down. 5.7 Link Navigation. If the creator of the opened PDF document has defined links or bookmarks, you can navigate to the text position they are pointing to. -
Page 67: Save Pdf Document As A Text File
The reading position in VarioUltra is highlighted by a virtual cursor. Tap S3 for the menus and select Tools > Position in Document. This will present document information such as page number, line, and column. ** New ** with v1.4: Please note that is not possible to save the reading position inside a PDF document. -
Page 68: Find
5.12 Find. With the find feature it is possible to search for characters, words, or parts of text within an opened document. Once found, it is possible to set the reading position to the location. Here are the instructions for the Find feature: 1) Open the command menu with S3 and select menu item Find >... -
Page 69: Chapter 6: Excel Viewer
Chapter 6: Excel Viewer. In addition to previously described methods for opening the Excel Viewer (formerly the Excel Viewer) from the Main Menu, you can also enter the shortcut command x+B9B7B8 to open this application from anywhere in the Braille Notetaker. The Excel Viewer can be used to: 1) Open and read Excel XLS and XLSX documents 2) Copy text from an open document, to the clipboard. -
Page 70: Save Excel Files As A Text File
6.3 Save Excel Files as a Text File. Saving an Excel document as a text file (TXT) is simple. Tap S3 for the menus and select File > Save as Text File. Like the save function in the word processor app, a dialog prompts you to enter the file name and specify the save location. -
Page 71: Reading By Cell
6.7 Reading by Cell. Reading content cell by cell is achieved by moving the Navistick left and right along a row, or up and down within a column. When opening an Excel file for the first time, the VarioUltra reading cursor will default to cell A1. -
Page 72: Reading By Column
are separated by vertical line. Use the Navistick or D2 and D5 buttons to scroll along the row. With the general copy command c+B8B9, you can copy the current row to the clipboard. 6.9 Reading by Column. When reading by column, VarioUltra will display the content of all cells in that column. -
Page 73: Find And Find Next
Next sheet: B5B6 Previous sheet: B2B3 When you first move within the opened Excel file between worksheets the Excel Viewer presents the first cell (A1) of each sheet. If you have switched to a worksheet and moved to another cell position (e.g. A10), returning to this worksheet in future will return to the last presented cell of the sheet. -
Page 74: Define Row Heading
The result is, that in future you get this column heading in addition to the cell content and the cell coordinates. This additional information is set in brackets. 6.13 Define Row Heading. You can assign the cell contents of a column to become headings of the rows. -
Page 75: Exit Excel Viewer
1) Open the command menu and select the menu item Tools > Settings. 2) Activate the check box “Display notification for cell comments” 3) On the braille display, an asterisk (*) will appear in front of the cell coordinate to indicate when a cell has comment. 6.16 Exit Excel Viewer To exit the Excel Viewer, select command menu item File >... -
Page 76: Chapter 7: Calculator
Chapter 7: Calculator. In addition to previously described methods for opening the Calculator from the Main Menu, you can also enter the shortcut command c+B9B7B8 to open this application from anywhere in the Braille Notetaker. General information about the Calculator application: 1) Simple and scientific calculations can be performed. -
Page 77: Entering Numbers And Operators
c. Power d. Exponential e. Natural Logarithm f. Logarithm to Base 10 Log g. Modulo h. Sine i. Cosine j. Tangent 3. Expressions menu a. Pi b. Euler c. Bracket Open d. Bracket Close 4. Execute Calculation menu 7.2 Entering Numbers and Operators Note that all numbers and operators must be entered using Computer Braille. -
Page 78: Inputting Calculations
7.3 Inputting Calculations. Input your calculation in the line displayed and press B8 or the “equals sign”. The equals sign will be inserted and the calculation and its result will be displayed after it. Notes: 1. The result can be used as the basis for another calculation with the appropriate operator. -
Page 79: Using The Clipboard
It is possible to move within a calculation by moving the cursor with B9+B1 or B9+B4. You can also move left and right with the Navistick. The previous 10 calculations are kept in the calculations list. Use Navistick up and down or D1 and D3. Previous calculations can be edited to perform further calculations. - Page 80 addition, the usual pocket calculator memory functions (M+, M-) are also available. These values are also added to the memory list. The following commands are available: 1. Add calculation to memory list: I+B9, or command menu item Tools > Memory functions > Add to memory list. 2.
-
Page 81: Scientific Mathematical Functions
7.9 Scientific Mathematical Functions. Mathematical functions and operators can be input directly, or via command menu item Math functions > Basic functions, or command menu item Math functions > Advanced. Calculations involving division and/or multiplication take precedence over those containing addition and subtraction (BODMAS precedence). The inclusion of parenthesis allows calculations to be ordered. -
Page 82: Conversions
7. Hyperbolic cosine: cosh0,75 8. Arcus cosine degrees (Inverse); acos0,75 9. Tangent (degrees): tan 45 Tangent in radians: tanr(4+7) Hyperbolic tangent: tanh0,75 Arcus tangent degrees (Inverse): atan0,5 7.13 User Constants. The variables x, y, and z can have any constant values assigned to them. -
Page 83: Exit Calculator
7.15 Exit Calculator. To exit the Calculator and return to the main menu, press and hold system key S3. Chapter 8: Timers. In addition to previously described methods for opening the Timers application from the Main Menu, you can also enter the shortcut command t+B9B7B8 to open this application from anywhere in the Braille Notetaker. -
Page 84: Stopwatch
6. When the end time is reached, a tone will be emitted once. The elapsed time field will have been reset to 00:00 and the “Start” button is once again available. 7. Selecting “OK” or “Cancel” will only close the timer dialog; if the timer is running it will continue to do so in the background, emit a tone when the end time is reached. -
Page 85: Alarm Clock
the main view will now display “Pause” and “Stop” buttons which can be used to pause or stop the measurement. When paused, a “resume” button will appear in the place of the “Pause” button, which will resume the measurement. 4. The time measurement can be accompanied with acoustic signals. Open the command menu by pressing S3 and then select menu item Tone Signals, and then the corresponding entry. -
Page 86: Exit Timers
ring. Alarms are given as tone signals and/or vibration. The names of the four alarm clocks, which are also displayed at wake-up time, can be determined by the user. The alarms are switched off by default. To set an alarm, proceed as follows: 1. - Page 87 To exit Timers and return to the main menu, press and hold system key...
-
Page 88: Chapter 9: File Manager
Chapter 9: File Manager. In addition to previously described methods for opening the File Manager application from the Main Menu, you can also enter the shortcut command f+B9B7B8 to open this application from anywhere in the Braille Notetaker. The File Manager can be used to: 1. -
Page 89: Create A New Folder
When you enter the File Manager application, you will have access to the 32GB of internal storage, which is called Flashdisk. ** New ** with v1.4: Note that file and folder names are always shown in Computer Braille. At the root position, you will find Flashdisk and the Temp folder. Beside each name you will find a number range (eg 1 of 2), followed by the date and time of creation. -
Page 90: Open A File Or Folder
5. A dialog will open and you will find yourself in an edit box where the new folder name can be entered. Note that a suggested name “Newfolder” will be present. 6. You can either accept this suggested name, or overwrite with your preferred name. -
Page 91: Delete A File Or Folder
** New ** with v1.4: PowerPoint PPT, PPTX, PPS, and PPSX files are also supported. To change what type of files you see, follow these additional instructions. 1. From within the Word Processor, follow the instructions 1 through 3 above to get to the file tree. 2. -
Page 92: Rename A File Or Folder
2. Open the command menu (S3) and select menu item File > Delete. 3. A dialog will open with a security question and a message about the number of files in the folder and/or the file size. Select the “Yes” option to confirm the deletion. 4. -
Page 93: Opening Documents
Here are the instructions to create a new blank document: 1. Open the command menu by tapping S3. 2. Select File > New. A dialog will open, with a text field where you can give your file a name. ** New ** with v1.4: please ensure that your file name is entered in computer braille (B9 + D1). -
Page 94: Introduction
open. A braille pattern on the first braille cell will flash to indicate VarioUltra is busy. Do not attempt to switch off VarioUltra or otherwise interrupt the process when this cell is flashing. Using shortcut command o+B8B9 in future will open the Open File dialog and position you in the file list. -
Page 95: Additional Information About Files And Folders
When you are on a folder in the list, tapping right on the Navistick or entering command B9B4 will move to the right, one level down from the root directory. Tapping left on the Navistick or entering command B9B1 goes left, and up a level. The uppermost level of VarioUltra’s internal storage will display the internal storage folder (Flashdisk) as well as any USB memory stick (Stick) that may be plugged in. -
Page 96: Using Varioultra As An External Drive On A Pc
9.14 Using VarioUltra as an External Drive on a PC. Like all BAUM braille displays, VarioUltra is Human Interface Device (HID) compliant, which means that connecting to a PC as an external drive requires only that a USB cable be connected to the micro USB connection on VarioUltra, and to a standard USB connection on the PC. -
Page 97: Chapter 10: Settings Menu
Chapter 10: Settings Menu. VarioUltra Settings and related submenus contain a variety of options that you can customize to your personal preferences. In addition to the various methods outlined earlier in this manual on how to access Settings, you can also enter shortcut command s+B9B7B8 to access it from anywhere inside the Braille Notetaker. -
Page 98: Alerts > Volume
The Alerts Menu includes: 1. Volume 2. Vibration On/Off (Checkbox) 3. Ok 4. Cancel 10.2.1 Alerts > Volume. The volume of beeps can be adjusted from 0 to 100. Tap the left or right edge of Navistick to decrease or increase the volume in increments of 10. -
Page 99: Braille > Braille Presentation
10.3.1 Braille > Braille Presentation. The Braille Presentation menu contains options to set the left and right margins, choose whether the braille display should jump or drag when the left and right margins are reached, and choose whether system messages are shown with Word Wrap. These settings are valid both when editing texts in the word processor and in edit boxes. -
Page 100: Braille > Show Messages With/Without Word Wrap
Uncheck the box and words may be split at the end of a line. Note: this mostly affects the VarioUltra 20 because most messages fit on a single line of the VarioUltra 40 display. - Page 101 4. Flashing (Checkbox). Off by default, check the box to toggle between a non-moving or a flashing cursor. 5. Flash Rate: Enter the flashrate in milliseconds. Enter a value between 200 and 2000. Only appears if Flashing checkbox is checked. 6.
-
Page 102: Braille > Default Braille Codes
4. Flash Rate: Enter the flashrate in milliseconds. Enter a value between 200 and 2000. Only appears if Flashing checkbox is checked. 5. Ok. Select this option to save changes and exit to the Cursor menu. 6. Cancel. Select this option to abort changes and exit to the Cursor menu. -
Page 103: Braille > Standard Braille Tables
3. With the Master Switch function, you easily can switch between this braille code setting and the default computer braille setting. 4. It is possible to set several profiles using the Settings > IO Profiles covered in section 10.8. Once set, you can very quickly switch between different braille tables. -
Page 104: Settings > Display Settings
If Hide is selected, braille dots 7 and 8 will not be displayed when reading on the braille display. This means that computer braille characters which contain dots 7 and 8 will not be displayed correctly and dot 8 will not appear when text is highlighted. If Display is selected, braille dots 7 and 8 will be displayed whenever they appear in the text. -
Page 105: Display Settings > Templates
The default setting is to show the hotkey as a separate letter on the braille display. In the case of the Settings option, you should see the letters mi (for menu item), the letter s (representing the hotkey), and the name of the application, which in this case is settings. - Page 106 4. Textbox 5. Textbox Read Only 6. List Box 7. File 8. Folder The settings dialog for each template contains the following controls: 1. Info field “braille”. This shows the selected segments (single element information) and their order for the braille presentation. To alter the selection or the order, open the assigned edit dialog.
-
Page 107: Templates > Menu Item
1. Move left: Moves the selected list item one position to the left, thus changing the position of the segment. 2. Move right: Moves the selected list item one position to the right, thus changing the position of the segment. 3. -
Page 108: Templates > Button
2. In the dialog, select info field “braille” and select the assigned button “edit”. 3. In the list “items” select the entry “1 MI”. 4. In the dialog textbox you will see MI displayed. Edit the text so that the letter M is displayed, followed by a single space. 5. -
Page 109: Templates > Textbox Read Only
2. In the dialog go to info field “braille” and select the assigned button “edit”. 3. In the list “items” select the entry <hotkey>, which has no position number. 4. Open the command menu by pressing S3 briefly and select “hide this element”. -
Page 110: Templates > Folder
1. For the braille presentation, we want segment 1 to display “Fi” instead of “Li”. To make this change we would do the following: 2. Open Settings > Presentation > Templates > file. 3. In the dialog go to info field “braille” and select the button “edit”. 4. -
Page 111: Display Settings > Messages
For added security, passwords are presented in hidden mode by default. In this mode, all characters are shown as asterisks (*). This mode does not allow you to confirm that the password has been entered correctly. If you would prefer that passwords are shown on the braille display as you enter them, go to Settings >... -
Page 112: Keyboard > B8 Key
If the word you’re typing is Baum, you type letters B A U as normal, but when you type the letter M, you will press the space bar along with braille keys B1B3B4. - Page 113 In the one hand settings, you can assign the keys. See information below. The last entries are two buttons to activate either the right-hand mode or the left-hand mode. Note: As soon as you quit the dialog with OK your one-hand settings are activated and the braille keyboard does no longer react as before.
- Page 114 Example with activated Right hand mode: B4 is used to enter "B1, B4" B5 is used to enter "B2, B5" B6 is used to enter "B3, B6" B8 is used to enter "B7, B8" B0 is used to enter "B9, B0" B9 is used as key "empty column"...
-
Page 115: Keyboard > Key Mapping
Example 1: to enter the word “hello”: 1. Enter letter h by pressing B4, B5 keys followed by B5 key. 2. Enter letter e by pressing B4 key followed by B5 key. 3. Enter letter l by pressing B4, B5, B6 keys followed by B9 key (empty column because the letter uses dots of only the left braille cell.) 4. -
Page 116: Keyboard > Auto Repeat For Navistick
Note that L and R refer to the left (B9) and right (B0) thumb keys respectively. 10.5.6 Keyboard > Key Debounce Some people type braille very fast. Some of those people type faster than most braille typists on the planet. For this select group of people, there may be occasions when their fast typing may result in some keystrokes getting lost during typing. -
Page 117: Date And Time > Date
Changing Date and Time settings is done inside menu item Settings > Date and Time. Things that can be changed include the date, time, date and time format, and the time zone. There are OK and Cancel buttons, that you use to accept changes you have made, or not. It is necessary to use US English Computer Braille when entering date and time information, otherwise your changes will not take effect. -
Page 118: Date And Time > Date And Time Format
Here are the instructions for changing the time and date. 1. Go to menu item Settings > Date and Time. 2. The first line shows the current date. To change the date, press the cursor routing button to the right of the number you wish to change and then press the B7 key to backspace. -
Page 119: Settings > Power Management
Believe it or not, there are 106 different time zones in the world. Here are some of the more commonly used: o Hawaii, 3 of 106 o Alaska, 4 of 106 o Pacific, 6 of 106 o Arizona, 7 of 106 o Mountain, 9 of 106 o Central, 11 of 106 o Eastern, 16 of 106... - Page 120 “acculog.txt” file. This should only be done when consulting with BAUM service technicians on servicing issues. The battery of VarioUltra passes 2 limits during charging and discharging.
-
Page 121: Settings > Io Profiles
VarioUltra should provide between 8 and 12 hours of use on a full charge. If you experience less than this range, it could be because your battery’s 0% and 100% values have been lost. Contact BAUM technical support in such cases. -
Page 122: Io Profiles > Loading A Profile
feature to switch between Computer Braille (B9 + D1) and UEB (B9 + D2). The controls found within the IO Profiles dialog include: 1. List Profiles: this shows the numbers and names of the individual profiles. You can load, delete, edit, or rename the selected profile. 2. -
Page 123: Io Profiles > Use Selected Profile
2. Menu Settings > Braille > Standard Braille Tables: Select the desired Braille Table which you want to use when Master Switch Computer Braille is enabled. i.e. TBFR2007 for French will allow to toggle between UEB grade 1 and French Computer Braille with the Master Switch option. -
Page 124: Braille Display Mode > Device Emulation
If you’re using technology or software that is affected in this manner, you may need to change the Device Emulation from VarioUltra, to another BAUM display such as Pronto or VarioConnect. This emulation mode lets you disguise VarioUltra a braille display that your older technology or software recognizes. -
Page 125: Braille Display Mode > Show Message If Device Connected
The Vibrate on Device Connected option is a checkbox. Uncheck the box to stop the vibration from occurring. When vibration is off, you will need to manually check Bluetooth channels to see if a pair device has connected. 10.9.4 Braille Display Mode > Show Message if Device Connected. When checked, VarioUltra will display a message if a device is connected. - Page 126 3. HID key delay (in ms) 30 – 100 (Default: 60 milliseconds) 4. As an overview, the parameters are shown in addition behind the device name in the list "paired device" in short form: (BRL xxms, HID xxms, HID table table.U2H) Important: Please follow the rules below, to ensure that the application of the connected device receives the characters correctly, which are generated...
-
Page 127: Settings > Bluetooth Menu
Also, the capacity of the processor of your connected device is responsible for the transfer speed. If in doubt, set a value 10 ms higher. 10.10 Settings > Bluetooth Menu. Menu item Settings >Bluetooth opens a dialog where you can adjust settings relating to Bluetooth connections, including pairing with other devices. -
Page 128: System > Update
The System Menu contains the following options: 1. Update 2. Disk Cleanup 3. Reset Device 10.11.1 System > Update. As explained earlier in this manual, updating of VarioUltra software was done by copying the file to a USB stick, connecting it to VarioUltra, and then entering an update command. -
Page 129: Exit Settings
want to clean things up before returning it, follow these instructions to reset VarioUltra. 1. Reset User Settings to Default (Checkbox) 2. Remove All Bluetooth Pairings (Checkbox) 3. Choose the Reset User Settings to Default option to put all settings back to factory default. 4. -
Page 130: Chapter 11: Help Menu
11.1 Exit Help To exit Help and return to the main menu, press and hold system key Chapter 12: Contact BAUM Thank you very much for being a VarioUltra customer. While our developers and designers are extremely talented, producing a device like VarioUltra does not happen by accident. - Page 131 BAUM distributor. a. Send email to support@baum.de. BAUM (USA) also maintains an email list that is monitored by BAUM (USA) staff, along with our colleagues from BAUM (UK), and BAUM in Germany. To subscribe, send an email to varioultra-...
-
Page 132: Chapter 13: Acknowledgements
Chapter 13: Acknowledgements We know that not everyone will read this manual, and that only some will read all of it. Whichever reader of manuals you happen to be, please know that development of this manual would not have been possible without the attention to detail and thoughtful perspective of the following individuals. - Page 133 A couple of things to know: 1. Like other BAUM braille devices, VarioUltra supports the use of the display buttons (D buttons) to enter commands. So instead of entering Chord-H for the home screen, you could press D125. 2. Standard commands in the industry allow for Chord commands.
-
Page 134: Varioultra Brailleback Commands
o Toggle Screen Curtain On and Off: Chord B123456 o Pause or continue speech: Chord B1234 o Toggle Speech On and Off: Chord B134 o Scroll Left One Page: Chord B246 o Scroll Right One Page: Chord B135 o Scroll Up One Page: Chord B3456 o Scroll Down One Page: Chord B1456 o Select Text: Chord B356 o Deselect Text: Chord B236... - Page 135 Although neither the VarioUltra Manual nor BrailleBack Help mention any functionality for D1, D3, D4, or D6, they work as alternative navigation commands. See the notes in the Navigation Commands listed below. o Move to previous item: Navistick Left. (Note: D3 also performs this action.) o Move to next item: Navistick Right.
-
Page 136: Varioultra Commands
o Next Link/Control/Form Field: B9+B1+B4. o Previous Link/Control/Form Field, B9+B7+B1+B4. o Next List: B9+B2+B4. o Previous List: B9+B7+B2+B4. Our sincere thanks to VarioUltra user Suzy Triton for her assistance updating the BrailleBack command list section of the VarioUltra User Guide. 14.3 VarioUltra Commands This section contains a summary of default VarioUltra commands. - Page 137 o Move up and down in vertical list or menu: Navistick up or down. o From within a menu, entering a hotkey will open that application or select the menu item: Type hotkey letter, such as ‘w’ for word processor. o Open Word Processor: Long Press S1, or ‘w’...
-
Page 138: Jaws Commands
o Exit Command Menu: Tap S3. o General cancel command: B9B0+B7B8. o Highlight current character: B9+B1B4. o Highlight current word: B9+B2B5. o Highlight current sentence: B9+B3B6. o Highlight current line: B9+B1B2B4B5. o Highlight current paragraph: B9+B1B3B4B6. o Highlight current page: B9+B1B2B3B4B5B6. This assumes there are line and/or page breaks in the document. -
Page 139: Varioultra Commands For Mac Osx
o Enter: B8, or press Navistick. o Braille Shift Tab: D1+D3. o Top of File: D1+D4. o Bottom of File: D3+D6. o Braille Escape: D1+D5. o Braille Describe Font: D1+Cursor Routing. o Route JAWS cursor to PC cursor: D2+D4. o Braille Enter: D2+D6. o Windows Start Menu: D3+D4. - Page 140 Our special thanks to Taylor Jones and Michael Fish from Virginia for their assistance compiling the commands for using VarioUltra with Mac OS and VoiceOver. The Mac OS action is written first, followed by the command that must be entered on VarioUltra. VO is used for VoiceOver. o Move VO cursor left: B9 plus B1, or Navistick left o Activates the back button: B9 plus B12 o Activate the delete key: B9 plus B145...
-
Page 141: Varioultra Menu Structure
Move VO cursor left: B9 plus B1, or Navistick Left o Move VO cursor right: B9 plus B4, or Navistick Right Note: with the introduction of version 1.4, BAUM (USA) plans to offer a hard-copy braille version of the VarioUltra command list. It will be available upon request for registered customers. - Page 142 Braille Presentation _ Left margin: 0 _ Right margin: 0 _ CHK Jump _ CHK Show messages with word wrap _ Dot Strength _ OK _ Cancel Cursor _ Reading mode o Cursor shape o CHK Inverted o CHK Flashing o Flash rate (only visible if Flashing checked o OK o Cancel...
- Page 143 o USA English Contracted Braille 2/5 (DEFAULT) o UEB Grade 1, 3/5 o UEB Grade 2, 4/5 o Computer Braille 5/5 _ Writing Default o USA English Uncontracted Braille 1/5 o USA English Contracted Braille 2/5 (DEFAULT) o UEB Grade 1, 3/5 o UEB Grade 2, 4/5 o Computer Braille 5/5 _ CHK Display text of boxes in reading braille code...
- Page 144 o Turk.b2u 24/26 o Ucranian.b2u 25/26 o US.b2u 26/26 (Default for English language version of VU) _ Output Table – list item: move Navistick left or right to change selection o Arabic.u2b 1/31 o Arabic_Wael.u2b 2/31 o Croation.u2b 3/31 o Danish.u2b 4/31 o Dutch.u2b 5/31 o EurHebArab.u2b 6/31 o Eurobraille Unicode.u2b 7/31...
- Page 145 B9+D1 and B9+D2 to switch between Computer Braille and contracted braille Display settings _ Menu shortcut commands _ CHK Show braille key shortcuts _ CHK Show display key shortcuts _ OK _ Cancel Hotkeys _ Hide 1/3 _ Show 2/3 _ Highlight 3/3 ...
- Page 146 _ OK _ Cancel List Box _ Edit _ Set to defaults _ OK _ Cancel File _ Edit _ Set to defaults _ OK _ Cancel Folder _ Edit _ Set to defaults _ OK _ Cancel o Password options ...
- Page 147 Key Debounce time (ms): 50 CHK Autorepeat for Navistick and Qwerty keyboard _ Initial delay: 1000 _ Repeat rate: 4 CHK Autoscroll On/Off OK Cancel o Date and Time Date: MM/DD/YYYY Time: HH:MM:SS AM/PM ...
- Page 148 Device Emulation _ VarioUltra 1/3 Device Emulation _ VarioConnect 2/3 Device Emulation _ Pronto 3/3 Device Emulation Enable Bluetooth Automatically Vibrate on Device Connected Show a message if a device was connected Paired Devices Key Simulation Properties ...
-
Page 149: Compliances
CHK Reset bookmarks and cursor positions (only visible if bookmarks and cursor positions have been remembered) Cancel Reset and Restart Device Message: “Restarting …” o Help Manual VarioUltra _ Quick Start Guide VarioUltra _ User Guide VarioUltra (RTF) _ User Guide VarioUltra (PDF) ... -
Page 150: Environmentally Friendly Disposal According To Eu-Directive 2012/19/Eu
This device must accept any interference received, including interference’s that may cause undesirable operation 2. Changes or modifications not expressly approved by the party responsible for compliance could void the user’s authority to operate the equipment. NOTE: This equipment has been tested and found to comply with the limits for a Class B digital device, pursuant to Part 15 of the FCC Roles. - Page 154 Hamilton House Email: info@baumuk.com Mabledon Place Web: www.baumuk.com London, WC1H 9BB United Kingdom Please be advised that this user guide may contain errors, and is therefore subject to being changed or updated without prior notice. © 2017 BAUM Retec AG...
Need help?
Do you have a question about the VarioUltra 20 and is the answer not in the manual?
Questions and answers