Table of Contents
Advertisement
Advertisement
Chapters
Table of Contents
Troubleshooting

Related Manuals for Hypertherm ArcGlide Torch Height Control


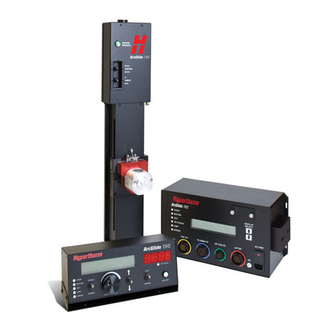
Summary of Contents for Hypertherm ArcGlide Torch Height Control
- Page 1 ArcGlide THC ® Instruction Manual 806450 – Revision 3 – November 2010...
- Page 3 – November, 2010 Hypertherm, Inc. Hanover, NH USA www.hypertherm.com © Copyright 2010 Hypertherm, Inc. All Rights Reserved ArcGlide, EDGE Pro, Hypertherm, HPR and Sensor THC are trademarks of Hypertherm, Inc. and may be registered in the United States and/or other countries...
- Page 4 49 6181 58 2123 (Technical Service) 55 11 2409 2636 Tel 55 11 2408 0462 Fax Hypertherm (S) Pte Ltd. 82 Genting Lane Hypertherm México, S.A. de C.V. Media Centre Avenida Toluca No. 444, Anexo 1, Colonia Olivar de los Padres Annexe Block #A01-01 Singapore 349567, Republic of Singapore Delegación Álvaro Obregón...
- Page 5 CoNteNtS Safety and Compliance ................................ S-1 Product Stewardship .................................... PS-1 Environmental Stewardship ..................................ES-1 Specifications ..................................1-1 Introduction .........................................1-3 Control module ....................................1-3 Lifter assembly ....................................1-3 Human machine interface (HMI) ..............................1-3 Plasma interface ....................................1-4 Industrial Ethernet switch ................................1-4 Specifications ......................................1-5 System .......................................1-5 Control module (090054) ................................1-5 Lifter assembly (090053) ................................1-6 Optional HMI (090055) .................................1-7 Discrete plasma interface (090052) ............................1-8...
- Page 6 tAbLe of CoNteNtS Configuration examples ..................................2-13 Multiple ArcGlide THCs with Hypernet connection to an EDGE Pro CNC and HPR or HPR XD plasma system ......................................2-13 ArcGlide THC with Hypernet connection to an EDGE Pro CNC and discrete connection to an HPR or HPR XD plasma system .................................
- Page 7 tAbLe of CoNteNtS ArcGlide discrete interface signal examples ............................ 2-49 Inputs ....................................... 2-49 Outputs ......................................2-50 CNC discrete I/O ..................................2-51 Plasma discrete I/O ..................................2-53 Optional operator console discrete I/O ..........................2-55 ArcGlide software setup ..................................2-56 ArcGlide axes ....................................2-57 ArcGlide THC ports ..................................
-
Page 8: Table Of Contents
tAbLe of CoNteNtS Maintenance .....................................4-1 Introduction .........................................4-3 Lifter routine maintenance ..................................4-3 Carriage ......................................4-3 Sealing strip ......................................4-4 Cable connections ..................................4-5 System grounding ...................................4-5 Flow of ArcGlide operations ...................................4-6 Common cutting faults ..................................4-10 How to optimize cut quality .................................. 4-11 Plasma set-up tips ..................................4-11 Maximize the life of consumable parts ............................. -
Page 9: A Plasma Arc Can Damage Frozen Pipes
Fasten the accordance with appropriate national and local electrical codes. retaining nut tightly. Input power • T ighten all electrical connections to avoid excessive heating. • B e sure to connect the power cord ground wire to the ground in the disconnect box. Hypertherm Safety and Compliance English... -
Page 10: Electric Shock Can Kill
Leave the workpiece in place or on the workbench with the work cable attached during the cutting process. All Hypertherm plasma systems use high voltage in the • B efore checking, cleaning or changing torch parts, disconnect the cutting process (200 to 400 VDC are common). take the main power or unplug the power supply. -
Page 11: Cutting Can Cause Fire Or Explosion
• L abel and color-code all gas hoses to identify the type of gas in • K eep the protective cap in place over valve except when the cylinder each hose. Consult applicable national and local codes. is in use or connected for use. • N ever allow electrical contact between the plasma arc and a cylinder. • N ever expose cylinders to excessive heat, sparks, slag or open flame. • N ever use a hammer, wrench or other tool to open a stuck cylinder valve. Hypertherm Safety and Compliance English... -
Page 12: A Plasma Arc Can Cause Injury And Burns
A PLASMA ARC CAN CAUSe INJURY AND bURNS Instant-on torches Plasma arc comes on immediately when the torch switch is activated. • D o not hold metal near the cutting path. The plasma arc will cut quickly through gloves and skin. • N ever point the torch toward yourself or others. • K eep away from the torch tip. Hypertherm Safety and Compliance English... -
Page 13: Arc Rays Can Burn Eyes And Skin
Pacemaker and hearing aid wearers should consult a doctor before body. going near any plasma arc cutting and gouging operations. • K eep as far away from the power supply as possible. To reduce magnetic field hazards: • K eep both the work cable and the torch lead to one side, away from your body. Hypertherm Safety and Compliance English... -
Page 14: Noise Can Damage Hearing
Consult your local “Authority Having Jurisdiction” (AHJ) to determine Hypertherm does not, by the publication of any Hypertherm manual, whether any edition of NFPA 68 has been “adopted by reference” in intend to urge action that is not in compliance with all applicable your local building codes. -
Page 15: Additional Safety Information
Avoid direct eye exposure. For your convenience and safety, on Hypertherm products that use a laser, one of the following laser radiation labels has been applied on the product near where the laser beam exits the enclosure. The maximum output (mV), wavelength emitted (nM) and, if appropriate, the pulse duration is also provided. - Page 16 Hypertherm Safety and Compliance English...
-
Page 17: Cutting Equipment
European directives and standards. Only those versions of testing Hypertherm products with a CE Marking located on or near the data plate have been tested for compliance with the European Low Voltage Where required by local national regulations, IEC 60974-4 Directive and the European EMC Directive. - Page 18 IEC standards described here, you are required to consult with an appropriate legal or other advisor familiar with the International Electrotechnical standards, and shall not rely on Hypertherm in any respect regarding the interpretation or application of such standards.
-
Page 19: Environmental Stewardship
Any On January 27, 2003, the European Parliament and the Council of the materials that are cut by the end user are not provided by Hypertherm European Union authorized Directive 2002/96/EC or WEEE (Waste with the product. - Page 20 The MSDS are for chemicals provided with the product and other chemicals used in or on the product. MSDS can be downloaded from the Downloads Library on the Hypertherm web site at https://www. hypertherm.com. On the Search screen, insert MSDS in the document title and click on Search.
-
Page 21: Specifications
Section 1 SPeCIfICAtIoNS In this section Introduction .........................................1-3 Control module ....................................1-3 Lifter assembly ....................................1-3 Human machine interface (HMI) ..............................1-3 Plasma interface ....................................1-4 Industrial Ethernet switch ................................1-4 Specifications ......................................1-5 System .......................................1-5 Control module (090054) ................................1-5 Lifter assembly (090053) ................................1-6 Optional HMI (090055) .................................1-7 Discrete plasma interface (090052) ............................1-8 Ethernet switch ....................................1-9 ArcGlide communication .................................. -
Page 22: Specifications
SPeCIfICAtIoNS Cutting table Workpiece Gantry ArcGlide lifter ArcGlide control module ArcGlide HMI Star ground (optional) Plasma system Rails example of an ArcGlide tHC installed on a cutting table with a plasma system and CNC Note: The ArcGlide control module and Ethernet switch should be located in an electrical cabinet that is electrically grounded and environmentally clean. -
Page 23: Introduction
The HMI includes a liquid crystal display (LCD), operating switches, and a rotary/push knob selector for THC setup and control. This module is optional when used with Hypertherm CNCs that can run Phoenix version 9.5 software (or later). The main functions are: • ... -
Page 24: Plasma Interface
The plasma interface performs two main functions. It provides precise, scaled feedback of the plasma arc voltage to the control module. It also provides a convenient control signal interface to the ArcGlide THC. Hypertherm offers two types of plasma interface: • ... -
Page 25: Specifications
SPeCIfICAtIoNS Specifications System Input power 115 VAC or 230 VAC, 1 Phase, 50/60 Hz Operating temperature -10º C to 40º C (14º F to 104º F) Operating humidity 95% relative humidity Warranty 2 years for electronics and lifter Control module (090054) Regulatory approvals CE, CSA 100 to 120 VAC/200 to 240 VAC, 2.6 A/1.5 A,... -
Page 26: Lifter Assembly (090053)
SPeCIfICAtIoNS Lifter assembly (090053) Regulatory approvals Motor 70 VDC, 3 A Limit switches +24 VDC Motor Permanent magnet Motor drive PWM Servo amplifier Lifter feedback Incremental encoder Lifter limit switches Home switch and lower limit switch Lifter control switches Manual up/down and station disable switches Maximum Z axis speed 1520 cm/minute (600 in/minute) Maximum Z axis stroke... -
Page 27: Optional Hmi (090055)
SPeCIfICAtIoNS optional HMI (090055) Regulatory approvals CE, CSA 100 VAC to 240 VAC, 50/60 Hz, 40 mA to 20 mA, Input power 1 Phase, Hypernet communication Shielded RJ-45 Cat-5e Operating temperature -10º C to 40º C (14º F to 104º F) Operating humidity 95% relative humidity 130.50 mm (5.14”) -
Page 28: Discrete Plasma Interface (090052)
SPeCIfICAtIoNS Discrete plasma interface (090052) This plasma interface is required for configurations that use discrete communication. electrical Input power 24 V (AC or DC) Parallel digital I/O +12 VDC to +24 VDC Serial digital I/O 5 VDC Voltage divider ratio 50:1 Arc voltage 50.80 mm (2.00”) -
Page 29: Ethernet Switch
The Ethernet switch should be located in an electrical cabinet that is electrically grounded and environmentally clean. Hypertherm recommends three Advantech™ unmanaged industrial Ethernet switches, which are also available from Hypertherm. The following page provides part numbers and details about each model. - Page 30 SPeCIfICAtIoNS 5 Ports 8 Ports 16 Ports Hypertherm part number 005657 005655 005656 Advantech part number EKI-2525I-AE EKI-7629C-AE EKI-7626C-AE 37 mm x 140 mm x 95 mm 79 mm x 152 mm x 105 mm 79 mm x 152 mm x 105 mm Width x height x depth (1.46 in x 5.51 in x 3.74 in)
-
Page 31: Arcglide Communication
SPeCIfICAtIoNS ArcGlide communication The diagrams on the next two pages illustrate discrete and Hypernet communication that the ArcGlide THC uses to exchange signals with the CNC and the plasma system. Use the following table to distinguish between discrete and Hypernet communication. Communication style Data architecture Cabling configuration Discrete I/O and serial... -
Page 32: Hypernet Communication Configurations
SPeCIfICAtIoNS Hypernet communication configurations ArcGlide THCs in Hypernet configurations connect to the CNC and plasma system using the Hypernet protocol over shielded, Ethernet Cat-5e cables. Both the CNC and plasma systems in this configuration must have a dedicated, Hypernet- configured, Ethernet port for these connections. In addition, a Hypernet configuration must include an industrial-grade Ethernet switch to route communication from the CNC to the other units in the system. -
Page 33: Discrete Communication Configurations
SPeCIfICAtIoNS Discrete communication configurations In a discrete configuration, signals are routed through the ArcGlide control module. Each unit in the configuration, except the HMI, is connected to the control module with discrete cables. The HMI communicates with the control module using the Hypernet protocol over a shielded Ethernet Cat-5e cable. In a discrete configuration, the HMI must be included. - Page 34 SPeCIfICAtIoNS 1-14 ArcGlide THC Instruction Manual...
- Page 35 Section 2 INSTALLATION In this section: Hardware setup ......................................2-3 Upon receipt .....................................2-3 Claims ........................................2-3 Installation requirements ................................2-3 Placement of system components ..............................2-3 Recommended grounding and shielding practices ...........................2-4 Introduction .........................................2-4 Types of grounding ..................................2-4 Steps to take ....................................2-5 RFI and EMI Grounding .................................2-9 System description for a Hypernet configuration ..........................
- Page 36 Install the lifter ......................................2-25 Connect the Ohmic wire to HPR XD plasma systems ......................2-27 Connect the Ohmic wire to other plasma systems ......................2-28 Ground the lifter .................................... 2-29 Install the control module ..................................2-30 Ground the control module ............................... 2-31 Install the optional HMI ..................................
-
Page 37: Installation
Section 2 INSTALLATION In this section: Hardware setup ......................................2-3 Upon receipt .....................................2-3 Claims ........................................2-3 Installation requirements ................................2-3 Placement of system components ..............................2-3 Recommended grounding and shielding practices ...........................2-4 Introduction .........................................2-4 Types of grounding ..................................2-4 Steps to take ....................................2-5 RFI and EMI Grounding .................................2-9 System description for a Hypernet configuration .......................... - Page 38 Install the lifter ......................................2-25 Connect the Ohmic wire to HPR XD plasma systems ......................2-27 Connect the Ohmic wire to other plasma systems ......................2-28 Ground the lifter .................................... 2-29 Install the control module ..................................2-30 Ground the control module ............................... 2-31 Install the optional HMI ..................................
-
Page 39: Hardware Setup
Claims for damage during shipment – If your unit was damaged during shipment, you must file a claim with the carrier. Hypertherm will furnish you with a copy of the bill of lading upon request. If you need additional assistance, call Customer Service listed in the front of this manual, or your authorized Hypertherm distributor. -
Page 40: Recommended Grounding And Shielding Practices
INStALLAtIoN Recommended grounding and shielding practices DANGeR eLeCtRIC SHoCK CAN KILL Disconnect electrical power before performing any maintenance. All work requiring the removal of the plasma system cover must be performed by a qualified technician. See Section 1 of the plasma system instruction manual for more safety precautions. -
Page 41: Steps To Take
The gantry bus bar should have a separate, heavy 21.2mm (4 AWG) EMI ground cable (Hypertherm part number 047031) to the table bus bar. The EMI ground cables for the torch lifter and the RHF console must each run separately to the table ground bus. - Page 42 13. If the OEM is installing a voltage divider to process arc voltage for use in the control system, the voltage divider board should be mounted as close as possible to the point where the arc voltage is sampled. If the Hypertherm voltage divider board is used, the output signal is isolated from all other circuits.
- Page 43 INStALLAtIoN Plasma system lead Ground rod Gantry example of a good cutting table ground bus. The picture above shows the connection from the gantry ground bus, the connection from the ground rod, the plasma system positive lead, the RHF console*, the CNC enclosure, the torch holder, and the plasma system chassis. * Applies to systems that use a remote high frequency (RHF) console ArcGlide THC Instruction Manual...
- Page 44 INStALLAtIoN Cable to ground bus on the cutting Component table ground cables example of a good gantry ground bus. It is bolted to the gantry, close to the motor. All of the individual ground cables from the components mounted on the gantry go to the bus except those from the RHF console* and the torch holder. A single heavy cable then goes from the gantry ground bus to the ground bus bolted to the table.
-
Page 45: Rfi And Emi Grounding
INStALLAtIoN RfI and eMI Grounding RFI and EMI grounding and shielding is the grounding system that limits the amount of electrical “noise” emitted by the plasma and motor drive systems. It also limits the amount of noise that is received by the CNC and other control and measurement circuits. -
Page 46: System Description For A Hypernet Configuration
INStALLAtIoN System description for a Hypernet configuration The following diagram illustrates the cable and signal connections in a Hypernet communication configuration. Note: Serial communication is transmitted over Hypernet cables. Control module HMI (optional) Industrial ethernet switch Lifter CNC with Hypernet HPR plasma system with Hypernet Key:... -
Page 47: System Description For A Discrete Configuration
INStALLAtIoN System description for a discrete configuration The following diagram illustrates the cable and signal connections in a discrete communication configuration. Note: For information on multidrop configurations, refer to the instruction manual for your plasma system. Control module Lifter Plasma system Customer-supplied operator console (optional) Station on/off/program switch... - Page 48 INStALLAtIoN 2-12 ArcGlide THC Instruction Manual...
-
Page 49: Configuration Examples
Configuration examples Multiple ArcGlide tHCs with Hypernet connection to an eDGe Pro CNC and HPR or HPR XD plasma system ArcGlide control module Rotary address switch, set to 1 Rotary address (optional) HMI switch set to 1 Shielded ethernet cable, up to 61 m (200 ft) Rotary address Interlock Lifter interface cable... -
Page 50: Arcglide Thc With Hypernet Connection To An Edge Pro Cnc And Discrete Connection To An Hpr Or Hpr Xd Plasma System
ArcGlide tHC with Hypernet connection to an eDGe Pro CNC and discrete connection to an HPR or HPR XD plasma system ArcGlide control module eDGe Pro CNC Rotary address switch, set to 1 Shielded ethernet cable, up to 61 m (200 ft) Interlock Lifter interface cable HYPERNET... -
Page 51: Arcglide Thc With Discrete Connection To A Picopath Cnc And Hpr Or Hpr Xd Plasma System
ArcGlide tHC with discrete connection to a Picopath CNC and HPR or HPR XD plasma system ArcGlide Shielded ethernet HMI address cable ArcGlide control module address 1 CNC with Picopath interface and serial communication ArcGlide HMI Axes 3,4 AXES 3,4 address 1 to CNC RS-422 port, terminate as required... -
Page 52: Arcglide Thc With Discrete Connection To A Generic Cnc And Hpr Or Hpr Xd Plasma System
ArcGlide tHC with discrete connection to a generic CNC and HPR or HPR XD plasma system ArcGlide HMI Shielded ethernet cable address 1 ArcGlide control module address 1 Generic CNC with serial communication Axes 1,2 Axes 3,4 to CNC RS-422 port, terminate as required CNC I/o cable Lifter interface cable... -
Page 53: Arcglide Thc With Discrete Connection To A Generic Cnc And Hpr400 Xd
ArcGlide tHC with discrete connection to a generic CNC and HPR400 XD ArcGlide HMI address 1 Shielded ethernet cable ArcGlide control module address 1 Generic CNC with serial communication Axes 3,4 Axes 1,2 CNC I/o cable Lifter interface cable RS-422 serial port oeM-supplied cable to CNC RS-422 port, terminate as required... -
Page 54: Arcglide Plasma Interface With Discrete Connection To An Hpr Or Hpr Xd Plasma System
ArcGlide plasma interface with discrete connection to an HPR or HPR XD plasma system J2-16 NO CONNECT Interface cable 123760 J2-15 Db37 to Db37 J2-16 FUTURE USE NO CONNECT +24V THC FIELD +24V OUT FOR I/O USE IF NEEDED J2-15 FIELD +24V OUT 500MA MAX J2-14 COMMON... -
Page 55: Arcglide Thc With Discrete Communication To Picopath Cnc And Hsd130 Plasma System
ArcGlide tHC with discrete communication to Picopath CNC and HSD130 plasma system ArcGlide HMI address 1 ArcGlide control CNC with Picopath interface module address 1 Axes 3,4 Shielded ethernet cable Axes 1,2 Lifter interface cable CNC I/o cable electrode (-) Plasma interface I/o cable HSD130 Work (+) -
Page 56: Arcglide Thc With Discrete Connections To Picopath Cnc And Max200, Ht2000, Or Ht2000 Lhf Plasma System
ArcGlide tHC with discrete connections to Picopath CNC and MAX200, Ht2000, or Ht2000 LHf plasma system ArcGlide HMI address set to 1 Shielded ethernet cable ArcGlide control module address set to 1 CNC with Picopath interface Lifter interface cable Axes 3,4 Axes 1,2 MAX200 CNC I/o cable... -
Page 57: Arcglide Plasma Interface With Discrete Connection To Max200, Ht2000, Or Ht2000 Lhf Plasma System
ArcGlide plasma interface with discrete connection to MAX200, Ht2000, or Ht2000 LHf plasma system No connection J3-7 START - BLU +24V PLASMA START START for Ht2000 and Ht2000LHf, set RELAY J3-8 START - BLK ArcGlide plasma inputs to dry contact by sliding the switch on the control COMMON module to D. -
Page 58: Arcglide Plasma Interface Connection To Powermax G3 Series Plasma System
ArcGlide plasma interface connection to Powermax G3 series plasma system Rotary address switch, set to 1 Set dry contacts by ArcGlide HMI sliding the switch to D. Rotary address switch, set to 1. ArcGlide control module CNC with Picopath interface CAt- 5e shielded Axes ethernet cable... -
Page 59: Arcglide Cnc Interface With Discrete Connection To A Picopath Cnc
Backshell Ground Ground INTERLOCK INPUT • Start with Hypertherm-supplied ArcGlide CNC interface cable and terminate the Picopath end. • This example uses CNC outputs 10, 11, 12, and inputs 11 and 12. Map I/O in Phoenix software accordingly. 24V COMMON COMMON • ... -
Page 60: Arcglide Plasma Interface Discrete Connection To Any Plasma System
ArcGlide plasma interface discrete connection to any plasma system No connection J2-16 NO CONNECT J2-15 J2-16 FUTURE USE NO CONNECT FIELD +24V OUT +24V THC FOR I/O USE IF NEEDED J2-15 J2 Inputs J3 outputs 500MA MAX FIELD +24V OUT J2-14 COMMON Not connected... -
Page 61: Install The Lifter
INStALLAtIoN Install the lifter 44.45 mm (1.75”) 44.45 mm (1.75”) 44.45 mm (1.75”) 44.45 mm (1.75”) 44.45 mm (1.75”) 44.45 mm (1.75”) 44.45 mm (1.75”) 44.45 mm (1.75”) 44.45 mm (1.75”) 44.45 mm (1.75”) 17.8 mm (.7”) 6.7 mm 114.3 mm (0.266 in.) 4.5”... - Page 62 INStALLAtIoN 1. Position the lifter on the gantry: • Low enough that the torch can reach the workpiece. • High enough that the torch does not touch the table. • T he bottom of the lifter must be within 20.32 cm (8.00”) of the thinnest workpiece. • M ounting holes have the same spacing as the Sensor THC and Command THC lifters. 2. Mount the lifter on the gantry: a. Remove the side panels to expose the mounting screw holes. b.
-
Page 63: Connect The Ohmic Wire To Hpr Xd Plasma Systems
INStALLAtIoN Connect the ohmic wire to HPR XD plasma systems Note Do not splice Ohmic wires. To connect the Ohmic wire from an HPR XD torch to the ArcGlide lifter: 1. Remove the top cover of the motor compartment on the lifter. 2. -
Page 64: Connect The Ohmic Wire To Other Plasma Systems
INStALLAtIoN Connect the ohmic wire to other plasma systems Note Do not splice Ohmic wires. If your plasma system is not an HPR XD system, connect the ArcGlide Ohmic wire to the torch: 1. Unfasten the tywrap around the coiled Ohmic wire and straighten the Ohmic wire. 2. -
Page 65: Ground The Lifter
INStALLAtIoN Ground the lifter The lifter must be grounded correctly to insure accurate initial height sense (IHS) To ground the lifter: 1. Remove the bottom nut and washer of the grounding assembly on the lifter. 2. Fit the ground wire terminal on the ground wire over the grounding post. 3. -
Page 66: Install The Control Module
INStALLAtIoN Install the control module 381.00 mm (15.37”) 168.91 mm (6.65”) 71.63 mm (2.82”) 107.95 mm (4.25”) 25.40 mm 157.23 mm 358.65 mm (1.00”) (6.19”) (14.12”) 166.62 mm Control module front (6.56”) Control module right side 371.35 mm (14.62”) 165.00 mm (6.50”) 127.00 mm (5.00”) -
Page 67: Ground The Control Module
INStALLAtIoN Install the control module where it will be easy to read the display and to reach the controls during installation and troubleshooting. A dry, dust-free wiring cabinet is ideal. Leave clearance space of 20.32 cm (8.00 in) from the front of the control module and 6.35 mm (0.25 in) from the heatsink. -
Page 68: Install The Optional Hmi
INStALLAtIoN Install the optional HMI 130.58 (5.14”) 298.00 mm (11.73”) 101.60 mm (4.00”) 65.00 mm (2.50”) 117.60 mm (4.63”) 20.00 mm (0.79”) 10-32 x 9.52 mm HMI module front (3/8”) Phillips head screw 9.55 mm 19.43 mm (0.38”) (0.77”) HMI right side 5 mm (0.201 in.) diameter 63.50 mm... -
Page 69: Ground The Hmi
INStALLAtIoN To install the HMI: 1. Remove the mounting bracket from the HMI. 2. Place the mounting bracket on the surface where you will mount the HMI and attach the bracket with screws through the holes in the bottom of the bracket. 3. -
Page 70: Connect Hypernet Cables
INStALLAtIoN Connect Hypernet cables A system configuration in which there is more than one Hypernet span requires an industrial-grade Ethernet switch. For more information on the requirements for this switch, see Specifications. In this type of configuration, the Hypernet links are made from the ArcGlide directly to the Ethernet switch and from there to the CNC or plasma system. - Page 71 INStALLAtIoN 2. Use a Hypernet cable to connect the CNC to the Ethernet switch: a. Insert one end of the Hypernet cable into the Hypernet port on the back of an EDGE Pro CNC or to a Hypernet-configured, dedicated Ethernet port on any other CNC.
-
Page 72: Connect Discrete Cables
INStALLAtIoN Connect discrete cables In a discrete configuration, the communication links are made from the control module to the HMI, CNC, plasma system, and optional operator console. In this type of configuration, the control module and HMI communicate over a single span of Hypernet. - Page 73 INStALLAtIoN 3. Connect the plasma system to the control module: a. Insert the end of the plasma interface I/O cable with the blue band into the Plasma I/O connector on the front of the control module. b. Connect the other end of the cable into the plasma I/O connector (J5) on the plasma interface PCB in the plasma Discrete connection to system.
-
Page 74: Cables
INStALLAtIoN Cables Lifter interface cable Red band Connect one end to Connect one end to the the top of the lifter. connector on the control module with the red circle. Part number Length Part number Length 223219 3.0 m (10 ft) 223115 23.0 m (75 ft) 223220... -
Page 75: Hypernet And Hmi Interface Cable
INStALLAtIoN Hypernet and HMI interface cable Connect this end to the Connect this end to ArcGlide HMI. the control module or Ethernet switch. In a Hypernet or mixed configuration where there is more than one Hypernet span, use these cables to connect the components of the system to the Ethernet switch. -
Page 76: Operator Console I/O Cable
INStALLAtIoN operator console I/o cable Green band Add the appropriate Connect this end to connector for your the connector on the console on this end. control module with Contact your console the green circle. supplier for additional information. Part number Length 223216 3.0 m (10 ft) -
Page 77: Arcglide Motor Control Cnc Interlock Kit (228594)
INStALLAtIoN ArcGlide motor control CNC interlock kit (228594) As part of a motion control system, the ArcGlide has an interlock to enable and disable Z-axis motion. This interlock must be wired correctly and according to the appropriate national and local codes to allow the quick stop of motion. The interlock must be closed (pins 25 and 26) to enable the Z-axis motion of the ArcGlide. -
Page 78: Cnc I/O Cable
INStALLAtIoN CNC I/o cable Yellow band Connect this end to the CNC by adding the appropriate connector for your CNC. Connect this end to the connector on the control module with the yellow circle. Part number Length 223213 3.0 m (10 ft) 223214 6.0 m (20 ft) 223122... - Page 79 INStALLAtIoN Pin number* Color Signal name Dry contact or sourced circuit Orange IHS Complete output A normally open Black IHS Complete output B White Retract complete output A normally open Retract complete output B Green Machine Motion output A normally open Machine Motion output B Blue...
-
Page 80: Plasma Interface I/O Cable
INStALLAtIoN Plasma interface I/o cable Connect this end to Blue band the port on the control Connect this end to the module with the blue discrete plasma interface circle. at the plasma system Pins 38 – 50 are not used. Part number Length Part number Length 223227 3.0 m (10 ft) 223103... - Page 81 INStALLAtIoN Note: All ArcGlide CNC inputs can be configured for dry contact closures or 12 – 24 V sourced inputs. Pin number* Color Signal name Dry contact or sourced circuit Corner output A Green Corner output B Pierce output A Blue Pierce output B Hold output A Yellow Hold output B Start output A Brown Start output B Spare output A Orange Spare output B...
-
Page 82: Non-Serial Plasma Interface Cable
INStALLAtIoN Non-serial plasma interface cable This cable connects the ArcGlide plasma interface PCB and control board inside the plasma system. Use this cable only when the CNC provides serial communication directly to the control board. red heatshrink Part number Length Used in 223192 61 cm (2 ft) - Page 83 INStALLAtIoN Pin number Color Signal name Corner output A Green Corner output B Pierce output A Blue Pierce output B Hold output A Yellow Hold output B Start output A Brown Start output B Spare output A Orange Spare output B Remote on output A White Remote on output B...
-
Page 84: Serial Plasma Interface Cable
INStALLAtIoN Serial plasma interface cable This cable connects the ArcGlide plasma interface PCB and control board inside the plasma system. Use this cable when serial communication is supplied to the plasma system by the ArcGlide THC. Part number Length 123760 61.0 cm (2 ft) 123209 1.5 m (5 ft) -
Page 85: Arcglide Discrete Interface Signal Examples
INStALLAtIoN ArcGlide discrete interface signal examples Inputs The figures below show simplified schematics of the ArcGlide THC inputs. The inputs for both CNC and plasma can be configured for dry contacts (no external voltage), the default, or for positive voltage sourced inputs. The inputs have two different modes that are selected using switches behind the calibration and setup door on the top right front of the control module. -
Page 86: Outputs
INStALLAtIoN outputs Most of the ArcGlide THC outputs are relay contacts and can be used for either AC or DC loads. All relay outputs are protected with automatically resetable thermal fuses that protect against currents above 100 mA. The 24 V supply is limited to a total of 2 Amps for all outputs. -
Page 87: Cnc Discrete I/O
INStALLAtIoN CNC discrete I/o All the required discrete interface signals between the control module and the CNC are marked with asterisks (*) in the following table. All other signals are optional for multiple torch operation, improved performance, or reduction in cycle times. - Page 88 INStALLAtIoN CNC I/o Description Spare inputs 1 These are unused inputs to the ArcGlide that are available for future use. and 2 This is an optional signal output from the ArcGlide to the CNC. This signal is used to indicate that the Initial Height Sensing (IHS) is complete and that the torch is in position and ready to fire.
-
Page 89: Plasma Discrete I/O
INStALLAtIoN Plasma discrete I/o All the required discrete interface signals between the control module and the plasma system are marked with asterisks (*) in the following table. All other signals are optional for multiple torch operation, improved performance, or reduction in cycle times. - Page 90 INStALLAtIoN Plasma I/o Description This is an optional output from the plasma system that indicates that the plasma system is not ready to receive a Plasma Start. The plasma system may be busy changing or purging gas flows Not Ready or be involved in some other time consuming operation.
-
Page 91: Optional Operator Console Discrete I/O
INStALLAtIoN optional operator console discrete I/o The following discrete signals are used between the control module and the optional, customized operator console. This connector has a green ring operator Description console I/o When this switch is active, its contact input signal indicates that the cutting station connected to this THC is disabled and will not operate when an active Cut Control command is issued from Manual Disable the CNC. -
Page 92: Arcglide Software Setup
2. On the Machine setup screen,use the scroll box next to ArcGlide THCs Installed to specify the number of ArcGlide THCs you are configuring. 3. Select Yes next to Use Hypertherm Ethernet to configure the system for Hypernet communication. Select No to configure the system for discrete communication. -
Page 93: Arcglide Axes
INStALLAtIoN ArcGlide axes Use the setup parameters on the ArcGlide axes screens to verify that the THC operates successfully for your application. To view ArcGlide axis setup parameters: 1. On the Machine Setup screen, select ArcGlide Axis > ArcGlide. If you have installed more than one ArcGlide axis, the screen displays a numbered soft key for each axis. -
Page 94: Arcglide Thc Ports
ArcGlide tHC ports To assign ports for the ArcGlide THC: 1. Verify that the ArcGlide setup fields are correct in the Machine setup screen. See Select ArcGlide and Hypertherm Ethernet for more detail. 2. Select Setups > Password and enter the Station password. -
Page 95: Arcglide Setup Parameters
IHS operation. For the standard Hypertherm lifter, the value of 5 is appropriate. If this value is set too high, the lifter speed regulation will become unstable and prone to oscillation. If this value is set too low, the speed regulation can become slow and inaccurate. - Page 96 (4X) mode so the number of counts per revolution is equal to the number of pulses per revolution multiplied by four. The value used for the Hypertherm 24.13-cm (9.5-inch) lifter is 20,320 counts per inch. The Hypertherm 24.13-cm (9.5-inch) lifter has an encoder with 1,000 pulses per revolution which produces 4,000 counts per revolution in 4X mode.
- Page 97 IHS operation. With the Hypertherm 24.13-cm (9.5-inch) lifter, the value of 5 is appropriate. It may be necessary to reduce this value if the THC is used with a thin workpiece. Use the Test IHS function to optimize this value.
- Page 98 At the low input line voltage limit, the motor drive is capable of supplying about 45 VDC. The motor used in the Hypertherm 24.13-cm (9.5-inch) lifter will produce full rated torque at about 3,300 RPM driven by this voltage. The Hypertherm 24.13-cm (9.5-inch) lifter has a 5mm pitch ball-screw which requires 25.4 (in/mm) / 5 (mm) = 5.08 revolutions to travel one linear inch.
- Page 99 When to use: During installation. How to use: With the Hypertherm 24.13-cm (9.5-inch) lifter, this value is set to 60 IPM. To avoid poor speed regulation, do not set this value below 10% of Maximum Speed. Example: 60 IPM...
- Page 100 INStALLAtIoN 2-64 ArcGlide THC Instruction Manual...
-
Page 101: Operation
Section 3 oPeRAtIoN In this section: Operator controls .......................................3-2 Control module ....................................3-2 Lifter ........................................3-3 HMI ........................................3-4 Daily operations ......................................3-5 Startup procedure ...................................3-5 Shutdown procedure ..................................3-5 ArcGlide THC operating modes ................................3-6 Manual mode.......................................3-6 Automatic modes .......................................3-6 Arc voltage control (AVC) disabled ............................3-7 Set arc voltage mode ..................................3-7 Sampled arc voltage mode ................................3-7 Operating the HMI .....................................3-9... -
Page 102: Operator Controls
oPeRAtIoN operator controls Control module Item Control Description LEDs These LEDs show the status of system operations. Display window This window displays status, error, and diagnostic messages. Display select Press the UP or DOWN arrow to scroll up or down through the screens in the display window. -
Page 103: Lifter
oPeRAtIoN Lifter Item Control Description Station status light This light is illuminated if the lifter is enabled. The light flashes slowly when there is an error. It flashes rapidly in Align mode. When the light is off, the brake is locked and the lifter is disabled. Station enable/disable Press this switch up to enable the lifter for operation. -
Page 104: Hmi
oPeRAtIoN Item Control Description LEDs These LEDs show the status of system operations. Station enable and Press this switch up to enable the lifter for operation. Press the switch down to disable disable switch the lifter before maintenance, to replace consumables, or to power OFF the lifter. In HPR and HPR XD systems in which Remote On is installed on the plasma interface, this switch can be used to power ON or OFF the plasma system. -
Page 105: Daily Operations
oPeRAtIoN Daily operations Startup procedure The ArcGlide THC receives its power directly from the plasma system. Therefore, to supply power to the ArcGlide, you must connect the power cord and power ON the plasma system. To power ON an entire cutting system, power on the units in the following order: 1. -
Page 106: Arcglide Thc Operating Modes
oPeRAtIoN ArcGlide tHC operating modes The following pages describe the automatic and manual modes for the ArcGlide THC. For more information about operating in these modes, see ArcGlide operating parameters. WARNING the tHC lifter can injure your hand the down-force pressure of the lifter can cause injury. be sure that the system is in a safe condition before accessing the lifter area. -
Page 107: Arc Voltage Control (Avc) Disabled
oPeRAtIoN Arc voltage control (AVC) disabled AVC disabled mode is the simplest automatic operating mode for the ArcGlide THC. The ArcGlide automatically performs IHS and then moves to the pierce height. When the torch is in position, it fires but delays motion until the pierce is complete. - Page 108 oPeRAtIoN Stop time Cut off time Torch height disable Auto kerf detect AVC delay Cut height delay Creep time Pierce delay IHS start height Puddlejump height Pierce height Transfer height Workpiece ArcGlide sequence of operation in automatic mode ArcGlide THC Instruction Manual...
-
Page 109: Operating The Hmi
oPeRAtIoN operating the HMI If your plasma cutting system does not include a CNC connected with Hypernet, the HMI is required so an operator can control the ArcGlide THC. On the HMI, the operator can set parameters, read error and diagnostic messages, and manually control the position of the torch. -
Page 110: Hmi Screen Hierarchy
oPeRAtIoN HMI screen hierarchy Main screen Auto Mode Error message Set volts Cut Height Pierce Height Manual Mode Pierce Delay AVC Enabled Error message Pierce Height Setup screen operation screen Sampled Voltage mode Thick Plate cycle Diagnostics screen Crossover Height Retract Height Preflow and IHS Stall Force... -
Page 111: Main Parameters
oPeRAtIoN Main parameters The Main screen is the primary display that the operator sees during normal operation. Auto IDLE PARK NO ERRORS Set Volts 133.5v Cut Height 0.13in HMI Parameter Value Use the Auto/Manual switch to select automatic or manual operation: • ... -
Page 112: Setup Parameters
oPeRAtIoN Setup parameters The setup parameters screen provides data for setup and maintenance. Operational Data <back> Sampled V Mode Thick Plate Cycle HMI Parameter Value <back> Select this line to return to the Main screen. When sampled voltage mode is ON, the arc voltage is sampled at the beginning of the cut and this value is averaged with previous samples to provide the set-point for the Sampled V Mode AVC during the remainder of the cut. - Page 113 oPeRAtIoN HMI Parameter Value Ohmic Plate Sense When this parameter is ON, the Ohmic contact sense is used. When this parameter is ON, automatic kerf detection is active. When a kerf crossing Kerf Detect is detected, AVC is disabled and the torch position is fixed for a short period to avoid diving into the workpiece.
-
Page 114: Diagnostics Screen
oPeRAtIoN Diagnostics screen The Diagnostics display on the HMI provides information about errors that the HMI receives from the control module, the control state of the cutting system, as well as whether Hypernet is enabled and diagnostics for the switches on the front panel of the HMI. - Page 115 oPeRAtIoN HMI Parameter Value Normal errors (continued) ERR 7 FAILED MOVE TO IHS START The lifter failed to reach IHS crossover height. ERR 8 FAILED TO CONTACT PLATE The torch failed to contact the workpiece within 60 seconds. ERR 9 FAILED TO CLEAR PLATE The torch failed to retract and break Ohmic contact within 10 seconds.
- Page 116 oPeRAtIoN HMI Parameter Value Critical errors ERR 23 INPUT VOLTAGE LOW The incoming AC line voltage is more than 20% low. ERR 24 INPUT VOLTAGE HIGH The incoming AC line voltage is more than 15% high. ERR 25 OVER TEMPERATURE The maximum temperature for the processor has exceeded the maximum value.
- Page 117 oPeRAtIoN HMI Parameter Value Control State One of the following ArcGlide control states: IDLE PARK I n this state, the plasma system is OFF, the servo motor has no power, and the lifter brake is ON. This is the low power standby state. The lifter waits for the Cycle Start input signal and enters the IHS Slow Approach state.
- Page 118 oPeRAtIoN HMI Parameter Value Control State IHS SLOW APPROACH The lifter continues to move down at IHS Speed, using Stall Limit, until the lifter receives the Tip Sense input signal or stalls. When the (continued) THC receives the Tip Sense input signal or detects a stall, it enters the Workpiece Contact state.
- Page 119 oPeRAtIoN HMI Parameter Value Control State SAMPLE The lifter receives a new Arc Voltage sample for this cut. It modifies the operating Arc Voltage Control set point and enters the Cutting state. (continued) CUTTING If Auto Mode is active and the Corner Hold input signal from the CNC is not active, the lifter controls the torch height using arc voltage feedback.
-
Page 120: Installation Screen
oPeRAtIoN Installation screen The Installation data display provides information on ArcGlide hardware and software settings that are used by the control module. Installation Data <back> Slide Length Max Servo Current 133.5v HMI Parameter Value Slide Length This value is the length of the lifter’s usable travel. Max Servo Current This is the maximum continuous motor current for which the lifter motor is rated. - Page 121 oPeRAtIoN HMI Parameter Value Relative Speed Gain This gain value regulates the speed of the lifter. Relative Position Gain This gain is used for closed loop positioning. Relative ARC Volts Gain This gain is used when the THC is operating closed-loop arc voltage control. Arc Voltage Calibration This value is used to finely calibrate the measured arc voltage accuracy Display Units...
-
Page 122: Manual Mode
oPeRAtIoN Manual Mode In manual mode, only errors and pierce delay information is displayed. Manual NO ERRORS Pierce Delay 1.00s <Setup Parameters> HMI Parameter Value Error The most recent error condition. Pierce Delay 0 to 10 seconds with 0.01 second resolution <Setup Parameters>... -
Page 123: Lifter Disabled Mode
oPeRAtIoN Lifter Disabled Mode When the lifter is disabled, there are only two parameters that display. Disabled Arc Starts Arc Minutes HMI Parameter Value The number of times the arc has started since the last time consumables were Arc Starts changed and the counter was restated. -
Page 124: Arcglide Operating Parameters
The parameters shown in the following illustration of the Process screen in the Phoenix software determine the operation of an ArcGlide THC that is configured with a Hypertherm CNC. Many of these parameters interact with other parameters on this screen or on other screens in the software. The tables following this illustration describes each parameter and how to set it for the results you want. - Page 125 oPeRAtIoN Note: Under normal circumstances, the parameters with an asterisk (*) and values that appear in bold in the following tables are the only selections that should be necessary. Phoenix parameter Description Height Control* Description: In Manual Mode, the torch only moves in response to manual UP/DOWN commands from the Raise and Lower softkeys in Phoenix software on the CNC, an operator console, the HMI, or the lifter, no other torch height motion occurs.
- Page 126 oPeRAtIoN Phoenix parameter Description Set Arc Current Description: This is the value for the plasma arc current. Enter the number of amps for the material that has been selected. This value originates in the plasma process cut charts and can be temporarily fine-tuned on this screen.
- Page 127 oPeRAtIoN Phoenix parameter Description Nozzle Contact IHS Description: To set this parameter, the Height Control must be in Automatic Mode. When Nozzle Contact IHS is ON, the THC uses electrical Ohmic contact to sense the workpiece. This setting is normally disabled on water tables or painted workpiece because of the unreliability of the electrical contact.
- Page 128 oPeRAtIoN Parameters group box The mode you select for the Parameter Mode parameter determines how the values for the parameters in the following table are set. Under normal circumstances, the only value you must select is Default for Parameter Mode. Phoenix parameter Description Parameter Mode*...
- Page 129 oPeRAtIoN Phoenix parameter Description Retry on transfer fail Description: This value determines the number of times that the CNC will attempt to re-start the plasma after failing to transfer. The CNC removes and reapplies the start signal on each re-start attempt.
- Page 130 oPeRAtIoN Phoenix parameter Description AVC Delay Description: This value sets the number of seconds that are required for the cutting machine and plasma torch to achieve steady-state operation at the cut height. After this delay, the AVC is enabled for the remainder of the cut. If the THC is in Sampled Voltage mode, the arc voltage sample is taken after this delay.
-
Page 131: Maintenance
Section 4 MAINteNANCe In this section: Introduction .........................................4-3 Lifter routine maintenance ..................................4-3 Carriage ......................................4-3 Sealing strip ......................................4-4 Cable connections ..................................4-5 System grounding ...................................4-5 Flow of ArcGlide operations ...................................4-6 Common cutting faults ..................................4-10 How to optimize cut quality .................................. 4-11 Plasma set-up tips .................................. - Page 132 MAINteNANCe ArcGlide PCBs ......................................4-43 HMI processor (228581) ................................4-43 HMI 7-segment display interface (228582) .......................... 4-45 THC controller interface (228577) ............................4-46 THC processor (228578) ................................4-51 Discrete plasma interface (228576) ............................4-55 Hypernet plasma interface (141161) ............................4-59 Lifter interface (228580) ................................
-
Page 133: Lifter Routine Maintenance
MAINteNANCe Introduction Hypertherm assumes that the service personnel who perform the troubleshooting testing are high-level electronic service technicians who have worked with high-voltage electro-mechanical systems. Knowledge of final isolation troubleshooting techniques is also assumed. In addition to being technically qualified, maintenance personnel must perform all testing with safety in mind. -
Page 134: Sealing Strip
MAINteNANCe Sealing strip The sealing strip behind the carriage must be oiled at every lubrication interval. To oil the sealing strip: 1. Remove the front panel to access the carriage and sealing strip. 2. Apply a few drops of oil (Shell Tellus 100 heavy hydraulic fluid is recommended) to the sealing strip. 3. -
Page 135: Cable Connections
MAINteNANCe Cable connections All cables should be checked regularly for chafing or unusual wear. If the outside insulation has been cut or otherwise damaged, replace the cable. In particular, check the Ohmic contact wire. WARNING Do not disconnect cables when the system power is oN. System grounding Verify that all components of the system are individually grounded to a driven earth ground, as described in Recommended grounding and shielding practices in the Installation section of this manual. -
Page 136: Flow Of Arcglide Operations
MAINteNANCe flow of ArcGlide operations The flowchart on the following pages illustrate the sequence of states in the operation of an ArcGlide THC. Power ON reset Initialize uP clock, on-chip I/O, expansion I/O. Setups were saved the last time the THC shut down. Read stored setup parameters from Flash. - Page 137 MAINteNANCe Main loop The Spare input activates when the test fixture cables are connected. Spare2_in? Self-diagnostics Data is automatically copied into the operating parameters Write expansion outputs. and the status is automatically transmitted. Service active Hypernet links. I/O is updated and control loops execute at 10 mSec intervals.
- Page 138 MAINteNANCe Operating states CNC Hypernet link active? Use HMI operating parameters. Use CNC operating parameters. Use CNC discrete wire operating signals. Use Hypernet CNC operating signals. Station disabled. Critical error? Plasma remote power OFF. Plasma remote power ON. Plasma system Hypernet link active? Use discrete wire plasma system operating signals and arc voltage.
- Page 139 MAINteNANCe Enter operating state. First time in this state? Update motor drive and lifter brake outputs. Update CNC interface and plasma supply outputs, front panel status LEDS. Set desired torch position. Reset state timer. Not the first time in this state. Error = this error.
-
Page 140: Common Cutting Faults
MAINteNANCe Common cutting faults fault Possible causes 1. Work cable connection on the cutting table is not making good contact. Failure to transfer. 2. Torch-to-work distance is too high. 3. The surface of the workpiece is rusty, oiled, or painted. 1. -
Page 141: How To Optimize Cut Quality
Follow carefully each step in the operating cycle for each operating mode, described earlier in this section. Purge the gas lines before cutting. Maximize the life of consumable parts Hypertherm’s LongLife process automatically “ramps up” the gas and current flows at the start and ramps them down ®... -
Page 142: Additional Factors Of Cut Quality
MAINteNANCe Additional factors of cut quality Cut angle A cut part whose 4 sides average less than 4° of cut angle is considered acceptable. Note: The squarest cut angle will be on the right side with respect to the forward motion of the torch. Note: To determine whether a cut-angle problem is being caused by the plasma system or the drive system, make a test cut and measure the angle of each side. -
Page 143: Additional Improvements
• D ifferent material chemistries can have an adverse effect on the pierce capability of the system. In particular, high- strength steel and steel with a high manganese or silicon content can reduce the maximum pierce capability. Hypertherm calculates mild steel pierce parameters with certified A-36 plate. • I f the system has difficulty piercing a specific material or thickness, increasing the shield preflow pressure can help in some cases. This may reduce starting reliability. -
Page 144: Update Arcglide Software
Download from a laptop If your configuration does not include an EDGE Pro CNC or the correct interface with the ArcGlide, you can download the AGUpdater.zip file from Hypertherm. This file contains the program and script files necessary to update the ArcGlide components. -
Page 145: Operator Tests
The IHS test checks that the IHS process operates correctly. Perform this test when lifter parameter values need to be adjusted or verified. To test IHS: • O n the front of the HMI, press the IHS Test button. Each successive press of the button moves the torch between the transfer and retract heights. • O n a Hypertherm CNC, the Test IHS soft key on the Process screen performs the same function. ArcGlide THC Instruction Manual 4-15... -
Page 146: Problems And Solutions
MAINteNANCe Problems and solutions The following table lists problems and provides solutions for each problem. Problem Solution 1. Check Hypernet cables from the ArcGlide. 2. Verify that the Ethernet switch is powered ON. Unable to establish communication with the 3. Verify that the plasma control board is not receiving dual serial signals. CNC or plasma system. - Page 147 MAINteNANCe Problem Solution 1. Check that THC is in Automatic Mode. If not, select Automatic Mode. 2. Check that Nozzle Ohmic Contact is ON (enabled). 3. Check that nozzle ohmic contact wire is not disconnected. Ensure that the wire is connected at both ends. 4.
- Page 148 MAINteNANCe Problem Solution 1. Check Pierce Delay; the delay is set too long so that the torch dwells Arc extinguishes immediately after transfer in the piercing position too long before machine motion. or creates an excessively large pierce hole. 2. Check that Machine Motion Out is active after Pierce Delay ends. The laser pointer is not illuminated The station is not enabled.
-
Page 149: Troubleshooting Routines
EDGE Pro Edge Pro (1396 setup screen) is set to None (use the Should be set to setup password.) NONE Contact Hypertherm Contact HT Tech Support Technical Support. DONE Done ArcGlide THC Instruction Manual 4-19... -
Page 150: Error Message Troubleshooting
On the ArcGlide THC, error messages are displayed on both the HMI and the control module. In addition, on Hypertherm CNCs, a system error message window can be configured in the Watch Window. This window displays the last 5 system error messages. See the System Setup chapter in the Phoenix Software Operator’s Manual. - Page 151 If the lifter is not a Hypertherm lifter and the installation is new, change the encoder wiring to the control module. If this is an existing system that was previously working, check the cable connections to the motor encoder.
- Page 152 MAINteNANCe error Description Possible Causes Corrective action The nozzle contact input is The nozzle contact input is Go into the diagnostic screen in the EDGE Pro or sensed while the lifter is in active while the upper limit HMI or control module and verify that the Upper Limit the home position.
- Page 153 MAINteNANCe error Description Possible Causes Corrective action The upper limit (or home) The upper limit switch is Verify that the lifter has adequate range of motion switch was activated while faulty. while cutting. The torch may need to be raised within cutting.
- Page 154 MAINteNANCe error Description Possible Causes Corrective action During auto operation or The IHS Start Height may Check the value of IHS Start Height. This value IHS test, the lifter failed to be programmed too low. should be 0.75 inches or more. Lower values will reach the IHS Start height.
- Page 155 The lifter cable could be faulty or there while retracting. could be a faulty input to the control module. Call Hypertherm Technical Service for further assistance. If the input shut off, disconnect the Ohmic wire from the back of the torch and reconnect it to the lifter PCB.
- Page 156 If this is a new installation, check the Gain settings Possible problem with the for the lifter. If it is a Hypertherm lifter, refer to the encoder. instruction manual for proper settings. Possible damaged lifter In the diagnostic screen of the EDGE Pro or control...
- Page 157 MAINteNANCe error Description Possible Causes Corrective action The ArcGlide did not In a Hypernet system, Check the transfer time setting in the CNC (Hypernet receive the Transfer signal check the Transfer Time only). The transfer time needs to be long enough to from the plasma system setting in the Plasma allow the plasma system to purge gases.
- Page 158 MAINteNANCe error Description Possible Causes Corrective action The Transfer signal was This error occurs when Check the plasma system for errors. lost before the Arc Glide cutting scrap and running removed the Plasma Start the torch off the edge of Check the transfer height (or pierce height) setting in signal from the plasma the workpiece.
- Page 159 MAINteNANCe error Description Possible Causes Corrective action The torch failed to retract The value of the Pierce Verify that the pierce height is set correctly in the to the pierce height after Height parameter is set too CNC or in the control module. the arc transfer and after a high.
- Page 160 MAINteNANCe error Description Possible Causes Corrective action The Transfer Signal A faulty or loose Check for loose or damaged cables between the from the plasma system connection to the plasma control module, the plasma interface board, and the remained active at the end system transfer (or motion control board of the plasma system.
- Page 161 MAINteNANCe error Description Possible Causes Corrective action With sampled arc voltage The IHS at the next Check whether the consumable life counter on the On, the sample arc voltage pierce point could not be ArcGlide was reset after changing the consumables. from cut to cut was out performed accurately.
- Page 162 MAINteNANCe error Description Possible Causes Corrective action The nozzle contact input The Arc Voltage set point Check the arc voltage set point and compare the was turning on and is set too low. value to the plasma cut chart. off numerous times in succession or was on Sample Arc Voltage is If sample arc voltage is on, verify the torch height by...
- Page 163 MAINteNANCe error Description Possible Causes Corrective action Nozzle Contact Sense The stall force is set to low Perform a test IHS and verify that the torch is input did not turn on while and the torch stalled out reaching the plate. If the torch is firing in the air: performing an HIS.
- Page 164 Verify that other heat dissipating components are not mounted too close to other mounted too close to the control module. heat dissipating devices or components. If this error occurs repeatedly, contact Hypertherm Technical Service. Internal failure with the control module. 4-34...
- Page 165 Verify that other heat dissipating components are not mounted too close to other mounted too close to the control module heat dissipating devices or components. If this error occurs repeatedly, contact Hypertherm Technical Service. Internal failure with the control module. The interlock input Is...
- Page 166 MAINteNANCe error Description Possible Causes Corrective action The magnetic torch break The torch made excessive Re-install the magnetic torch breakaway. away has separated. plate contact or made contact to some portion of Verify that the torch is not diving into the plate while the cutting table.
- Page 167 MAINteNANCe error Description Possible Causes Corrective action The lifter calibration The lifter failed to home Verify that the upper limit switch is functioning process failed after the properly. properly. lifter was homed. The gains settings are not Re-home the lifter and verify that the lifter is homing factory settings.
- Page 168 MAINteNANCe error Description Possible Causes Corrective action The CNC lost the The CNC is not powered Verify that the CNC has properly booted up. Hypernet connection after and the control module is it had been established. powered. Verify that the Hypernet setting in the CNC is set to ON and that all ArcGlide setups screens are properly The Hypernet setting in the configured.
- Page 169 MAINteNANCe error Description Possible Causes Corrective action The internal position There is electrical noise on Check the encoder counts in the control module counter has counted the lifter cable or the cable or CNC and verify that the settings are the default beyond its maximum value.
- Page 170 MAINteNANCe error Description Possible Causes Corrective action The number of Hypernet The Hypernet components Check the unit addresses on all the Hypernet devices packets that dropped out are not addressed and verify that all units on each station have the same exceeded the maximum properly.
-
Page 171: Printed Circuit Board (Pcb) Block Diagrams
MAINteNANCe Printed circuit board (PCb) block diagrams Control module Lifter tHC interface PCb Lifter interface PCb Lifter interface Lifter interface Op-con interface Motor brake encoder interface Plasma interface Upper/lower limit switches Tip touch Board interconnect Station enable switch Manual up/down switch Breakaway switch Board interconnect Laser pointer... - Page 172 MAINteNANCe Lifter Lifter interface PCb Motor brake encoder interface Upper/lower limit switches Tip touch Station enable switch Manual up/down switch Control module Breakaway switch tHC interface PCb Laser pointer Station active light CNC interface CNC I/O Lifter interface Lifter interface Op-con interface Discrete plasma interface Board interconnect...
-
Page 173: Arcglide Pcbs
MAINteNANCe ArcGlide PCbs HMI processor (228581) Default settings = 1 J3 Display ribbon cable tP10 J4 LCD character SW6 Unit address switch, module default setting = 1 J7 RJ45 tP10 J8 front panel LeDs UNIT ADDRESS J12 Power Display input backlight tP37 J11 Rotary encoder input... - Page 174 MAINteNANCe J4 LCD Character module J8 front panel LeDs Pin number Signal Pin number Signal +LED V +LED V Start LED Motion LED Limit LED AVC LED Error LED Contact LED Spare1 LED E1 (lines 1 and 2) Spare1 LED J9 Display backlight Pin number Signal...
-
Page 175: Hmi 7-Segment Display Interface (228582)
MAINteNANCe HMI 7-segment display interface (228582) J1 Display ribbon cable connector HMI 7-segment display interface PCb J3 Display ribbon cable Pin number Signal Pin number Signal +LED V Hundreds decimal point +LED V Hundreds G Ones decimal point Hundreds F Ones G Hundreds E Ones F... -
Page 176: Thc Controller Interface (228577)
MAINteNANCe tHC controller interface (228577) J3 to transformer Motor drive J1 board interconnects PCb back view CNC I/o Plasma I/o op-Con I/o Lifter I/o (male) (female) (female) (male) PCb front view tHC controller interface PCb J3 to transformer Pin number Signal 115 V input 1 115 V input 2... - Page 177 MAINteNANCe J1 board interconnects Pin numbers Signal Pin numbers Signal CNC Cycle Start input CNC IHS Complete output CNC IHS Disable input CNC Retract Complete output CNC AVC Disable input CNC Machine Motion output CNC IHS Sync input CNC Error output +5 VDC Ground CNC Spare 1 input...
- Page 178 MAINteNANCe J1 board interconnects (continued) Pin numbers Signal Pin numbers Signal Lifter Manual Down input Op-Con enabled output Lifter Change Consumable Op-Con error output Encoder A Op-Con spare output Encoder B Not connected +5 VDC Ground Op-Con Disable input 1/50 Arc V – Op-Con Select input 1/50 Arc V+ Op-Con Torch Up input...
- Page 179 MAINteNANCe J4 Lifter interface Pin number Signal Pin number Signal Motor + Encoder input A – Motor – Encoder input A + Brake – Common – Common – Change consumables switch + Power +24 VDC Lifter down switch + Ohmic contact sense common Lifter up switch + Ohmic contact sense Breakaway switch + Ohmic contact sense bias +12 VDC...
- Page 180 MAINteNANCe J6 CNC interface Pin number Signal Pin number Signal Cycle Start input + THC Error output B Cycle Start input – Torch Breakaway output A Low gain input + Torch Breakaway output B Low gain input – CNC Spare output A AVC Disable input + CNC Spare output B AVC Disable input –...
-
Page 181: Thc Processor (228578)
MAINteNANCe tHC processor (228578) Dry or sourced input switches, default setting = D (dry) front panel LCD character LeDs module J3 board interconnects SW3 Unit address switch, UNIT ADDRESS default setting = 1 LCD b/L Hypernet LCD b/L tHC processor PCb Note: In a Hypernet configuration, the Unit address switch (SW3) on the THC processor PCB must have the same address as the Unit address switch on the HMI processor and the Hypernet interface PCBs. - Page 182 MAINteNANCe J4 Display backlight J8 Hypernet Pin number Signal Pin number Signal +5 V TX + (transmit data +) Ground TX – (transmit data –) Not connected RX + (receive data +) Not connected Not connected J5 LCD Character module RX – (receive data –) Pin number Signal Not connected Not connected J10 Db9 RA female...
- Page 183 MAINteNANCe J3 board interconnects Pin numbers Signal Pin numbers Signal CNC Cycle Start input CNC IHS Complete output CNC IHS Disable input CNC Retract Complete output CNC AVC Disable input CNC Machine Motion output CNC IHS Sync input CNC Error output +5 VDC Ground CNC Spare 1 input...
- Page 184 MAINteNANCe J3 board interconnects (continued) Pin numbers Signal Pin numbers Signal Lifter Manual Down input Op-Con Enabled output Lifter Change Consumable Op-Con Error output Encoder A Op-Con Spare output Encoder B Not connected +5 VDC Ground Op-Con Disable input 1/50 Arc V – Op-Con Select input 1/50 Arc V+ Op-Con Torch Up input...
-
Page 185: Discrete Plasma Interface (228576)
MAINteNANCe Discrete plasma interface (228576) J5 tHC discrete cable J1 HPR Interface electrode – Contact closure Contact closure Work + inputs to tHC outputs from tHC voltage Discrete plasma interface PCb LeDs* Number Color Signal Green Plasma on Green Plasma start Green Arc transfer Green... - Page 186 MAINteNANCe J1 Plasma interface Pin number Signal (+24 V or contact closure inputs to the tHC HPR RX – from a generic plasma system) HPR TX – Pin number Signal RS422 Com Motion Ground Common Ground Error Ground Common Ground Ramp error Not connected Common Not connected Not ready...
- Page 187 MAINteNANCe (Relay contact outputs from the tHC to a generic plasma system) Pin number Signal Corner A Corner B Pierce A Pierce B Hold A Hold B Plasma start A Plasma start B Spare THC out A Spare THC out B Remote on A Remote on B Common...
- Page 188 MAINteNANCe J5 Plasma I/o cable (blue) Pin number Signal RS422 RX – RS422 RX + RS422 TX – RS422 TX + RS422 common Motion input + Input common – Error input + Input common – Rampdown error input + Input common – Not ready input + Input common – Spare input + Input common –...
-
Page 189: Hypernet Plasma Interface (141161)
MAINteNANCe Hypernet plasma interface (141161) Connect the arc voltage terminals to the I/o board in the HPR plasma system. Connect pins 1 and 2 to locations 1 and 3 on terminal block 2 in the plasma supply. Remote oN/off out Unit address 24VAC input... - Page 190 MAINteNANCe J4 Arc voltage* J5 CNC interface Pin number Signal Pin number Signal Work + HPR RX – Electrode – HPR TX – RS422 Common * The arc voltage terminals on connector J4 must be Motion connected to the I/O board in the plasma supply. Error Rampdown error HPR not ready...
-
Page 191: Lifter Interface (228580)
MAINteNANCe Lifter interface (228580) Lifter interface top surface of interface J8 enable/disable switch Up/down switch J7 Laser pointer J4 breakaway Motor brake encoder J5 torch tip J3 Upper limit switch J1 Lower limit switch J2 LeD bottom surface of interface Lifter interface PCb J1 Upper limit switch J3 Lower limit switch... - Page 192 MAINteNANCe J5 torch tip J9 Up/down switch Pin number Signal Pin number Signal Ohmic torch tip Up switch Ohmic torch tip Common Down switch Not connected J6 Motor brake encoder J10 Lifter I/o cable (red) Pin number Signal Pin number Signal Motor + Motor +...
-
Page 193: Parts List
Section 5 PARtS LISt In this section: Lifter parts ........................................5-2 THC controller parts....................................5-4 HMI parts ........................................5-5 Plasma interface PCB ....................................5-6 ArcGlide THC Instruction Manual... -
Page 194: Lifter Parts
PARtS Lifter parts Item Part number Description Quantity 228588 Kit: Station Enable 5 V LED 228585 Kit: Enable/disable switch 228584 Kit: Torch up/down switch 228592 Kit: Laser pointer diode 228608 Kit: Breakaway cable 228593 Kit: 11.34 kg (25 lb) Magnetic breakaway 228607 Kit: 4.54 kg (10 lb) Magnetic breakaway 228597 Kit: Pneumatic breakaway 128277 Kit: Lifter torch mounting bracket, 35 mm (1-3/8 in) 128278... - Page 195 PARtS Item Part number Description Quantity 228580 Kit: Lifter interface PCB 228591 Kit: Lifter slide 228587 Kit: Upper limit proximity switch 228586 Kit: Lower limit proximity switch ArcGlide THC Instruction Manual...
-
Page 196: Thc Controller Parts
PARtS tHC controller parts Item Part number Description Quantity 228589 Kit: LCD display 228578 Kit: THC Processor PCB 228577 Kit: THC Control interface PCB 228590 Kit: 120 VAC, 5 V, 5 amp, 25 W power source 228579 Kit: 230 V Surge PCB ArcGlide THC Instruction Manual... -
Page 197: Hmi Parts
PARtS HMI parts Item Part number Description Quantity 228589 Kit: LCD display 228583 Kit: Momentary pushbutton switch 228590 Kit: 120 VAC, 5 V, 5 amp, 25 W power source 228579 Kit: 230 V Surge PCB 228581 Kit: HMI processor PCB 228582 Kit: HMI 7-segment display PCB ArcGlide THC Instruction Manual... -
Page 198: Plasma Interface Pcb
PARtS Plasma interface PCb Item Part number Description Quantity 228576 Kit: Plasma interface PCB ArcGlide THC Instruction Manual... -
Page 199: Wiring Diagrams
Section 6 WIRING DIAGRAMS Introduction This section contains the wiring diagrams for the system. When tracing a signal path or ref er enc ing with the Parts List or troubleshooting sections, please be aware of the following format to assist you in un d er s tand i ng the wiring diagrams’ organization: • S heet numbers are located in the lower right-hand corner. • ... - Page 200 WIRING DIAGRAMS ArcGlide THC Instruction Manual...
- Page 201 WIRING DIAGRAMS ArcGlide THC Instruction Manual...
- Page 202 WIRING DIAGRAMS ArcGlide THC Instruction Manual...
- Page 203 WIRING DIAGRAMS Black 229280 Brown 229281 Blue UPPER SWITCH UPPER SWITCH 229282 Black Brown +12 Vdc Black Upper Limit Sw Blue Common Common Brown +5 Vdc Note: Torch +12 Vdc tip wire can Brown Black Lower Limit Sw Blue LOWER SWITCH LOWER SWITCH inserted into Blue...
- Page 204 WIRING DIAGRAMS 100-pin Connector to Motor Controller Processor PCB 223007 LIFTER INTERFACE 223006 OP-CON INTERFACE ArcGlide Motor Controller 223004 Interface PCB PLASMA INTERFACE 141088 223005 CNC INTERFACE Motor + RS422 Rx- Cycle Start Input (+) Black Black Black Motor - RS422 Rx+ Cycle Start Input (-) Black...
- Page 205 WIRING DIAGRAMS 100-pin Connector to Motor Controller Interface PCB Black ArcGlide Motor Controller Processor PCB LCD BACKLIGHT LCD BACKLIGHT 141091 HYPERNET OPTIONS RESERVED SWITCH RESERVED POWER POWER 123998 ETHERNET CABLE OVERLAY FLEX CIRCUIT FRONT PANEL WITH OVERLAY 101037 223003 +5 VDC POWER RIBBON CABLE 123999 ATTACHED TWISTED PAIR LCD Display...
- Page 206 WIRING DIAGRAMS RIBBON CABLE 223000 RESERVED OPTIONS RESERVED SWITCH RESERVED 7 SEGMENT DISPLAY RESERVED ArcGlide 7 Segment PCB 141085 ArcGlide HMI PCB 141082 ETHERNET UNIT ADDRESS HYPERNET IHS SWITCH IHS SWITCH LCD BACKLIGHT LCD BACKLIGHT ROTARY INPUT POWER POWER IHS PUSHBUTTON ROTARY ENCODER 229241 005630...
Need help?
Do you have a question about the ArcGlide Torch Height Control and is the answer not in the manual?
Questions and answers