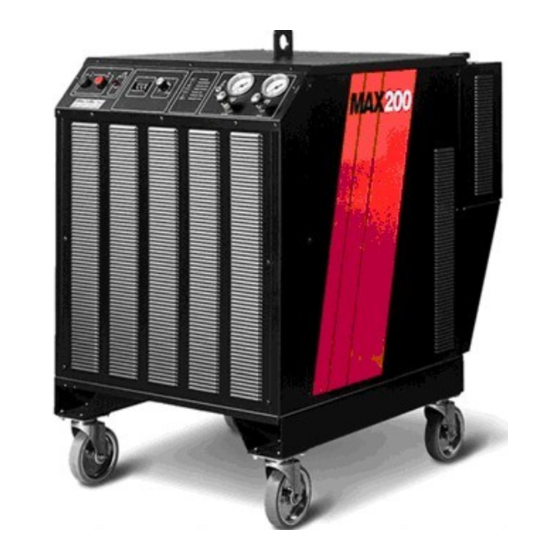
Hypertherm MAX200 Instruction Manual
Hand torch plasma arc cutting system
Hide thumbs
Also See for MAX200:
- Instruction manual (187 pages) ,
- Product configuration manual (14 pages) ,
- Field service bulletin (10 pages)

Related Manuals for Hypertherm MAX200


Summary of Contents for Hypertherm MAX200
- Page 1 MAX200 ® Hand Torch Plasma Arc Cutting System Instruction Manual 800870 – Revision 17 EN50199 EN60974-1...
- Page 2 IM087 Revision 16 6/20/04 Changed Page Description 6.20 Added 128904 torch handle replacement kit and rearranged parts list. 6.21 Added numbers to illustrate what parts are included in kit 128904. 6.22 Added 128905 torch handle replacement kit and rearranged parts list. 6.23 Added numbers to illustrate what parts are included in kit 128905.
- Page 3 5.24 Added 120667 electrode 5.25 Revised figure 5- 12 5.26 Added 120667 electrode & revised figure 5-13 5.27- 32 Added MAX200 Rev 1 hand torch and leads Spelling correction d.2-4 Added 120667 electrode IM87 Revision 12 8/98 Changed Page Description...
- Page 4 IM87 Rev 11 5/98 Changed Page Description 4-18 Added new Electrode 4-20 Added new Electrode 4-23 Added new Electrode 5-18 Added new Electrode 5-19 Added new Electrode 5-21 Revised Kit contents Added new Electrode Added new Electrode and Revised Kit contents...
- Page 5 Changed troubleshooting (second problem) 6.04 Removed word "red" in second & third problem descriptions 6.05 Removed word "red" in first problem description e.03 Changed reference from 220-380-415V CE to 400V CE 8 sheets MAx200 wiring diagram format changes 013-2-179 Rev K...
- Page 6 (P/N 800870) Revision 17 – November 2013 Hypertherm, Inc. Hanover, NH USA www.hypertherm.com © Copyright 2013 Hypertherm, Inc. All Rights Reserved Hypertherm and MAX are trademarks of Hypertherm, Inc. and may be registered in the United States and/or other countries...
- Page 7 K.B. Warehouse Complex Singapore 417847, Republic of Singapore 65 6 841 2489 Tel 65 6 841 2490 Fax 65 6 841 2489 (Technical Service) Hypertherm (Shanghai) Consulting Co., Ltd. Suite 305, CIMIC Towers 1090 Century Boulevard, Pudong Shanghai 200120 P.R. China...
-
Page 8: Electromagnetic Compatibility (Emc
The size of the surrounding area to be Earthing of Workpiece considered will depend on the structure of Hypertherm's CE-marked equipment is built Where the workpiece is not bonded to earth the building and other activities that are tak- in compliance with standard EN50199. The for electrical safety, nor connected to earth ing place. -
Page 9: Warranty
Hypertherm system. Any damage infringement, and Hypertherm’s obligation to indemnify shall be caused by the use of other than genuine Hypertherm parts may conditioned upon Hypertherm’s sole control of, and the not be covered by the Hypertherm warranty. -
Page 10: Table Of Contents
Pacemakers et prothéses auditives ........................1a-5 Section 2 SPECIFICATIONS..........................2-1 General ..................................2-2 Product Specifications ..............................2-3 MAX200 Power Supplies ..........................2-3 MAX200 CE Power Supplies ...........................2-4 PAC200T (90°) Cutting Trigger Torch......................2-5 PAC200E (65°) Gouging Trigger Torch ......................2-6 Section 3 SETUP ..............................3-1 Upon Receipt ................................3-2 Damage Claims ...............................3-2... - Page 11 Changing Consumable Parts ...........................4-6 Changing the Water Tube ..........................4-8 PAC200T/E Safety Trigger Operation......................4-9 Cutting................................4-10 Gouging................................4-11 Piercing ................................4-15 Common Cutting Faults ..........................4-16 Duty Cycle..............................4-16 Claims and Technical Questions ..........................4-17 Cut Charts................................4-17 Cut Chart and Consumable Parts Index .........................4-18 MAX200 Instruction Manual...
- Page 12 Extended Leads..............................6-25 Trigger Torch 26-Foot Lead Assembly (Torch to Extension Box) ..............6-26 Section 7 WIRING DIAGRAMS ..........................7-1 MAX200 Electrical Schematic & Block Diagram (013-2-179) ................9 Sheets Coolant System Schematic/Diagram (029-2-313) .....................1 Sheet Timing Chart ..............................1 Sheet Appendix A FILTERS ............................a-1 Appendix B PROPYLENE GLYCOL SAFETY DATA ..................b-1...
- Page 13 TABLE OF CONTENTS Appendix D PAC200 (65°) CUTTING TORCH.....................d-1 Appendix E ELECTROMAGNETIC COMPATIBILITY (EMC) ................e-1 General ..................................e-2 Power Cable ................................e-2 Connect Power Cable ...............................e-2 Power Supply ..............................e-2 Line Disconnect Switch ............................e-4 EMI Filter Parts List ..............................e-5 MAX200 Instruction Manual...
- Page 14 Grounding Safety ..............................1-4 Compressed Gas Equipment Safety ........................1-5 Gas Cylinders Can Explode If Damaged ........................1-5 Noise Can Damage Hearing .............................1-5 Pacemaker and Hearing Aid Operation ........................1-5 A Plasma Arc Can Damage Frozen Pipes ........................1-5 Additional Safety Information ............................1-5 Hypertherm Plasma Systems...
-
Page 15: Recognize Safety Information
• Install an aeration manifold on the floor of the water closed container. table to eliminate the possibility of hydrogen • Do not cut containers that have held combustible detonation. Refer to the Appendix section of this materials. manual for aeration manifold details. Hypertherm Plasma Systems 11-98... -
Page 16: Electric Shock Can Kill
• Provide a disconnect switch close to the power grounding conductor first. supply with properly sized fuses. This switch allows • Each Hypertherm plasma system is designed to be the operator to turn off the power supply quickly in used only with specific Hypertherm torches. Do not an emergency situation. -
Page 17: A Plasma Arc Can Cause Injury And Burns
Work Table Connect the work table to an earth power cord ground. Fasten the retaining nut tightly. ground, in accordance with appropriate national or • Tighten all electrical connections to avoid excessive local electrical codes. heating. Hypertherm Plasma Systems 5/6/02... -
Page 18: Compressed Gas Equipment Safety
Protection Association, 470 Atlantic Avenue, Boston, MA 02210 Hazardous Substances, American Welding Society 10. OSHA, Safety and Health Standards, 29FR 1910 550 LeJeune Road, P.O. Box 351040, Miami, FL 33135 U.S. Government Printing Office, Washington, D.C. 20402 Hypertherm Plasma Systems 11-98... -
Page 19: Section 1A
Sécurité des bouteilles de gaz comprimé .......................1a-5 Les bouteilles de gaz comprimé peuvent exploser en cas de dommages .............1a-5 Le bruit peut provoquer des problèmes auditifs......................1a-5 Pacemakers et prothèses auditives ........................1a-5 Un arc plasma peut endommager les tuyaux gelés....................1a-5 Hypertherm Systèmes plasma 1a-1 2/12/01... -
Page 20: Identifier Les Consignes De Sécurité
• Ne pas couper de récipients contenant des matières Se référer à l’annexe du manuel pour plus de combustibles. renseignements sur les collecteurs d’aération. 1a-2 Hypertherm Systèmes plasma 2/12/01... -
Page 21: Les Chocs Électriques Peuvent Être Fatals
• Installer un sectionneur avec fusibles appropriés, à la prise de terre appropriée. proximité de la source de courant. Ce dispositif permet à • Chaque système plasma Hypertherm est conçu pour être l’opérateur d’arrêter rapidement la source de courant en utilisé uniquement avec des torches Hypertherm cas d’urgence. -
Page 22: L'arc Plasma Peut Provoquer Des Blessures Ou Des Brûlures
Bien serrer l’écrou de retenue. Table de travail Raccorder la table de travail à la terre, • S’assurer que toutes les connexions sont bien serrées conformément aux codes de sécurité locaux ou nationaux pour éviter la surchauffe. appropriés. 1a-4 Hypertherm Systèmes plasma 5/6/02... -
Page 23: Sécurité Des Bouteilles De Gaz Comprimé
LES TUYAUX GELÉS • Se tenir le plus loin possible de la source de courant. Les tuyaux gelés peuvent être endommagés ou éclater si l'on essaie de les dégeler avec une torche plasma. Hypertherm Systèmes plasma 1a-5 2/12/01... -
Page 24: Specifications
Section 2 SPECIFICATIONS In this section: General ..................................2-2 Product Specifications ..............................2-3 MAX200 Power Supplies ..........................2-3 MAX200 CE Power Supplies ...........................2-4 PAC200T (90°) Cutting Trigger Torch.......................2-5 PAC200E (65°) Gouging Trigger Torch ......................2-6 MAX200 Instruction Manual 1-96... -
Page 25: General
Hypertherm offers two hand torches for plasma cutting: the PAC200T (90°) cutting trigger torch, and the optional PAC200T (65°) cutting trigger torch (refer to Appendix D). In addition to cutting, the MAX200 is also a plasma arc gouging system when used with the PAC200E (65°) gouging trigger torch. - Page 26 43" (109 cm) w/casters Depth..............41-1/4" (104 cm) w/o handle 50" (127 cm) w/handle Weight ..............780 pounds (351 kg) Cooling..............Forced Air (Class F) Gas Requirements: Gas Type/Quality..........Air (compressed)/clean, dry, oil-free Oxygen (liquid)/99.5% Nitrogen (liquid)/99.995% Carbon Dioxide (compressed or liquid)/ 99.5% MAX200 Instruction Manual 1-99...
- Page 27 The specifications specific to the 400V CE, 3 Ph, 50 Hz power supplies (073200 and 073213) are listed below. These CE power supplies conform to all other non CE power suppy specifictions as listed above. Refer to the Appendix E for EMC requirements, power cable connections, and parts information specific to the MAX200 CE power supplies.
-
Page 28: Pac200T (90°) Cutting Trigger Torch
: 220 scfh Air: 280 scfh 290 scfh Coolant Flow Rate..........0.8 gpm (3 lpm) Weight (without leads)..........2.5 pounds (1.1 kg) * Note: This number is for torch only (without leads). See Parts List section for torch assembly with leads. MAX200 Instruction Manual... -
Page 29: Pac200E (65°) Gouging Trigger Torch
Note: This number is for torch only (without leads). See Parts List section for torch assembly with leads. See Gouging in Section 4 for examples of gouging techniques. *** When Argon-Hydrogen is used as the plasma gas. MAX200 Instruction Manual... -
Page 30: Setup
Connecting the Power Cable .........................3-10 Connecting the Air and Gas Hoses ........................3-11 Connecting the Torch Lead Assembly ......................3-14 Connecting the Work Cable ...........................3-14 Connecting the Torch to the Torch Leads.......................3-16 Grounding ................................3-18 Work Clamp ..............................3-18 Adjusting Plasma Gas ............................3-19 MAX200 Instruction Manual 1-97... -
Page 31: Upon Receipt
Damage Claims If your unit was damaged during shipment, you must file a claim with the carrier. Hypertherm will furnish you with a copy of the bill of lading upon request. Call Customer Service listed in the front of this manual or your authorized Hypertherm distributor. -
Page 32: Air And Gas Supply Requirements
Air Supply Use cylinder compressed air or shop compressed air as the source supply for the MAX200. Use an inert gas hose to connect the air supply to the input connection on the filter/pressure regulator mounted on the rear of the power supply. -
Page 33: Additional Air Filtration
Plasma Gas To use liquid nitrogen, liquid oxygen, or argon/hydrogen as the plasma gas, it must be supplied to the MAX200 at these purities: nitrogen, 99.995% and oxygen, 99.5%. The gas supply source can be compressed gas cylinders or liquid containers. -
Page 34: Filling The System
1. Ensure the torch lead is connected. Refer to page 3-14, Connecting the Torch Lead Assembly. Note: Always add coolant with the MAX200 system off. 2. Fill the tank with coolant until the level reaches the bottom of the neck, approximately 2.9 gallons (11 liters). -
Page 35: Power Requirements
Cable Size Current Rating 200 VAC 107 amps 208 VAC 107 amps 220 VAC 107 amps 380 VAC 69 amps 400 VAC 69 amps 415 VAC 69 amps 480 VAC 52 amps 600 VAC 39 amp MAX200 Instruction Manual 1-97... -
Page 36: 240/480V Linkboard Configurations
SETUP 240/480V Linkboard Configurations • Hypertherm ships the 240/480-volt unit (#073002) from the factory linked for 480-volt operation. The links must be moved for 240-volt operation. Ensure that the linkboard is configured properly to the appropriate voltage line (see Figure 3-1). -
Page 37: 220/380/400/415V Transformer T1 And T2 Configurations
7.5A to 20A. The alternate fuses are located on the floor of the power supply. * A long # 6 wire is shipped with every unit. Figure 3-2 220/380/400/415V Transformer T1 and T2 Configurations (1 of 2) MAX200 Instruction Manual 1-97... - Page 38 SETUP Figure 3-2 220/380/400/415V Transformer T1 and T2 Configurations (2 of 2) MAX200 Instruction Manual 1-97...
-
Page 39: Power, Gas, And Torch Lead Connections
To connect the power cable to the MAX200, proceed as follows (see Figure 3-3): 1. Insert the power cable through the strain relief at the rear of the MAX200. Connect the power cable leads to TB1 located at the rear center panel of the right side. -
Page 40: Connecting The Air And Gas Hoses
Plasma (Air) and Shield (Air) Hoses MAX200 systems are normally shipped from the factory configured, so that air is supplied to both the PLASMA and SHIELD GAS inlets from a single filter/pressure regulator. The filter is used to maintain a high air purity level. All moisture, oil, and other contaminants must be removed. - Page 41 3. Connect the shop-supplied or cylinder-supplied air hose to the input of the filter pressure regulator. Air Supply Plasma Gas Hose Supply Hose Shield Filter/Pressure Air Hose JIC Cap Regulator Figure 3-5 Plasma Gas and Shield Air Connections 3-12 MAX200 Instruction Manual 1-97...
- Page 42 SETUP Plasma (Gas) and Shield (Gas) Hoses When gases other than air are used, the user must connect the liquid or compressed bottled gases to the MAX200 as follows (see Figure 3-6): 1. Connect the plasma gas supply hose to the PLASMA gas inlet.
-
Page 43: Connecting The Torch Lead Assembly
OFF before working on the torch or torch leads! To connect the PAC200T/E torch lead assembly to the MAX200, proceed as follows (see Figure 3-7): 1. Connect the torch COOLANT RETURN lead (red w/red band for 25' leads; blue w/red band for extended leads) to the bulkhead adapter. - Page 44 2 bulkhead adapter Plasma Gas bulkhead Coolant Supply blue w/green band Work Cable Coolant Return red w/red band - (25' leads) blue w/red band - (ext. leads) Figure 3-7 PAC200T/E Torch Lead Connections to MAX200 MAX200 Instruction Manual 3-15...
-
Page 45: Connecting The Torch To The Torch Leads
9. Insert the top rib of the BOOT into the handle just above the screw holes. 10. Align both halves of the handle, press together, and secure with the six (6) screws. 11. Add torch coolant to system. See Filling the System on page 3-5. 3-16 MAX200 Instruction Manual... - Page 46 SETUP Boot Leads Handle Switch Spring Trigger Handle Torch Lead Insulator Main Body Screws Figure 3-8 PAC200T (90°) Cutting Trigger Torch Assembly MAX200 Instruction Manual 3-17...
-
Page 47: Grounding
SETUP Grounding To ensure proper operation, personal safety, and to reduce emission of radio frequency interference, the MAX200 must be properly grounded: Work Clamp 1. Attach the work clamp to the workpiece. Make sure that the work clamp and the workpiece make good metal-to- metal contact. -
Page 48: Adjusting Plasma Gas
If your torch leads are greater than 50 feet in length, the plasma gas must be adjusted. 1. At the front panel of the MAX200 power supply while in TEST mode, adjust the PLASMA gas valve control by increasing the TEST pressure approximately 5 psi per 50 ft of lead length (beyond 50 ft) from what is called out in the Cut Charts. -
Page 49: Operation
Changing Consumable Parts ...........................4-6 Changing the Water Tube ..........................4-8 PAC200T/E Safety Trigger Operation ......................4-9 Cutting................................4-10 Gouging ................................4-11 Piercing ................................4-15 Common Cutting Faults ..........................4-16 Duty Cycle..............................4-16 Claims and Technical Questions..........................4-17 Cut Charts................................4-17 Cut Chart and Consumable Parts Index .........................4-18 MAX200 Instruction Manual 1-97... -
Page 50: Front Panel Controls
• COOLANT TEMP LED When illuminated, indicates that the torch coolant temperature is too high (above 70° C, 160° F). • COOLANT FLOW LED When illuminated, indicates that the coolant flow from the torch is inadequate. MAX200 Instruction Manual 1-97... -
Page 51: Status Indicators Before Startup
Other fault conditions may also be indicated when the line power is switched on. Correct any other fault conditions before pressing the the POWER ON (I) button. See Troubleshooting in Section 3 of MAX200 Service Manual, IM-162 (801620). • TEST/RUN switch Sets dynamic (flowing) gas flow. -
Page 52: Pre-Operation
• Do not attach the work clamp to the work table. • Make sure that there is good metal-to-metal contact between the work clamp and the workpiece. 5. Apply power to the MAX200 power supply via the wall disconnect switch. See Status Indicators Before Startup earlier in this section. - Page 53 9. Move the torch along the cut path until the cut is complete. 10. When all cutting is complete, push the red OFF button until the green ON button goes out. 11. Shut off all gas supplies. MAX200 Instruction Manual...
-
Page 54: Operating Tips
8. Inspect the inside of the torch body by using a mirror, or by looking carefully inside. The inside of the torch body must be clean and undamaged. If the center water tube is nicked or damaged, see Changing the Water Tube on page 4-8. MAX200 Instruction Manual... - Page 55 11. Install the nozzle and finger-tighten it. Finish tightening it with the wrench. Do not overtighten it. 12. Replace the retaining cap. Make sure that it is tightened snugly; if it is loose, it can affect the shield gas flow. Shield Retaining Cap Nozzle Swirl Ring Electrode Figure 4-2 Changing Consumable Parts MAX200 Instruction Manual...
-
Page 56: Changing The Water Tube
4. Look for any damage or bends in the water tube. 5. Remove and replace the water tube by using the water tube wrench (027347) supplied by Hypertherm (Fig. 4-3). When installing water tube, do not over tighten! Snug down by hand only. -
Page 57: Pac200T/E Safety Trigger Operation
Safety Off position. In this position the trigger can be pulled back, so that the torch can be fired. Release the safety to return to the Safety On position as shown in step 1. Figure 4-4 PAC200T/E Torch Safety Trigger Operation MAX200 Instruction Manual... -
Page 58: Cutting
4. Hold the torch nozzle (tip) at a vertical position and watch the arc as it cuts along the line (Fig. 4-6). By lightly dragging the nozzle on the workpiece, you can maintain a steady cut. For straight-line cuts, use any straight edge as a guide. Figure 4-5 Starting a Cut 4-10 MAX200 Instruction Manual... -
Page 59: Gouging
Dragging the Torch Gouging The MAX200 gouges mild steel, stainless steel, and aluminum when using the PAC200E gouging torch with gouging consumables. Use the following guidelines to assist you with the gouging process: 1. When gouging, it is absolutely necessary to wear full protection – a welding helmet with at least a #12 glass, welding gloves and a welding jacket. - Page 60 36 lbs/hr (16 kg/hr) Straight Weaving Gouge 41 lbs/hr (18 kg/hr) Side Gouge 43 lbs/hr (19 kg/hr) Side Weaving Gouge 52 lbs/hr (23 kg/hr) * When Argon-Hydrogen is used as the plasma gas Figure 4-7 Feeding Into Gouge 4-12 MAX200 Instruction Manual...
- Page 61 OPERATION Straight Gouge Weaving Gouge Figure 4-8 Straight Gouging Techniques MAX200 Instruction Manual 4-13...
- Page 62 OPERATION Side Gouge Weaving Gouge Figure 4-9 Side Gouging Techniques 4-14 MAX200 Instruction Manual...
-
Page 63: Piercing
4. When the pierce is complete, proceed with the cut. 1. Tilt the torch and squeeze the trigger switch. 2. Rotate the torch to an upright position. Figure 4-10 Piercing MAX200 Instruction Manual 4-15... -
Page 64: Common Cutting Faults
• You are cutting material greater than one-inch thick. • The work clamp is not making a good electrical contact to the workpiece due to paint, rust, etc. • Arc voltage is greater than 150 volts (at 200 amps). 4-16 MAX200 Instruction Manual... -
Page 65: Claims And Technical Questions
OPERATION Claims and Technical Questions Claims for defective merchandise – All units shipped from Hypertherm undergo rigorous quality control testing. However, if your unit does not function correctly: 1. Read the Troubleshooting section of this manual. You may find the problem is quite easy to fix, such as a loose connection. -
Page 66: Cut Chart And Consumable Parts Index
Air / Air 020891 020882 020615 020607 220021 4-39 Steel H35/Air 020891 020882 020934 020607 020933 4-40 Stainless H35 / N 020891 020882 020934 020607 020933 4-41 Steel Aluminum H35 / N 020891 020882 020934 020607 020933 4-42 4-18 MAX200 Instruction Manual... - Page 67 1140 1-1/4 1-1/2 1-3/4 5/16 5/16 Piercing above 1 inch (25 mm) not recommended. * If leads are greater than 50 feet, increase TEST pressure 5 psi for every extra 50 feet of torch lead length. MAX200 Instruction Manual 4-19...
- Page 68 2540 2030 1270 .157 3/16 Piercing above 5/8 inch (15 mm) not recommended. * If leads are greater than 50 feet, increase TEST pressure 5 psi for every extra 50 feet of torch lead length. 4-20 MAX200 Instruction Manual 9-99...
- Page 69 1750 .197 5/64 1150 5/64 5/64 Piercing above 1/8 inch (3 mm) not recommended. * If leads are greater than 50 feet, increase TEST pressure 5 psi for every extra 50 feet of torch lead length. MAX200 Instruction Manual 4-21...
- Page 70 1140 1-1/4 1-1/2 1-3/4 5/16 5/16 Piercing above 1 inch (25 mm) not recommended. * If leads are greater than 50 feet, increase TEST pressure 5 psi for every extra 50 feet of torch lead length. 4-22 MAX200 Instruction Manual...
- Page 71 1900 1575 .158 1150 3/16 Piercing above 3/8 inch (10 mm) not recommended. * If leads are greater than 50 feet, increase TEST pressure 5 psi for every extra 50 feet of torch lead length. MAX200 Instruction Manual 4-23 9-99...
- Page 72 .157 1140 3/16 1-1/4 1-1/2 Piercing above 1 inch (25 mm) not recommended. * If leads are greater than 50 feet, increase TEST pressure 5 psi for every extra 50 feet of torch lead length. 4-24 MAX200 Instruction Manual 9-99...
- Page 73 3/16 1400 1000 1-1/4 1-1/2 Piercing above 7/8 inch (22 mm) not recommended. * If leads are greater than 50 feet, increase TEST pressure 5 psi for every extra 50 feet of torch lead length. MAX200 Instruction Manual 4-25 9-99...
- Page 74 (270 SCFH) 2800 2030 1400 .157 3/16 Piercing above 3/8 inch (10 mm) not recommended. * If leads are greater than 50 feet, increase TEST pressure 5 psi for every extra 50 feet of torch lead length. 4-26 MAX200 Instruction Manual...
- Page 75 3700 1/16 5/64 3050 5/64 1900 Piercing above 1/8 inch (3 mm) not recommended. * If leads are greater than 50 feet, increase TEST pressure 5 psi for every extra 50 feet of torch lead length. MAX200 Instruction Manual 4-27...
- Page 76 1520 3/16 1140 1-1/4 1-1/2 Piercing above 7/8 inch (22 mm) not recommended. * If leads are greater than 50 feet, increase TEST pressure 5 psi for every extra 50 feet of torch lead length. 4-28 MAX200 Instruction Manual 9-99...
- Page 77 3/16 1250 1000 1-1/4 1-1/2 Piercing above 7/8 inch (22 mm) not recommended. * If leads are greater than 50 feet, increase TEST pressure 5 psi for every extra 50 feet of torch lead length. MAX200 Instruction Manual 4-29 9-99...
- Page 78 H35 Plasma / N Shield This gas combination (Hypertherm recommends a mixture of 35% hydrogen and 65% argon for the plasma gas) gives maximum thickness cutting capability, minimum dross levels, minimum amount of surface contamination, excellent weldability and excellent cut quality. Electrode life is extended when this combination is used.
- Page 79 (20 SCFH) (270 SCFH) 1060 Piercing above 3/8 inch (10 mm) not recommended. * If leads are greater than 50 feet, increase TEST pressure 5 psi for every extra 50 feet of torch lead length. MAX200 Instruction Manual 4-31 9-99...
- Page 80 2200 3/16 1650 1300 1-1/4 1-1/2 Piercing above 7/8 inch (22 mm) not recommended. * If leads are greater than 50 feet, increase TEST pressure 5 psi for every extra 50 feet of torch lead length. 4-32 MAX200 Instruction Manual...
- Page 81 2290 1780 1270 1010 .157 3/16 Piercing above 3/8 inch (10 mm) not recommended. * If leads are greater than 50 feet, increase TEST pressure 5 psi for every extra 50 feet of torch lead length. MAX200 Instruction Manual 4-33...
- Page 82 5/64 3550 1.00 5/64 2550 1.00 Piercing above 1/8 inch (3 mm) not recommended. * If leads are greater than 50 feet, increase TEST pressure 5 psi for every extra 50 feet of torch lead length. 4-34 MAX200 Instruction Manual...
- Page 83 1780 3/16 1270 1-1/4 1-1/2 Piercing above 7/8 inch (22 mm) not recommended. * If leads are greater than 50 feet, increase TEST pressure 5 psi for every extra 50 feet of torch lead length. MAX200 Instruction Manual 4-35 9-99...
- Page 84 1400 1050 1-1/4 1-1/2 5/16 Piercing above 7/8 inch (22 mm) not recommended. * If leads are greater than 50 feet, increase TEST pressure 5 psi for every extra 50 feet of torch lead length. 4-36 MAX200 Instruction Manual 9-99...
- Page 85 H35 Plasma / N Shield This gas combination (Hypertherm recommends a mixture of 35% hydrogen and 65% argon for the plasma gas) gives maximum thickness cutting capability, excellent cut quality and excellent weldability. Electrode life is extended when this combination is used.
- Page 86 (270 SCFH) 2200 1980 1530 1280 Piercing above 1/2 inch (12 mm) not recommended. * If leads are greater than 50 feet, increase TEST pressure 5 psi for every extra 50 feet of torch lead length. 4-38 MAX200 Instruction Manual 9-99...
- Page 87 1 inch = 25.4 mm; 1 scfh = 28.316 liter/hour; 1 psi = .0689 bar = 6.895 KPa * If leads are greater than 50 feet, increase TEST pressure 5 psi for every extra 50 feet of torch lead length. MAX200 Instruction Manual 4-39...
- Page 88 OPERATION PAC200E Hand Torch Mild Steel – Gouging • 200 amps H35 Plasma / Air Shield Hypertherm recommends a mixture of 35% hydrogen and 65% argon for the plasma gas. 020891 020882 020934 020607 020933 Nozzle Swirl ring Electrode Shield...
- Page 89 OPERATION PAC200E Hand Torch Stainless Steel – Gouging • 200 amps H35 Plasma / N Shield Hypertherm recommends a mixture of 35% hydrogen and 65% argon for the plasma gas. 020891 020882 020934 020607 020933 Nozzle Swirl ring Electrode Shield...
- Page 90 OPERATION PAC200E Hand Torch Aluminum – Gouging • 200 amps H35 Plasma / N Shield Hypertherm recommends a mixture of 35% hydrogen and 65% argon for the plasma gas. 020891 020882 020934 020607 020933 Nozzle Swirl ring Electrode Shield Retaining cap...
- Page 91 In this section: Routine Maintenance ..............................5-2 Troubleshooting ................................5-3 Removal and Replacement of Torch.........................5-6 Removal ................................5-6 Replacement ..............................5-6 Removal and Replacement of Torch Lead Assembly ....................5-8 Removal ................................5-8 Replacement ..............................5-8 Increase or Decrease Torch Lead Length.........................5-9 Adjusting Plasma Gas............................5-12 MAX200 Instruction Manual 7-96...
-
Page 92: Maintenance
Routine Maintenance The MAX200 system is designed to require very little regular maintenance under normal use. Refer to MAX200 Service Manual, IM-162 ( #801620) for torch, torch leads, torch coolant and power supply routine maintenance checks to keep your system in top running condition. -
Page 93: Troubleshooting
MAINTENANCE Troubleshooting Becoming familiar with the contents of this manual will aid in safely troubleshooting the MAX200 power supply and torch should the need arise. The following procedures will show the user how to locate the most common problems. Refer to the electrical schematic for additional information. Also, Section 6, Parts List will help you locate the components when using these troubleshooting procedures. - Page 94 Inspect the high voltage transformer T5 for leaking oil or overheating. If either of these conditions exist, replace T5. Solution: Inspect the electrical connections at connectors PL26/REC26 (T5), TB3-60 and 61, and pins 3 and 4 at connectors PL6/REC2 (PCB7). Repair or replace any defective connectors or wires. MAX200 Instruction Manual 1-97...
- Page 95 The work clamp is not connected or it is broken. Solution: Connect or repair the work clamp. Cause: The torch is cracked. Solution: Replace the torch. Cause: The pilot arc relay CR1 is defective. Check for contacts that are welded shut Solution: Replace relay CR1. MAX200 Instruction Manual 1-97...
-
Page 96: Removal And Replacement Of Torch
4. Insert the torch Switch, Safety Trigger and Trigger Spring into the handle half that it was removed from. 5. Insert the top rib of the Boot into the handle just above the screw holes. 6. Align both halves of the handle, press together, and secure with the six (6) screws. MAX200 Instruction Manual... - Page 97 MAINTENANCE Boot Leads Handle Switch Safety Trigger Trigger Spring Handle Torch Lead Main Body Insulator Screws Figure 5-1 PAC200T (90°) Torch Assembly MAX200 Instruction Manual...
-
Page 98: Removal And Replacement Of Torch Lead Assembly
1. Connect the torch lead assembly to the power supply by referring to the Connecting the Torch Lead Assembly procedure on page 3-14. 2. Connect the torch lead assembly to the torch by referring to the Removal and Replacement of Torch procedure on page 5-6. MAX200 Instruction Manual... -
Page 99: Increase Or Decrease Torch Lead Length
Figure 5-2 on pg. 5-10. Note: If you have the PAC200T/E 25-foot leads (029865) that come with the 25-foot MAX200 system and you want to lengthen the leads, you cannot use these 25-foot leads with any of the extended leads sets. - Page 100 Center Section Leads Box: Torch Leads Ext. #029593 (50') #001313 Lead Insulator 11/16" (2) #024365 Leads:PAC200T/E Lead Insulator 9/16" Torch to Ext. Box (1) #046065 #029866 (25') EXT. BOX TORCH END – CONNECTIONS SEE FIGURE 5-1 Leads: Ext. Box to SEE FIGURE 5 Power Supply #029867 (25') or...
- Page 101 See page 3-5 to add torch coolant. 14. If you have increased torch lead length from 50 feet or under to 75 feet or over, see Adjusting Plasma Gas on page 5-12. MAX200 Instruction Manual 5-11...
-
Page 102: Adjusting Plasma Gas
1. At the front panel of the MAX200 power supply while in TEST mode, adjust the PLASMA gas valve control by increasing the TEST pressure approximately 5 psi per 50 ft of lead length (beyond 50 ft) from what is called out in the Cut Charts. -
Page 103: Parts List
Section 6 PARTS LIST In this section: MAX200 Power Supply .............................6-2 Illustrations/Parts Lists .............................6-2 Recommended Spare Parts ...........................6-16 Power Supply ..............................6-16 Hand Torch and Torch Leads .........................6-16 Hand Torch Systems...............................6-17 MAX200T (90°) Hand Torch Cutting Systems ....................6-17 MAX200E (65°) Hand Torch Gouging Systems .....................6-17 PAC200T/E Consumables, Torch Assemblies &... - Page 104 PARTS LIST MACHINE DELAY AMPS 6 SEC Figure 6-1 Power Supply – Control Panel SA, Front MAX200 Instruction Manual...
- Page 105 Holder, lamp 005168 Bulb, 28VDC 005089 Lens, white for 005088 Not applicable to hand torch system. Not applicable to hand torch system. 029360 Panel, thumbwheel/machine delay SA 005123 Thumbwheel 009604 Resistor, variable, 100 K, 1 turn MAX200 Instruction Manual 1-99...
- Page 106 PARTS LIST Figure 6-2 Power Supply – Front View MAX200 Instruction Manual...
- Page 107 Cover, MAX200 front filter panel 27441* Filter, 24 X 24 X 2 fiberglass air * Items not shown in Figure 6-2. Refer to MAX200 Service Manual IM-162 (801620), Section 3, Routine Maintenance to check and replace filter. MAX200 Instruction Manual...
- Page 108 PARTS LIST Figure 6-3 Power Supply – Right Side, Front View MAX200 Instruction Manual...
- Page 109 * Power Supplies with THC – 073020, 073021, 073022, 073023, 073024 and 073213 (CE) ** Power Supplies without THC – 073002, 073003, 073004, 073005, 073026 and 073200 (CE) ◊ Connector to thermostat is shown. Thermostat is in transformer. MAX200 Instruction Manual 2-00...
- Page 110 PARTS LIST Figure 6-4 Power Supply – Right Side, Rear View MAX200 Instruction Manual...
- Page 111 Trans, control, 208/240/480V, 1Ø, 60 Hz 014081 Trans, control, 220/380/400/415V, 3Ø, 50 Hz 014083 Trans, control, 600V, 3Ø, 60 Hz 014101 Trans, control, 200V, 3Ø, 60 Hz 041534 PCB, power distribution PCB6 008322 Fuse, Amp., 250 VAC MAX200 Instruction Manual 2-00...
- Page 112 PARTS LIST Figure 6-5 Power Supply – Left Side, Front View 6-10 MAX200 Instruction Manual...
- Page 113 Shunt, 100 Amp, 100 mv 007024 Shunt, 200 Amp, 100 mv 008317 Fuse, semiconductor, 125 Amp, 250 V 008317 Fuse, semiconductor, 125 Amp, 250 V 20 -24 Obsoleted chopper SA 029320 Left Side Chopper SA, CH2 129118 MAX200 Instruction Manual 6-11 1-99...
- Page 114 PARTS LIST Figure 6-6 Power Supply – Left Side, Rear View 6-12 MAX200 Instruction Manual...
- Page 115 Transformer, High Voltage SA 008479 Terminal strip, quick connect 029312 High Freq Input/Output Panel SA 009350 Assembly, spark gap 009349 Assembly, coil, high frequency 041145 PCB, input/output PCB5 029202 Sensor, current Left Side Chopper SA, CH2 129118 MAX200 Instruction Manual 6-13 2-00...
- Page 116 PARTS LIST Figure 6-7 Power Supply – Rear View 6-14 MAX200 Instruction Manual 9-99...
- Page 117 PARTS LIST Rear Wall Outside – MAX200 Power Supply Part Item Number Description Designator Qty. 129252 Pump Motor Subassembly 128385 Kit, Replacement Motor, 1/3 HP 128384 Kit, Replacement Pump, 70 GPH 031122 Drive Coupling, Pump to motor 129383 Valve Subassembly (w/ elec connectors)
-
Page 118: Recommended Spare Parts
Coolant, propylene glycol 100% * Power Supplies with THC Hand Torch and Torch Leads Part Number Description Designator 120045 PAC200T 90° (cutting) Torch Main Body 020908 PAC200E 65° (gouging) Torch Main Body 029865 Leads SA:PAC200T/E Torch/PS 25 ft 6-16 MAX200 Instruction Manual 1-97... -
Page 119: Hand Torch Systems
073159 073123 073183 073135 100' Leads 073172 073148 073160 073124 073184 073136 125' Leads 073173 073149 073161 073125 073185 073137 150' Leads 073174 073150 073162 073126 073186 073138 * Heat shield (020881) included in MAX200E systems MAX200 Instruction Manual 6-17... -
Page 120: Pac200T/E Trigger Torch Consumables
020415 Mild Air / Air 020891 020882 020615 020607 220021 Steel H35/Air 020891 020882 020934 020607 020933 Stainless H35 / N 020891 020882 020934 020607 020933 Steel Aluminum H35 / N 020891 020882 020934 020607 020933 6-18 MAX200 Instruction Manual... - Page 121 020920 (200A H35 - Stnlss only) Figure 6-8 PAC200T (90°) Cutting Trigger Torch Consumable Parts Nozzle 020615 (Air) Electrode 220021 (Air) Retaining Shield Swirl Ring 020891 020882 020607 020933 (H35) 020934 (H35) Figure 6-9 PAC200E (65°) Gouging Trigger Torch Consumable Parts MAX200 Instruction Manual 6-19...
-
Page 122: Pac200T ((90°) Cutting Torch Assembly
027254 Spring, Trigger, PAC120/200T/E Torch 220021 Electrode: MAX200 Air/Oxygen 020607 Swirl Ring: MAX200 Air/N2/H35 020608 Nozzle: MAX200 .086 200A Air/N2/H35 020915 Shield Cap: PAC200T Cutting Torch 020918 Shield: PAC200T 200A PAC200T (90°) Cutting Torch Assembly with 25 Ft Lead Item... - Page 123 Cap:#6 Brass 220021 Electrode:MAX200 Air/Oxy 020415 Electrode:MAX200 N2/H35 020918 Shield:PAC200T Hand Torch 200A 020604 Swirl Ring:MAX200 Oxy 020605 Nozzle:MAX200 .082 200A Oxy 020607 Swirl Ring:MAX200 Air/N2/H35 020608 Nozzle:MX200 .086 200A Air/N2 027055 Lubricant:Silicone 1/4-Oz Tube 027194 Nozzle Wrench:MAX200/HT2000 044027 O-Ring:BUNA 70DURO 1.301X.070...
- Page 124 Water Tube:PAC200E Electd Cool 044027 O-Ring:Buna 1.301X.070 027254 Spring, Trigger, PAC120/200T/E Torch 020933 Electrode: PAC200E 020607 Swirl Ring: MAX200 Air/N2/H35 020934 Nozzle: PAC200E N2 020882 Shield Cap: PAC200E Torch 020891 Shield: PAC200E Torch PAC200E Gouging Torch Assembly with 25 Ft Lead...
- Page 125 PARTS LIST † † † † † See page 6-24 for detail of torch leads. †† Heat Shield 020881 not included in PAC200E Torch Assembly. Order separately. Figure 6-11 PAC200E (65°) Gouging Trigger Torch Assembly MAX200 Instruction Manual 6-23...
-
Page 126: Pac200E Gouging Torch Consumable Parts Kit
Cable: 200T/E Shield Gas 047203 Cable, 16-1 Pair 005094 Push Button Switch: Torch – 074069 Splice 024197 Sheath: MAX200 Hand Torch Leads 25' * Note: If leads longer than 25 feet are needed, use extended leads (see page 6-25). 6-24 MAX200 Instruction Manual... -
Page 127: Extended Leads
Box:Torch Leads Ext (one half) 1 pair 028716 PAC200T/E Torch Leads Ext 75' 75 ft 029866* Leads SA:PAC200T/E Torch-XBT 25' 029594 Leads MAX200 Hand Torch XT 50' PS End 001313 Box:Torch Leads Ext 1 pair 028717 PAC200T/E Torch Leads Ext 100' 100 ft 029866*... - Page 128 047203 Cable, 16-1 Pair 005094 Push Button Switch: Torch – 074069 Splice 024197 Sheath: MAX200 Hand Torch Leads 25' 015036 UN: Right Hand 'A' Male Brass 015049 UN: AC'A' Male Brass 015208 Adapter: #5 Male X #5 Male Brass 074067 Term 22-18 .25 Male QC Insul...
- Page 129 PARTS LIST 027130 Screw (9) Figure 6-14 MAX200 Rev 1 Hand Torch Assembly 6-28 MAX200 Instruction Manual 2-99...
- Page 130 PARTS LIST MAX200 Rev 1 Hand Torch Assembly The following is a listing of the MAX200 Rev 1 90° Hand Torch with 25 foot and 50 foot leads. Refer to Figure 6-14. Part Item Number Description Qty. 073008 MAX200 90 Deg. Hand Torch 25'...
- Page 131 PARTS LIST MAX200 Rev 1 Hand Torch Lead Assembly Parts Item Part Number Description 029309 Hand Torch Lead, 25 Ft. 023326 Lead Pilot, Shield Gas, 25 Ft. (blue) 024194 Lead, Plasma Gas, 25 Ft. (red) 024192 Lead, Cap Sensor, 25 Ft. (gray) 023324 Cable, Water Cooled, 25 Ft.
- Page 132 PARTS LIST MAX200 Rev 1 Hand Torch Lead Extensions Part No. Description Length 028496 Lead Extensions, Hand Torch 100 ft 028497 Lead Extensions, Hand Torch 150 ft For more detailed information on hand-torch lead extensions and their installation, please refer to instruction manual IM-140 (P/N 801400).
-
Page 133: Wiring Diagrams
WIRING DIAGRAMS Introduction This section contains the wiring diagrams for the MAX200 system. When tracing a signal path or referencing with the Parts List or Troubleshooting sections, please be aware of the following format to assist you in understanding the wiring diagrams' organization: •... - Page 134 Push Button, Battery Fuse Normally Open Receptacle Ground Clamp Cap, polarized Relay, Coil Ground, Chassis Cap, non-polarized Relay, Normally Closed Ground, Earth Cap, feed-thru Relay, Normally Open IGBT Circuit breaker Relay, Solid State, AC Inductor Coax shield Relay, Solid State, DC Current Sensor Relay, Solid State, Dry Light...
- Page 135 Time Delay Closed, Switch, Level, Torch Symbols NO/Off Normally Closed Switch, Pressure, Transformer Normally Closed Electrode Switch, Pressure, Transformer, Air Core Normally Open Switch, 1 Pole, 1 Throw Nozzle Transformer Coil Switch, 1 Pole, 2 Throw Triac Switch, 1 Pole, 1 Throw, Shield Center Off VAC Source...
- Page 136 W/THC 073020 240-480/60 073021 600/60 073022 208/60 073023 380-415/50 Unit 15 073024 200/50 Remote Current Control 073193 15X1 Hold Cable 2nd MAX200 System 023340 (Optional control w/Machine I/O Cable) DRAWN BY DATE MATERIAL 5-9-96 CHECKED BY DATE APP. BY DATE...
- Page 137 APP. BY DATE Box-5010 Hanover, NH 03755-5010 603/643-3441 UNLESS OTHERWISE SPECIFIED: DESCRIPTION DIMENSIONS ARE IN INCHES. ELEC/GAS SCHEM: MAX200 TOLERANCES ARE: THIS DRAWING AND ALL INFORMATION 2 PL DECIMAL ±.01 CONTAINED THEREON IS CONSIDERED 3 PL DECIMAL ±.005 ITEM NO.
- Page 138 APP. BY DATE 2-B2 Box-5010 Hanover, NH 03755-5010 603/643-3441 UNLESS OTHERWISE SPECIFIED: DESCRIPTION DIMENSIONS ARE IN INCHES. ELEC/GAS SCHEM: MAX200 TOLERANCES ARE: THIS DRAWING AND ALL INFORMATION 2 PL DECIMAL ±.01 CONTAINED THEREON IS CONSIDERED 3 PL DECIMAL ±.005 ITEM NO.
- Page 139 DATE APP. BY DATE Box-5010 Hanover, NH 03755-5010 603/643-3441 UNLESS OTHERWISE SPECIFIED: DESCRIPTION DIMENSIONS ARE IN INCHES. ELEC/GAS SCHEM: MAX200 TOLERANCES ARE: THIS DRAWING AND ALL INFORMATION 2 PL DECIMAL ±.01 CONTAINED THEREON IS CONSIDERED ITEM NO. DRAWING NO. FILE NAME 3 PL DECIMAL ±.005...
- Page 140 APP. BY DATE Box-5010 Hanover, NH 03755-5010 603/643-3441 UNLESS OTHERWISE SPECIFIED: DESCRIPTION DIMENSIONS ARE IN INCHES. ELEC/GAS SCHEM: MAX200 TOLERANCES ARE: THIS DRAWING AND ALL INFORMATION 2 PL DECIMAL ±.01 CONTAINED THEREON IS CONSIDERED 3 PL DECIMAL ±.005 ITEM NO.
- Page 141 DATE APP. BY DATE Box-5010 Hanover, NH 03755-5010 603/643-3441 UNLESS OTHERWISE SPECIFIED: DESCRIPTION DIMENSIONS ARE IN INCHES. ELEC/GAS SCHEM: MAX200 TOLERANCES ARE: THIS DRAWING AND ALL INFORMATION 2 PL DECIMAL ±.01 CONTAINED THEREON IS CONSIDERED ITEM NO. DRAWING NO. FILE NAME 3 PL DECIMAL ±.005...
- Page 142 APP. BY DATE Box-5010 Hanover, NH 03755-5010 603/643-3441 UNLESS OTHERWISE SPECIFIED: DESCRIPTION DIMENSIONS ARE IN INCHES. ELEC/GAS SCHEM: MAX200 TOLERANCES ARE: THIS DRAWING AND ALL INFORMATION 2 PL DECIMAL ±.01 CONTAINED THEREON IS CONSIDERED 3 PL DECIMAL ±.005 ITEM NO.
- Page 143 APP. BY DATE Box-5010 Hanover, NH 03755-5010 603/643-3441 UNLESS OTHERWISE SPECIFIED: DESCRIPTION DIMENSIONS ARE IN INCHES. ELEC/GAS SCHEM: MAX200 TOLERANCES ARE: THIS DRAWING AND ALL INFORMATION 2 PL DECIMAL ±.01 CONTAINED THEREON IS CONSIDERED 3 PL DECIMAL ±.005 ITEM NO.
- Page 144 PLASMA 26psi SHIELD SHIELD 4psi PLASMA CON1 TORCH 70psi NOZZLE GAS FLOW DIAGRAM MAX200 TIMING CHART CON1 MAIN CONTACTOR PLASMA PRE/POST FLOW SOLENOID VALVE SHIELD GAS SOLENOID START XFER STOP POST PLASMA STEP GAS SOLENOID VALVE FLOW CAP-ON-SENSE SOLENOID VALVE...
- Page 145 10-10-91 APP. BY DATE Box-5010 Hanover, NH 03755-5010 603/643-3441 UNLESS OTHERWISE SPECIFIED: DESCRIPTION DIMENSIONS ARE IN INCHES. RSVR SA:MAX200/HT2000 PWR SPLY TOLERANCES ARE: THIS DRAWING AND ALL INFORMATION 2 PL DECIMAL ±.01 ITEM NO. DRAWING NO. FILE NAME CONTAINED THEREON IS CONSIDERED 3 PL DECIMAL ±.005...
-
Page 146: Timing Chart
TIMING CHART MAX200 CON1 START XFER STOP POST FLOW... - Page 147 Max200 Timing Chart Con1 Main Contactor Plasma Pre/Post flow solenoid valve Shield gas solenoid Plasma step gas solenoid valve Cap-On-Sense solenoid valve Plasma charging valve Power On switch Power Off switch Plasma gas outlet pressure switch. N.O. switch that closes when the plasma gas pressure exceeds 3 psi.
-
Page 148: Filters
Appendix A FILTERS In this section: Hankison® Centriflex® Filters...........................a-2 Hankison® Aerolescer® Filters..........................a-4 Hankison® Hypersorb® Filters ..........................a-6 Wilkerson Type PC6 Filter/regulator .........................a-8 MAX200 Instruction Manual... - Page 157 Appendix B PROPYLENE GLYCOL SAFETY DATA BENZOTRIAZOLE SAFETY DATA In this appendix: Propylene Glycol Safety Data Section 1 Chemical Product and Company Identification ..........b-2 Section 2 Information on Ingredients ................b-2 Section 3 Hazards Identification..................b-2 Section 4 First Aid Measures ..................b-3 Section 5 Fire Fighting Measures ...................
- Page 162 % of Propylene Glycol Figure b-1 Freezing Point of Propylene Glycol Solution...
- Page 166 b-10...
- Page 167 Appendix C AERATION MANIFOLD In this section: Aeration Manifold for Plasma Cutting Aluminum.......................c-2 Introduction...............................c-2 Making an Aeration Manifold - Figure c-1......................c-2 MAX200 Instruction Manual...
- Page 168 Connect the manifold to a shop air line. Set a pressure regulator to obtain a steady stream of bubbles. Aeration Manifold Distribution Lines Regulated air in Figure c-1 Aeration Manifold MAX200 Instruction Manual...
- Page 169 PAC200T (65°) Consumables, Torch Assembly & Torch Leads................d-2 Consumables ..............................d-2 Consumable Parts Kit ............................d-3 Torch Assembly with Torch Lead, 25 Ft......................d-4 Torch Lead Assembly, 25-Ft (Torch to Power Supply) ..................d-6 Extended Leads................................d-7 Torch Lead Assembly, 25-Ft (Torch to Extension Box)..................d-8 MAX200 Instruction Manual...
- Page 170 APPENDIX D PAC200T (65°) Cutting Torch Consumables, Torch Assemblies& Torch Leads The PAC200T (65°) trigger hand torch is option available from Hypertherm. Along with the torch, the associated conumables, consumable parts kit and torch lead assemblies are described. Consumables The consumables listed below are used in the 65° trigger torch for the Cut Charts on the listed pages. Operating (Cut Chart) parameters are also the same for PAC200T (90°) and PAC200E (gouging) hand torches.
- Page 171 Cap:#6 Brass 220021 Electrode:MAX200 Air/Oxy 020415 Electrode:MAX200 N2/H35 020918 Shield:PAC200T Hand Torch 200A 020604 Swirl Ring:MAX200 Oxy 020605 Nozzle:MAX200 .082 200A Oxy 020607 Swirl Ring:MAX200 Air/N2/H35 020608 Nozzle:MX200 .086 200A Air/N2 027055 Lubricant:Silicone 1/4-Oz Tube 027194 Nozzle Wrench:MAX200/HT2000 044027 O-Ring:BUNA 70DURO 1.301X.070...
- Page 172 Spring, Trigger, PAC120/200T/E Torch 075365 P/S, #6X3/4, PH, Pan 029865 Leads SA:PAC200T/E Torch/PS 25 ft 120667 Electrode: MAX200 Air/Oxygen 020607 Swirl Ring: MAX200 Air/N2/H35 020608 Nozzle: MAX200 .086 200A Air/N2/H35 020915 Shield Cap: PAC200T Cutting Torch 020918 Shield: PAC200T 200A MAX200 Instruction Manual...
- Page 173 APPENDIX D † † † See page d-6 for detail of torch leads. Figure d-2 PAC200T (65°) Cutting Torch Assembly MAX200 Instruction Manual...
- Page 174 Cable, 16-1 Pair 005094 Push Button Switch: Torch 024197 Sheath: MAX200 Hand Torch Leads 25' 046065 Tube 9/16 ID X .03 WL Nat Tef .333 ft * Note: If leads longer than 25 feet are needed, use extended leads (see page d-7).
- Page 175 Box:Torch Leads Ext (one half) 1 pair 028716 PAC200T/E Torch Leads Ext 75' 75 ft 029866* Leads SA:PAC200T/E Torch-XBT 25' 029594 Leads MAX200 Hand Torch XT 50' PS End 001313 Box:Torch Leads Ext 1 pair 028717 PAC200T/E Torch Leads Ext 100' 100 ft 029866*...
- Page 176 Cable: 200T/E Shield Gas Torch/Box 047203 Cable, 16-1 Pair 005094 Push Button Switch: Torch 024197 Sheath: MAX200 Hand Torch Leads 25' 015036 UN: Right Hand 'A' Male Brass 015049 UN: AC'A' Male Brass 015208 Adapter: #5 Male X #5 Male Brass 074067 Term 22-18 .25 Male QC Insul...
- Page 177 Appendix E ELECTROMAGNETIC COMPABILITY (EMC) In this section: EMC Introduction ..............................e-2 General ..................................e-3 Power Cable ................................e-3 Connect Power Cable ...............................e-3 Power Supply ..............................e-3 Line Disconnect Switch ............................e-5 EMI Filter Parts List ..............................e-6 MAX200 Instruction Manual...
-
Page 178: Emc Introduction
Safety critical equipment, for example as possible and should be positioned guarding of industrial equipment. close together, running at or close to the e. Health of the people around, for floor level. example the use of pacemakers and hearing aids. MAX200 Instruction Manual... -
Page 179: General
Connect one end of the power cable to the EMI filter first and then connect the other end to the line disconnect switch. Power Supply 1. Locate the EMI filter on the top rear of the power supply (see Figure e-1). Strain Relief EMI Filter Figure e-1 MAX200 Power Supply with EMI Filter – Side View MAX200 Instruction Manual 1-97... - Page 180 Filter Figure e-2 MAX200 Power Supply with EMI Filter Cover Off – Top View 3. Insert the power cable through the strain relief (see Figure e-1). 4. Connect leads L1 to U, L2 to V, and L3 to W terminals of TB1 (see Figure e-3). Ensure that all connections are tight to avoid excessive heating.
-
Page 181: Line Disconnect Switch
ON (1) pushbutton on the MAX200 power supply has not been pressed. As a common safety practice, ALWAYS verify that the line disconnect switch is in the OFF position before installing, disconnecting or servicing in this area. -
Page 182: Emi Filter Parts List
008610 Strain Relief: 1-1/2NPT 1.5ID 2-Screw 029316 TB1 Input-Power SA: 200/2000/4X00/HD 109036 Filter: 60A 440VAC 3PH 2-Stage Electronic 109040 Filter Mounting Bracket for 109036 129033 Pilot Light SA: 200/2000-CE Fitler Figure e-4 MAX200 EMI Filter Parts MAX200 Instruction Manual 3-96...
Need help?
Do you have a question about the MAX200 and is the answer not in the manual?
Questions and answers