
Related Manuals for HITEC X2 ACPro


Summary of Contents for HITEC X2 ACPro
- Page 1 OPERATION MANUAL WARNING: THE CHARGING AND DISCHARGING OF RC HOBBY BATTERIES CAN BE DANGEROUS. FAILURE TO FOLLOW THE INSTRUCTIONS AND WARNINGS IN THIS MANUAL MAY RESULT IN PROPERTY DAMAGE AND/OR LOSS OF LIFE.
-
Page 2: Table Of Contents
Table of Contents Table of Contents: Introduction..........................03 Warning and Safety Notes.....................04 Product Layout..........................08 Specifications..........................09 Features............................10 Battery & Power Supply Connections................12 Power Distribution........................13 Operation............................14 Program Flow Chart........................15 Charger Operation........................16 Lithium Battery Program ..............17 [LiP0/LiHV/LiFe/Lilon] NiMH/NiCd Battery Program....................25 Pb Lead-Acid Battery Program....................29 Battery Meter..........................32 Battery Resistance Meter......................33 Soldering Iron..........................34... -
Page 3: Introduction
With dual inputs affording flexible battery charging at home and in the field, the X2 AC Pro also boasts Hitec’s innovative power distribution mode which allows you to efficiently assign output power based on individual battery requirements. -
Page 4: Warning And Safety Notes
Warning and Safety Notes Warning: Be sure to read this section for your own safety. Caution: Be sure to read this section to prevent accidents and damage to your charger. Warning Tip: This section will help you maximize the performance of your charger. - Page 5 Warning and Safety Notes [cont.] Never attempt to charge or discharge the following types of batteries: • A battery fitted with an integral charge circuit or a protection circuit • A battery pack which consists of different types of cells (including different manufacturer’s cells) •...
- Page 6 Warning and Safety Notes [cont.] Standard Battery Parameters LiPo LiPo HV LiIon LiFe NiCd NiMH Nominal 3.7V/cell 3.8V/cell 3.6V/cell 3.3V/cell 1.2V/cell 1.2V/cell 2.0V/cell Voltage 4.2V/cell 4.35V/cell 4.1V/cell 3.6V/cell 1.5V/cell 1.5V/cell 2.46V/cell Max. Charge Voltage Storage 3.8V/cell 3.85V/cell 3.7V/cell 3.3V/cell Voltage Allowable Fast ≤...
- Page 7 Warning and Safety Notes [cont.] When in doubt, always use a higher gauge wire (lower AWG number). It is common to see charging leads constructed of 14AWG, 16AWG or 18AWG wire. Always refer to recommendations from your battery manufacturer for your specific battery type and size before initiating a charge or discharge process.
-
Page 8: Product Layout
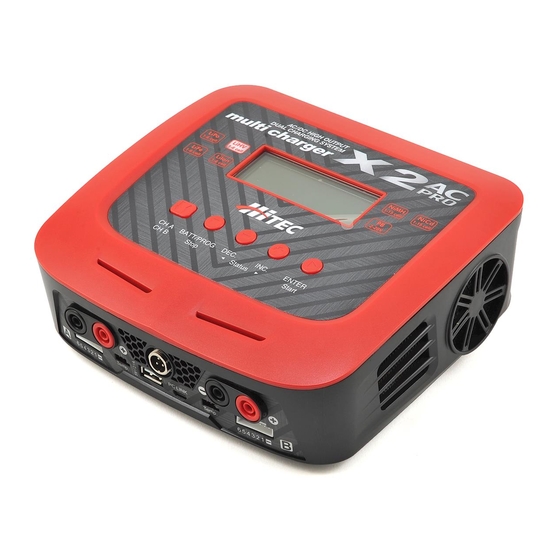
Product Layout In the case of an error, the screen will communicate the cause of the error and emit an audible sound. The Set Contains: 1. X2 AC Pro Charger 2. XH Adaptor X 2 3. Power Cord 4. Charging Cable X 2 5. -
Page 9: Specifications
Specifications X2 AC Pro Specifications AC Input 100 - 240 Volts AC DC Input 11 - 20 Volts DC 200 Watts with Power Distribution Total Charge Circuit Power AC Input Between Channel A and B Charge Current Range AC Power 0.1 - 10.0 Amps x 2 200 Watts Channel A Total Charge Circuit Power DC Input... -
Page 10: Features
You can monitor pack voltage, cell voltage and other data during the operation. Additionally, you have the ability to set up the charger and update the firmware if required. Please check the Hitec RCD Inc website for the correct version required for your charger. - Page 11 Features [cont.] times in a row automatically. This function is useful for ensuring a full battery charge. Delta-Peak Sensitivity for NiMH/NiCd: This automatic charge termination program is based on the principle of the Delta-peak voltage detection. When the battery’s voltage exceeds the threshold, the process will be terminated automatically.
-
Page 12: Battery & Power Supply Connections
Battery & Power Supply Connections TO AVOID SHORT CIRCUITS, ALWAYS CONNECT THE CHARGE LEADS TO THE CHARGER FIRST, AND THEN TO THE BATTERY. REVERSE THE Warning SEQUENCE WHEN DISCONNECTING THE PACK. Battery Connection With Balance Adaptor. X1 CHARGER BALANCE ADAPTOR BALANCE DC 11-18V SOCKET... -
Page 13: Power Distribution
Power Distribution BATT/PROGRAM Safety Timer SYSTEM SETTING-> 120Min LIPO BALANCE LIPO BALANCE 5.1A 22.2V(6S) 5.1A 22.2V(6S) AC Max Power Set AC Max Power Set AC Max Power Set LIPO BALANCE 5.1A 22.2V(6S) Powered by AC Household Current: In AC mode, the X2 AC Pro has a maximum charging output of 200 watts total. This charge output can be allocated differently to each channel utilizing the Power Distribution feature. -
Page 14: Operation
Operation Switch from Resume or Start Charge Channel A to B or Processes Confirm Any Action Channel B to A Scroll Through the Main Menu Alter Values See the Status of Individual Stop Any Charge Processes Cells in Balance Charge Mode CH A/CH B: Switch from Channel A to B or from Channel B to A. -
Page 15: Program Flow Chart
Program Flow Chart THE FLOW CHART DEPICTS ONE CHANNEL AS THE EXAMPLE FOR BOTH CHANNELS. CHANNEL A AND CHANNEL B ARE IDENTICAL. Note START LiPo BALANCE CHG LiPo CHARGE LiPo FAST CHARGE LiPo STORAGE LiPo DISCHARGE BATT/PROGRAM 2.0A 7.4V (2S) 2.0A 7.4V (2S) 2.0A 7.4V (2S) -
Page 16: Charger Operation
Charger Operation The following section contains detailed procedures that must be followed to make the charger work. When you power the charger on, it will automatically enter the LiPo Battery balance program screen. Use the CHA/CHB button to toggle between channels A and B and the BATT PROG/STOP button to enter the BATT PROGRAM screen. -
Page 17: Lithium Battery Program [Lip0/Lihv/Life/Lilon]
Lithium Battery Program [LiP0/LiHV/LiFe/Lilon] Lithium: This program is only suitable for charging/discharging Lithium chemistry batteries (LiPo, LiHV, LiIon and LiFe). The X2 AC Pro offers the following Lithium charge modes: Charge, Balance Charge, Fast Charge, Storage and Discharge. BEFORE SELECTING A CHARGE MODE, IT IS CRITICAL THAT YOU SELECT THE CORRECT TYPE OF LITHIUM BATTERY TO BE CHARGED. - Page 18 Lithium Battery Program [LiP0/LiHV/LiFe/Lilon cont.] You are now ready to begin charging. Press and hold the R:3SE R S:3SER ENTER/Start ►button until you see “BATTERY CHECK, ” CANCEL(STOP) followed by the “CONFIRM (ENTER) / CANCEL(STOP)“ R:3SE R S:3SER screen. The “CONFIRM/CANCEL“ screen displays the CONFIRM(ENTER) number of cells detected by the processor as ”R”...
- Page 19 Lithium Battery Program [LiP0/LiHV/LiFe/Lilon cont.] See page 12 for the appropriate charging connections setup for this operation. First, select the correct battery type by following the LiPo BALANCE instructions on page 16. Once you have set the correct 2.7A 11.1V (3S) battery type, press the ►...
- Page 20 Lithium Battery Program [LiP0/LiHV/LiFe/Lilon cont.] Lithium Fast Charge Mode: Charging in Fast Charge Mode allows for a shorter charge time and will result in a slightly reduced charging capacity. To achieve maximum charge capacity, we recommend you use the Lithium Balance Charge Mode. If a fast charge is necessary, select the fast charge mode and follow the same charging instructions as for the Lithium Charge Mode or Lithium Balance Charge Mode.
- Page 21 Lithium Battery Program [LiP0/LiHV/LiFe/Lilon cont.] DURING CHARGING/DISCHARGING, THE BATTERY SHOULD BE PLACED INSIDE A FIRE PROOF/RETARDANT BAG AND ON A FIRE PROOF SURFACE Caution AWAY FROM OTHER COMBUSTIBLE OBJECTS. Once charging has commenced, the charger will display LP3s 2.7A 11.88V the following real-time information: battery type/cell count, FAS 005:39 00256 charging current, battery voltage, charging time and charged capacity.
- Page 22 Lithium Battery Program [LiP0/LiHV/LiFe/Lilon cont.] Press the ► button again and the voltage value will begin flashing. Use the or ▬ buttons to adjust the value to the desired rate. The voltage and cell count should match the values listed on the battery label. You are now ready to begin charging.
- Page 23 Lithium Battery Program [LiP0/LiHV/LiFe/Lilon cont.] DISCHARGING LITHIUM CHEMISTRY BATTERIES CAN CAUSE PERMANENT DAMAGE TO THE BATTERY AND IT IS NOT RECOMMENDED FOR Warning ANYTHING OTHER THAN THE DISPOSAL OF THE BATTERY. IF YOU CHOOSE TO DISCHARGE YOUR LITHIUM BATTERIES, MAKE SURE TO PAY CLOSE ATTENTION TO THE MINIMUM VOLTAGE SETTING.
- Page 24 Lithium Battery Program [LiP0/LiHV/LiFe/Lilon cont.] DURING CHARGING/DISCHARGING, THE BATTERY SHOULD BE PLACED INSIDE A FIRE PROOF/RETARDANT BAG AND ON A FIRE PROOF SURFACE Caution AWAY FROM OTHER COMBUSTIBLE OBJECTS. Once charging has commenced, the charger will display LP3s 2.7A 11.88V the following real-time information: battery type/cell DCH 005:39 00256 count, charging current, battery voltage, charging time and charged capacity.
-
Page 25: Nimh/Nicd Battery Program
NiCd/NiMH Battery Program NiCD/NiMH: This program is only suitable for charging/discharging NiCd/NiMH batteries. The X2 AC Pro offers the following NiCd/NiMH charge modes: Charge, Auto Charge, Discharge, Re-Peak and Cycle. Selecting the Battery Type: After powering on the X2 AC Pro, press the ■ button repeatedly until you reach the appropriate program for the battery type you wish to charge. - Page 26 NiCd/NiMH Battery Program [ cont.] NiCd/NiMH Auto Charge Mode: In this mode, the charger automatically detects the connected NiMH or NiCd battery and determines the proper full charge and cutoff thresholds. Setting the upper charge current limit for safe levels based on your battery specifications will ensure safe charging of your specific battery.
- Page 27 NiCd/NiMH Battery Program [ cont.] Follow the instructions provided with your battery when setting the voltage cutoff. The X2 AC Pro will stop discharging when the battery has reached the preset voltage cutoff. Press and hold the ► button to begin discharging. Once NiMH 1.3A 10.42V discharging has commenced, the charger will display AUT 002:22 00106...
- Page 28 NiCd/NiMH Battery Program [ cont.] Once the Re-Peak process has begun, the charger will NiMH 1.3A 10.42V display the following real-time information: battery type, RPC 004:04 00686 charging current, battery voltage, elapsed time and charged capacity. Once the Re-Peak process has completed, the screen will read “END: RE-PEAK” and the charger will emit a chiming sound.
-
Page 29: Pb Lead-Acid Battery Program
NiCd/NiMH Battery Program [ cont.] Once cycling has commenced, the charger will display the NiMH 0.5A 9.6V following real-time information: battery type, charging/ D > C 00086 discharging current, battery voltage, charging time and charged capacity. You will also see “D>C“ or “C>D“. This will indicate which cycling order you have chosen. Either “D“... - Page 30 Pb Lead-Acid Battery Program [ cont.] Pb Charge Mode: BEFORE YOU BEGIN CHARGING YOUR BATTERY, MAKE SURE YOU HAVE READ AND UNDERSTAND ALL OF THE WARNINGS AND SAFETY Warning INFORMATION CONTAINED ON PAGES 02-07. or ▬ buttons to change it to the After selecting the correct battery type, use the “CHARGE“...
- Page 31 Pb Lead-Acid Battery Program [ cont.] Press the ► button again and the voltage rate value will Pb Discharge or ▬ buttons to set the voltage begin flashing. Use the 1.5A 12.0V(6P) and number of cells. Press and hold the ► button and discharging will begin. Once charging has commenced, the charger will display P-6 1.0A 13.56V...
-
Page 32: Battery Meter
Battery Meter Battery Meter: You can use the battery meter function to check your battery’s total voltage, the highest voltage, the lowest voltage, and the voltage of each cell. Simply connect the battery to the charger via the main battery lead to the battery socket and the balance wires to the balance socket as shown below. -
Page 33: Battery Resistance Meter
Battery Resistance Measurement Battery Resistance Measurement: The X2 AC Pro has the ability to check your battery’s total internal resistance, highest total resistance, lowest total resistance and the resistance of each cell. Simply connect the battery to the charger via the main battery lead to battery socket and the balance wires to the balance socket as shown below. -
Page 34: Soldering Iron
Soldering Iron Setup and Connection: Connect the soldering iron cord to the unit securely. Insert Rotate Clock-Wise Choose desired soldering tip and install it. Saturate cleaning sponge with water and place it into the stand. Put the iron on the stand and do not touch any metallic parts while operating. Operation and Setting Temperature: Power on the charger, select channel A, and press DEC or BATT/PROGRAM... - Page 35 Soldering Iron [ cont.] When the soldering station is in operation, the soldering tip temperature is between 392°F-842°F (200 °C-450°C). Mishandling Caution may cause burns or start a fire. Do not use the soldering iron near flammable items such as nitro gas, LiPo batteries, etc. For safety reasons, DO NOT charge batteries and soldering items at the same time.
-
Page 36: Memory Preset - Data Store/Load
Memory Preset - Data Save/Load Memory Preset - Data Save/Load: The Save Data and Load Data programs make it easy to store and load charge and discharge profiles for up to 10 batteries per channel. Data can be saved for each battery type and each charge mode available with the X2 AC Pro. - Page 37 Memory Preset - Data Save/Load [ cont.] Per Cell Discharge Voltage: Press the ► button and the DSCH VOLTAGE per cell discharge voltage value will begin to flash. Use 3.0V/CELL or ▬ buttons to change the per cell discharge voltage, then press the ► button to confirm your selection.
-
Page 38: Advanced System Set Up
Advanced System Set Up The system will be set to its default parameters when powered on for the first time. The screen displays the following information in sequence and the user can change any given value on each screen. To change a parameter value in the program, press START/ENTER to make that value blink. - Page 39 Advanced System Set Up [ cont.] ITEM SELECTION DESCRIPTION NiMH Sensitivity This program is for NiMH/NiCd batteries D.Peak Default Default: only. When the charger detects that the delta peak value has reached the value 4mV/Cell you set, the charger will say the battery is 5-15mV/Cell fully charged.
-
Page 40: Warning And Error Messages
Warning and Error Messages In the case of an error, the screen will communicate the cause of the error and emit an audible sound. An incorrect polarity is detected. The battery has been interrupted. The battery connection is incorrect. The balance connect is incorrect. The input voltage is less than 11V. -
Page 41: Using The Charge Control Software [Charge Master]
Using the Charge Control Software [ Charge Master] The free “Charge Master” software gives you unparalleled ability to operate the charger through your computer. You can monitor pack voltage, cell voltage, and other data during charging, view the charge data in real-time graphs, or control charging and firmware updates from the “Charge Master. -
Page 42: Commonly Used Terms
Commonly Used Terms Commonly Used Terms: A, mA: Unit of measurement relating to a charge or discharge current. 1000 mA = 1A (A = Ampere, mA = Milliampere). Ah, mAh: Unit of measurement for the capacity of a battery (Amperes x Time Unit;... -
Page 43: Conformity Declarations
Do not attempt to guess the rated voltage of the battery. Conformity Declarations Hitec's X2 AC Pro satisfies all relevant and mandatory CE directives and complies with FCC Part 15 Subpart B: 2010. For EC directives: The product has been tested to meet the following technical... -
Page 44: Disposal And Prop 65 Warning
ONE YEAR LIMITED WARRANTY: For a period of one year from the date of purchase HITEC RCD USA, INC. shall REPAIR OR REPLACE, at our option, defective equipment covered by this warranty, otherwise the purchaser and/or consumer is responsible for any charges for the repair or replacement of the charger. - Page 45 4. Ship prepaid (COD or postage-due returns will not be accepted) via a traceable common courier (UPS, insured parcel post, FedEx, etc.) to: Hitec RCD USA, Inc., Customer Service Center, 12115 Paine St., Poway CA 92064...
- Page 46 W: www.hitecrcd.com | E: service@hitecrcd.com | P: 858.748.6948...
Need help?
Do you have a question about the X2 ACPro and is the answer not in the manual?
Questions and answers