Table of Contents
Advertisement
Quick Links
Advertisement
Table of Contents

Subscribe to Our Youtube Channel
Related Manuals for Christie CP2000-XB


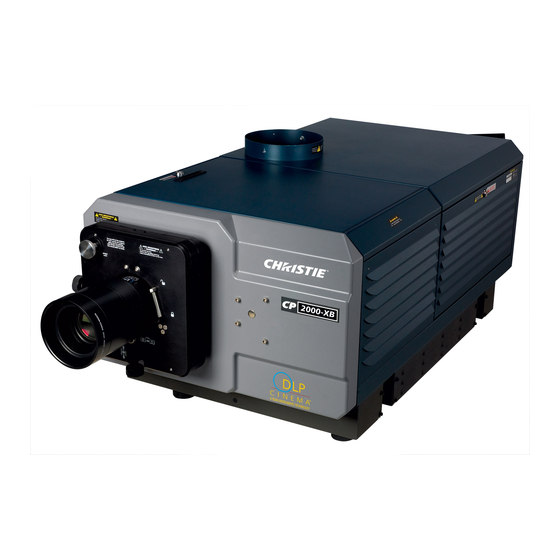
Summary of Contents for Christie CP2000-XB
- Page 1 CP2000-XB S E T U P G U I D E 020-100250-02...
-
Page 3: Table Of Contents
Carrying/Moving the Projection Head ..................2-13 Using a Forklift ...........................2-13 Using the FredFrame™ ......................2-13 Stacking ............................2-13 2.4 Installing a Lens, Lamp and Cooling....................2-14 2.4.1 Install Lens(es)...........................2-14 Primary Lens ..........................2-14 Auxiliary Lens Installation (Optional) ..................2-14 2.4.2 Install First Lamp........................2-14 CP2000-XB Setup Guide 020-100250-02 Rev. 1 (06-2009) - Page 4 2.11.4 Copy the Channel Settings To Another Channel ..............2-27 2.11.5 Add Auxiliary Lens........................2-28 2.12 Fold Mirror and Convergence Adjustment ..................2-28 Fold Mirror Adjustment ......................2-28 DMD Convergence ........................2-28 2.13 Calibrating the CP2000-XB System ....................2-29 Color Calibration ........................2-29 Electronic Screen Masking ......................2-29 Projector Configuration File .......................2-29 3: Basic Operation 3.1 Safety Warnings and Guidelines......................3-1...
- Page 5 5.2.2 Lamp Suddenly Goes Off ......................5-1 5.2.3 No Lamp Current Reading......................5-1 5.2.4 Flicker, Shadows or Dimness ....................5-2 5.2.5 LampLOC™ Does Not Seem to Work..................5-2 5.2.6 LiteLOC™ Does Not Seem to Work..................5-2 5.3 TPC ..............................5-2 CP2000-XB Setup Guide 020-100250-02 Rev. 1 (06-2009)
- Page 6 5.6.10 Colors in the Display are Inaccurate ..................5-5 5.6.11 The Display is Not Rectangular ....................5-5 5.6.12 The Display is “Noisy” ......................5-5 5.6.13 There are Random Streaks on the Bottom of the Image ............5-5 CP2000-XB Setup Guide 020-100250-02 Rev. 1 (06-2009)
-
Page 7: Purchase Record And Service Contacts
1 Introduction This manual is intended for trained users authorized to operate professional high-brightness projection systems. Only qualified Christie trained service technicians knowledgeable about all potential hazards associated with high voltage, ultraviolet exposure and high temperatures generated by the lamp and associated circuits are authorized to 1) assemble/install the projector and 2) perform service functions inside the projector. -
Page 8: List Of Components
Optional Rack Stand 1.2.1 Power and Lamp Requirements POWER LEVELS: The universal ballast in the CP2000-XB offers adjustable lamp power to suit the size of lamp currently in use. Software allows each lamp to be over-driven by approximately 10% of its maximum rating. -
Page 9: The Projector
• DC2K 3D Triple Flash functionality, capable of projecting full resolution 3D images under a 6:2 frame rate multiplication. NOTE: DLP version 13 series or higher is required. • HDCP decryption on both DVI inputs allows display of copy protected alternate content. CP2000-XB Setup Guide 020-100250-02 Rev. 1 (06-2009) -
Page 10: Labels And Markings
Section 8 Specifications. • References to other documents appear italicized and bold, such as Christie Service Manual. • References to software menus and available options appear bold, such as Main Menu, Preferences. • User input or messages that appear on screen, in status display units or other control modules appear in Courier font. -
Page 11: 2: Installation & Setup
Connection Panel at the rear of the projector. NOTE: To connect other types of sources, such as alternative content through DVI or Christie’s Cine-IPM 2K, you must remove the access panel located on the underside of the projector near the air filter. Drill an exit hole or leave the panel off. - Page 12 Then set the ballast AC ON/OFF switch to ON and listen for the internal cooling fan start-up. NOTE: There is no other indication of ballast ON status. Figure 2-3 Connect Head to Ballast Figure 2-4 Ballast Connection CP2000-XB Setup Guide 020-100250-02 Rev. 1 (06-2009)
- Page 13 Section 2: Installation & Setup HEAD-TO-AC: Connect the Christie-supplied IEC 320 (220V) 15-amp line cord to a single phase 208V AC supply. Do not substitute other cords. Input power required is 200 - 240 VAC (±10%), 50 to 60 Hz @ 3 amps for 208 V.
-
Page 14: Installation Considerations
Figure 2-8 Audience Coverage with a Flat Screen NOTE: CP2000-XB high-contrast lenses are designed primarily for use with flat screens, but the projector’s depth-of-field range allows the lens to be focused on mildly curved screens as well. While focus remains sharp in the corners, there may be significant pincushion distortion, primarily at the top of the screen. -
Page 15: Rear Screen Installations
Table 2.2 Typical Aspect Ratios Application Aspect Ratio SXGA 1.25 (5:4) 35mm filmstrip 1.32 (4:3) NTSC Video//XGA 1.33 (4:3) PAL Video/XGA 1.33 (4:3) HDTV Video 1.78 (16:9) Letter box Video/Flat 1.89 (2048 x 1080) Cinemascope 2.35 CP2000-XB Setup Guide 020-100250-02 Rev. 1 (06-2009) -
Page 16: Displaying Both Flat And Scope
Achieving either of these displays from a variety of incoming source material (that may or may not be in a format matching that of the screen) depends on lenses, proper settings in the projector, and certain room conditions. Refer to Section 4: Cinema Operation of the CP2000-XB User Manual (020-100163-xx). CP2000-XB Setup Guide... -
Page 17: Other Considerations
In such cases, some lens offset can reduce the keystone distortion. Later, when your projector is up-and-running, adjust precise image geometry and placement as described in Section 2.10 Basic Image Alignment. CP2000-XB Setup Guide 020-100250-02 Rev. 1 (06-2009) -
Page 18: Throw Distance
In addition, please keep in mind that due to lens manufacturing tolerances for lens focal length, actual throw distance can vary ±5% or more between lenses described as having the same throw ratio. CP2000-XB Setup Guide 020-100250-02 Rev. 1 (06-2009) -
Page 19: Vertical And Horizontal Position
4) Simultaneous horizontal and vertical offset can limit the adjustment range of each, as can long throw distances. CP2000-XB Setup Guide 020-100250-02 Rev. 1 (06-2009) -
Page 20: Alternative Method Of Describing Vertical Offset
Note that the positioning shown at right is often mistakenly referenced as 70% offset but it is not—it is 40% offset derived as 410/1024 x 100. A 70% offset is explained below and shown in Figure 2-16. Figure 2-15 Horizontal Offset Range 2-10 CP2000-XB Setup Guide 020-100250-02 Rev. 1 (06-2009) -
Page 21: Alternative Method Of Describing Horizontal Offset
To adjust the height and level of the projector, extend or retract the feet by rotating them. See Figure 2-17. Figure 2-17 Adjusting the Feet CP2000-XB Setup Guide 2-11 020-100250-02 Rev. 1 (06-2009) -
Page 22: Tilting And Special Orientation
Since this projector cannot be inverted or tilted beyond 15 during use, all installations are front-mount and require the Normal Front Image Orientation setting in the Admin: General menu. For shipping, remove lamp and rotate the projector box as needed. 2-12 CP2000-XB Setup Guide 020-100250-02 Rev. 1 (06-2009) -
Page 23: Hoisting And Stacking
Side-Venting Exhaust Adapter to route exhaust air from the bottom projector away from the top projector (not required with a side-by-side projector row). Never stack more than 2 projection heads together, and do not attempt to move stacked projectors without proper transport equipment. CP2000-XB Setup Guide 2-13 020-100250-02 Rev. 1 (06-2009) -
Page 24: Installing A Lens, Lamp And Cooling
(mostly side-masking screens) obtained by optically stretching a pre-squeezed image. INSTALL THE AUXILIARY LENS MOUNT ON THE PROJECTOR: At the front of the projector, install the auxiliary lens mount hardware as described in the instructions provided with Christie’s Auxiliary Lens Mount Kit. -
Page 25: Cooling
Extractor Fan and Duct For any CP2000-XB with any lamp, install the Christie extractor fan and duct to pull warm exhaust air from the projector at a minimum rate of 450 CFM (for 2 or 3 kW lamps) or 600 CFM (for 4.5 kW or higher lamps). - Page 26 Projector ADD EXTRACTOR See Figure 2-25. Connect the other end of the duct to the Christie heat extractor/blower, twisting to secure flaps over pins on the fan. Make sure that the grille end of the fan faces down. For longer exhaust runs at your site, add extractors/boosters as necessary—the vane switch at the...
- Page 27 Attach remaining safety cables between the 1) duct and fan, and 2) fan and supporting structure. Figure 2-26 Safety Cable at Projector—Flown or Front Mount CP2000-XB Setup Guide 2-17 020-100250-02 Rev. 1 (06-2009)
-
Page 28: Side-Venting Duct (Adapter)
The coolant should fill slightly more than half of the reservoir to ensure adequate circulation. Use only the Christie approved coolant Jeffcool E105 provided in the liquid coolant fill service kit (P/N 003-001837-02). Danger! HAZARDOUS SUBSTANCE - The coolant used in this product contains ethylene glycol. -
Page 29: Installing And Connecting Sources
Sources 2.5.2 Non-Cinema To display alternative content from a DVI source or from Christie’s Cine-IPM 2K, remove the access panel located on the underside of the projector near the air filter. Connect two independent sources, or connect the Cine-IPM 2K to both ports for 10-bit processing. Add an exit hole to the panel, or leave the panel off. -
Page 30: Connecting For Communications
PC/Laptop, Server or Network To communicate with the CP2000-XB from a computer, server or an existing network, connect the equipment to Ethernet A or Ethernet B. Both ports route to the 5-port Ethernet hub connected to the projector’s main processing electronics. -
Page 31: Connecting The Ballast
5. Re-install the ballast cover. 2.7.2 Connect to Projector Connect all 4 ballast cables—two DC power cables, and 2 communication/control cables—to the rear of the projector and to the lamp ballast. Refer to Figure 2-3. CP2000-XB Setup Guide 2-21 020-100250-02 Rev. 1 (06-2009) -
Page 32: Initial Power-Up
Particularly in a projector rented for temporary installation, the setting may have to be changed from its last use. Adjustment range is 2-30m (6½-100 ft.). 2.8.3 Power-up Power up the CP2000-XB system as described in Section 3.3 Power-up Procedure. 2-22 CP2000-XB Setup Guide 020-100250-02 Rev. -
Page 33: Maximizing Light Output
If used, click Lens Reset from the Advanced: Lens menu to ensure ILS settings are properly recalled. Ensure the CP2000-XB is properly positioned relative to the screen before you begin. -
Page 34: Basic Optical Alignment Procedure
Vertical Offset Motorized Knob Vertical Offset Anchor Bolt Horizontal Boresight Bolt Horizontal Lock/ Offset Unlock Knob Lens Motorized Horizontal Offset Focus Vertical Boresight Bolt Figure 2-34 Anatomy of the Lens Mount 2-24 CP2000-XB Setup Guide 020-100250-02 Rev. 1 (06-2009) -
Page 35: Adjust Offset
52% of the image displayed on one side or the other of the lens. 2) Maximum offsets are slightly less when offsetting in both directions (H and V) at once. Figure 2-36 Vertical Offset Range CP2000-XB Setup Guide 2-25 020-100250-02 Rev. 1 (06-2009) -
Page 36: Adjust Left/Right Boresight
Figure 2-39 Aerial View Illustrating 5. When both sides appear equally blurry, adjust the Offset by Misaligned Boresight clicking the up/down/left/right buttons on the Main: Lens menu to re-center the image on the screen. 2-26 CP2000-XB Setup Guide 020-100250-02 Rev. 1 (06-2009) -
Page 37: Adjust Top/Bottom Boresight
Re-focus the center of the image. The goal is for good focus at the center and on all sides. 8. Adjust the Vertical Hold Screw to lock the lens mount in place. Check boresight again. See Figure 2-41. For more information on ILS and channel setups, refer to Section 3: Operation of the CP2000-XB User Manual (020-100163-xx). -
Page 38: Add Auxiliary Lens
Qualified service technicians can correct as described on the color label provided inside the projection head. NOTE: Custom Convergence Kit required (available separately). 2-28 CP2000-XB Setup Guide 020-100250-02 Rev. 1 (06-2009) -
Page 39: Calibrating The Cp2000-Xb System
Results are defined in a file, activated, and downloaded to projector memory to be used as a basis for all future displays. If there are changes to the environment in the future (for example, a new screen is installed), the CP2000-XB should be re-calibrated. Also note that correction for proper color balance sometimes reduces overall light output. -
Page 41: 3: Basic Operation
UV radiation. This projector must be installed on the floor only, and operated in an environment which meets the operating range specifications. Refer to the CP2000-XB User Manual (020-100163-xx) for details. 3.1.2 AC/Power Precautions... -
Page 42: Lamp Precautions
Warning! EXPLOSION HAZARD —Wear authorized protective clothing whenever the lamp door is open! NOTES: 1) Christie’s protective clothing recommendations are subject to change. 2) Any local or federal specifications take precedence over Christie recommendations. -
Page 43: Liquid Cooler
Section 3: Basic Operation 3.2.3 Liquid Cooler The liquid cooler system circulates liquid to and from the DMDs in the CP2000-XB projection head, keeping their operating temperature at an acceptable level. Periodically check the coolant level visible by removing the igniter grille (rear side grille adjacent to the side input panel)—check for 1) leaks and 2) proper liquid level. -
Page 44: Power-Up Procedure
1. Press the lamp button on the Main menu to turn the lamp OFF. You must hold the button down briefly. 2. Cool the lamp. Warning! Wait at least 10 minutes so that fans completely cool the lamp. 3. Set the ballast breaker to OFF. CP2000-XB Setup Guide 020-100250-02 Rev. 1 (06-2009) -
Page 45: Introduction To The Touch Panel Controller (Tpc)
A simple design with familiar menu icons enables a novice user to display an accurate and fully optimized image by pressing a single button on the touch-screen, while protecting precisely configured presentations from accidental or unauthorized change. CP2000-XB Setup Guide 020-100250-02 Rev. 1 (06-2009) -
Page 46: Trained Operators, Advanced Users, Administrators And Installers
3.5.2 TPC Power-up Defaults When the CP2000-XB powers up, the Touch Panel Controller will begin the steps of Initializing…, Attempting to log on…, and Updating status, displaying its progress on the TPC status bar at the bottom of the screen. When initializing is complete, all files are refreshed on the TPC and the system is in a ready-to-use default operating mode: •... -
Page 47: Tpc Alarm Window
Lock the projector lid. If still failed, double-check the high-security lock itself, plus all related harnessing. Make sure a Type 3 interface board is installed and that you are using main software v10.0.30 or higher CP2000-XB Setup Guide 020-100250-02 Rev. 1 (06-2009) - Page 48 TPC Main menu. Since most interlock alarm conditions are triggered by switches, check the operation of these switch levers. 2) When you have restored interlock integrity, the lamp button on the TPC Main menu is automatically re-enabled. CP2000-XB Setup Guide 020-100250-02 Rev. 1 (06-2009)
-
Page 49: Working With 3D
• For routing the projector’s output sync to your Sync Output Device—connect from the projector’s GPIO, accessed from underside of the projector) to the emitter or polarizer. Refer to the CP2000-XB User Manual (020-100163-xx) for GPIO pinouts and other 3D sync cable details. -
Page 50: Supported Hardware Setup
NOTES: 1) All configurations require a custom 3D Sync Cable, such as supplied by RealD, for the GPIO port. 2) A pull-up power supply (not shown) is also required for the IR emitter or polarizing cell. 3) Refer to the CP2000-XB User Manual (020-100163-xx) for cabling details. Figure 3-3 Typical Dual-Input 3D System (SHOWN WITH ACTIVE GLASSES) 3.6.3 3D Instructions... - Page 51 From the projector’s GPIO port, connect your 3D Stereo Sync cable to your 3D controlling device such as an emitter or polarizer. NOTE: RealD 3D sync cable recommended. 8. ADJUST DISPLAY, SCREEN, ETC.: As desired, adjust the image color, etc. CP2000-XB Setup Guide 3-11 020-100250-02 Rev. 1 (06-2009)
-
Page 53: Maintenance And Cleaning
For cleaning off dust and/or grease, you will need: • Soft camel-hair brush • Dust-free blower—filtered dry nitrogen blown through an anti-static nozzle. • Dust-free lens tissue such as Melles Griot Kodak tissues (18LAB020), Optowipes (18LAB022) or Kim Wipes or equivalent CP2000-XB Setup Guide 020-100250-02 Rev. 1 (06-2009) -
Page 54: Cleaning The Lens
2. If necessary, use a brush with hot water and suitable detergent. Important! Do not bend the impeller blades or loosen the balancing weights. IGNITER - Clean the high voltage terminal and insulator to remove accumulated dust or dirt. CP2000-XB Setup Guide 020-100250-02 Rev. 1 (06-2009) -
Page 55: Lamp Replacement
Contact Christie or your dealer. Lamp Replacement NOTE: For this procedure you will need a compatible Christie Xenon CDXL or CXL lamp as shown in the CP2000-XB User Manual (020-100163-xx)—never install a lamp intended for a different model or projector. - Page 56 Rest the anode (+) end of the lamp on the lamp cradle as shown in Figure 4-1, right, and slip the posi- tive lamp connector over the bulb end. Figure 4-1 Install Bulb CP2000-XB Setup Guide 020-100250-02 Rev. 1 (06-2009)
- Page 57 Warning! Do not attempt to ignite the lamp until its type (kW) is correctly set in the Install menu. STEP 14 - Turn the Lamp On Press and hold the lamp button on the TPC Main menu. CP2000-XB Setup Guide 020-100250-02 Rev. 1 (06-2009)
-
Page 58: Filter Replacement
Slide the filter up and discard. Insert the new air filter, following the labeling for proper inside/outside ori- entation. Slide all the way down into its slot (3. and 4. in Figure 4-4). Warning! Use only Christie filters. Never operate the projector without the filter installed. - Page 59 Section 4: Maintenance Figure 4-4 Replacing the Air Filter CP2000-XB Setup Guide 020-100250-02 Rev. 1 (06-2009)
-
Page 60: Replacing A Lens
Replacing a Lens A variety of primary lenses can accommodate different throw distances and specific types of installations—refer to section 6 of the CP2000-XB User Manual (020-100163-xx). To replace or change a lens: 1. Release the lens-locking lever (UP position). -
Page 61: Power
1. If the lamp button is entirely disabled (not selectable at the TPC Main menu, indicated by a red X on the lamp button), there is an interlock failure such as an open lamp door, failed lamp fan, etc. A flashing red alarm window also indicates this. Refer back to solutions listed in the CP2000-XB User Manual (020-100163-xx). -
Page 62: Flicker, Shadows Or Dimness
Compact Flash memory card. Save backups to a PC/laptop only, not the TPC (contact your administra- tor). 6. If the locations of button presses on the screen seem to be misinterpreted, the TPC screen may need recalibrating. CP2000-XB Setup Guide 020-100250-02 Rev. 1 (06-2009) -
Page 63: Ethernet
The display file needs correction. 5.5.3 Image Appears Squeezed or Vertically Stretched into Center of Screen Source data converted from film and pre-squeezed for CP2000-XB’s display format may require use of the auxiliary lens to regain full scope image width and proper proportions. -
Page 64: Non-Cinema Displays
2. The horizontal or vertical scan frequency of the input signal may be out of range for the projector. Refer to section 6 of the CP2000-XB User Manual (020-100163-xx) for scan frequency ranges. 3. The sync signal may be inadequate. Correct the source problem. -
Page 65: Data Is Cropped From Edges
NOTE: password-protected. 2. Or, if you do not have access to the Touch Panel Controller’s Advanced menu and cannot adjust the processing path, use your 3rd-party input source to crop off the streaks. CP2000-XB Setup Guide 020-100250-02 Rev. 1 (06-2009)
Need help?
Do you have a question about the CP2000-XB and is the answer not in the manual?
Questions and answers