Table of Contents
Advertisement
Quick Links
Advertisement
Table of Contents

Related Manuals for Atag VA6111AF


Summary of Contents for Atag VA6111AF
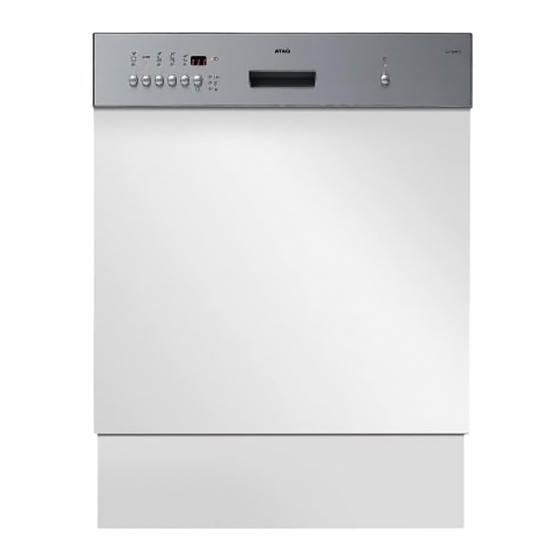
- Page 1 Atag VA6111AF...
- Page 2 SOI/TD - PR 599 38 70-09...
-
Page 3: Table Of Contents
TABLE OF CONTENTS: ACCESSIBILITY.............................4 To access the components from above: ..................4 To access the components housed in the base from the front: ............4 To access the components housed in the base from the lower section: ........4 To access components from the side: ....................5 STRUCTURAL CHARACTERISTICS ....................6 Door area ............................6 Base area ............................6... -
Page 4: Accessibility
ACCESSIBILITY 1.1 To access the components from above, first remove the worktop: (a) Remove the two screws from the rear section. (b) Push the top forwards and release. In case of Built-In dishwashers the worktop is a metal plate. It is fixed by screws to the structure. -
Page 5: To Access Components From The Side
1.4 To access components from the side, remove the relative lateral panel: (a) First remove the worktop (see 1.1), the plinth and the lower front panel (1.2). (b) Remove the three rear screws and the upper screw. (c) Detach the lateral panel from the rear and slide away from the frontal anchor slot. NB: Before laying the dishwasher on a side panel or on the rear panel suck the water in the sump, for example by using a syringe, so as the water does not reach the pressure switch tube or the tub. -
Page 6: Structural Characteristics
STRUCTURAL CHARACTERISTICS The appliance may be considered as consisting of three major assemblies: DOOR AREA - BASE AREA - TUB AREA The entire structure is enclosed by a series of removable parts such as the worktop, the door, two lateral panels, the plinth and the lower front panel. -
Page 7: Tub Area
2.3 Tub area Fitted externally to the tub: Lateral uprights Upper rear cross-member Upper front cross-member Lower front cross-member Supports for upper basket wheels External feed manifold to the upper spray arm Sump assembly Thermostat/temperature sensor + turbidity sensor Water fill tank (short or long) Drying duct/fan (if featured) Fitted inside the tub: Sliding guides for upper basket... -
Page 8: Central Drain Filter
3.1 Central drain filter (a) From inside the tub, use the lever to rotate the filter assembly about 45° in a counter-clockwise direction, and remove the assembly from its housing. (b) Use the central ring to pull the coarse-mesh filter (a or A) and remove from the fine-mesh filter (b, if featured). -
Page 9: Access From Above
Access from above 4.1 Drying duct/fan (if featured) (a) Remove the worktop (see 1.1) (b) Raise gently and detach the duct from the water fill tank, taking care not to damage the sponge sealing element between the tank and the duct. (c) From inside the tub, detach the intake ring by pressing the four hooks. -
Page 10: Timer (Electro-Mechanic Versions)
5.2.1 Timer (electro-mechanic versions) (a) First remove the cover, then the two screws which secure the timer to the control panel. (b) Pull out the knob/flange assembly. Important: On certain series of dishwasher with different stylings, it is necessary to remove the knob before removing the timer. -
Page 11: External Door
5.3 External door (a) Open the door and remove the six perimetral screws which secure it to the inner door. (b) Remove the two lateral screws (c) Slide the external door forwards and remove 5.4 Beam on floor (fully-integrated versions only, if featured) (a) Remove the external door (see 5.3). -
Page 12: Latch Assembly
5.6 Latch assembly (a) First, remove the control panel (see 5.2), then the two screws which secure the latch assembly to the inner door. (b) To remove the microswitch, lever the anchor tabs open and extract the switch from its housing. Important: To replace the latch ferrule and/or the plate: remove the cap which covers the hole and remove the central screw. -
Page 13: Thermostat/Temperature And Turbidity Control Sensor
(d) When remounting, place the wiring accurately taking care not to damage the plastic parts and that the wiring do not come into contact with the warm or live components which are fitted inside the appliance (for ex. water fill solenoid, heating element…); ensure that the board housing is fitted properly to the plastic support. -
Page 14: Salt Sensor (If Featured)
5.11 Salt sensor (if featured) (a) First remove the plinth and the lower front panel (see 1.2). (b) Detach the electrical connectors from the sensor. (c) Using a tool release the salt sensor from the water softener and slide it downwards, in some models, or simply pull it backwards in other models. -
Page 15: Access From The Base
Access from the base NB: Before laying the dishwasher on a side panel or on the rear panel remove the water in the sump by suction, for example with a syringe, so as it does not reach the pressure switch tubes or the tub. 6.1 Anti-flooding device (if featured) (a) Remove the bottom panel (if featured) (see 1.3). -
Page 16: Water Softening System (If Featured)
(i) Detach all the hoses (to the heating element, the water softener (if featured, see picture on the left), the washing motor, the drain pump and the pressure switches) (j) Remove the thermostat and the O-ring (see 5.8) (k) Detach the drain pump (see 6.5). (l) Pull the sump out, taking care not to damage the tub seal. -
Page 17: Drain Pump
6.5 Drain pump (a) Remove any residual water from the sump by suction so that it does not flow into the tub and the pressure switch tubes, then lay the appliance on the rear panel. (b) First remove the plinth, the lower front panel (see 1.2) and the bottom panel (if featured) (see 1.3). -
Page 18: Access From The Sides
Access from the sides RIGHT SIDE VIEW LEFT SIDE VIEW 7.1 Washing motor capacitor (a) Remove the worktop (see 1.1), the plinth and the lower front panel (see 1.2) and the right side (see 1.4). (b) In some models: remove the protective cap and detach the electrical connectors pull the capacitor upwards to remove it from its seat in the base (c) In some models: Pull the capacitor upwards to remove... -
Page 19: Supports For Upper Basket Wheels
7.3 Supports for upper basket wheels (a) Remove the worktop (see 1.1), the plinth and the lower front panel (see 1.2), the appropriate lateral panel (see 1.4) and the upper basket (see 3.4.a). (b) From outside the tub, remove the two screws which secure the basket guide wheels in position. -
Page 20: Water Fill Tank
7.6 Water fill tank (a) From inside the tub, unscrew the steam venting ring. (b) Remove the worktop (see 1.1), the plinth and the lower front panel (see 1.2) and the left-hand lateral panel (see 1.4). Detach the tube to the fill solenoid. -
Page 21: Washing Motor
7.7 Washing motor (a) Remove any residual water from the sump by suction so that it does not flow into the tub and the pressure switch tubes when the appliance is laid on the rear panel. (b) Remove the worktop (see 1.1), the plinth and the lower front panel (see 1.2), the bottom panel (see 1.3) and the anti-flooding device (see 6.1 ) (if featured) and the right-hand lateral panel (see 1.4). -
Page 22: Level/Anti-Overflow Pressure Switches And Support
7.8 Level/anti-overflow pressure switches and support (a) Remove the worktop (see 1.1), the plinth, the lower front panel (see 1.2) and the right-hand lateral panel. (b) From the side, detach the electrical and hydraulic connections from the pressure switch to be replaced. (c) Using a tool, carefully detach the pressure switch from the support and slide it downwards. -
Page 23: Tube-Enclosed Heating Element
7.9 Tube-enclosed heating element (a) Remove any residual water from the sump by suction so that it does not flow into the tub and the pressure switch tubes when the appliance is laid on the rear panel. (b) Remove the plinth and the lower front panel (see 1.2), the bottom panel (see 1.3), the anti-flooding device (see 6.1) (if featured), and the right-hand lateral panel (see 1.4), then lay the appliance on the rear panel. -
Page 24: Power Cable And Terminal Block With Integrated Suppressor
7.11 Power cable and terminal block with integrated suppressor Proceed as follows to replace the power cable: (a) Remove the cover from the terminal block (located in the rear section). To do so, use a tool to release the two plastic tabs and slide the terminal block to the right. (b) Loosen the screw on the cable clamp, detach the electrical connections and pull the power cable free. -
Page 25: Replacing The Tub
Replacing the tub (a) From inside the tub, remove the following: (c) Remove the following: Lower basket Worktop (free-standing versions) Upper basket Door assembly Wheel guides for the upper basket Plinth Steam venting ring/sealing ring Front panel Softening unit cap and ring/sealing ring Lower cross-member Latch cover Lateral panels...
Need help?
Do you have a question about the VA6111AF and is the answer not in the manual?
Questions and answers