Table of Contents
Advertisement
Quick Links
Advertisement
Table of Contents

Subscribe to Our Youtube Channel
Related Manuals for Atag VA6111QF


Summary of Contents for Atag VA6111QF
- Page 1 VA6111QF User information Dishwasher...
- Page 2 Dear customer, Please read this User Information carefully and keep it to refer to at a later date. Pass this User Information on to any subsequent owner of the appli- ance. The following symbols are used in the text: Safety instructions Warning: Notes that concern your personal safety.
-
Page 3: Table Of Contents
Contents Operating Instructions ........Safety . -
Page 4: Operating Instructions
Operating Instructions 1 Safety Prior to using for the first time • Follow the ”Instructions for installation and connection”. Correct use • The dishwasher is only intended for washing domestic dishes. • Additions or modifications to the dishwasher are not permitted. •... -
Page 5: Diagram Of Appliance
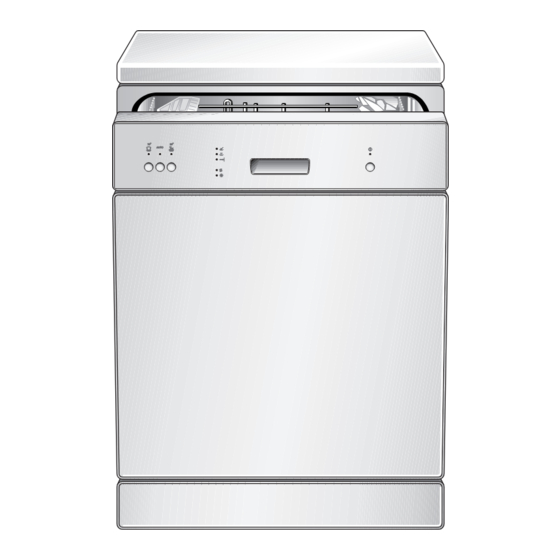
Diagram of appliance Upper basket spray arm and floor spray arm Water hardness dial Dispenser for special salt Dispenser for detergent Dispenser for rinse aid Rating plate Filters Control panel ON/OFF button The ON/OFF button is used to turn the dishwasher on and off. - Page 6 Programme buttons End of cycle indicator Programme progress display Function buttons Control indicators The Programme buttons are used to select the desired dishwashing cy- cle. Function buttons: In addition to the pre-set dishwashing cycle, the following functions can also be set using these buttons: Function button 1 Sets the water softener Function button 2...
-
Page 7: Prior To Using For The First Time
Prior to using for the first time If you wish to use 3 in 1 detergent: – First read the section “Using 3in1 detergents”. – Do not fill up with special salt or rinse aid. If you do not use 3in1 detergent, before using for the first time 1. - Page 8 The LED indicator for the end of the dishwashing cycle will flash simul- taneously: – The number of times that the LED indicator for the end of the dish- washing cycle flashes corresponds to the hardness setting. – This sequence of flashes is repeated several times, with a 3 second pause in-between.
-
Page 9: Adding Special Salt
Adding special salt To decalcify the water softener, it must be filled up with special salt. Use only special salt suitable for domestic dishwashers. If you do not use 3 in1 detergent, fill up with special salt: – Before using the dishwasher for the first time. –... -
Page 10: Filling Up With Rinse Aid
Filling up with rinse aid With rinse aid the rinsing water drains away better and so you get smear-free, gleaming dishes and clear glasses. If you do not use 3in1 detergent, fill up with rinse aid: – Before using the dishwasher for the first time. –... - Page 11 Setting the amount of rinse aid required Only change the amount dispensed, if smears, milky spots (reduce the amount) or dried on water spots (increase the amount) can be seen on glasses and dishes. (See section “If dishwashing results are not satisfac- tory”.) The dosage can be set from 1-6.
-
Page 12: In Daily Use
In daily use Loading cutlery and dishes Sponges, cleaning cloths and any other objects that can absorb water must not be washed in the dishwasher. Plastic and Teflon-coated dishes and pans tend to retain water droplets. These dishes and pans therefore do not dry as well as those made of china and stainless steel. - Page 13 Loading cutlery Warning: Sharp knives and other items of cutlery with sharp edges must be laid in the cutlery rack or in the upper basket to avoid the risk of injury. To ensure that all items of cutlery in the cutlery basket can be reached by the water, you should: 1.Place the grid insert on the cut- 2.Place forks and spoons in the...
- Page 14 To make it easier to load larger dish- es, the two plate rests on the right in the lower basket can be folded down. Cups, Glasses, Coffee Service Load smaller, fragile crockery and long, sharp cutlery in the upper bas- ket.
-
Page 15: Adding Detergent
Adding detergent Detergents remove the dirt from dishes and cutlery. The detergent must be added before the cycle starts. Only use detergent intended for do- mestic dishwashers. The detergent compartment is lo- cated on the inside of the door. 1. If the lid is closed: Press the release button. -
Page 16: Using 3In1 Detergents
Concentrated detergents Today’s detergents for dishwashers are almost exclusively low-alkaline concentrated detergents with natural enzymes in tablet or powder form. Using 50°C dishwashing cycles in conjunction with these concentrated detergents reduces pollution and is good for your dishes, as these dish- washing cycles are specially matched to the dirt-dissolving properties of the enzymes in concentrated detergents. -
Page 17: Selecting The Dishwashing Cycle (Cycle Table)
Selecting the dishwashing cycle (Cycle Table) Programme Consumption sequence values Dishwashing- Suitable Type of cycle for: soiling heavily soiled, Dinner serv- dried-on food re- • • • • ice and mains, in particular cookware protein and starch Dinner serv- normally soiled, •... - Page 18 Selecting a programme When your dishes look like this, select: an intensive programme. a normal or energy-saving pro- gramme.
-
Page 19: Starting A Dishwashing Cycle
Starting a dishwashing cycle 1. Check that the spray arms can turn freely. 2. Turn the water tap on fully. 3. Close the door. 4. Press the ON/OFF button. 5. Select the desired cycle. The programme display lights up. The selected cycle will begin after ap- proximately 3 seconds. -
Page 20: Switching Off The Dishwasher
Switching off the dishwasher Do not switch off the dishwasher until the indicator for the end of the dishwasher cycle is illuminated in the cycle progress display. 1. Press the ON/OFF button. All display indicators will go out. 2. Turn off the water tap. Carefully open the door. - Page 21 Cleaning the filters The filters must be regularly checked and cleaned. Dirty filters will spoil the wash results. 1. Open the door and remove the lower basket. 2. Turn the handle about ¼ of a turn anticlockwise (A) and remove the fil- ter system (B).
- Page 22 Cleaning the spray arm jets Regularly check the jets in the spray arms for blockages. When cleaning is necessary, remove spray arm from the fixture and clean jets with a pointed object (wire or needle). Then rinse out the spray arm using a strong jet of water.
-
Page 23: What To Do If
Bottom spray arm 1. To remove bottom spray arm, pull it upwards out of its catch. 2. Clean spray arm jets. 3. Place bottom spray arm back in posi- tion against connecting piece and press down firmly, until you feel it snap into place. - Page 24 Malfunction Possible cause Remedy The tap is blocked or furred Clean tap. with lime-scale. The tap is turned off. Turn the tap on. The filter (where present) in The programme indicator for Clean the filter in the the threaded hose fitting on the selected dishwashing cy- threaded hose fitting.
-
Page 25: If The Dishwashing Results Are Not Satisfactory
Malfunction Possible cause Remedy The dishwashing compart- ment is made from rust-free stainless steel. Rust spots in the dishwashing compart- ment are due to rust parti- Only wash cutlery, dish- Rust spots are visible in the cles from external sources es and pans that are dishwashing compartment. -
Page 26: Disposal
There are smears, streaks, milky spots or a shiny bluish coating on glasses and dishes. • Lower rinse aid dosage. There are dried water drops on the glasses and dishes. • Increase rinse aid dosage. • The detergent may be the cause. Contact the detergent manufactur- er's customer advice centre. -
Page 27: Technical Data
Technical data Capacity: 12 place settings including serving dishes Permitted water pres- 1-10 bar (=10-100 N/cm = 0.1-1.0 MPa) sure: Electrical connection: 230 V, 10 A, also see the rating plate on the right-hand side of the dishwasher’s interior door . Total output 2250 W Dishwashers that can be integrated and built-in... -
Page 28: Notes For Test Institutes
Notes for Test Institutes Testing in accordance with EN 60704 must be carried out with the appliance fully loaded and using the test cycle (see “Cycle Table”). Tests in accordance with EN 50242 must be carried out when the salt dispenser in the water softener and the rinse aid dispenser have been filled with salt and rinse aid respectively, and using the test cycle (see “Cycle Table”). - Page 29 Lower basket with cutlery basket Cutlery basket *) If there are cup racks in place on the lefthand side or if beer glass holders are in place, remove them.
-
Page 30: Installation And Connection Instructions
Installation and connection instructions 1 Safety information for the installation • Only transport the dishwasher in an upright position, otherwise salt water may run out. • Before using the dishwasher for the first time, check for any damage caused in transport. Do not under any circumstances connect an ap- pliance that is damaged. -
Page 31: Installing The Dishwasher
Installing the dishwasher • The dishwasher must be installed on a firm floor and adjusted to en- sure that it is stable and level in all directions. • To compensate for unevenness in the floor and to match the height of the appliance to that of sur- rounding units, extend the thread- ed feet using a screwdriver. -
Page 32: Connecting The Dishwasher
Connecting the dishwasher Connecting to the water supply • The dishwasher can be connected to cold and hot water supplies up to max. 60°C. • The dishwasher must not be connected to open hot water appliances or instantaneous water heaters. Permitted water pressure Lowest permitted water pressure: Consult your plumber if the water pres-... - Page 33 Water drainage Drain hose The drain hose must not be kinked, crushed or entangled. Connecting the drain hose: – Maximum permitted height: 1 metre. – Minimum required height: 40 cm above the bottom edge of the ap- pliance. Extension hoses •...
- Page 34 Electrical connection Details about the voltage, type of supply and the fuses required are to be found on the rating plate. The rating plate is located on the right- hand inner edge of the dishwasher door. To isolate the dishwasher from the mains, pull out the mains plug. Important: –...
-
Page 35: Service
Service In the event of technical faults, please first check whether you can remedy the problem yourself with the help of the operating instruc- tions (section “What to do if…”). If you were not able to remedy the problem yourself, please contact the Customer Care Department or one of our service partners. - Page 36 Nederland Home Produkt Service (ATAG) Postbus 249 6920 AE DUIVEN tel: 0900 - 5550001 fax: 026 - 8821444 België ATAG België NV 9420 Erpe-Mere tel: 053 - 806208 fax: 053 - 806057 Postbus 1033 • 6920 BA Duiven • Nederland...
Need help?
Do you have a question about the VA6111QF and is the answer not in the manual?
Questions and answers